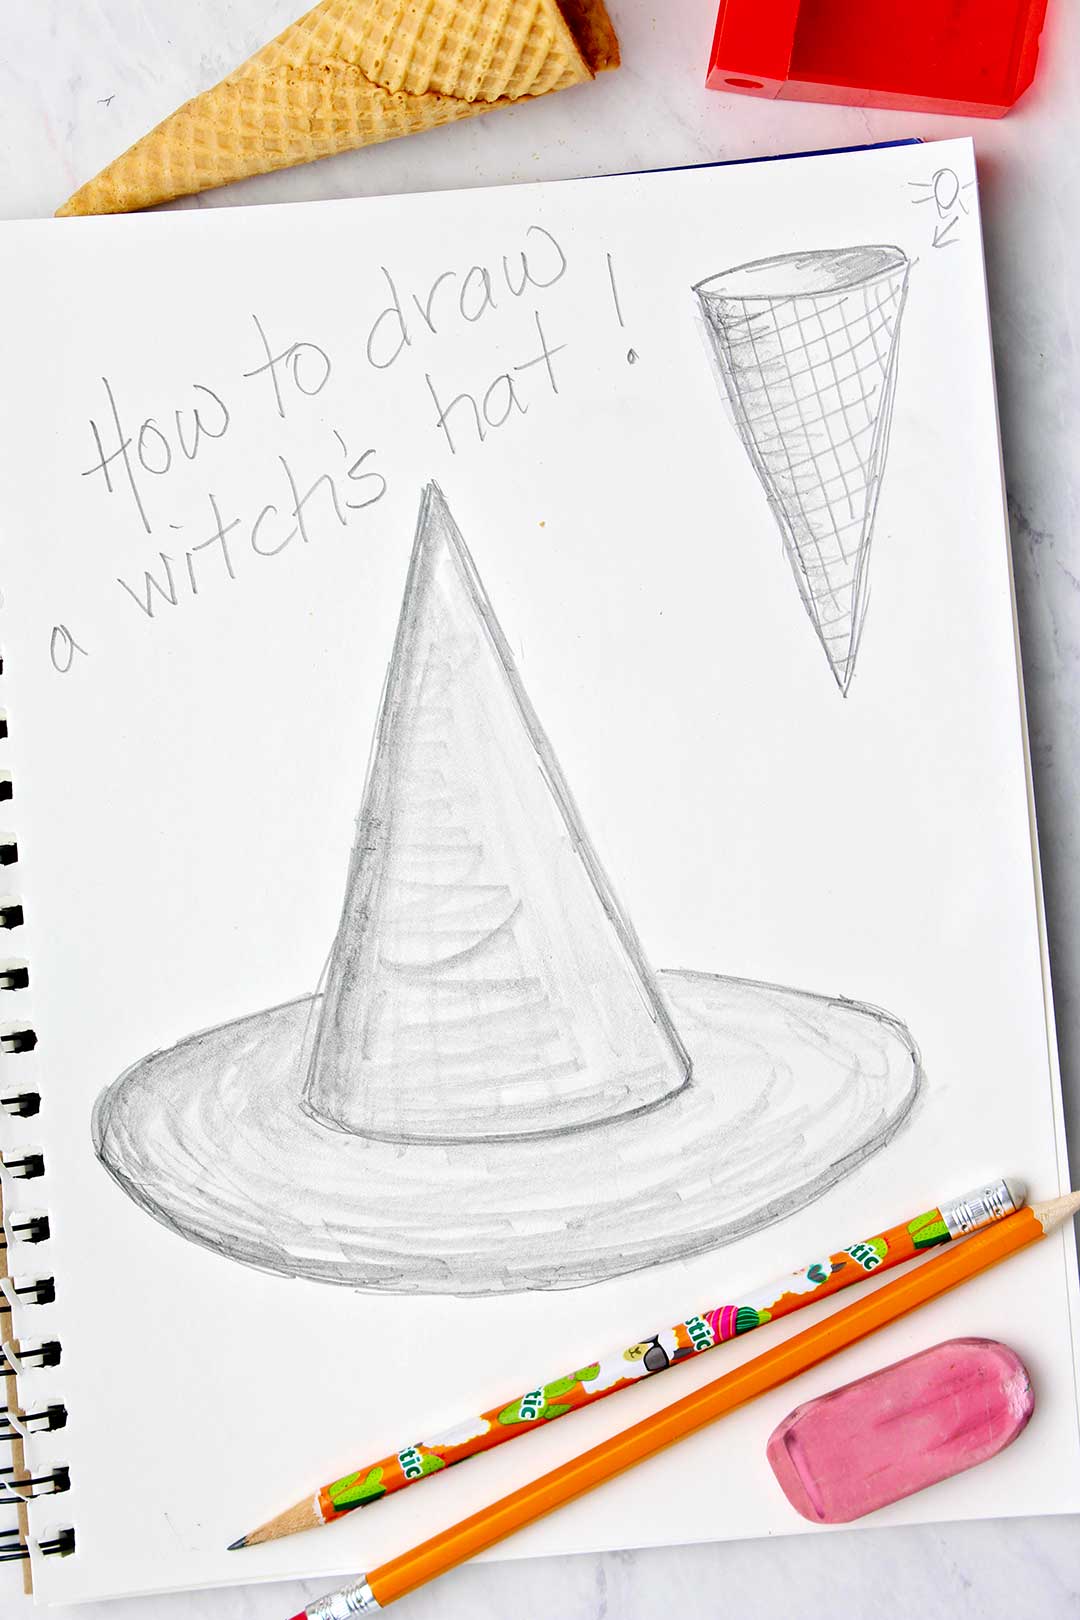
An Easy Witches Hat Drawing
This easy Witch Hat Drawing tutorial comes to you from over 50 years of my drawing, doodling, and sketching experience! Follow the step-by-step instructions to draw and shade a witch hat that turns out perfectly every single time.
If there’s one thing I’ve taken away from years of teaching art to all ages, it’s that everyone can learn to draw! All you need is a few minutes, a piece of paper and a pencil to learn how to draw the shapes and piece them together into a witch hat. This tutorial is perfect for kids who want to learn the basics of drawing - the skills they learn here will help them on the next art project as well!
Supplies You’ll Need
You will have most of these materials in your home. Here are a few quick notes about the supplies.
- Pencils – Use a #2B school Pencils as you start learning to draw.
- Eraser– use a pink Eraser, the type of eraser that you add to the end of your pencil, or a kneaded eraser.
- Drawing paper – Draw on a heavier weight Sketchbook or cardstock.
Witch Hat Drawing Step 1: Review Drawing A Cone
The only thing that I had that was cone shaped was an actual ice cream cone! Convenient, huh? Let's review How to Draw a Cone.
A cone begins by drawing a deep “V” shape.
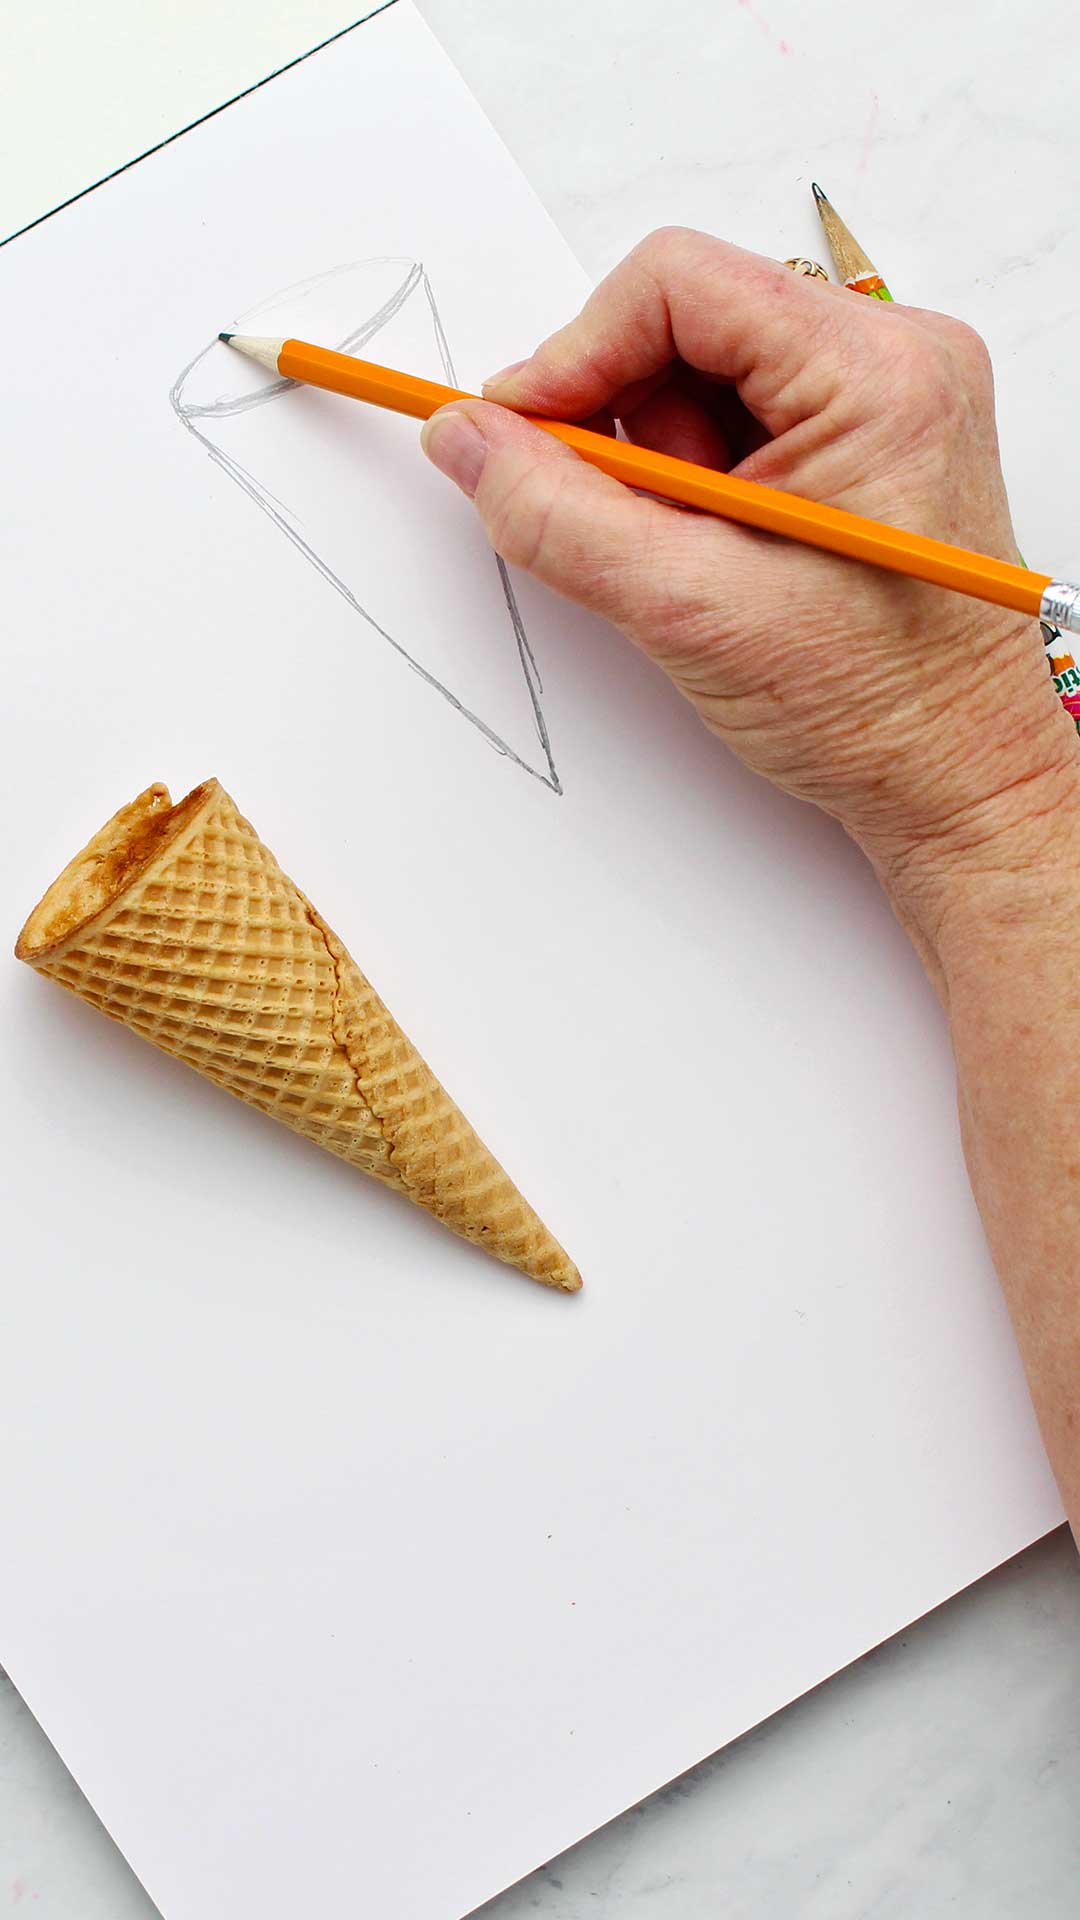
Remember the smile line we talked about when learning How to Draw a Sphere? Well, we use a smile line to connect the two top tips of the “V”. Then draw a line (like an upside-down smile line) over the top.
See how that makes an oval on top of the cone? The farther you tip the top of the cone away from you, the less deep the smile line is, the longer the oval shape will be.
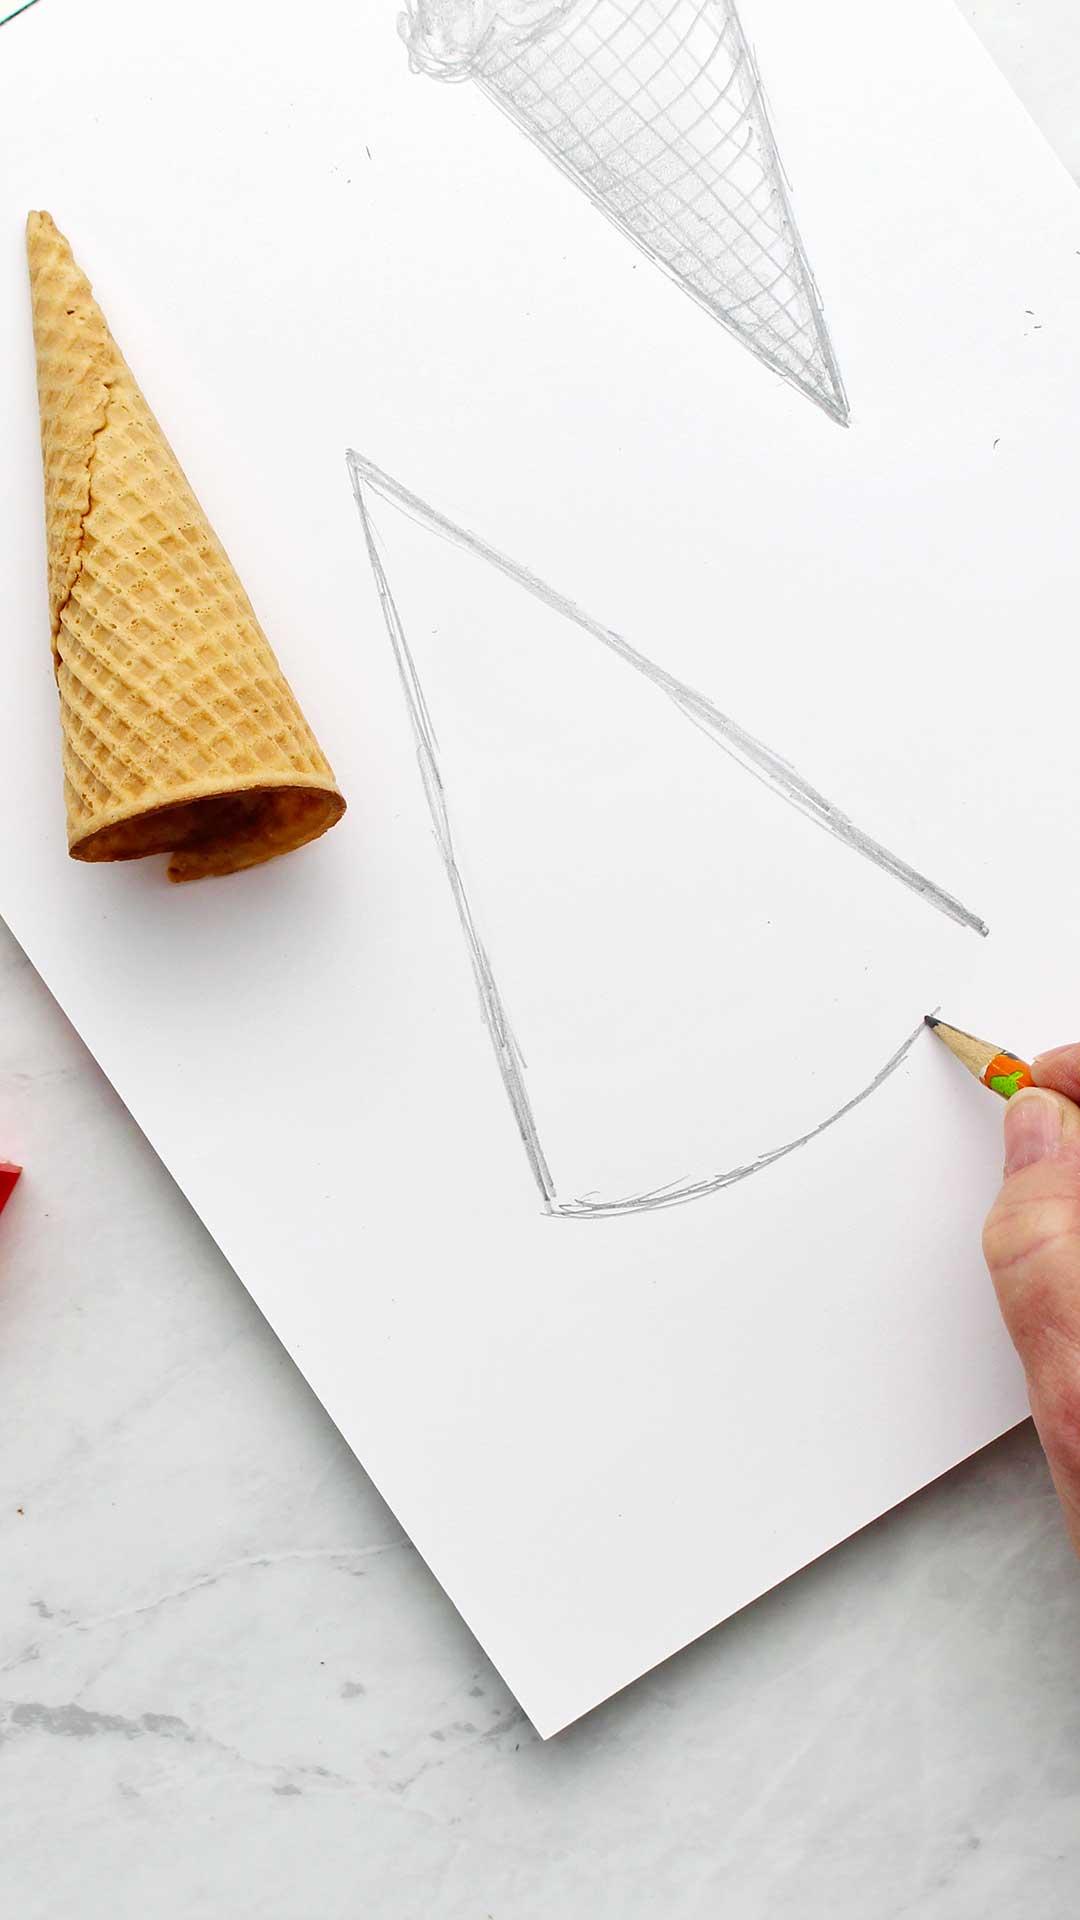
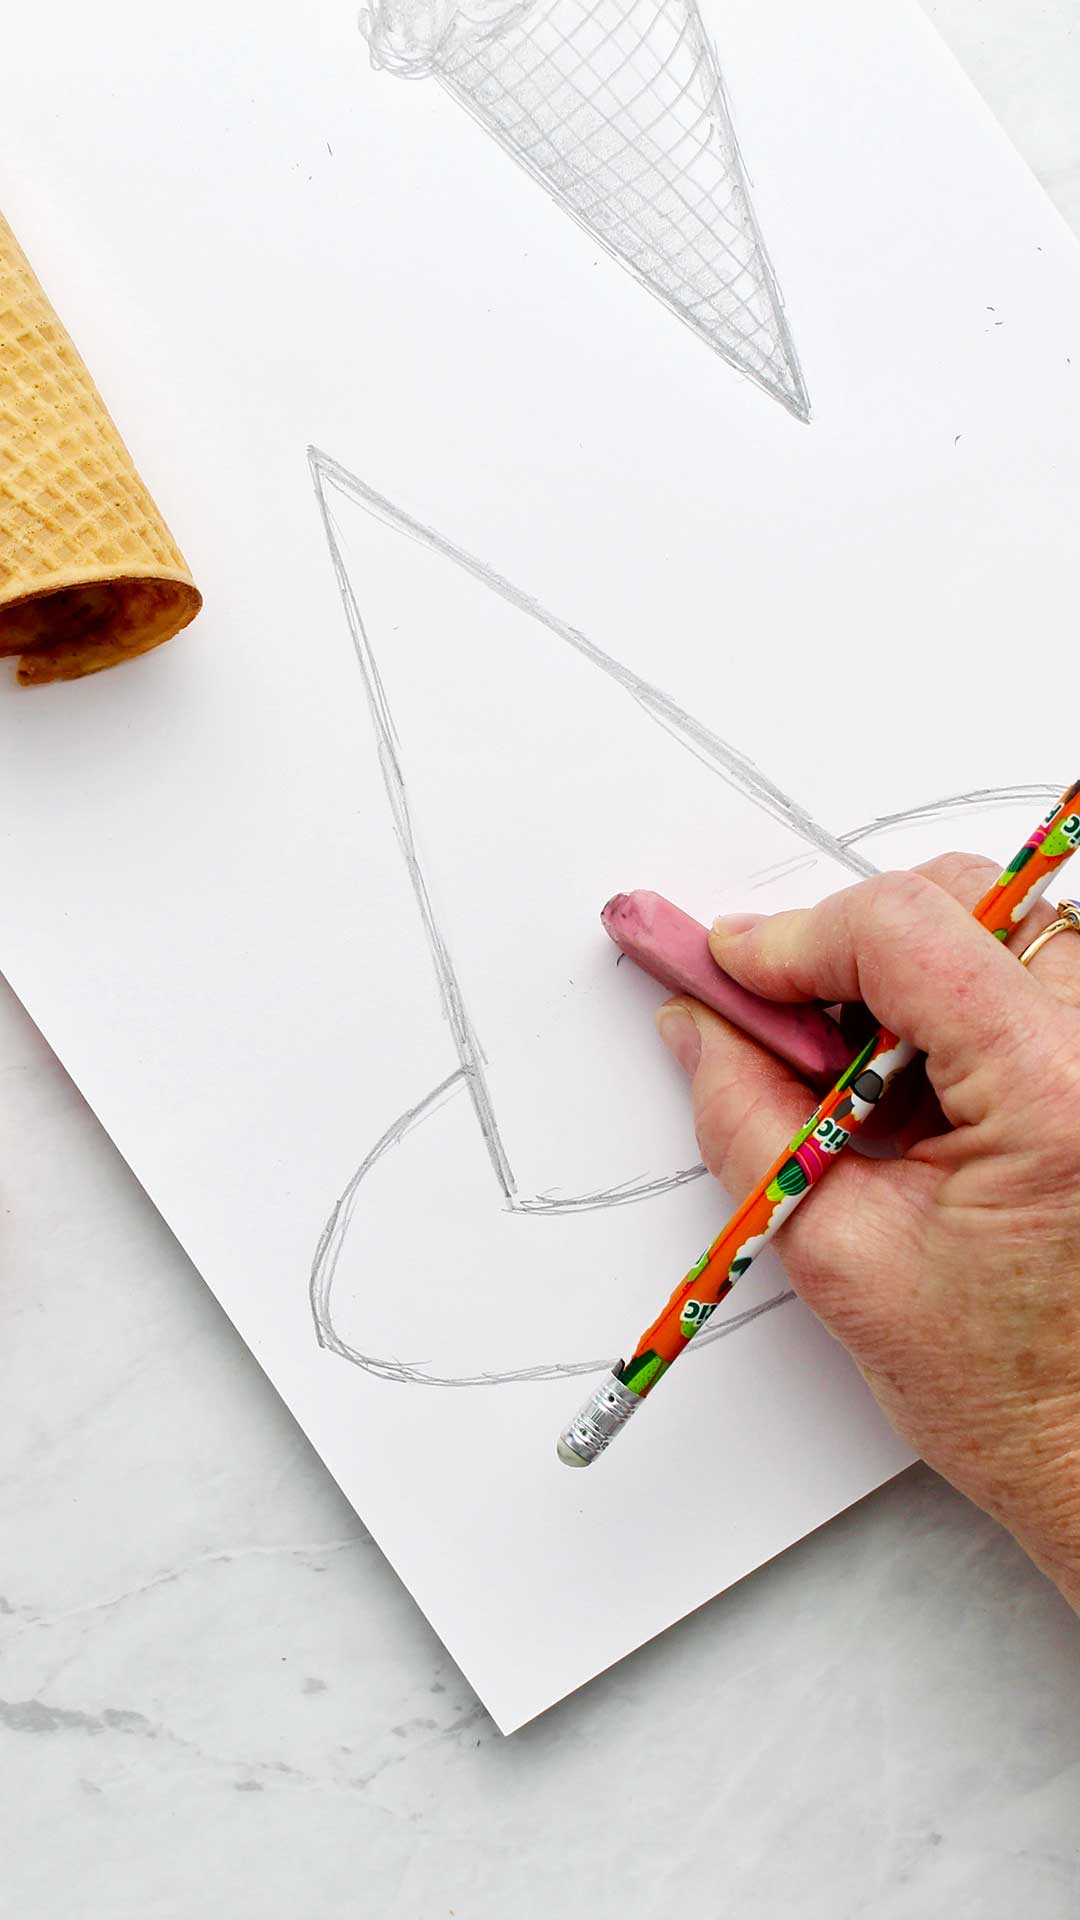
Step 2: How to Draw A Witch Hat
When we learn How to Draw a Witch Hat, we will start by tipping the cone upside down-with the tip of the cone up.
Draw a tall tee-pee shape, an upside down “V”.
This is going to be the pointed top of the hat.

Step 3: Drawing the brim of the witch hat
Make a smile line between the two tips of the “V” but this time don’t draw another line like you did on the top of the ice cream cone.
Instead, draw a second smile line below the first smile line that has the same smile shape but goes wider than the first line. This is the brim of the hat.
Draw a second upside down smile line that goes on top of the brim of the hat and connects the two ends. This will make a long oval shape to complete the brim of the hat.
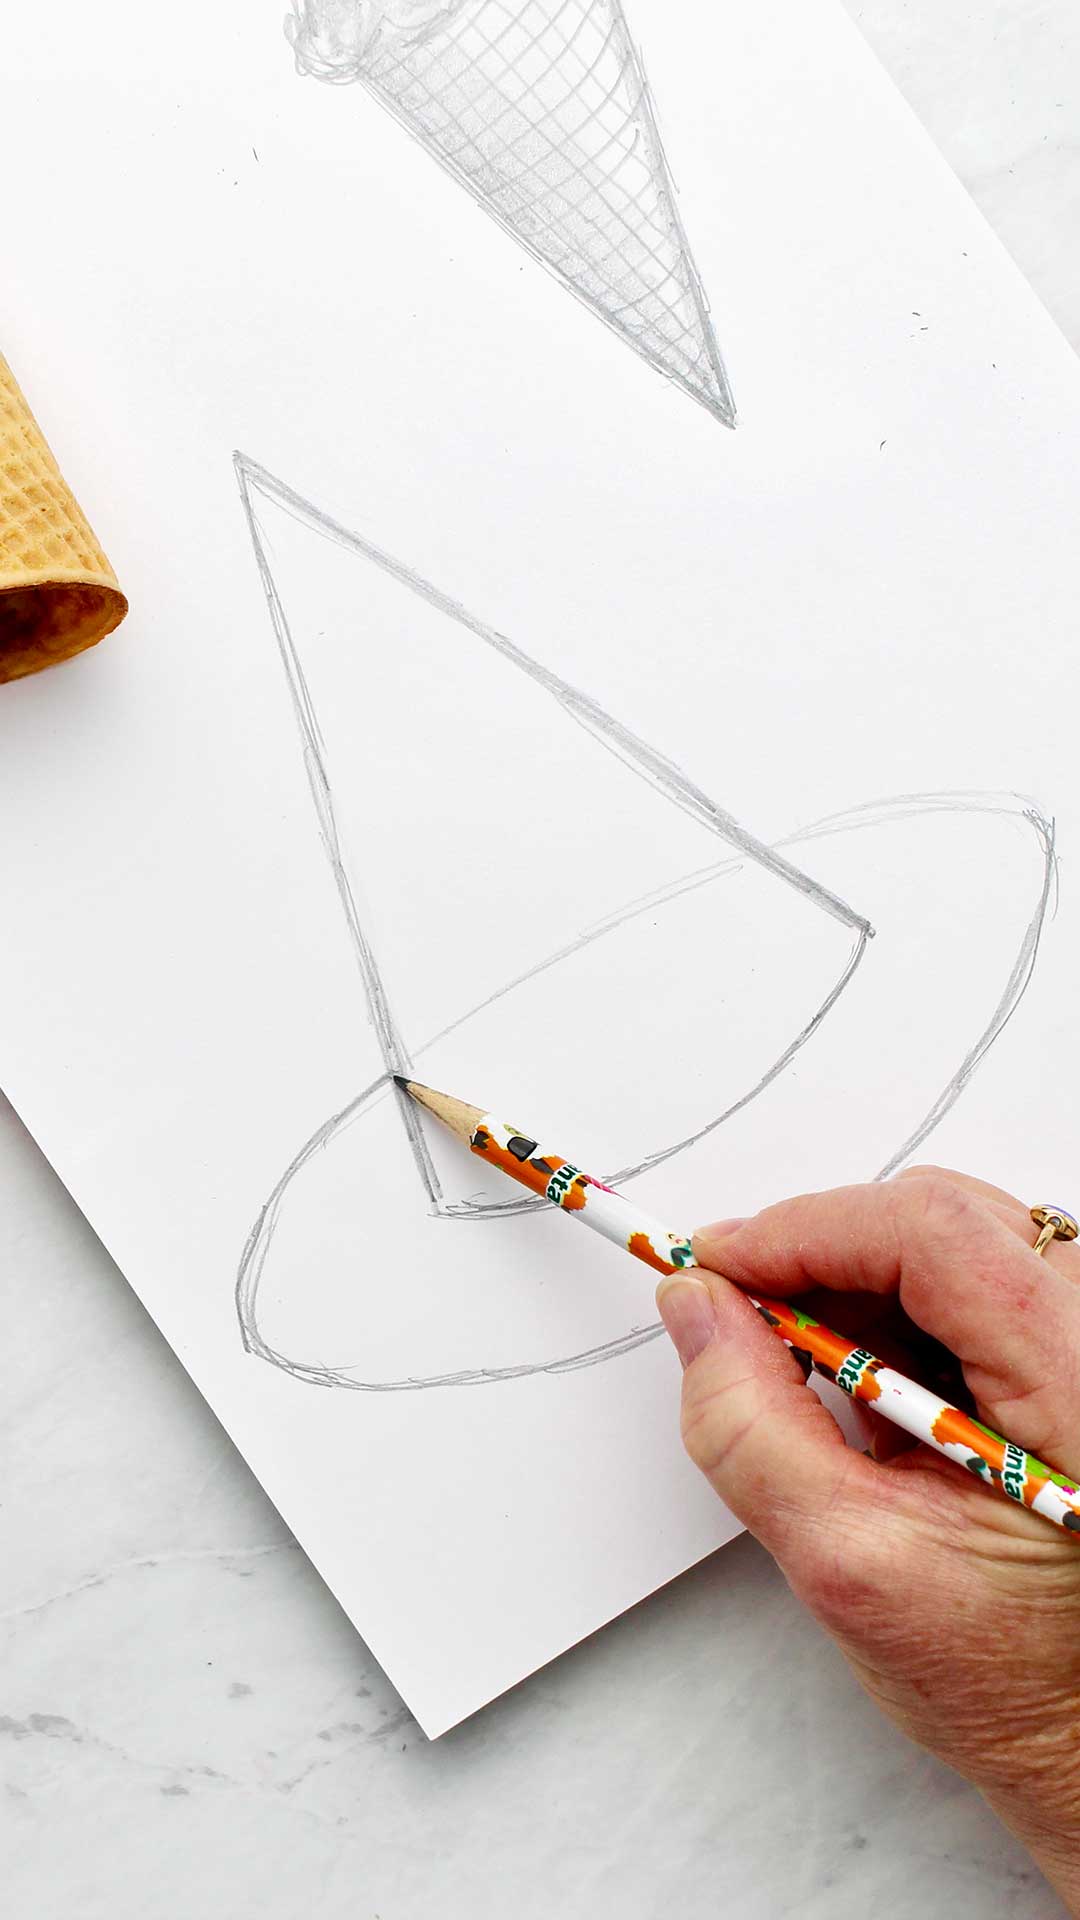
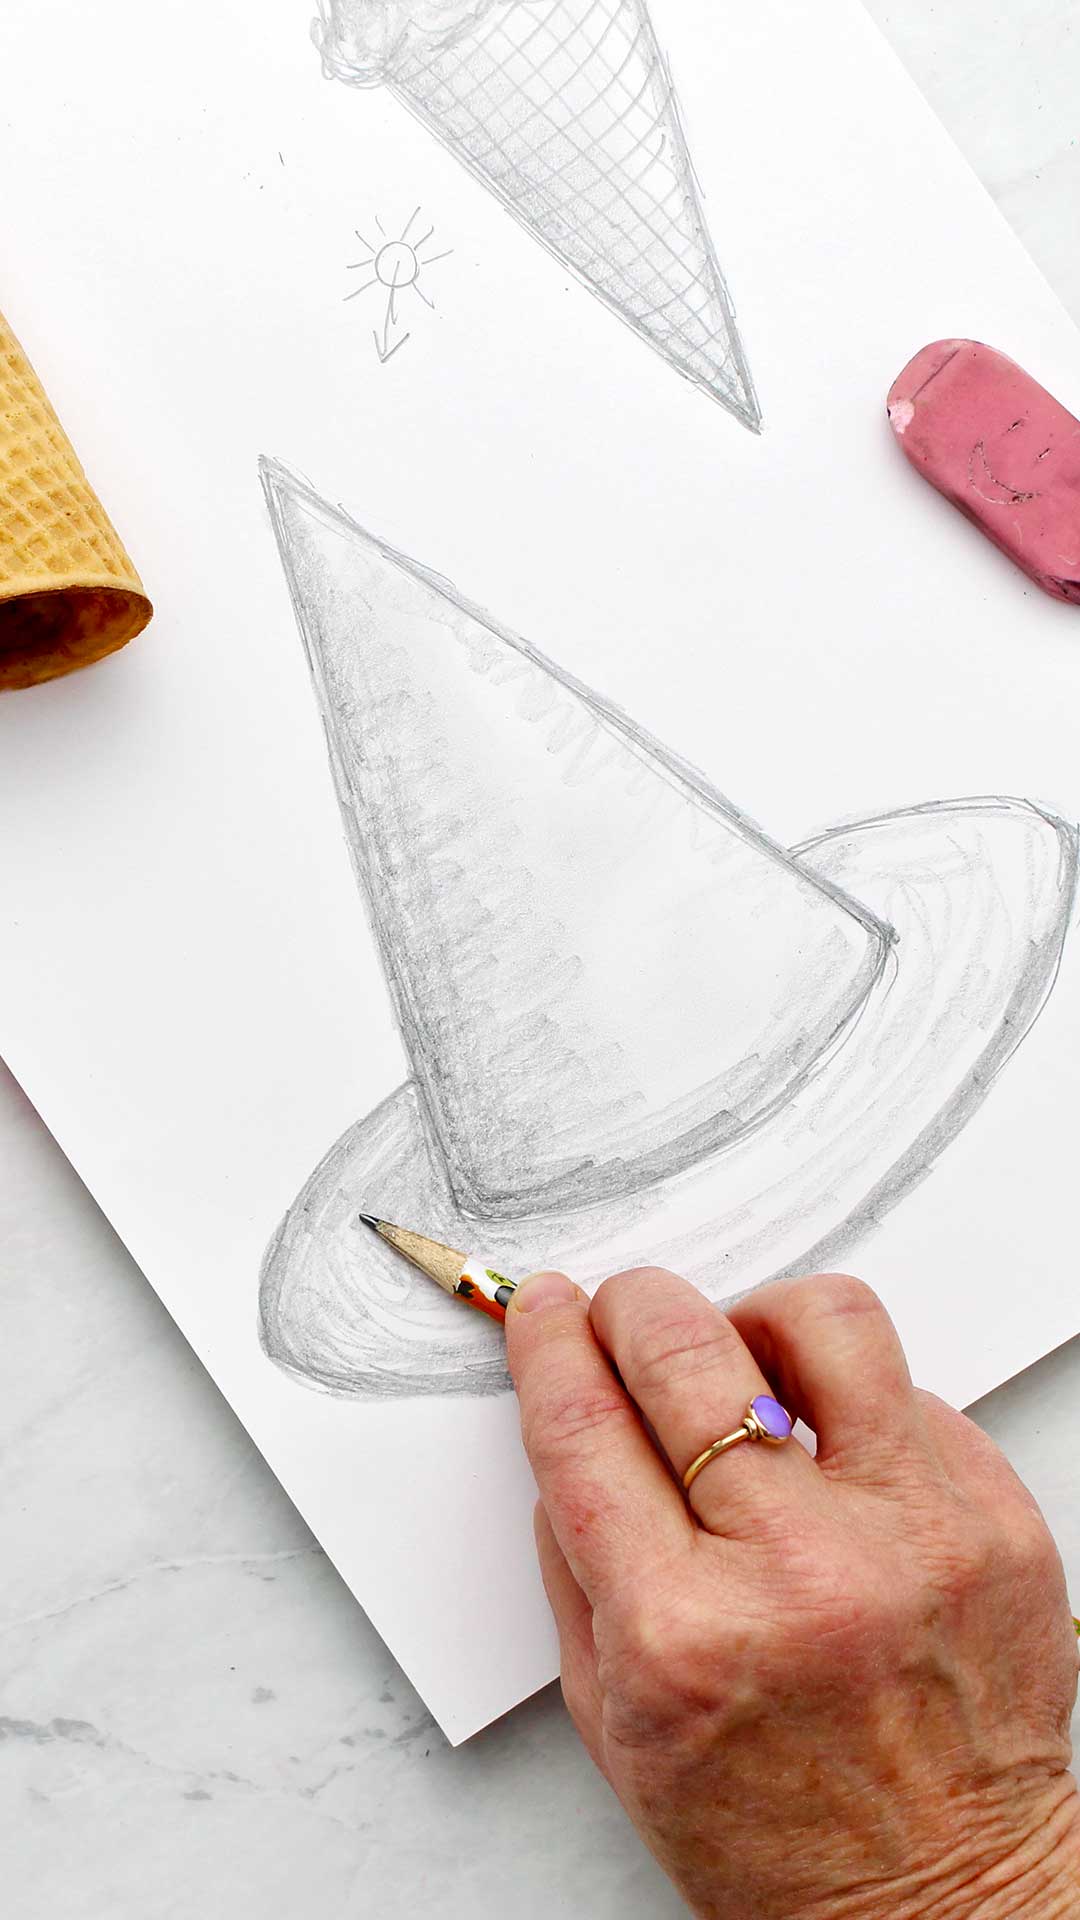
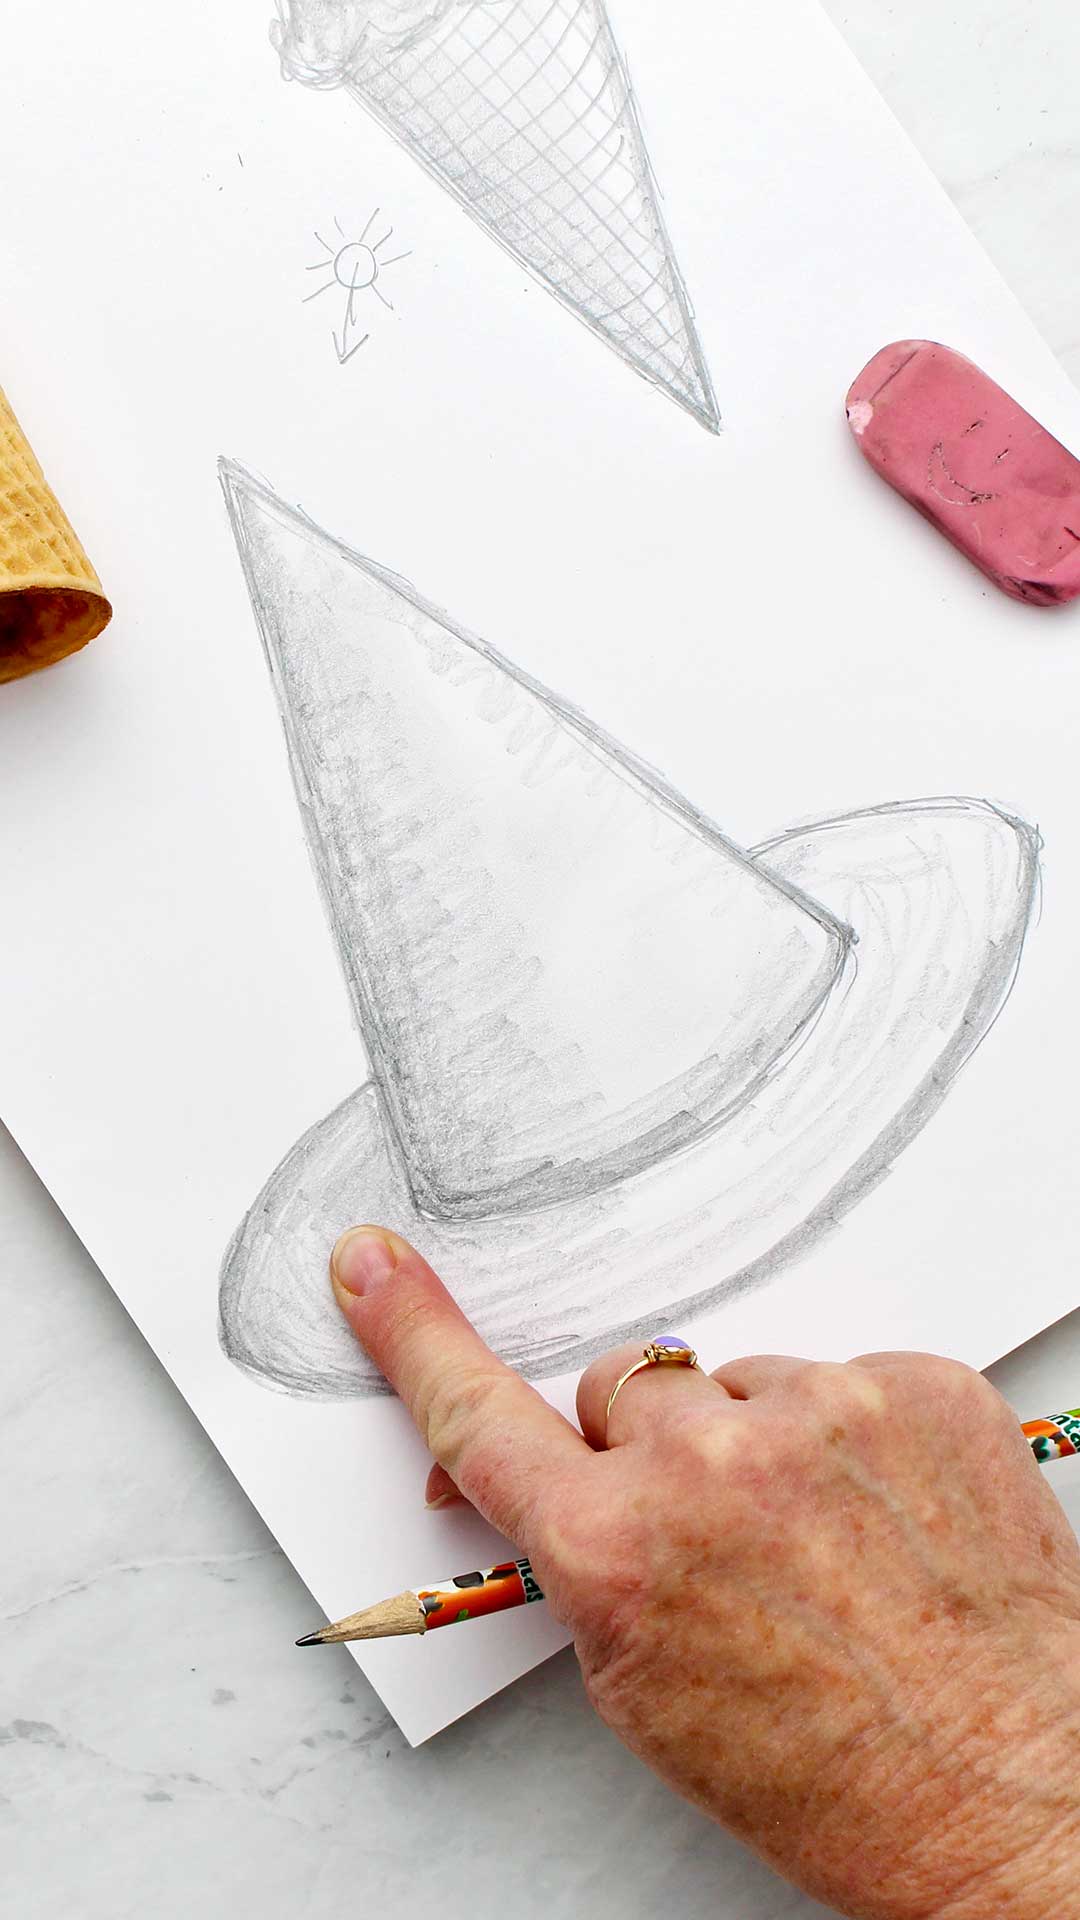
Erase the part that goes behind the V-shaped top of the hat.
Tip: After you have practiced a bit you can draw this top smile line and just skip that area that is behind the pointed top of the hat. Then you won’t have to do the erasing. But for learning, it’s easier to draw the whole line and erase.
Step 4: Finish Your Witch Hat Drawing With Shading
- Shade the hat by imagining that the light source is shining from the top right. That means that the shade is on the left-hand side of the hat.
- Lay the pencil more on its side and use the side of the lead on the paper instead of the tip. Gently press the side of the pencil led on the paper.
- Shade down the left side of the pointed part of the hat- using contour lines and shading up and down. Blend with your finger.
- Also shade on the left side of the hat brim and blend.
FAQs
Draw two sides to a tall triangle with the point to the top. Connect the bottom of the two lines with a “smile” line. This is the cone as if you are looking down at it. Add an upside down “smile” line that connects the bottom of the two sides of the triangle. This will create an oval shape on the bottom of the cone shape. This is the cone as if you are looking up at it from the bottom. You can turn this upside down to make a cone with the point downwards.
There are several posts on my site that help beginners learn to draw shapes. How to draw a sphere, how to draw a cube, how to draw a cylinder, how to draw a cone. There are step by step instructions on these posts for each shape that are great for a beginning artist!
More Like This Witches Hat Drawing
If you want some more drawing ideas and need inspiration, here are links to other drawing tutorials! These are great for any artist, whether you are just beginning or honing your skills!
Enjoy!
If you try this craft, let me know! Go ahead and leave a comment, rate it, and tag a photo with #WelcometoNanas wherever you post.
Come join the fun at https://welcometonanas.com
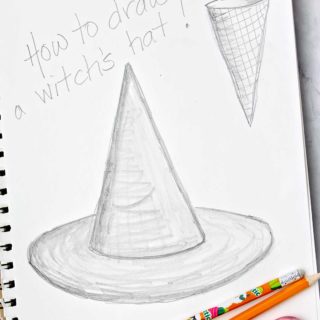
Simple Witch Hat Drawing
Equipment
- none needed
Items Required
Instructions
- When we learn How to Draw a Witch Hat, we will start by tipping a cone shape upside down-with the tip of the cone up.
- Draw a tall tee-pee shape, an upside down “V”. Make a smile line between the two tips of the “V”.This is going to be the pointed top of the hat.
- Draw a second smile line below the first smile line that has the same smile shape but goes wider than the first line. This is the brim of the hat.
- Draw a second upside down smile line that goes on top of the brim of the hat and connects the two ends. This will make a long oval shape to complete the brim of the hat.Erase the part that goes behind the V-shaped top of the hat.
- Shade the hat by imagining that the light source is shining from the top right. That means that the shade is on the left-hand side of the hat.Lay the pencil more on its side and use the side of the lead on the paper instead of the tip. Gently press the side of the pencil led on the paper.Shade down the left side of the pointed part of the hat- using contour lines and shading up and down. Blend with your finger.Also shade on the left side of the hat brim and blend.
- Boo! That wasn't hard, was it?


Leave a Reply