Ready to have your heart warmed?? You and your grands can make some sweet and easy glowing paper bag luminaries to line your sidewalks. Guests will be charmed as they make their way to the door.
Watch how to make paper bag luminaries

The perfect easy Christmas Craft
I’m not sure that there could be a craft that gives more bang for the buck then this one! A couple paper bags and an electric tea light is about all it takes to make this sweet craft.
These make great Christmas gifts for neighbors and friends, and they are a fun DIY project for the kiddos if you are looking for some holiday entertainment!
How to Make Paper Bag Luminaries
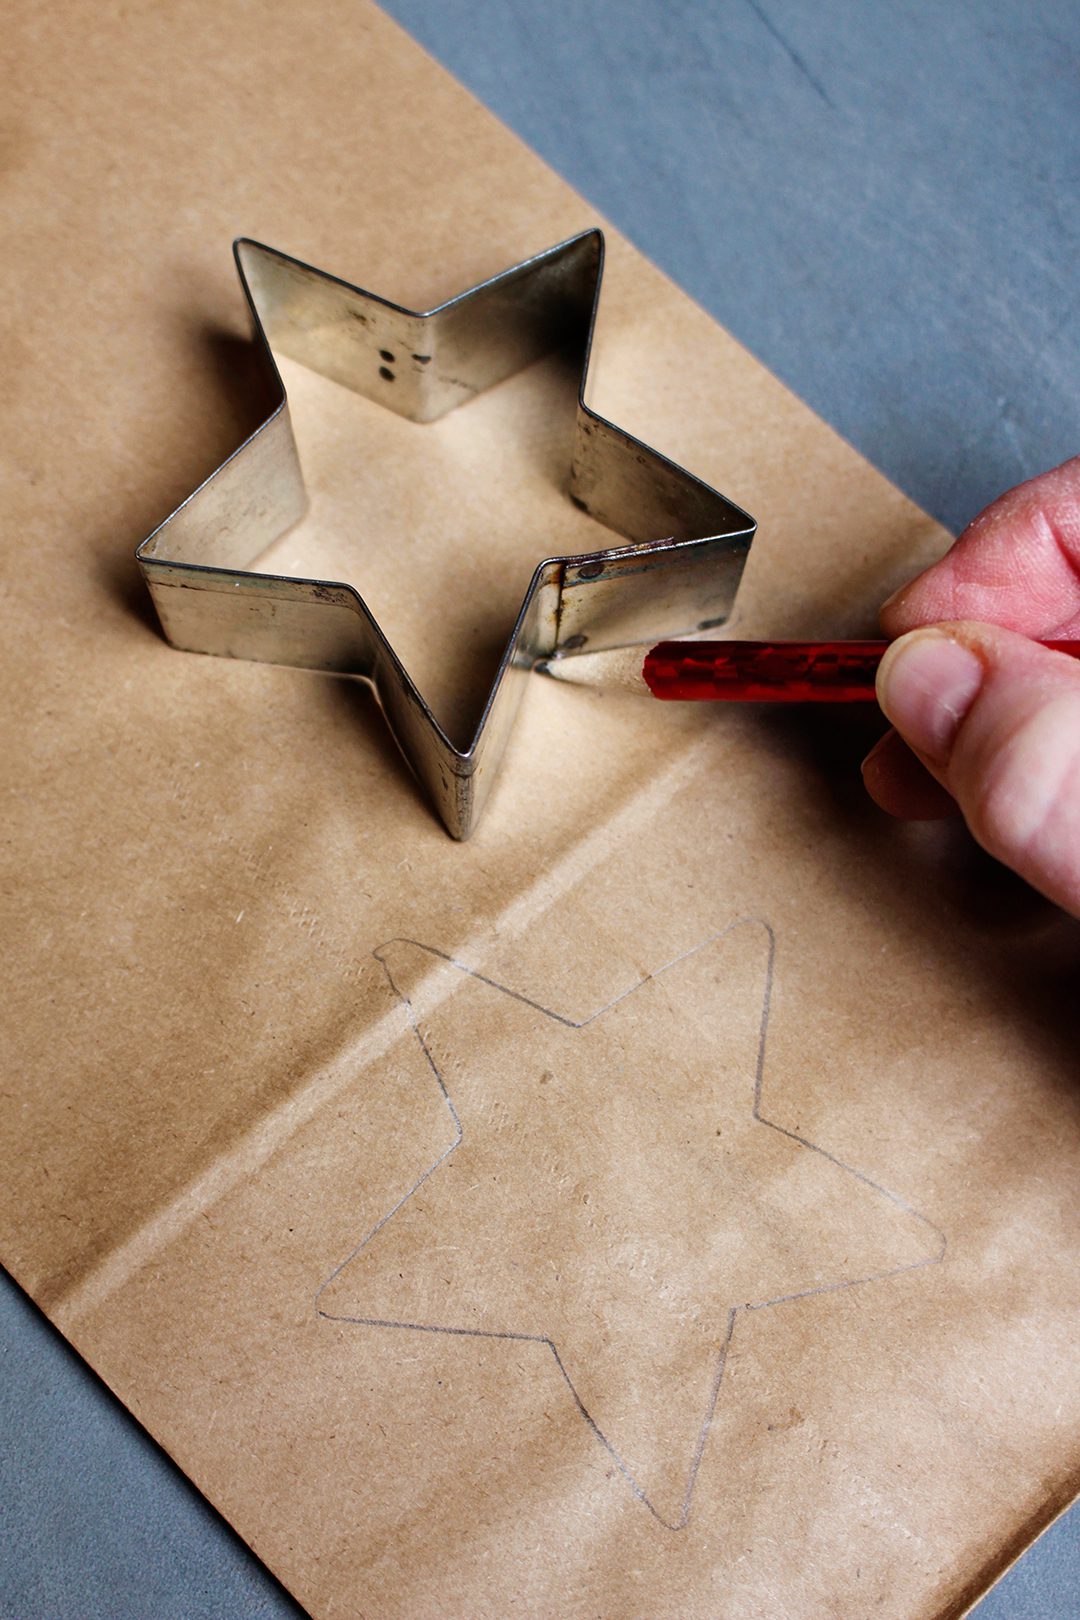
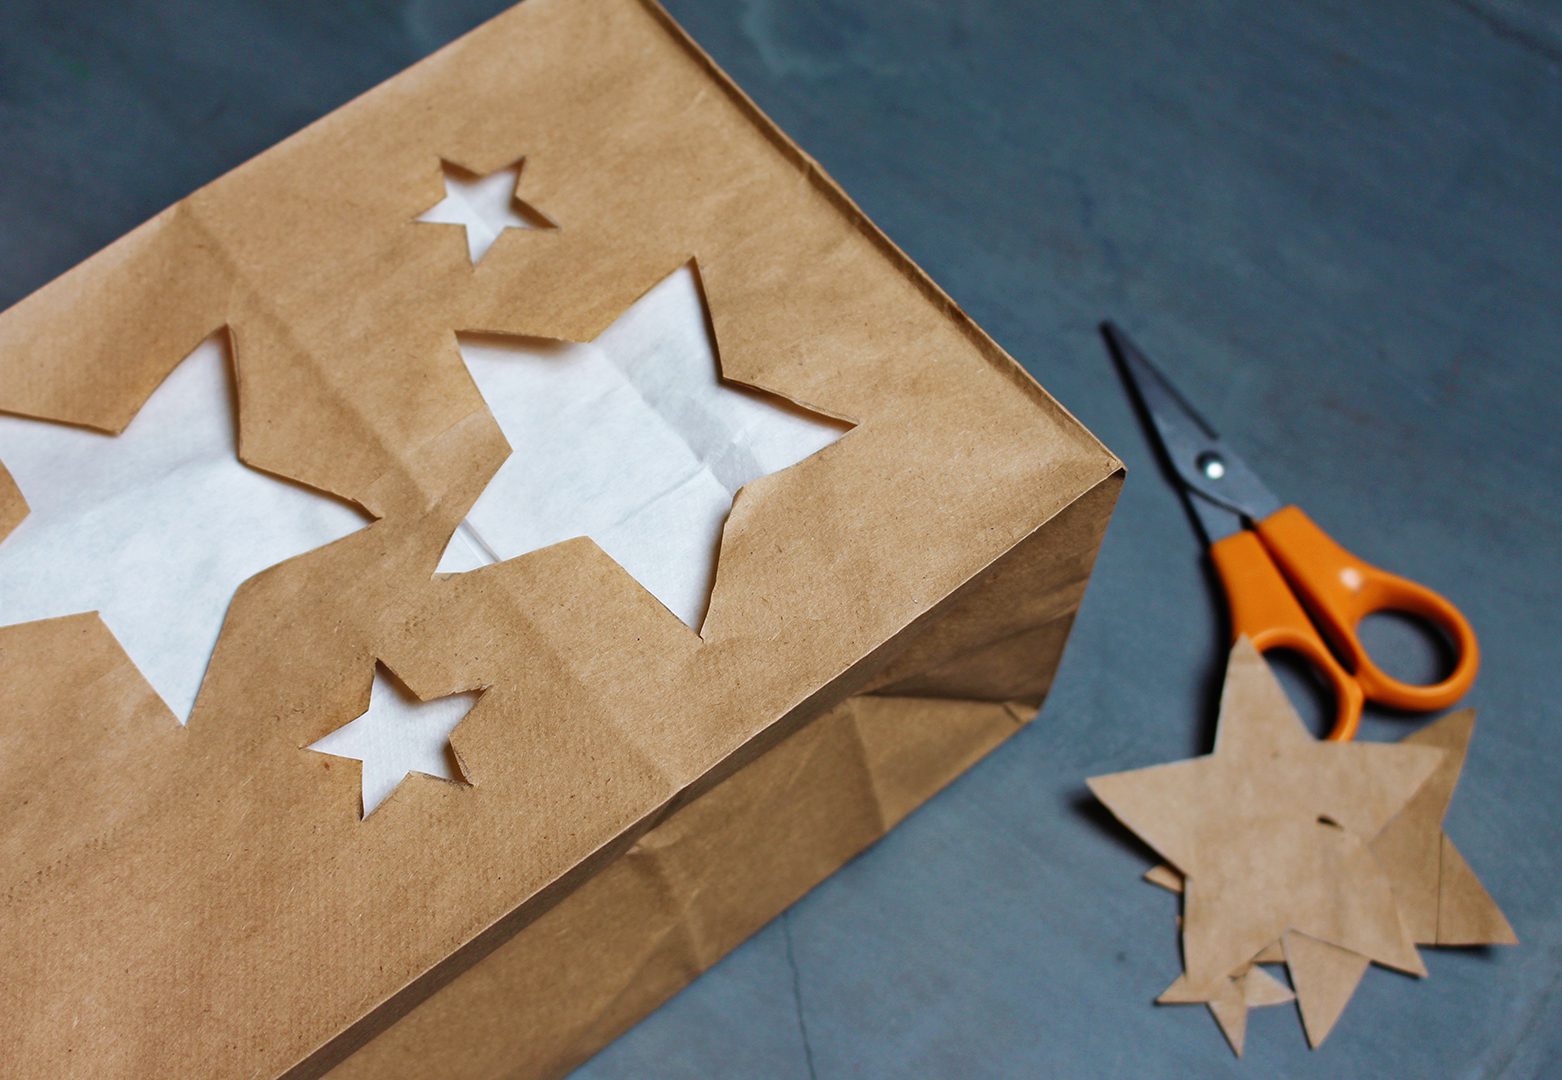
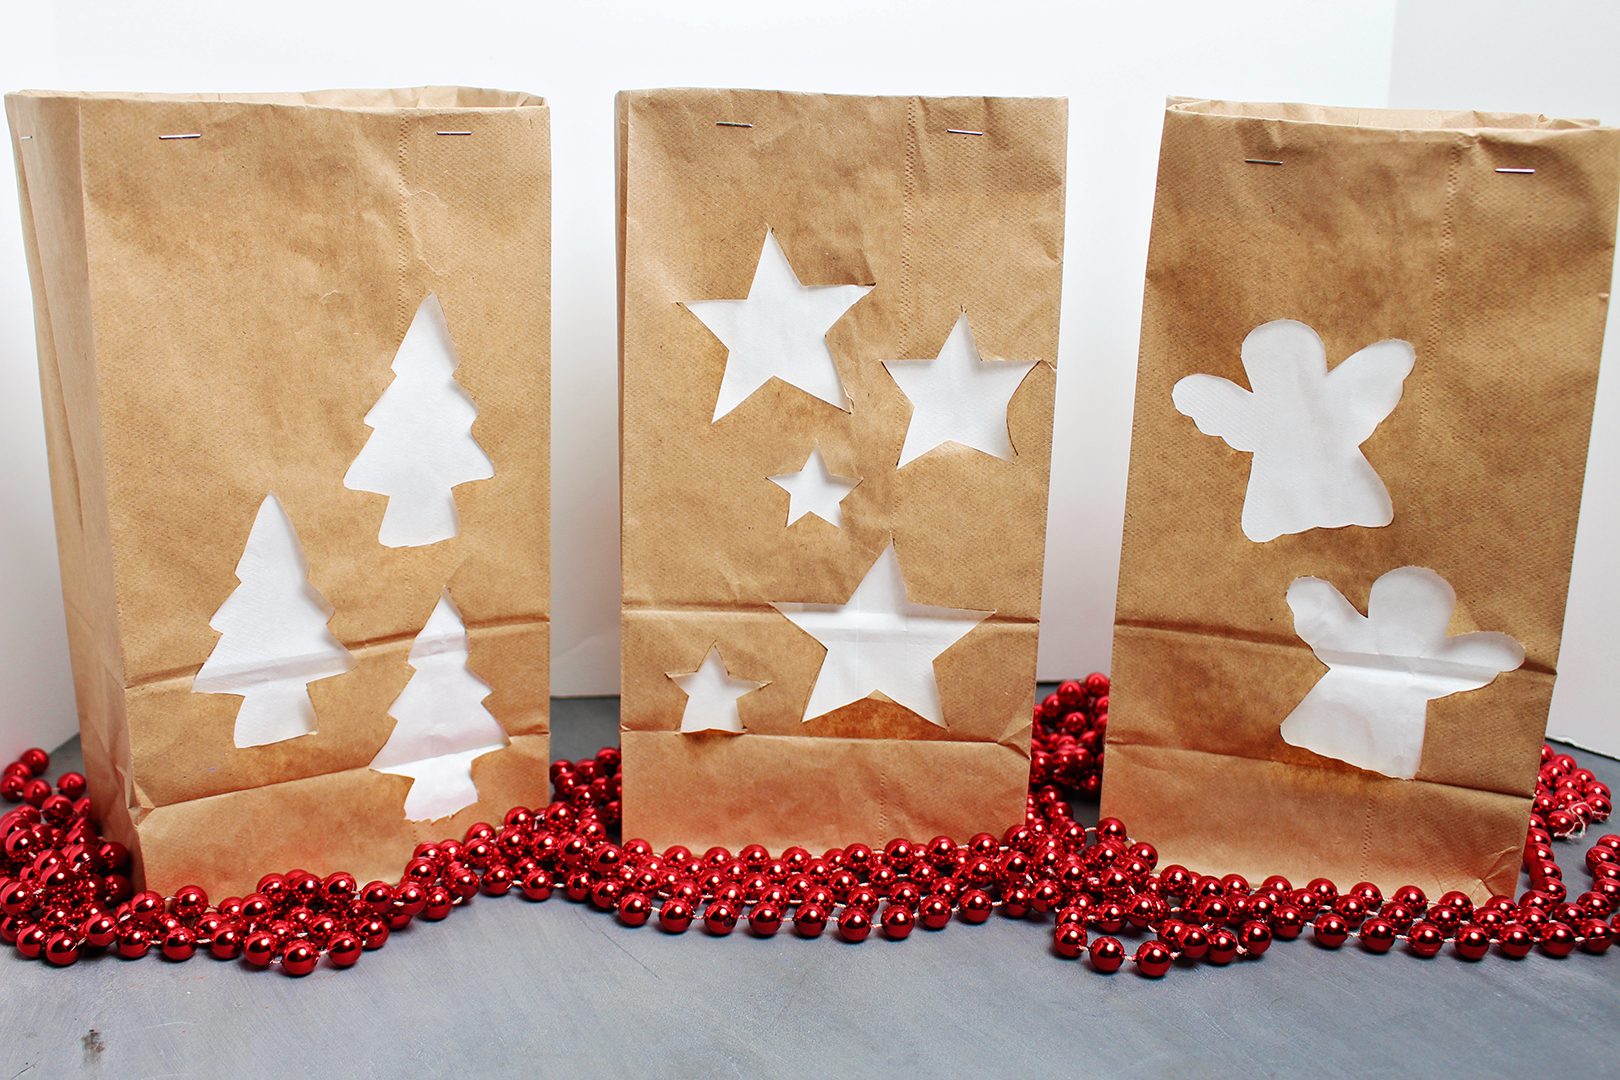
Have the grands decorate the side of Brown Paper Lunch Bags![]() with shapes that they will later cut out (for the light to shine through). They need to draw the shapes closer to the bottom of the bag, not close to the top of the bag.
with shapes that they will later cut out (for the light to shine through). They need to draw the shapes closer to the bottom of the bag, not close to the top of the bag.
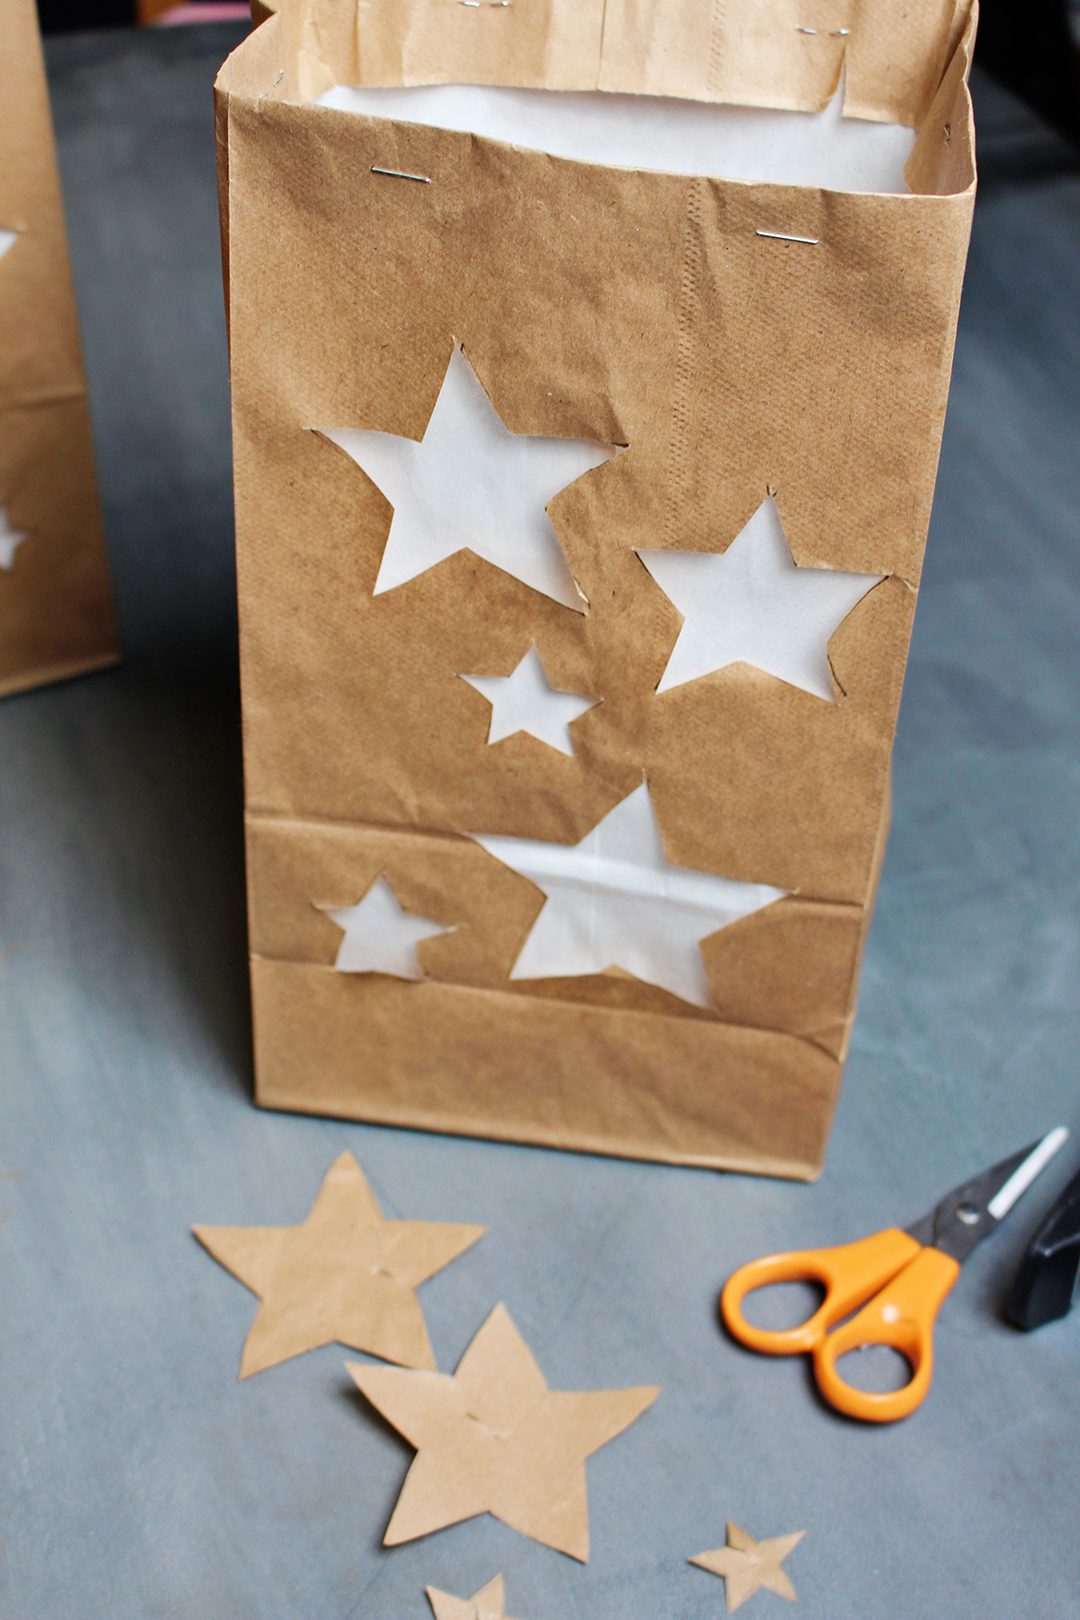
It worked really well to use Christmas Cookie Cutters![]() to draw around. The kids especially liked the stars. You may also have some stencils they may use.
to draw around. The kids especially liked the stars. You may also have some stencils they may use.
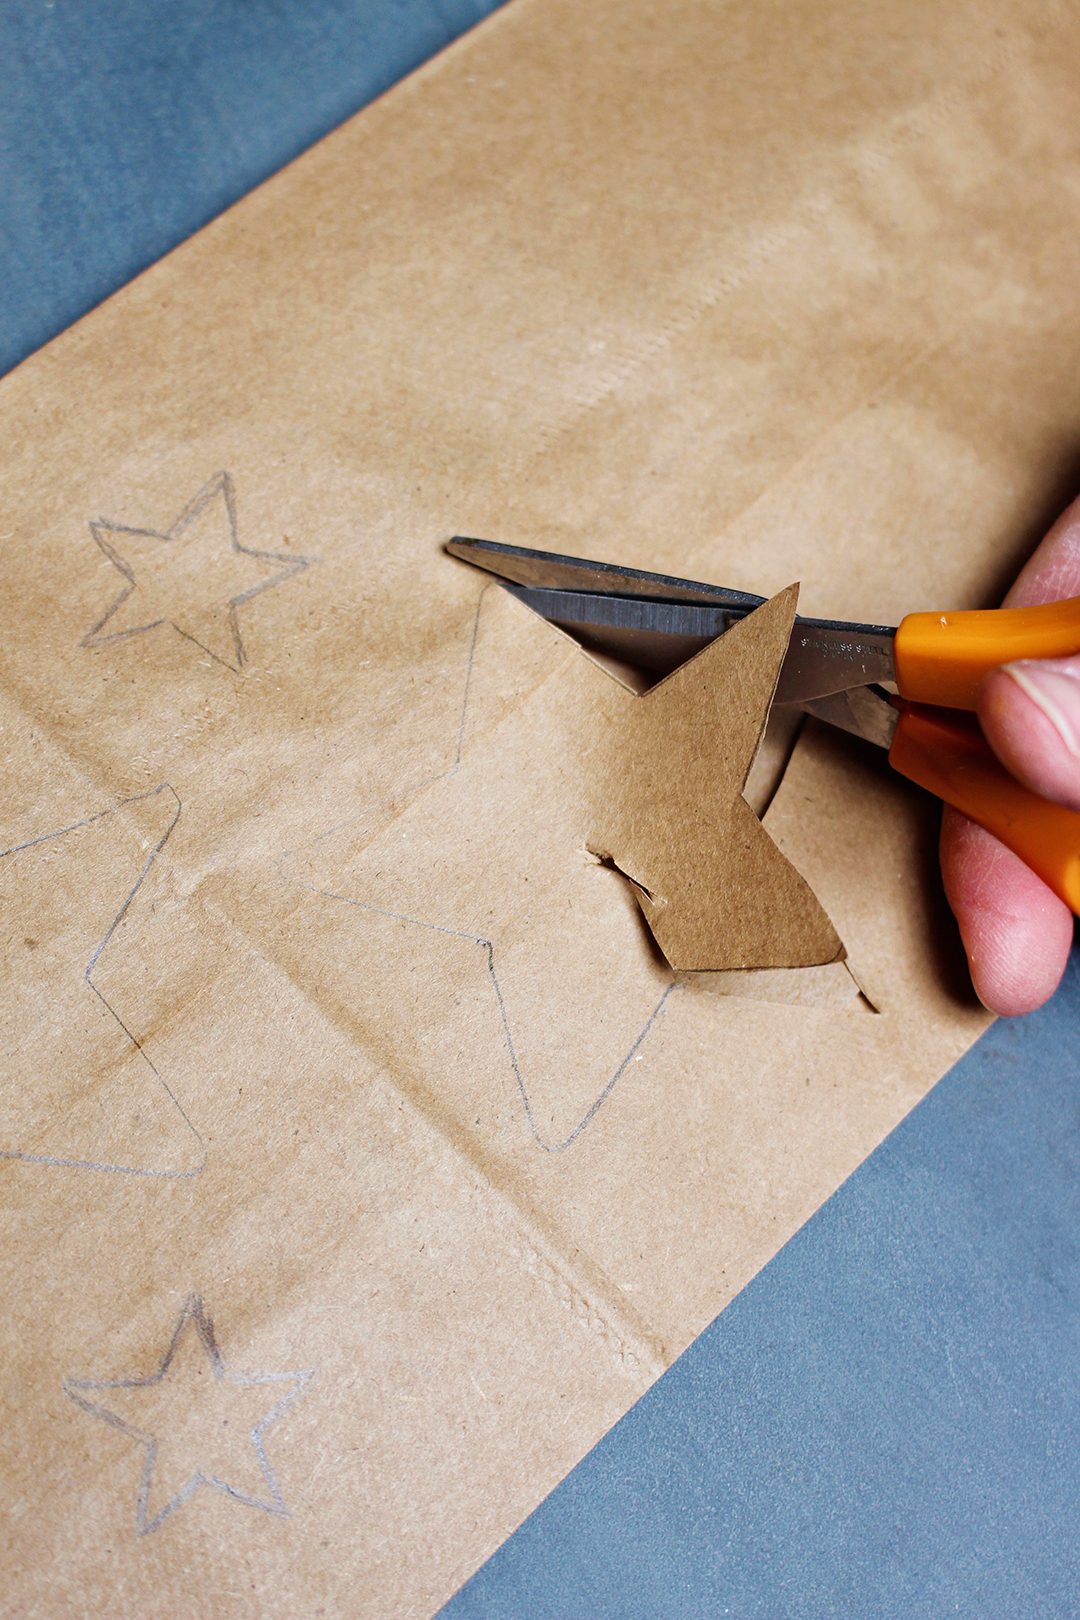
Cut out the shapes...
Cut a piece of cardboard that is the size of the side of the paper bag. Slip it inside the bag so that it fits next to the side of the bag you just decorated. This is to help prevent the child from cutting through the whole bag when cutting out the shapes they just drew.
Use a Scissors![]() to poke a hole in the center of the shape and then proceed to cut out the shape. Only cut through the decorated side of the bag.
to poke a hole in the center of the shape and then proceed to cut out the shape. Only cut through the decorated side of the bag.
Tip: You can decorate both sides of the bag in the same manner if you want. I usually only decorate one side of the bag as then it is stronger and stands up better.
Open the bag completely.
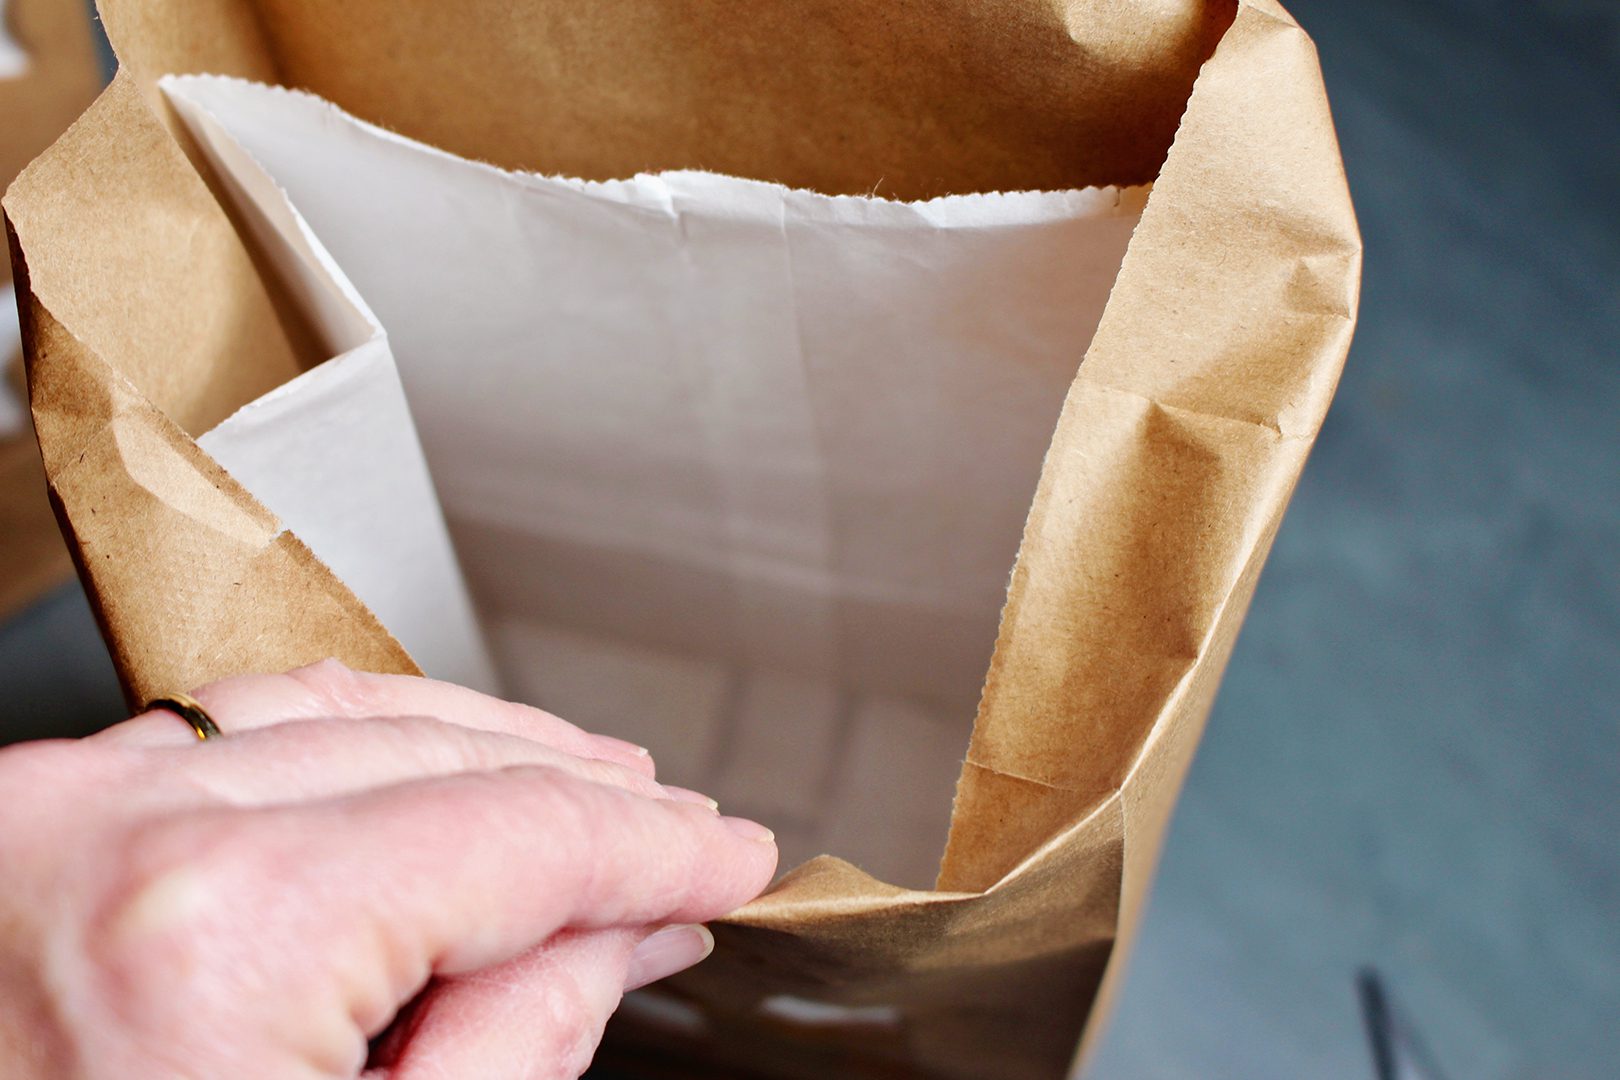
White and Brown Paper Bags
Take one of the White Paper Lunch Bags![]() and slip it inside of the decorated bag. Slip it in carefully so it doesn’t tear the cut out areas of the brown bag. Open it up completely so that it lines the brown bag.
and slip it inside of the decorated bag. Slip it in carefully so it doesn’t tear the cut out areas of the brown bag. Open it up completely so that it lines the brown bag.
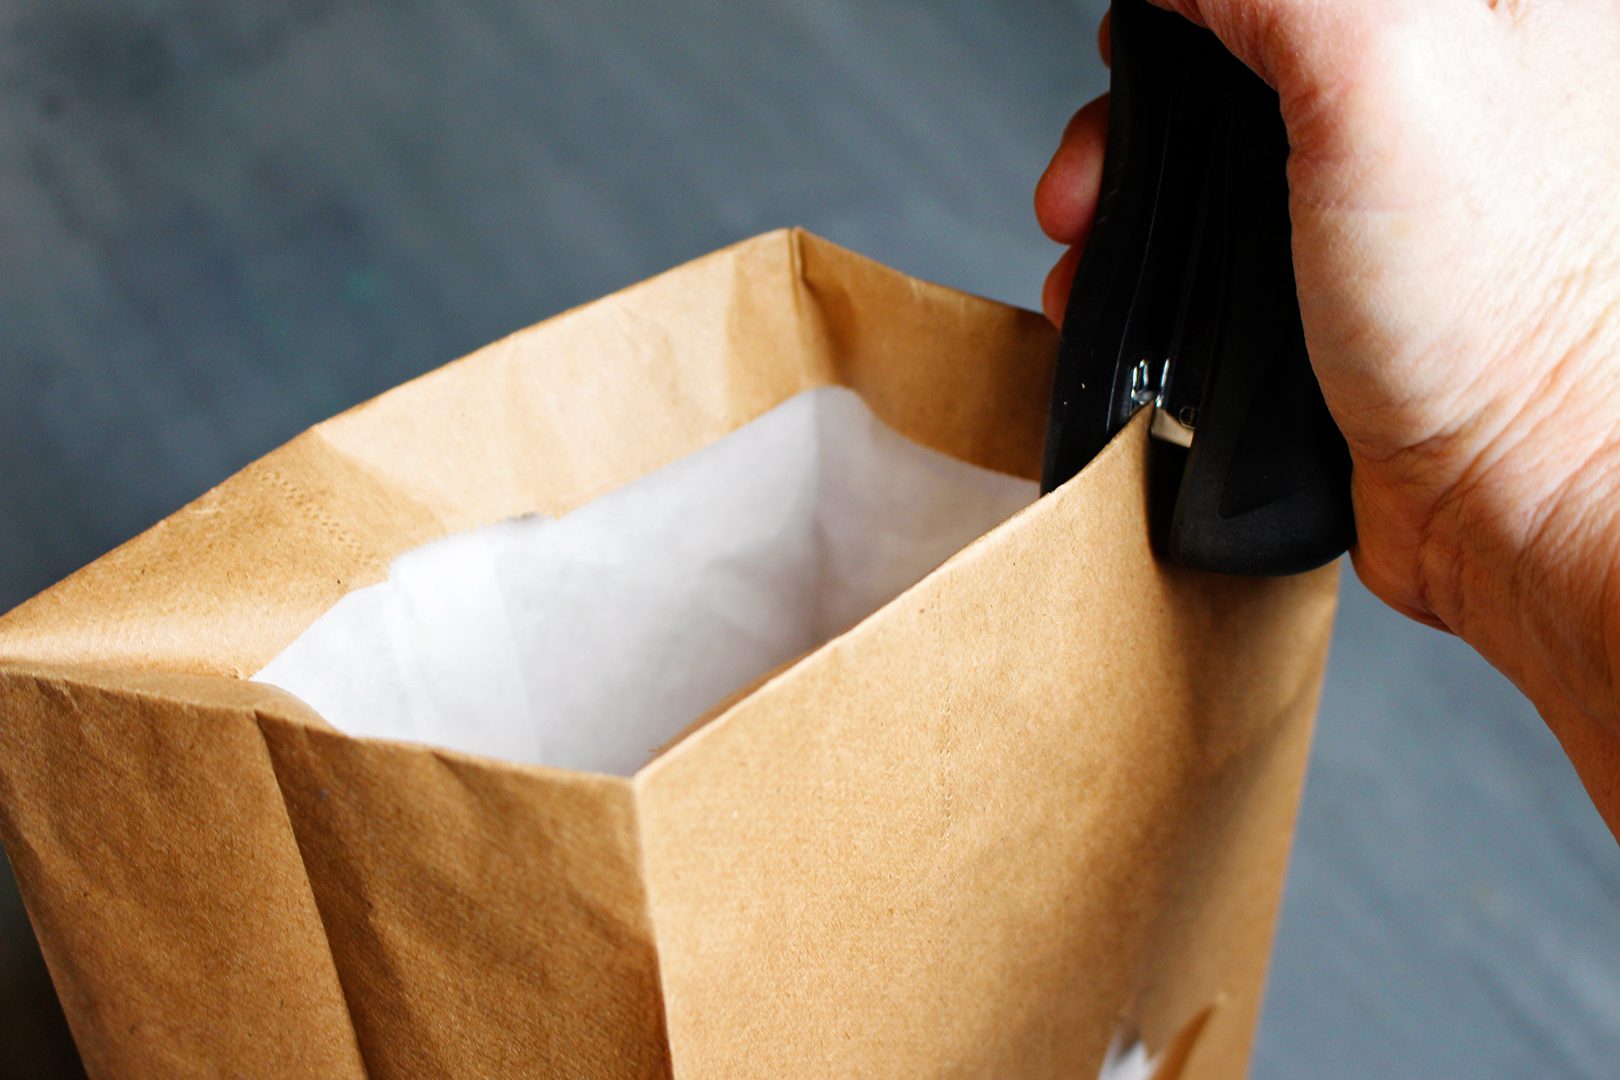
Gently fold the tops of the two bags down about one inch toward the inside of the bags. Staple this flap down. This helps the bag to stand up straight.
How to Keep Paper Bag Luminaries Safe!
The first step to making paper bag luminaries safer, is to weigh them down! Slip a piece of wood (that is cut to the size of the bottom of the bag) down into the bottom of the bag. OR pour a couple of inches of sand into the bottom of the bag. This prevents the bag from blowing away as easily.
I live on the top of a hill with very few trees so this is a very important step!!
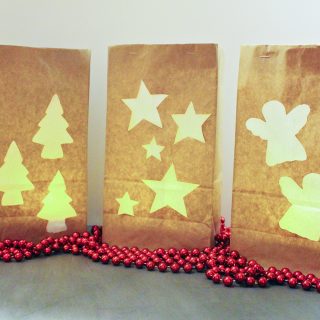
Next, you'll want to light them up in a way that won't involve actual flame. To do this, all you have to do is turn a Flameless Tea Lights![]() on and slip it into the bag!
on and slip it into the bag!
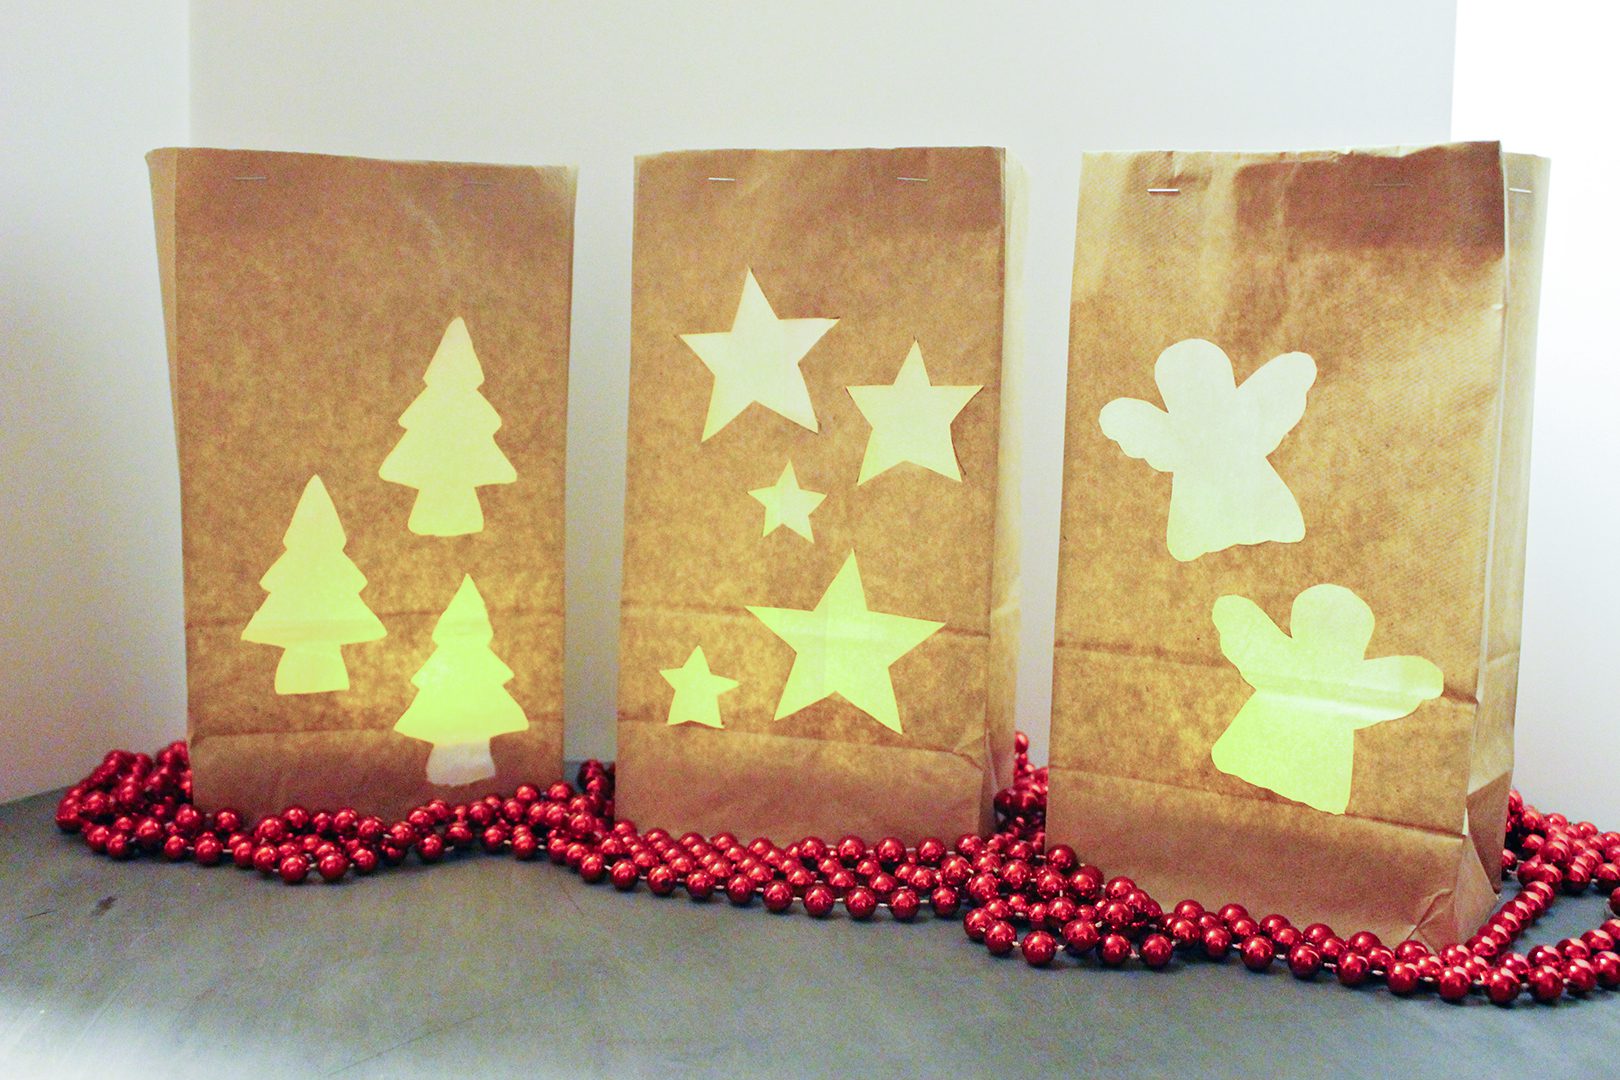
Turn off the lights and see how pretty the glowing paper bag luminaries look in a darkened room! Just think how pretty they will look on your porch or along your sidewalk after the sun goes down!
That’s it! Let the grands make a whole series of glowing paper bag luminaries to line the porch, sidewalk and driveway if you want!!
Relay for Life Luminaries
My high school club (FCCLA) does a money raising event each spring. It is called Relay for Life and the money goes to support cancer research.
Part of their money raising involves making luminaries to honor those we know that are fighting cancer. The decorated luminaries light up our walking path during the event and it’s always so beautiful and heart-warming to see them all lit up.
Last spring, during the event, I decided that we would make some cute glowing paper bag luminaries for Christmas this year!
These luminaries are to honor Jesus, the Light of the world, Who is the reason for Christmas season.
I hope they warm your hearts like they do mine.

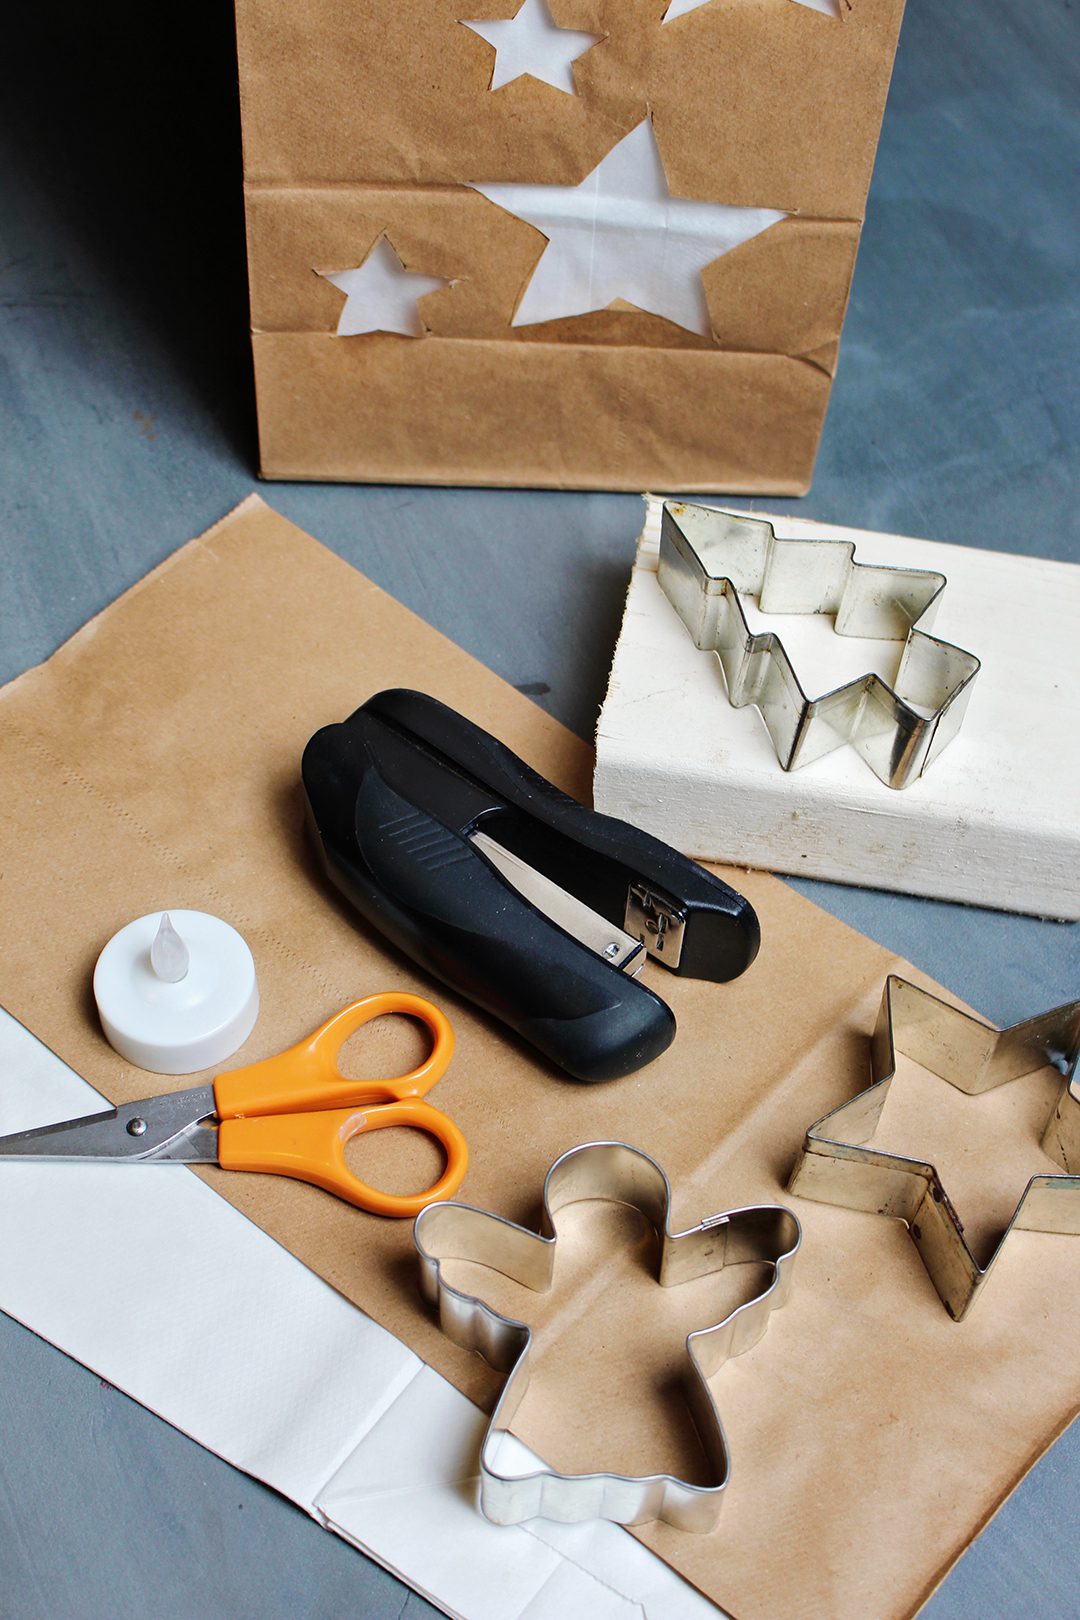
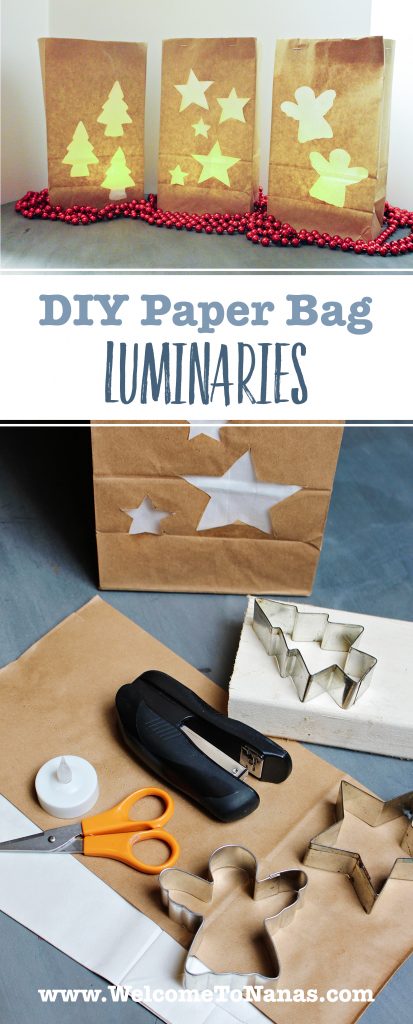
Supplies for DIY Glowing Paper Bag Luminaries:
- White Paper Lunch Bags
 (the same size as the brown paper bags)
- Cardboard (cut the size of the paper bag)
- Small wood blocks cut to fit flat in the bottom of the paper bags
- OR sand
More Fun Christmas Crafts for Kids
If you and the kids are on a holiday roll and want to keep making fun Christmas crafts, give these a try!
Make a No Sew Sock Gnome for Christmas
Simple Decoupaged Stained Glass Candle Holder
Heartwarming Christmas Scented Stovetop Potpourri
ENJOY!
If you try this craft, let me know! Go ahead and leave a comment, rate it, and tag a photo with #WelcometoNanas wherever you post.
Glowing Paper Bag Luminaries
Equipment
- Christmas Cookie Cutters
- Cardboard (cut the size of the paper bag)
- Scissors
Items Required
- 1 Brown Paper Lunch Bag
- 1 White Paper Lunch Bag (the same size as the brown paper bags)
- 1 Flameless Tea Light
- 1 Small wood block cut to fit flat in the bottom of the paper bags, OR sand
Instructions
- Decorate the side of a Brown Paper Lunch Bag with shapes, drawn closer to the bottom of the bag, not close to the top. Christmas cookie cutters work great, or you can use stencils if you have them!
- Cut a piece of cardboard that is the size of the side of the paper bag. Slip it inside the bag so that it fits next to the side of the bag you just decorated. This is to help prevent the child from cutting through the whole bag when cutting out the shapes they just drew.
- Use a Scissors to poke a hole in the center of the shape and then proceed to cut out the shape. Only cut through the decorated side of the bag.
- Take one of the White Paper Lunch Bags and slip it inside of the decorated bag. Slip it in carefully so it doesn’t tear the cut out areas of the brown bag. Open it up completely so that it lines the brown bag.
- Gently fold the tops of the two bags down about one inch toward the inside of the bags. Staple this flap down. This helps the bag to stand up straight.
- Slip a piece of wood (that is cut to the size of the bottom of the bag) down into the bottom of the bag. OR pour a couple of inches of sand into the bottom of the bag. This prevents the bag from blowing away as easily.
- turn a Flameless Tea Lights on and slip it into the bag. Turn off the lights and see how pretty the glowing paper bag luminaries look in a darkened room!
Video


Leave a Reply