Learn how to make an easy Mushroom Drawing (2 Ways!) with this awesome step-by-step drawing tutorial for kids! Draw mushrooms that turn out looking cute and realistic every time, even for beginners.
Jump to:
- Mushrooms for Drawing
- Cute Craft Alert: A Drawing of a Mushroom
- Supplies to make a Mushroom Drawing Easy
- Steps to Make an Easy Mushroom Drawing
- Craft Tips to Draw a Mushroom
- Craft Variations on How to Draw a Mushroom
- FAQ on how to draw a mushroom
- More How to Draw Activities for Kids
- Come join the fun at WTN!
- Easy Mushroom Drawing (2 Ways)!
Mushrooms for Drawing
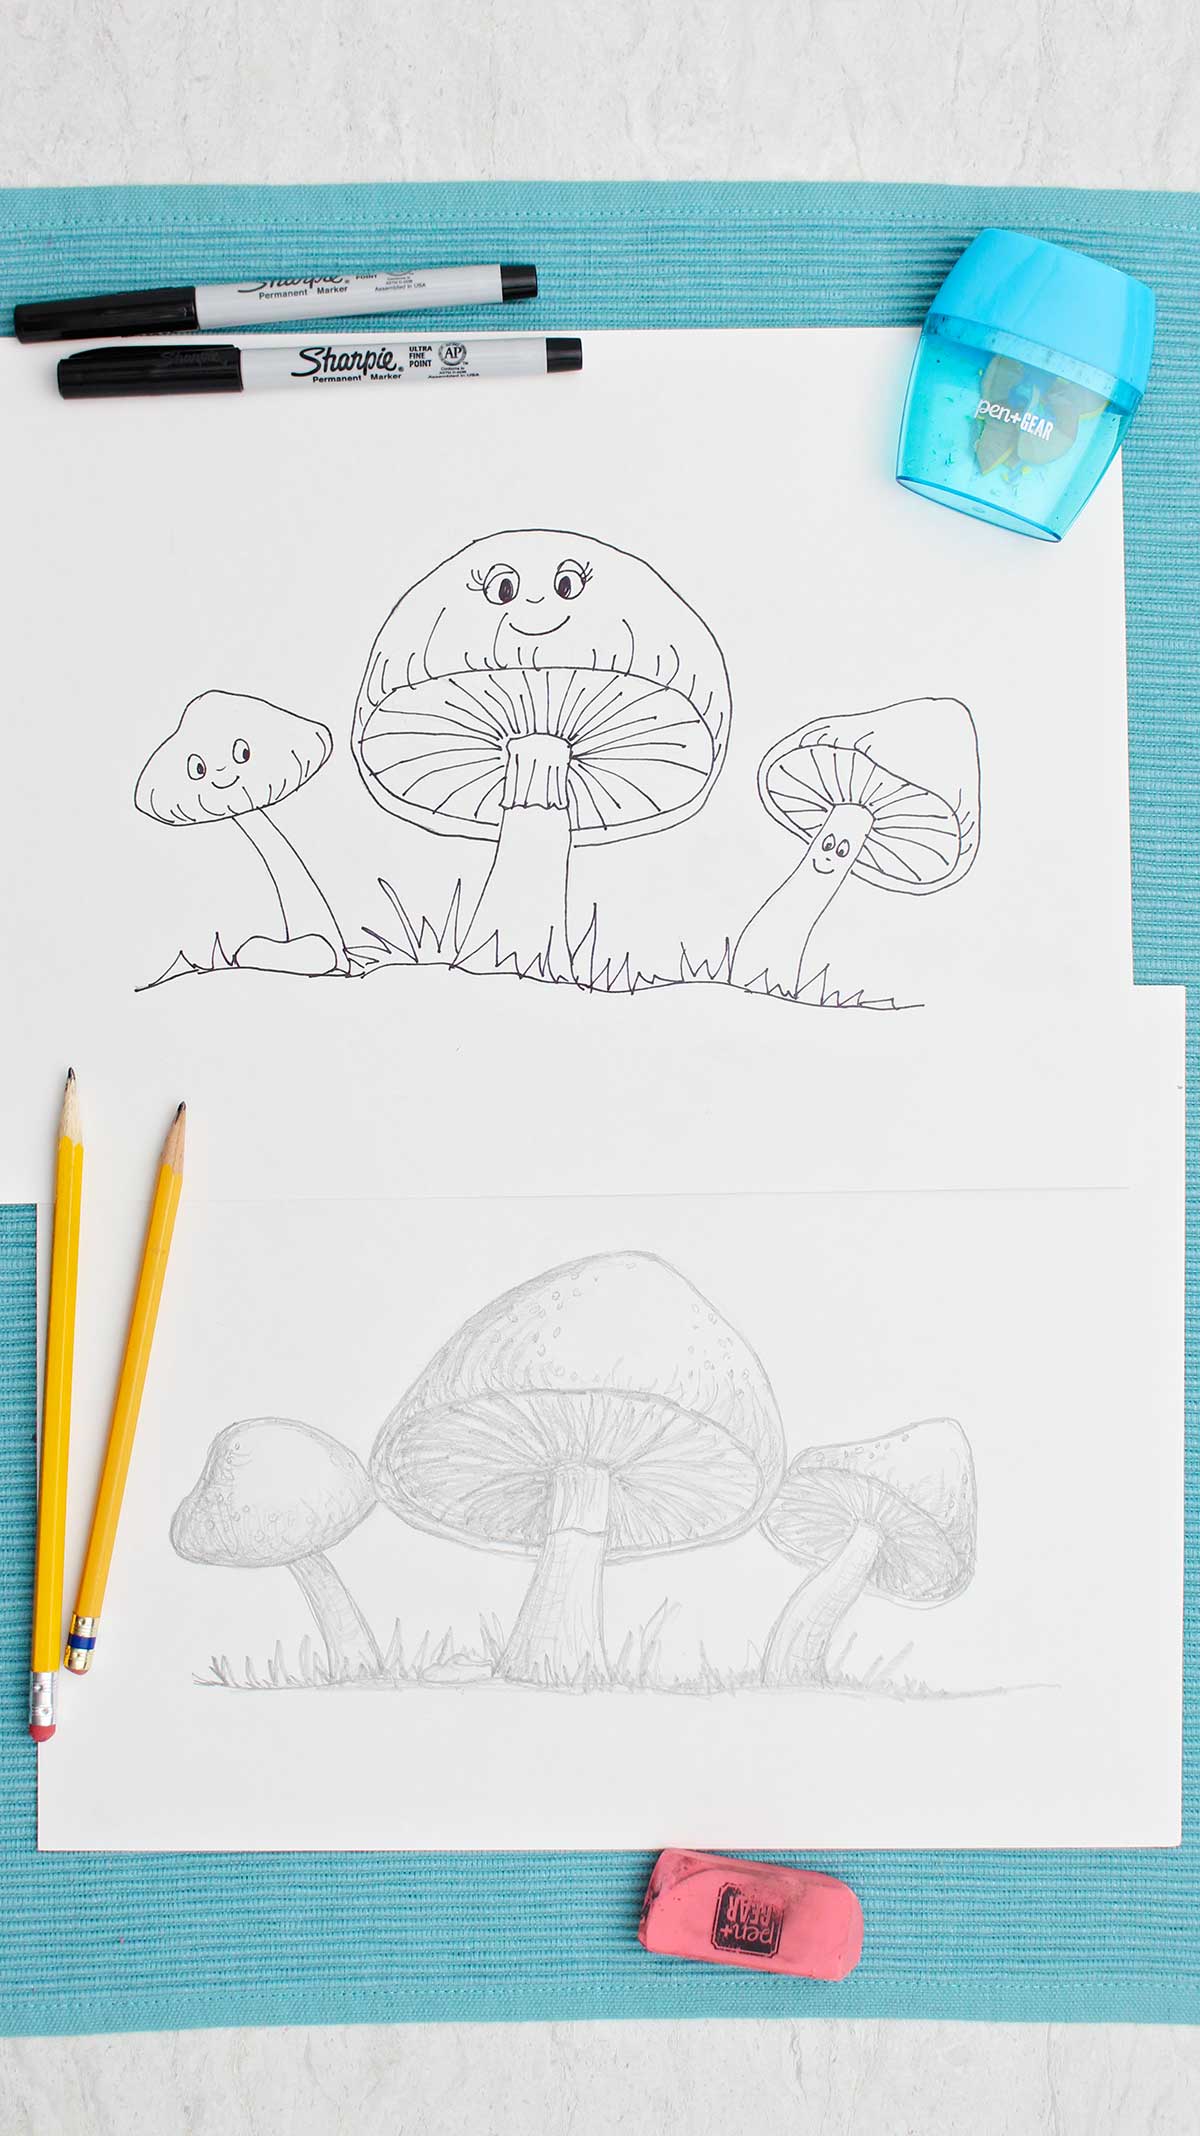
Mushrooms spring up after a rain in our area. They can spring up on your paper too when you see how truly easy it is to create this mushroom drawing in 2D or 3D. My video and step-by-step tutorial make it seem as if you have an experienced teacher sitting next to you.
The 2D picture makes a great coloring sheet- so add a face to make a cute mushroom drawing and then color it in. The kids will also be surprised at how realistic their 3D picture with shading turns out! Mushrooms are popular right now so come on, let’s try it!
Cute Craft Alert: A Drawing of a Mushroom
I have friends that hunt and pick certain edible mushrooms in the wild and use them in their recipes. They are great cooks and keep the mushroom locations a secret.
My cousin even raises mushrooms and sells them at the farmer’s market. These are the types we know are safe to eat, the ones that are bought at the store or from a farmer.
But me? Mushrooms feel like they’re part of a fairy land where I might find a gnome or fairy hiding if I’m quiet. I like to take pictures of mushrooms or draw them! They always take me by surprise when we discover them on a walk in our creek.
Supplies to make a Mushroom Drawing Easy
You don’t need much to bring these cute mushroom drawings to life!
- Drawing paper- Use drawing paper or a sketch book to try this tutorial.
- Pencil, pen, or marker- Use a pencil or marker to draw a butterfly.
- Eraser- Have an eraser handy when drawing with pencil
- Colored pencils- Use colored pencils or crayons to color in the butterfly drawing (optional).
Steps to Make an Easy Mushroom Drawing
The pictures and the video will make these steps clear. Follow along!
Easy 2D mushroom drawing - a cute easy mushroom drawing idea
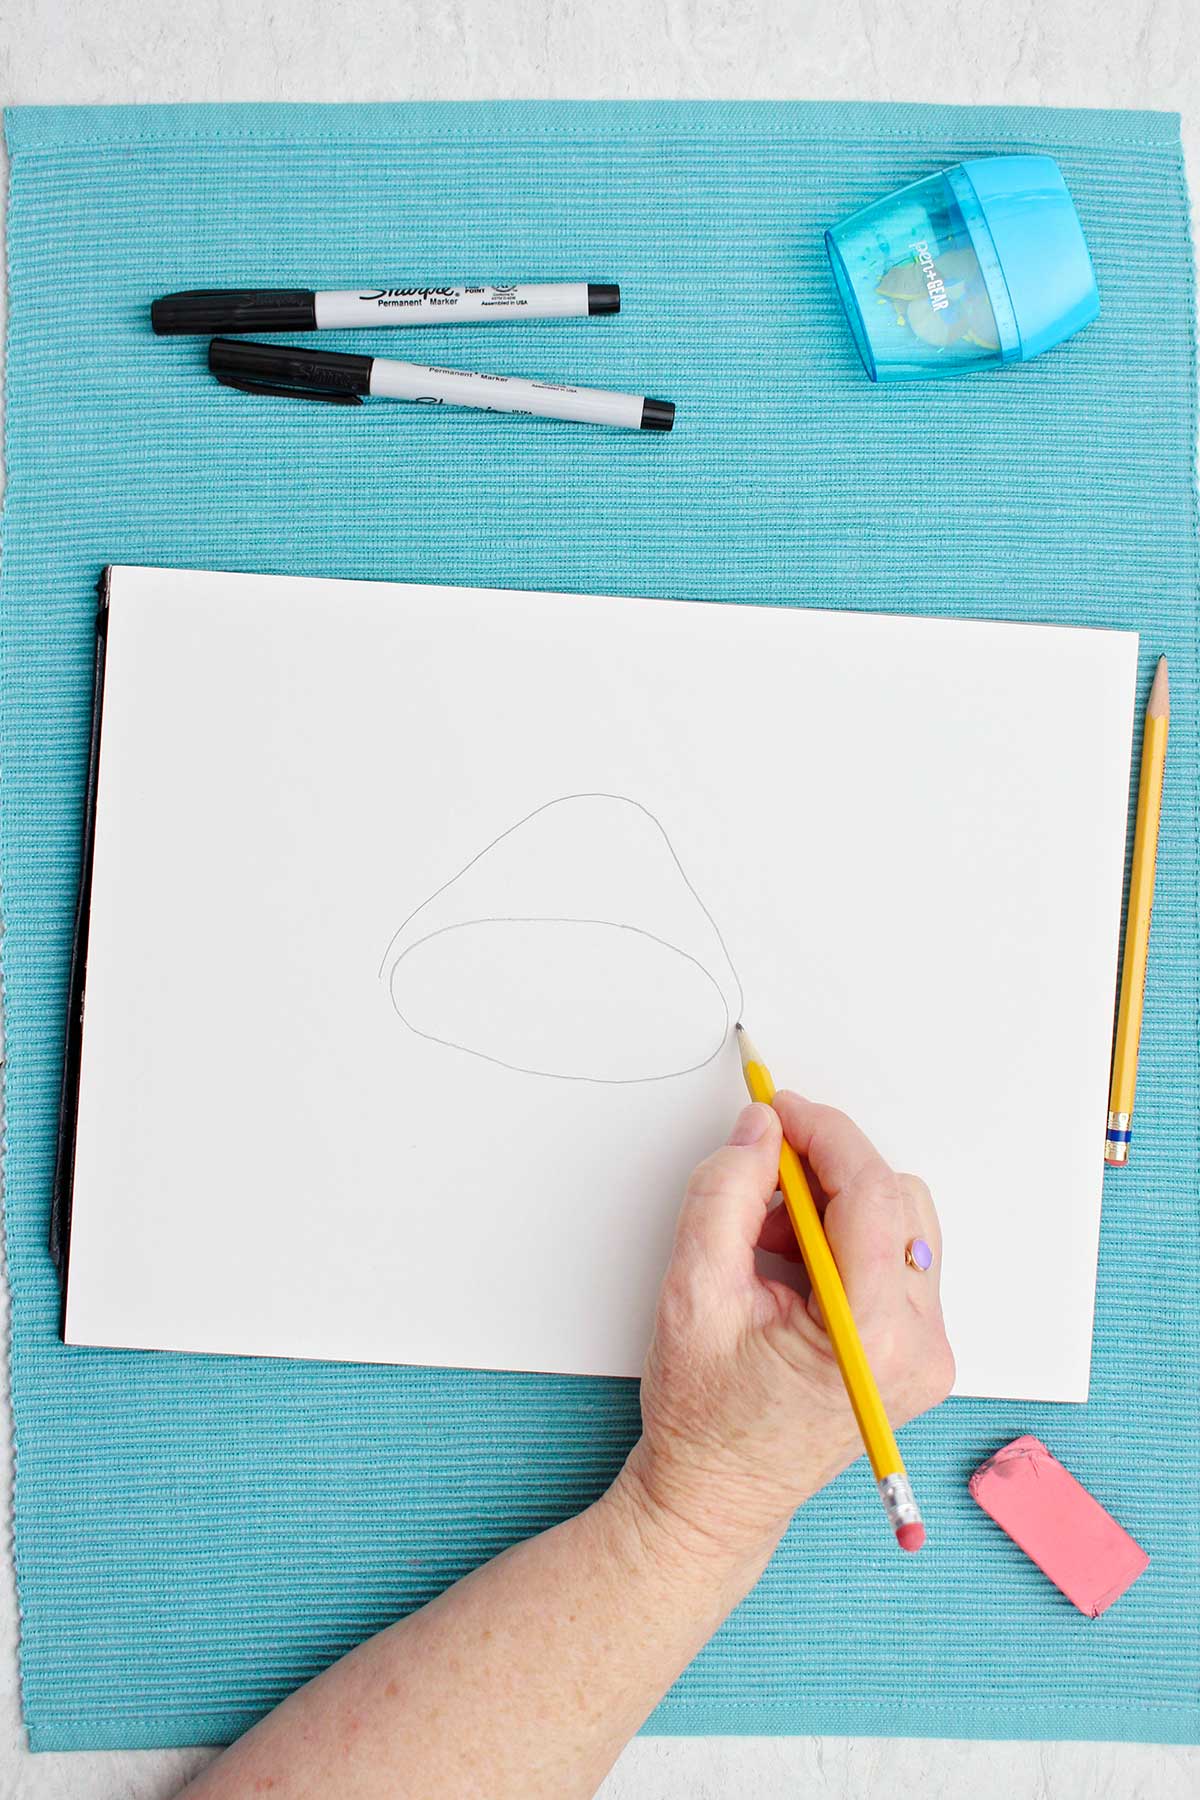
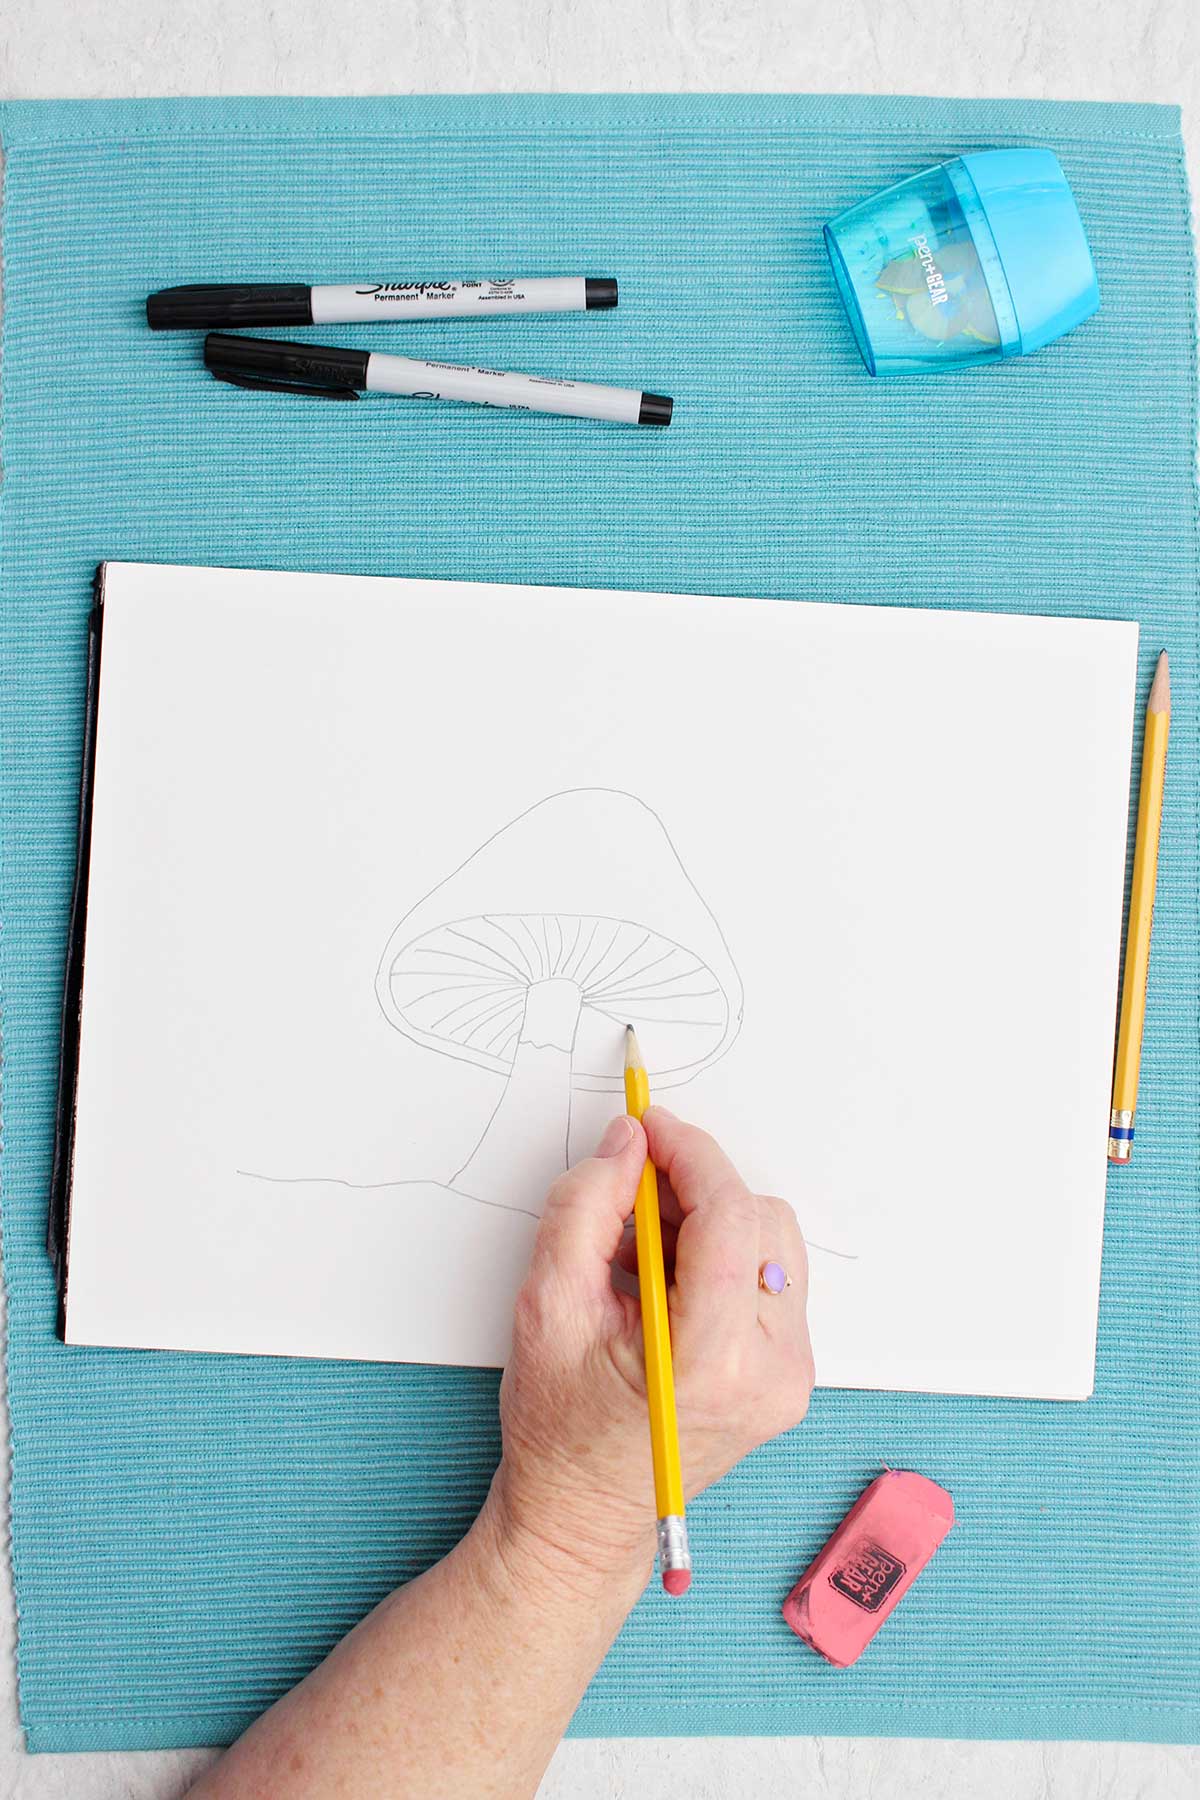
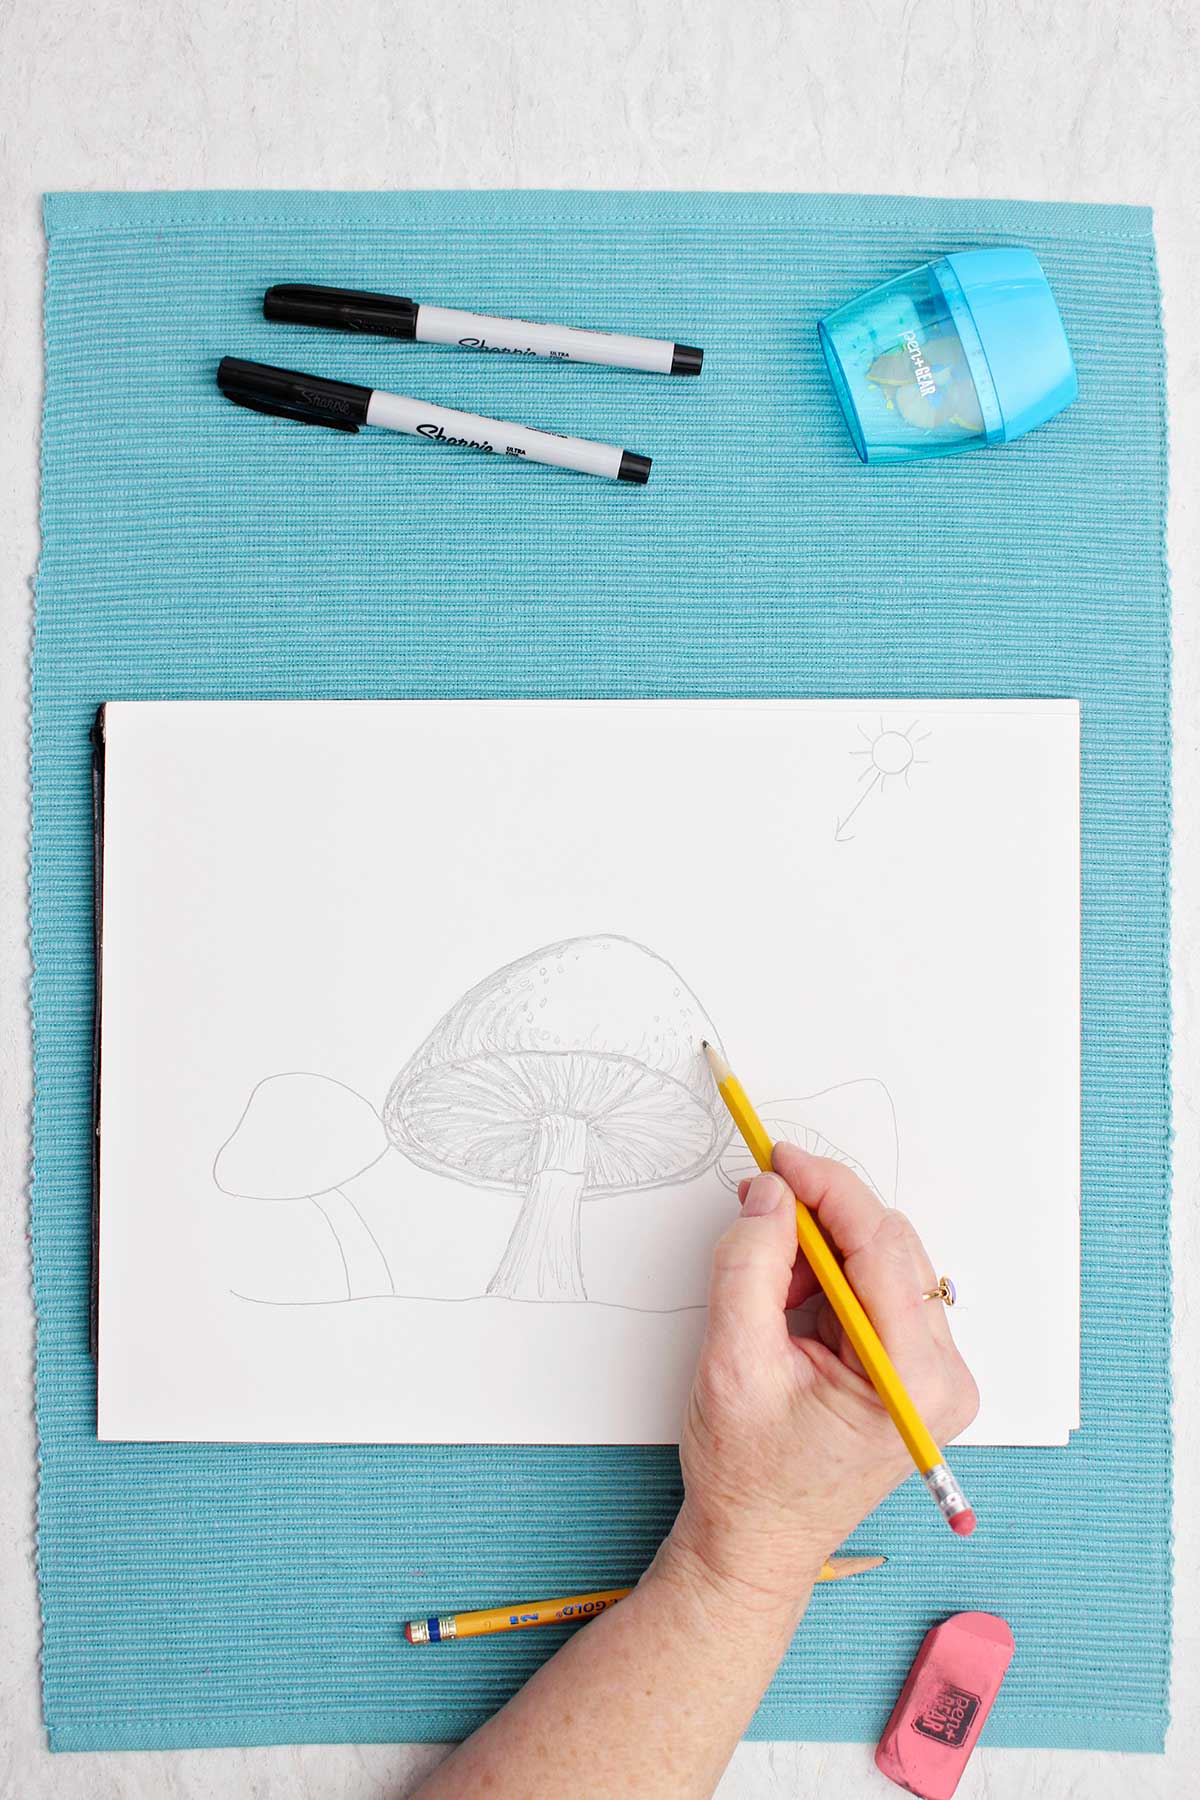
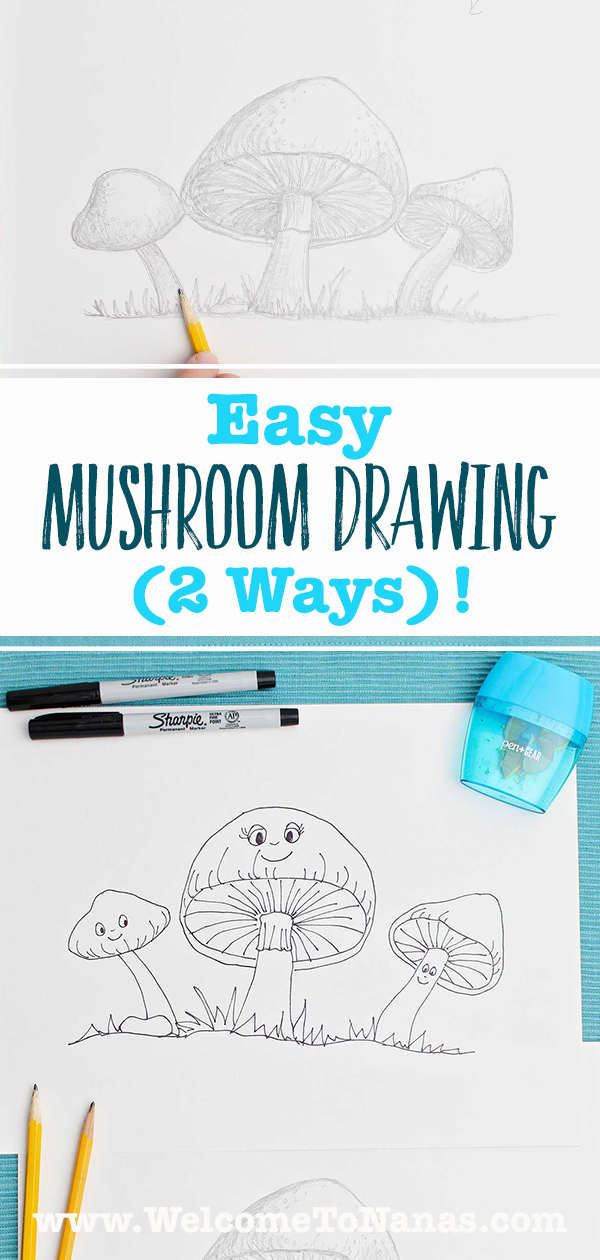
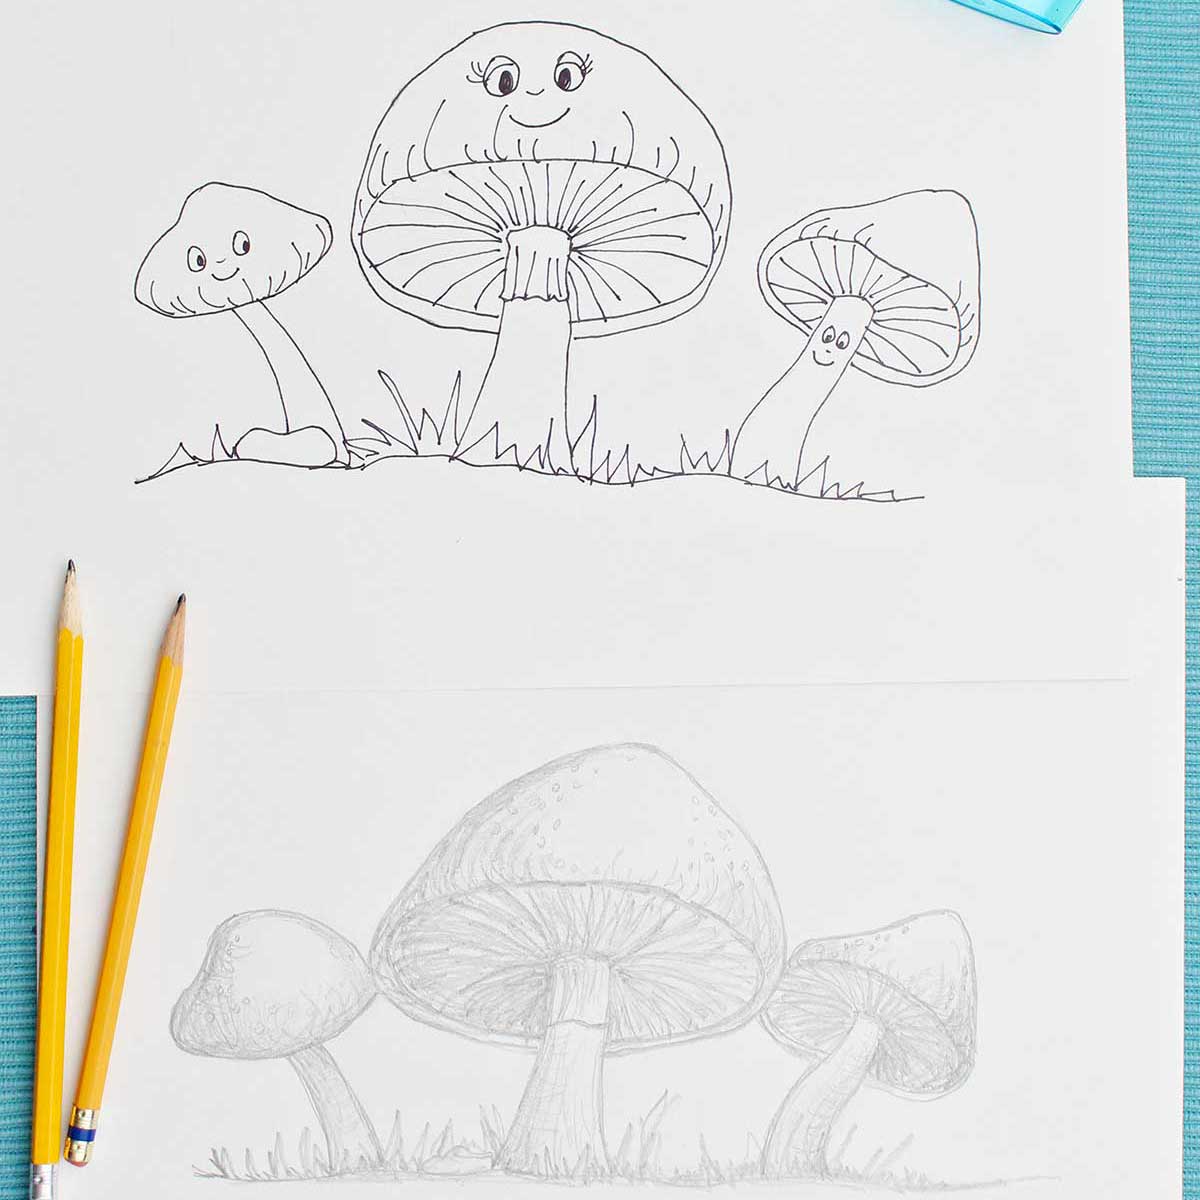
- We will start by drawing the top (or the cap) of the mushroom. In the center of your drawing paper, draw an oval that goes horizontally from side to side (the underside of the mushroom). Then draw a line that makes a mound over the top of the oval, continues closely under the oval, and connects with the beginning of the line. This is the puffy top of the mushroom.
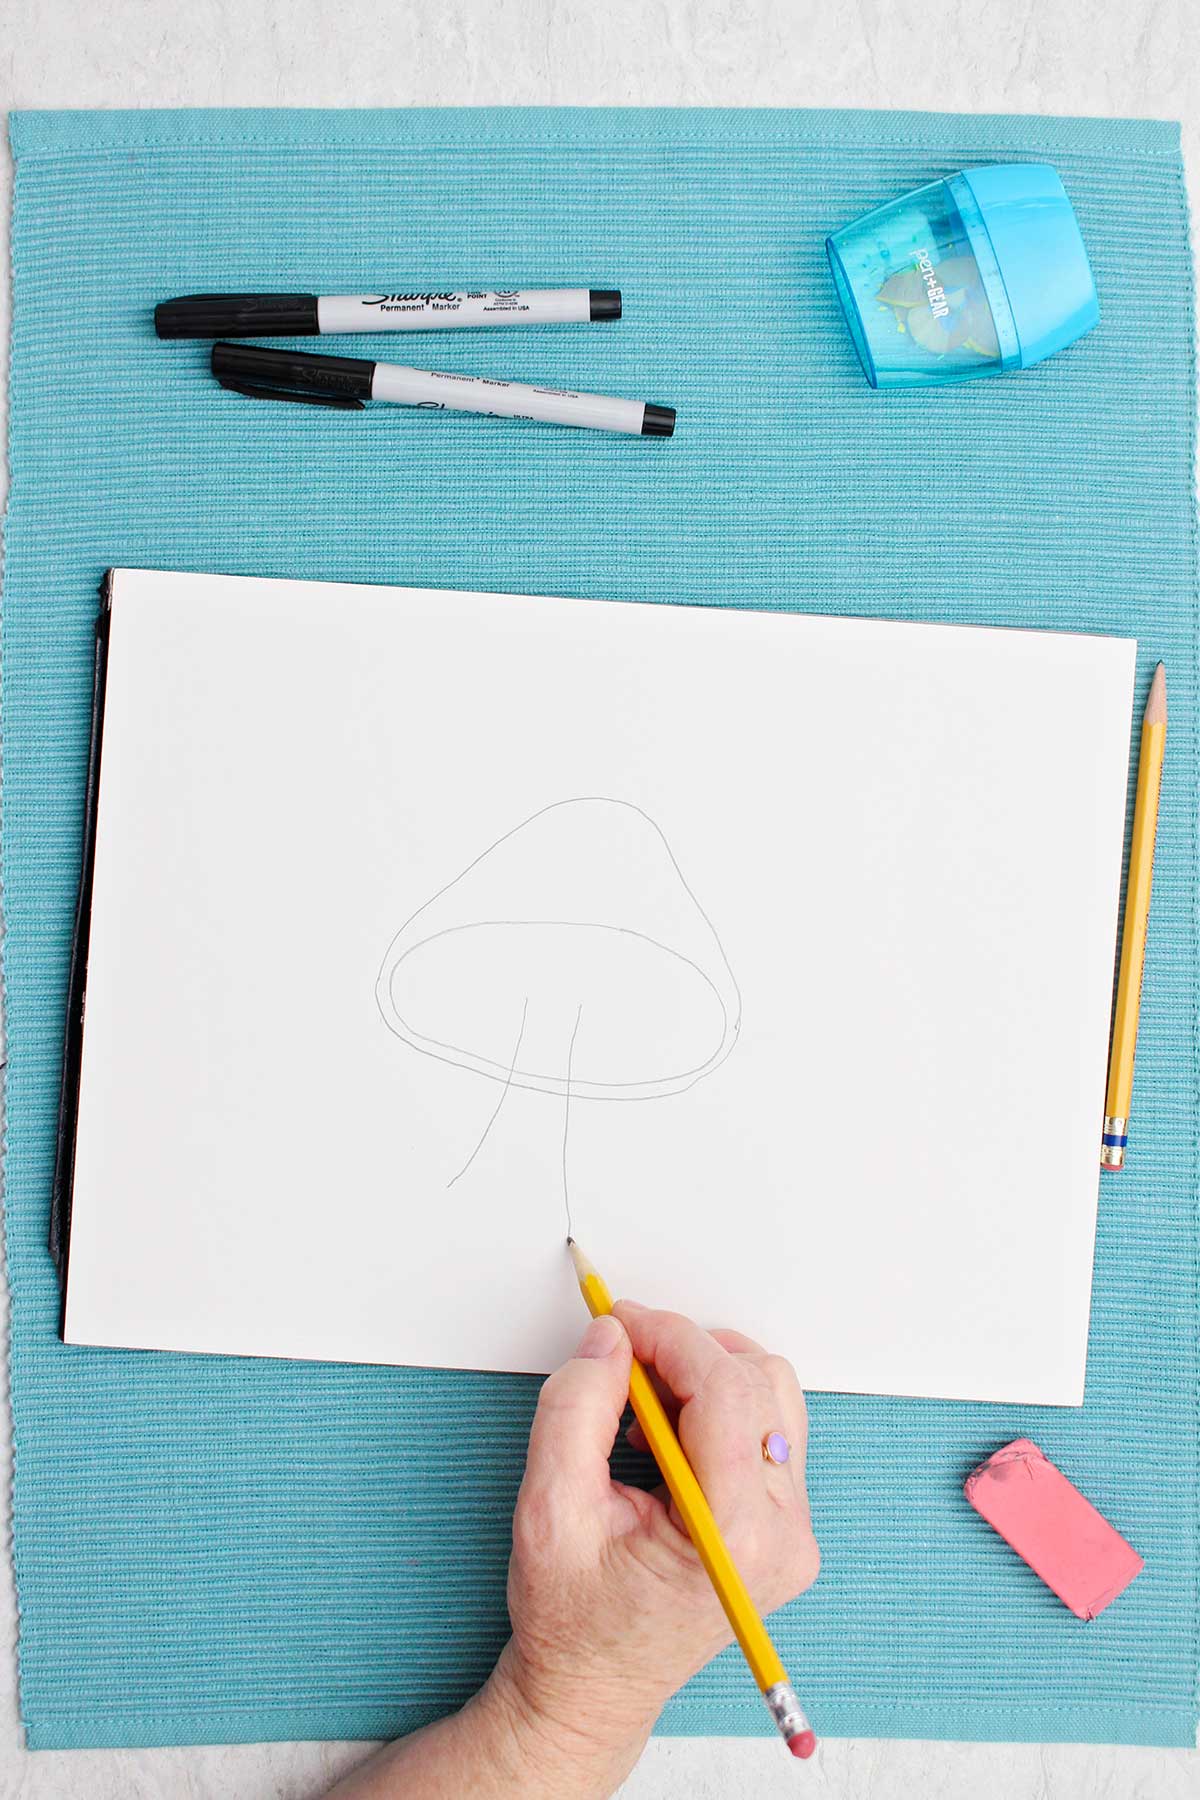
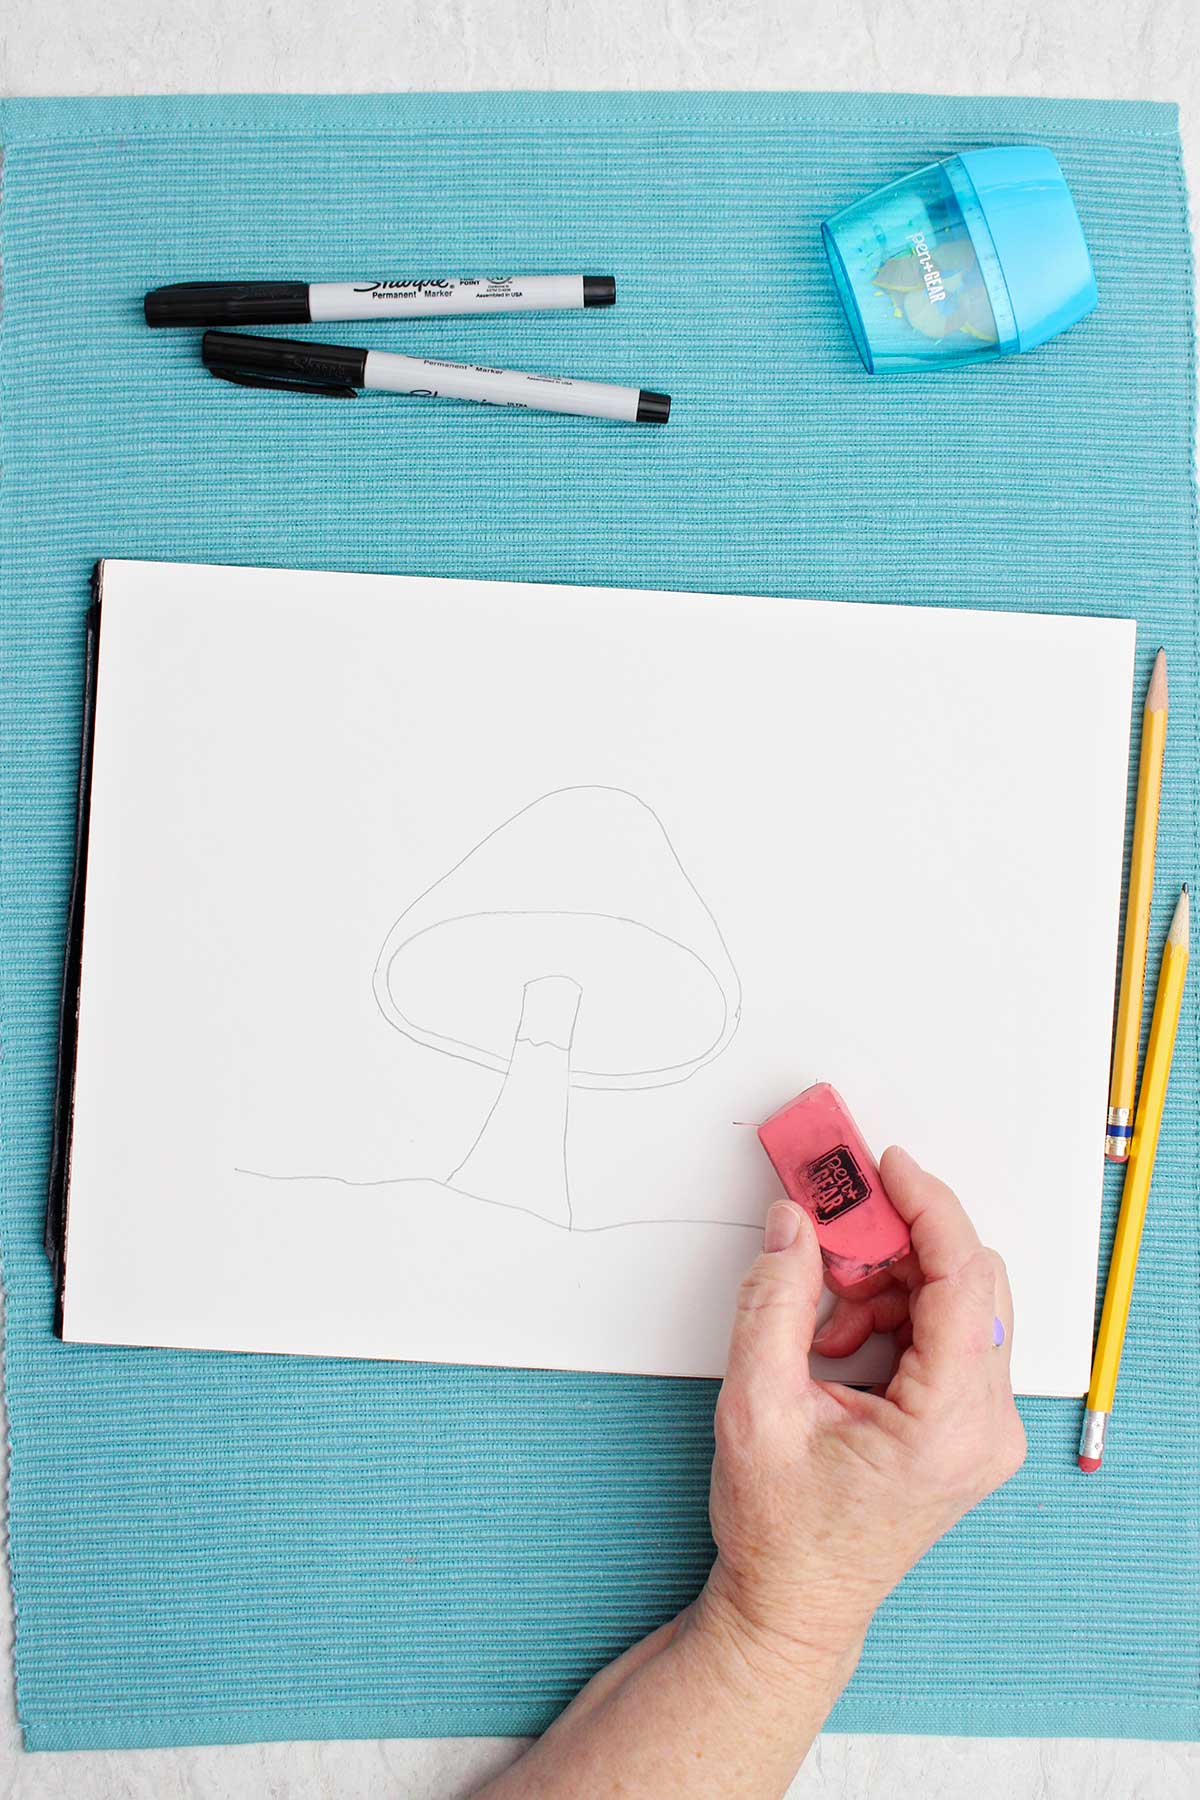
- We’ll make a stem by drawing two lines that start a close distance apart near the center of the oval. The lines go down and get wider apart (like a tree trunk). Draw an “upside down smile line” to connect the two lines at the top and a second line across the bottom which represents the ground.
- The stem has a “skirt” that is made with a wavy line about ¼ th the way down the stem with a few vertical lines on the skirt.
- The oval underside of the mushroom has “gill” lines that look like the spokes of a bicycle. They come out around the stem and radiate out to the outer edge of the oval. Draw these in on your picture.
- Make a few contour lines that are like small smile lines around the bottom of the mushroom cap to give the look of it being rounded (see picture).
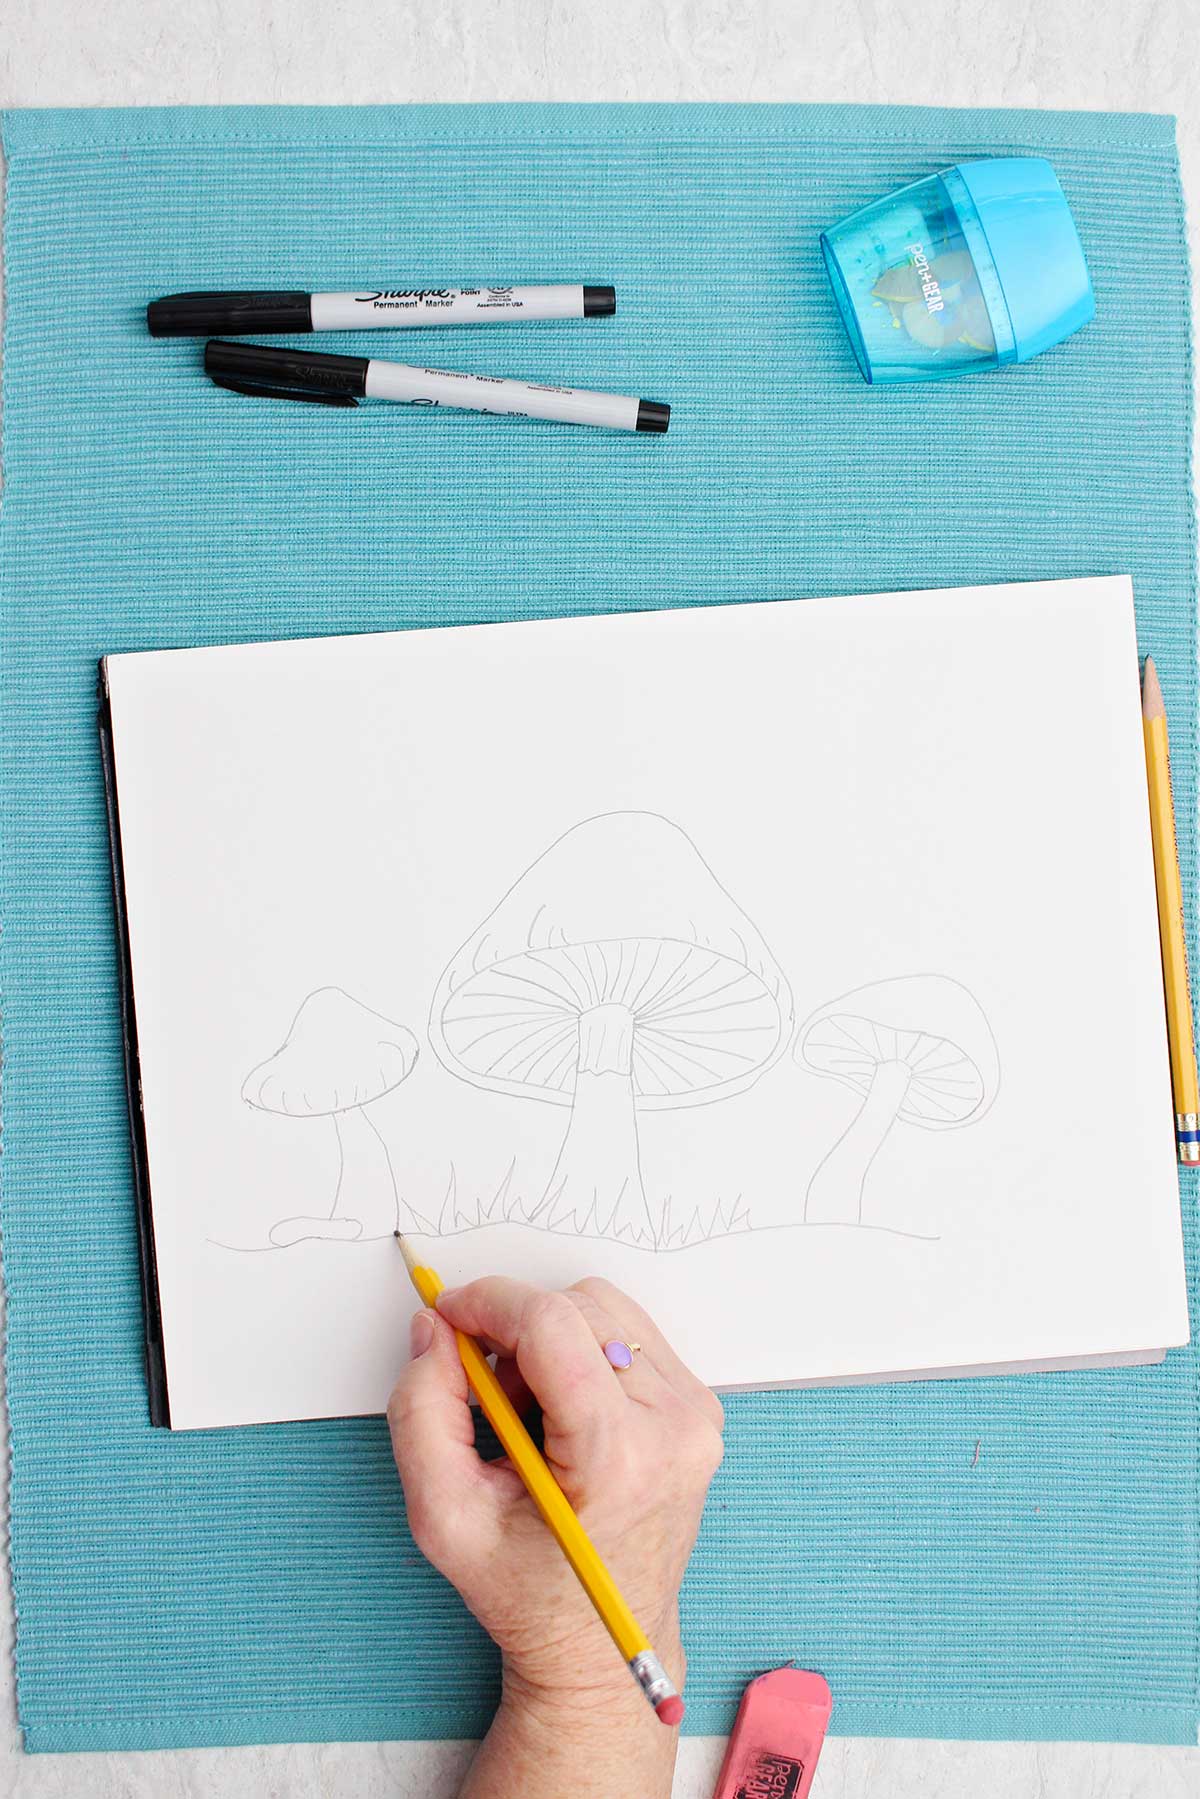
- For finishing touches, extend the ground line to the left and to the right. Add some grass above the ground line with an up and down zig-zag line.
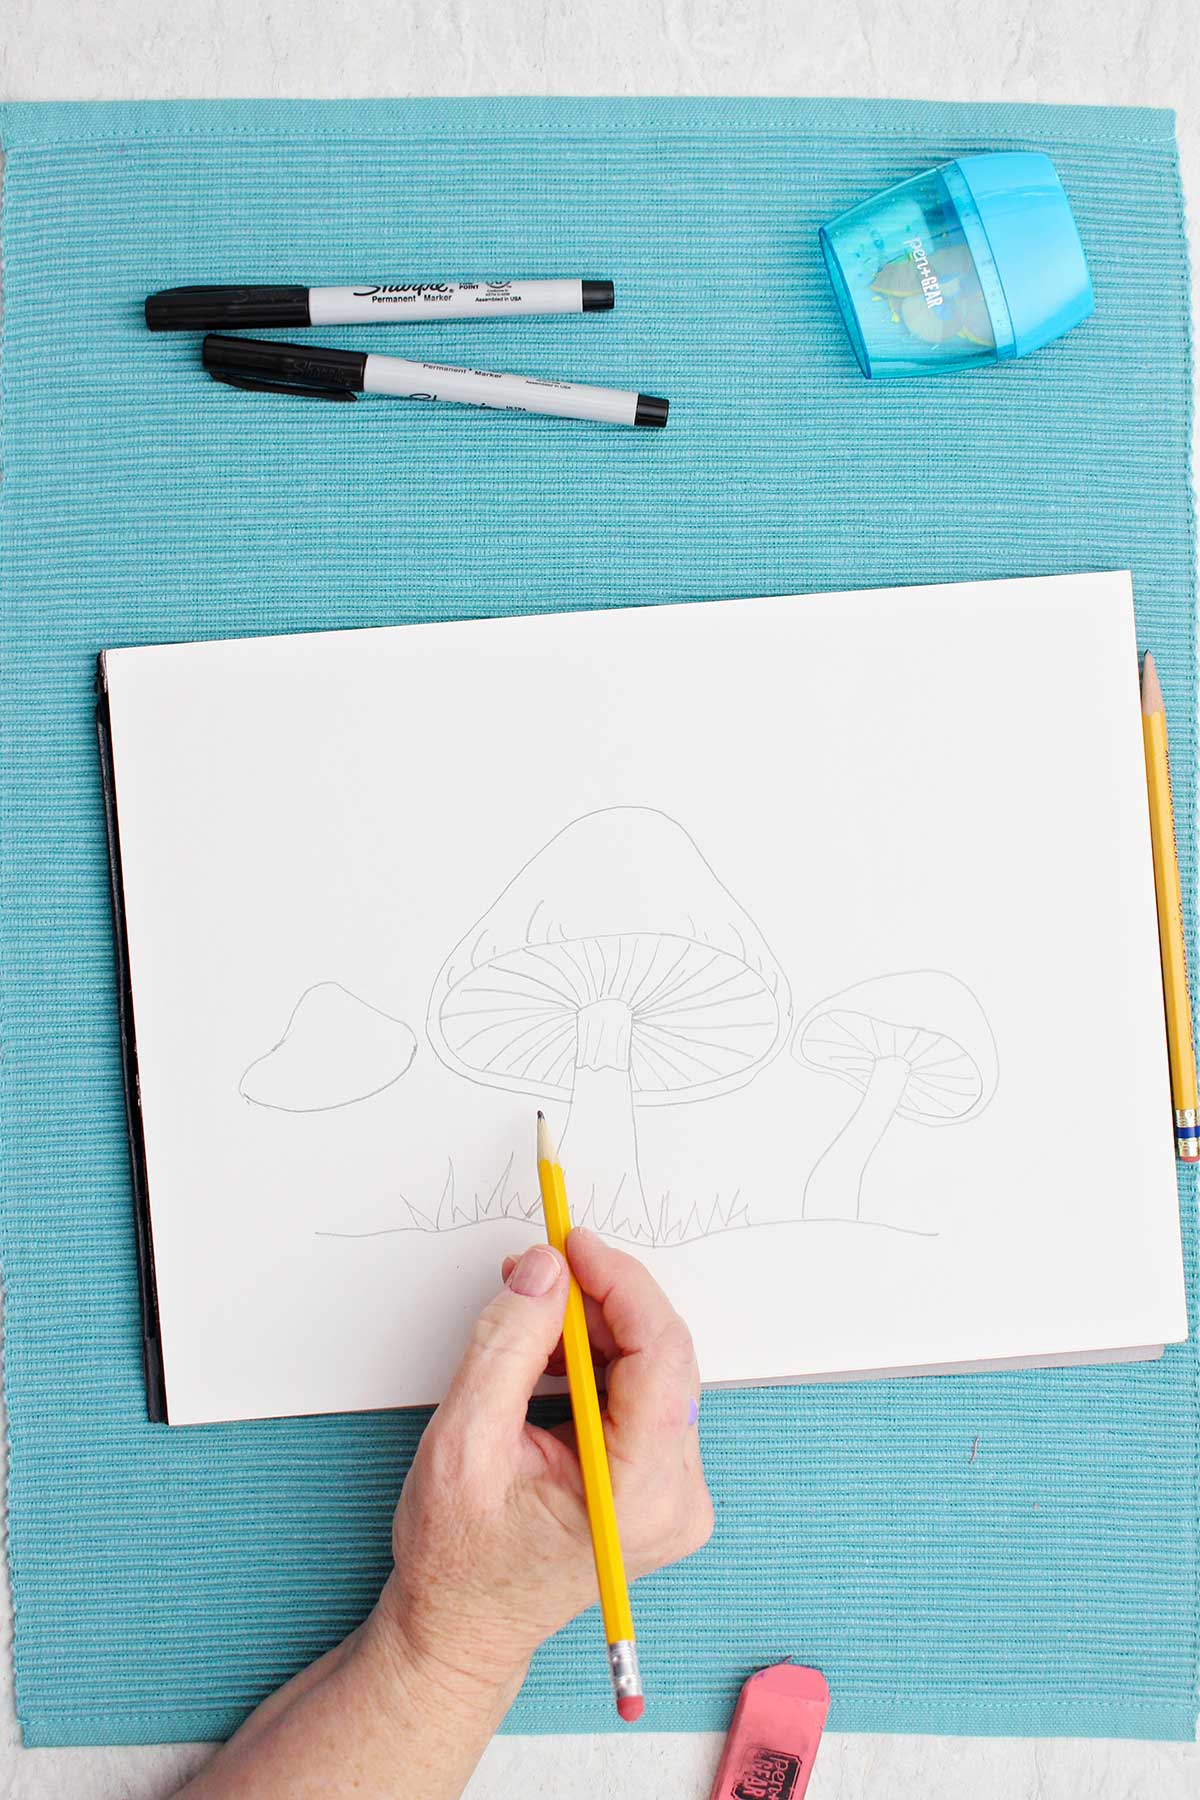
- A mushroom can be drawn that doesn’t show the underside. Start with a “smile” line that isn’t very curved. Draw the same mound line over the top but connect it on the left end of the smile line and the right end of the smile line. Draw the stem coming down from the center of the smile line. Finish as you did the other mushroom.
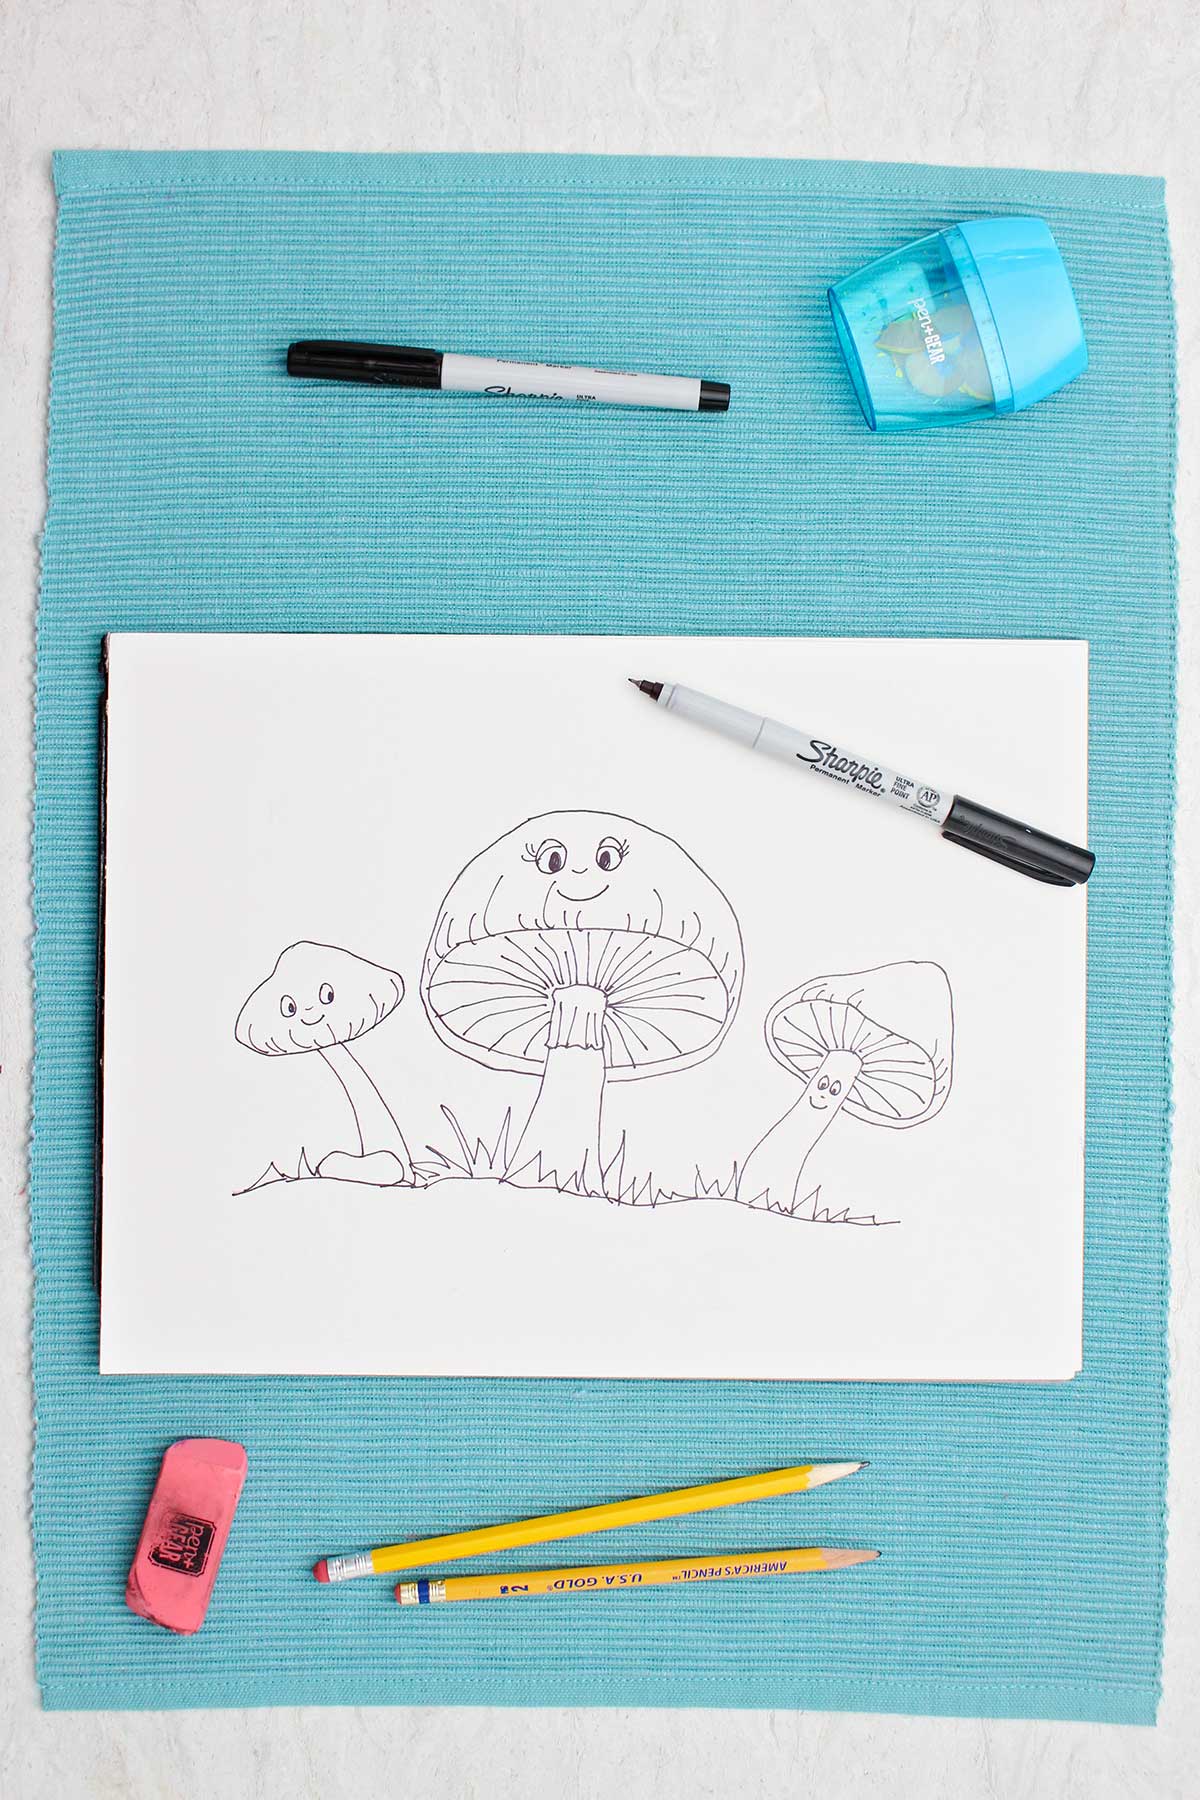
- Make this a cute mushroom drawing by drawing faces (arms, legs) on the mushrooms! Enjoy coloring your drawing in.
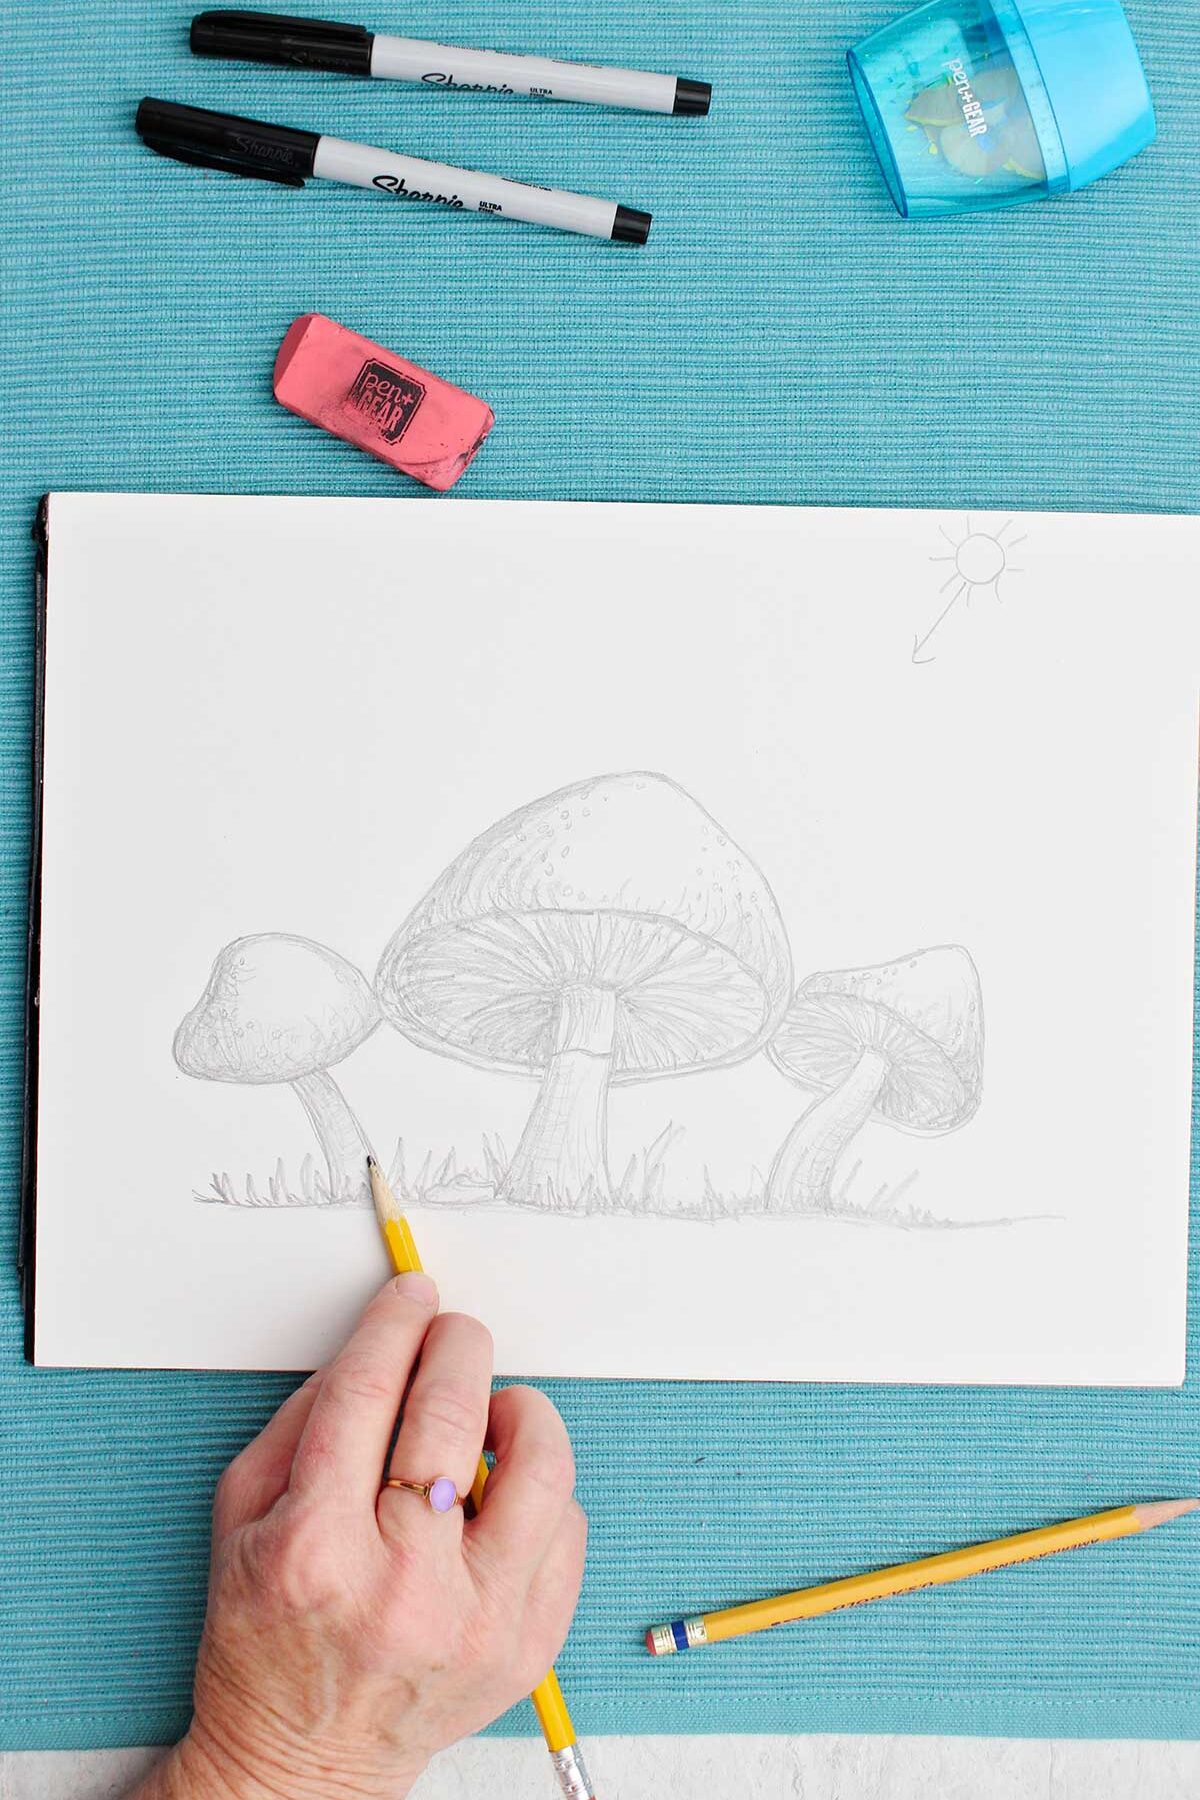
Easy 3D mushroom drawing with shading - a realistic mushroom drawing idea
- Draw the mushroom the same way as steps 1-5 in the 2D easy mushroom drawing instructions.
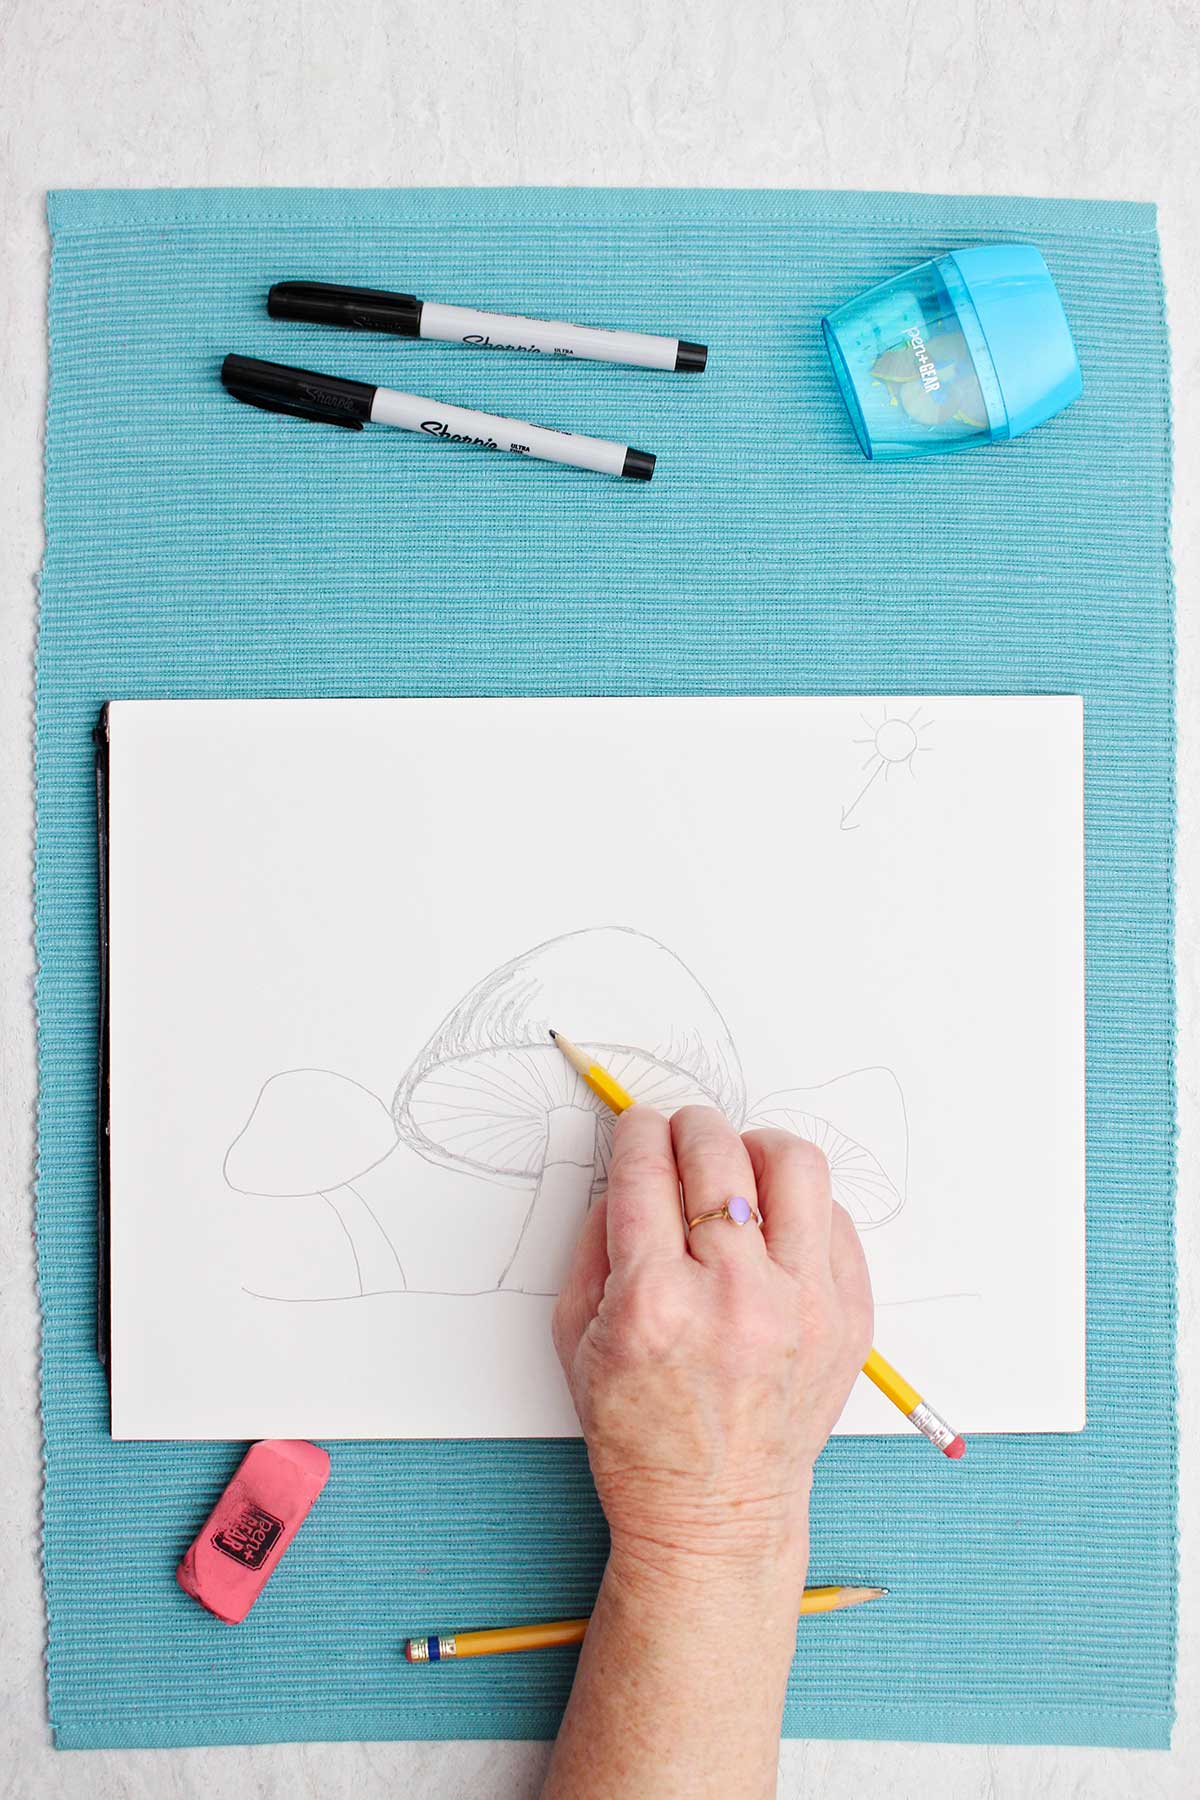
- We will have the light source of the picture coming down from the top right of the picture- as if the sun was there, shining down on the mushrooms you drew. Shade the edge of the mushroom cap with vertica “smile lines” that give the impression that the edge has a curved shape. Then shade the side of the cap that is farthest from the light source.
- Shade the stem. Shade the farthest edge of the stem from the light source. Even though it is under the cap, don’t darken it in completely.
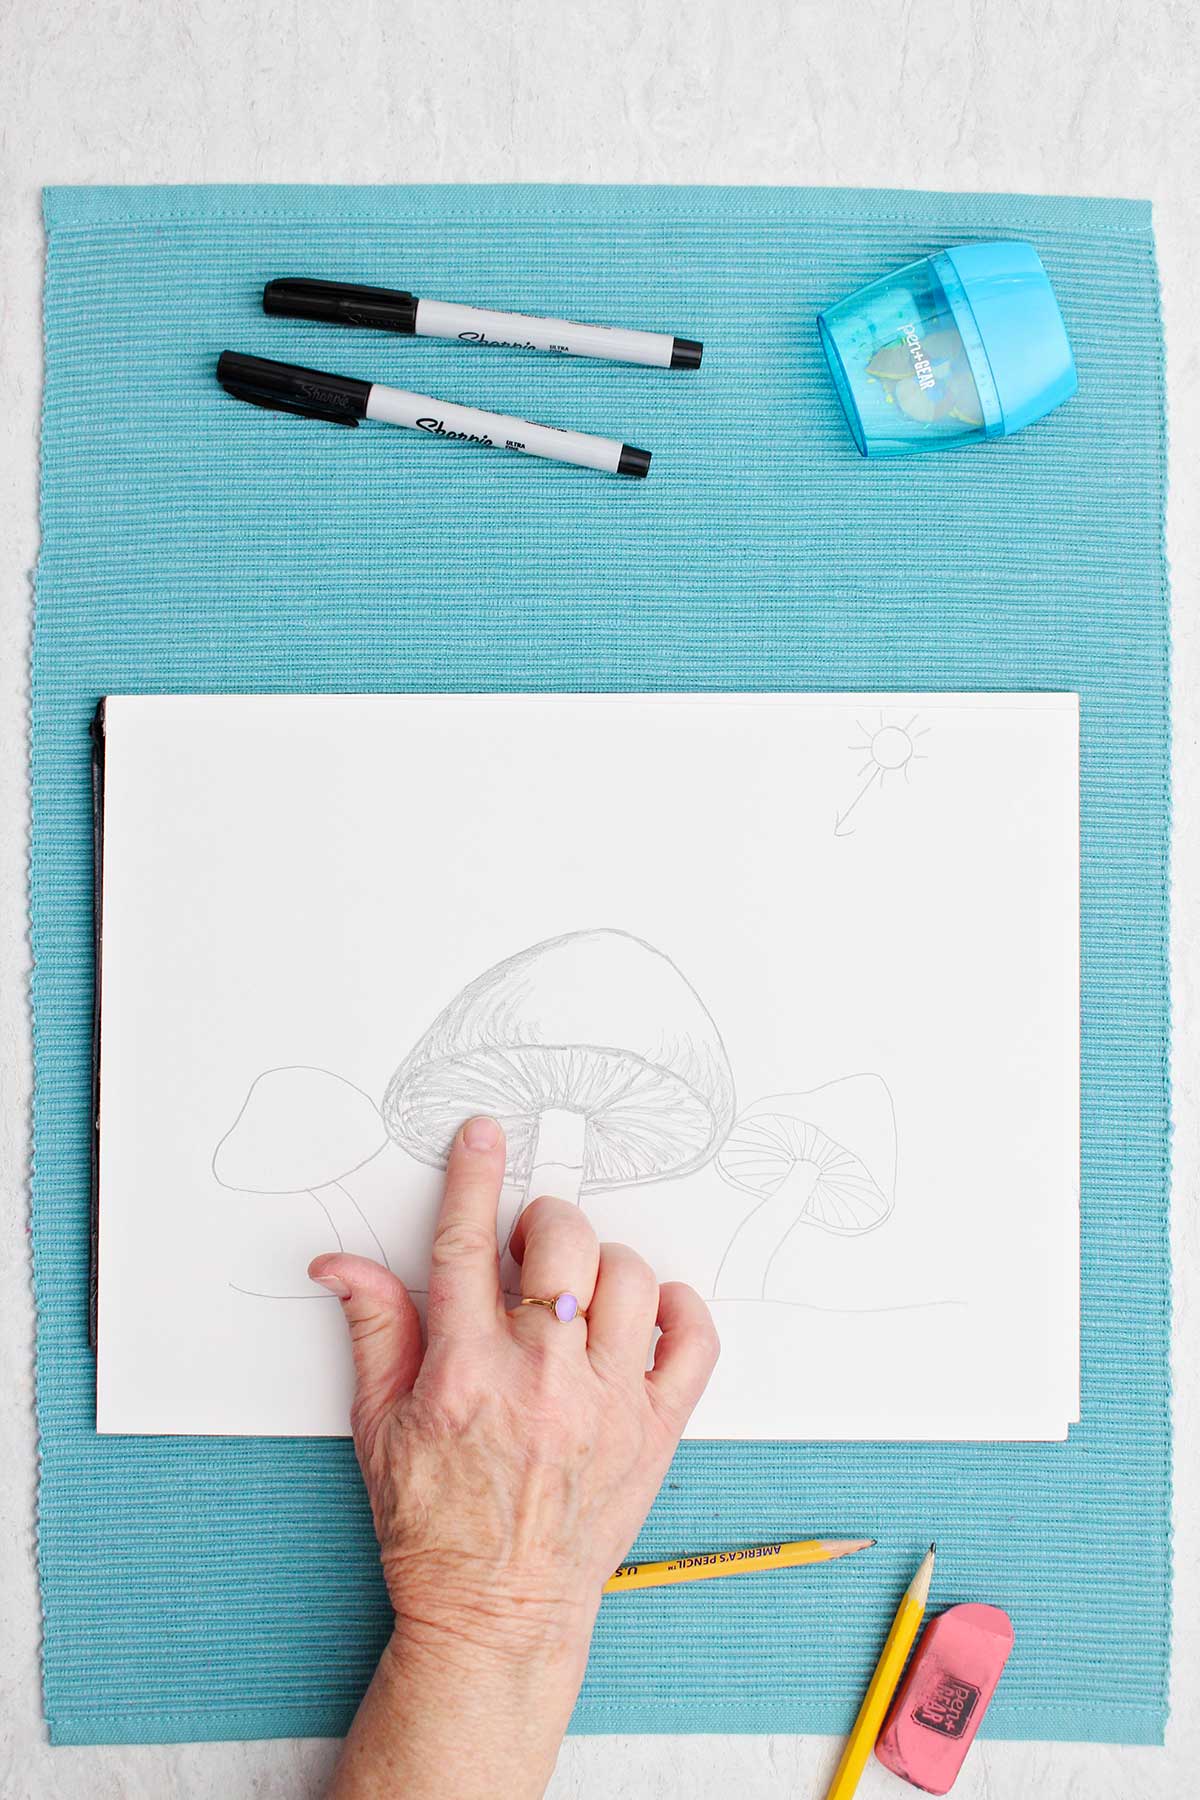
- Add some lines and dots on the cap of the mushroom to give it a textured look. The surface of a mushroom isn’t smooth. Add a few lines to the stem as well as fiber lines.
- Shade the underside gills of the mushroom. Darken the spoke like gill lines and shade the area (it is the underneath side of the mushroom and gets less light). But don’t completely darken it in, you want to still see the gill lines.
- Blend the shaded areas you’ve drawn. Use your finger or a blending tool to make the shaded areas look more even and smooth.
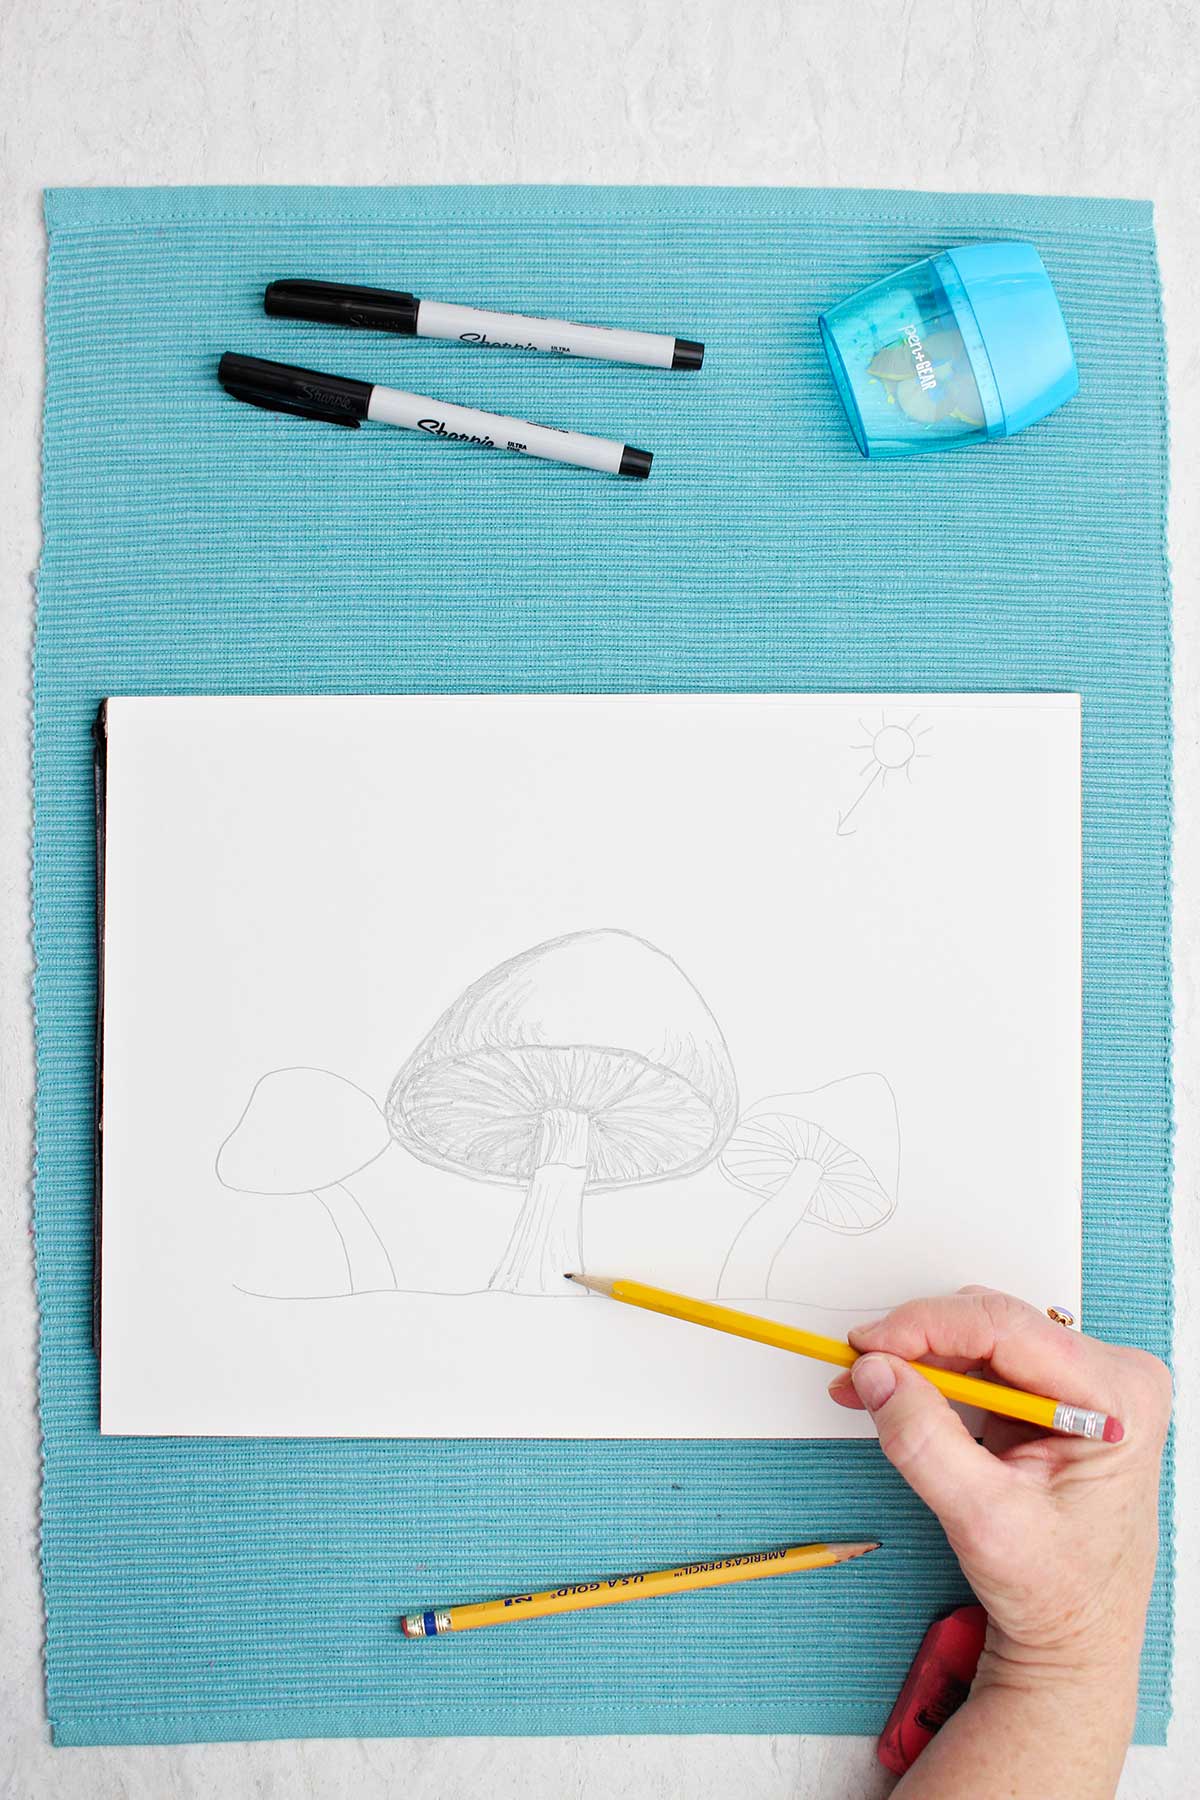
- Extend the ground line under the mushroom, draw grass with a vertical zig-zag type line. I use the side of my pencil for this. Shade the grass and blend the shading.
- Make more mushrooms in the same manner to make a grouping. Use a variety of shapes in the mushroom caps and stems.
Craft Tips to Draw a Mushroom
These tips can help make a mushroom drawing even easier!
- Practice making your ovals, draw several horizontal ovals till you get the shape you want.
- Mushrooms come in a variety of types and infinite shapes. Find a picture of a mushroom and use it as a model until you have practiced awhile. Then make them any shape you would like!
- An easy way to make grass is with a zig-zag line that goes up and down to various heights.
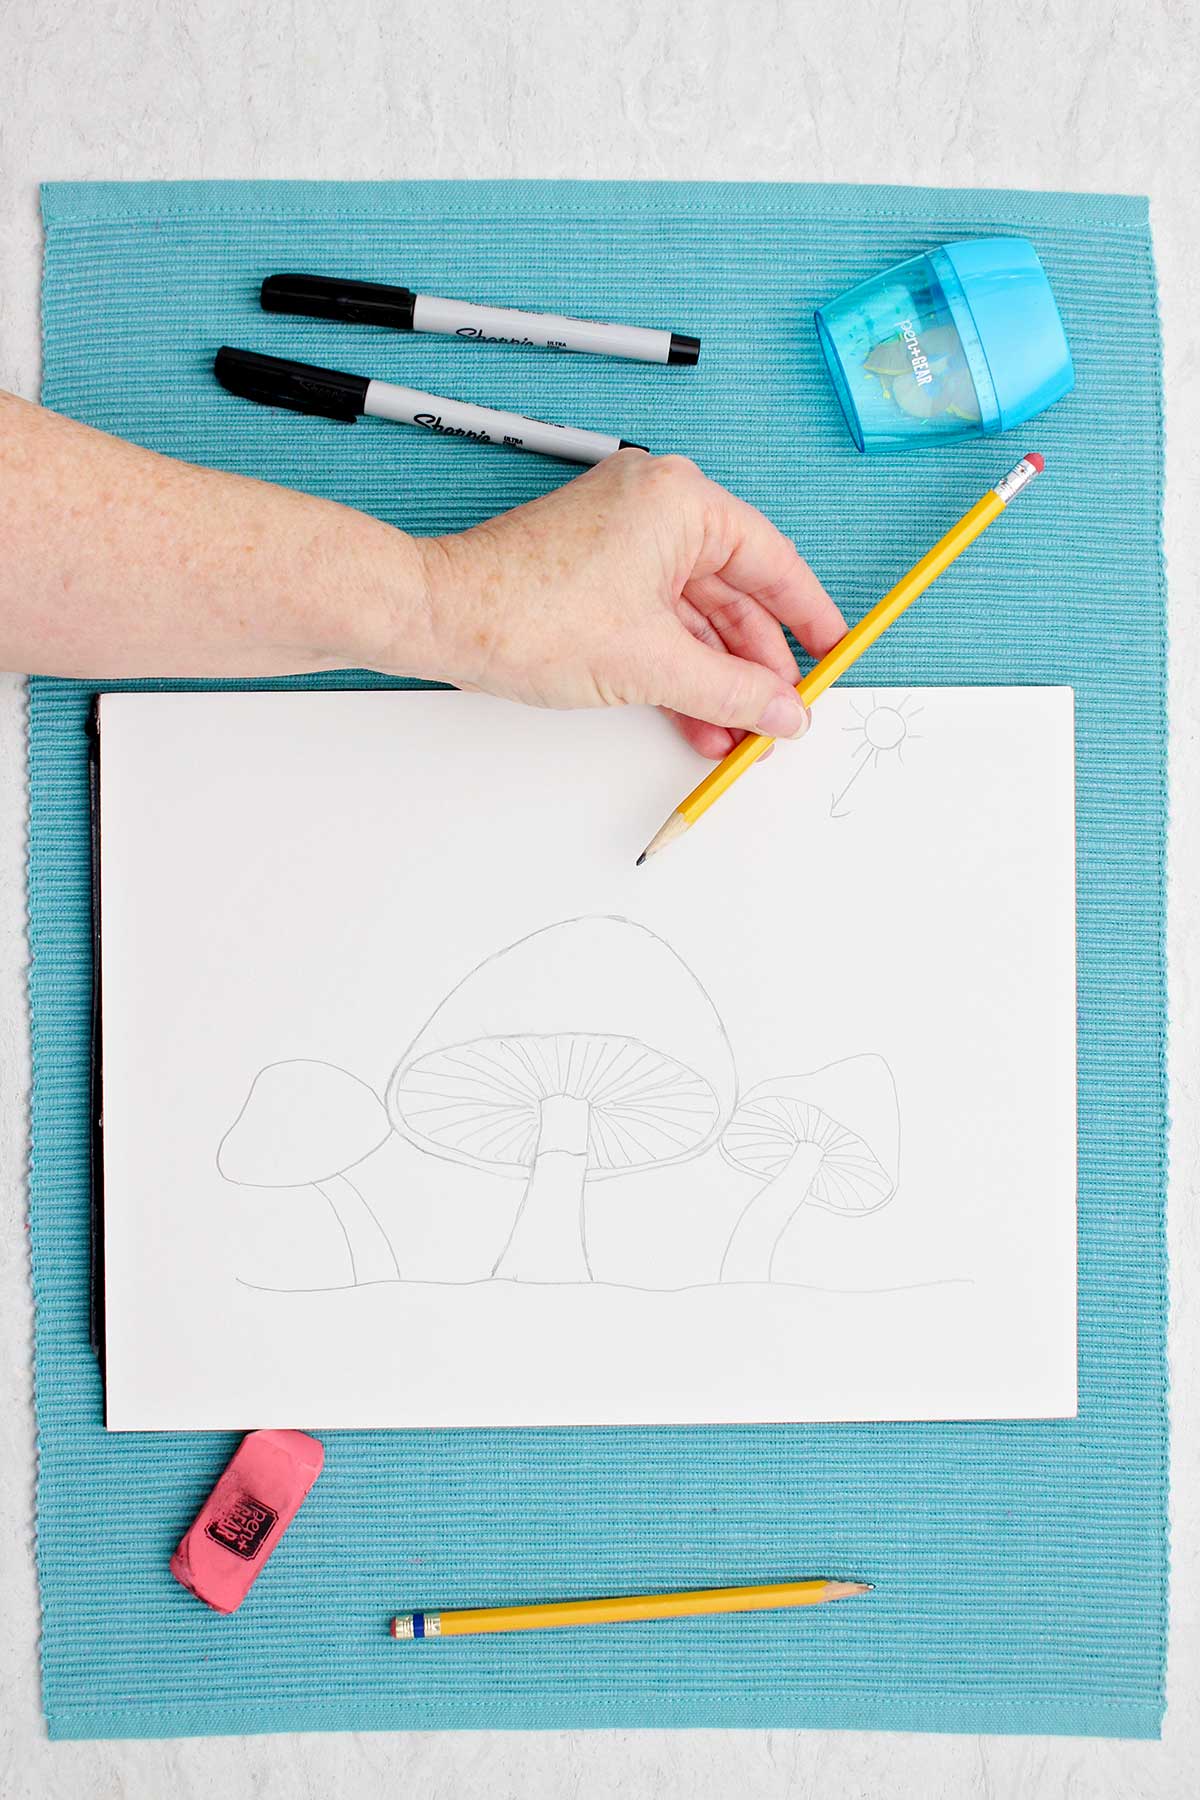
- Draw a small sunshine in the position you would like your light source to be in your picture. If you drew an arrow from this sunshine straight down to your mushroom, that would be the lightest part of the mushroom. The opposite side would be the darkest part of the mushroom. Do this little exercise as you shade the mushroom to remind yourself of where you should shade your drawing darker or leave lighter.
- Shading a picture is done with the side of the pencil lead, not the tip. Practice on another piece of paper. You want a smoother application of the pencil lead on the paper. The blending will be done with your finger or a blending tool.
- Don’t overdo the smudging or your drawing with look “muddy” with no white space for it to look light. You want your drawing to have white and dark and all the values of grey inbetween.
- The YouTube full length video can be found here: Easy Mushroom Drawing 2 Ways Video.
Craft Variations on How to Draw a Mushroom
Here are a few variations you’re welcome to try with this mushroom drawing:
- Try various shapes of mushroom tops until you are a master at it! Vary the cap and stem shapes to make your drawing interesting.
- Draw a variety of sizes and shapes of mushrooms with some overlapping the others. To make this easy to learn, start by drawing the entire mushroom overlapping with a previous mushroom. Then erase the part that would be hidden by the mushroom in front.
FAQ on how to draw a mushroom
Deciding on a direction for a light source and shading your drawing will be what makes it look realistic. Draw a little sunshine on your paper to represent the light and decide where that light would hit the mushroom. Leave that area white. Shade with the side of your pencil on the side of the mushroom top (cap) and stem away from the light source. It will begin to look more dimensional, more rounded as you do this.
A mushroom stem is much like a tree trunk but can lean in various directions. The top (cap) of a mushroom is shaped like a rounded hill top. The underneath side is an oval. The oval has lines on it similar to spokes on a bicycle called gills.
More How to Draw Activities for Kids
Looking for more great DIY drawing tutorials for kids? Here are a few favorites for you to try:

Come join the fun at WTN!
Try this craft, leave a comment, rate it, and tag a photo with #WelcometoNanas wherever you post.
Love getting crafts straight to your inbox? Sign up to receive a weekly email and get a free gift!
Easy Mushroom Drawing (2 Ways)!
Equipment
- none needed
Items Required
Instructions
Easy 2D Mushroom Drawing- a cute easy mushroom drawing
- We will start by drawing the top (or the cap) of the mushroom. In the center of your drawing paper, draw an oval that goes horizontally from side to side (the underside of the mushroom). Then draw a line that makes a mound over the top of the oval, continues closely under the oval, and connects with the beginning of the line. This is the puffy top of the mushroom.
- We’ll make a stem by drawing two lines that start a close distance apart near the center of the oval. The lines go down and get wider apart (like a tree trunk). Draw an “upside down smile line” to connect the two lines at the top and a second line across the bottom which represents the ground.
- The stem has a “skirt” that is made with a wavy line about ¼ th the way down the stem with a few vertical lines on the skirt.
- The oval underside of the mushroom has “gill” lines that look like the spokes of a bicycle. They come out around the stem and radiate out to the outer edge of the oval. Draw these in on your picture.
- Make a few contour lines that are like small smile lines around the bottom of the mushroom cap to give the look of it being rounded (see picture).
- For finishing touches, extend the ground line to the left and to the right. Add some grass above the ground line with an up and down zig-zag line.
- A mushroom can be drawn that doesn’t show the underside. Start with a “smile” line that isn’t very curved. Draw the same mound line over the top but connect it on the left end of the smile line and the right end of the smile line. Draw the stem coming down from the center of the smile line. Finish as you did the other mushroom.
- Make this a cute mushroom drawing by drawing faces (arms, legs) on the mushrooms! Enjoy coloring your drawing in.
Easy 3D Mushroom Drawing with shading
- Draw the mushroom the same way as steps 1-5 in the 2D easy mushroom drawing instructions.
- We will have the light source of the picture coming down from the top right of the picture- as if the sun was there, shining down on the mushrooms you drew. Shade the edge of the mushroom cap with vertica “smile lines” that give the impression that the edge has a curved shape. Then shade the side of the cap that is farthest from the light source.
- Shade the stem. Shade the farthest edge of the stem from the light source. Even though it is under the cap, don’t darken it in completely.
- Add some lines and dots on the cap of the mushroom to give it a textured look. The surface of a mushroom isn’t smooth. Add a few lines to the stem as well as fiber lines.
- Shade the underside gills of the mushroom. Darken the spoke like gill lines and shade the area (it is the underneath side of the mushroom and gets less light). But don’t completely darken it in, you want to still see the gill lines.
- Blend the shaded areas you’ve drawn. Use your finger or a blending tool to make the shaded areas look more even and smooth.
- Extend the ground line under the mushroom, draw grass with a vertical zig-zag type line. I use the side of my pencil for this. Shade the grass and blend the shading.
- Make more mushrooms in the same manner to make a grouping. Use a variety of shapes in the mushroom caps and stems.
Leave a Reply