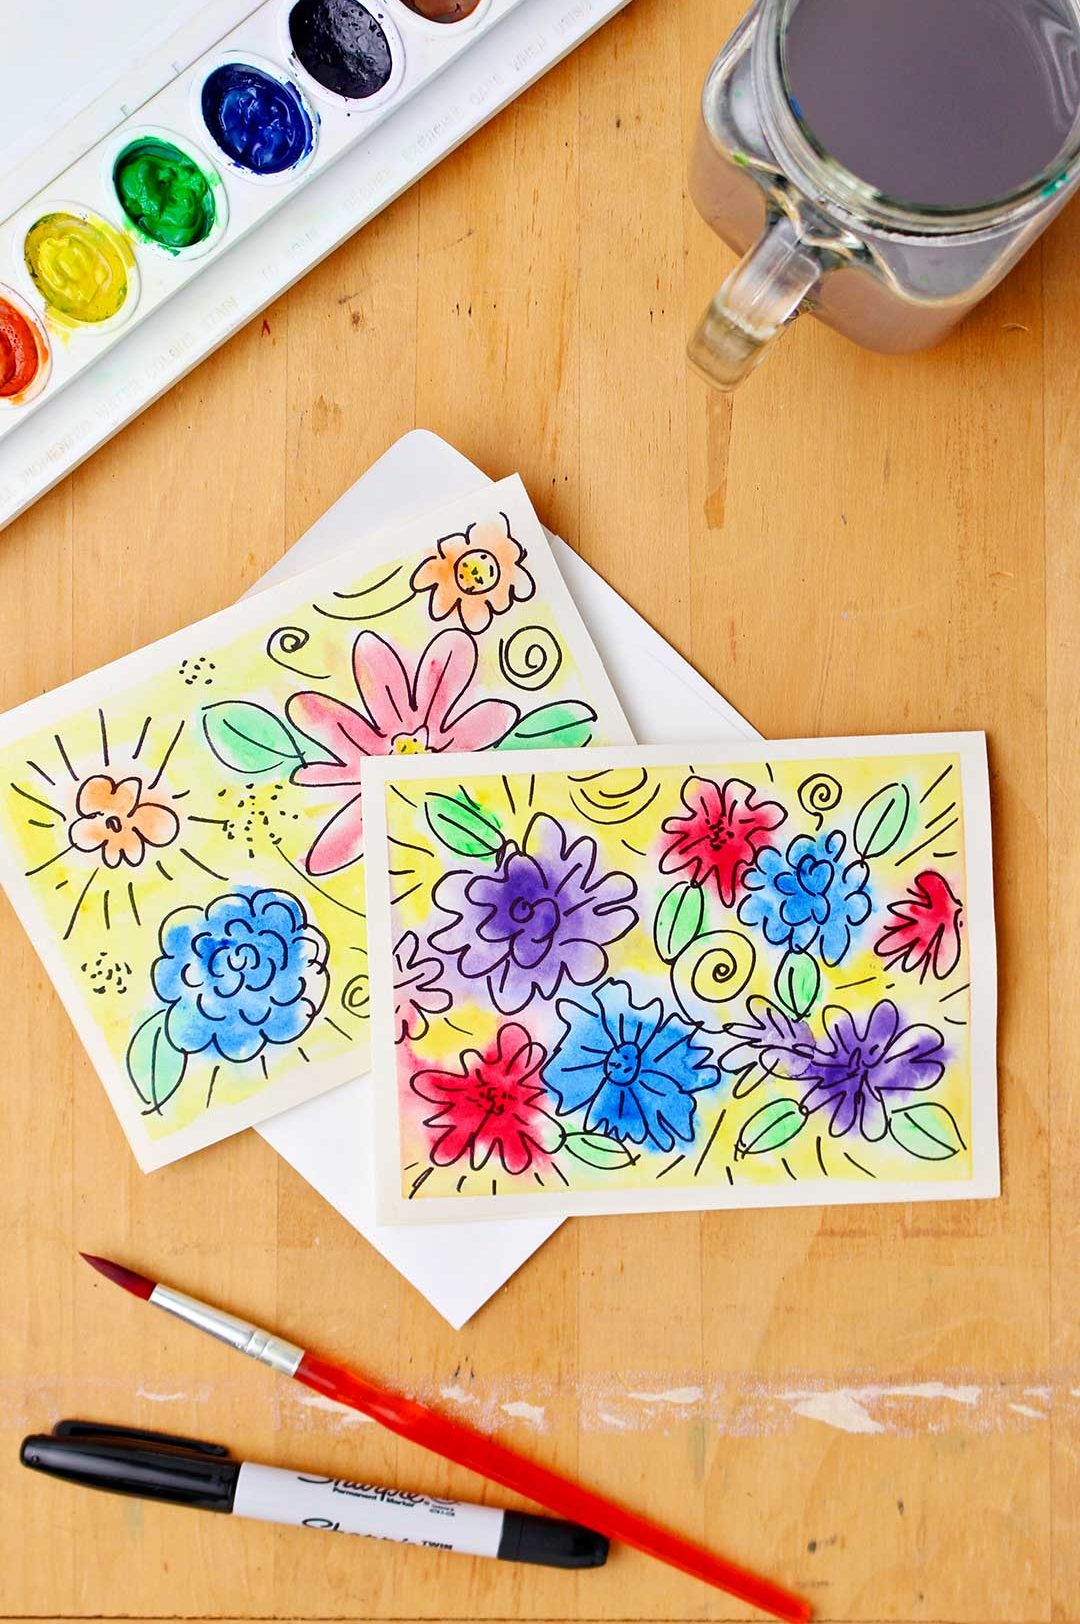
Need a handmade Mother's Day card idea?
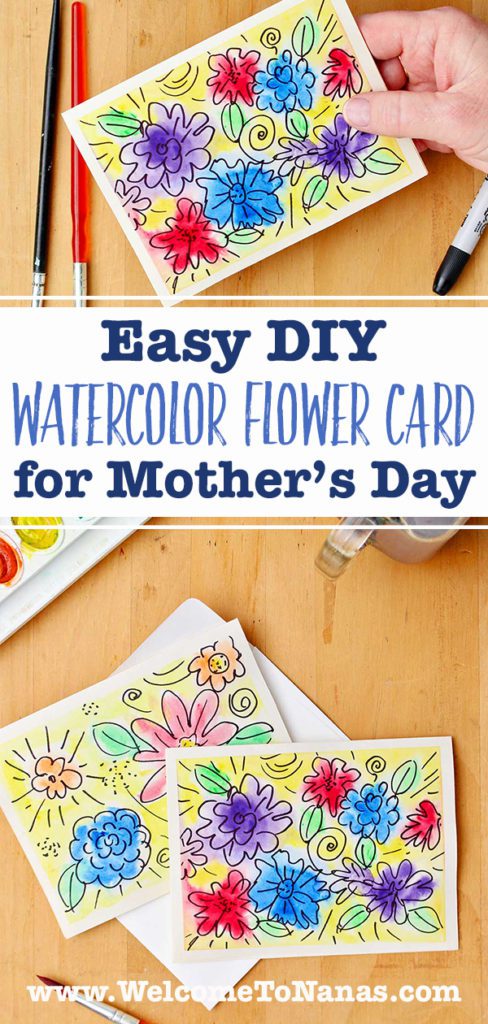
Want a cool card for mom that you can make yourself? Create an Easy DIY Watercolor Flower Card for Mother’s Day (or any occasion). This is a great starter project to try watercolor- it’s really simple.
You’ll use black marker lines and loose watercolor strokes to form whimsical flowers. She’ll love it! Others will too (including you)!
FYI:
This craft is good for age 5-9 or 10-13.
It takes about 30 minutes to complete.
Supplies for an Easy DIY Watercolor Flower Card for Mother’s Day:
- Watercolor paints
- Watercolor brush (beginner watercolor paints may include one in the set)
- Black permanent fine marker or ultra-fine marker
- Watercolor paper
- Painters tape or masking tape
Have fun while learning to watercolor
I’ve been dabbling in watercolor for years but haven’t done much loose watercolor until recently. I’m wanting to learn more- so how about doing it together? This is a great starter project.
Cut watercolor paper to card size
So we’ll start by cutting some watercolor paper to the size you will want for your card. Cut your card to fit inside the envelope that you are going to use. This can be any size envelope. Or you can make an envelope for your card using this tutorial: 3 Ways to Make Envelopes.
I like using A5 envelopes because they fit a half sheet of 8.5 x 11-inch paper folded in half. But again, you can use any size envelope.
Fold the card in half so you can see what part of the card is the front and what part is the back. You can do your painting on just the front half or on the entire card- front and back.
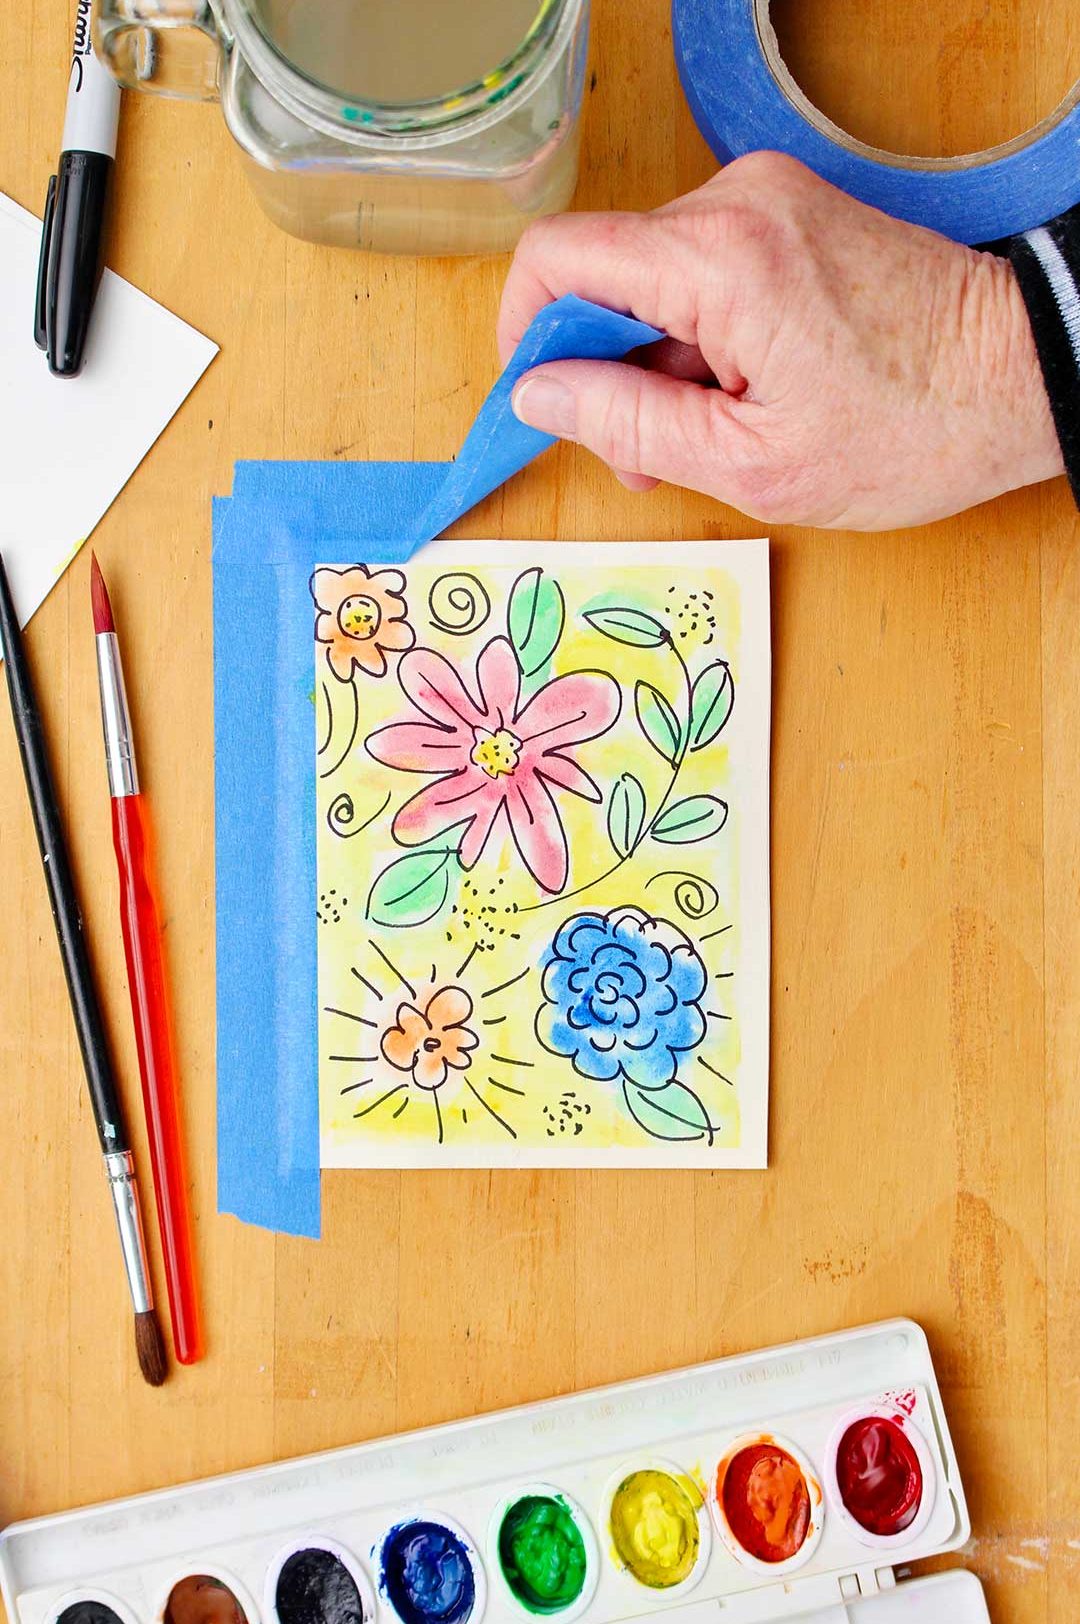
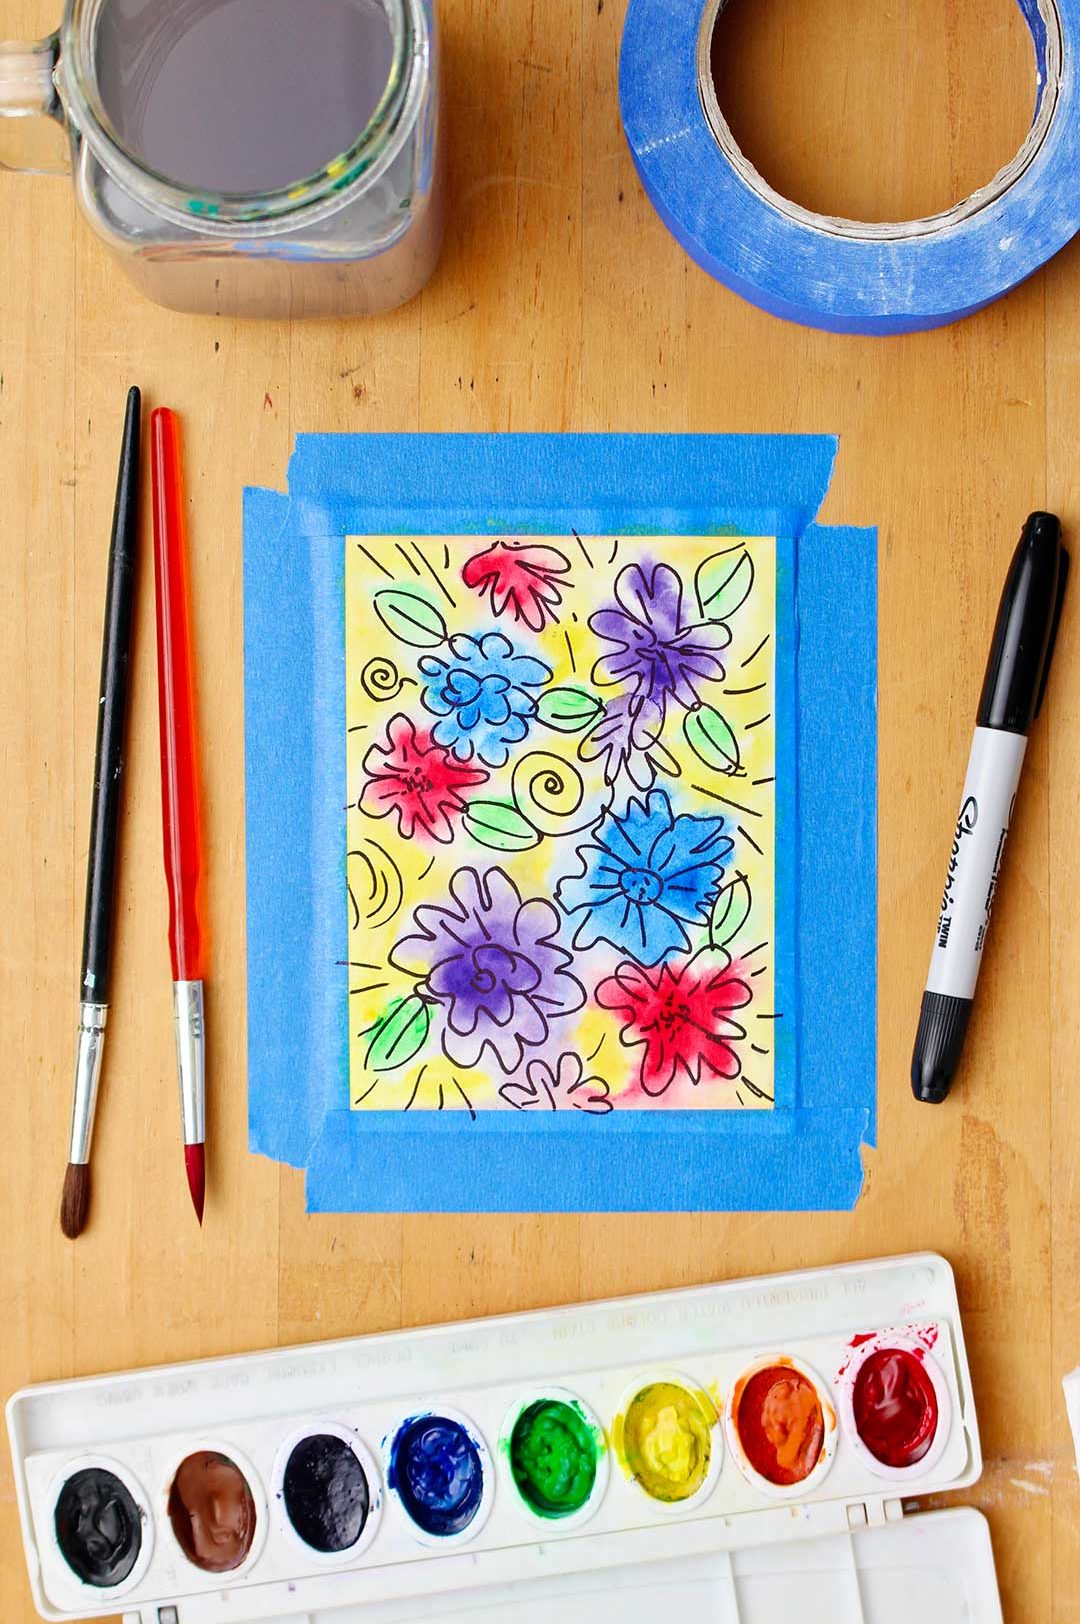
Tape down the watercolor paper
Tape your watercolor paper down to a flat surface. Try to place the tape so that it covers about ¼-inch of the paper’s edge and is as straight as possible. This keeps the paper from curling up as it dries.
Two ways to create Easy Watercolor Flower Cards
There are two ways to make this loose watercolor flower design. You can do the black lining first and add watercolor or do the watercolor wash colors first and add the black lining. We’re going to try both!
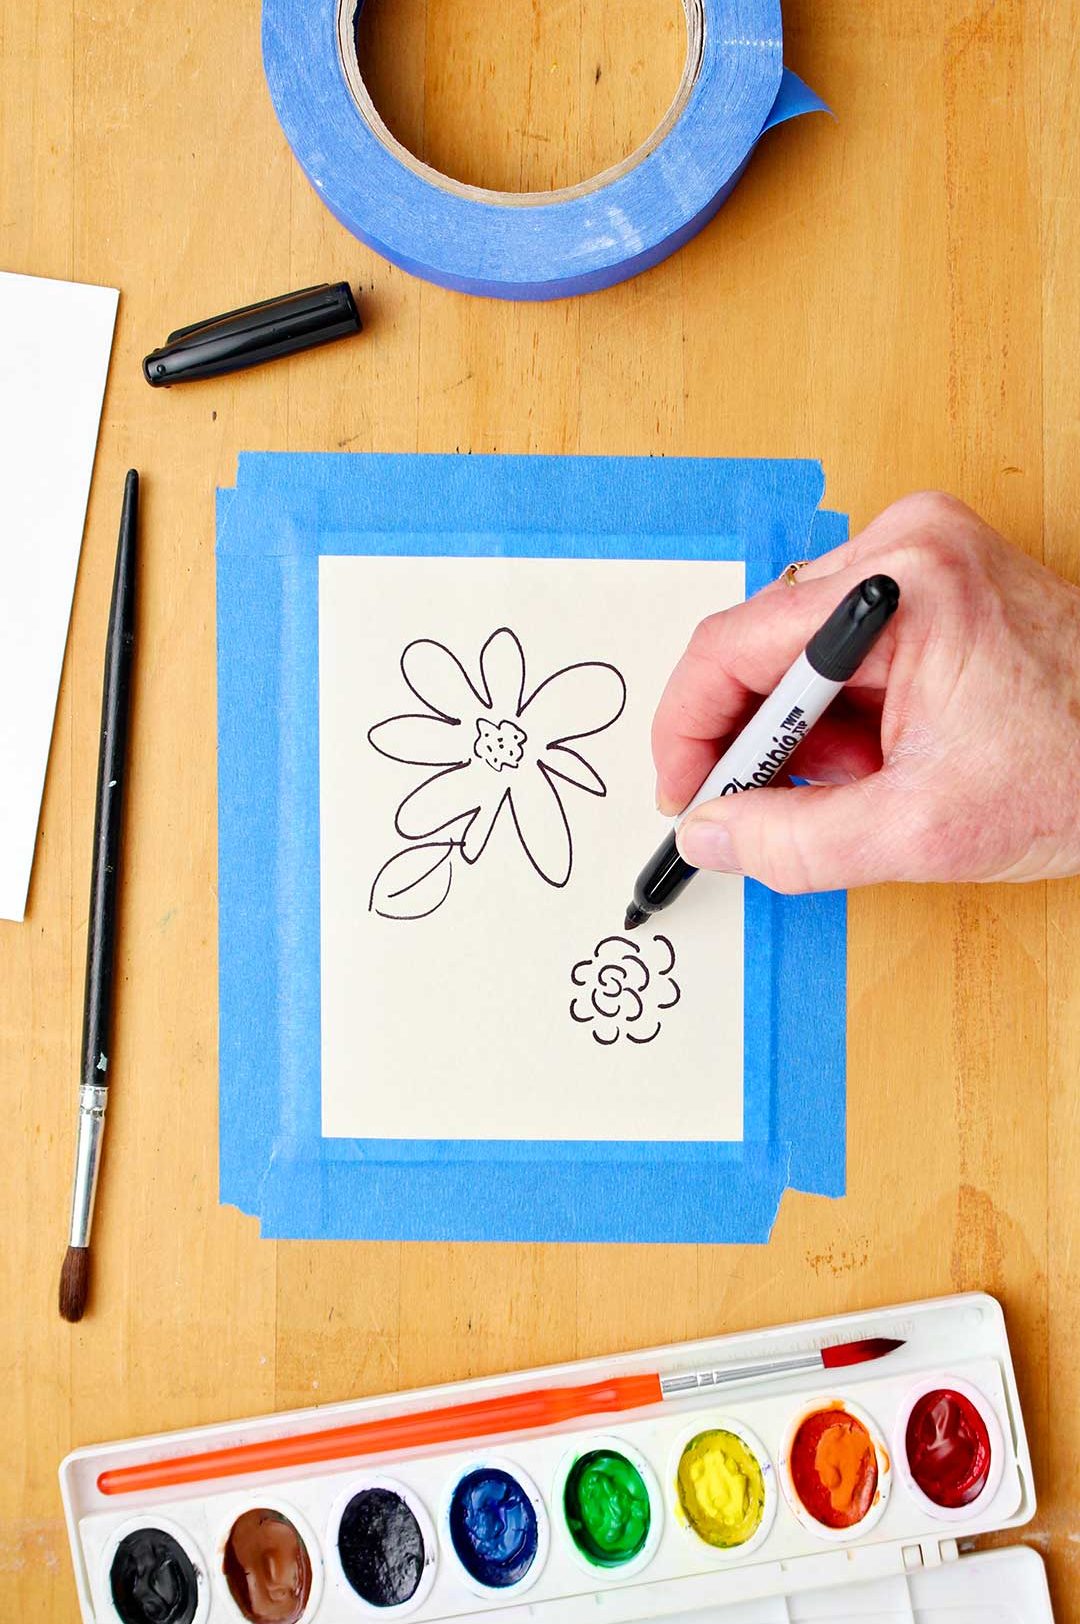
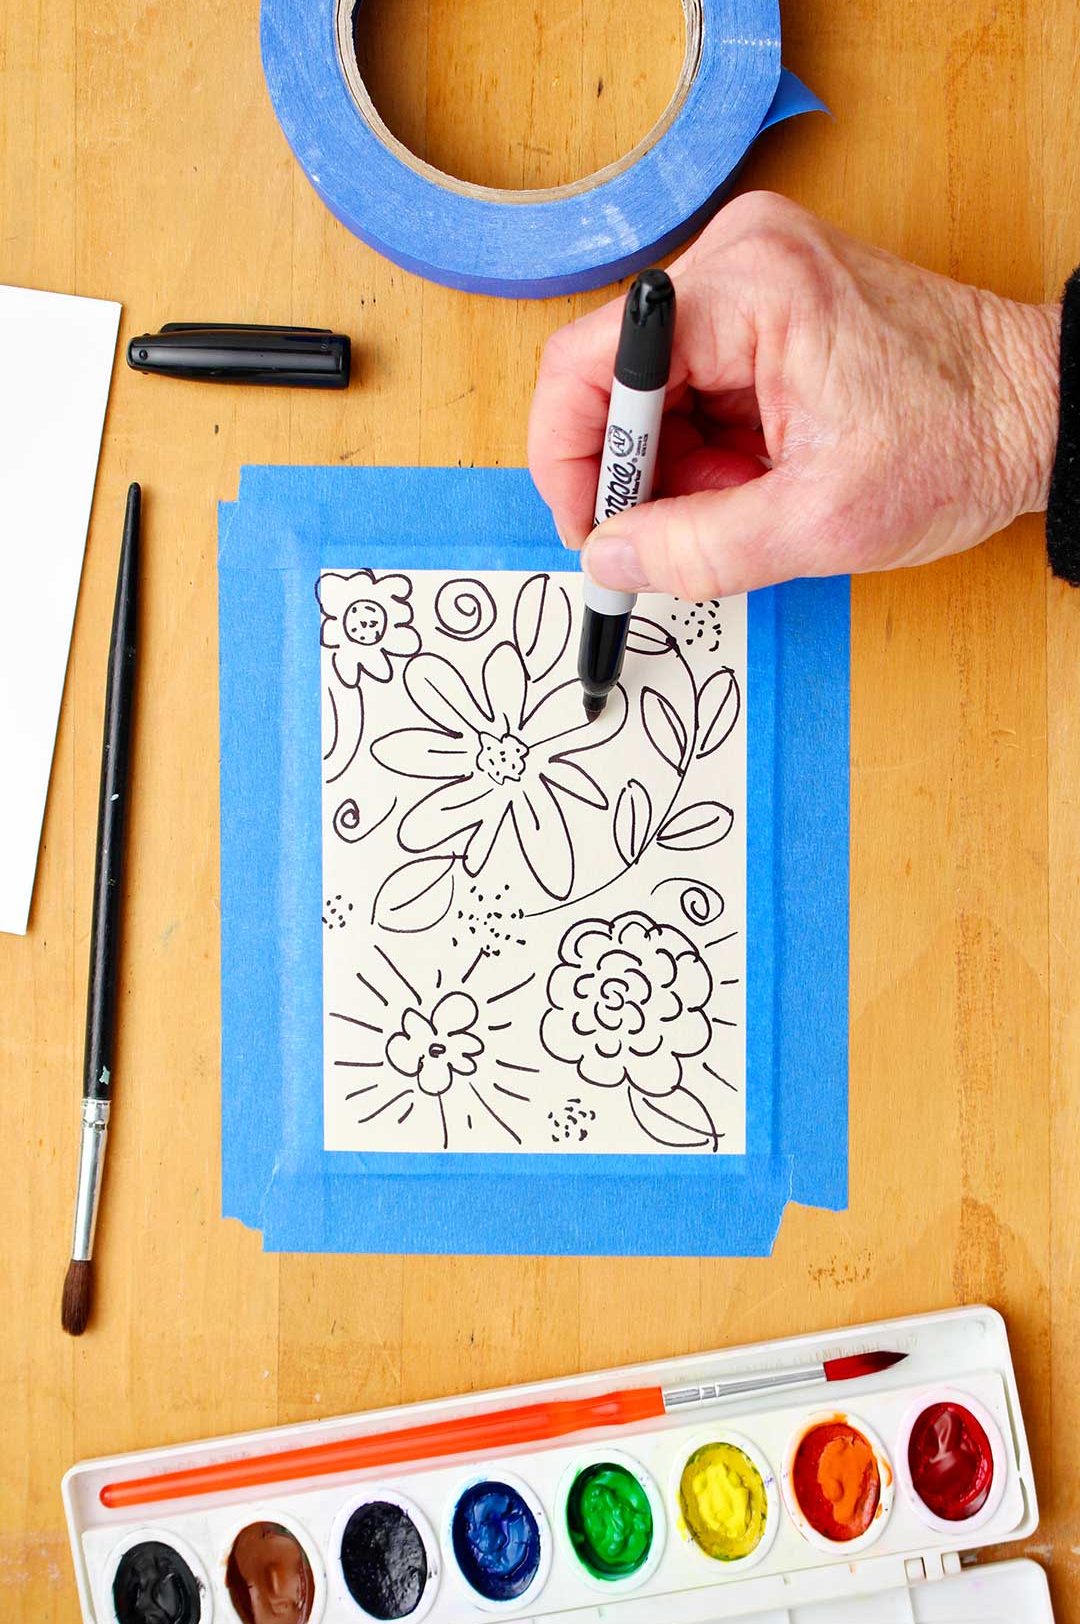
Black line whimsy first...
First, let’s try doing the black lines to make flower outlines and add the watercolor afterwards. You can make the drawing in pencil first or just dive in and draw with the permanent marker!
I like using a fine line or an ultra fine line permanent marker. You can experiment on an extra piece of paper and see how wide you want your lines.
The point of this is NOT to have real looking flowers, but to make a grouping of lines that gives the impression of a flower.
Flower and leaf ideas
A rose can be made by starting with small “c” shaped lines in a circle and making larger “c” shaped lines as you go around the circle until you like the size of your rose.
A daisy type flower is made with loose pointed or rounded petals that radiate from a center area made from a few dots, a circle, or a squiggly cloud shaped circle.
Leaves on the flowers are placed around the flowers randomly.
Curved lines with little branches can be stems or can hold small cloud shaped flowers.
These lines should be made without trying to look “real”, made loosely leaving spaces, and not even closing the shapes up all the time!
Perhaps you could try looking at the picture of a flower you like, squinting your eyes and trying to determine how to make the basic shape of that flower with just a few lines.
Have FUN at creating your watercolor flower card!
Fill your paper with flowers, lines and random squiggle lines and dots just to add interest. Don’t overfill it, stop when you like what you have done.
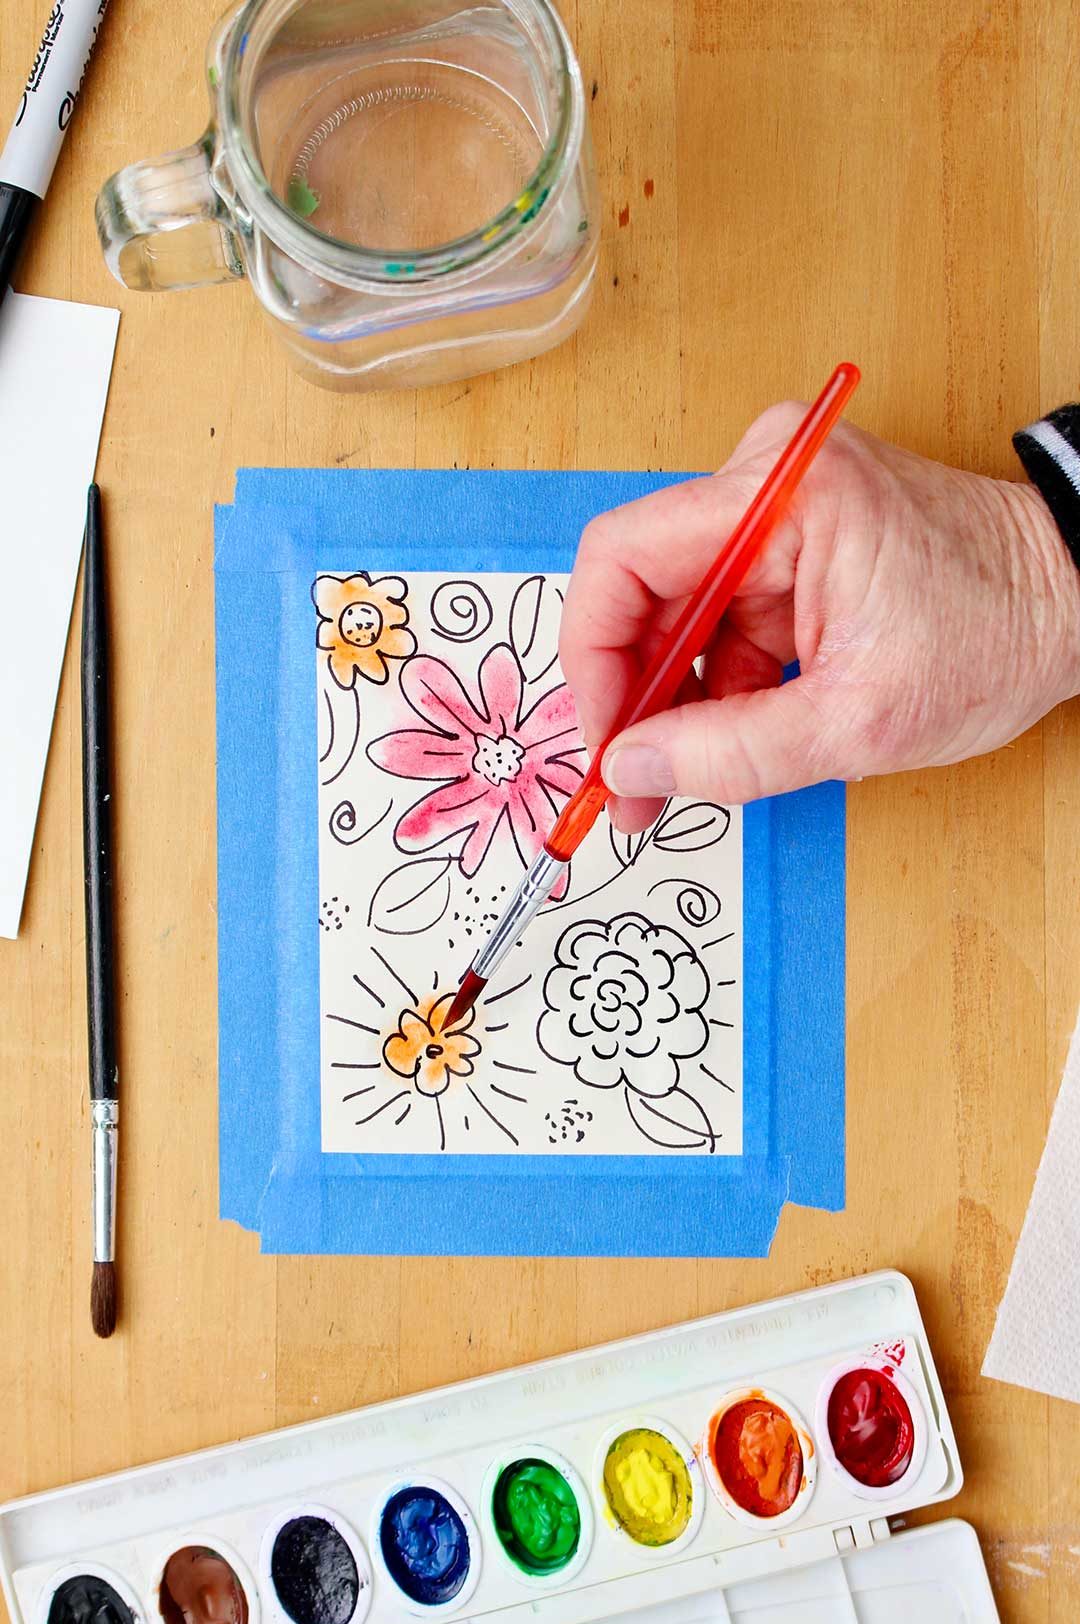
Add color to your homemade mothers day card
Take a second to think about what colors you would like to use on your card. Choose maybe three colors for flowers and a green for the leaves. (The color choice is completely up to you.)
Now, wet your paint brush and wet the area inside one or two of the flowers. It is ok if some of the area around the flower lines gets wet.
Add paint to your brush without adding a lot more water and touch it into the wet area, allowing the paint to spread out as it wants.
Add more paint if you want it darker and just let it continue to fill the water covered area. Don't manipulate it or try to "paint" the flowers, let the water do the work.
Rinse the brush well when changing colors.
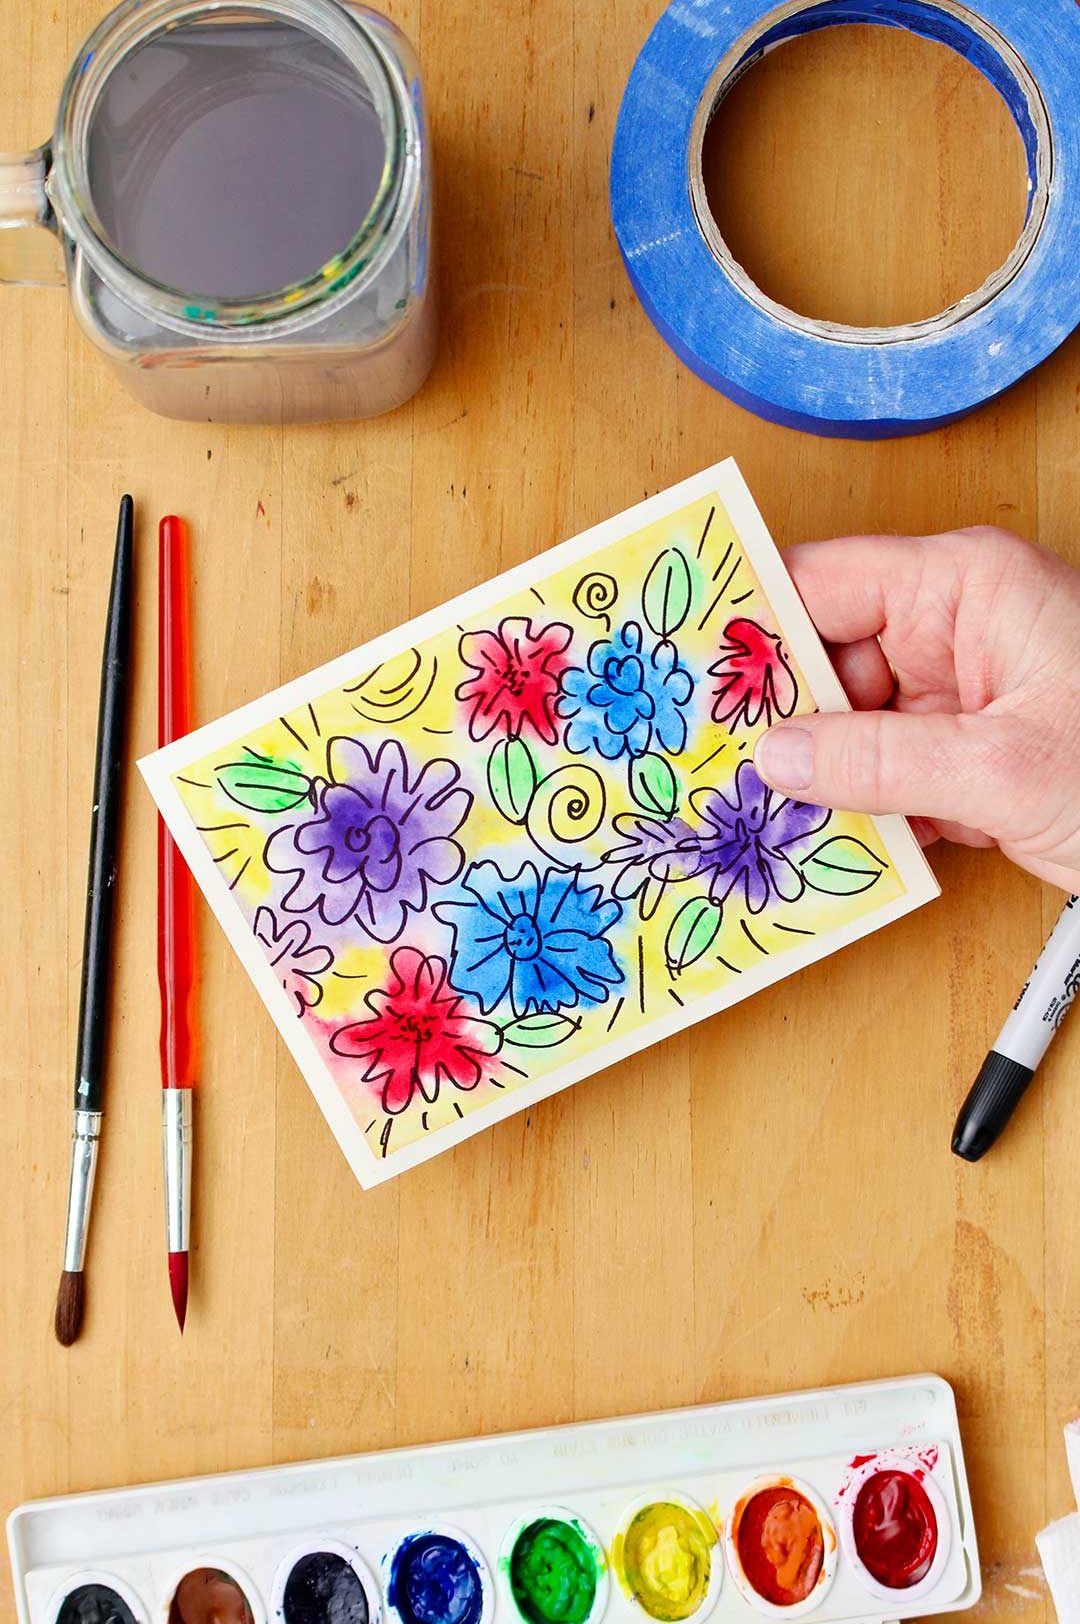
Fill in flowers and background
Keep doing this with other flowers, then the leaves, and then the areas in between the flowers and leaves.
It’s more than OK if the water and paint aren’t exactly inside the lines of the flower. And it’s ok if a couple of the colors blend a bit.
Go back and add drops of color in the centers of the flowers or areas you would like to have a bit more color.
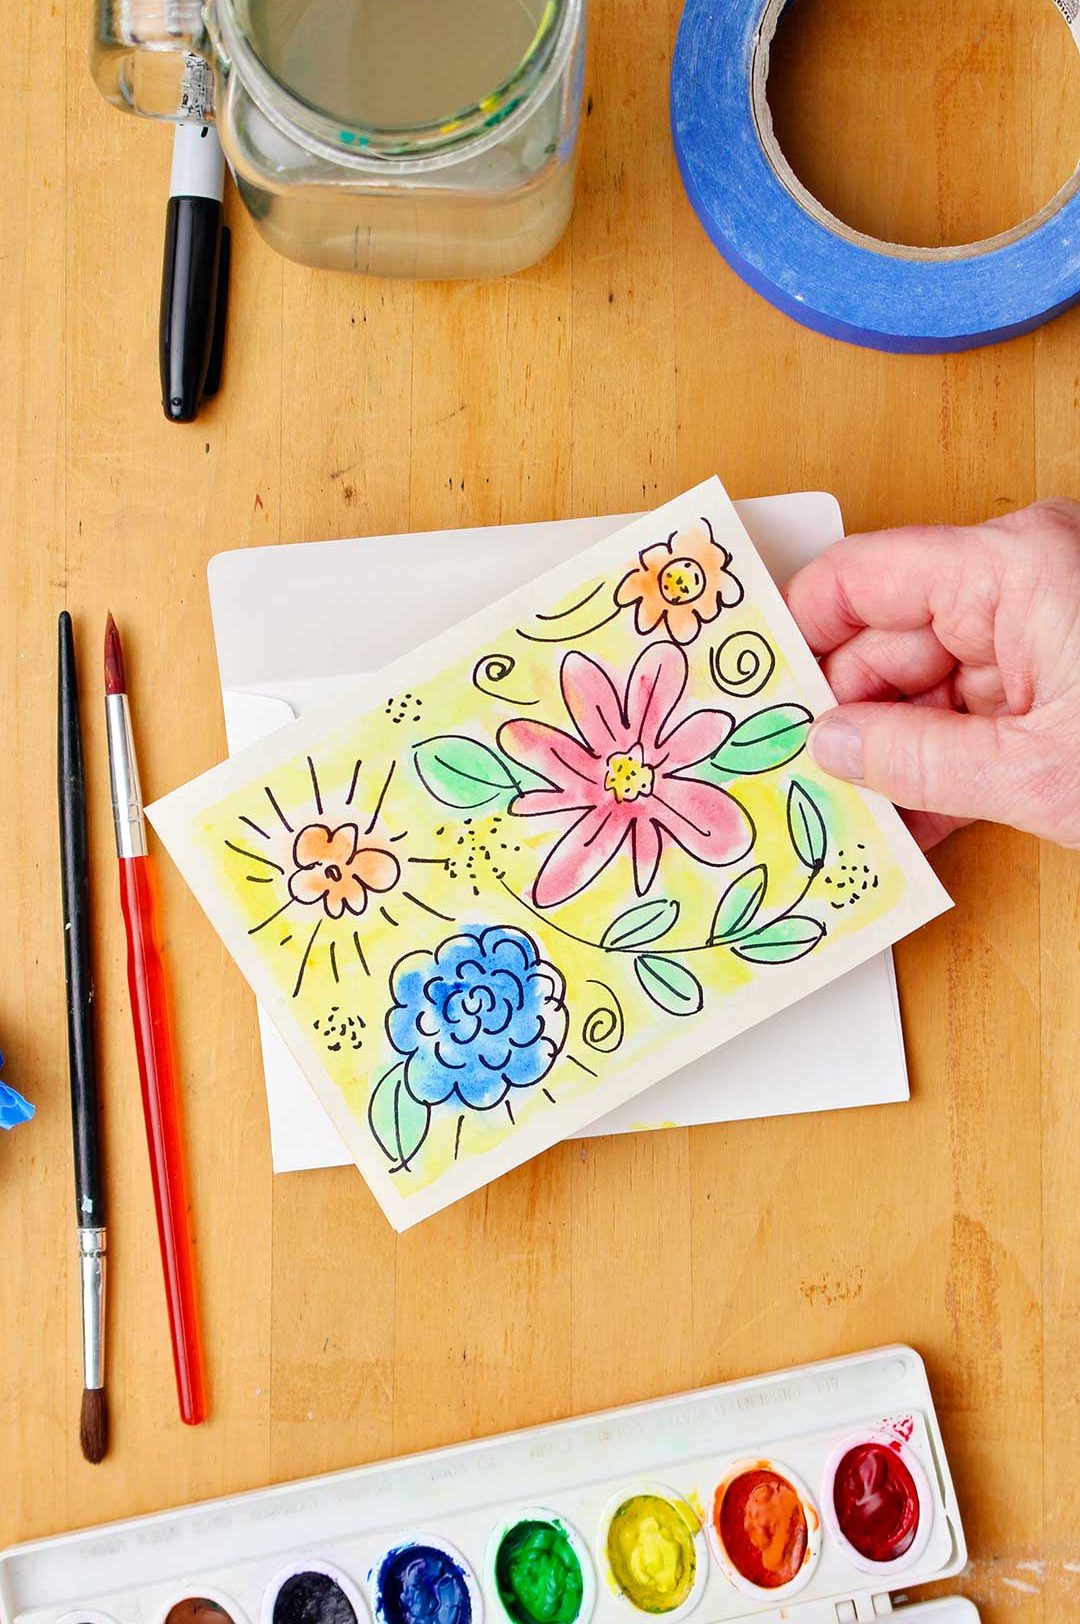
Let the card dry and then gently tear off the tape. Refold the card and write your message inside. Slip it into an envelope and it's ready to go!
If you don’t like your first try, try it again and see how much more comfortable you are the second time, knowing more about the process and how the paints work.
Now try putting the paint down first on your Watercolor Flower Card!
OK, ready to try it another way???
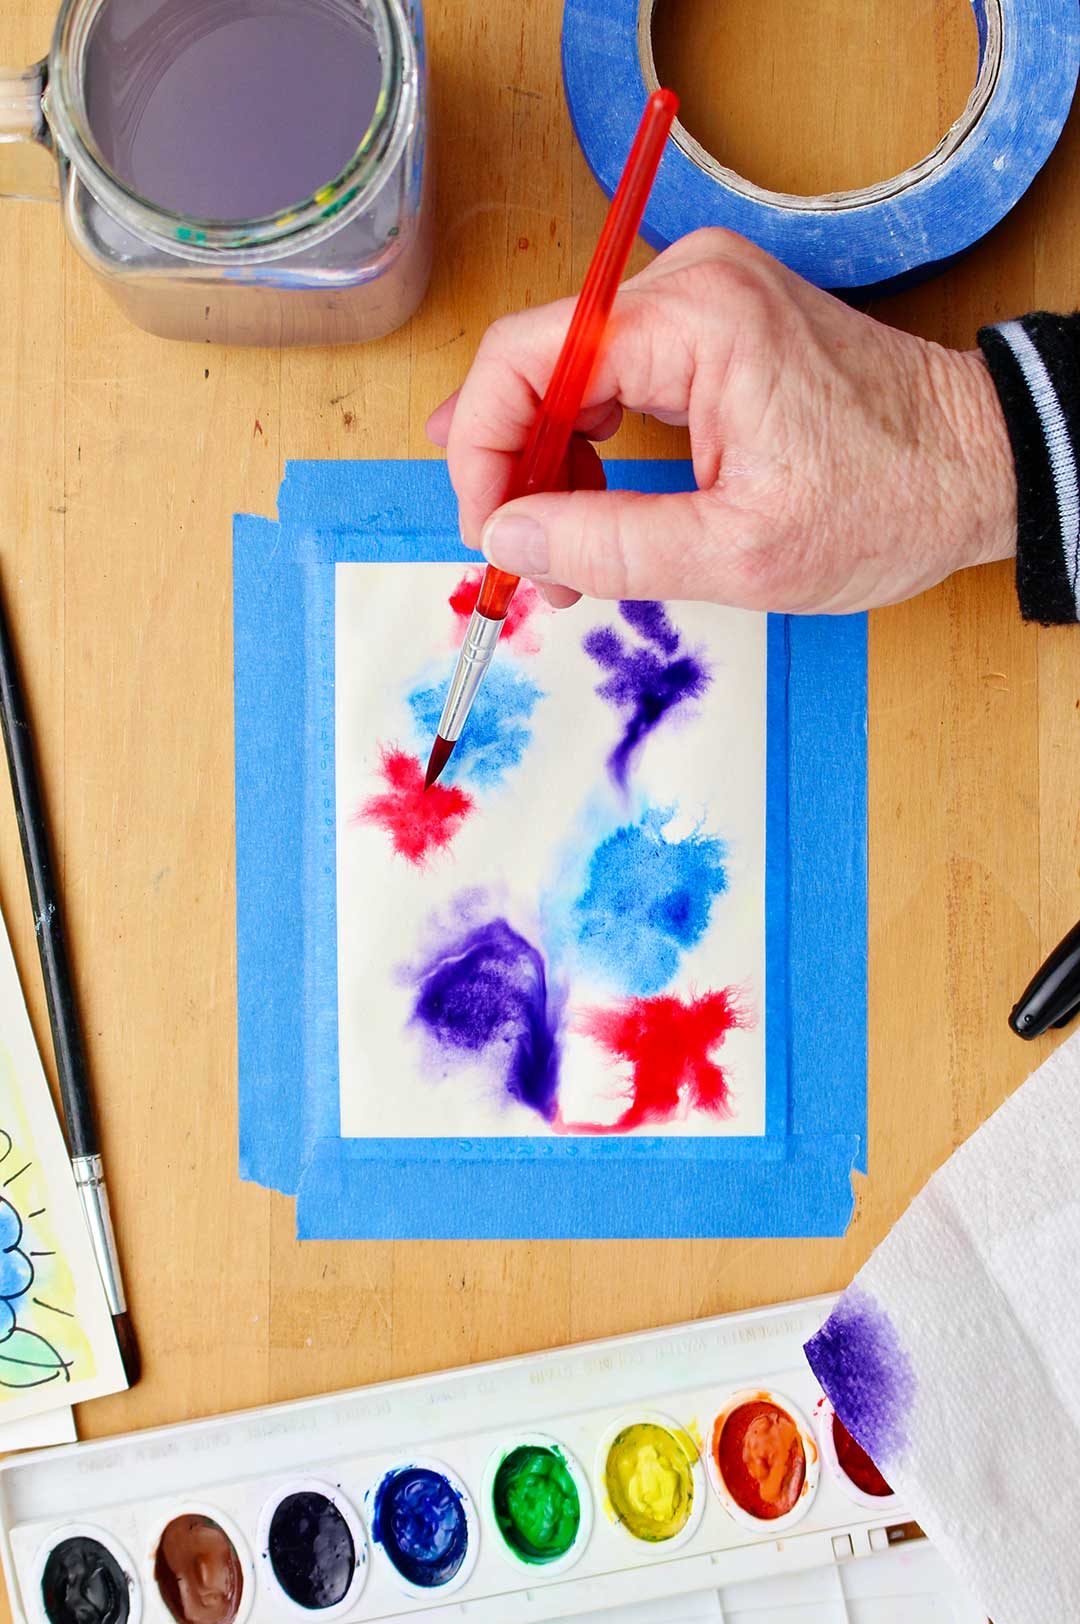
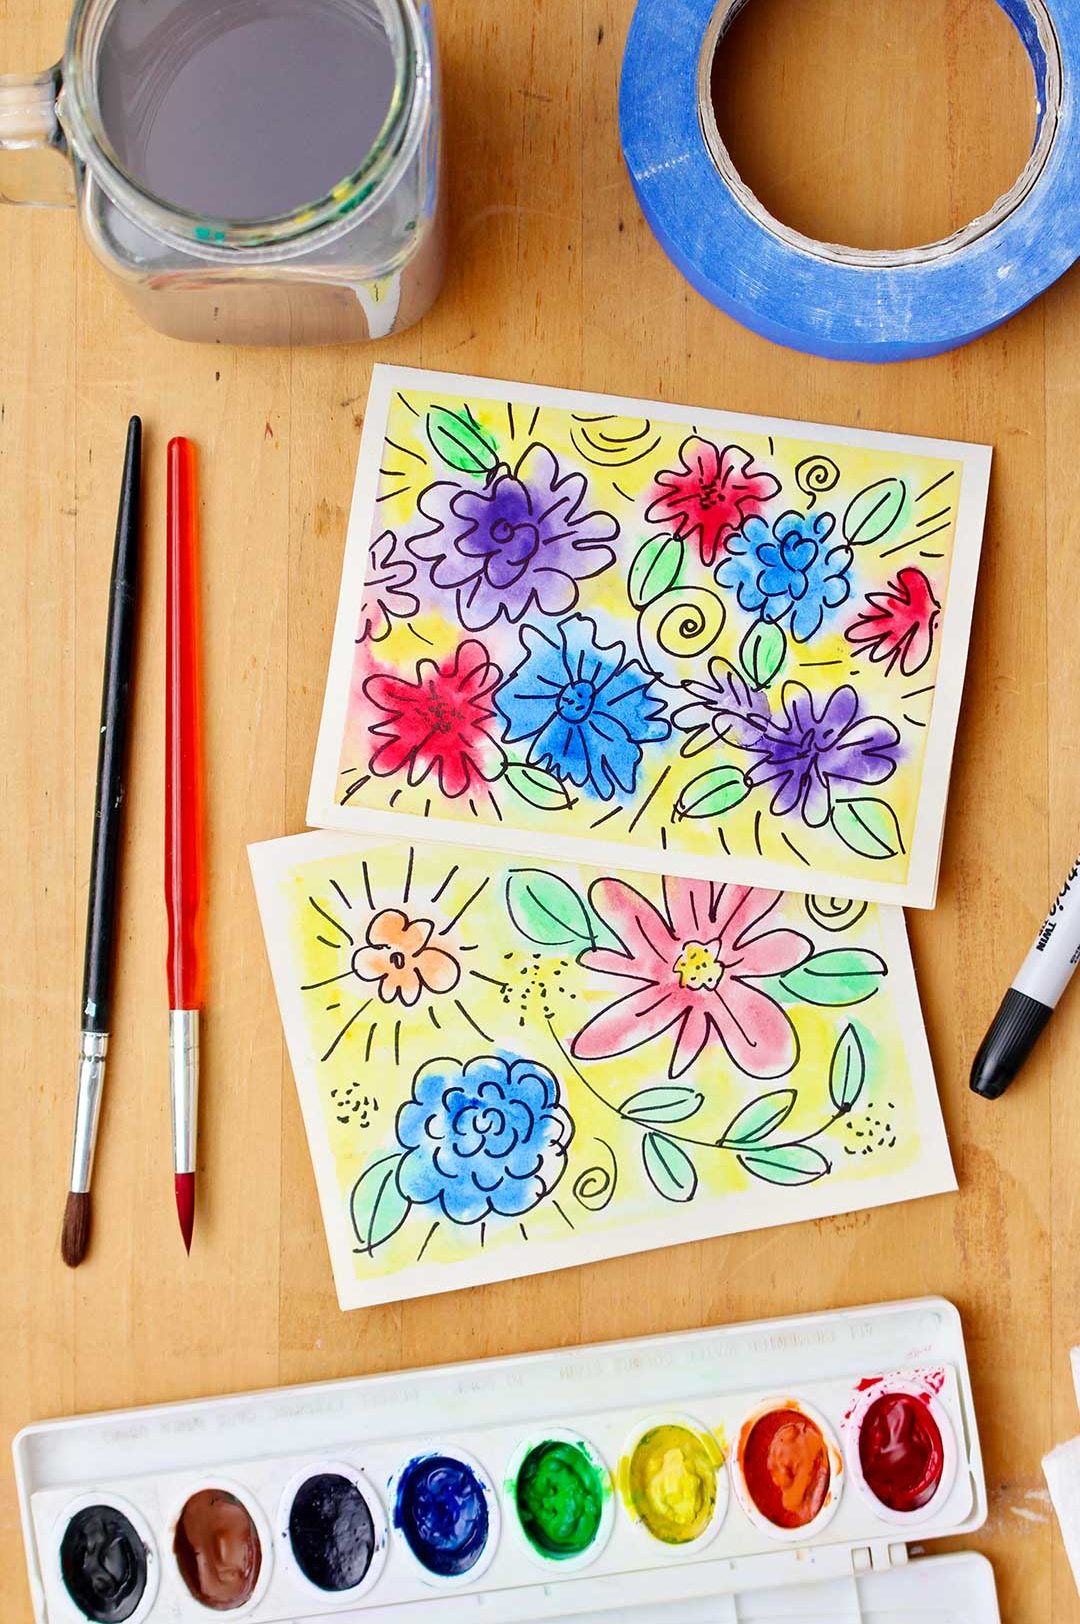
Secondly, let’s try doing the watercolor shapes first and adding the black lines after the paint is dry.
This time you are going to cut and tape your paper to the table and then wet the paper with water. The paper will be wet but not with water that is running off.
We are going to drop areas of color all over the paper, let it dry, and then put the black lines for flowers and leaves on top of the areas of color.
With that in mind, choose about three colors plus green for leaves.
Add paint onto your brush and drop it onto the paper in a couple areas. Rinse off your brush, add another color and drop it onto the canvas in a couple areas. Do this with the last color.
Then add drops of green between these areas in various places.
Go back and drop more color in areas that you want darker in that color.
Stop when you like the colors and let it dry.
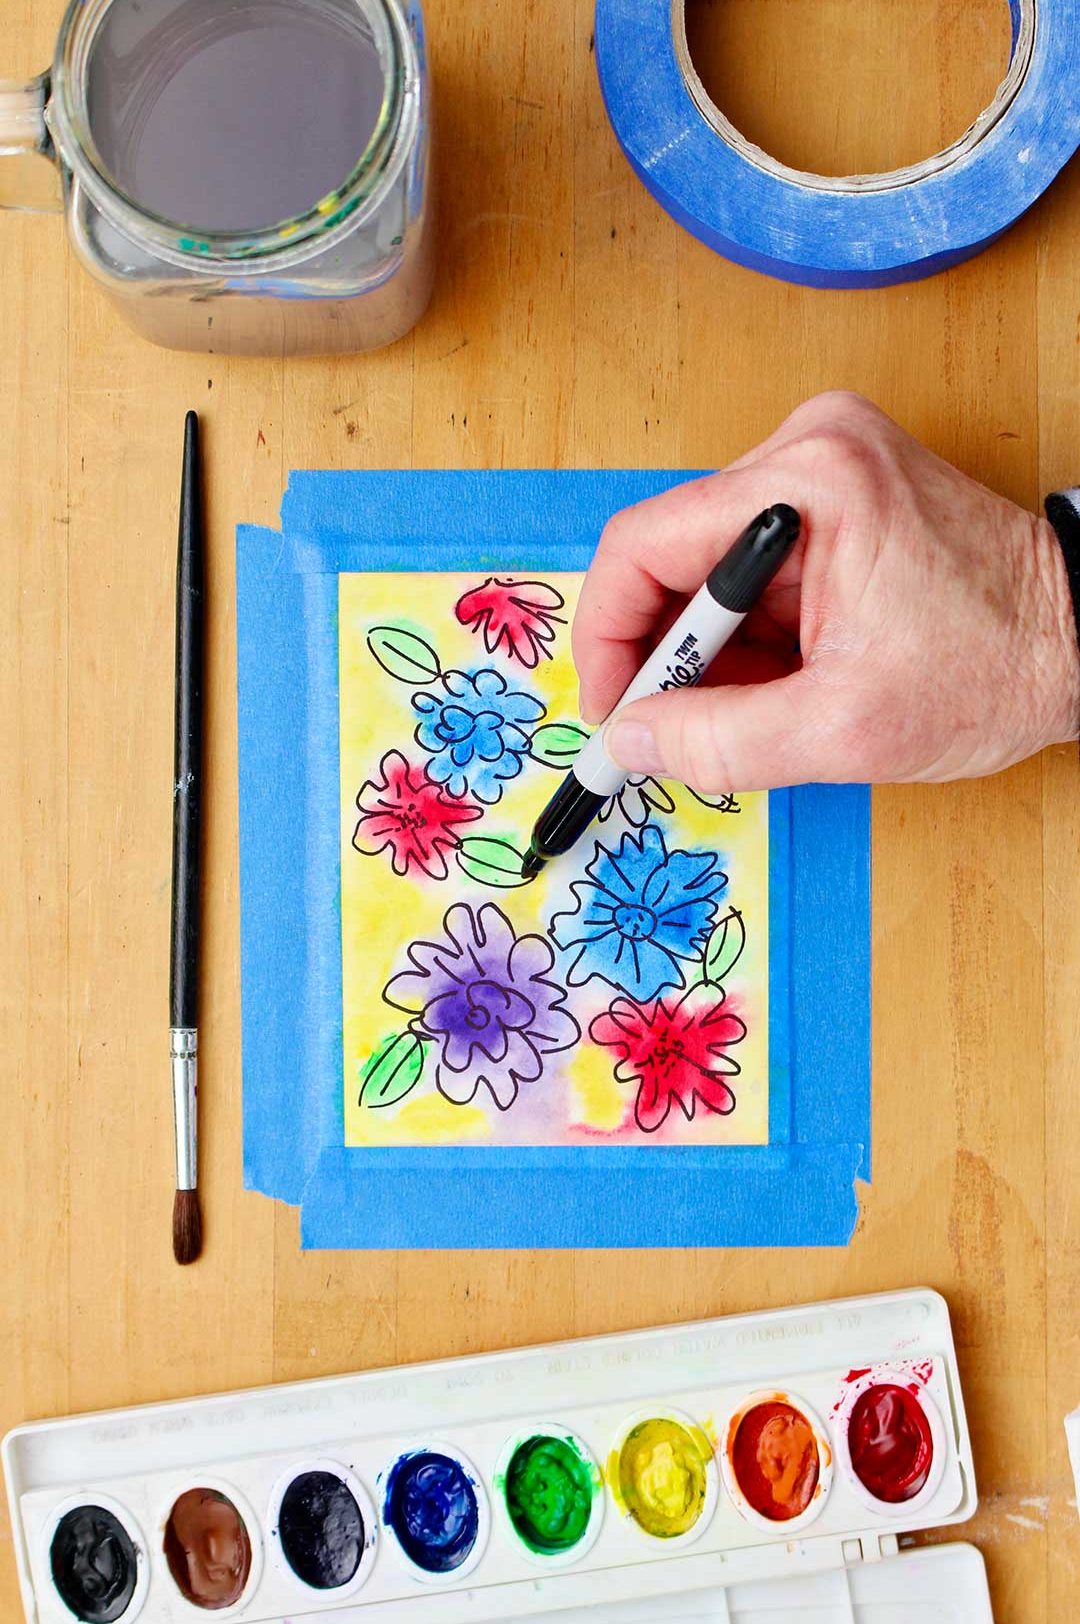
Now add the black line floral whimsy!
Now, your permanent black lines will be draw on top of the colors that are already there.
Remember, the point of this is NOT to have real looking flowers, but to make a grouping of lines that gives the impression of a flower.
Look above for ideas on how to go about making flowers, leaves, stems, and extra lines.
Perhaps you will make the rose on a “blob” of pink painted area. Make the leaves on top of the green areas.
Make random lines and dots in the areas between the flowers until you like the way it looks.
When done, take the tape off, refold the card and write your message inside. Put it inside the envelope and it is ready!
What easy watercolor flower card technique did you like best?
I’m really curious as to which method you liked best? Did you like doing the black lining first better or doing the watercolor areas first better?
Both are fun, get your creative juices going, and let you experiment with how paint works on the paper.
Either way, mom (or whomever you give the card to) will love your personal homemade card and will be eager to know how you did it! At least I would!
YouTube viewing option-
If you enjoy watching on YouTube head over to our channel, watch and join: YouTube Easy DIY Watercolor Flower Card.
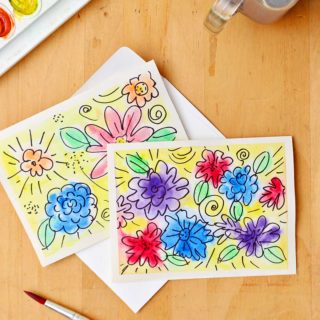
More ideas for homemade Mothers Day cards!
Here are a couple other ideas for cards that you can make:
Enjoy!
If you try this craft, let me know! Go ahead and leave a comment, rate it, and tag a photo with #WelcometoNanas wherever you post.
Come join the fun!
Easy DIY Watercolor Flower Card for Mother’s Day
Equipment
- Watercolor brush (beginner watercolor paints may include one in the set)
Items Required
Instructions
- So we’ll start by cutting some watercolor paper to the size you will want for your card. Cut your card to fit inside the envelope that you are going to use. This can be any size envelope. Or you can make an envelope for your card using this tutorial: 3 Ways to Make Envelopes.Fold the card in half so you can see what part of the card is the front and what part is the back. You can do your painting on just the front half or on the entire card- front and back.
- Tape your watercolor paper down to a flat surface. Try to place the tape so that it covers about ¼-inch of the paper’s edge and is as straight as possible. This keeps the paper from curling up as it dries.
- First, let’s try doing the black lines to make flower outlines and add the watercolor afterwards. You can make the drawing in pencil first or just dive in and draw with the permanent marker!I like using a fine line or an ultra fine line permanent marker. You can experiment on an extra piece of paper and see how wide you want your lines.The point of this is NOT to have real looking flowers, but to make a grouping of lines that gives the impression of a flower. A rose can be made by starting with small “c” shaped lines in a circle and making larger “c” shaped lines as you go around the circle until you like the size of your rose.A daisy type flower is made with loose pointed or rounded petals that radiate from a center area made from a few dots, a circle, or a squiggly cloud shaped circle.Leaves on the flowers are placed around the flowers randomly.Curved lines with little branches can be stems or can hold small cloud shaped flowers.These lines should be made without trying to look “real”, made loosely leaving spaces, and not even closing the shapes up all the time!
- Take a second to think about what colors you would like to use on your card. Choose maybe three colors for flowers and a green for the leaves. (The color choice is completely up to you.)Now, wet your paint brush and wet the area inside one or two of the flowers. It is ok if some of the area around the flower lines gets wet.Add paint to your brush without adding a lot more water and touch it into the wet area, allowing the paint to spread out as it wants. Add more paint if you want it darker and just let it continue to fill the water covered area. Don't manipulate it or try to "paint" the flowers, let the water do the work.Rinse the brush well when changing colors.
- Keep doing this with other flowers, then the leaves, and then the areas in between the flowers and leaves. It’s more than OK if the water and paint aren’t exactly inside the lines of the flower. And it’s ok if a couple of the colors blend a bit. Go back and add drops of color in the centers of the flowers or areas you would like to have a bit more color.
- Let the card dry and then gently tear off the tape. Refold the card and write your message inside. Slip it into an envelopeand it's ready to go!
Video


Leave a Reply