These adorable Easy Book Page Roses are the perfect DIY gift! They are simple to make out of any recycled or upcycled paper.

Jump to:
- DIY Easy Book Page Roses for a gift
- Fast and easy roses from book pages
- How do you turn a book page into a flower?
- Decorate your roses from book pages
- The book page rose stem
- Rose size variety and leaves
- Uses for your paper flowers
- More crafts? Yes, please!!
- Enjoy!
- Supplies for Book Page Roses
- DIY Easy Book Page Roses for Mom (Upcycle Old Paper)
DIY Easy Book Page Roses for a gift
Would you like to give your mother, nana, teacher, or even yourself a dozen roses, but don’t have fifty to seventy-five dollars to spend? Try making 12 book page roses! They make gorgeous roses and they won’t break your budget. I promise you’ll love them.
You can upcycle paper from old books and make a gift of love that will last.
These are perfect for a gift and for decorating on any occasion. I am thinking of so many ways to use these lovely book page flowers!
Fast and easy roses from book pages
The best thing is they are easy to make and once you get the hang of it, they don’t take long to create.
I have a full-length tutorial video that walks you through this process if you would like to make a book page rose along with me. Here is the link: DIY Easy Book Page Roses for Mom Full Length Video.
How do you turn a book page into a flower?
So start by finding an old book that needs a new life. I had an old music book that is falling apart that worked well.
You may want to consider the color of the paper in your book. Older books usually have more yellowed paper which is nice. But you may want a brighter white paper.
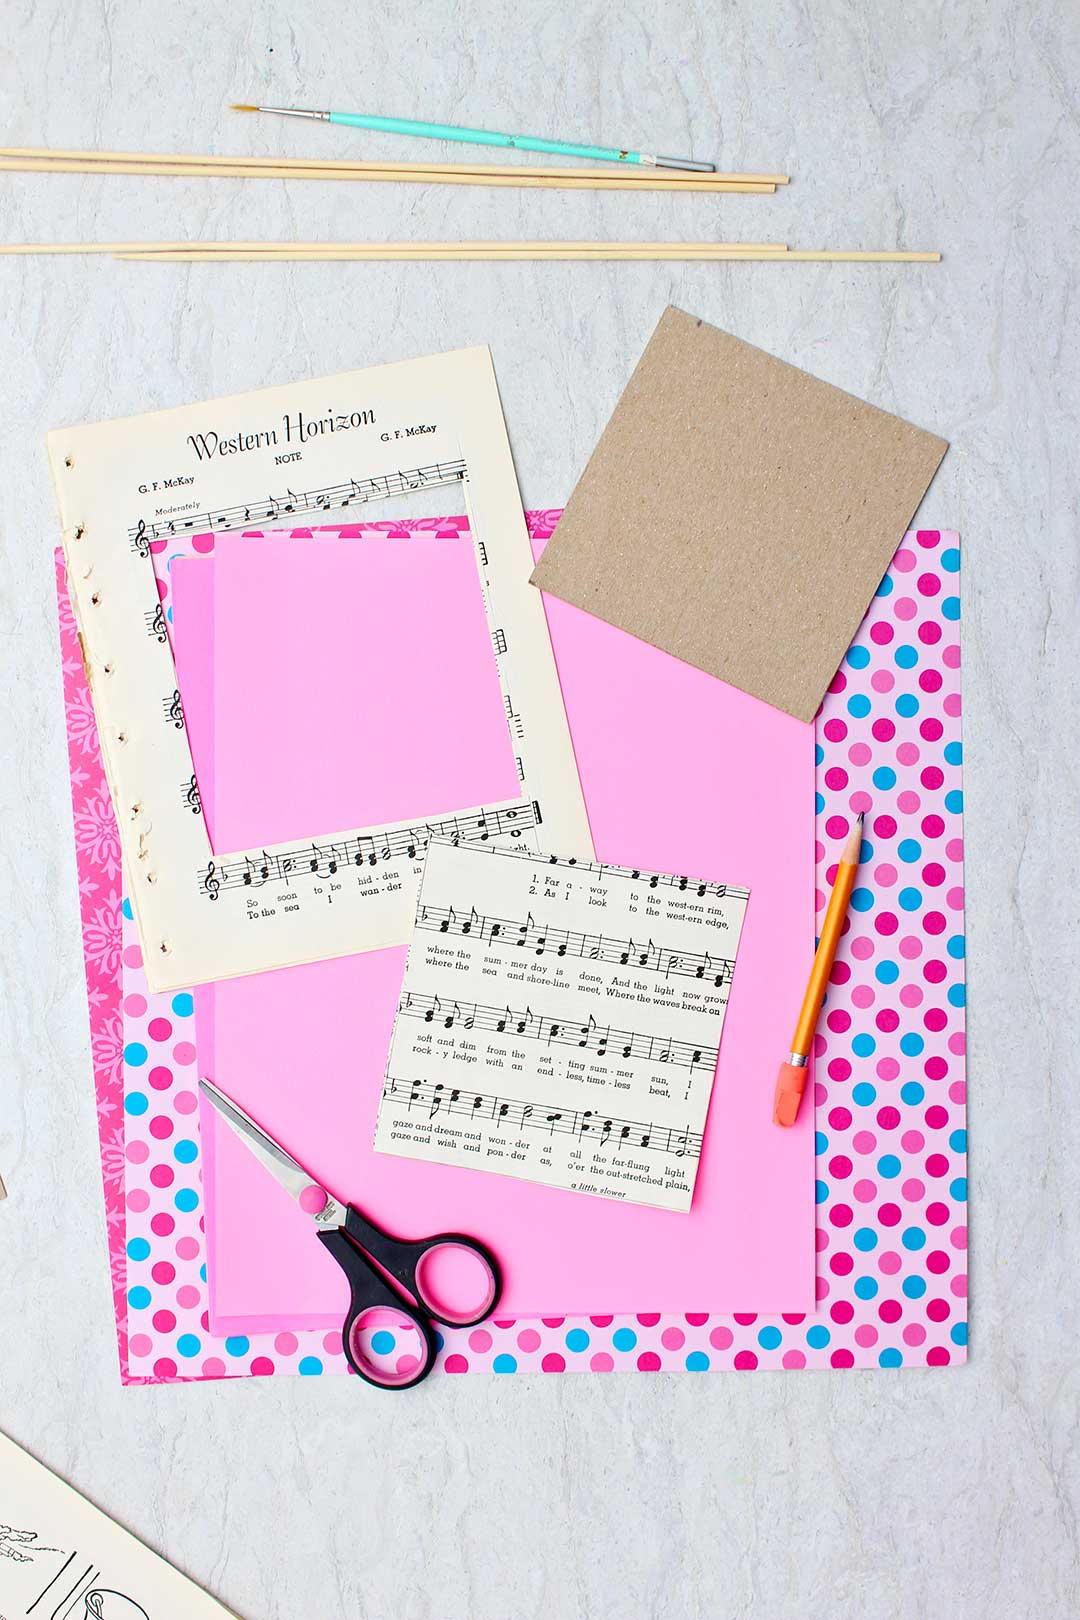
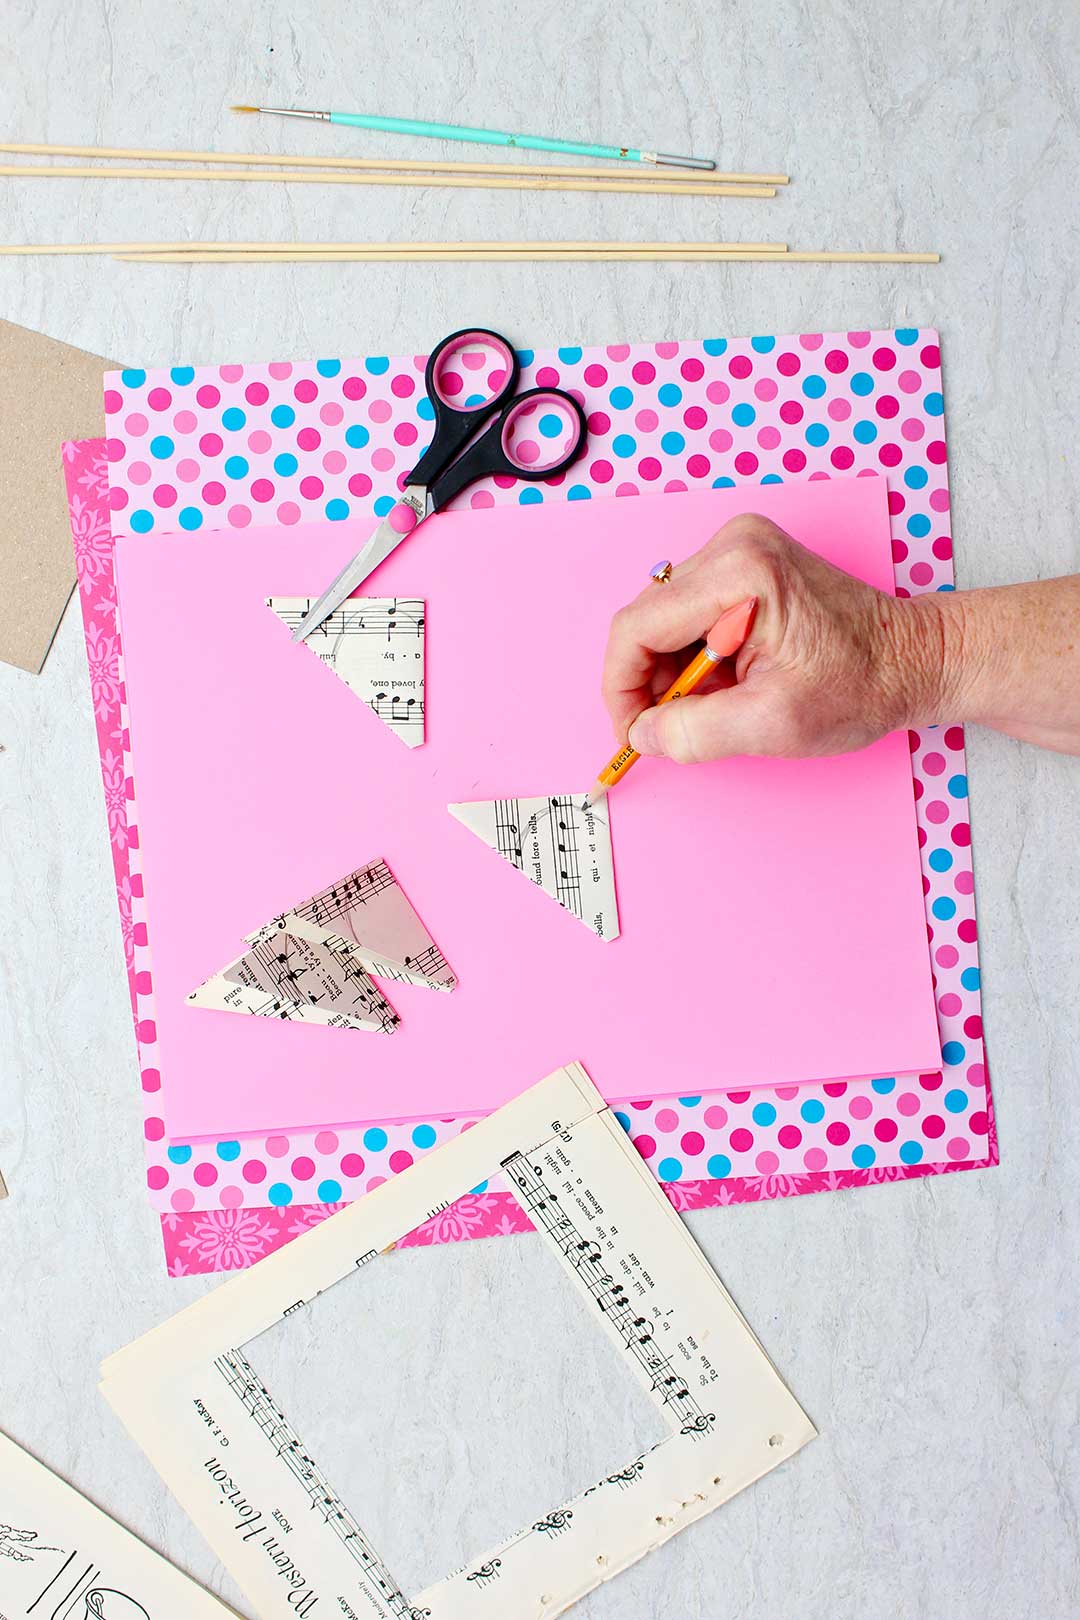
Cutting paper to size
Each flower will take four squares of paper that are the same size. You can make a square template out of cardboard or fold your paper up into a triangle and then cut around it, whatever is the easiest way for you.
You can make them with any size squares but it is easier to learn on a larger size.
I made a template that was 4.5 by 4.5 inches in size for this tutorial and drew around the template on one page of the book.
This makes it easy to cut pieces of paper that are squares of equal size. Then I stacked the pages and cut all four squares at once.
It is nice to have the print cover the square as much as possible so you can see these 4 squares were cut from the center of a book page.
Make 4 squares of paper from your old book pages.
Other paper types you can use
Note: You can use other types of paper to make your roses with different effects.
Coffee filters, colored magazine pages, scrapbooking paper, old sheet music, or an old map for example. What a great way to upcycle things that often go into the trash!!
Folding and shaping the paper rose petals
Fold each square into small triangles by triangle folding them three times. Then cut off about ¼th inch off the pointed end of the triangle (the tip that is joining the two folded edges of the triangle).
Hold the tip of the triangle you just clipped and set it down in front of you.
On the side of the triangle that is opposite the trimmed tip, draw a curved line that makes the piece look like an ice cream cone. Don’t let me lose you here, stay with me, don’t go get ice cream!!
Draw the same curved line on all four triangles.
Cut the top unfolded edge of each folded piece on the lines you drew.
See? They do look like an ice cream cone, don’t they?
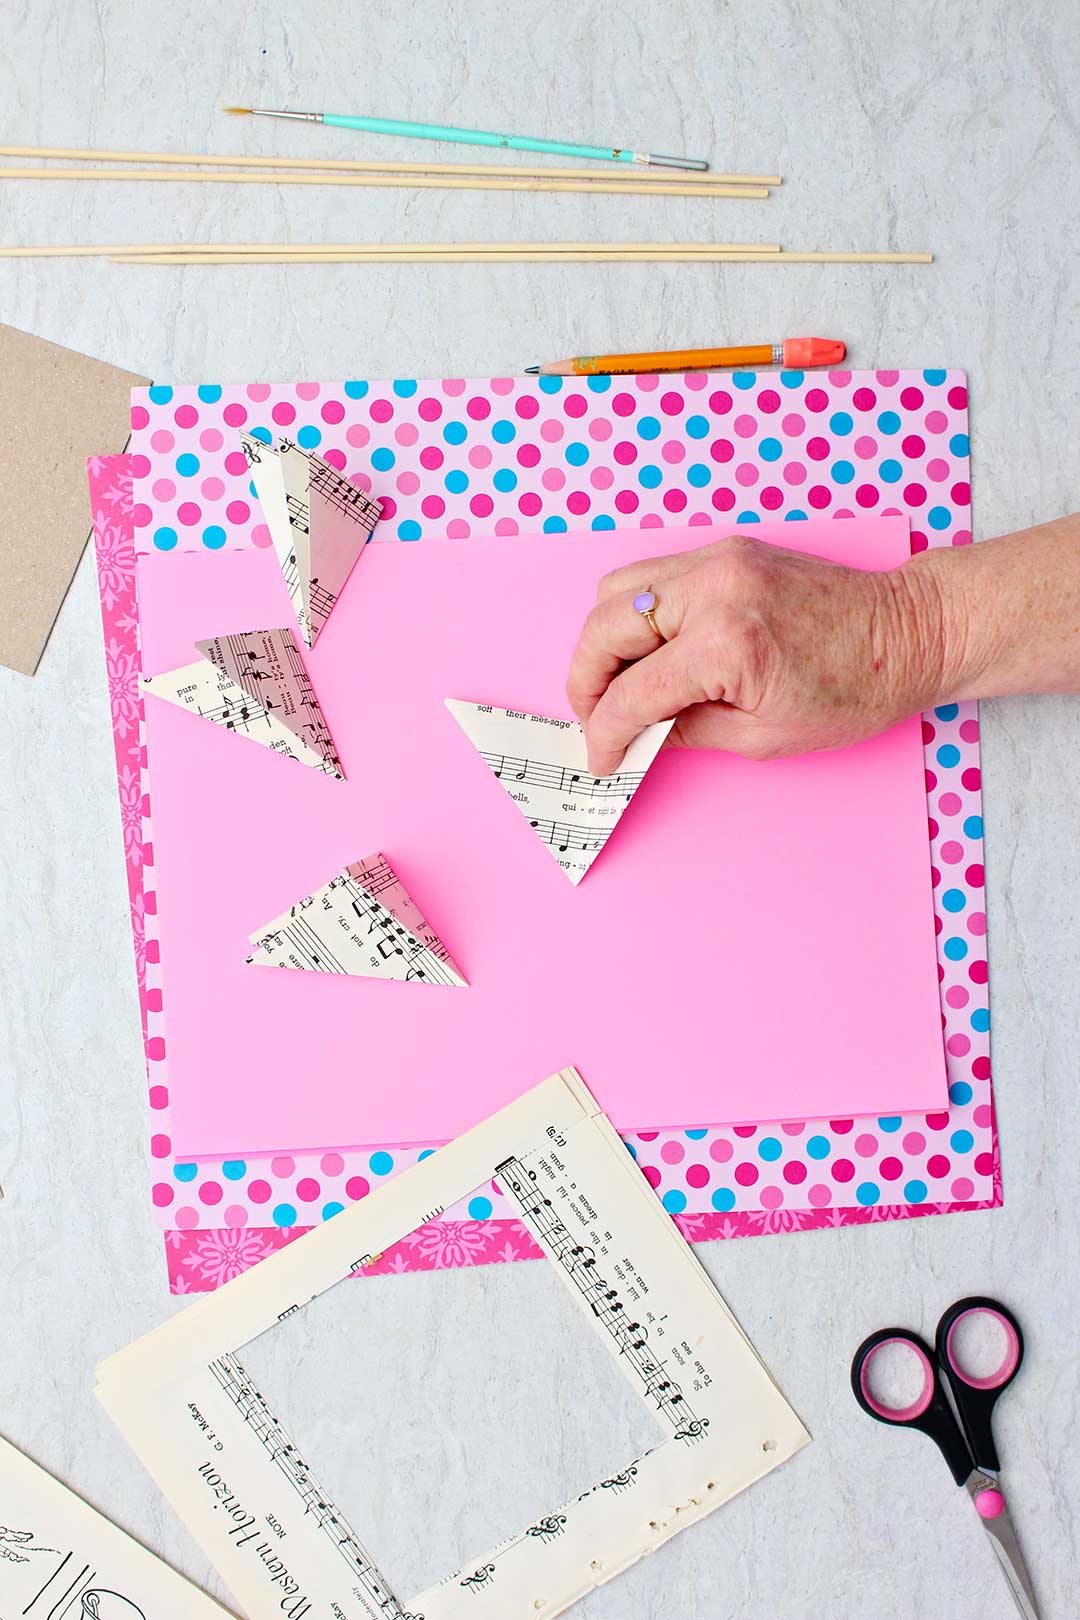
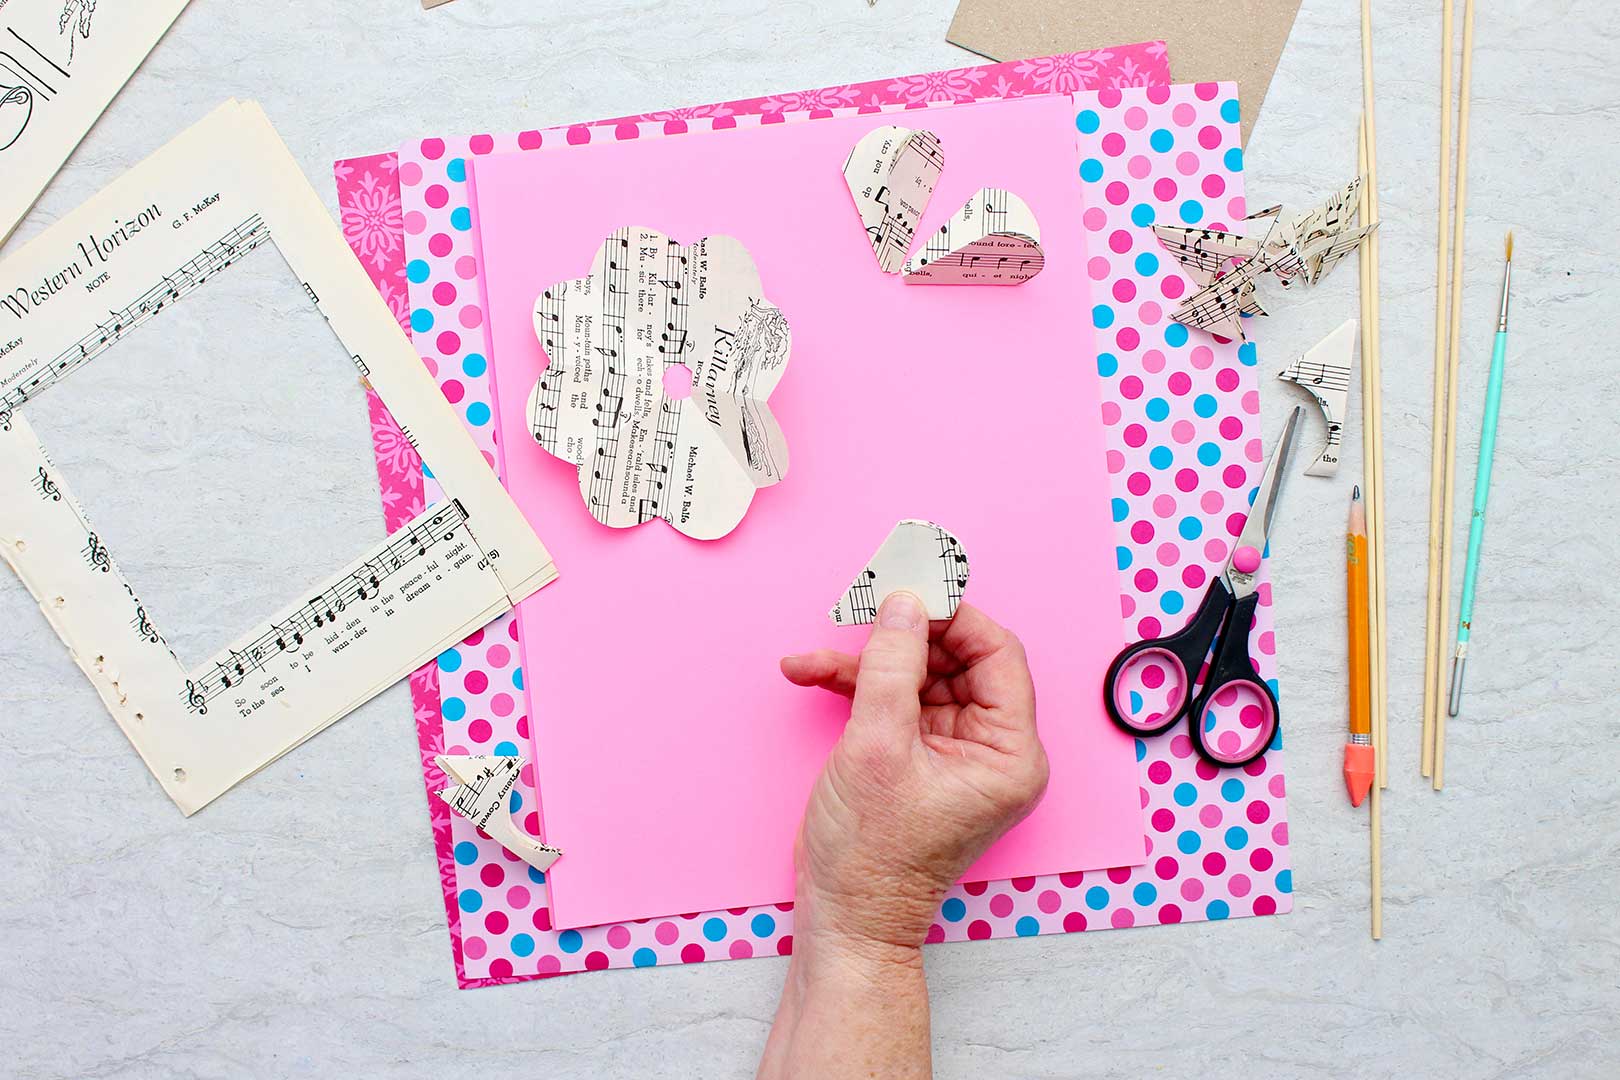
See the rose petals?
Open the first folded triangle. It has the shape of a flower with 8 petals and a cut out center.
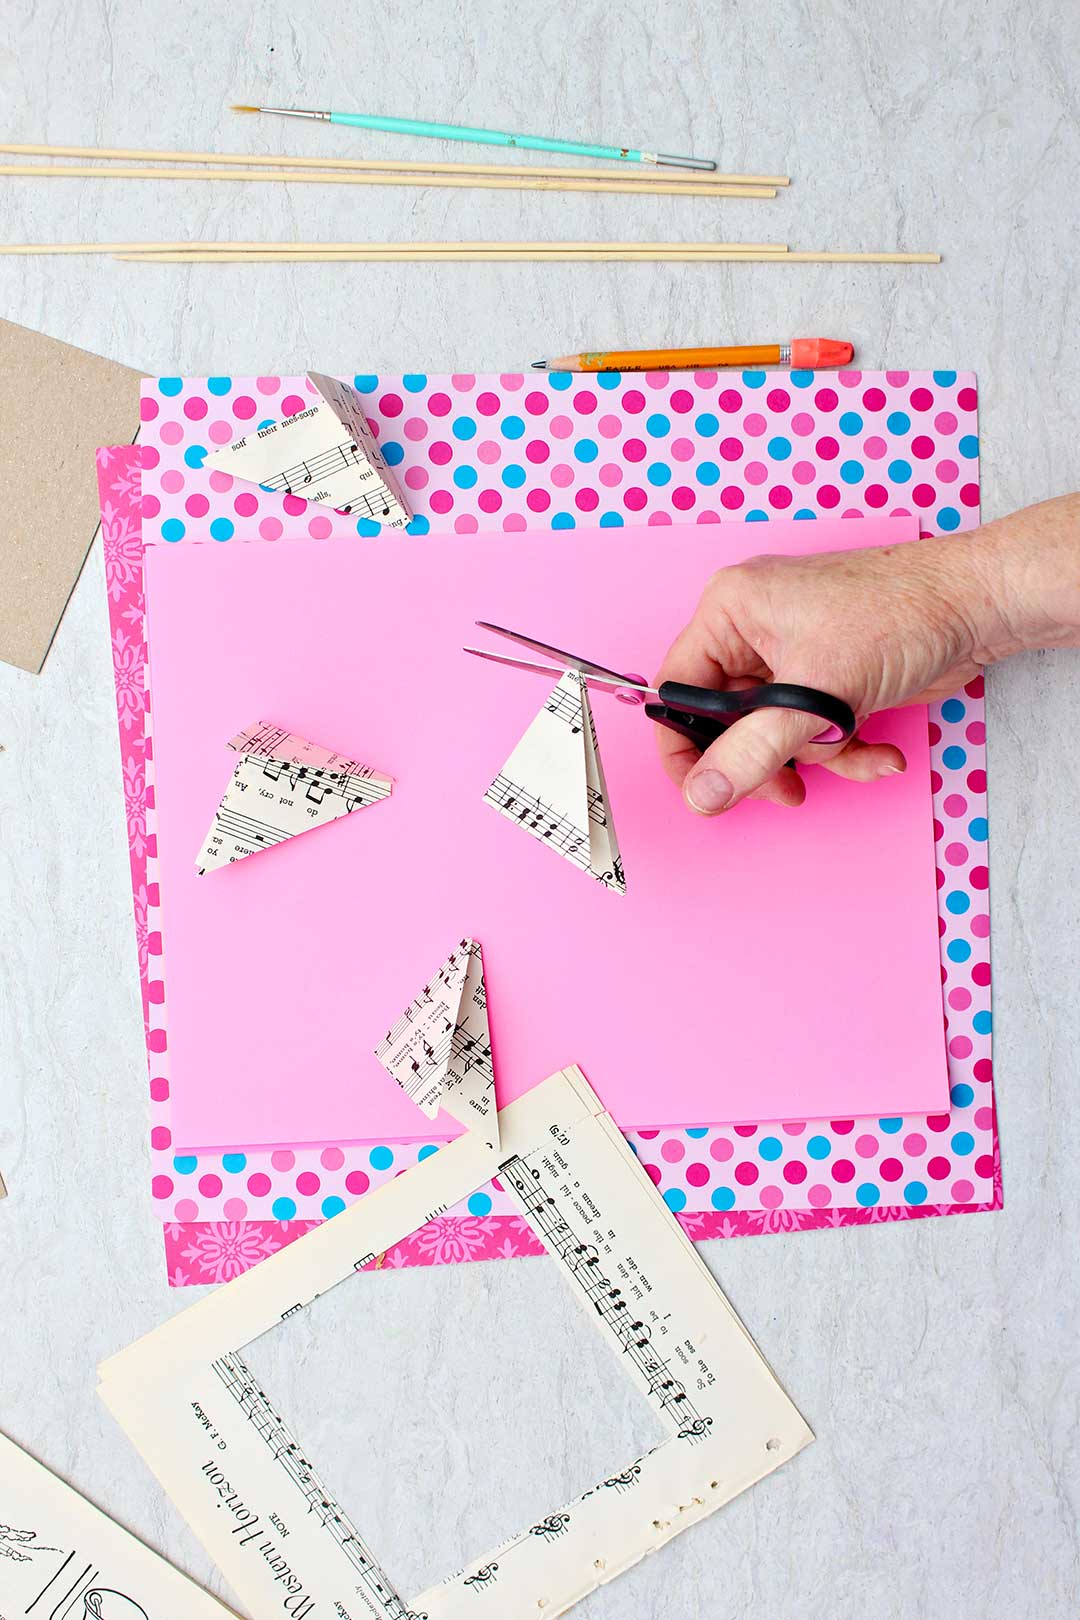
Take your scissors and cut out one petal shape, cutting on the folds. Set the 7-petal piece and the 1-petal piece to the side.
Open the second triangle and cut out a two-petal section (two adjoining petals). Set the two pieces to the side.
Open the third triangle and cut out a three-petal section.
And you guessed it…open the fourth square and cut it into two four-petal sections. You will only need one of the four-petal pieces so throw the second away or save it to make another book page rose.
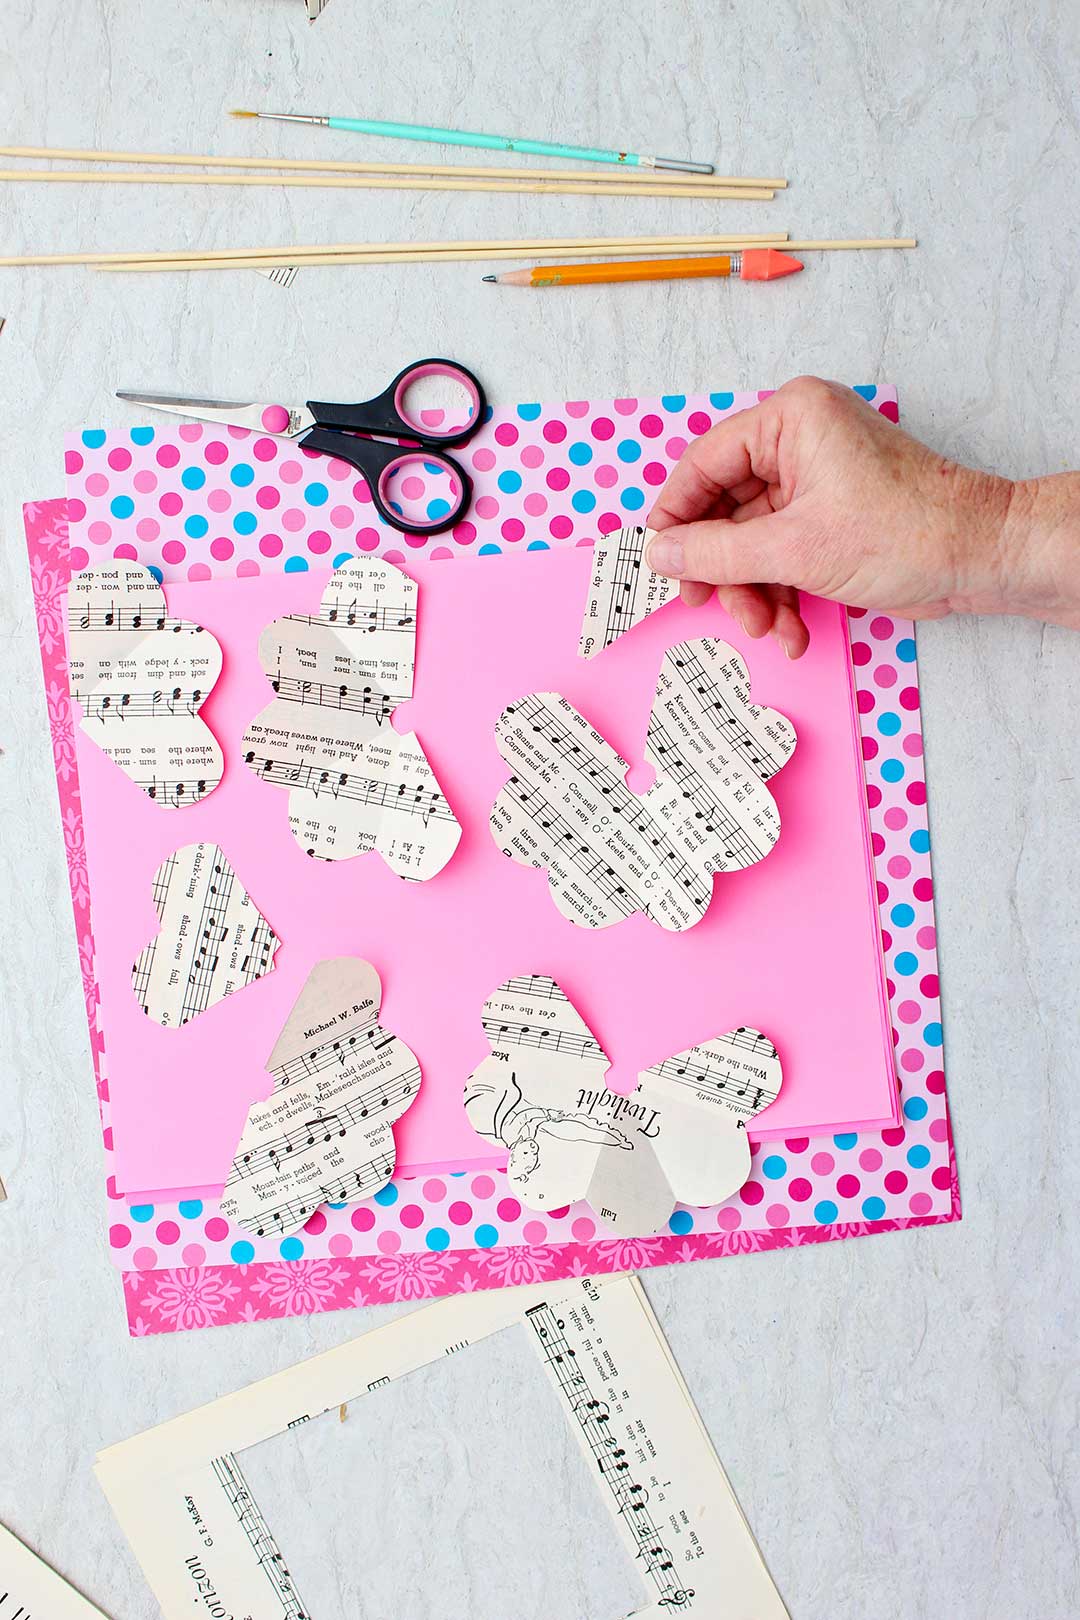
Line up the sections in order from one petal to seven petal sections.
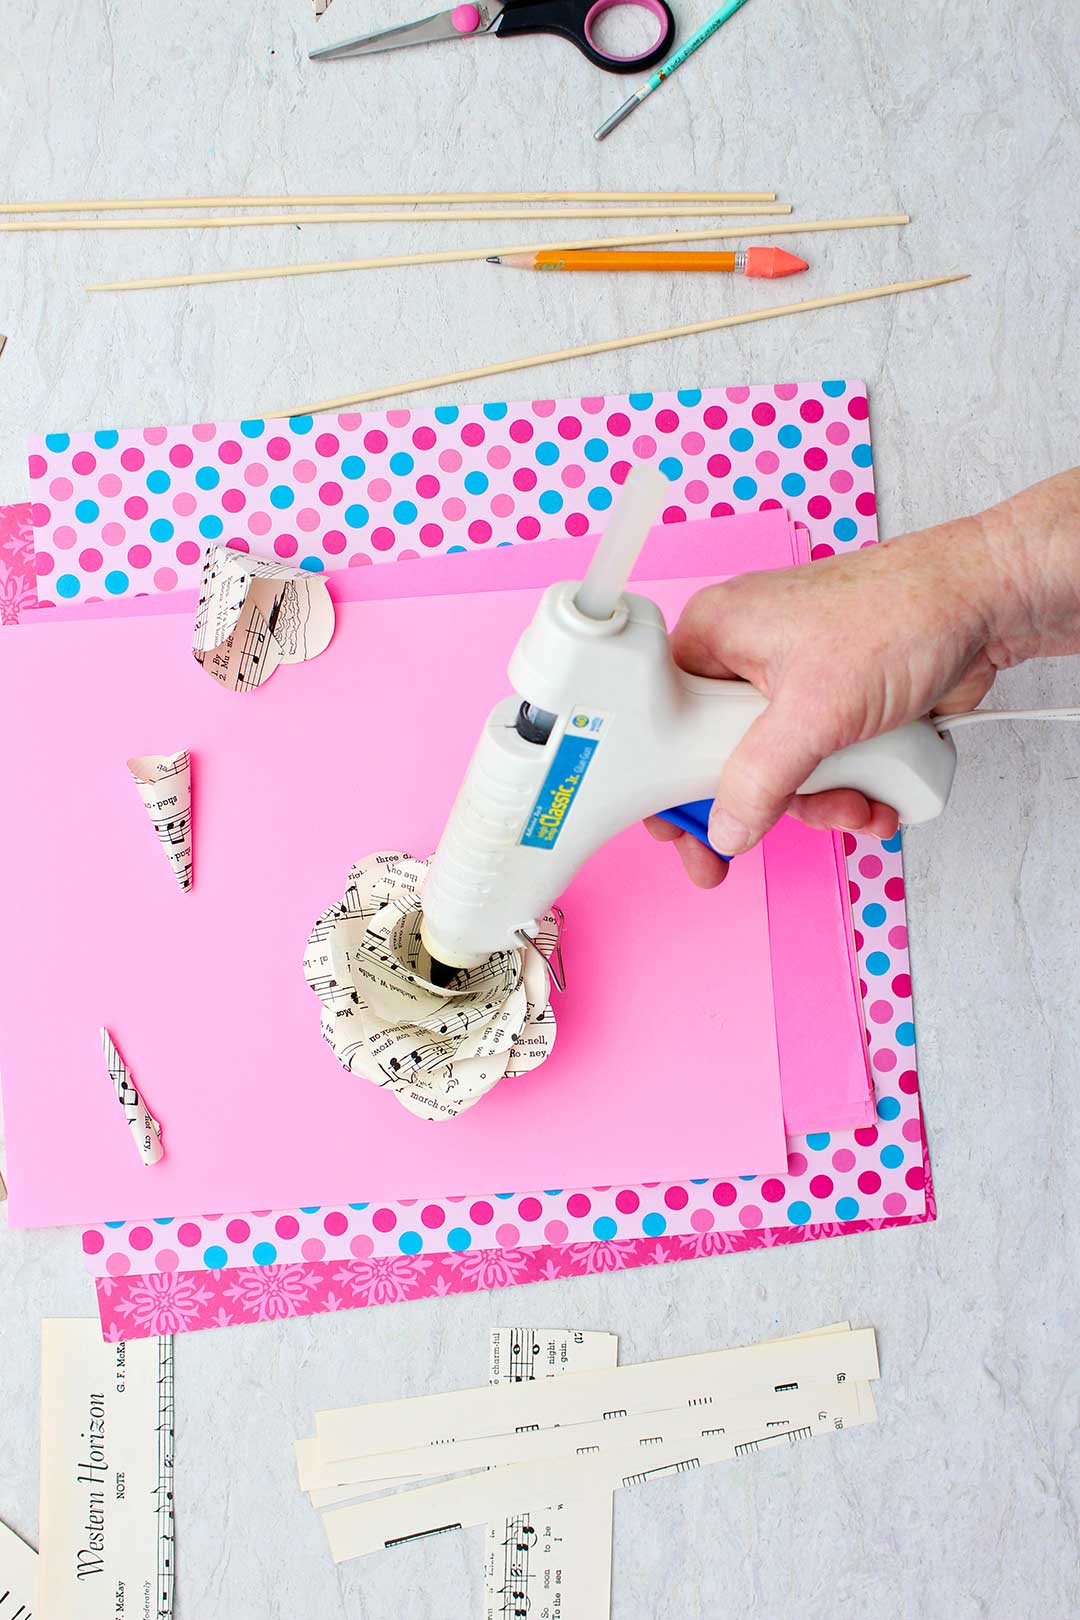
Gluing the petal rings together
Start with the largest section and glue the two edges of the petal section together so that it makes a ring.
Do this with each petal section. They get smaller and smaller in diameter as you get less and less petals!
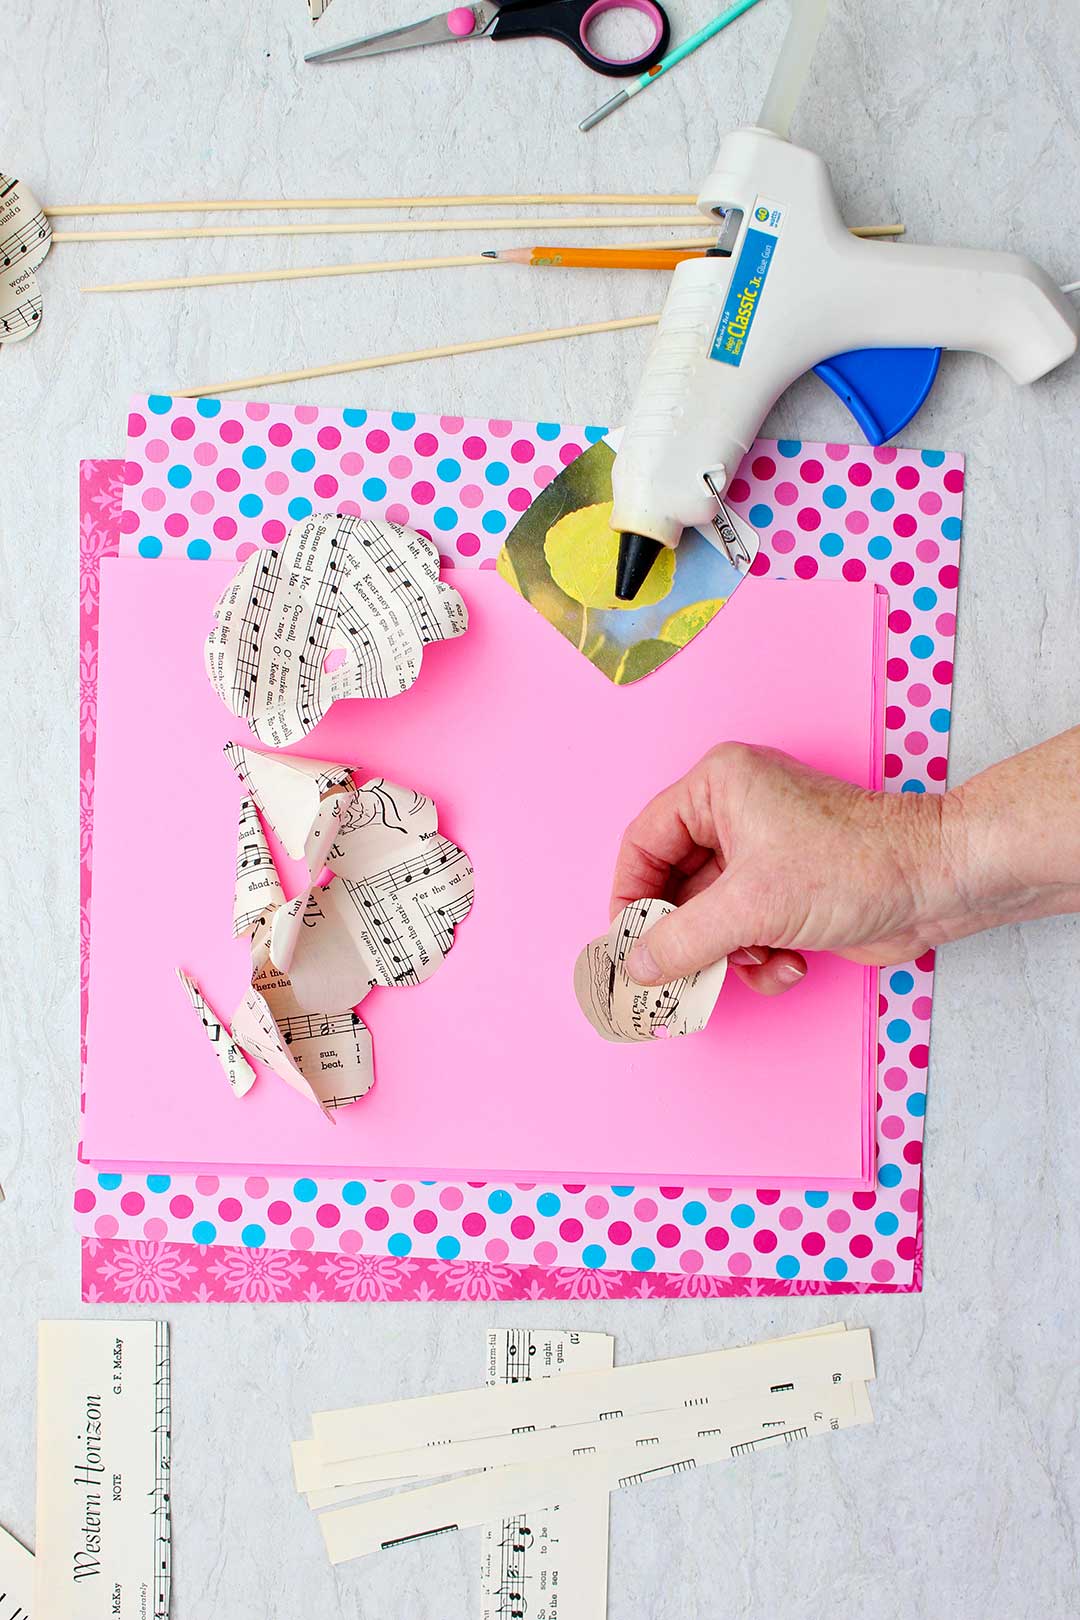
It helps a bit to roll the 1 and 2 petal sections around a toothpick or paint brush handle before trying to glue them as they are so small.
Note: You can use either tacky glue or a hot glue gun and hot glue (if using hot glue be very careful not to burn fingers as you form the petal sections). For younger kids you may want to use the tacky glue.
You can put a paint brush into the center and wrap the petal section around it to glue it if you want to.
The one-petal section is rolled tightly and will be the center of the rose. Do try to get this into a tight funnel shape even though it is small.
Make sure the glue is dry before going on.
Roses made out of book pages- amazing!
Take the largest piece, the 7-petal section, and put glue around the center hole. Place the 6-petal section down into the glue and hold in place to set the glue.
Line up the holes in the bottom of the two sections and put the petals of the sections in different directions. This helps it look more like a real rose shape.
Continue this process with each of the 5 largest sections, gluing and nestling the next smaller petal section inside the last.
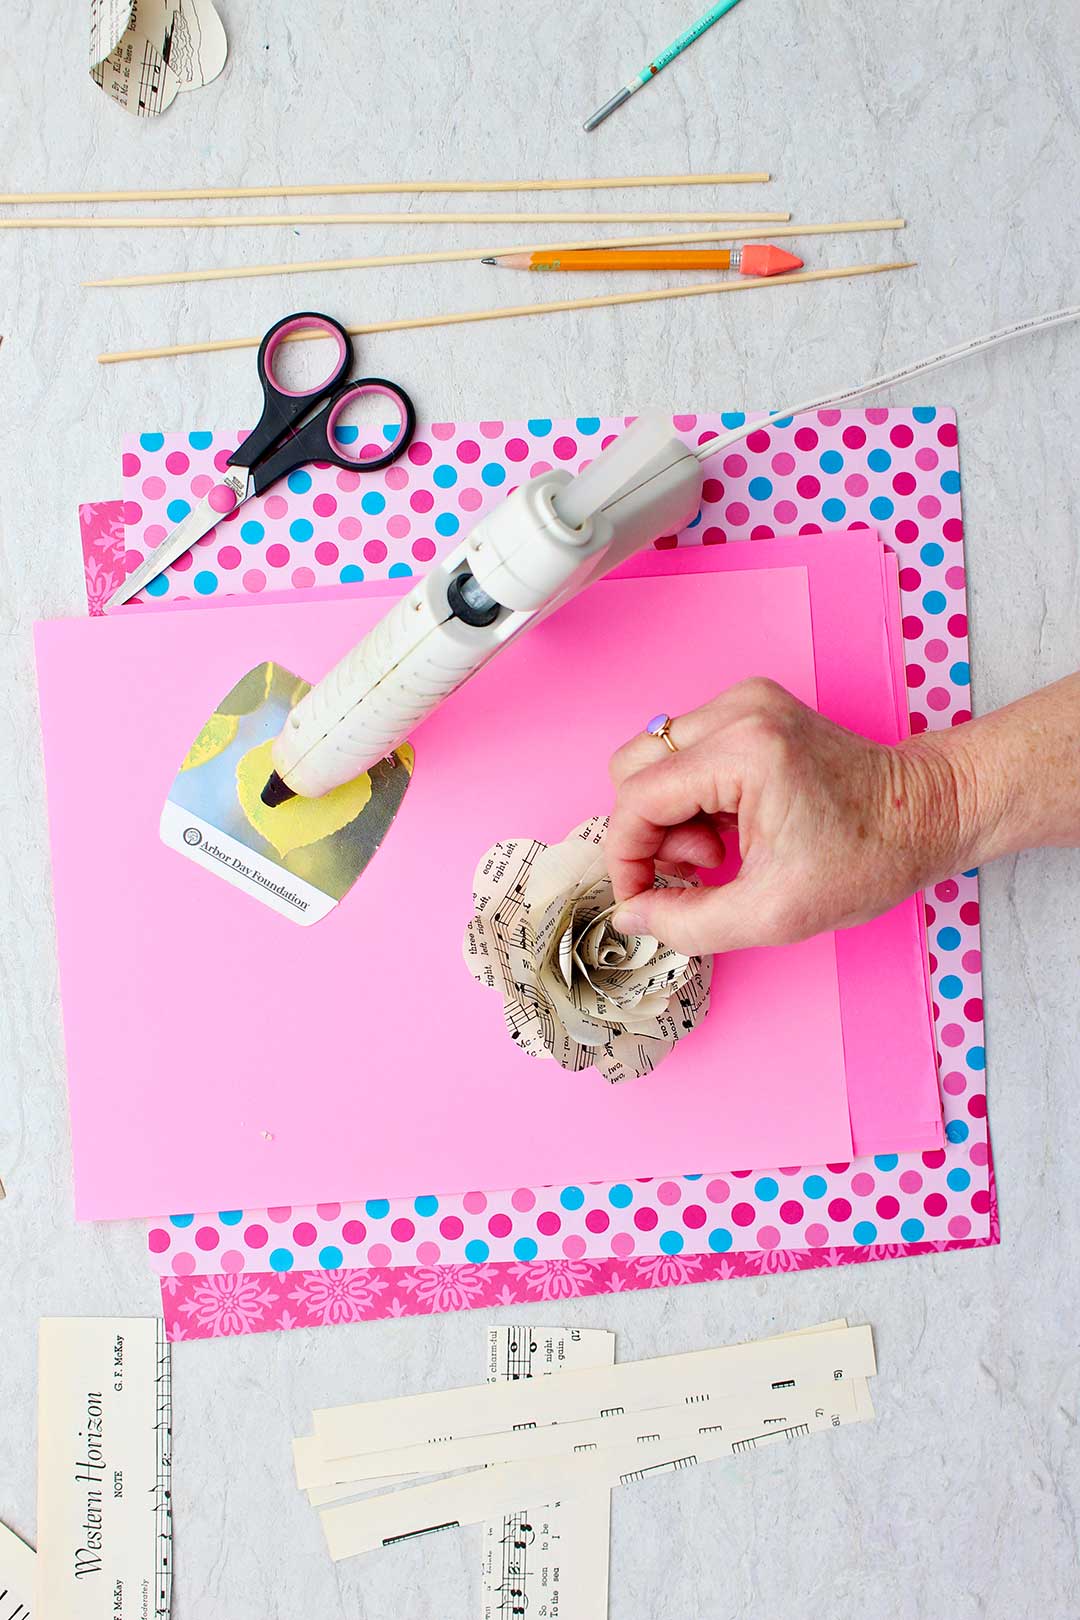
Middle of the flower
With the last two sections, add glue to the bottom of the one-petal section and slide it into the two-petal section.
Add glue down the bottom half of the two-petal section and slide it into the center of the rose. It will slide slightly down through the hole in the larger sections. So the point of these two sections will kind of stick out the bottom of the other sections.
This is what you want as that makes the center of the rose slightly lower than the larger petal rings instead of sticking out. This looks more natural.
This makes the middle of the paper page rose!
Adding the middle of the flower
With the last two sections, add a little glue to the bottom of the one-petal section and slide it into the two-petal section.
Add glue down the bottom half of the two-petal section and slide it into the center of the rose and it will slide slightly down through the larger sections. This makes the middle of the DIY book page roses!
If the hole in the bottom of the first 5 sections isn’t large enough for the last 2 sections to slip down into then cut it out a bit. The bottom of these two sections should slip through about ¼th inch.
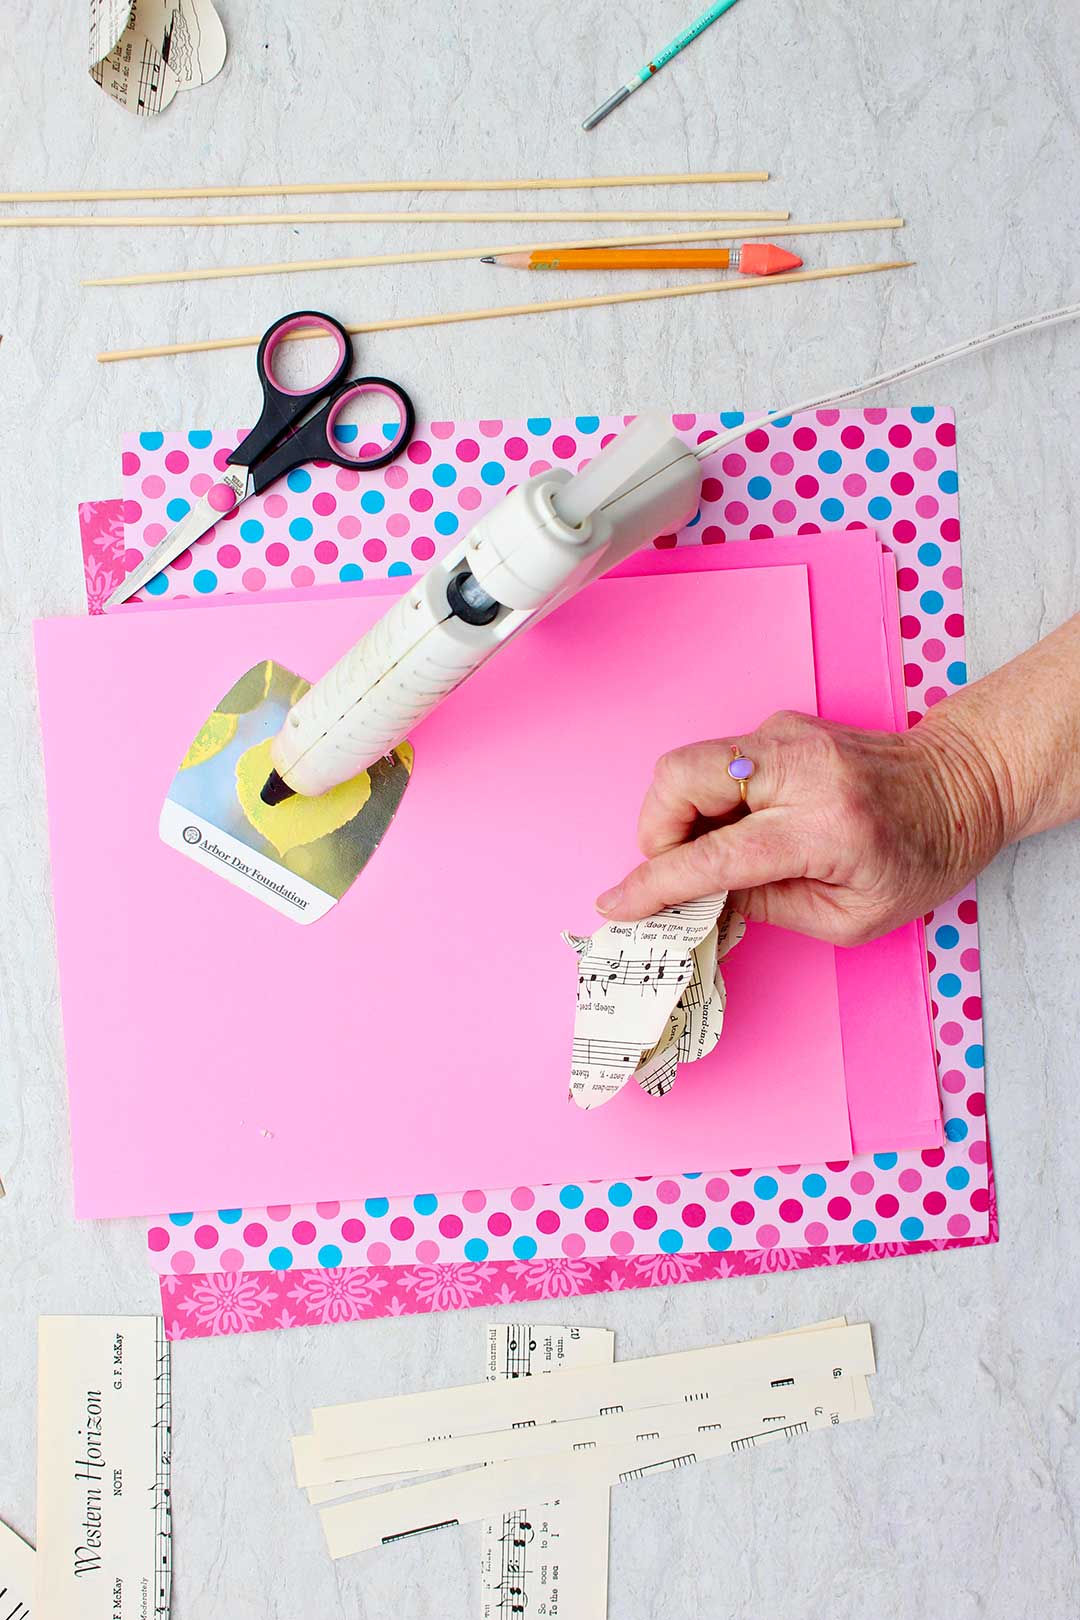
Curl the petals of the larger rings of petals using a toothpick or small paint brush handle. Do this by wrapping the outer edge of the rose petals back over the rounded object. You just want a gentle curve back.
Decorate your roses from book pages
Glue on small seed, crystal, or pearl beads, sprinkled glitter, add small sprays of paint, etc. for decoration as desired. I just leave mine plain but a bit of bling is always pretty.
If you would like you can leave the flower like this (without a stem) and use it in a variety of ways.
The book page roses would look nice on a:
- Garland
- Wreath- make a variety of sizes and hot glue them to a wreath form.
- Shelf- sitting on a book or against a decorative item
- Rose bowl
- Package or gift bag- make one larger and a couple smaller and glue them to the package or bag
The book page rose stem
But of course they can also be placed on a stem and arranged in a vase.
There are several ways to make a stem for your book page roses.
You could use a thin wooden dowel or a heavy wire to slip into the bottom center of the rose.
I chose to use a dowel and like the natural color of the wood.
Just add a little bit of glue to the dowel (or end of the wire) and slip it into the small hole in the center of the rose from the bottom side. You may need to add a piece of tape to secure it.
Another option for a stem is a straw. If using a straw for a stem, twist the end of the tip on the back of the rose. Add a bit of glue and push it down into the end of the straw. You could add some tape to this as well if that doesn’t hold firmly.
Wrap the straw or the dowel in floral tape or long strips of paper cut from your book pages if you want to cover the color of the straw up. This would also work for the dowel or wire stem.
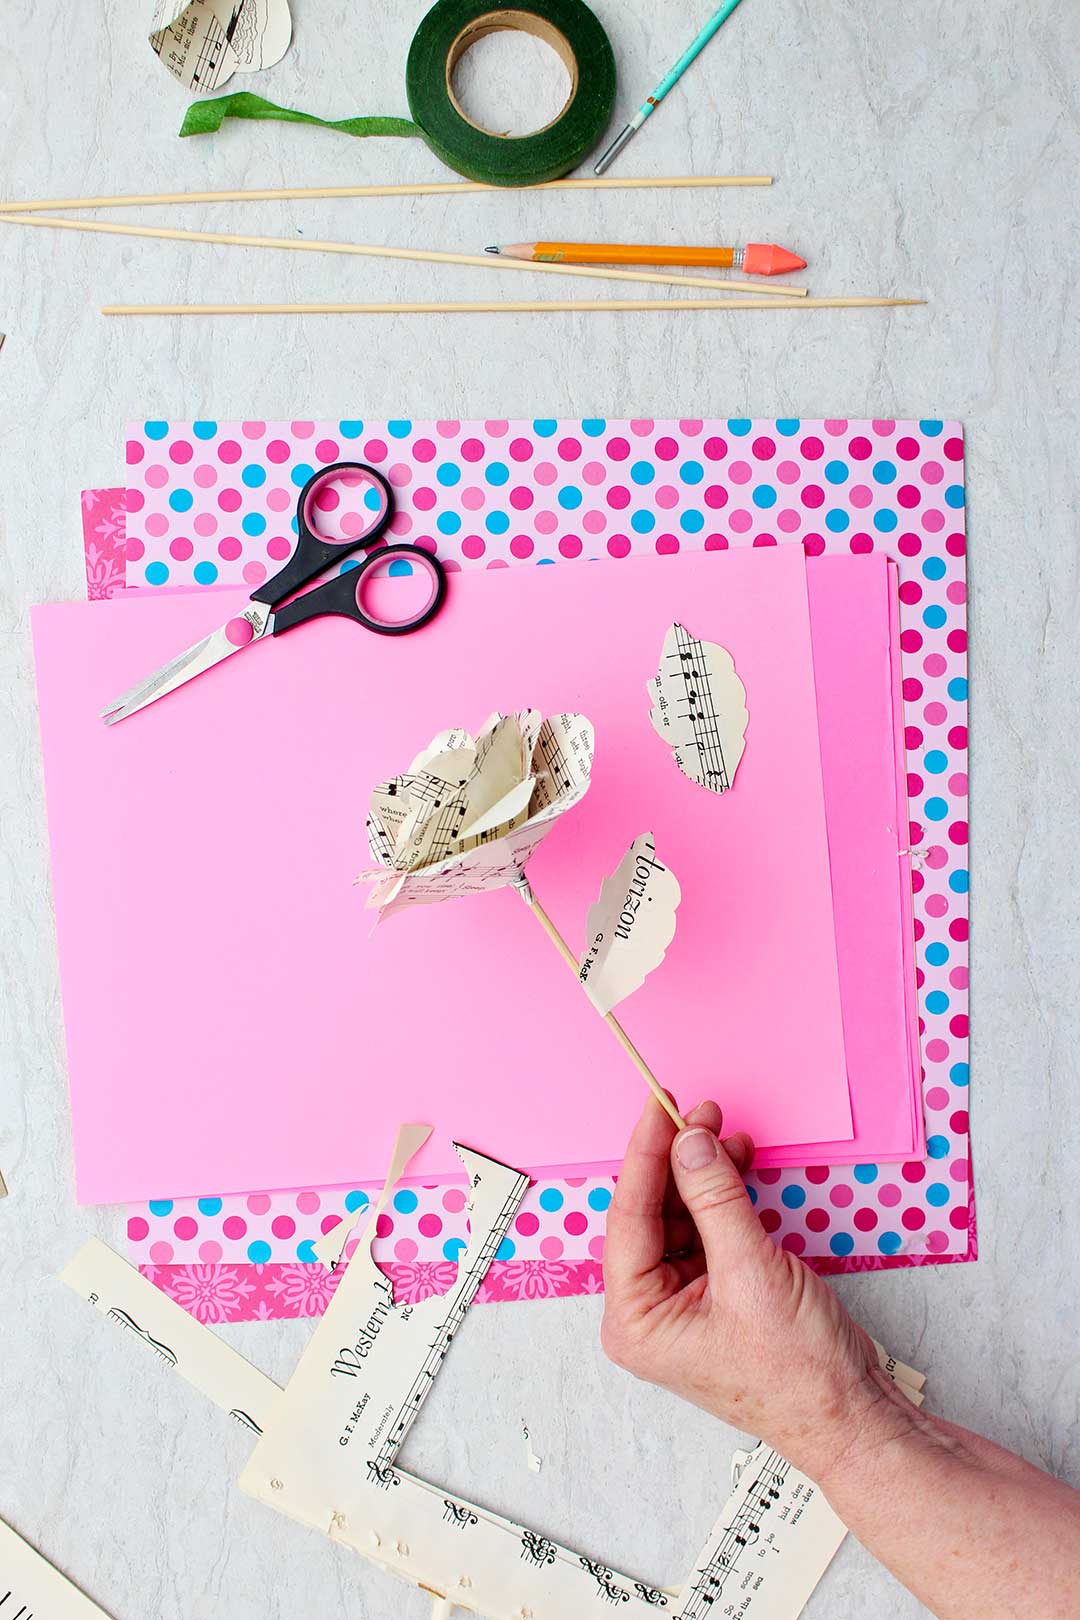
Rose size variety and leaves
I made several book page roses in a variety of sizes for a bouquet. Make a smaller rose with a smaller square pieces of your book paper.
It also looks nice to make a couple roses with only the smaller rings. This makes it look like a rose bud.
Lastly, you can also cut some leaves and glue them to the stems. The bouquet looks fuller that way.
Don’t they look so pretty?
Uses for your paper flowers
I think they are perfect for a Mother’s Day gift, don’t you? Or to set on your own counter as a decoration!!
OK...my mind is pondering event decorations- like proms or an open house at a library, wedding reception decorations or a ladies afternoon tea party?
These beautiful paper roses would work on guest tables, place cards, decorative bouquets, even a wedding bouquet!
Who knew what beautiful flowers could be made from pages of an old book!
Here's the link again to the full length video tutorial if you would like to walk through the paper rose project together! Link: Book Page Roses Full Length Tutorial.
Turn a page of a book into a beautiful rose in just a few steps! Start by cutting equal sized squares from the pages, then fold into triangles. Trim the tip and shape the edge into curved petals, then unfold. Cut these pieces into sections outlined in the tutorial, then glue together into the shape of a rose. Attach a stem and give as a beautiful gift that won't wilt!
This easy tutorial makes creating a rose out of paper super easy! Simply follow the steps to cut, fold and trim the paper into the correct sizes for rose petals. Glue together into the shape of a pretty rose and attach a stem. You'll have a bouquet of roses to decorate with or give as a gift ready in no time!
More crafts? Yes, please!!
If you would enjoy more recycled paper crafts, check out these options.

Enjoy!
If you try this craft, let me know! Go ahead and leave a comment, rate it, and tag a photo with #WelcometoNanas wherever you post.
Come join the fun at https://welcometonanas.com
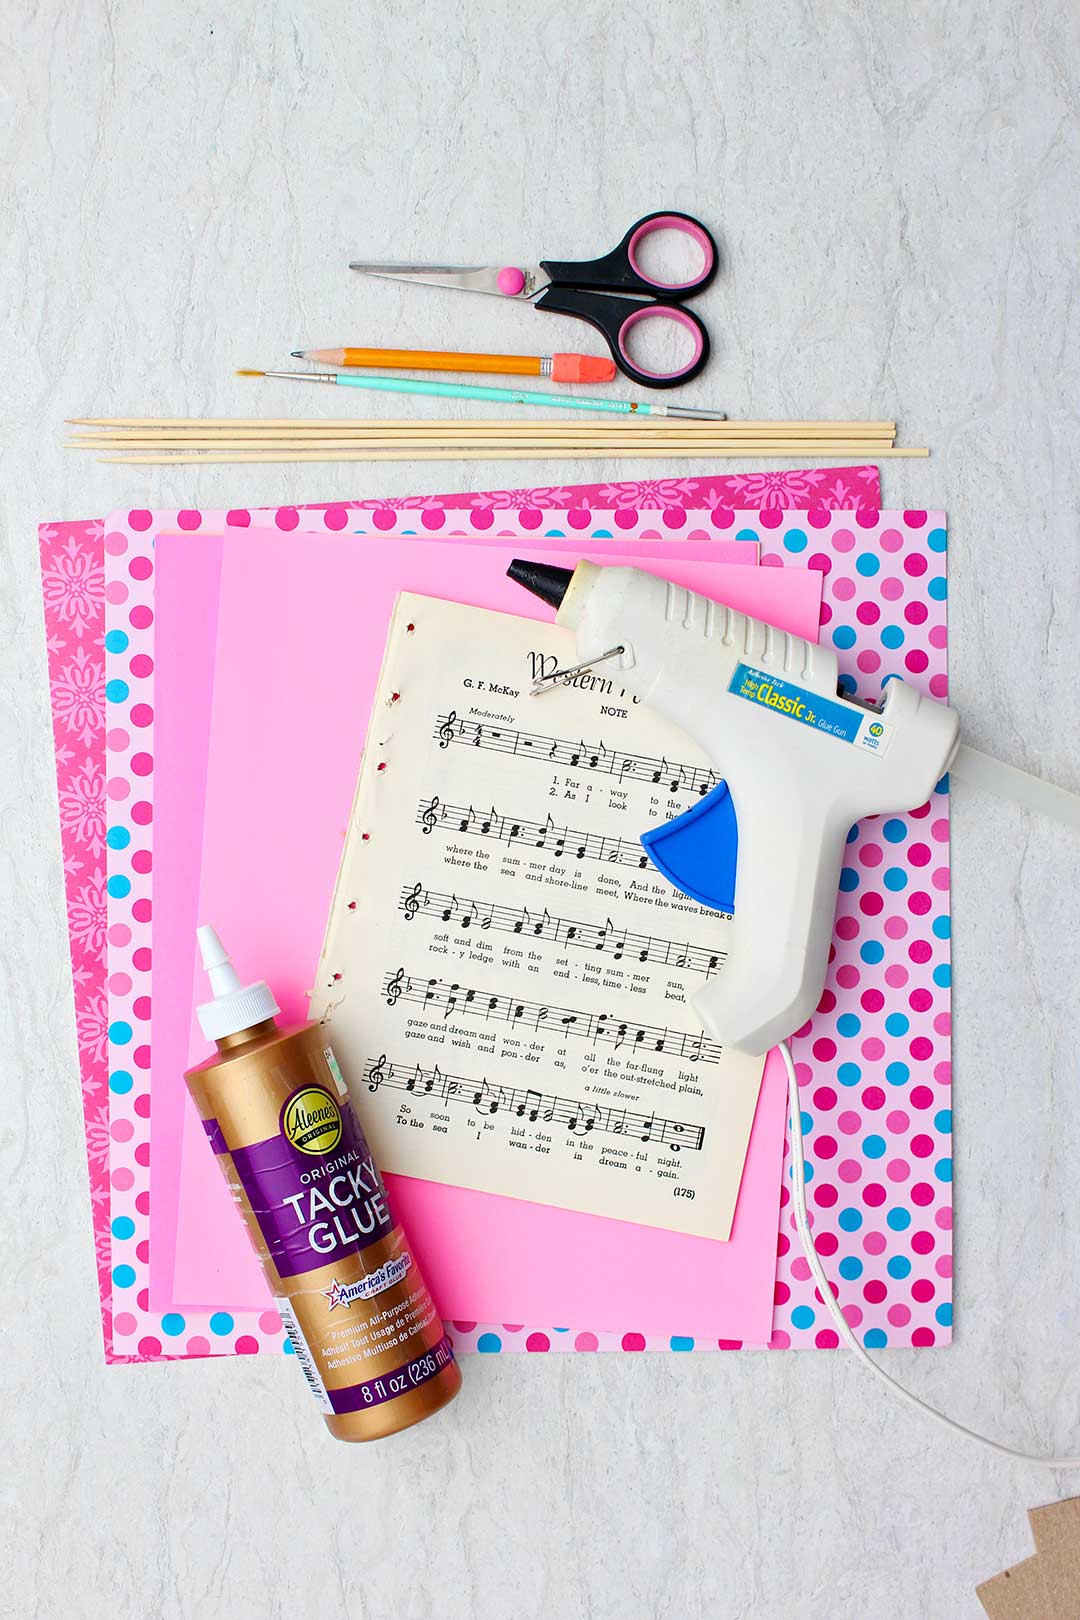
Supplies for Book Page Roses
- Paper from old book pages or other paper of your choice (upcycling is great!)
- Glue- hot glue gun and hot glue or tacky glue
- Scissors
- Stem- small dowel rods, sturdy wire, drinking straws
- Decorations if desired (optional)- like miniature pearls for example

DIY Easy Book Page Roses for Mom (Upcycle Old Paper)
Equipment
- Glue- hot glue gun and hot glue or tacky glue
- Scissors
Items Required
- Paper from old book pages or other paper of your choice (upcycling is great!)
- Glue- hot glue gun and hot glue or tacky glue
- Scissors
- Stem- small dowel rods, sturdy wire, drinking straws
- Decorations if desired (optional)- like miniature pearls for example
Instructions
- Each flower will take four squares of paper that are the same size. You can make a square template out of cardboard or fold your paper up into a triangle and then cut around it, whatever is the easiest way for you. You can make them with any size squares but it is easier to learn on a larger size.I made a template that was 4.5 by 4.5 inches in size for this tutorial and drew around the template on one page of the book.Make 4 squares of paper from your old book pages.
- Fold each square into small triangles by triangle folding them three times. Then cut off about ¼th inch off the pointed end of the triangle (the tip that is joining the two folded edges of the triangle).Hold the tip of the triangle you just clipped and set it down in front of you.
- On the side of the triangle that is opposite the trimmed tip, draw a curved line that makes the piece look like an ice cream cone.Draw the same curved line on all four triangles.Cut the top unfolded edge of each folded piece on the lines you drew.
- Open the first folded triangle. It has the shape of a flower with 8 petals and a cut out center. Take your scissors and cut out one petal shape, cutting on the folds. Set the 7-petal piece and the 1-petal piece to the side.Open the second triangle and cut out a two-petal section (two adjoining petals). Set the two pieces to the side.Open the third triangle and cut out a three-petal section.And you guessed it…open the fourth square and cut it into two four-petal sections. You will only need one of the four-petal pieces so throw the second away or save it to make another book page rose. Line up the sections in order from one petal to seven petal sections.
- Start with the largest section and glue the two edges of the petal section together so that it makes a ring. Do this with each petal section. They get smaller and smaller in diameter as you get less and less petals! It helps a bit to roll the 1 and 2 petal sections around a toothpick or paint brush handle before trying to glue them as they are so small. Note: You can use either tacky glue or a hot glue gun and hot glue (if using hot glue be very careful not to burn fingers as you form the petal sections).
- Take the largest piece, the 7-petal section, and put glue around the center hole. Place the 6-petal section down into the glue and hold in place to set the glue.Line up the holes in the bottom of the two sections and put the petals of the sections in different directions. This helps it look more like a real rose shape.Continue this process with each of the 5 largest sections, gluing and nestling the next smaller petal section inside the last.
- With the last two sections, add glue to the bottom of the one-petal section and slide it into the two-petal section.Add glue down the bottom half of the two-petal section and slide it into the center of the rose. It will slide slightly down through the hole in the larger sections. So the point of these two sections will kind of stick out the bottom of the other sections.This is what you want as that makes the center of the rose slightly lower than the larger petal rings instead of sticking out. This looks more natural.This makes the middle of the paper page rose!
- With the last two sections, add a little glue to the bottom of the one-petal section and slide it into the two-petal section.Add glue down the bottom half of the two-petal section and slide it into the center of the rose and it will slide slightly down through the larger sections. This makes the middle of the DIY book page roses!If the hole in the bottom of the first 5 sections isn’t large enough for the last 2 sections to slip down into then cut it out a bit. The bottom of these two sections should slip through about ¼th inch.Curl the petals of the larger rings of petals using a toothpick or small paint brush handle. Do this by wrapping the outer edge of the rose petals back over the rounded object. You just want a gentle curve back.
- Glue on small seed, crystal, or pearl beads, sprinkled glitter, add small sprays of paint, etc. for decoration as desired. I just leave mine plain but a bit of bling is always pretty.If you would like you can leave the flower like this (without a stem) and use it in a variety of ways.
- There are several ways to make a stem for your book page roses.You could use a thin wooden dowel or a heavy wire to slip into the bottom center of the rose. I chose to use a dowel and like the natural color of the wood. Just add a little bit of glue to the dowel (or end of the wire) and slip it into the small hole in the center of the rose from the bottom side. You may need to add a piece of tape to secure it.Another option for a stem is a straw. If using a straw for a stem, twist the end of the tip on the back of the rose. Add a bit of glue and push it down into the end of the straw. You could add some tape to this as well if that doesn’t hold firmly.Wrap the straw or the dowel in floral tape or long strips of paper cut from your book pages if you want to cover the color of the straw up. This would also work for the dowel or wire stem.
- Lastly, you can also cut some leaves and glue them to the stems. The bouquet looks fuller that way.Don’t they look so pretty?


Violeta says
Great tutorial, and I absolutely love your photos! I wanted to drop a quick message to let you know that today I’ve featured your upcycled book page rose DIY on Crafts on Display, hope you enjoy it! https://craftsondisplay.com/paper-crafts/upcycled-book-page-rose-tutorial-118838/
Joan says
I absolutely love this and such great directions. Thanks Joan