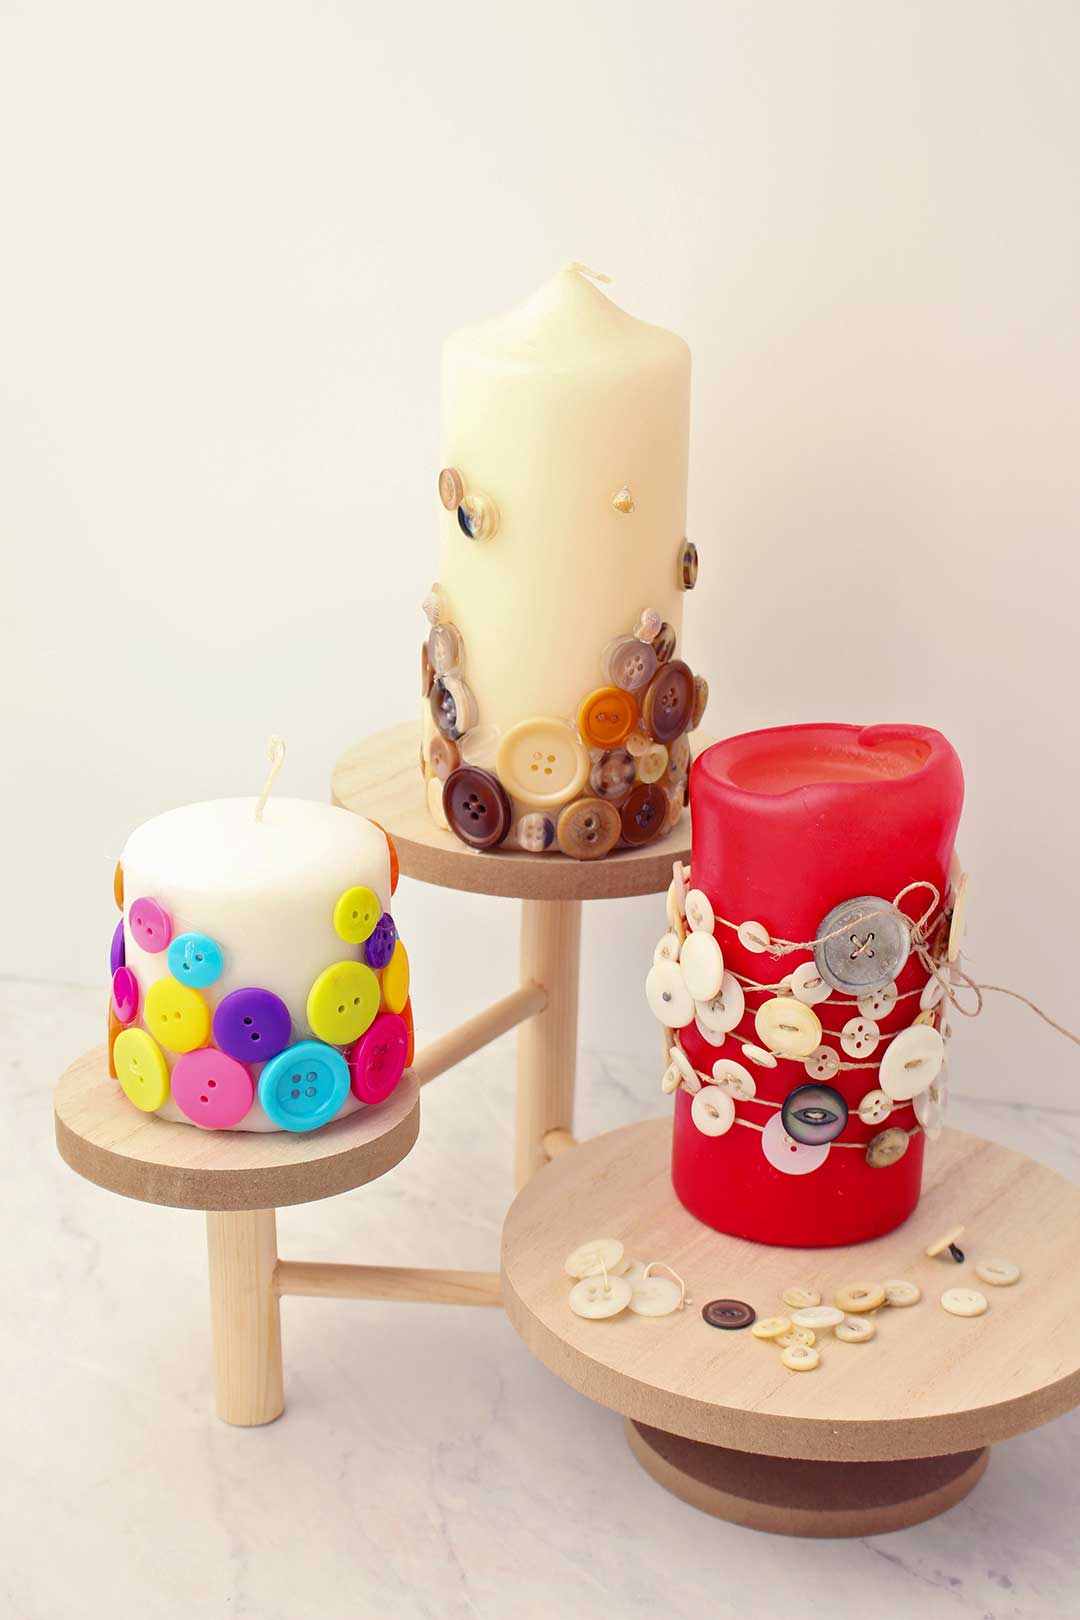
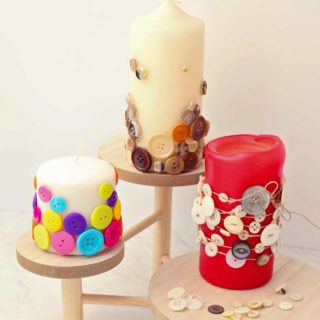
Decorative Pillar Candles
Decorating Candles with Buttons is a fast & easy way to create a one-of-a-kind gift or to dress up a pillar candle for your home or holiday.
We are making two button designs but there are so many variations possible, the sky is the limit, and it is a simple craft to do with kids.
My kids and I made candles like this a number of years ago. We dumped out all the buttons in my button jars and they each created such different versions on the same theme. One was a Christmas theme with red, green, and white buttons. One was a beige theme which I really liked, like this one here.
Decorating Candles with Buttons...and bling
Take note that there were a few small seashells in the mix. You don’t have to stick to just buttons! Go snag your supplies and grab any little extra things that would glue on nicely like broken jewelry, seashells, coins, or even small sticks and such.
You will need a pillar candle (new or partially used) in whatever size you prefer. If you plan on doing this craft with kids, in a group, or with a short amount of time it works well to use the short pillar candle. I added a fun flair to a partially used candle as well. Yay for upcycling.
If you've got more buttons to upcycle, you can also try making this Heart-Shaped Brooch. Or give "button painting" a try, it's so much fun.
Easy DIY Decorated Candle with Buttons
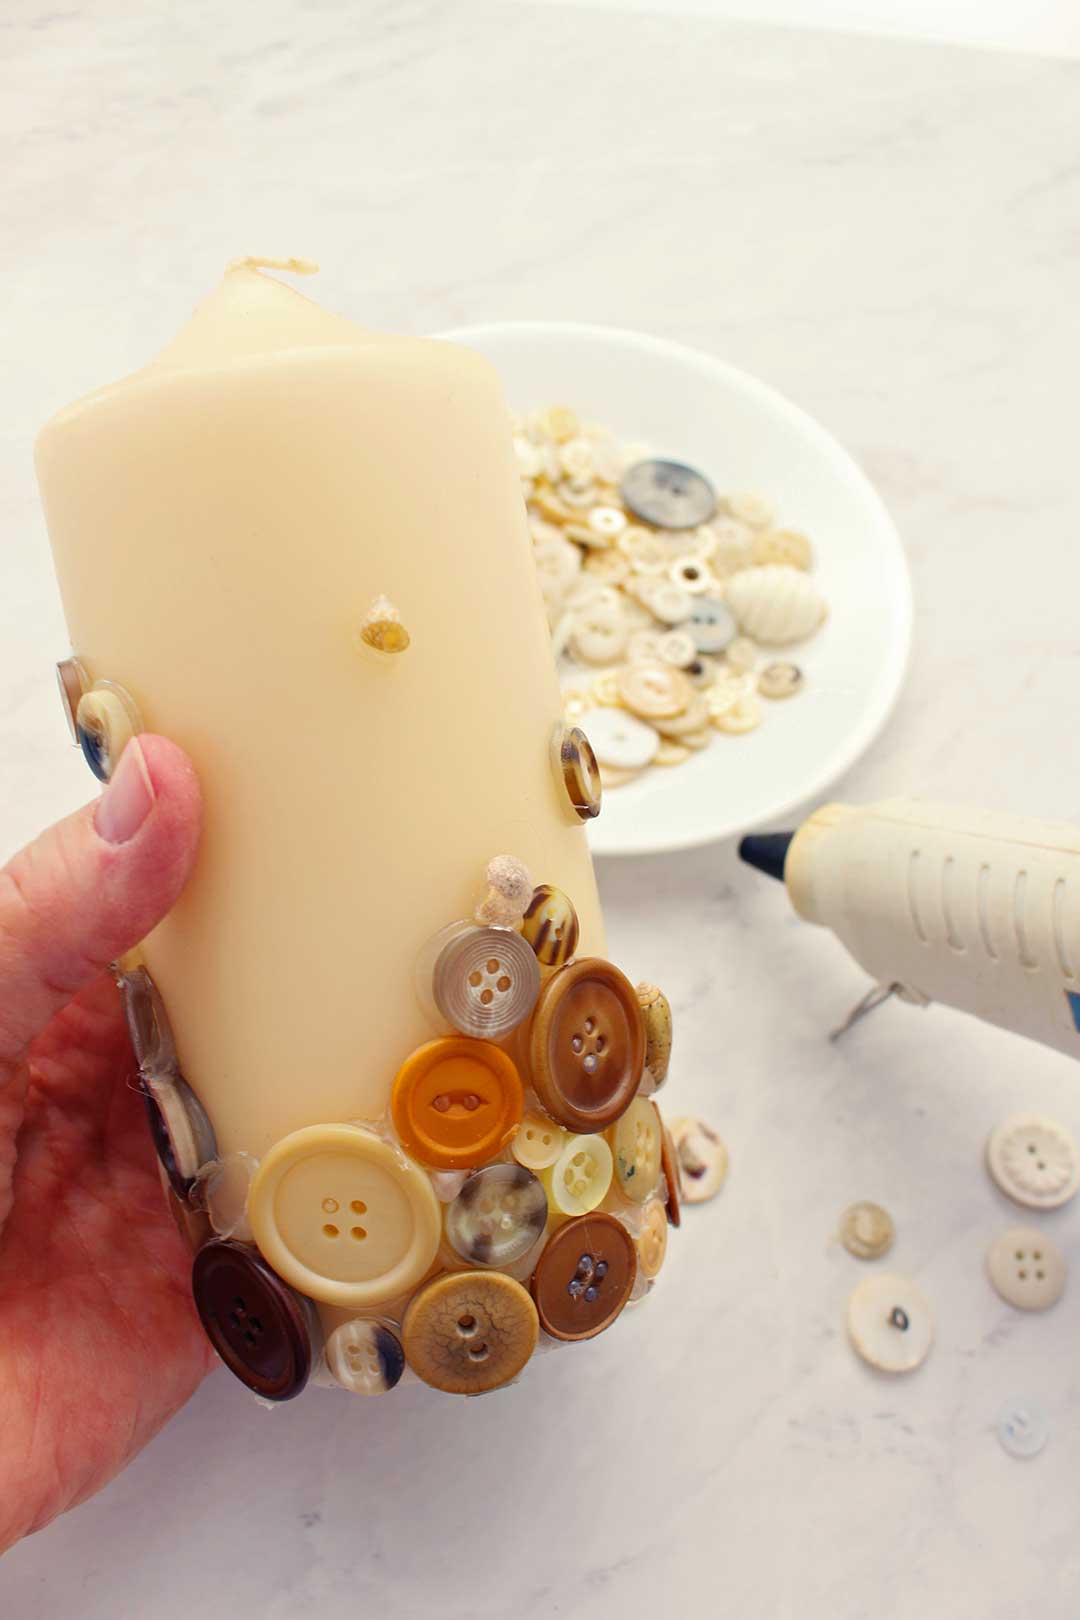
The first DIY Decorating Candles with Buttons option is simply gluing the buttons directly onto the candle.
The pictures show that I used a hot glue gun for attaching the buttons. If you have a glue gun with variable temperatures it would be nice to have the lower temperature option. I have been told that a tacky glue will work but have not tried that myself.
Give a bit of thought to what kind of design or pattern you may want for your candle and then jump in. This is such an easy and fast craft.
Gluing buttons on a pillar candle
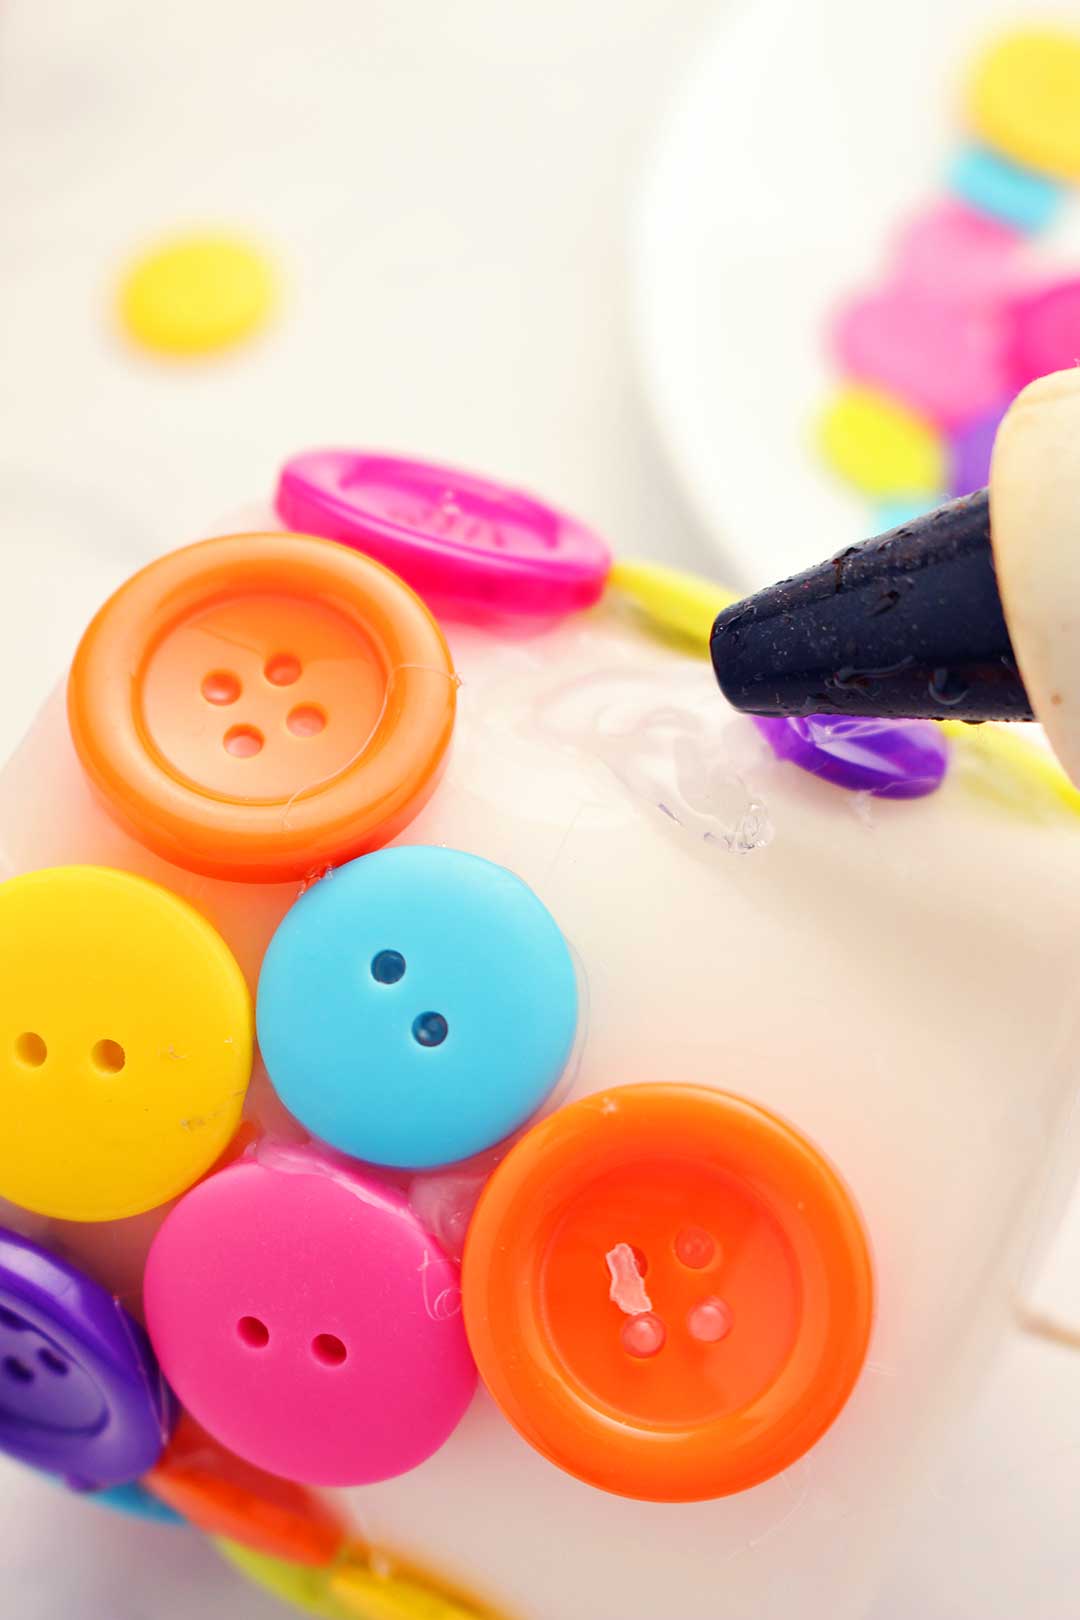
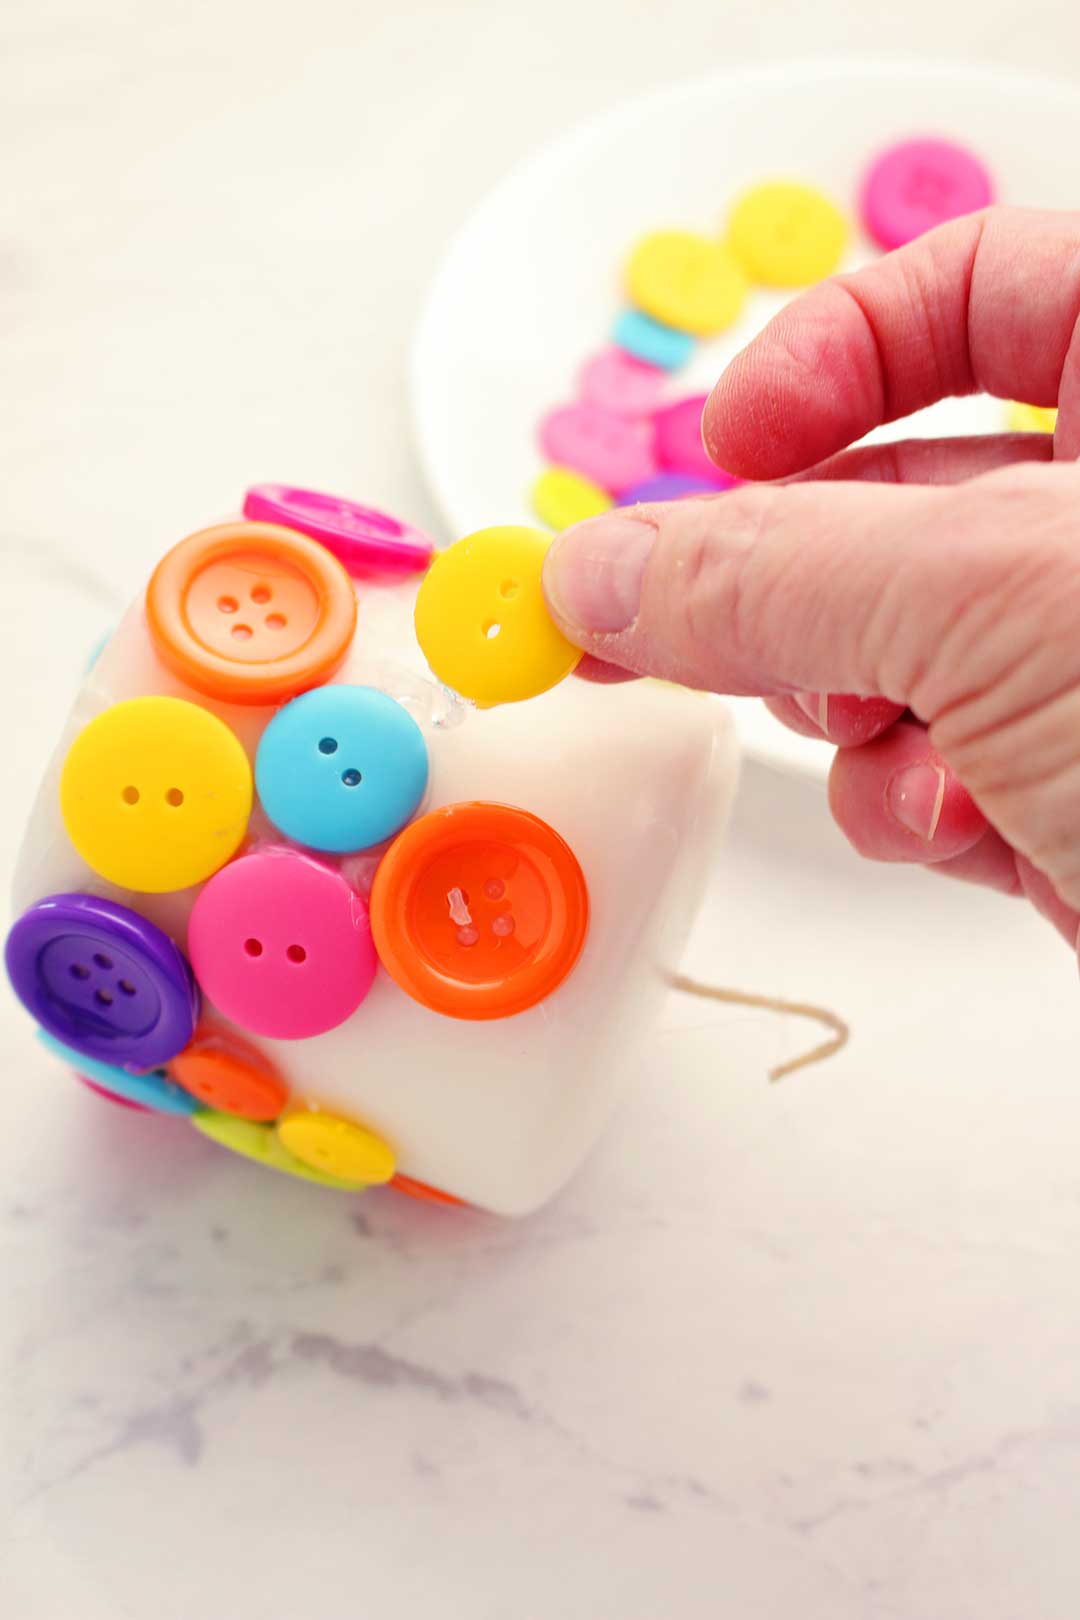
When using hot glue, place the candle on its’ side and place a small dab of glue on the surface of the candle where you want to place a button. Let the glue sit and balance for a second so it is stickier and stays in place on the candle. Then drop the button onto the glue. It will set up quickly.
Continue doing this until you have the candle covered as much as you would like.
The big colorful buttons on a small pillar candle made the project go together quickly. It is so cheerful and bright!
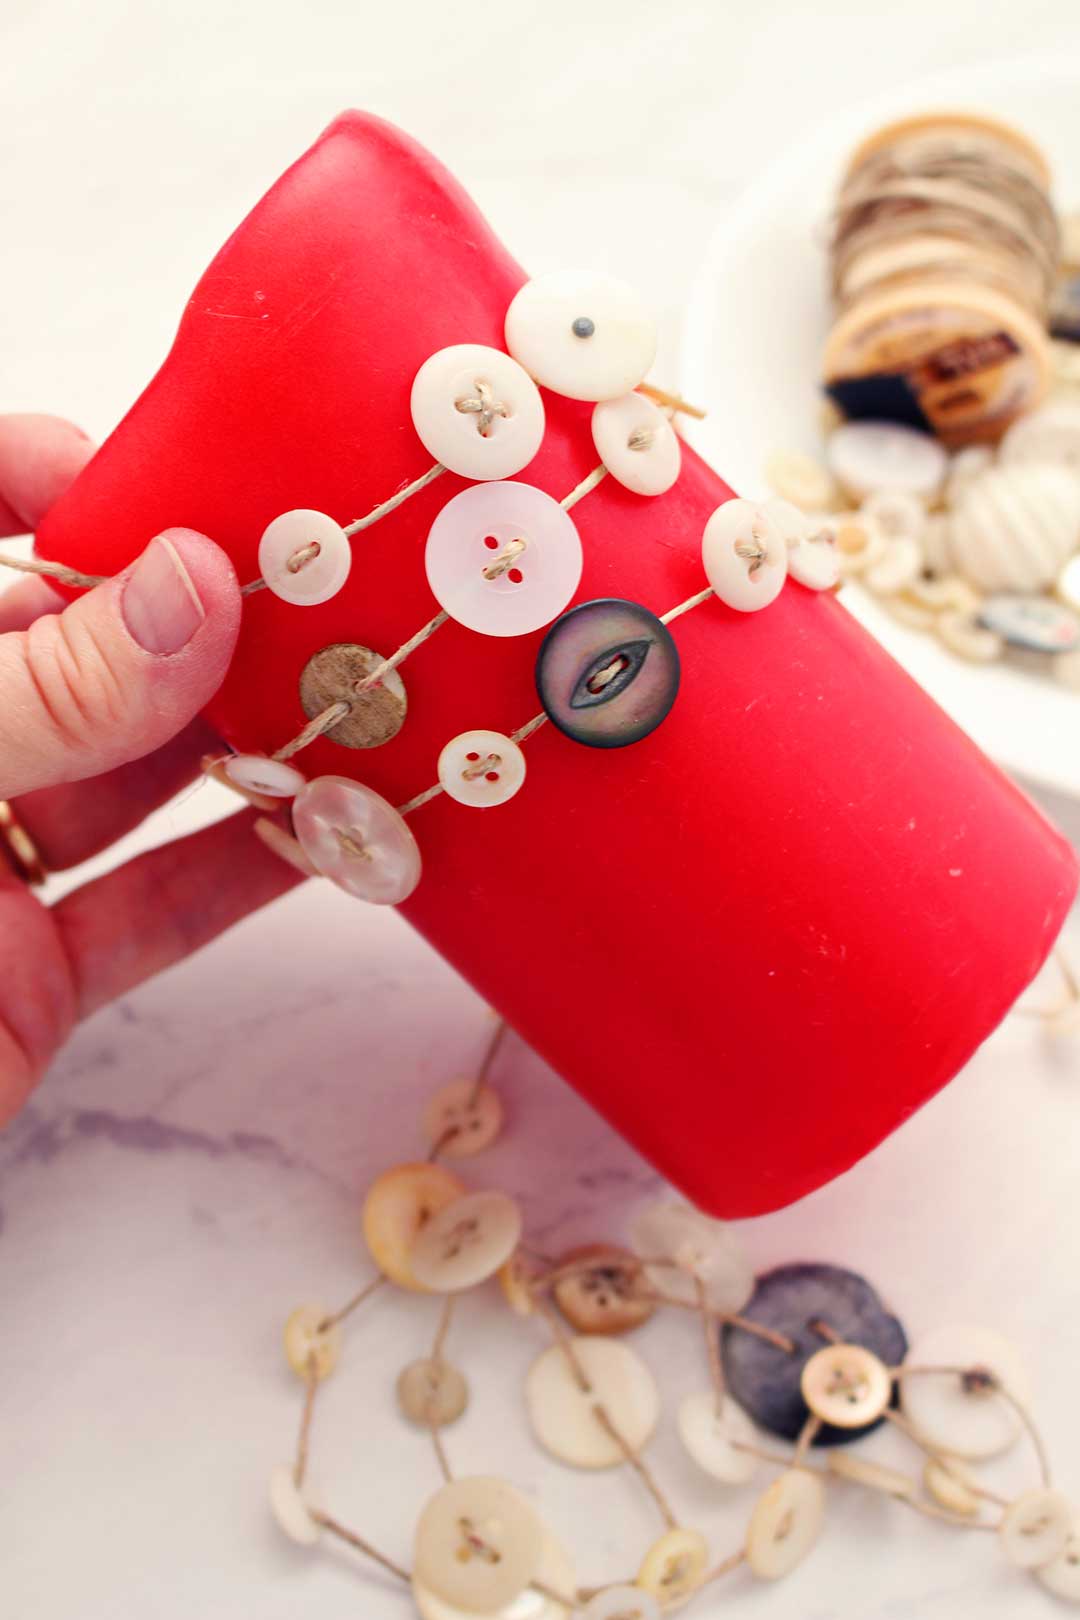
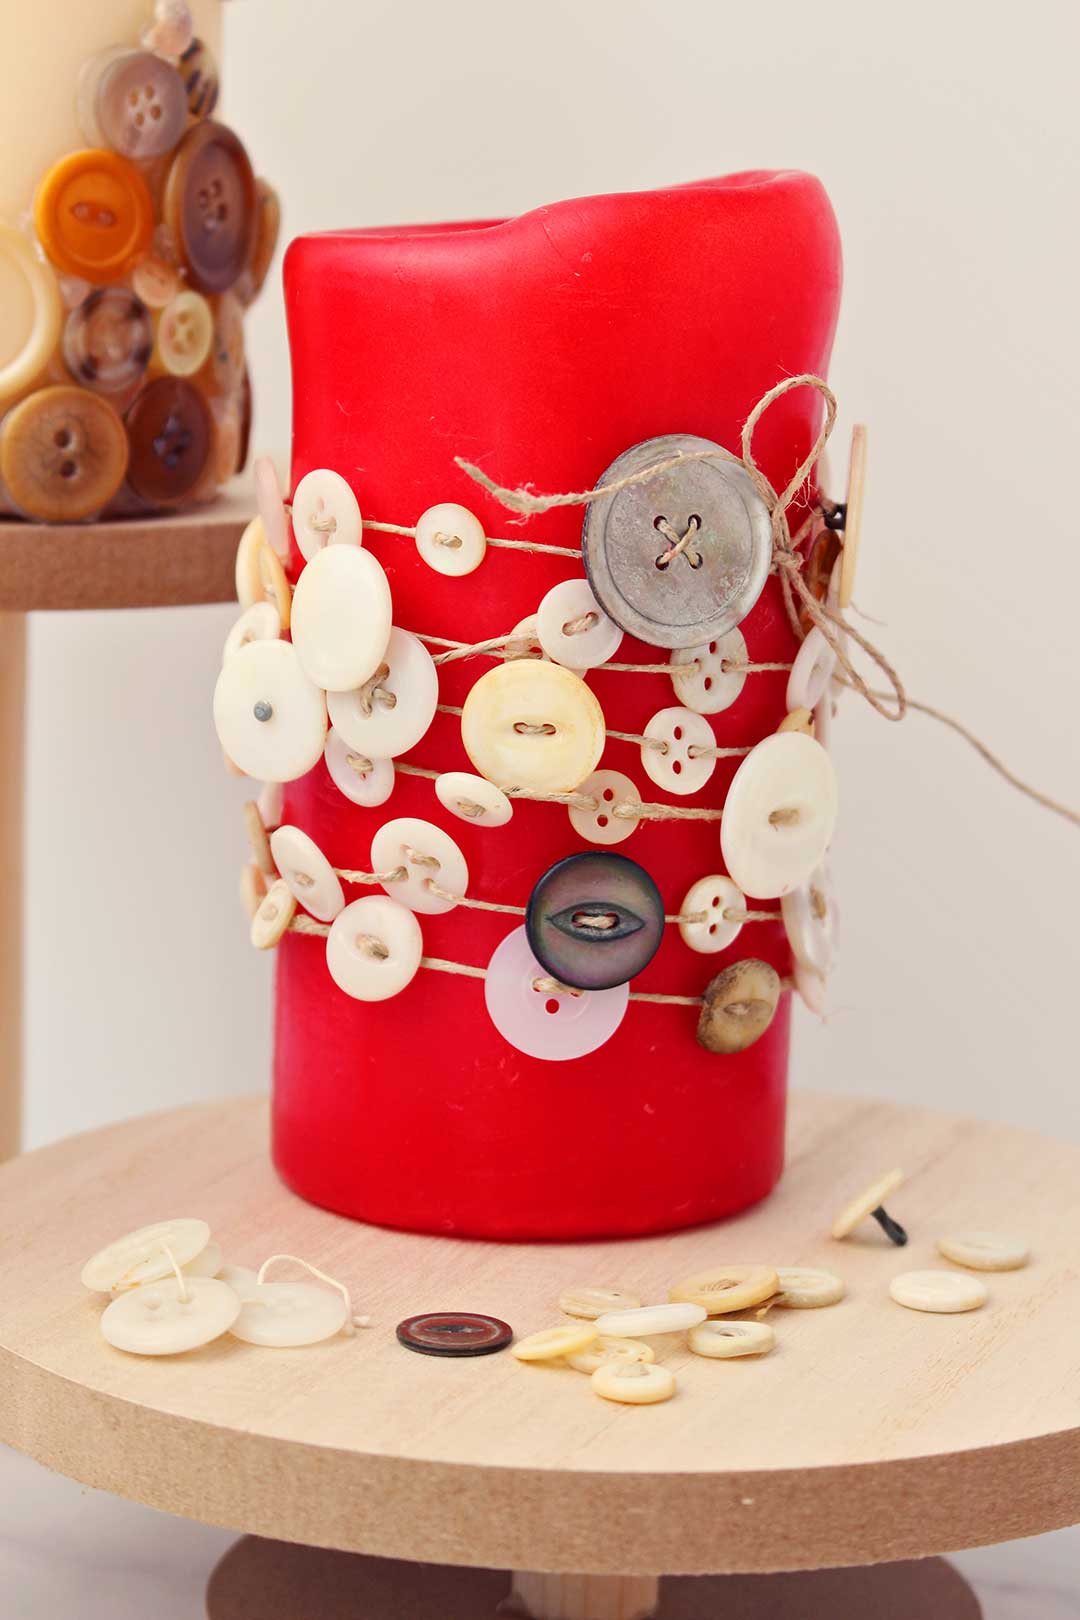
Wrapping a candle in a button strung garland
The second DIY Decorating a Candle with Buttons design uses buttons strung on thin twine or a heavy thread.
I just love how this turned out. It takes a bit more patience and dexterity to string the buttons but is still a pretty quick project.
Wrap the thread or twine around your pillar candle about 10-12 times for length and then cut the thread.
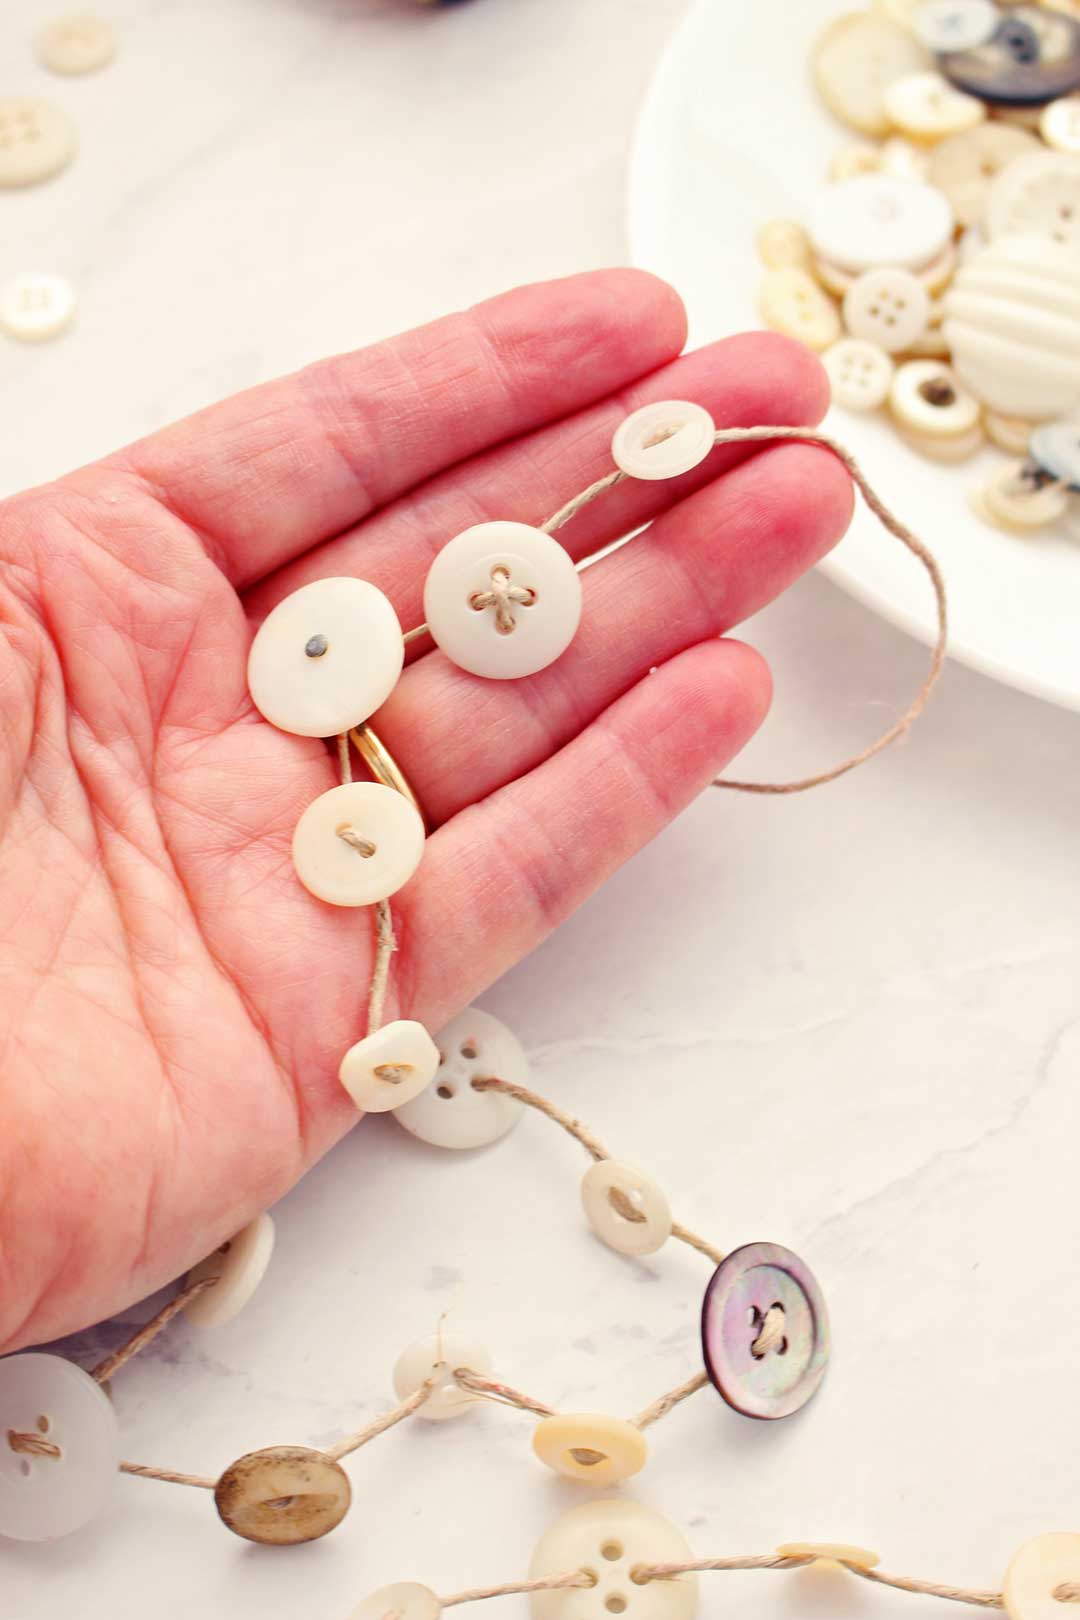
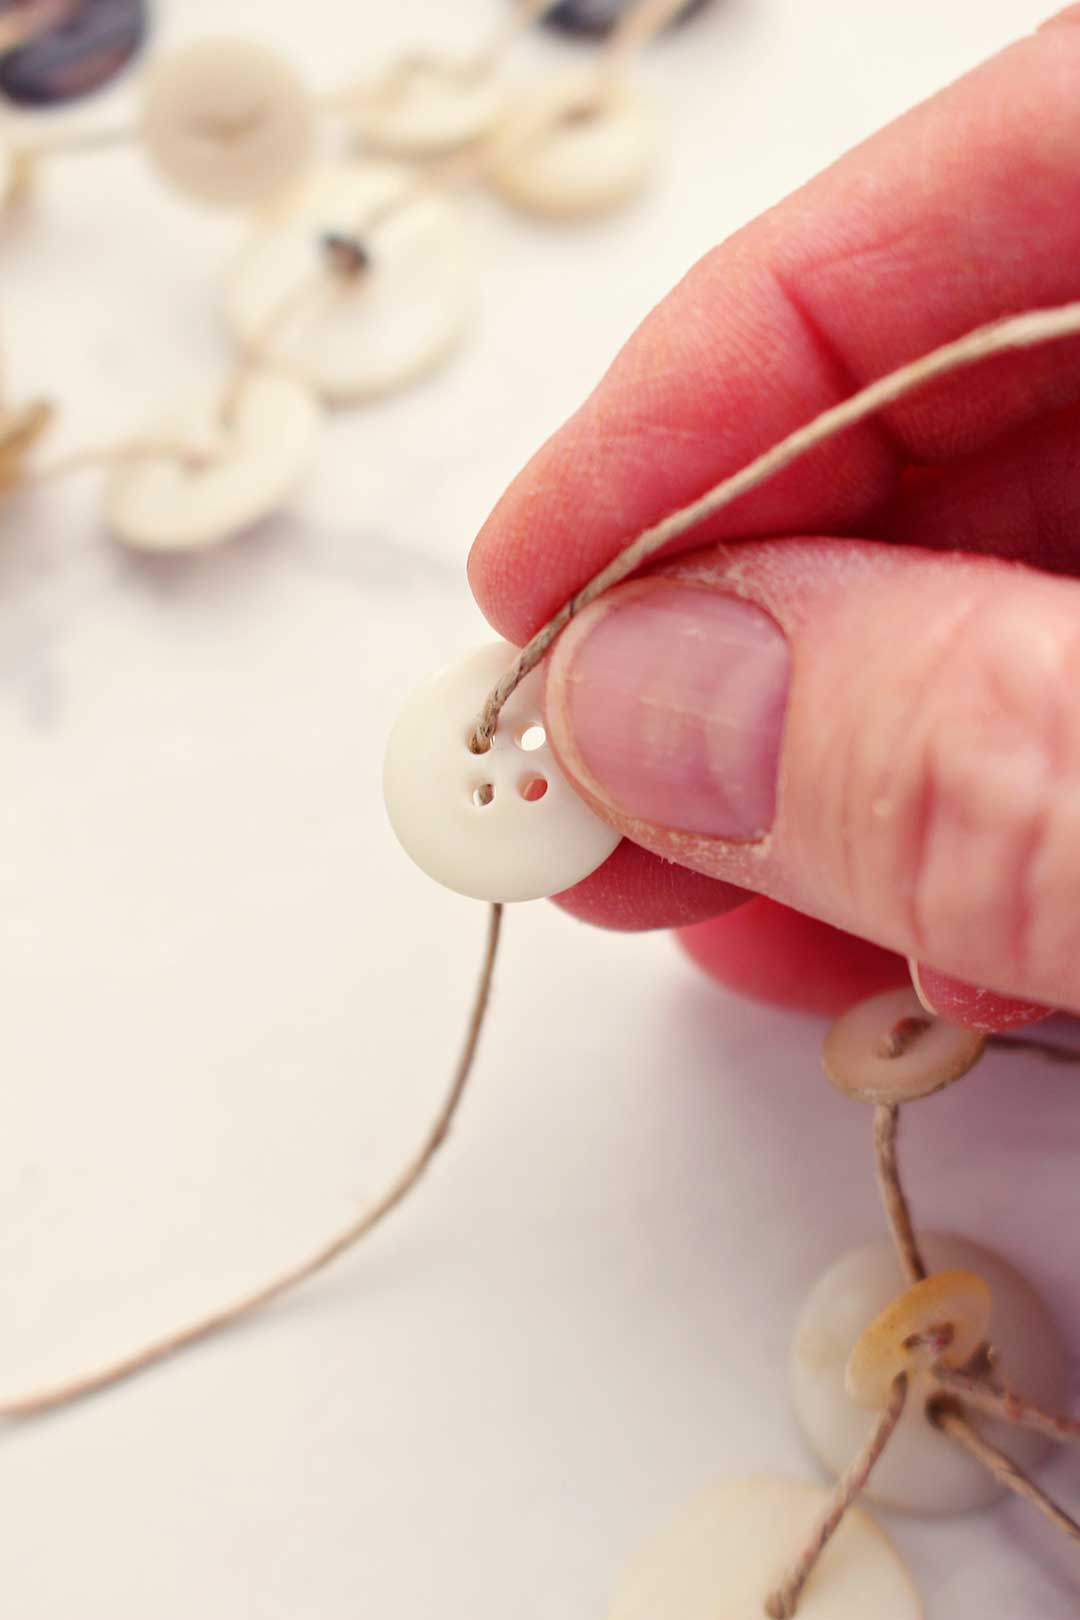
String the buttons onto the garland
Begin stringing the buttons onto the thread pulling the thread up and through at least two holes to keep it in place on the string. Tie a knot on some buttons to keep them in place and just for fun. The buttons should have about a ½-inch space between them. Leave about 5 inches on each end of the string.
Tip: It may help to twist the end of the twine with a bit of glue and let it dry so that it doesn’t fray and is easy to push through the buttonholes. There were some buttons where the holes were just too small for the twine to go through.
Start winding the button garland around the candle over and over until the side of the candle is filled.
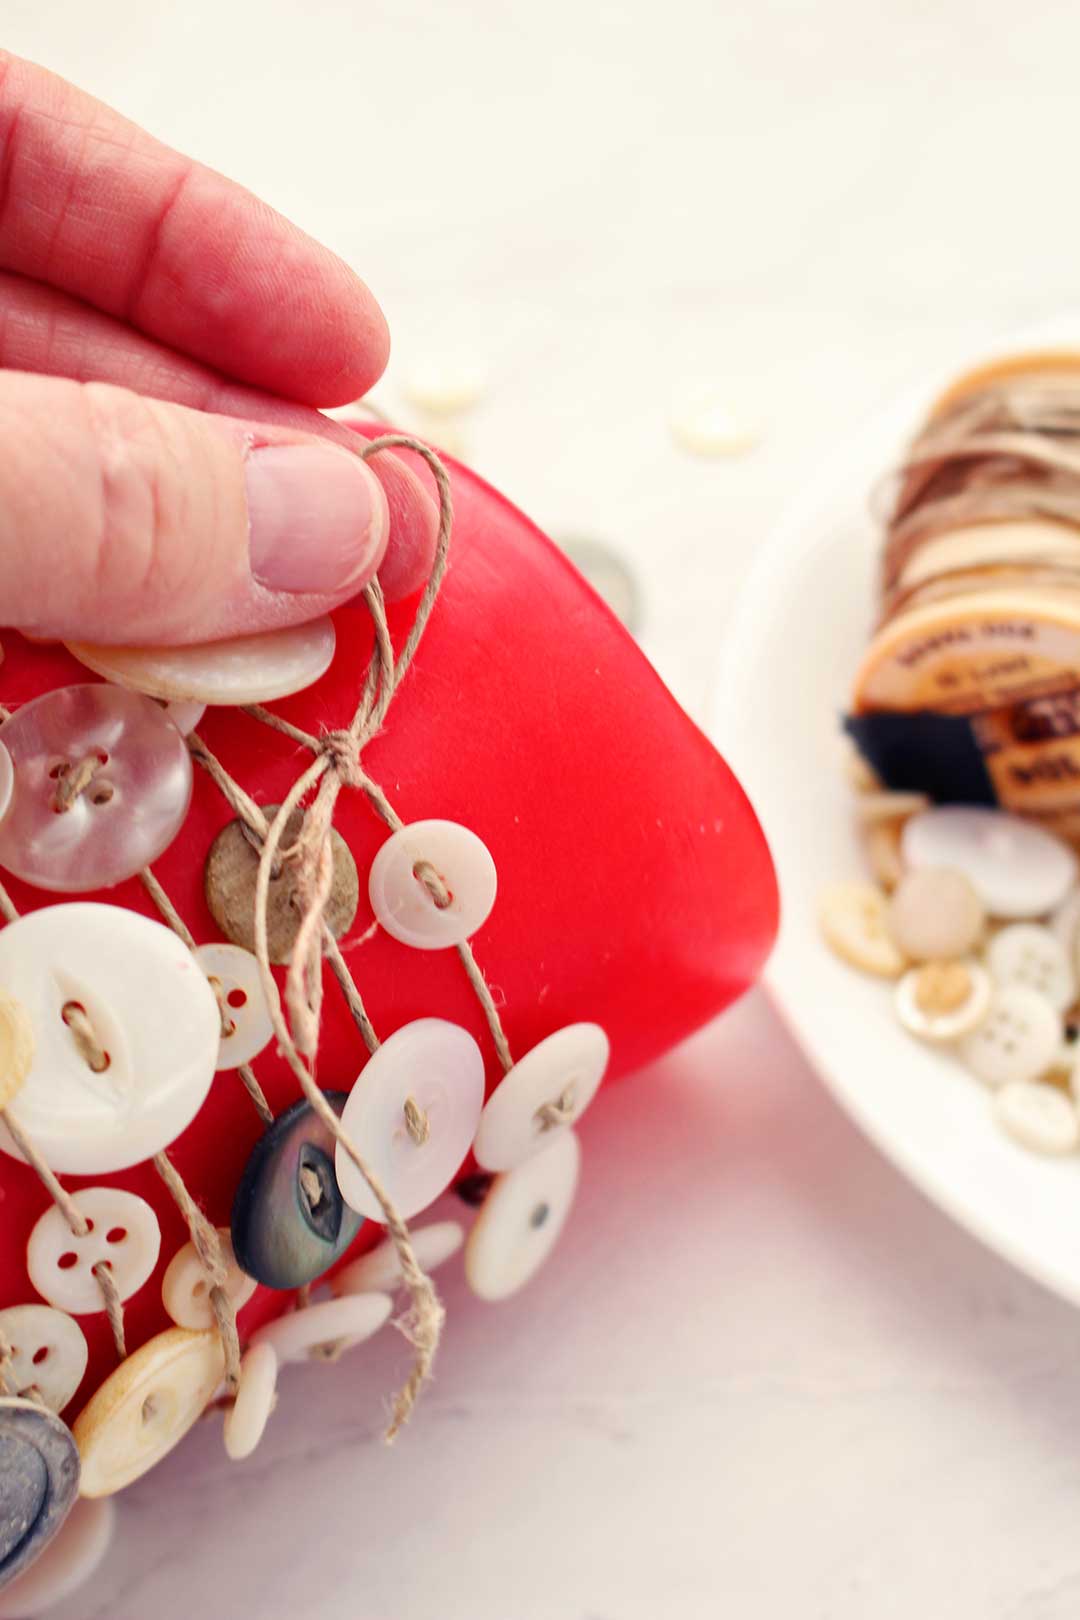
Bring the two ends together and tie them in a bow.
Oh, this looks so nice!!
Christmas Candle Decorations
I plan to use this one for Christmas.
Doesn’t your mind just start thinking of all kinds of other ways to use buttons?
If you would like other button projects, check out:
Enjoy!
If you try this craft, let me know! Go ahead and leave a comment, rate it, and tag a photo with #WelcometoNanas wherever you post.
Come join the fun at https://welcometonanas.com
DIY Decorating Candles with Buttons
Equipment
- Hot glue gun and glue
- Scissors
Items Required
- Pillar Candle- short or tall
- Buttons- ivory or colored
- Thin twine or heavy thread
Instructions
- 1 First version: Gluing buttons on a pillar candle
- Ponder the pattern and colors of buttons (and bling) you would like on your candle.
- Place the candle on its’ side and place a small dab of glue on the surface of the candle where you want to place a button. Let the glue sit and balance for a second so it is stickier and stays in place on the candle. Then drop the button onto the glue. It will set up quickly. Continue doing this until you have the candle covered as much as you would like.
- Continue doing this until you have the candle covered as much as you would like.
- 2 Second version: Wrapping a candle in a button strung garland
- Wrap the thread or twine around your pillar candle about 10-12 times for length and then cut the thread.
- Begin stringing the buttons onto the thread pulling the thread up and through at least two holes to keep it in place on the string. Tie a knot on some buttons to keep them in place and just for fun. The buttons should have about a ½-inch space between them. Leave about 5 inches on each end of the string.
- Start winding the button garland around the candle over and over until the side of the candle is filled.
- Bring the two ends together and tie them in a bow.


Erica says
This is such a cute idea!