Making paper snowflakes is magical, don’t you think? Well now it’s also made super easy with my step-by-step tutorial, and free printable patterns!
My grandkids, kids and I have made hundreds (if not thousands) of paper snowflakes over the years so you can bet this tutorial is kid-tested and approved. Print off my free template to try some simple designs for beginners, or create your own patterns for unending unique paper snowflakes!
Easy Paper Snowflake Pattern Template
This Amazing Free & Easy Paper Snowflake Pattern Template shows you how to create beautiful cut out snowflakes. This is a perfect winter activity and the free printable templates makes it easy peasy to make a beautiful snowflake design.
In my area, January is a time when we might get snow! This morning we had a heavy frost that made beautiful patterns on the trees. We had one large snow before Christmas and may get more next week.
Snow is really amazing. They say that every snowflake is different. How can that be?
I always try to look at individual snowflakes as they land on the sleeve of my black coat. I can see their delicate shape for a few seconds before they melt.
Snowflake Bentley- 6 sided unique snowflakes
I was recently reminded about a man whose nickname was Snowflake Bentley. He took photographs of real snowflakes over 150 years ago and they show that most snowflakes have six sides and are indeed unique.
So hearing about Snowflake Bentley made me think about a pattern for a simple snowflake that I remembered making years ago. I wanted to make some and then share it with you.
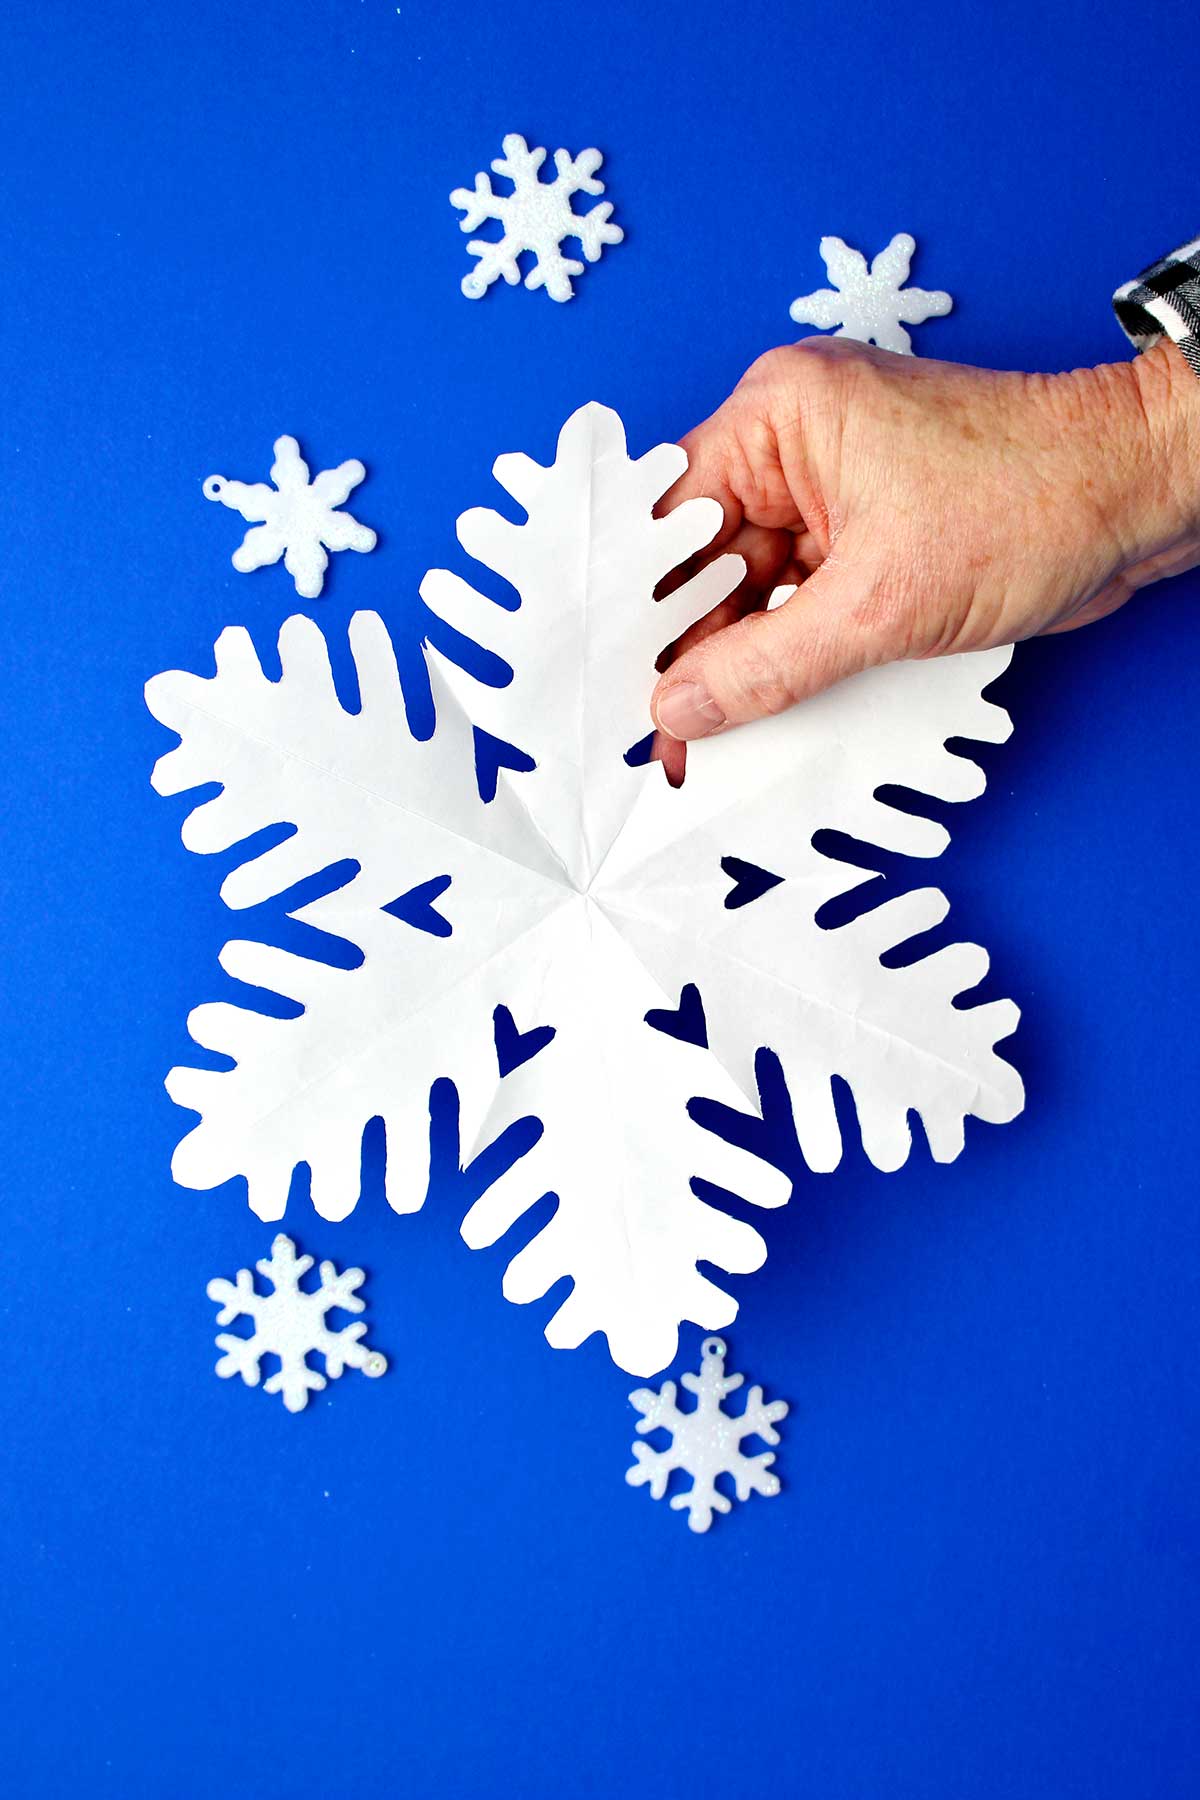
This technique folds the snowflake so that it makes a perfect snowflake with six sides, which is what Snowflake Bentley discovered that most snowflakes had.
Note: Making snowflakes using this template would make a great educational activity along with a study on snow, snowflakes or on fractions! There are books and links below to help you with this!
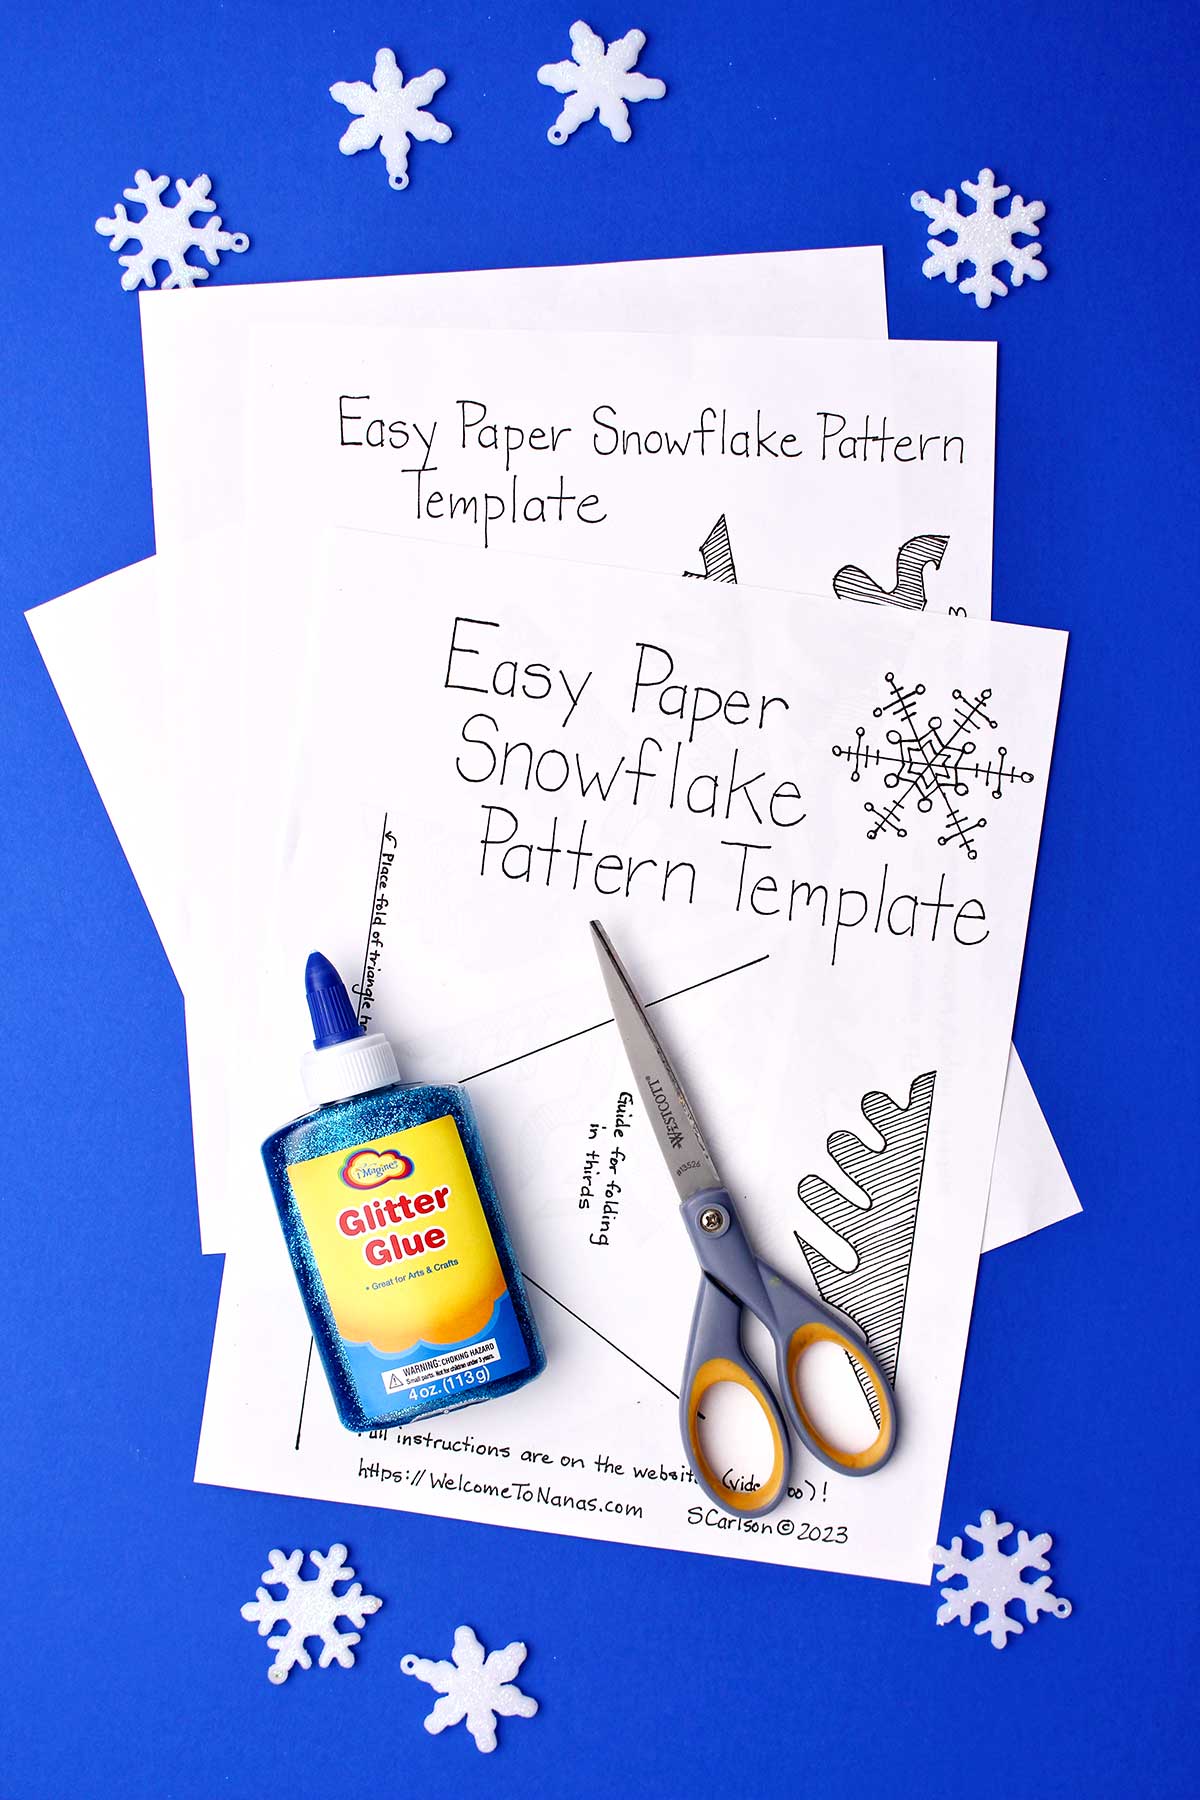
Supplies for Paper Snowflakes
- Copy of the Free Easy Paper Snowflake Pattern Template
- Paper- white printer paper or paper of your choice
- Scissors
- Pencil
1. Free printable Paper Snowflake Templates
I’ve created an easy paper snowflake pattern template for you to use to make this a fun activity with easy steps. It will help you to fold your paper into thirds and then sixths like you’re going to need. Plus it provides designs to draw on them that will cut a really cool snowflake.
There are 8 patterns that are all unique so each snowflake you make using each template will be a little different. They are so very beautiful!
So download the free pdf files and print off a copy of this pattern template for the snowflakes on white printer paper. It is found at this link: Amazing Free & Easy Paper Snowflake Pattern Template.
What’s also cool about this easy craft? It’s that besides this free and easy paper snowflake pattern template all you need is a simple sheet of paper! Well, I guess a pair of scissors and a pencil are necessary too!
2. How to Make Paper Snowflakes
Let’s get started by cutting out the small pattern template on the first page. That’s probably the easiest design that I created. It is a more simple design with curves that are easier to cut out for your first try.
Cut the template out on the heavy black outer line. Be sure to save the rest of the paper because you’re going to use that to help you fold the paper in the right shape.
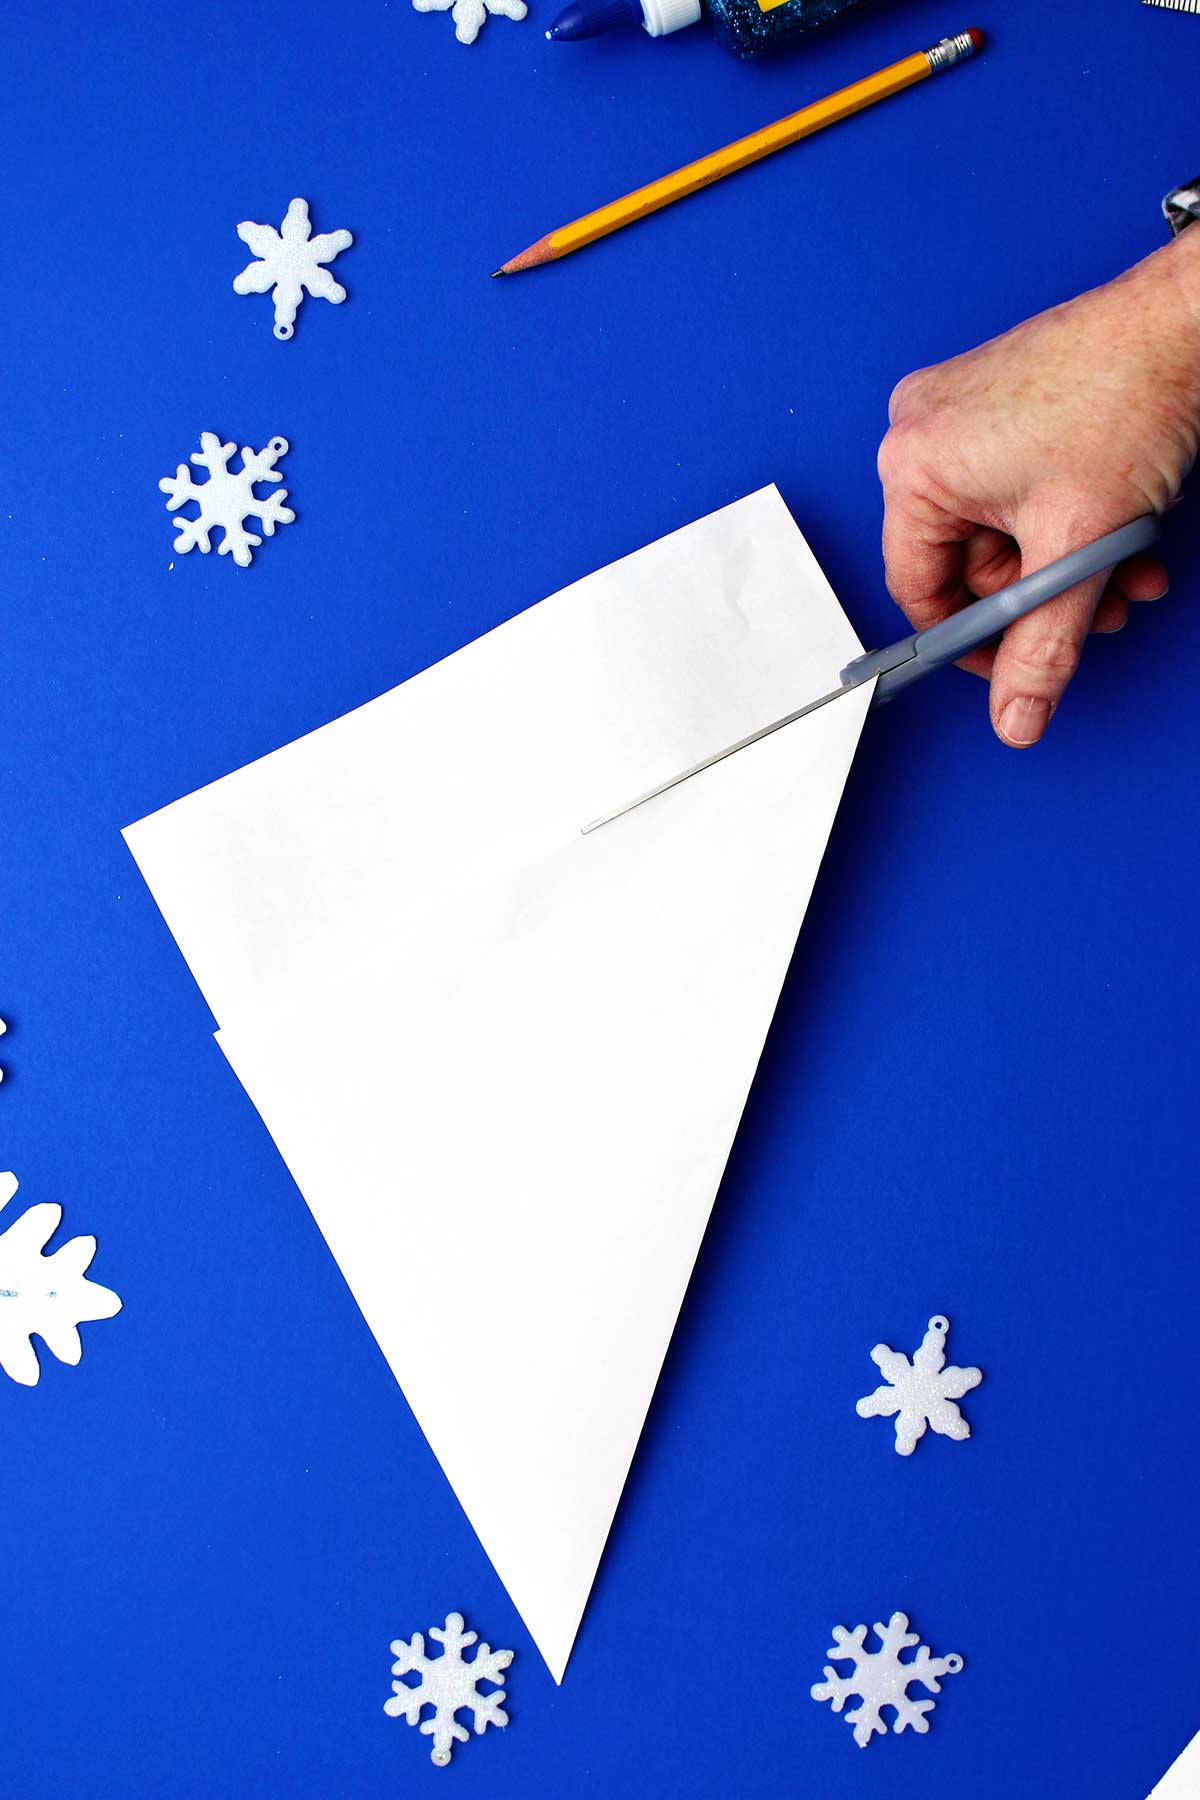
Grab your piece of white paper and let's cut it into a square piece of paper.
Fold one corner of the paper up and fold it so that it is even on the sides, creating a large triangle. Be as accurate as you can with your fold.
Then cut off the excess paper on the end- leaving just the folded triangle shape. I’m sure you’ve done this before! Boom- close to a perfect square!
3. How to Fold Paper Snowflakes
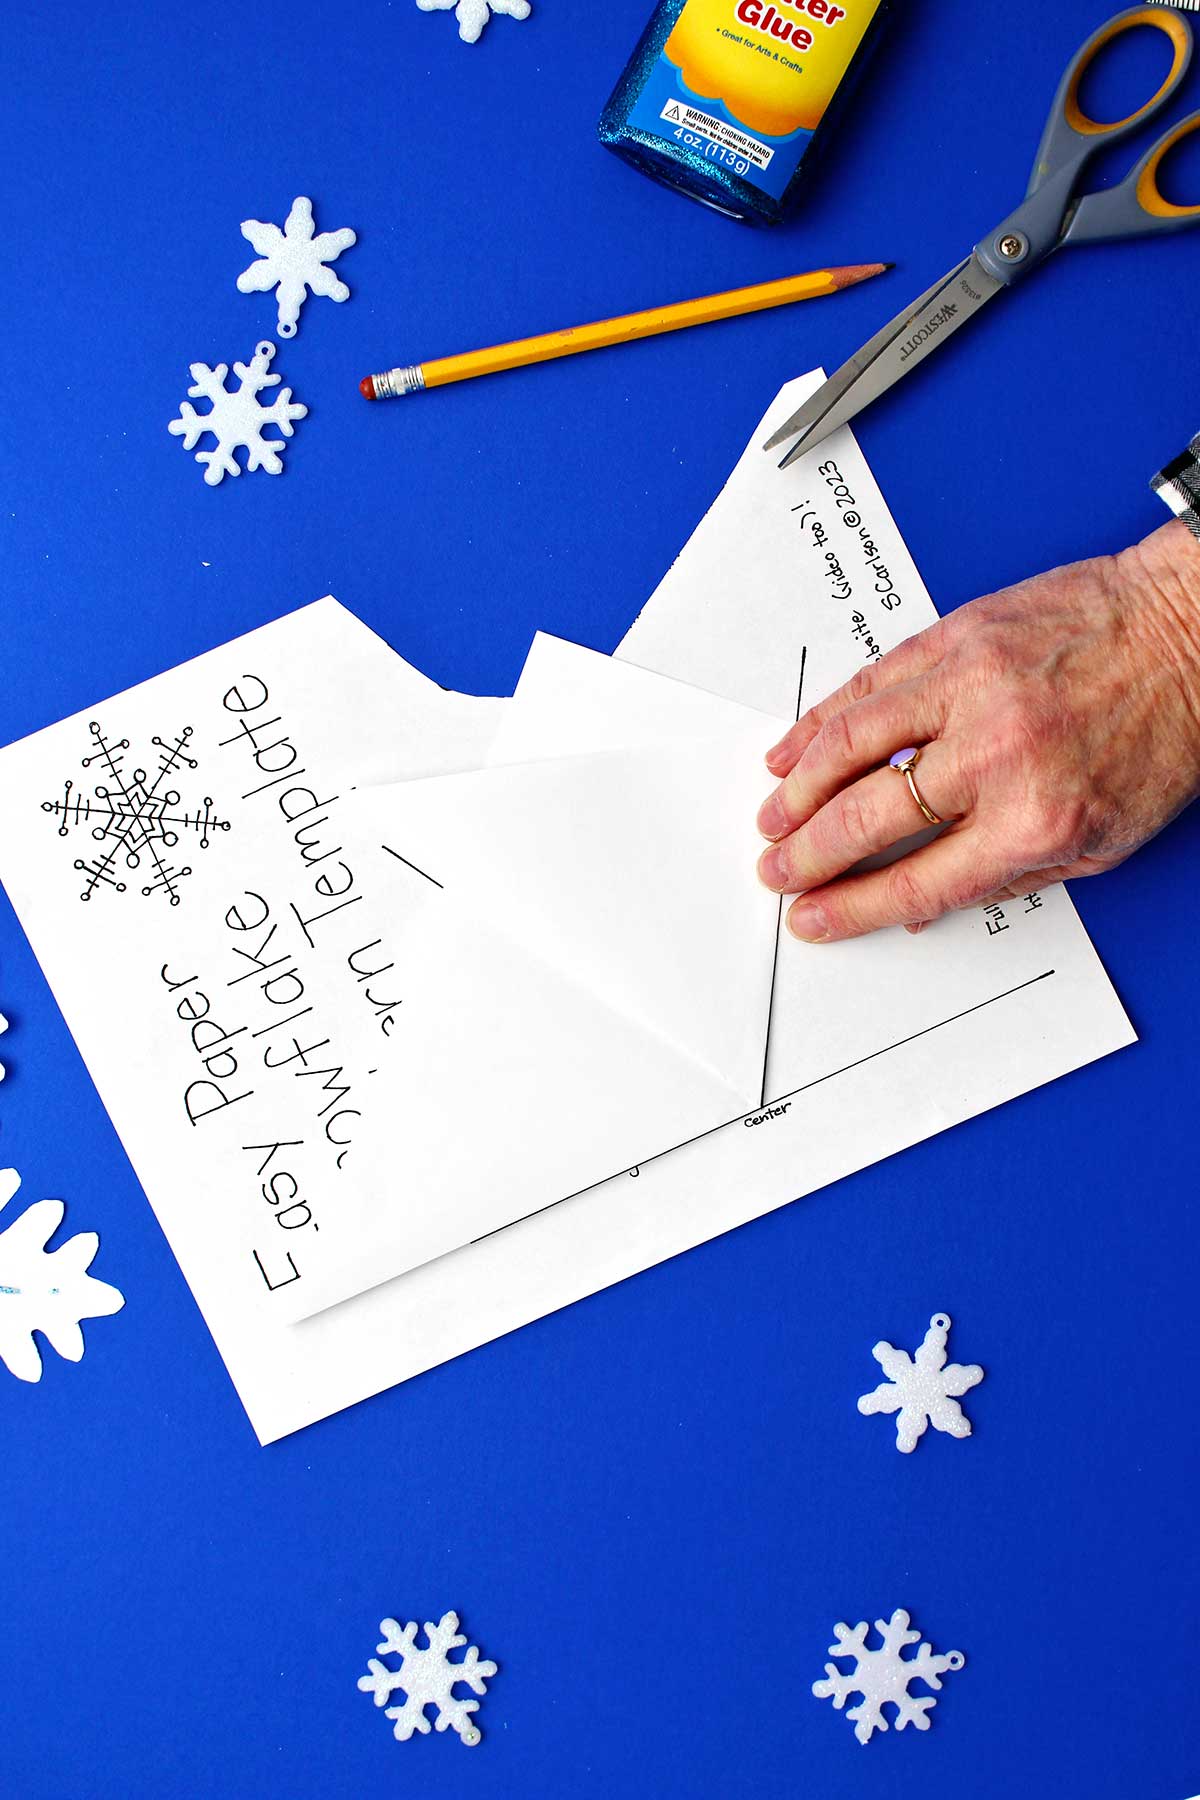
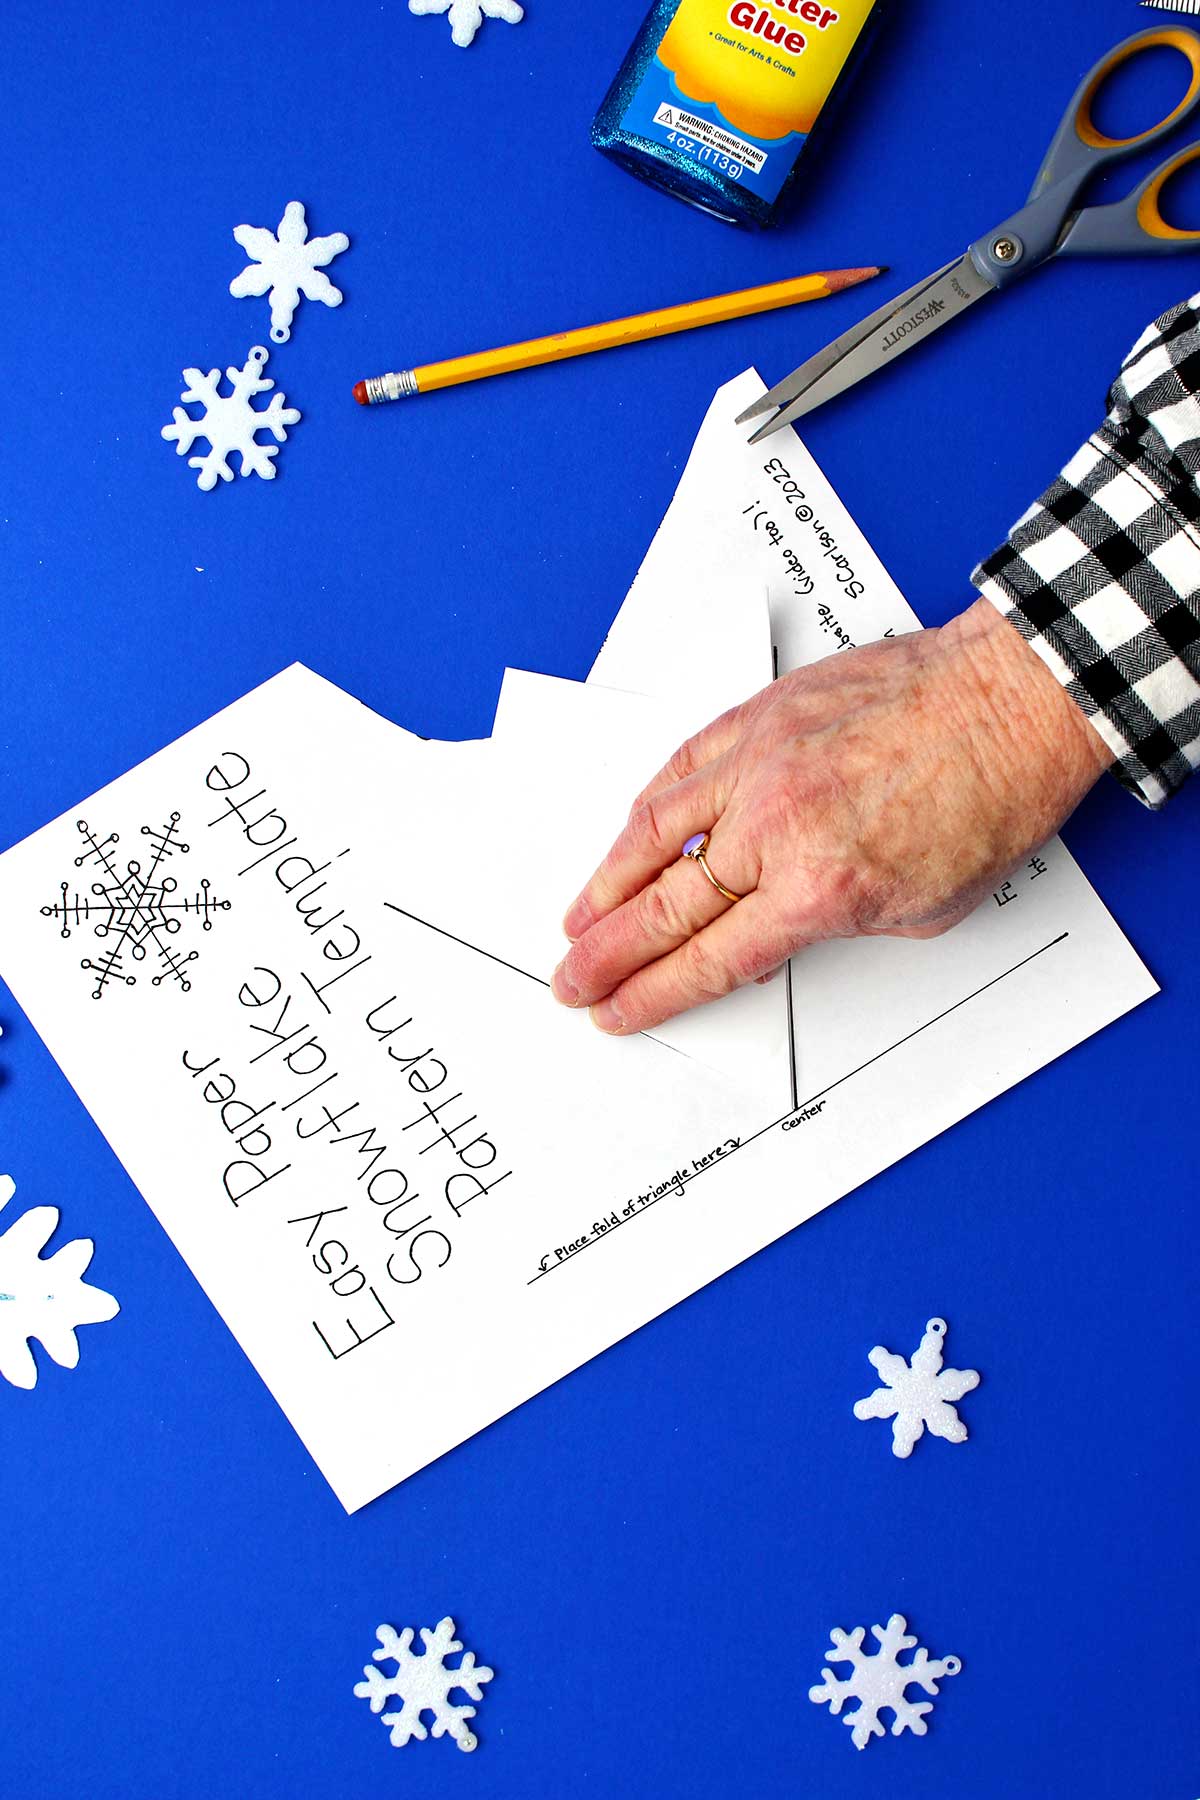
Leave the shape in a triangle and then fold the triangle in half so you can find the center of the long-folded edge. If you want to, you can mark that center point of the folded edge with a small little dot with a pencil. Reopen the paper into the large triangle.
Then take your folded triangle and place it on that first page of your template. There’s a long line that says “Place fold of triangle here” with a small dot where the center of the fold should be.
Once you have that lined up you’re going to take one corner of the triangle that’s along the line and fold it up so that the fold matches up with the black Diagonal line. Then crease it well.
Then take up the other corner of the triangle that’s along the line and fold it up so that the fold matches up with the other black diagonal line.
This has now folded your large paper triangle into a new shape with three equal sections.
You can now set the first page of the template to the side and just work with your folded piece of paper.
Note: I have a full length video tutorial on YouTube. This step-by-step tutorial may be an easy way to follow these directions, especially the first time. Click on this link: Easy Paper Snowflake Pattern Template Full Length Tutorial YouTube Video.
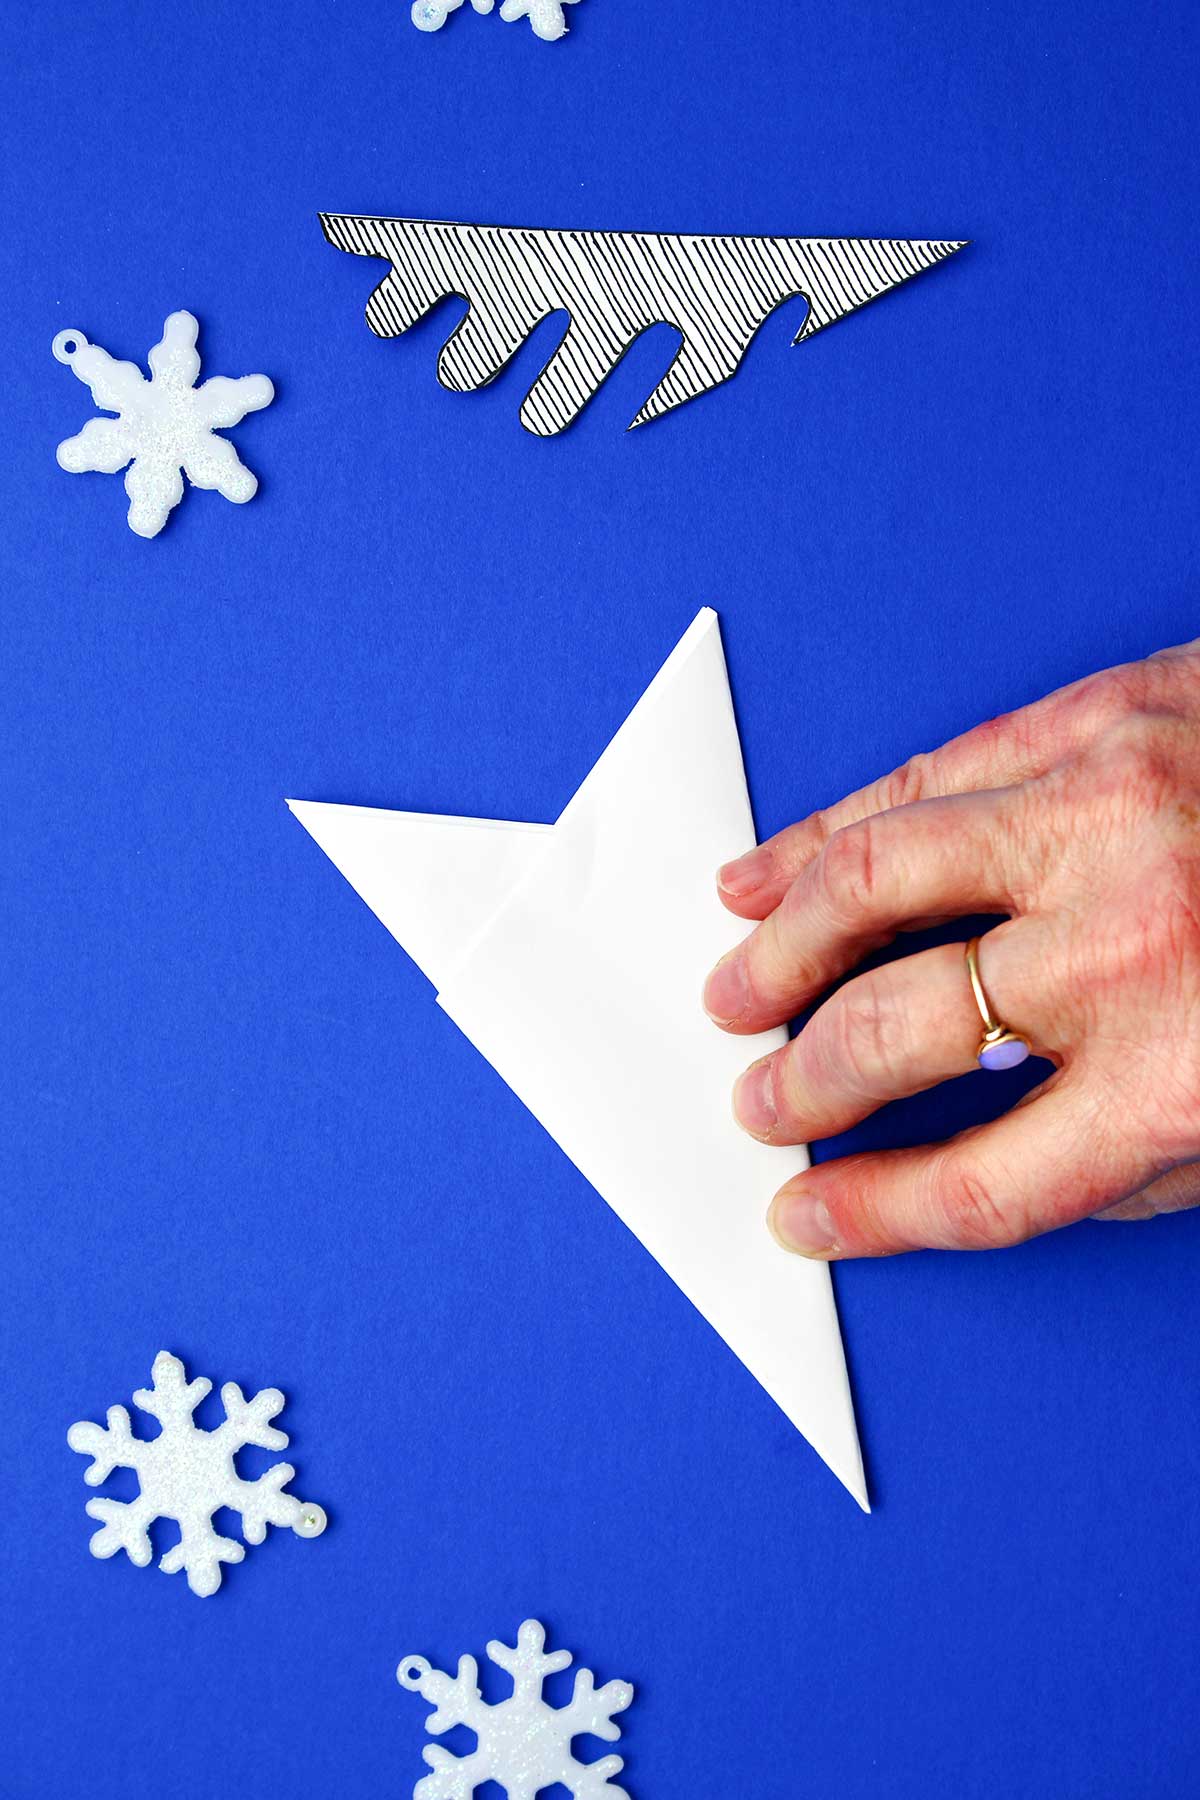
You’re going to take that folded piece and now fold it in half so that will make it go from 3 to 6 equal parts. It really helps to follow along with the pictures or the video to visualize what I’m talking about.
4. How to Draw Snowflake Patterns
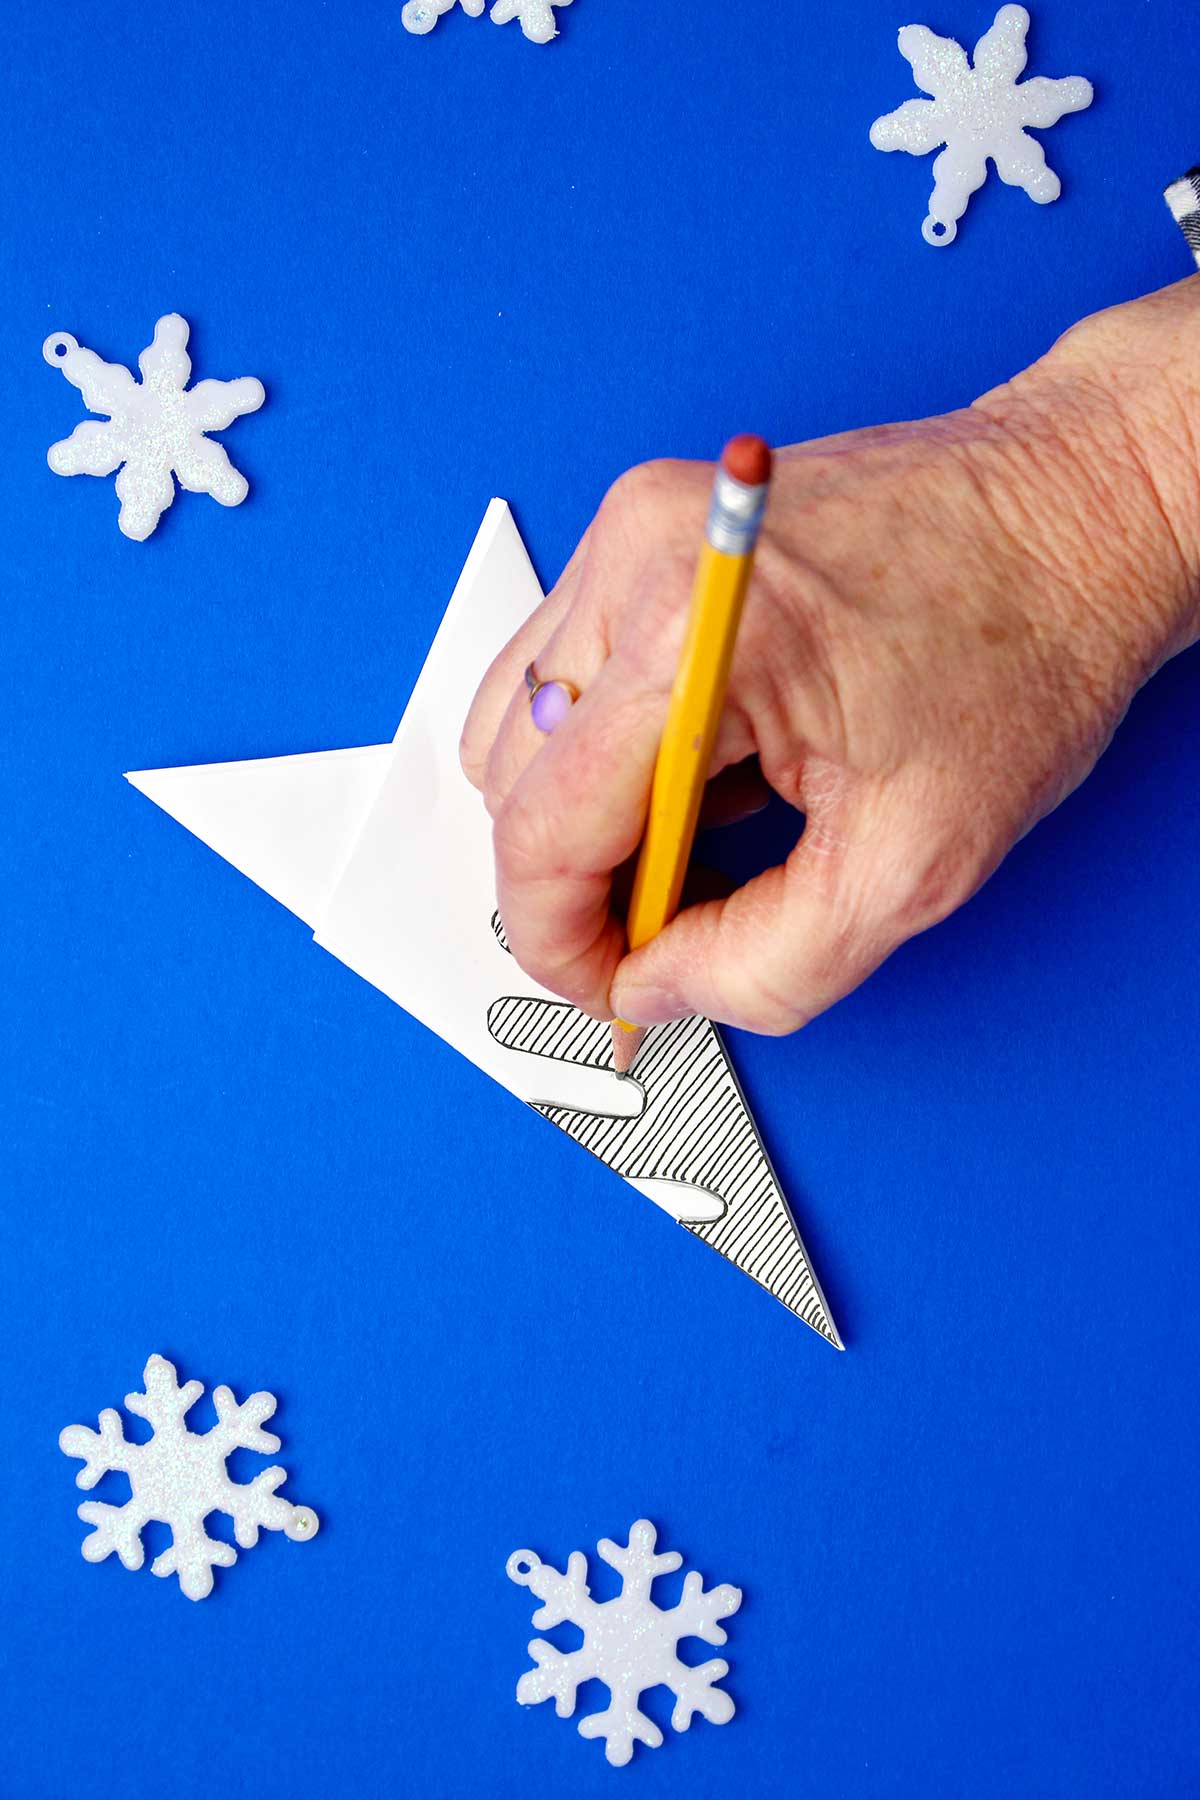
Now take the template that you cut out earlier and lay it on top of your folded piece of paper (striped or gray areas up). The very sharp point of the template fits down into the sharp point of the folded paper.
Take a pencil and draw the pattern onto your folded white piece of paper. You have to hold the pattern template so it doesn’t move around of course.
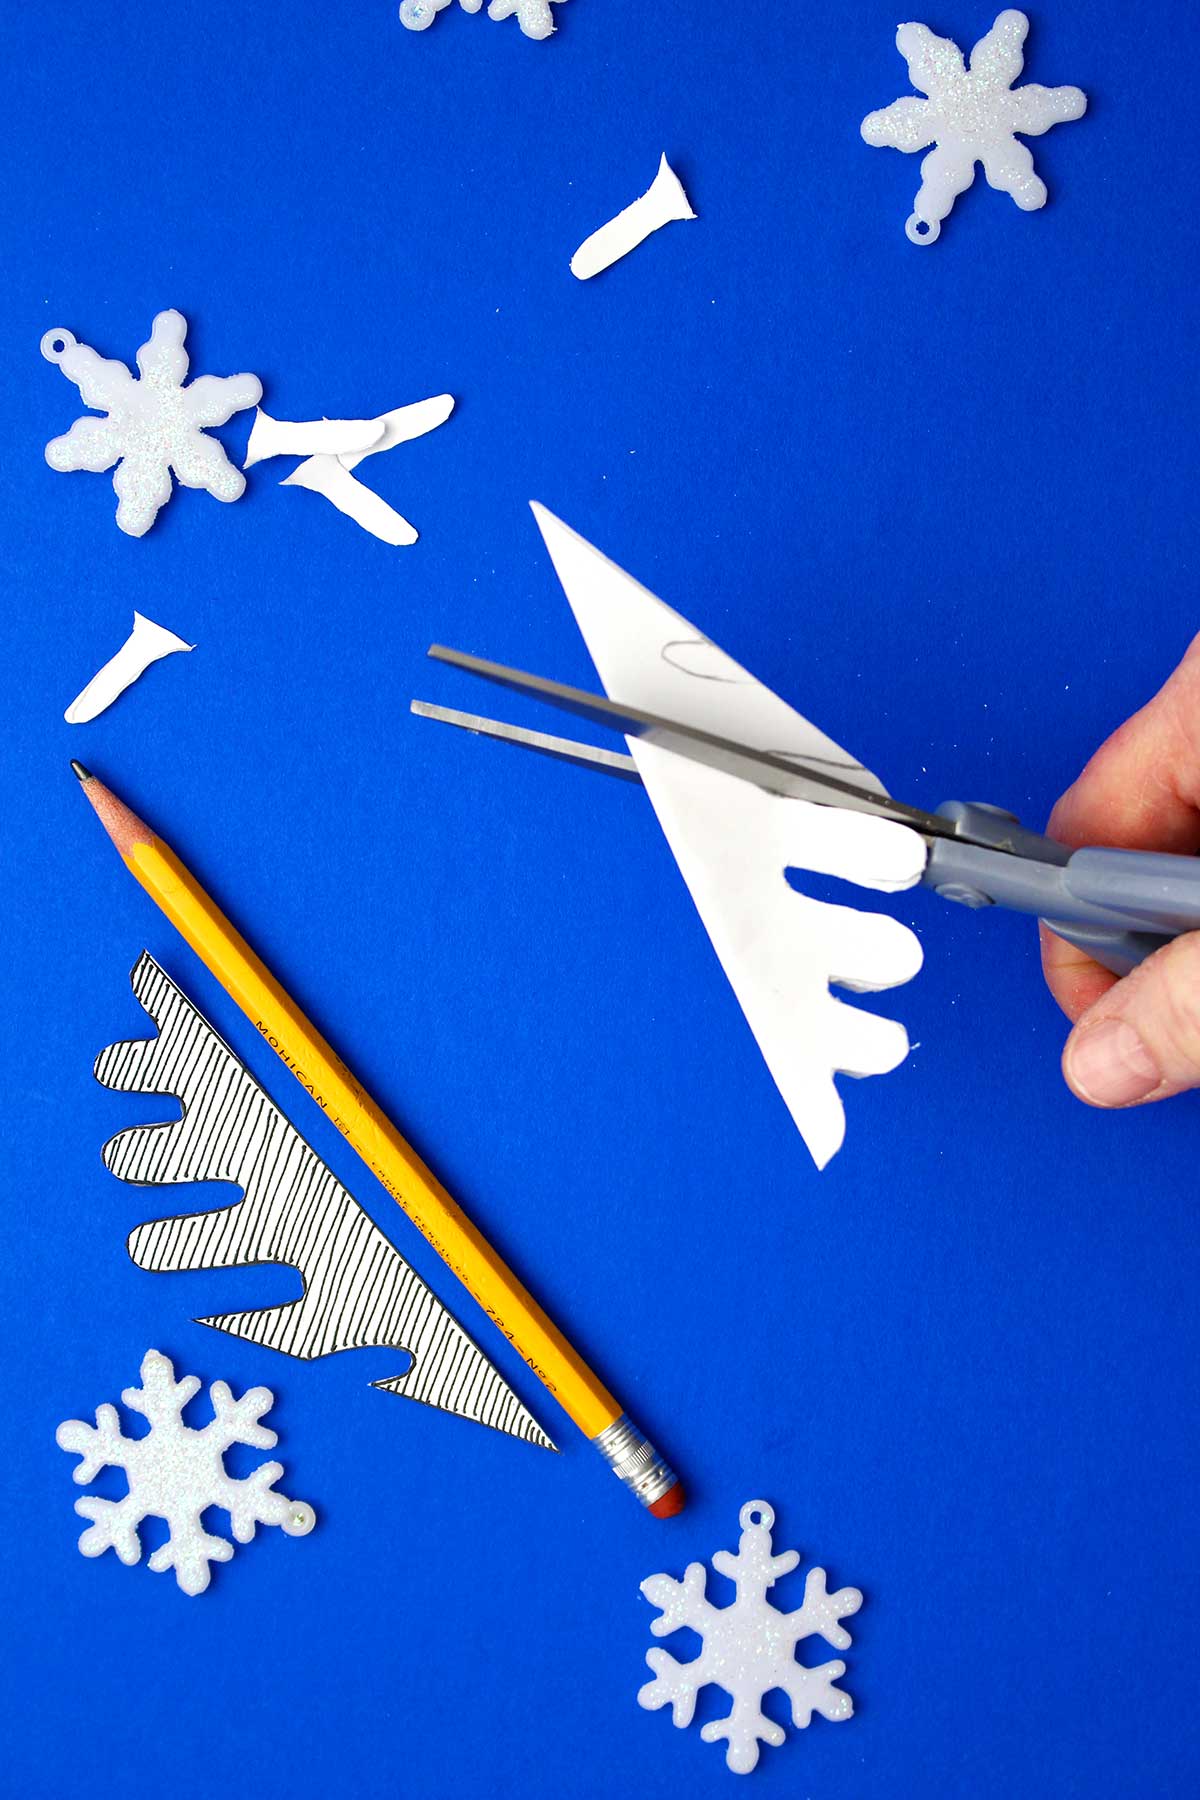
5. How to Cut out Paper Snowflakes
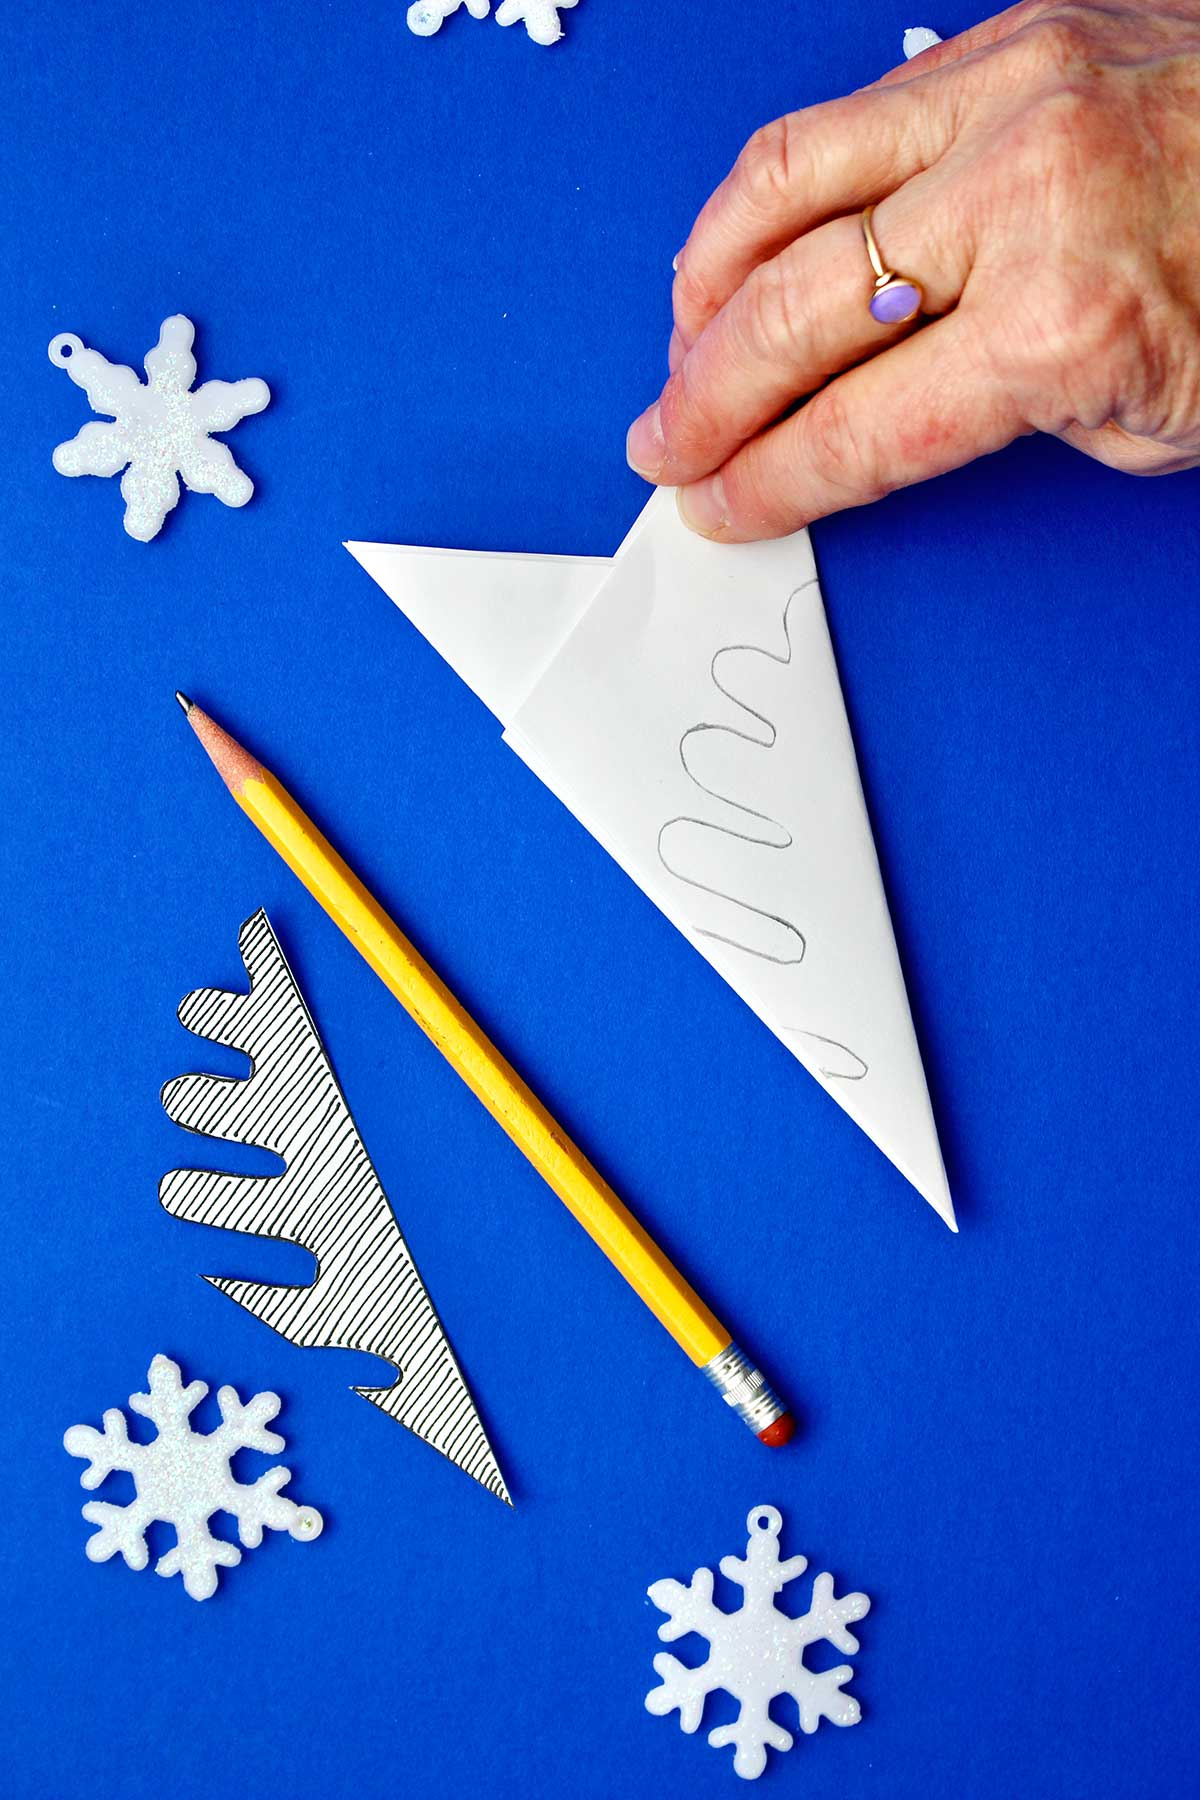
Set the template aside, pick up your scissors and then cut on your pencil line
You’ll notice that I never cut off the full fold on either side of this triangle folded piece of paper. If you cut off the entire fold, your snowflake will fall apart.
It takes a little bit of maneuvering to cut through that many layers of paper. It sure helps to have sharp scissors! Be sure hold onto the folded paper tightly and be careful to keep your fingers out of the way!
You may have give a little help to the younger kids. Or simplify the design down even further, to make it easy for them to do if they’re cutting abilities are lower.
Note: You can make the snowflake even more simple for your Littles if you’d like by not using the patterns. Just cut out a few triangles from each side of the folded paper shape. This is a great way to develop fine motor skills for the little kids.
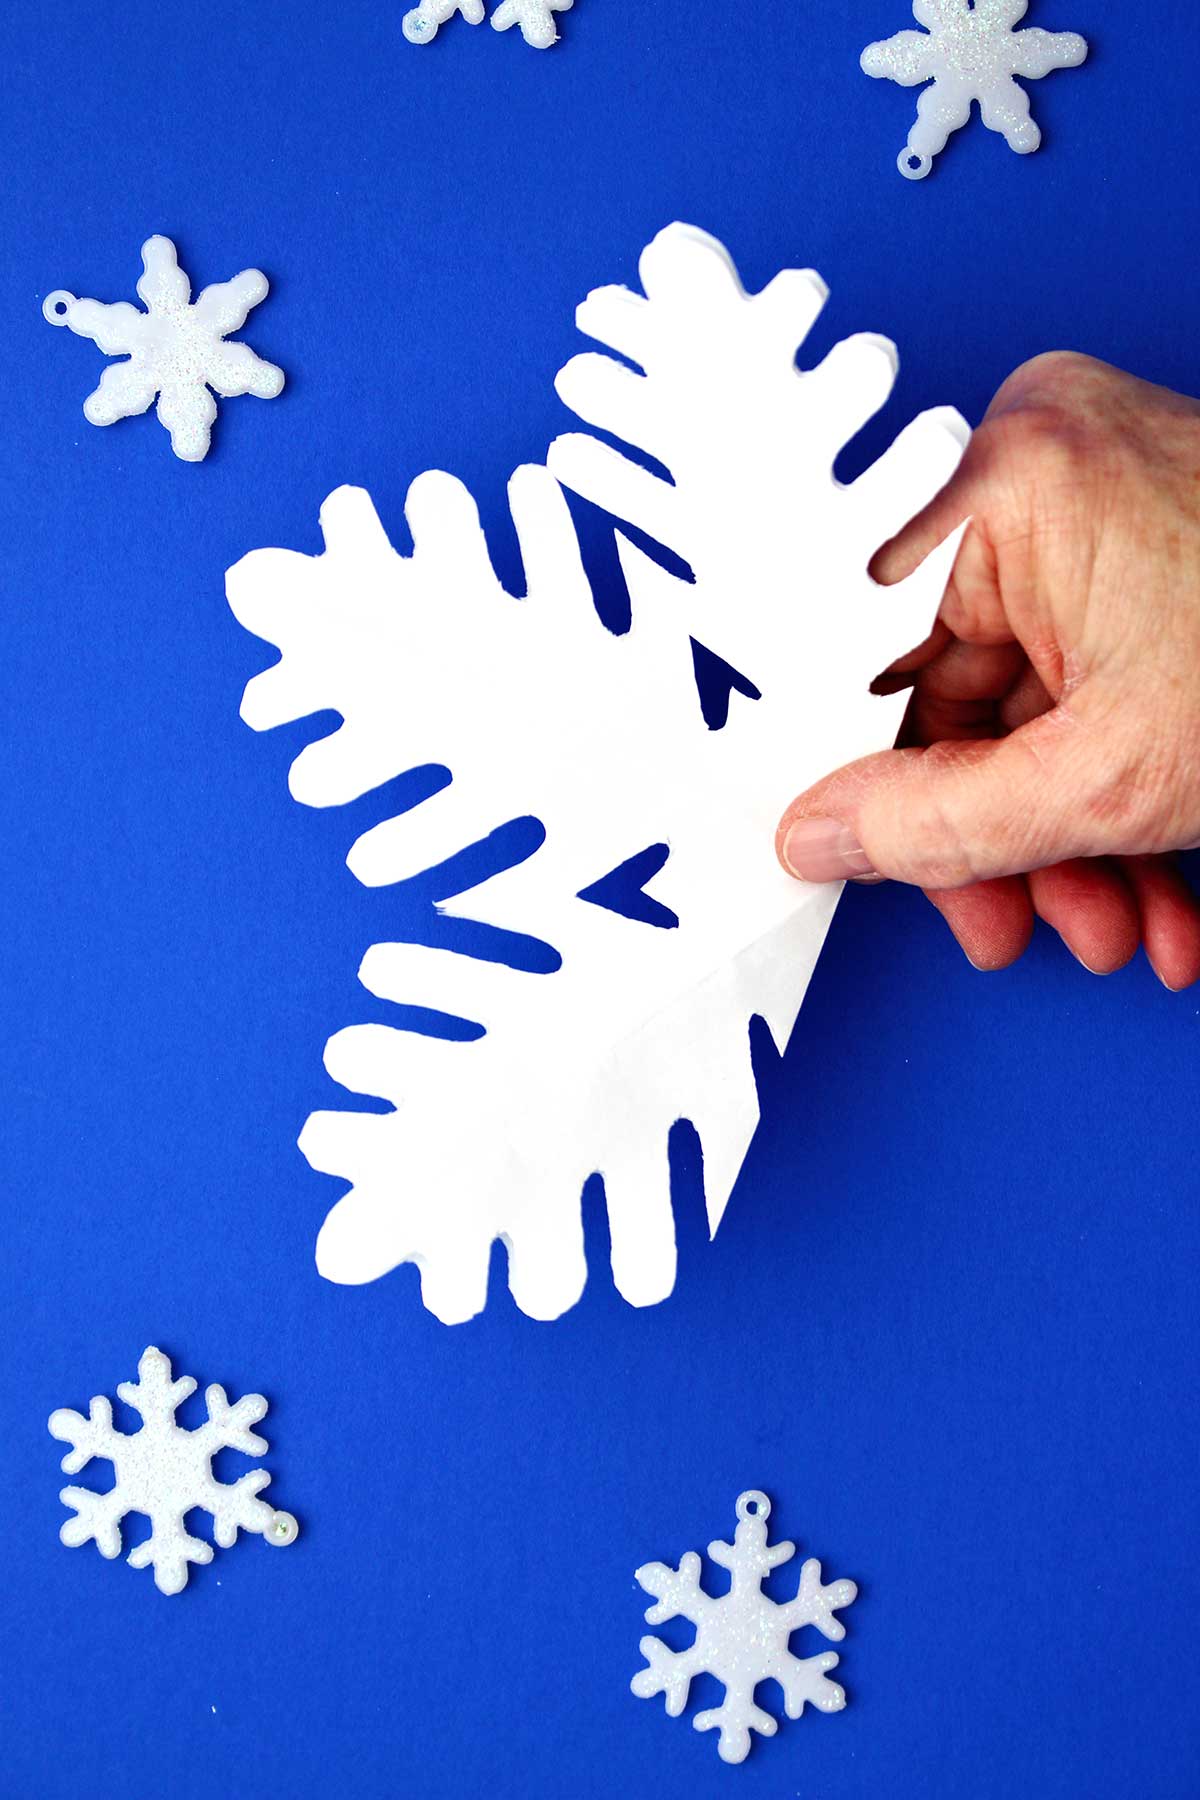
The fun part!! Open up the snowflake!
Now comes the fun part! It’s time to up the folded paper to see your finished snowflake design. I feel like there should be a drum roll or something.
Carefully open the folds of the paper one at a time, kind of pressing out the creases the best that you can. Sometimes the paper gets kind of caught on itself so be careful not to tear the paper as you open it up.
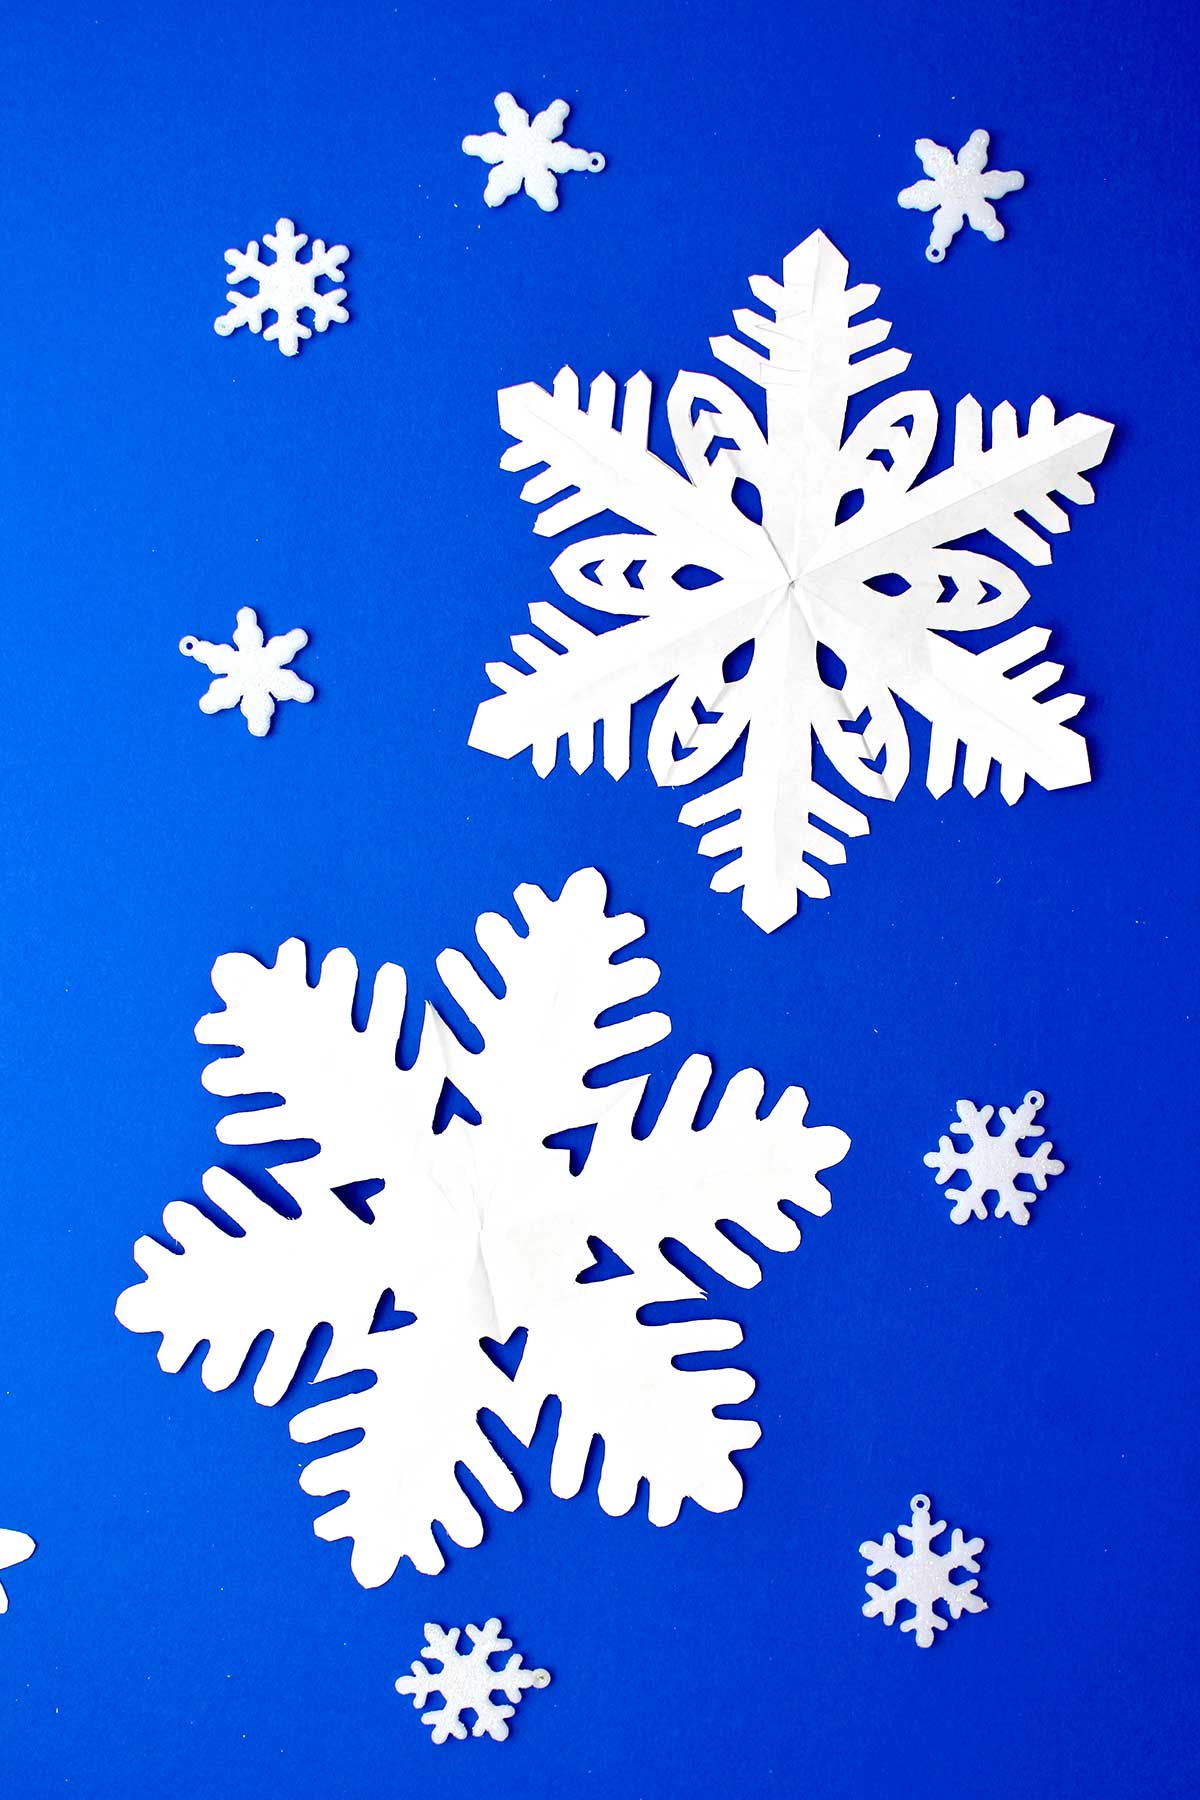
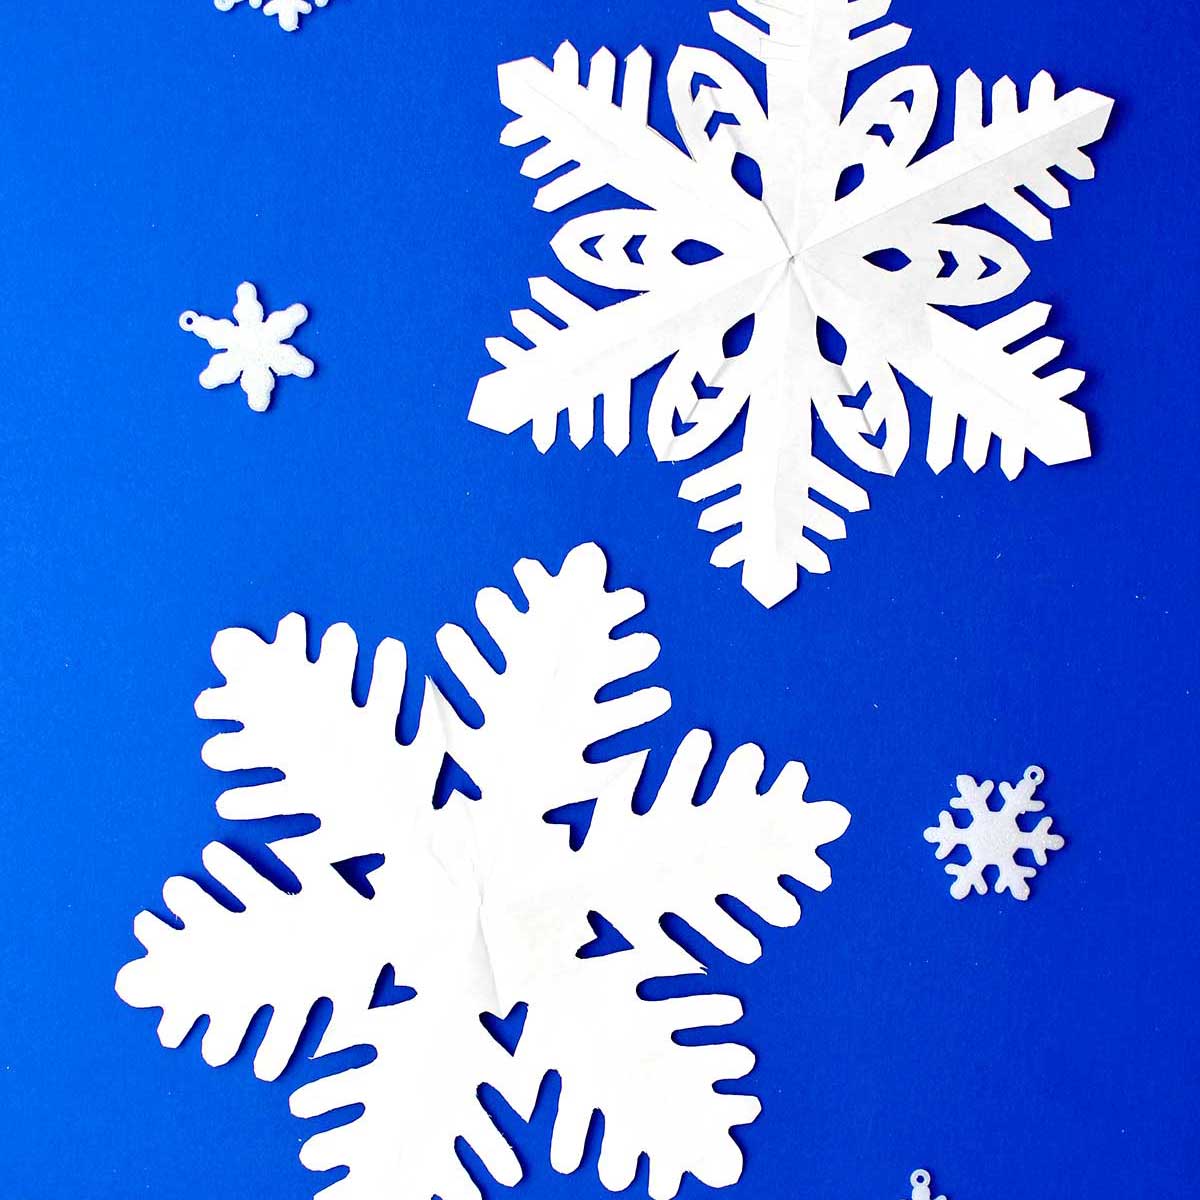
Isn’t that a beautiful snowflake? And it has six sides!

Free paper snowflake templates
Now, the only thing to do is grab more paper and try out all the other seven pattern templates from the second page of your free handout from Welcome to Nanas! These different snowflake designs make gorgeous snowflakes.
You could try another kind of paper if you want- like:
- letter size paper of any type (regular paper)
- colored paper
- scrapbooking paper
- wrapping paper (to make extra large snowflakes)
- parchment paper
- tissue paper (or other lightweight paper)
- construction paper
- coffee filters
Your own snowflake design
Of course you can make your own different designs for beautiful paper snowflakes. This is a great challenge for the older kids (and you!).
Remember not to cut off the whole fold on either side of your folded shape- that is key.
The best part of using my free snowflake templates first is that it will build your confidence to try your own designs and create your own unique paper snowflakes.
Try making them from a smaller triangle to make smaller snowflakes. Or from a larger paper for larger snowflakes. It looks great to have snowflakes of various sizes.
How to use your paper snowflakes -
These unique snowflakes can be taped up in a window or hung from a ceiling if you’d like. You can make a room into winter wonderland!
What I love about snowflakes is they are great as Christmas decorations but also as winter decorations after the holidays. That is a fun way to make the festive season last longer!!
I also like using them to make cards and other snowflake crafts. You’ll probably notice them in other posts on my site! Don't you love simple paper crafts?
Snowflake Bentley - thank you!
So I dedicate this post to Snowflake Bentley. Obviously this was his nickname because he developed the way to photograph snowflakes over 150 years ago.
He had to figure out how the best way to take a photograph in a way where the snowflake didn’t melt before he could get the picture taken. That was much harder than it sounds, especially since he had less equipment available. Others still use his techniques today with little changes.
Links to Snowflake Bentley's photos
Some of Bentley's snowflake pictures are so incredible. You can see them online. Here are a couple links to see some of his pictures and read a bit about him if you would like.
This is an article from the Smithsonian Institution Archives (Bentley donated 500 of his photographs to them for preservation): https://siarchives.si.edu/history/featured-topics/stories/wilson-bentley-pioneering-photographer-snowflakes
Here is a link to an article showing some of Snowflake Bentley’s pictures- you have to scroll down to see the photos of the snowflakes: https://siarchives.si.edu/sites/default/files/pdfs/WAB_Snow_1902.pdf
Children's books-
Lastly, here are some children’s books about Snowflake Bentley and about snow:
- Snowflake Bentley by Jacqueline Briggs Martin
- The Story of Snow: The Science of Winter’s Wonder by Mark Cassino and Jon Nelson
- Nature Stories- Little Snowflake by Suzanne Fossey
- Ten Sparkly Snowflakes Countdown Fun By Tiger Tales and Russell Julian
- No Two Alike- Board book by Keith Baker
More winter snow craft ideas!
Looking for more snow-inspired wintery fun? Give these fun crafts and activities a try!
- Simple Do It Yourself Snow Globe
- Silly Sock Snowman
- Easy 3-D Paper Plate Snowman Craft
- How to Make an Easy DIY Snowflake Out of Paper Bags
- Make an Incredible Ice Luminary & Ice Globe
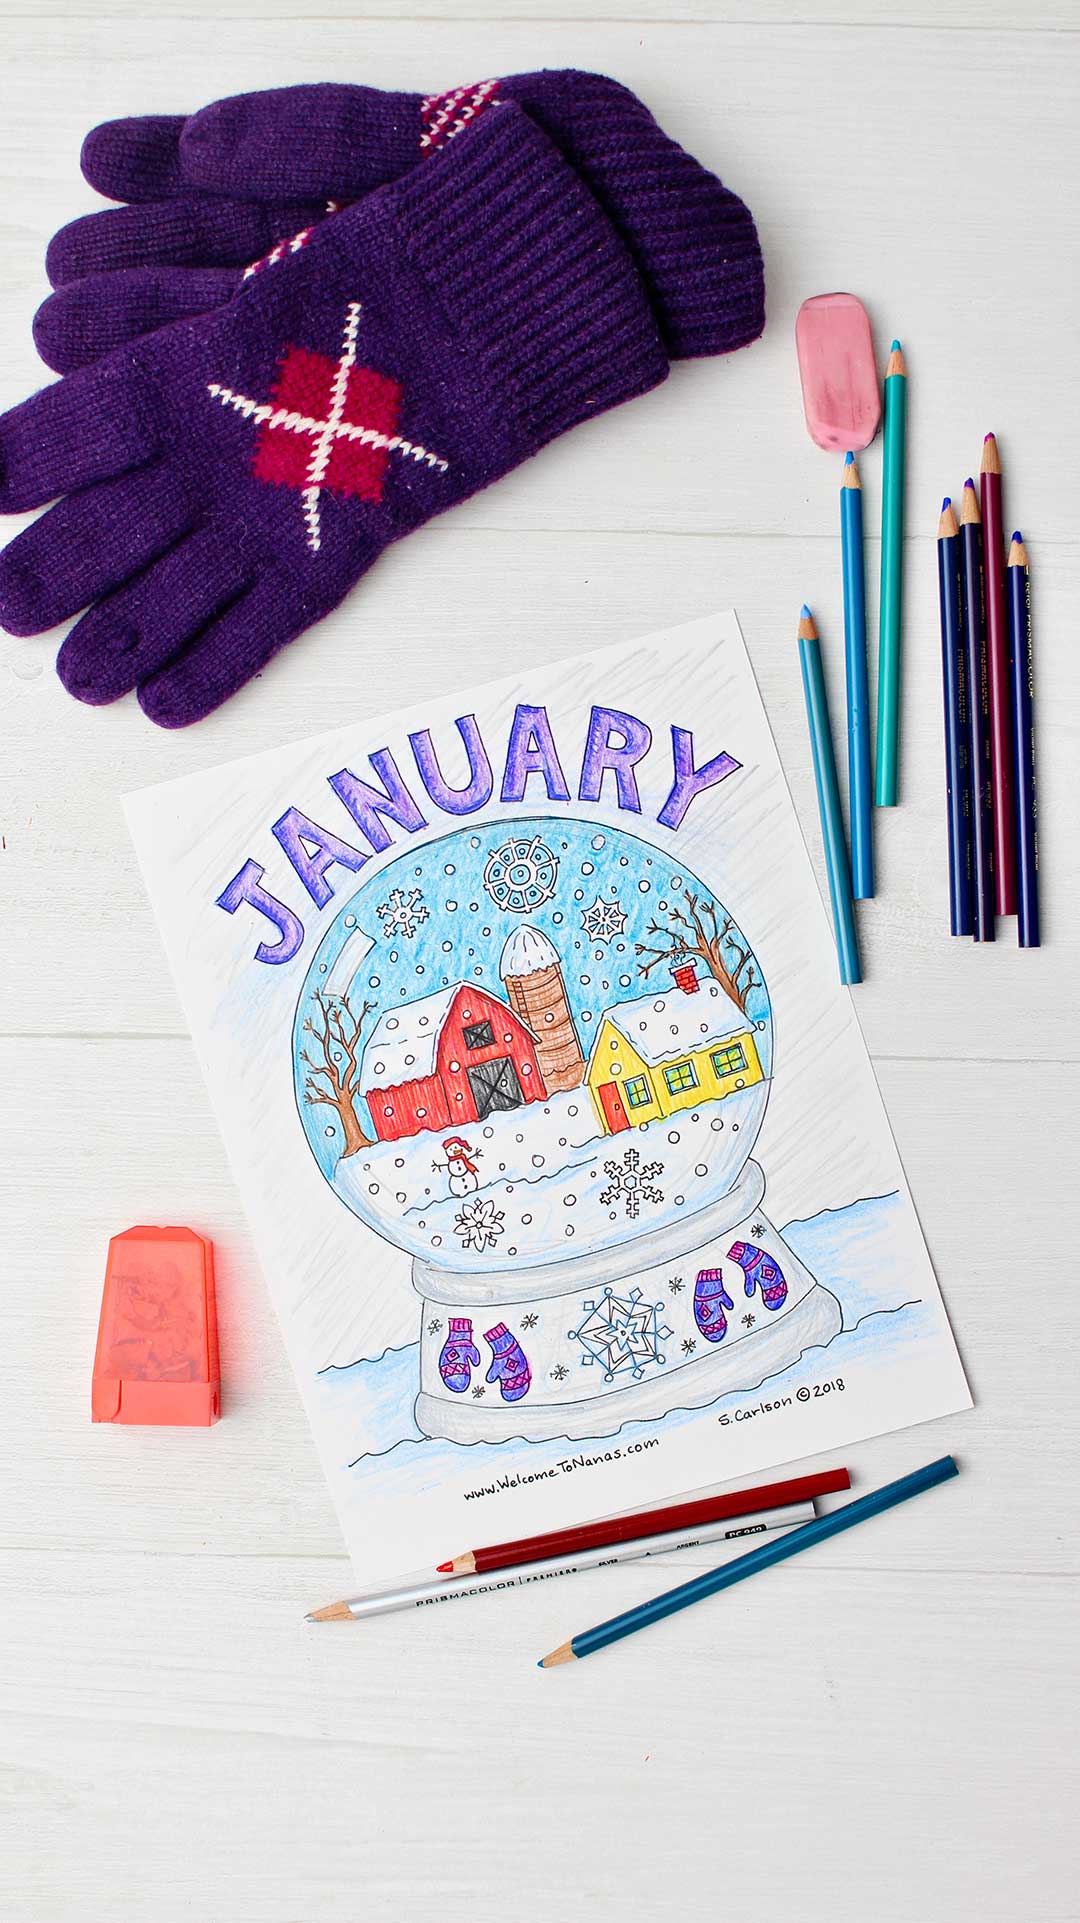
Snowflake Free Coloring Pages
We also have a great collection of free snowy coloring pages, just ready for you to print off and enjoy:
- Snow Globe January Coloring Page
- Winter Snow Sledding Coloring Page
- Winter Snowflake Free Coloring Page
- Winter Season Free Coloring Page
Enjoy!
If you try this craft, let me know! Go ahead and leave a comment, rate it, and tag a photo with #WelcometoNanas wherever you post.
Come join the fun at https://welcometonanas.com
Amazing Free & Easy Paper Snowflake Pattern Template
Equipment
- Scissors
Items Required
- Copy of the Free Easy Paper Snowflake Pattern Template
- Paper- white printer paper or paper of your choice
- Scissors
- Pencil
Instructions
- So download the free pdf files and print off a copy of this pattern template for the snowflakes on white printer paper. It is found at this link: Amazing Free & Easy Paper Snowflake Pattern Template
- Let’s get started by cutting out the small pattern template on the first page. That’s probably the easiest design that I created. It is a more simple design with curves that are easier to cut out for your first try. Cut the template out on the heavy black outer line. Be sure to save the rest of the paper because you’re going to use that to help you fold the paper in the right shape.
- Grab your piece of white paper and let's cut it into a square piece of paper. Fold one corner of the paper up and fold it so that it is even on the sides, creating a large triangle. Be as accurate as you can with your fold. Then cut off the excess paper on the end- leaving just the folded triangle shape. I’m sure you’ve done this before! Boom- close to a perfect square!
- Leave the shape in a triangle and then fold the triangle in half so you can find the center of the long-folded edge. If you want to, you can mark that center point of the folded edge with a small little dot with a pencil. Reopen the paper into the large triangle.Then take your folded triangle and place it on that first page of your template. There’s a long line that says “Place fold of triangle here” with a small dot where the center of the fold should be.Once you have that lined up you’re going to take one corner of the triangle that’s along the line and fold it up so that the fold matches up with the black Diagonal line. Then crease it well. Then take up the other corner of the triangle that’s along the line and fold it up so that the fold matches up with the other black diagonal line. This has now folded your large paper triangle into a new shape with three equal sections.You can now set the first page of the template to the side and just work with your folded piece of paper. Note: I have a full length video tutorial on YouTube. This step-by-step tutorial may be an easy way to follow these directions, especially the first time. Click on this link: Easy Paper Snowflake Pattern Template Full Length Tutorial YouTube Video.You’re going to take that folded piece and now fold it in half so that will make it go from 3 to 6 equal parts. It really helps to follow along with the pictures or the video to visualize what I’m talking about.
- Now take the template that you cut out earlier and lay it on top of your folded piece of paper (striped or gray areas up). The very sharp point of the template fits down into the sharp point of the folded paper.Take a pencil and draw the pattern onto your folded white piece of paper. You have to hold the pattern template so it doesn’t move around of course.
- Set the template aside, pick up your scissors and then cut on your pencil lineYou’ll notice that I never cut off the full fold on either side of this triangle folded piece of paper. If you cut off the entire fold, your snowflake will fall apart. It takes a little bit of maneuvering to cut through that many layers of paper. It sure helps to have sharp scissors! Be sure hold onto the folded paper tightly and be careful to keep your fingers out of the way!
- Now comes the fun part! It’s time to up the folded paper to see your finished snowflake design. I feel like there should be a drum roll or something.Carefully open the folds of the paper one at a time, kind of pressing out the creases the best that you can. Sometimes the paper gets kind of caught on itself so be careful not to tear the paper as you open it up.


Kathleen says
I enjoy reading about Your Wonderful DIYs! 🦋 My cellphone refuses to download PDFs :/ . But I'm goiñg to try to figure out another way. I figure trying to do Your DIY crafts might help me with my Grieving over the unexpected Loss of my Beloved FirstBorn Son, Richard.
Respectfully Yours ~Kathleen Lechner