Easy DIY Deer Costume
A woodland deer or fawn is a fun and simple costume for Halloween. A deer Halloween costume can work for a boy or a girl, just adapt the head piece.
This deer Halloween costume will take a few stitches of hand sewing if you would like to save the clothing used as the base of the costume. If you don’t care, you could hot glue the felt pieces directly onto the clothing.
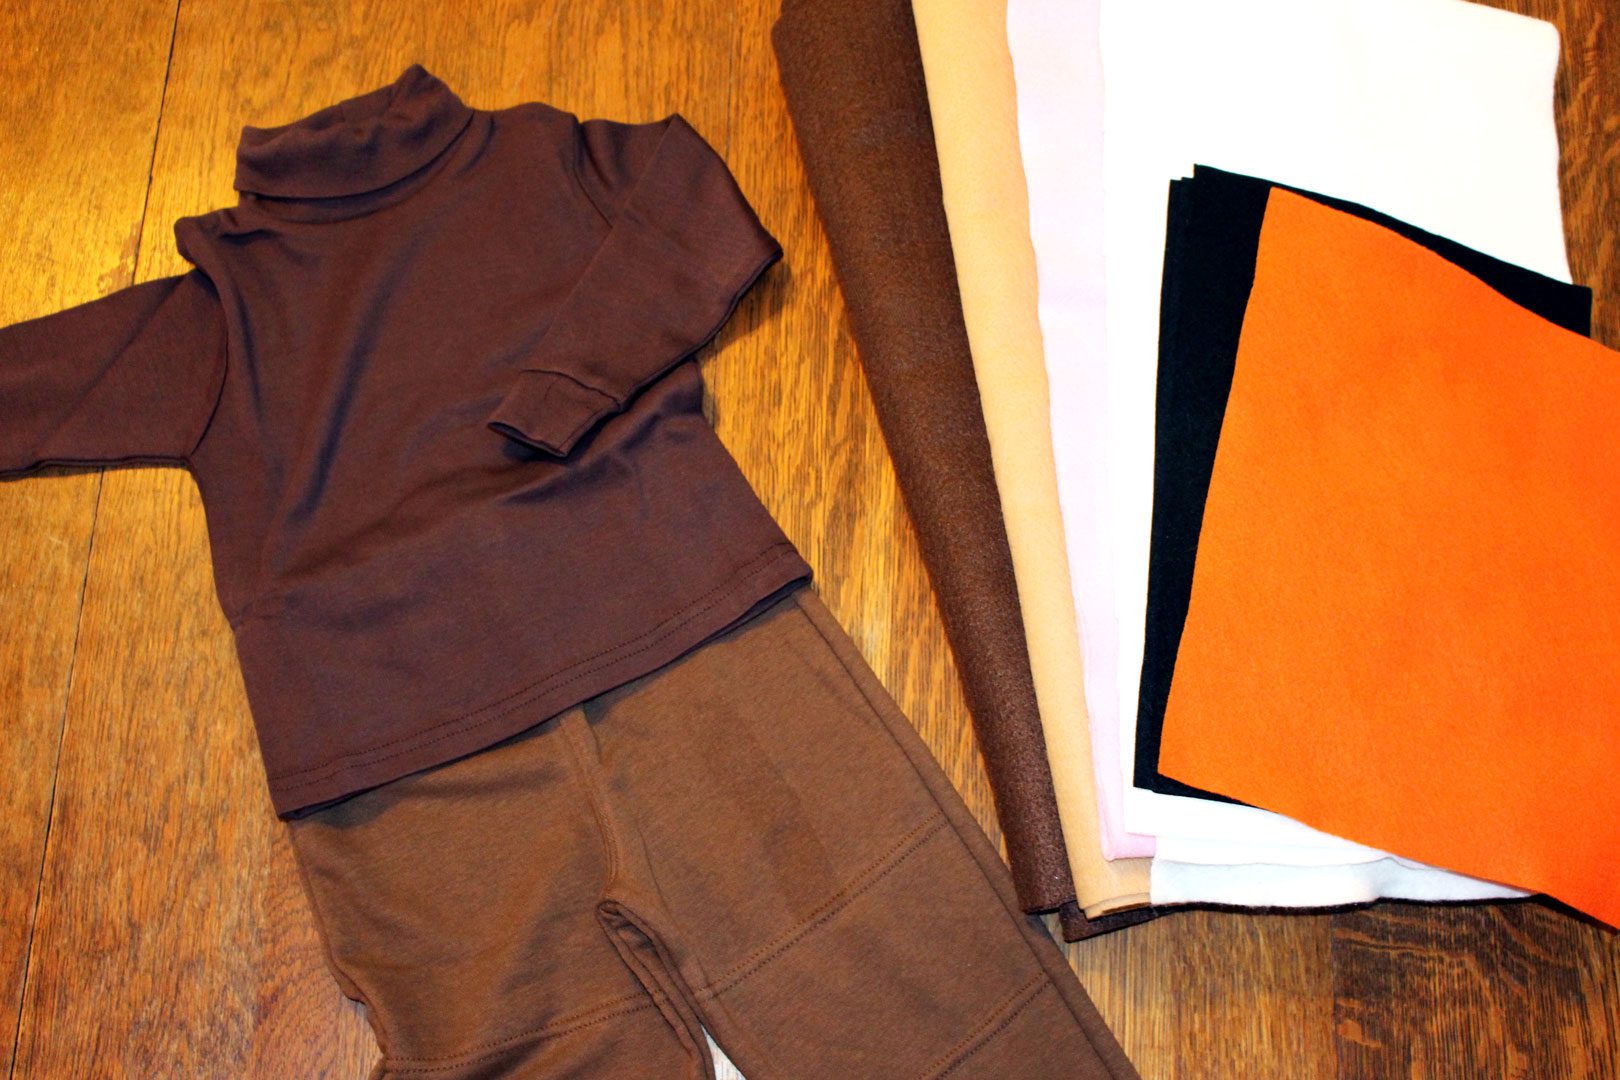
I used 8 ½ x 11” felt pieces (it only takes 3 pieces of each). You will start with an all brown outfit in your kiddo's size. The shoes can be anything, but black would be great (to look like hooves).
Deer Halloween Supplies
- Scissors, hand sewing needle and white thread
- Brown, long sleeved shirt
- Brown pants
- OR brown sleeper
- Brown headband OR brown ball cap
- 2 flowers or a bit of floral moss- optional
- Felt- white, brown, black (3- 8 ½x11” sheets of each color)
- 2 branches about 8 inches long
- Hot glue gun and glue
 Deer Costume DIY Instructions
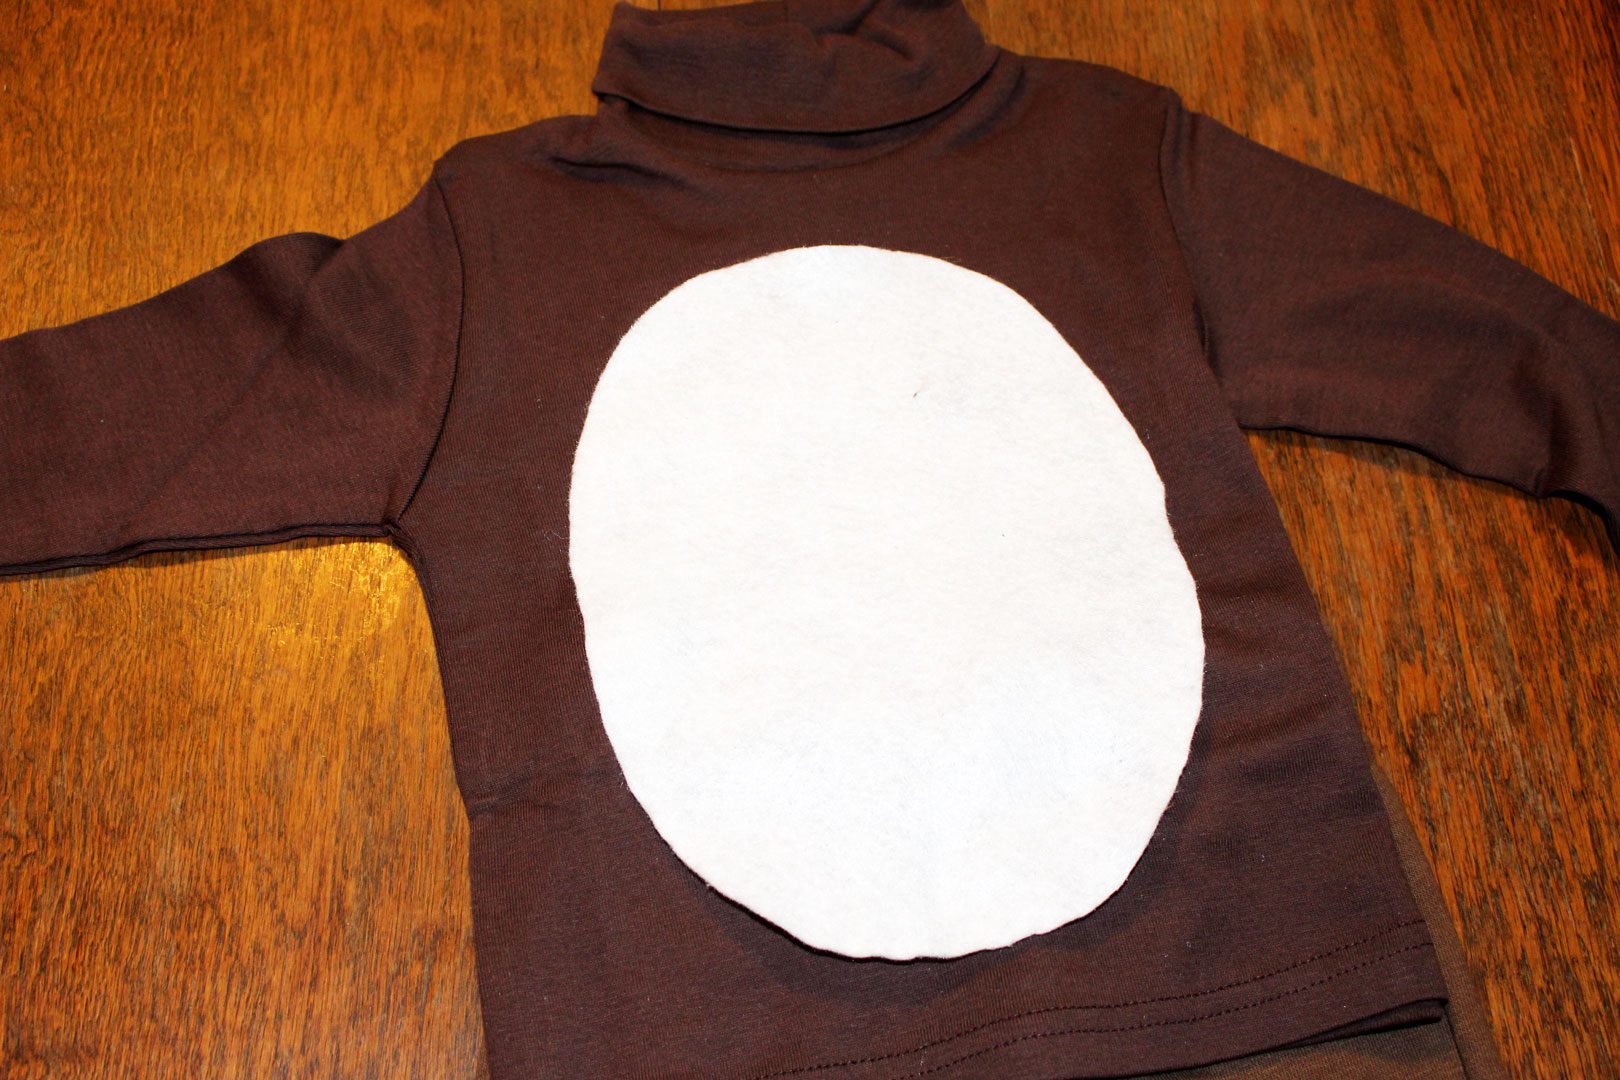
- Use one piece of the white felt and round the corners to make an oval. Using a hand sewing needle with a double thread and a running stitch around the outside of the oval, sew this onto the front of the brown shirt.
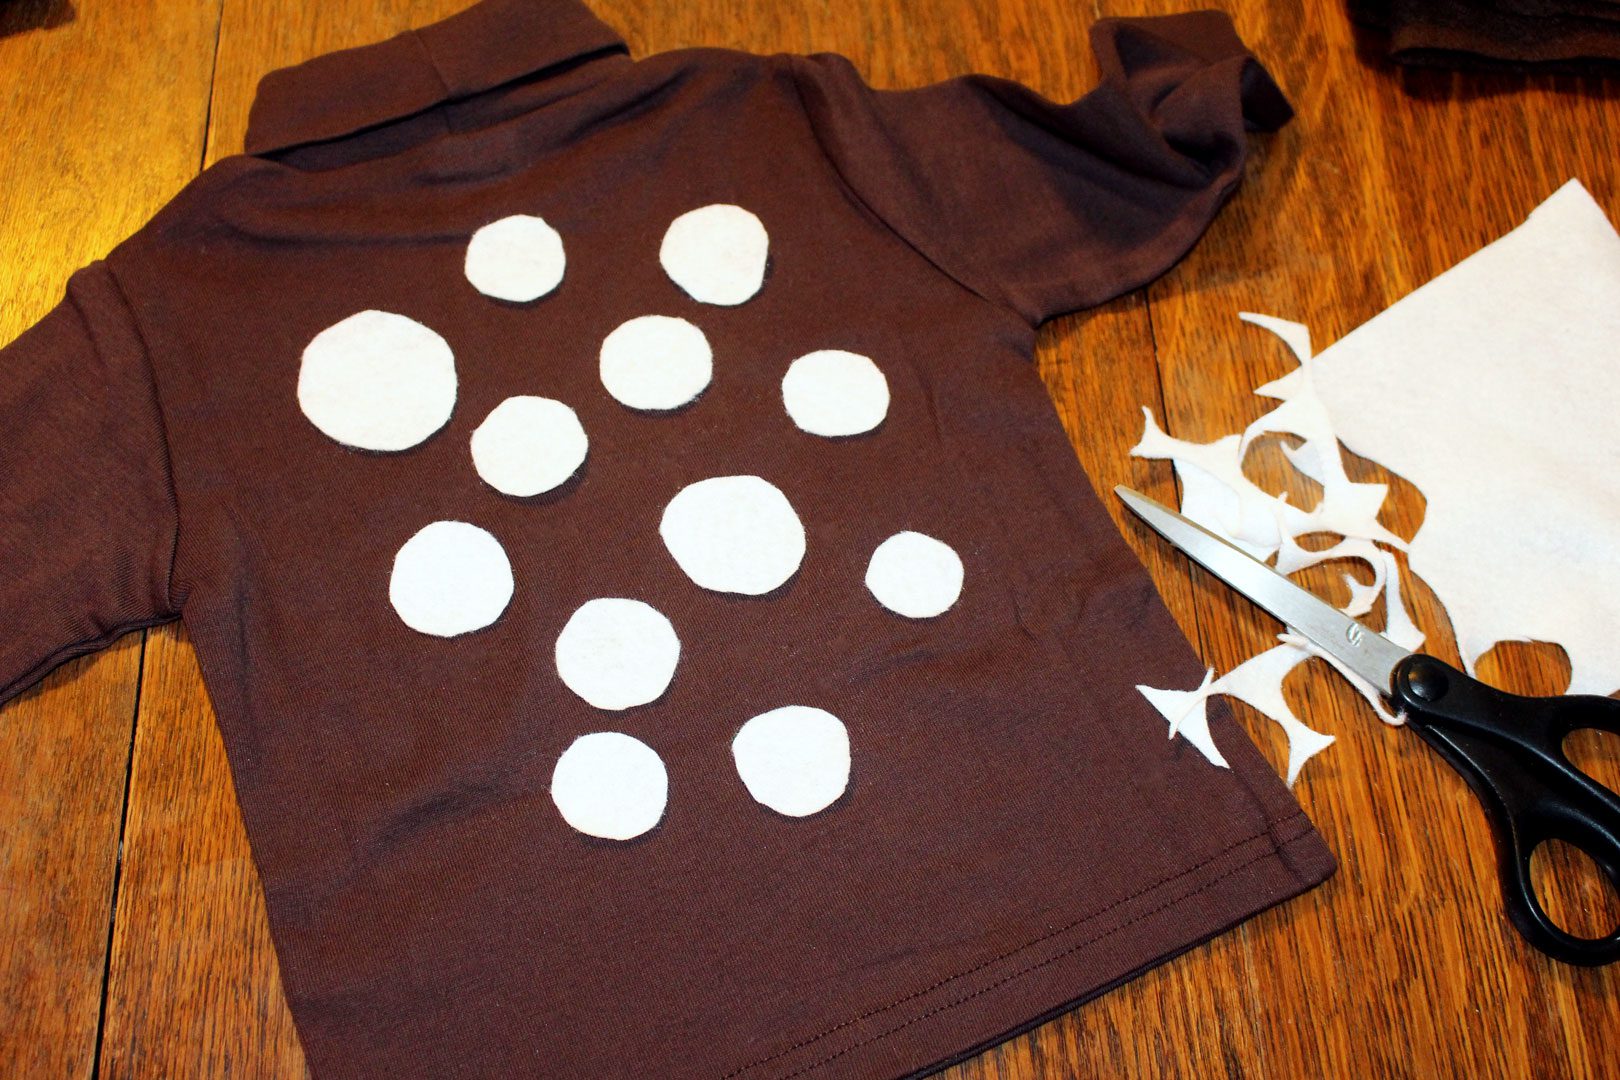
- Cut a series of about 12-13 circles that are a variety of sizes 1-2” in diameter. Sew these in a random pattern on the back of the brown shirt.
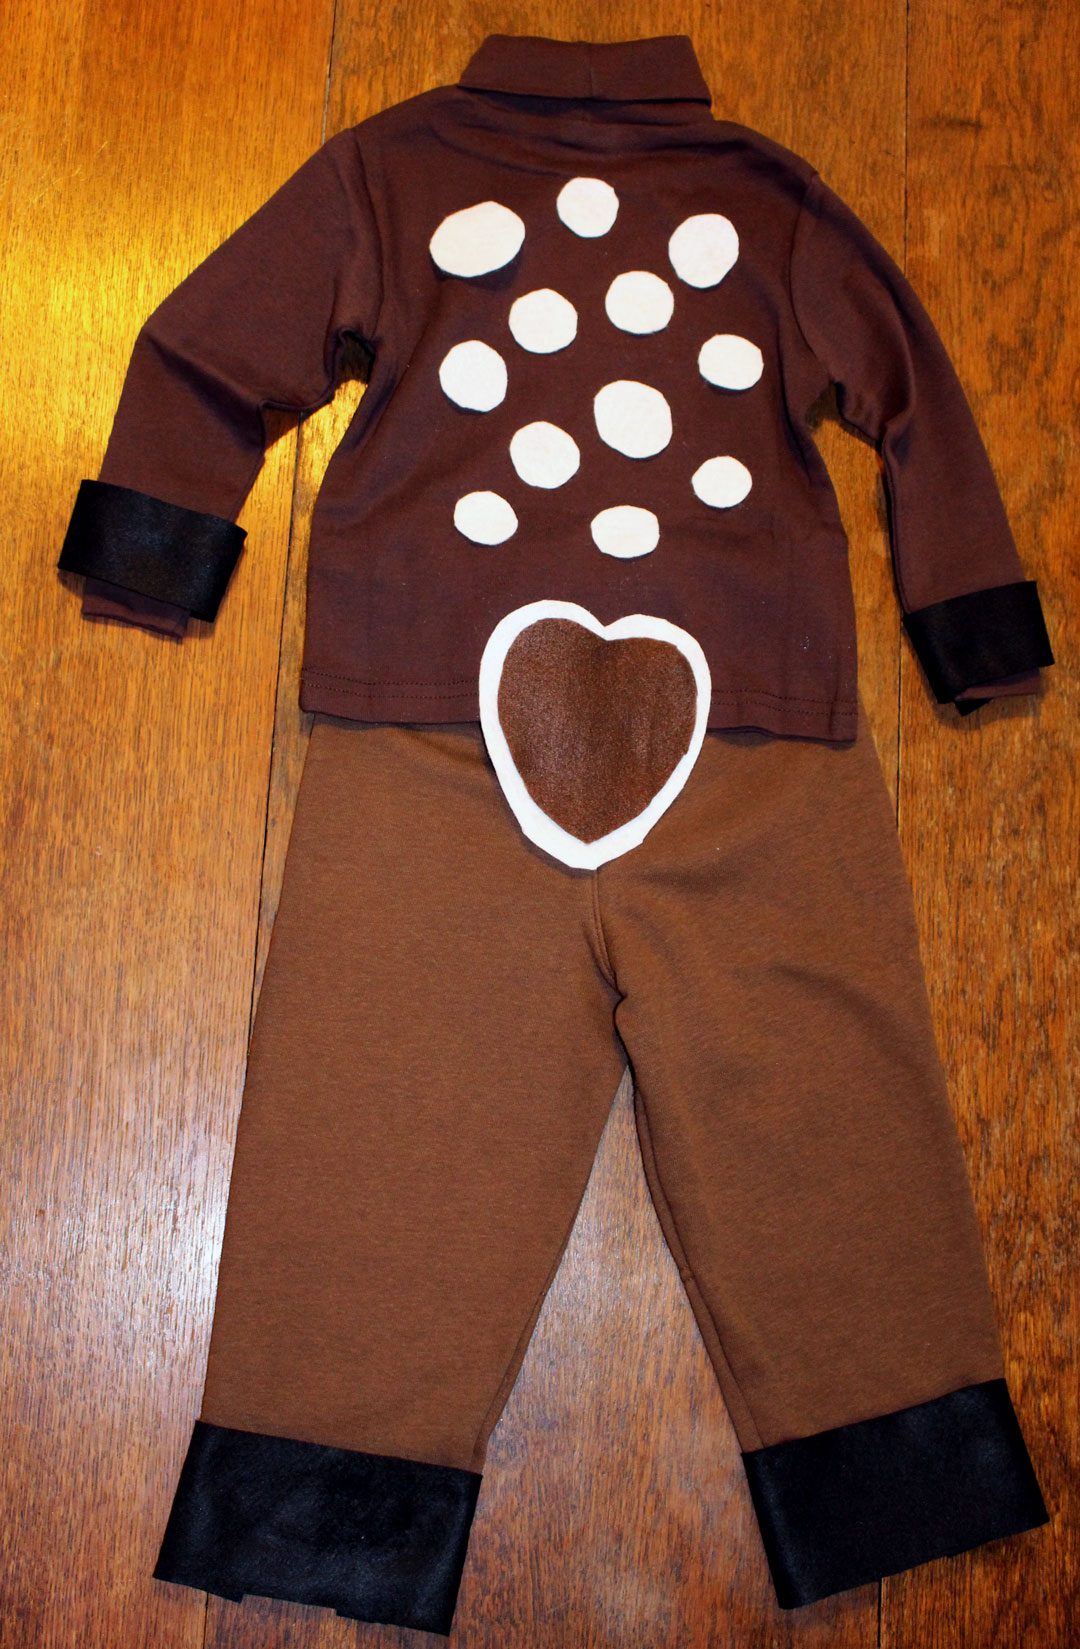
3. Cut a heart shape of white felt about 4-5” tall. Cut a second heart of brown felt slightly smaller than the first. Sew this onto the bottom of the back of the brown shirt, sew through both layers of felt. This is the tail.
4. Cut 1 ½-2” strips of black felt to use around the cuffs of the brown shirt sleeves and around the cuffs of the pants. Hand sew these on. These are hooves in case you were wondering!
5. The headpiece for the deer Halloween costume is made using a brown headband OR a brown ball cap (or a ball cap you have painted brown with acrylic paint). Our deer costume was made with a headband.
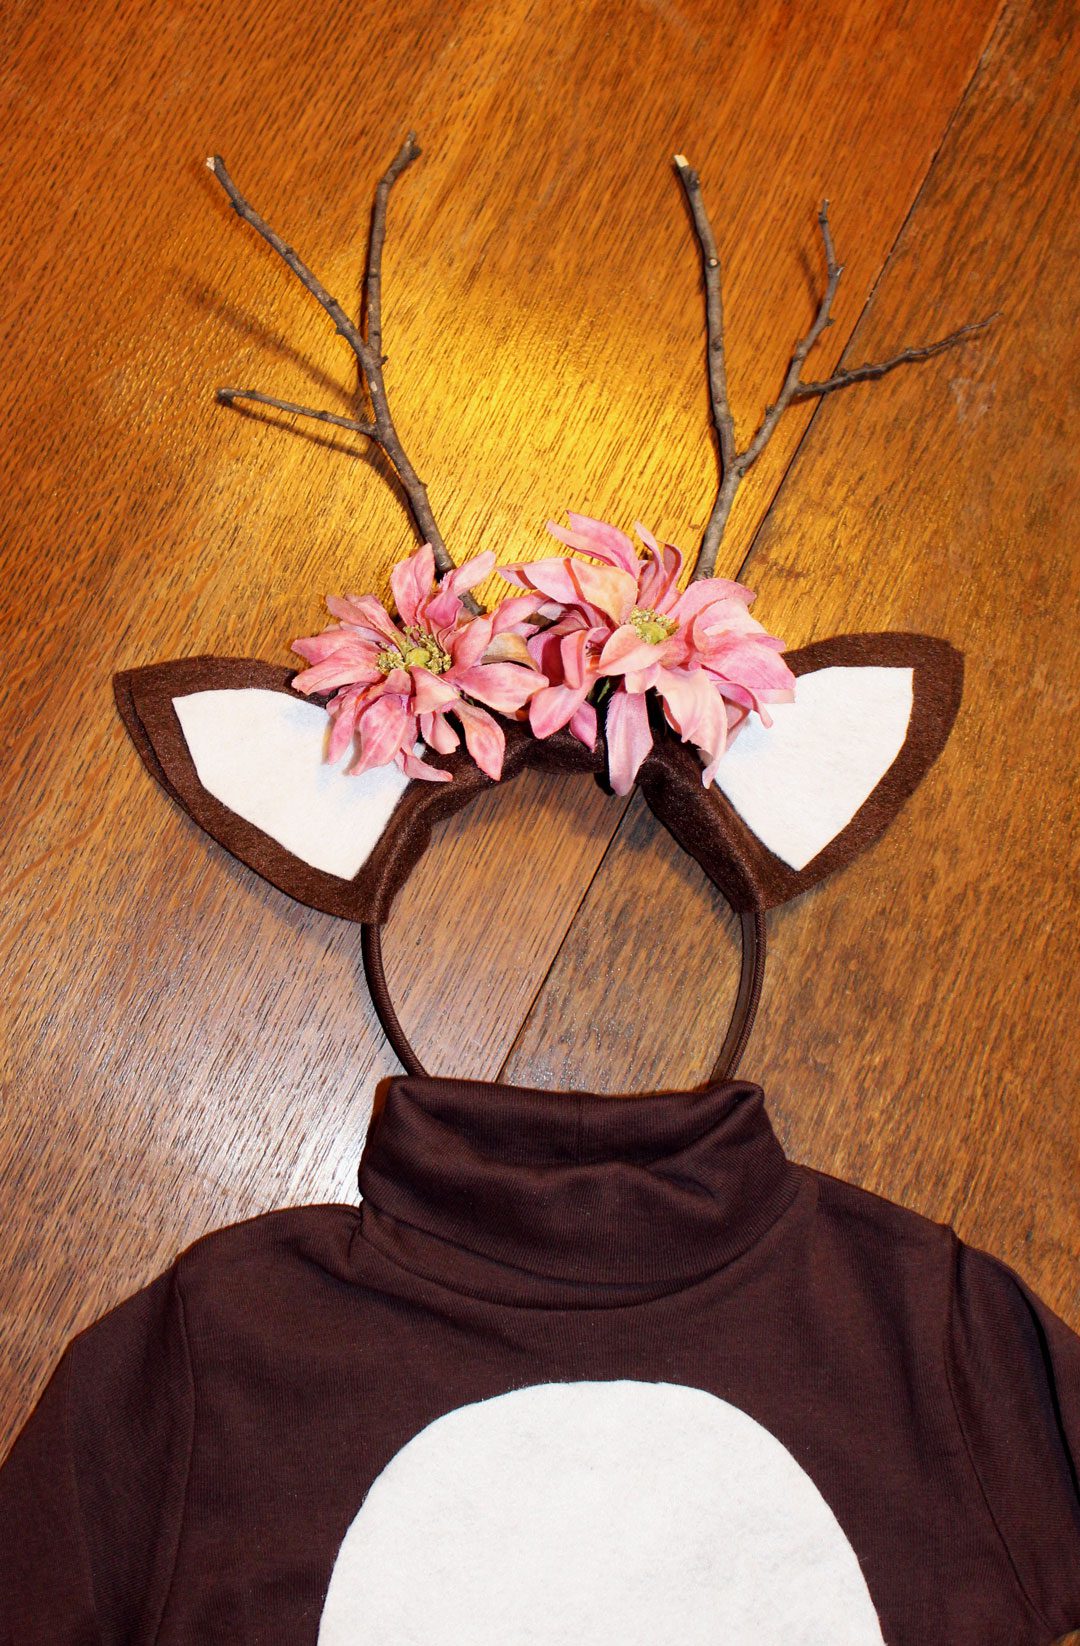
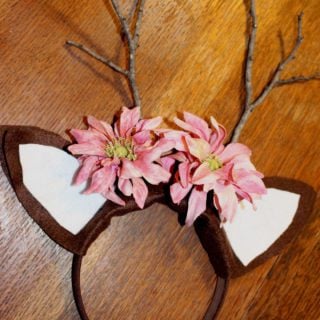
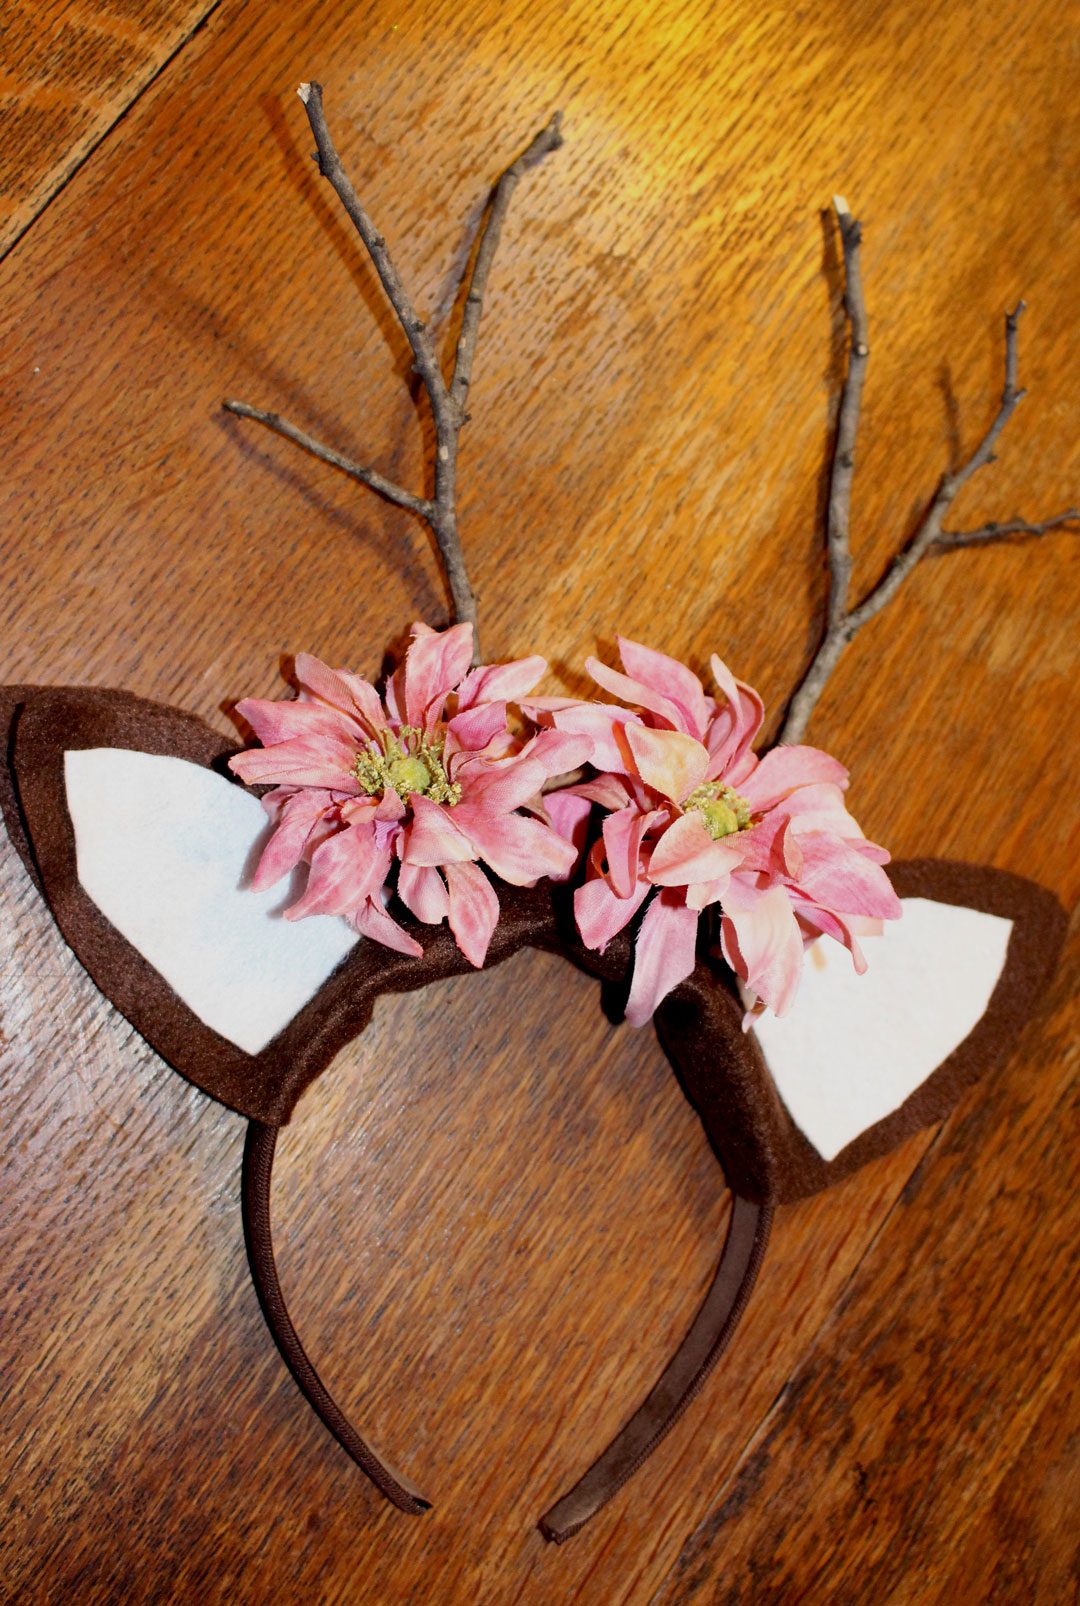
6. To make the ears, fold one piece of brown felt in half, hamburger style. Cut an ear about 5” tall and about 21/2” wide WITHOUT cutting off the folded edge. Wrap one ear around the headband about 2” from the center and then hot glue the two pieces of the ear together. Repeat with the second ear 2” the other direction from center. Hot glue. Cut two pieces of white felt that are slightly smaller than the ear and glue one to the front of each felt ear.
How to Make Antlers for This Deer Halloween Costume
Find two branches from the yard that are about 6-7” inches tall and forked/branched to look like antlers. Working with one at a time, place a large circle of hot glue on the top of the headband and hold the antler in it till it cools. Add more hot glue to the base and hold till it cools. Repeat until the antler feels sturdy. Then repeat with the second antler.
A couple flowers can be glued to the base of the antlers for a girl, for a boy a bit of floral moss or leave plain.
A second option is to use the brown hat to mount the ears and antlers. Hot glue each ear so that the felt won’t open up into two flaps. Then glue the two ears to the left and right side of the brim of the hat.
Hot glue the antlers to the front of the hat, between the ears. You can still add the flowers onto the brim of the hat if you want.
Note: You will want to remove the headband/ball cap with antlers when getting into the car!!
More Like This DIY Deer Costume
On the lookout for more Halloween costume ideas? Check out the list below! You can make all of these at home and can adapt the ideas for both kids and adults.
- DIY Animal Masks from Craft Foam
- Super Kid Cape
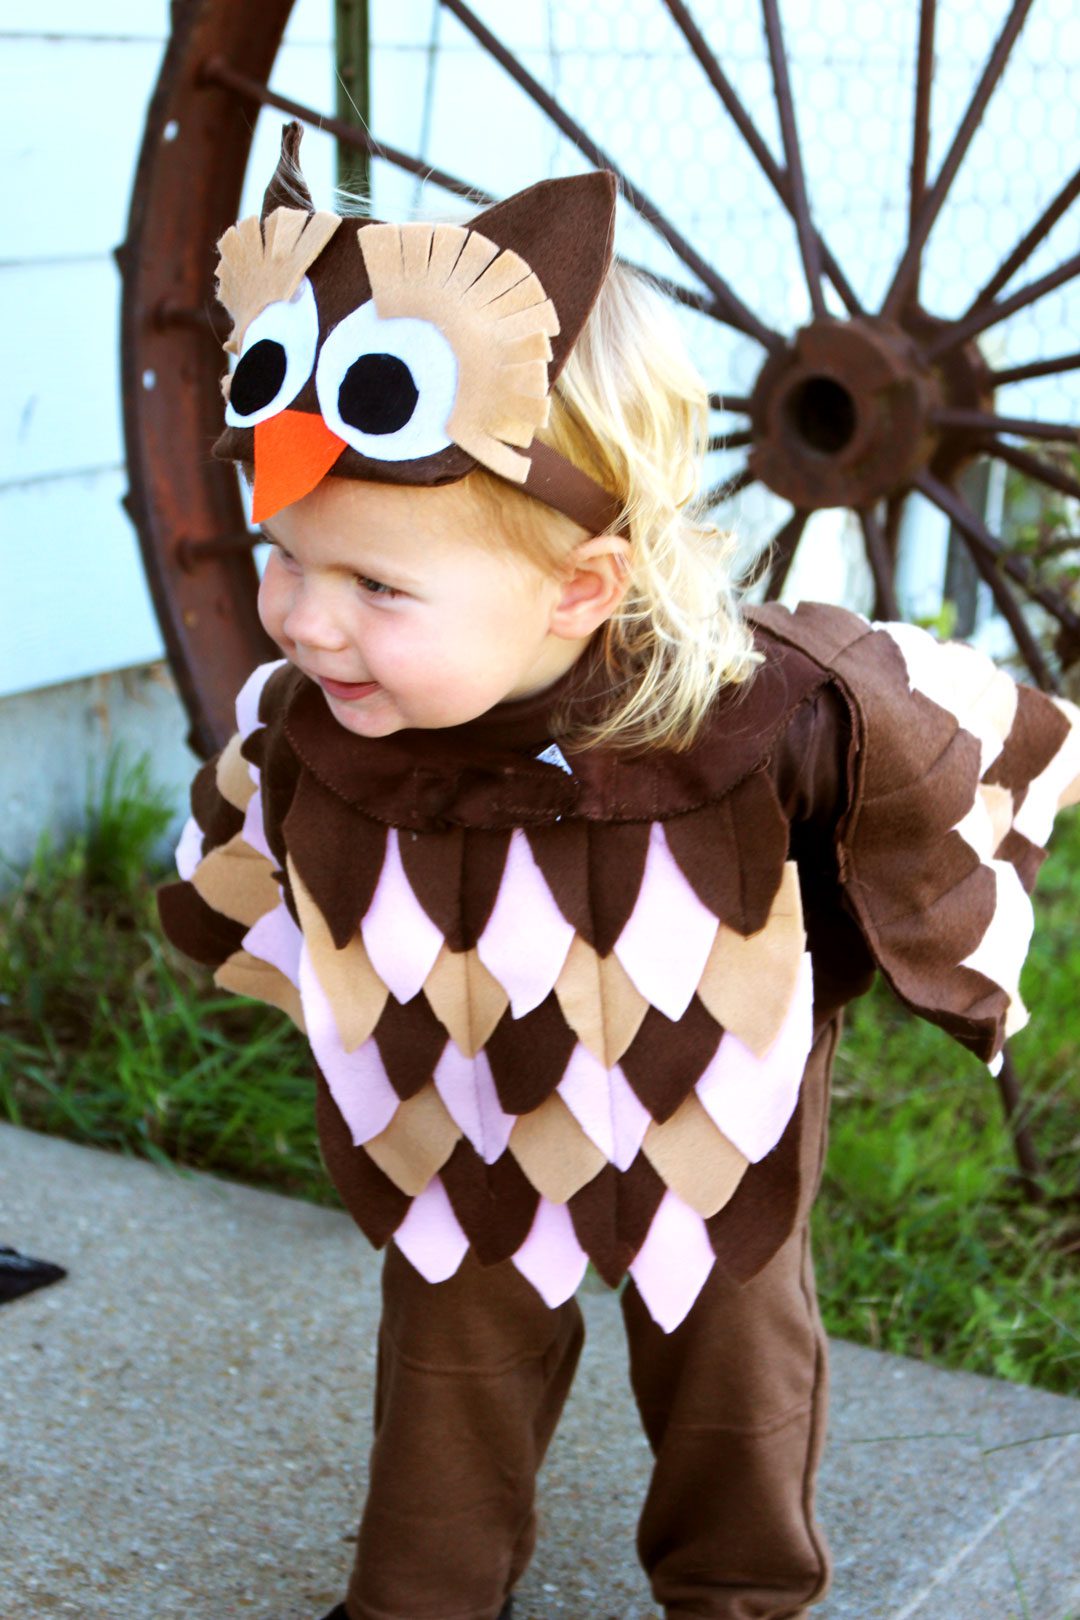
- Woodland Owl Halloween Costume
- DIY Buckskin Halloween Costume
- DIY Black Cat Halloween Costume
Have a safe time trick-or-treating! If you try this craft, let me know! Go ahead and leave a comment, rate it, and tag a photo with #WelcometoNanas wherever you post.
Come join the fun at https://welcometonanas.com
Last Minute DIY Deer Costume
Equipment
- Scissors
- Hot glue gun and glue
Items Required
- hand sewing needle and white thread
- Brown, long sleeved shirt
- Brown pants
- OR brown sleeper
- Brown headband OR brown ball cap
- 2 flowers or a bit of floral moss- optional
- Felt- white, brown, black (3- 8 ½x11” sheets of each color)
- 2 branches about 8 inches long
- Scissors,
- Hot glue gun and glue
Instructions
- Use one piece of the white felt and round the corners to make an oval. Using a hand sewing needle with a double thread and a running stitch around the outside of the oval, sew this onto the front of the brown shirt.
- Cut a series of about 12-13 circles that are a variety of sizes 1-2” in diameter. Sew these in a random pattern on the back of the brown shirt.
- Cut a heart shape of white felt about 4-5” tall. Cut a second heart of brown felt slightly smaller than the first. Sew this onto the bottom of the back of the brown shirt, sew through both layers of felt. This is the tail.
- Cut 1 ½-2” strips of black felt to use around the cuffs of the brown shirt sleeves and around the cuffs of the pants. Hand sew these on. These are hooves in case you were wondering!
- The headpiece for the deer Halloween costume is made using a brown headband OR a brown ball cap (or a ball cap you have painted brown with acrylic paint). Our deer costume was made with a headband.
- To make the ears, fold one piece of brown felt in half, hamburger style. Cut an ear about 5” tall and about 21/2” wide WITHOUT cutting off the folded edge. Wrap one ear around the headband about 2” from the center and then hot glue the two pieces of the ear together. Repeat with the second ear 2” the other direction from center. Hot glue. Cut two pieces of white felt that are slightly smaller than the ear and glue one to the front of each felt ear.
- Find two branches from the yard that are about 6-7” inches tall and forked/branched to look like antlers. Working with one at a time, place a large circle of hot glue on the top of the headband and hold the antler in it till it cools. Add more hot glue to the base and hold till it cools. Repeat until the antler feels sturdy. Then repeat with the second antler.A couple flowers can be glued to the base of the antlers for a girl, for a boy a bit of floral moss or leave plain.A second option is to use the brown hat to mount the ears and antlers. Hot glue each ear so that the felt won’t open up into two flaps. Then glue the two ears to the left and right side of the brim of the hat.Hot glue the antlers to the front of the hat, between the ears. You can still add the flowers onto the brim of the hat if you want.

 Deer Costume DIY Instructions


Leave a Reply