Kids can use this tutorial to make their own DIY secret spy decoder wheel for writing and decoding secret messages. Use the free printable and make a secret code!
Jump to:
- Printable DIY secret message decoder wheel
- Secret message encoder
- Escape room props
- Making your secret message decoder
- Keeping it easy with a free printable
- Cut out the circles
- How do I hold the secret message decoder together?
- Line up the letters
- Write down your message
- How do I use the Secret Message Decoder?
- Setting the code
- Encoding my message
- Let’s write our secret message.
- Continue encoding your message into a secret message.
- Tired of plain letters in your secret codes?
- How do I decode my secret messages?
- Enjoy using your decoder wheel
- Want more summertime activities?
- History of the Decoder Wheel (cipher wheel)
- Enjoy!
- Supplies for a DIY Secret Message Decoder Wheel
- Printable DIY Secret Message Decoder Wheel for Kids
Printable DIY secret message decoder wheel
This DIY secret spy decoder wheel is such a fun way for kids to write and decode secret messages! They will feel just like secret agents in a spy ring.
Use the free printable and make a secret code with the decoder wheel. Don't tell them that it is a great learning activity as well 😉
Secret message encoder
I am loving this printable DIY secret message decoder wheel!
When I was young, we used to get this kind of thing off the back of a cereal box.
We would cut it out and have hours of fun making secret messages that we could encode. Encode means make them into a secret code
I don’t know about you, but passing notes was a big deal when I was young. We used secret codes with a secret decoder wheel or chart to send our top secret notes.
It is exciting to have a secret message to share with a friend.
I think you’ll find that it’s going to help your kids and you have hours of fun, just like we did years ago!
Escape room props
If you've been to an escape room in the past few years you probably used a Secret Message Decoder Wheel of some sort. Escape rooms have become popular in the past few years so cypher wheels have as well.
You will be a step ahead in solving your escape room if you practice up on decoding messages!
Making your secret message decoder
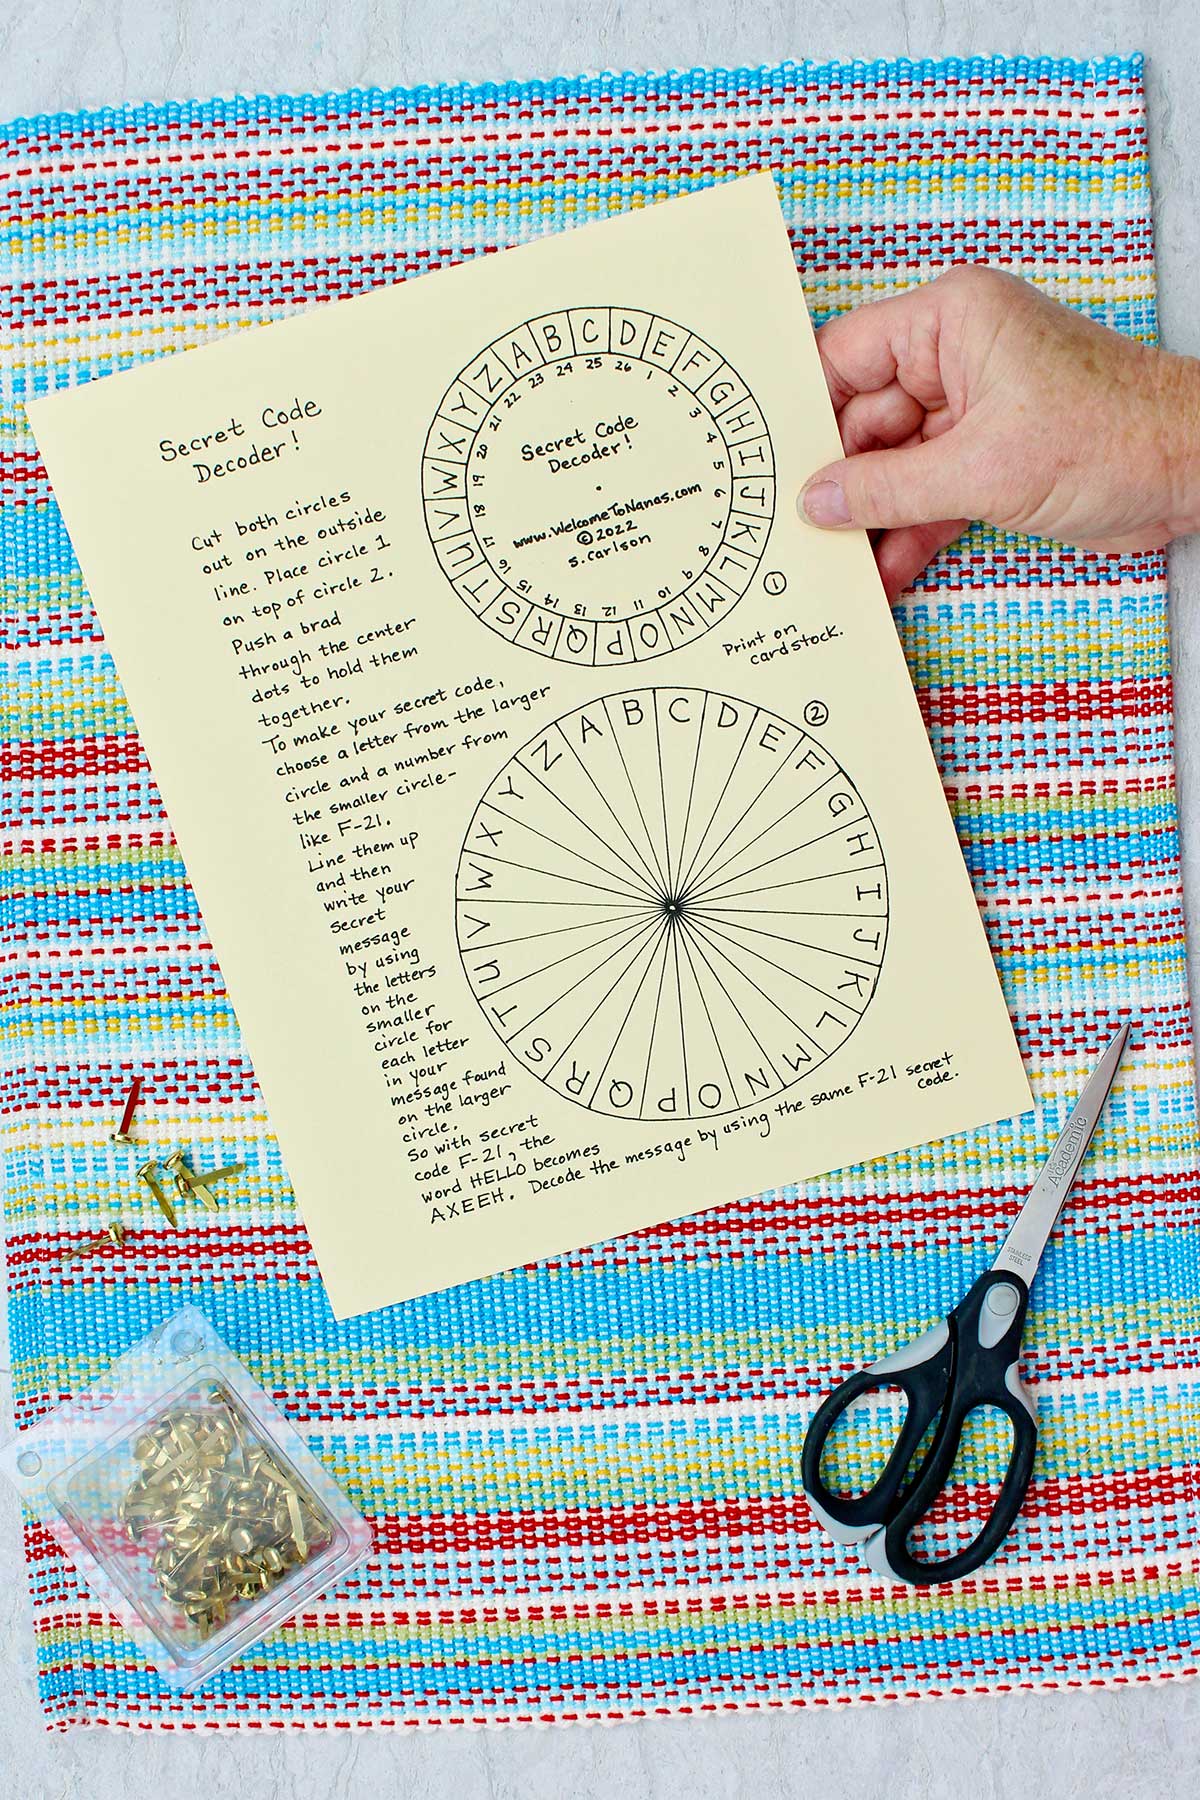
So you will need to make 2 copies of the Decoder Wheel, one for you and the other for the person receiving the secret message.
Here is the link: Free Printable DIY Secret Message Decoder Wheel.
I recommend printing the wheel out on card stock paper so it isn't floppy when you work with it.
Keeping it easy with a free printable
This is a very simple activity and everything‘s done for you on this free printable. All you need to do is cut it out and assemble it with a paper fastener.
If you would like to follow along with me as I make this craft, then turn on the full length tutorial video. Here’s the link: DIY Secret Message Decoder Wheel Full Length Tutorial Video.
Cut out the circles
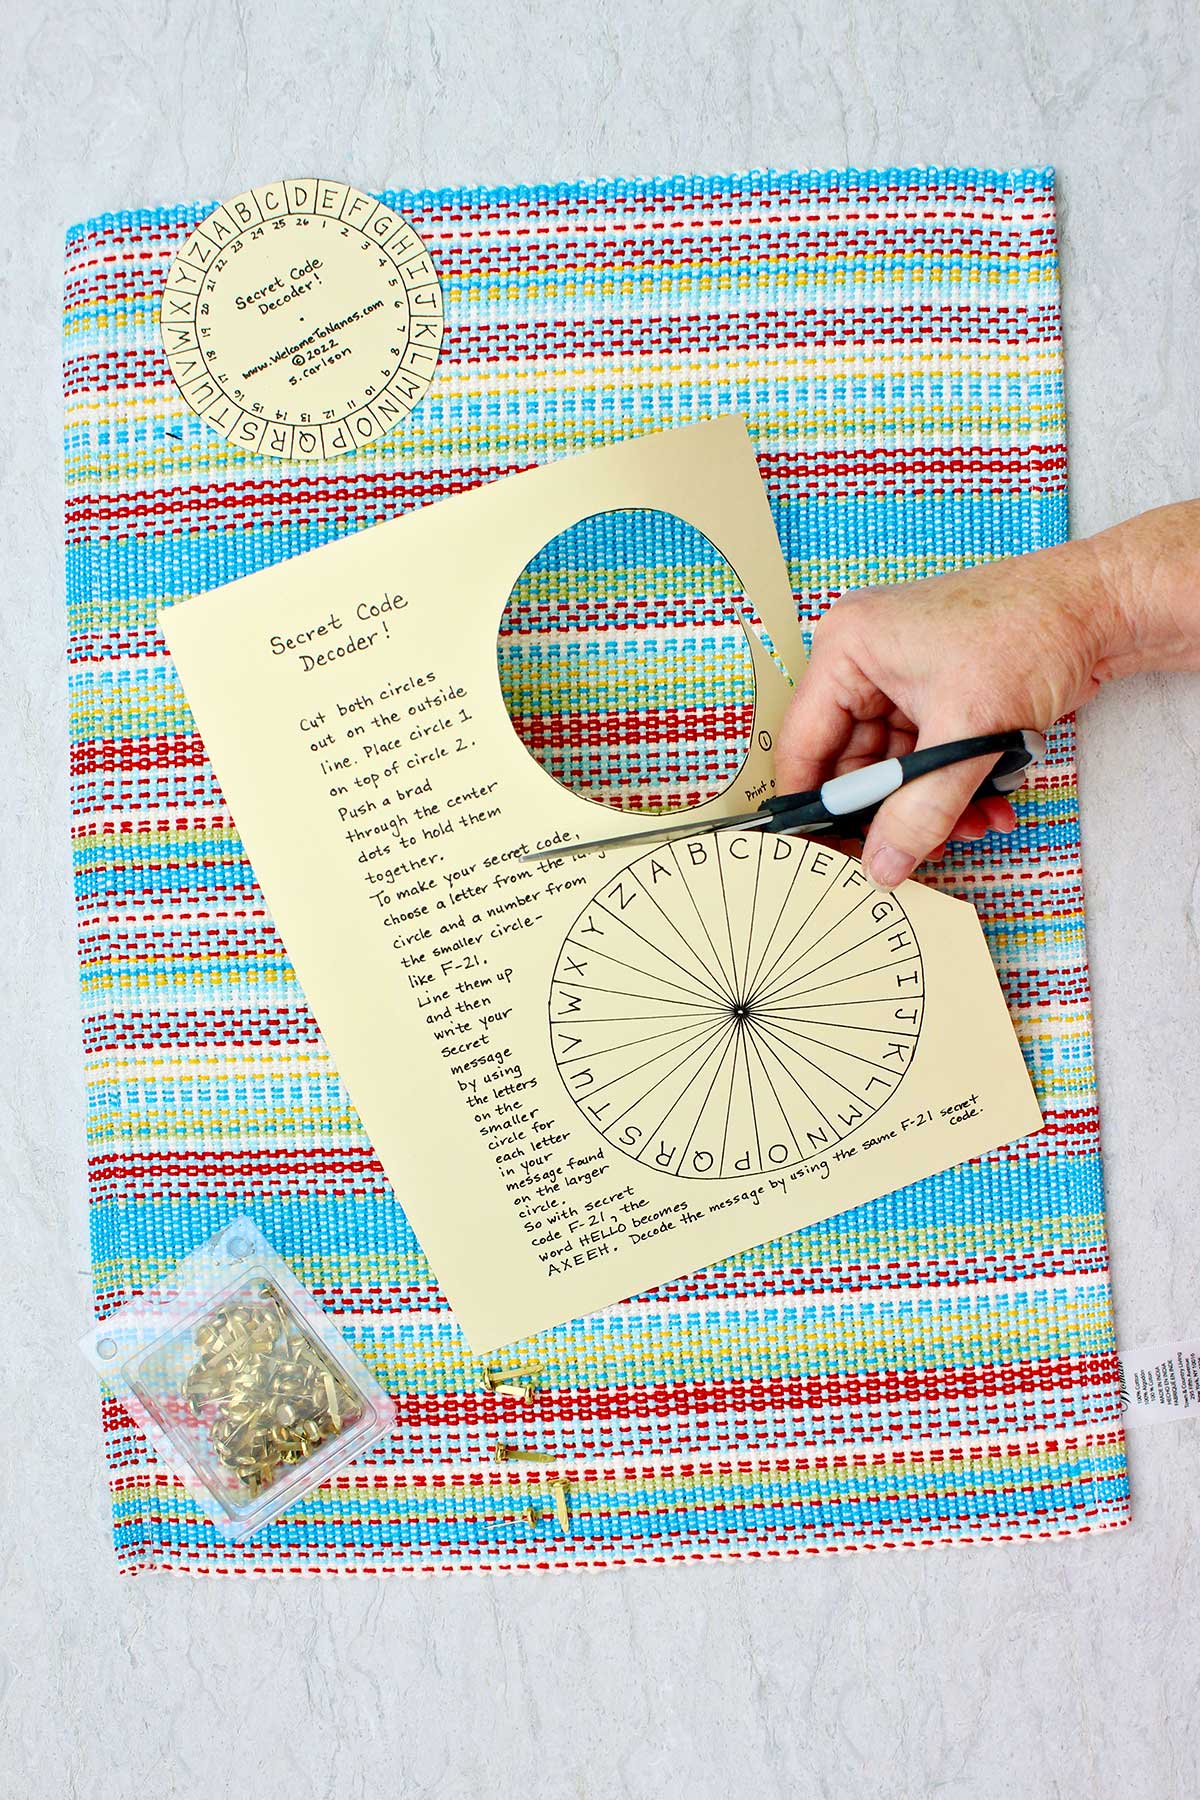
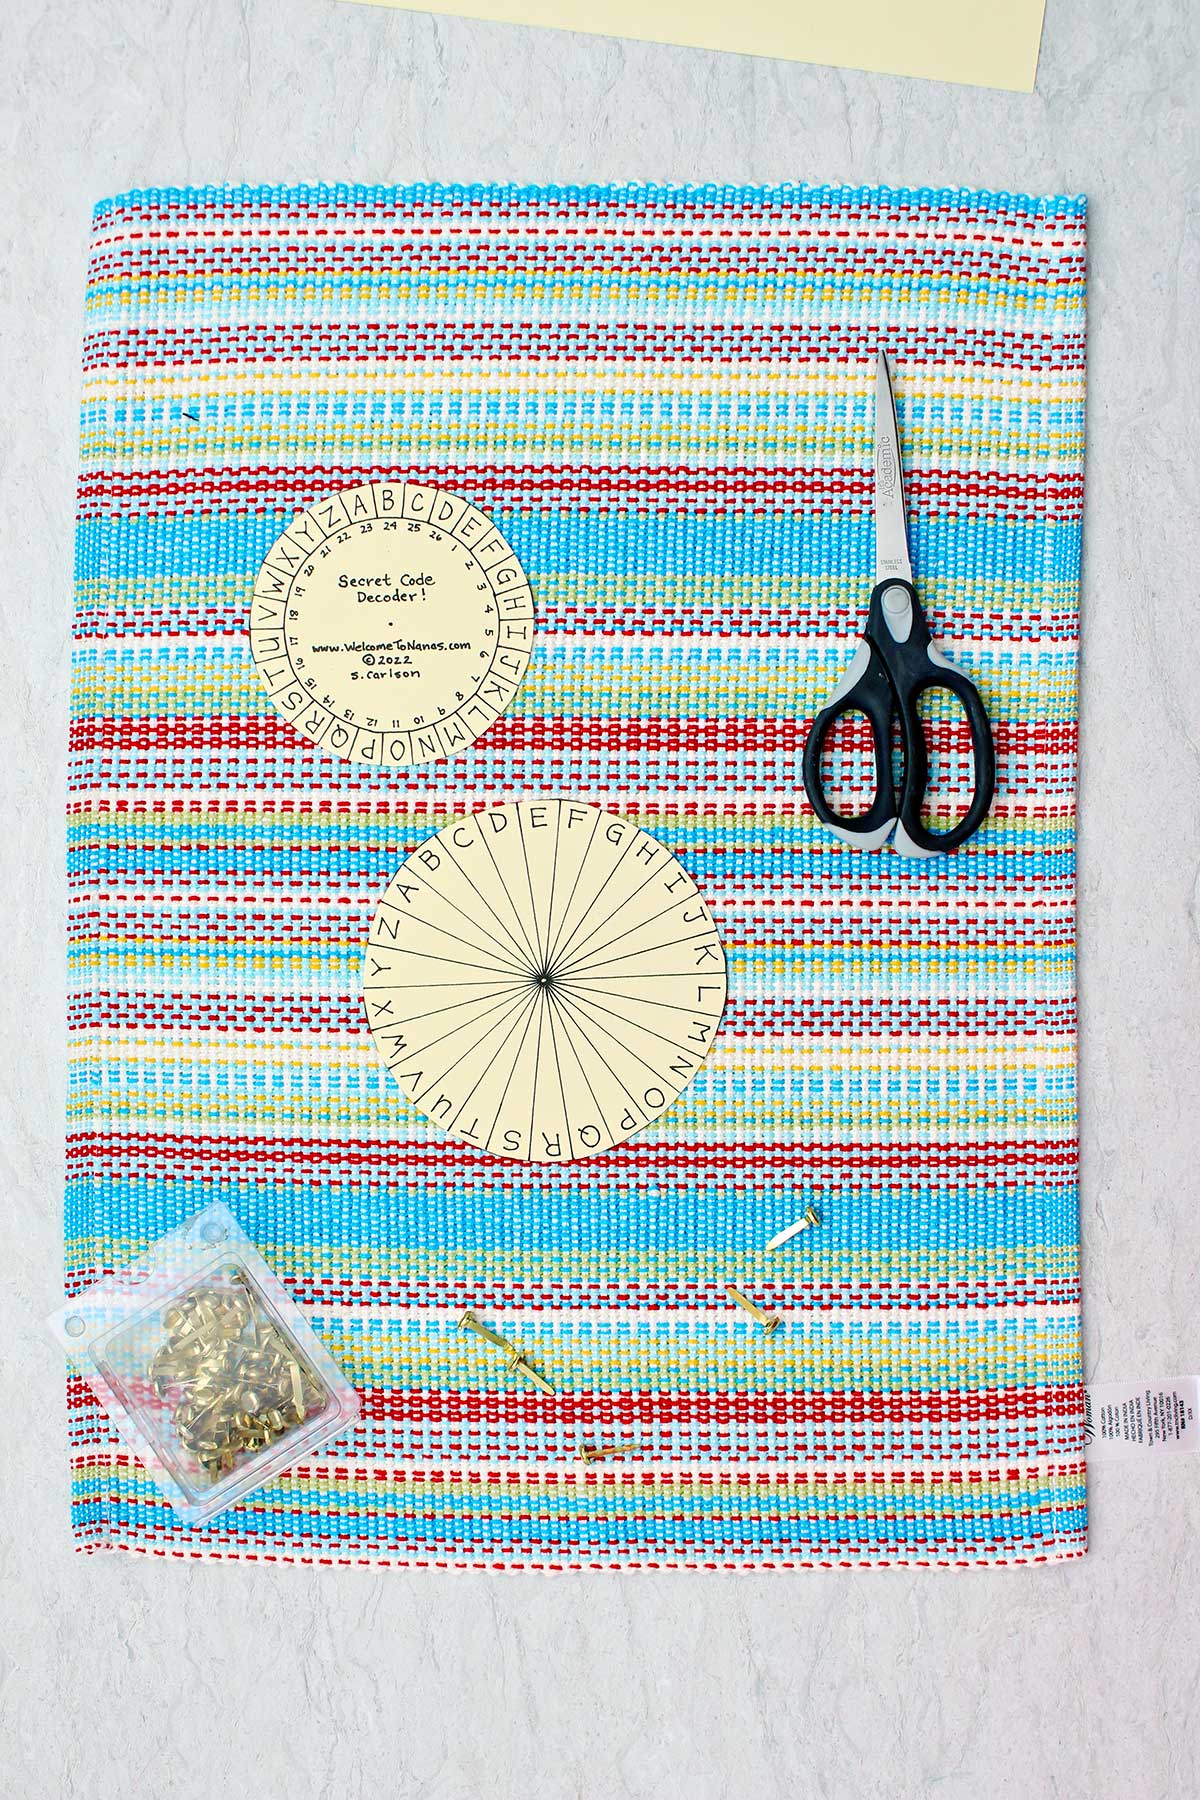
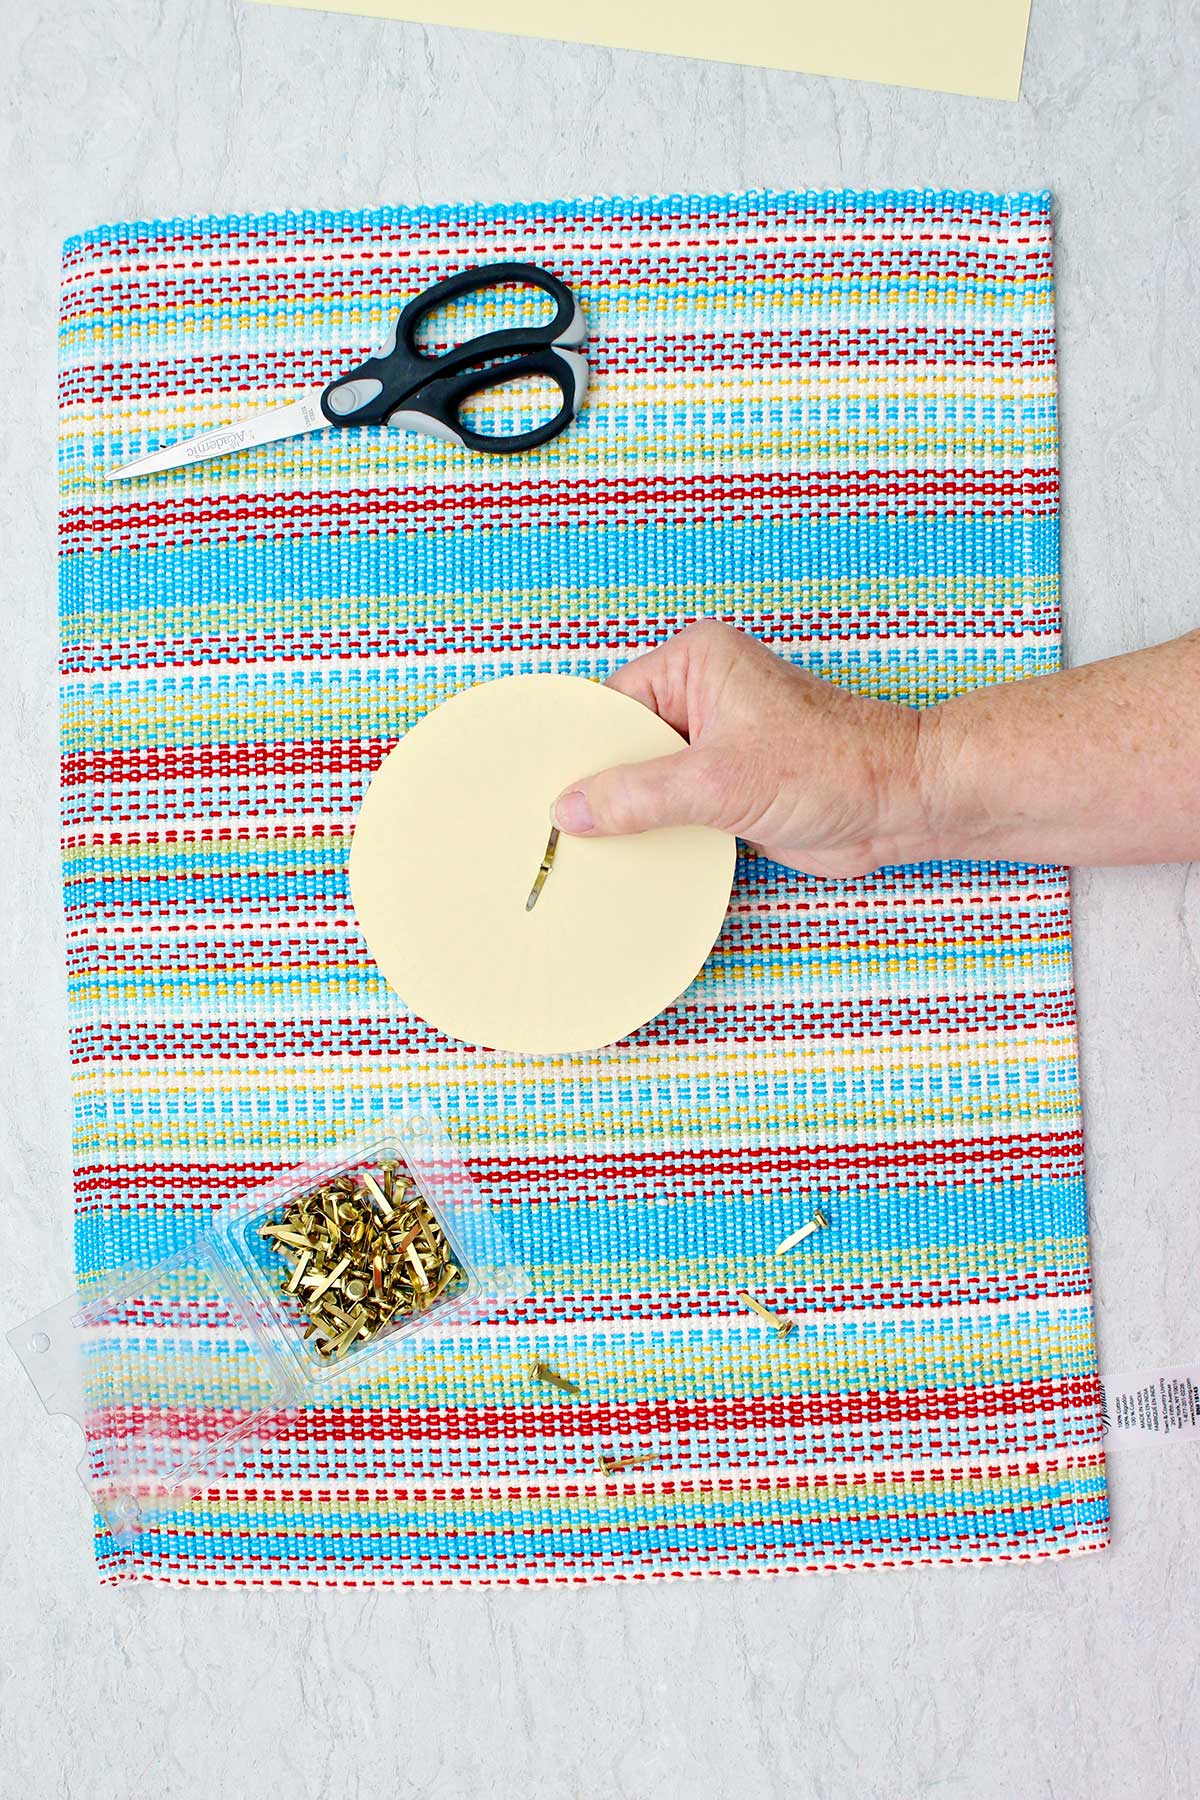
So you’re going to cut both circles out on the outside line.
Now we have two pieces that we’re going to put together to make our secret message decoder.
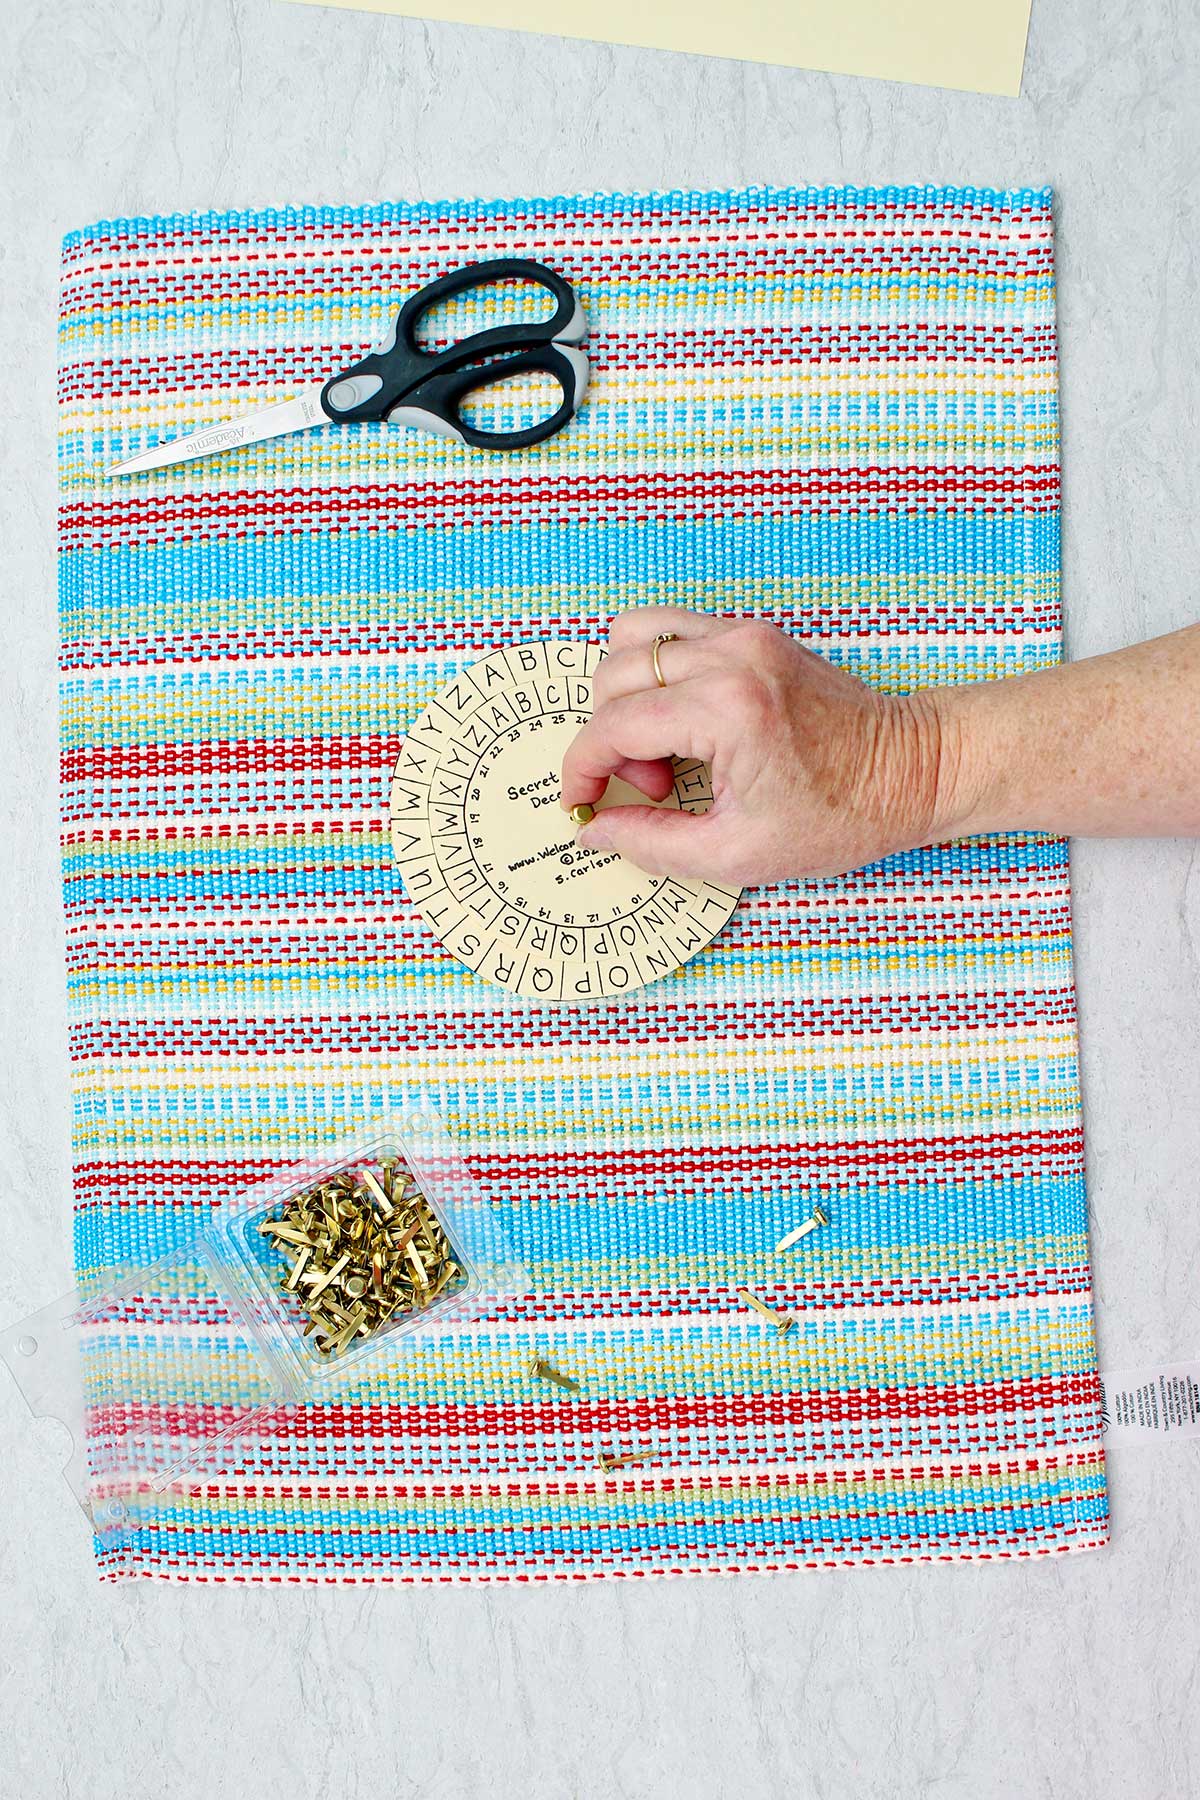
The next thing we do to put our decoder together is to punch a little hole in the center of both circles. This is where the paper fastener will go through.
I’m going to use a sharp sewing tool that is kind of sharp on the end to make the small holes.
You could use a toothpick, an ice pick, even use these brads that we’re going to use to poke through the holes. Look around for what you have on hand. You just need a small hole poked in the center of each circle.
Note: Oh, and please be very careful not to slip and hit your fingers with the sharp object!! Don't put your fingers or hand under the paper circles as you make the holes!
How do I hold the secret message decoder together?
Next we line up the two circles and put a brass brad through the center. We don’t use these much any more. I hope you have some on hand.
This little package has lasted me for years because I don’t use many of them.
Push the paper fastener through the center of the circles from the front to the back. They go through the two holes that you just made.
Note: Remember that the smaller circle goes on top of the larger circle with the printing showing.
Turn it over and on the back you will open up the two prongs of the brass brad to keep it in place.
The brass brad holds these two circles together and allows them to turn in a circle. Isn’t that cool?
Line up the letters
So I’m lining up the letters on the two circles- A to A, and B to B for right now.
You can see that the letters of the alphabet are all the way around the edge of each wheel…the outside wheel and the inside wheel.
We’re going to make our secret code from this.
So if you would like to encode something or write a secret message this free printable makes it easy peasy.
Write down your message
Start by writing your message down on a piece of paper. This will help you spell your words correctly and not forget a letter when making the secret message.
With your message in front of you, you know what all of the letters are.
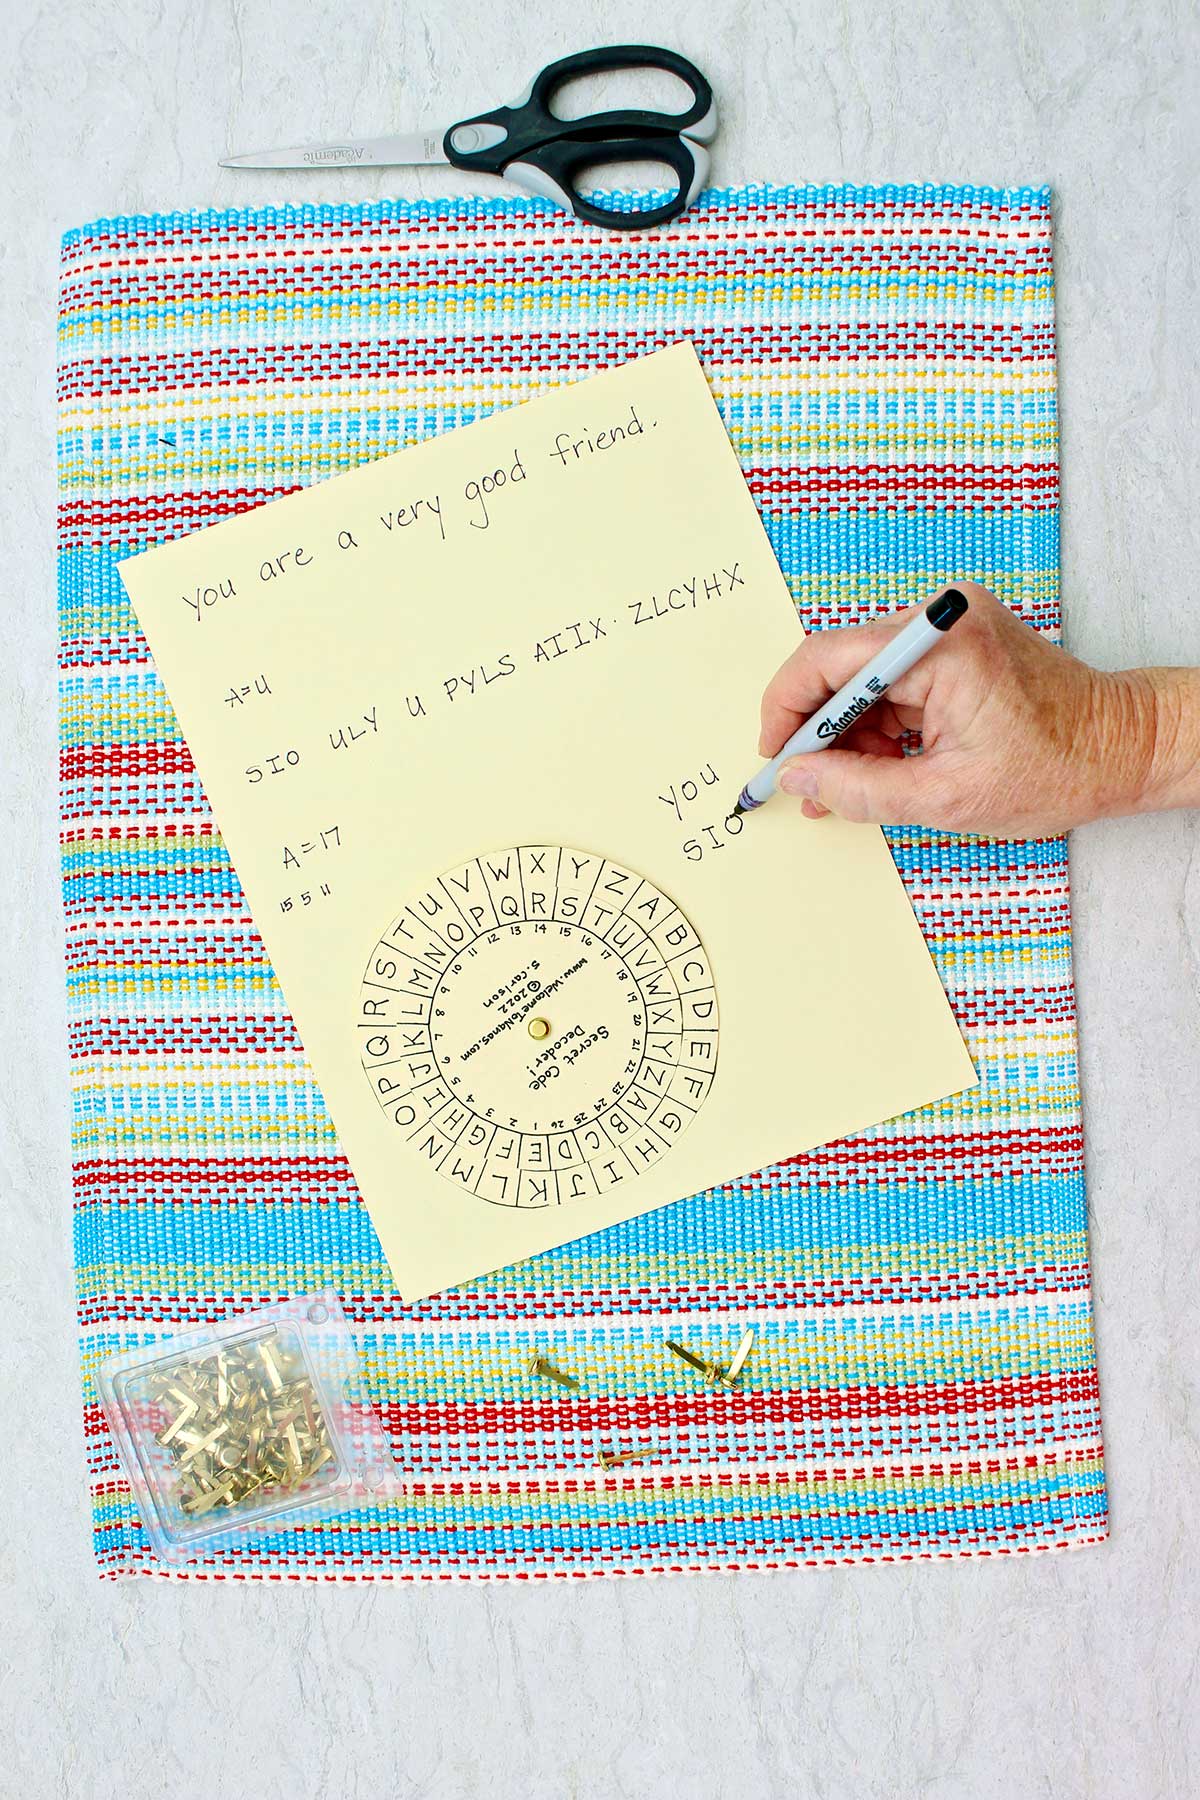
Let’s write our message: "You are a very good friend."
How do I use the Secret Message Decoder?
Now we’re going to make our own secret message from this!
First off, let me tell you about the secret message decoder.
The outside wheel will be for the original letters of your message. The inside wheel is going to be your code letters.
Setting the code
Right now I set the secret message decoder wheel so that A matches up with A on both wheels. We won’t keep it set this way because there would be no secret code as A would equal A (A=A).
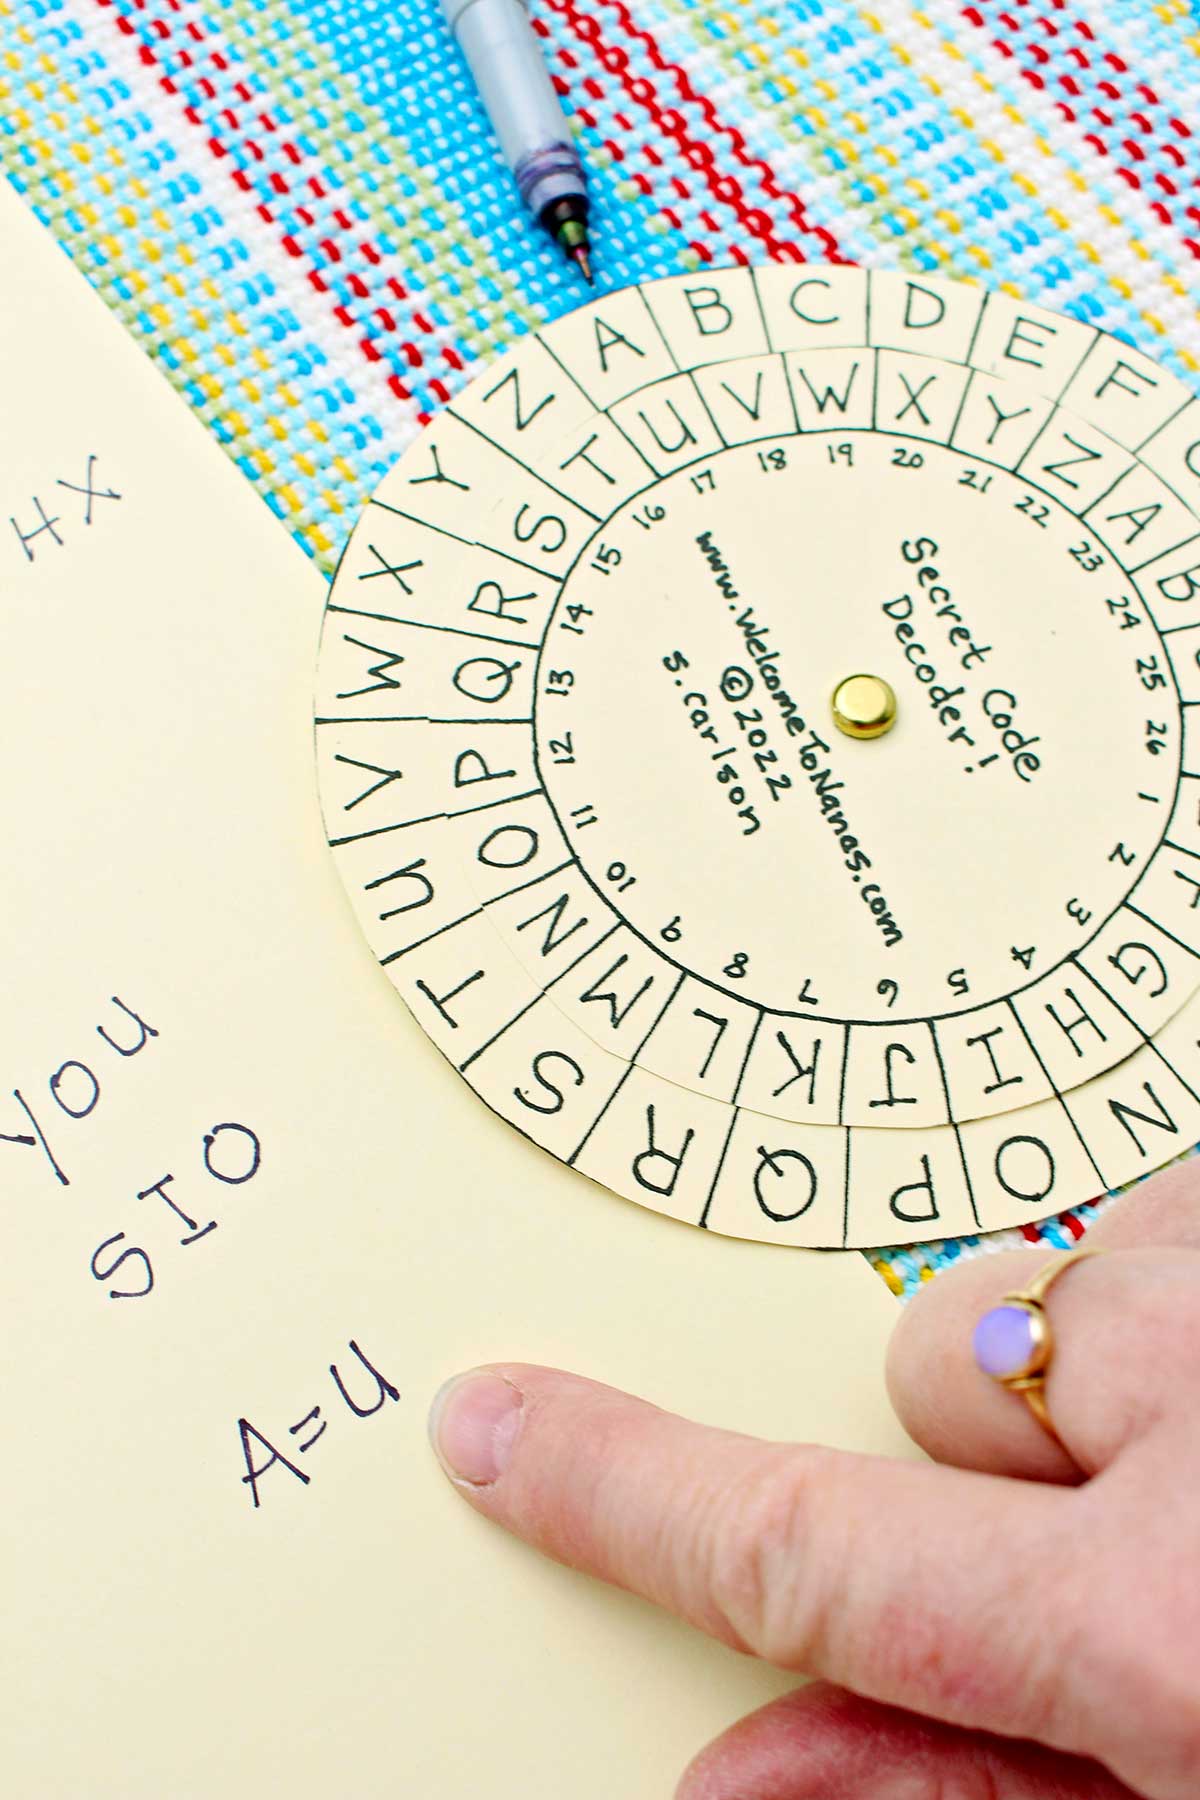
So I’m going to switch around the center circle and line up the A on the outer dial with U of the inner wheel.
So the code would be A=U or A=17 (the small number next to the letter U on the inner wheel).
When I send my message I need to let them know that A=U (or A=17). And I need to include a Secret Message Decoder Wheel.
What is fun is that you can change this code every time you write a message.
Encoding my message
Now I’m going to hold my decoder and set it to the code A=U. I find the A on the outer wheel and then turn the inner wheel so that the U lines up with the corresponding letter A on the larger circle.
I’ll write my secret message with the new letters on the inner circle.
I need to hold the decoder so that it doesn’t spin and the two wheels stay lined up so that A=U.
Let’s write our secret message.
I have my message written out on the top of the paper so I can see the letters and their order.
The first letter in my message is Y. So looking at the decoding wheel:
- Y on the outer wheel is lined up with the letter S on the inner wheel. Write the S down on the paper.
- O on the outer wheel is lined up with I. Write down I.
- U is lined up with O. Write down O.
The word YOU becomes SIO. That is the first word of the message in secret code with A=U (A=17)!

Continue encoding your message into a secret message.
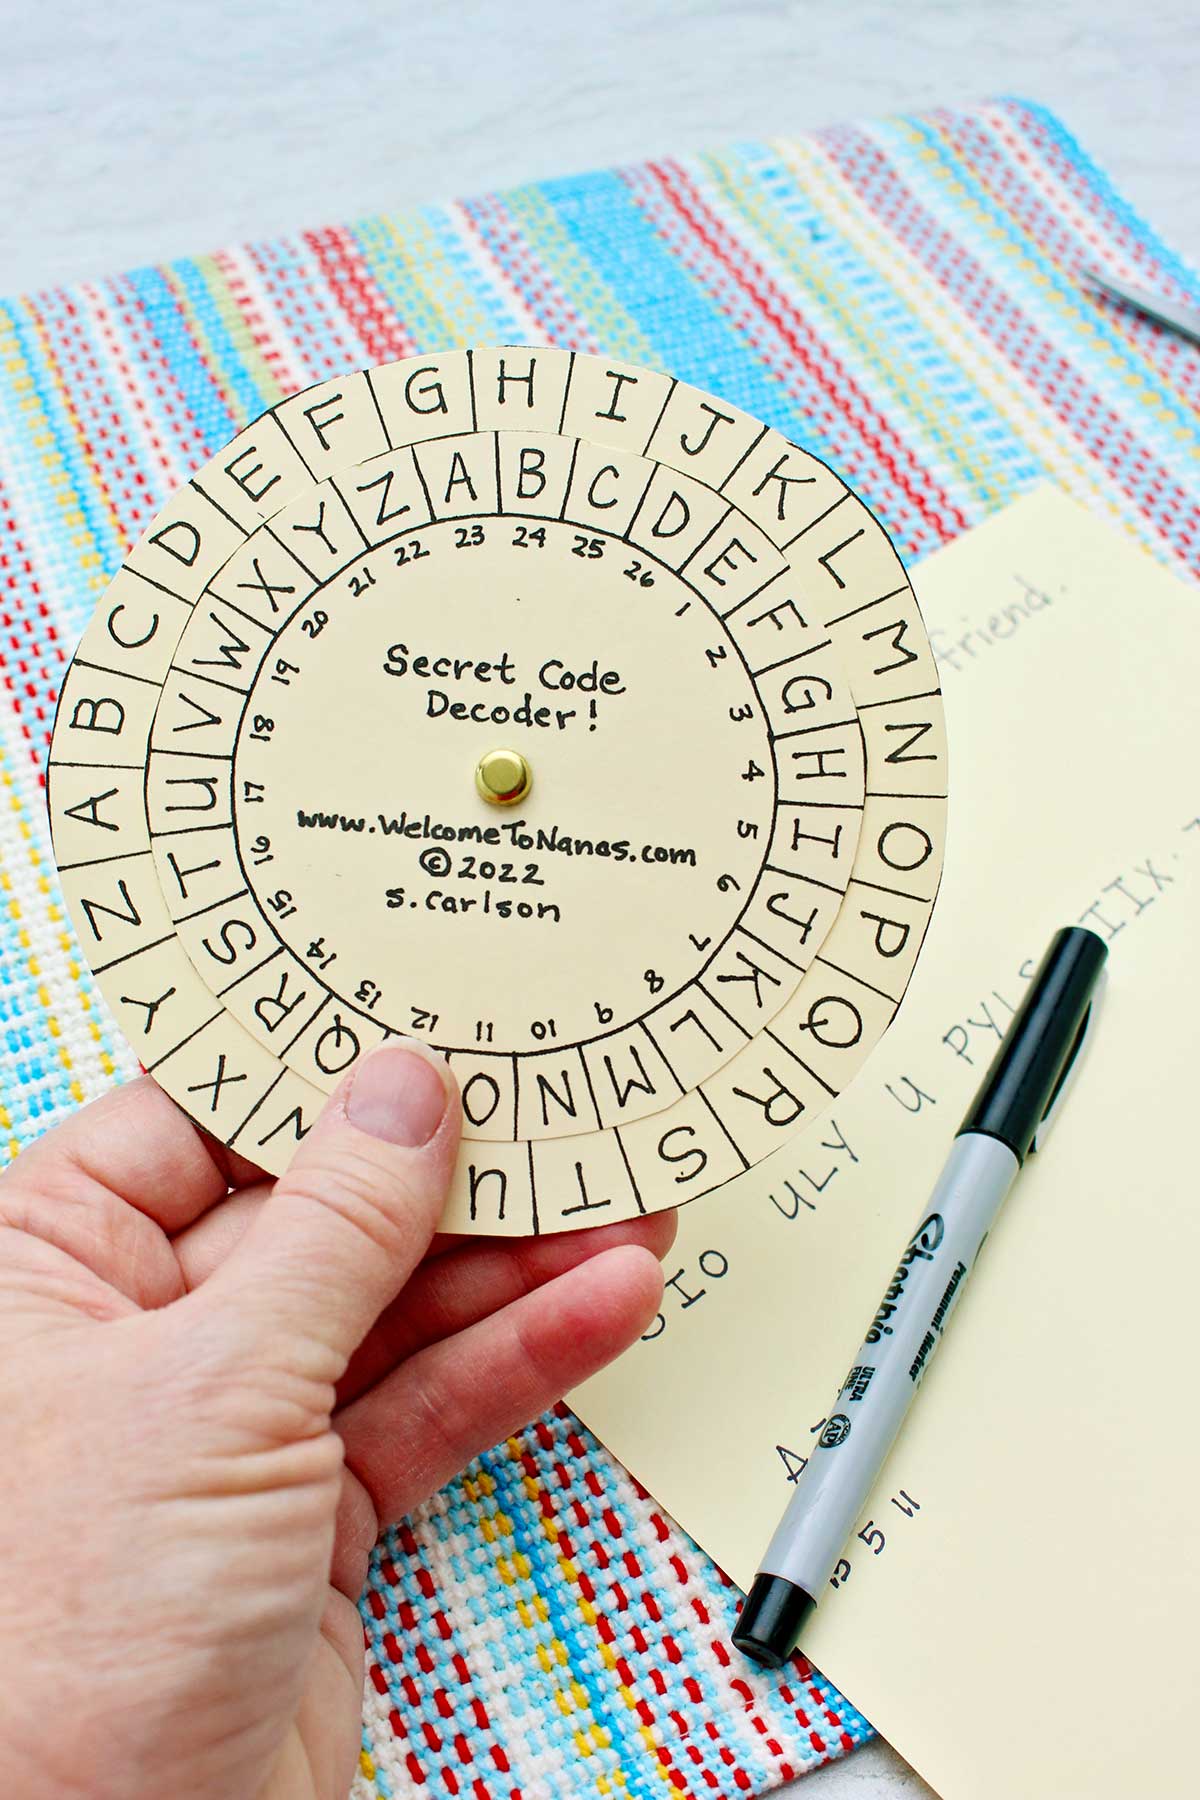
Your original message of “You are a very good friend ends up- SIO ULY U PYLS AIIX ZLCYHX.
And that is my secret message!
The second message is written out in code but it says the same thing as the first message.
Note: Be sure to leave spaces in between the words of your message.
Cut off the part of the paper with the key (A=U) and the secret message to give to your friend. Keep the original message with you.
It is best to start with a simple message to encode. And it is also best to write down the original message before encoding. It will go faster and will be more accurate. Yes!
Give your friend the code (A=U), the secret message, and the Secret Message Decoder Wheel. Then your friend can decipher (or decode) the secret message.
This craft activity is best for a child that is able to read and write so age 7 or older.
Tired of plain letters in your secret codes?
It is possible to use a number instead a second set of letters on the second decoder.
Leaving the Secret Message Decoder as it is we know that A=U. But if you look closely there is a number above the letter
With the letter A on the outer wheel lined up to U we can see that above the U on the inner wheel is the number 17.
So I could also choose the code A=17 instead of A=U.
If I did, the first word of the message would be encoded 15,5,11.
Note: If using numbers in your secret message be sure to write them very neatly so others can read them. You can't decode the message if the numbers run together (15, 5, 11 instead of 15511).
All of your encoding is done with the Secret Message Decoder Wheel. This is so cool.
How do I decode my secret messages?
To decipher or be able to read the secret code, set the decoder wheel on the code that was given (A=U). Keep the wheel in your hand and don’t turn the wheel as you are working deciphering the message.
Look at the first letter of the secret message. Find it on the inner wheel of the secret message decoder. See what letter on the outer wheel is lined up with it.
I find it helpful to write down each letter on paper as you go so you don’t forget!
Enjoy using your decoder wheel
I loved doing this as a kid and I played with my neighbor. We were the same age and we would make secret messages.
Perhaps you could invite someone to a party with a secret message. Send the secret code to the person you are inviting along with a message decoder wheel. You could have a mystery party of some sort.
This is a very simple activity that can be made quickly. Both you and the kids are going to love it!
I hope you enjoy your Printable DIY Secret Message Decoder Wheel and have lots of fun this summer.
Again, if you would like to follow along with me as I make this craft, then turn on the full length tutorial video. Here’s the link: DIY Secret Message Decoder Wheel Full Length Tutorial Video.
Want more summertime activities?
For more summertime activities take a look at these options:
- Amazing Summer Slip & Slide
- Giant Ice Cube Archeology
- 25 Fun Summer Activities for Kids!
- 14 Activities to Get Your Kids Outside!
History of the Decoder Wheel (cipher wheel)
Before I’m done, I wanted to tell you that Thomas Jefferson created a very complex Decoder Wheel about 250 years ago! He was the Secretary of State under President George Washington.
During the American Revolution messages were hand carried but later he needed a way to get secret messages through the foreign post office.
It was made out of a series of wooden discs. This wooden cypher wheel was much more complicated than our paper version with only two paper wheels!
Military leaders in the World War II used a version of a cypher wheel to send secret correspondence. Using a secret code was a safer way to communicate battle plans.
Military spy networks were able to send top secret instructions and with less fear of plans being found out.
You can read more about it at this safe website from Jefferson's Monticello: Research and Education on the wheel cipher.
Enjoy!
If you try this craft, let me know! Go ahead and leave a comment, rate it, and tag a photo with #WelcometoNanas wherever you post.
Come join the fun at https://welcometonanas.com
Supplies for a DIY Secret Message Decoder Wheel
- 2 copies of the Free Printable DIY Secret Message Decoder Wheel
- Cardstock paper
- Scissors
- Brass Brad (Paper fastener)
- Paper and pen
- Colored pencils or markers if you want to decorate your wheel or message
Printable DIY Secret Message Decoder Wheel for Kids
Equipment
- Scissors
Items Required
- 2 copies 2 copies of the Free Printable DIY Secret Message Decoder Wheel
- Cardstock paper
- Scissors
- Brass Brad (Paper fastener)
- Paper and pen
- Colored pencils or markers if you want to decorate your wheel or message optional
Instructions
- So you will need to make 2 copies of the Decoder Wheel, one for you and the other for the person receiving the secret message.Here is the link: Free Printable DIY Secret Message Decoder Wheel.I recommend printing the wheel out on card stock paper so it isn't floppy when you work with it.
- So you’re going to cut both circles out on the outside line.The next thing we do to put our decoder together is to punch a little hole in the center of both circles. This is where the paper fastener will go through.
- Next we line up the two circles and put a brass brad through the center. Push the paper fastener through the center of the circles from the front to the back. They go through the two holes that you just made.Note: Remember that the smaller circle goes on top of the larger circle with the printing showing. Turn it over and on the back you will open up the two prongs of the brass brad to keep it in place.
- Start by writing your message down on a piece of paper. This will help you spell your words correctly and not forget a letter when making the secret message.With your message in front of you, you know what all of the letters are.Let’s write our message: "You are a very good friend."
- Right now I set the secret message decoder wheel so that A matches up with A on both wheels. We won’t keep it set this way because there would be no secret code as A would equal A (A=A).So I’m going to switch around the center circle and line up the A on the outer dial with U of the inner wheel.So the code would be A=U or A=17 (the small number next to the letter U on the inner wheel).When I send my message I need to let them know that A=U (or A=17). And I need to include a Secret Message Decoder Wheel.
- Now I’m going to hold my decoder and set it to the code A=U. I find the A on the outer wheel and then turn the inner wheel so that the U lines up with the corresponding letter A on the larger circle.I’ll write my secret message with the new letters on the inner circle.I need to hold the decoder so that it doesn’t spin and the two wheels stay lined up so that A=U. Your original message of “You are a very good friend ends up- SIO ULY U PYLS AIIX ZLCYHX. And that is my secret message!
- To decipher or be able to read the secret code, set the decoder wheel on the code that was given (A=U). Keep the wheel in your hand and don’t turn the wheel as you are working deciphering the message.Look at the first letter of the secret message. Find it on the inner wheel of the secret message decoder. See what letter on the outer wheel is lined up with it.I find it helpful to write down each letter on paper as you go so you don’t forget!


Leave a Reply