Welcome To Nana's

  • All Crafts
  • Arts & Crafts
    • Drawing
    • Painting
    • Sewing
    • Paper craft
    • Nature
    • Recycled
    • Coloring Book
    • 3-D Project
  • Activities
    • Indoor
    • Outdoor
    • Science
    • Trip Activities
    • Recipes
  • Holiday
    • Christmas
    • Thanksgiving
    • Halloween
    • Easter
    • Fourth of July
    • Father's Day
    • Flag Day
    • May Day
    • Midsummers Day
    • Mother's Day
    • New Years
  • About
menu icon
go to homepage
  • All Crafts
  • Arts & Crafts
    • Drawing
    • Painting
    • Sewing
    • Paper craft
    • Nature
    • Recycled
    • Coloring Book
    • 3-D Project
  • Activities
    • Indoor
    • Outdoor
    • Science
    • Trip Activities
    • Recipes
  • Holiday
    • Christmas
    • Thanksgiving
    • Halloween
    • Easter
    • Fourth of July
    • Father's Day
    • Flag Day
    • May Day
    • Midsummers Day
    • Mother's Day
    • New Years
  • About
search icon
Homepage link
  • All Crafts
  • Arts & Crafts
    • Drawing
    • Painting
    • Sewing
    • Paper craft
    • Nature
    • Recycled
    • Coloring Book
    • 3-D Project
  • Activities
    • Indoor
    • Outdoor
    • Science
    • Trip Activities
    • Recipes
  • Holiday
    • Christmas
    • Thanksgiving
    • Halloween
    • Easter
    • Fourth of July
    • Father's Day
    • Flag Day
    • May Day
    • Midsummers Day
    • Mother's Day
    • New Years
  • About
×
Home » All Posts

Make a Kid's Fall Leaf Collage

Published: Oct 7, 2021 by Shelly · This post may contain affiliate links · Leave a Comment

Collage of different green leaves with white plate and bowl of paste on a table nearby.

Collage making with leaves-

It is fall and the leaves are turning color and beginning to drop where I live in the central U.S.  I often pick them up and bring them home just to sit on the table, the colors and shapes are so beautiful.

Take a leaf gathering nature walk!

Grab your grand and pick up some of those pretty leaves to make a kid’s fall leaf collage. It is amazing what ideas the kids will come up with using just leaves as their art medium when they make a leaf collage picture.

Hopefully the weather will be nice for your nature walk to collect up leaves from a variety of trees, bushes, flowers, and other plants of various sorts. The more variety the better. We did this activity awhile back and there wasn’t much variety of color in the leaves yet. 

There are a variety of leaf shapes as well. We did a Tree Leaf Identification Nature Journal in a previous post, and it is a fun project to make with leaves as well. Check out the idea here and perhaps collect leaves for that purpose at the same time!

Two girls side by side starting leaf collage with paint brushes and bowl of paste between them.

Leaves of three, let them be!

Note: In our area it is always good to remind kids what poison ivy looks like and to not touch it. “Leaves of three, let it be.” That would not be a good surprise!

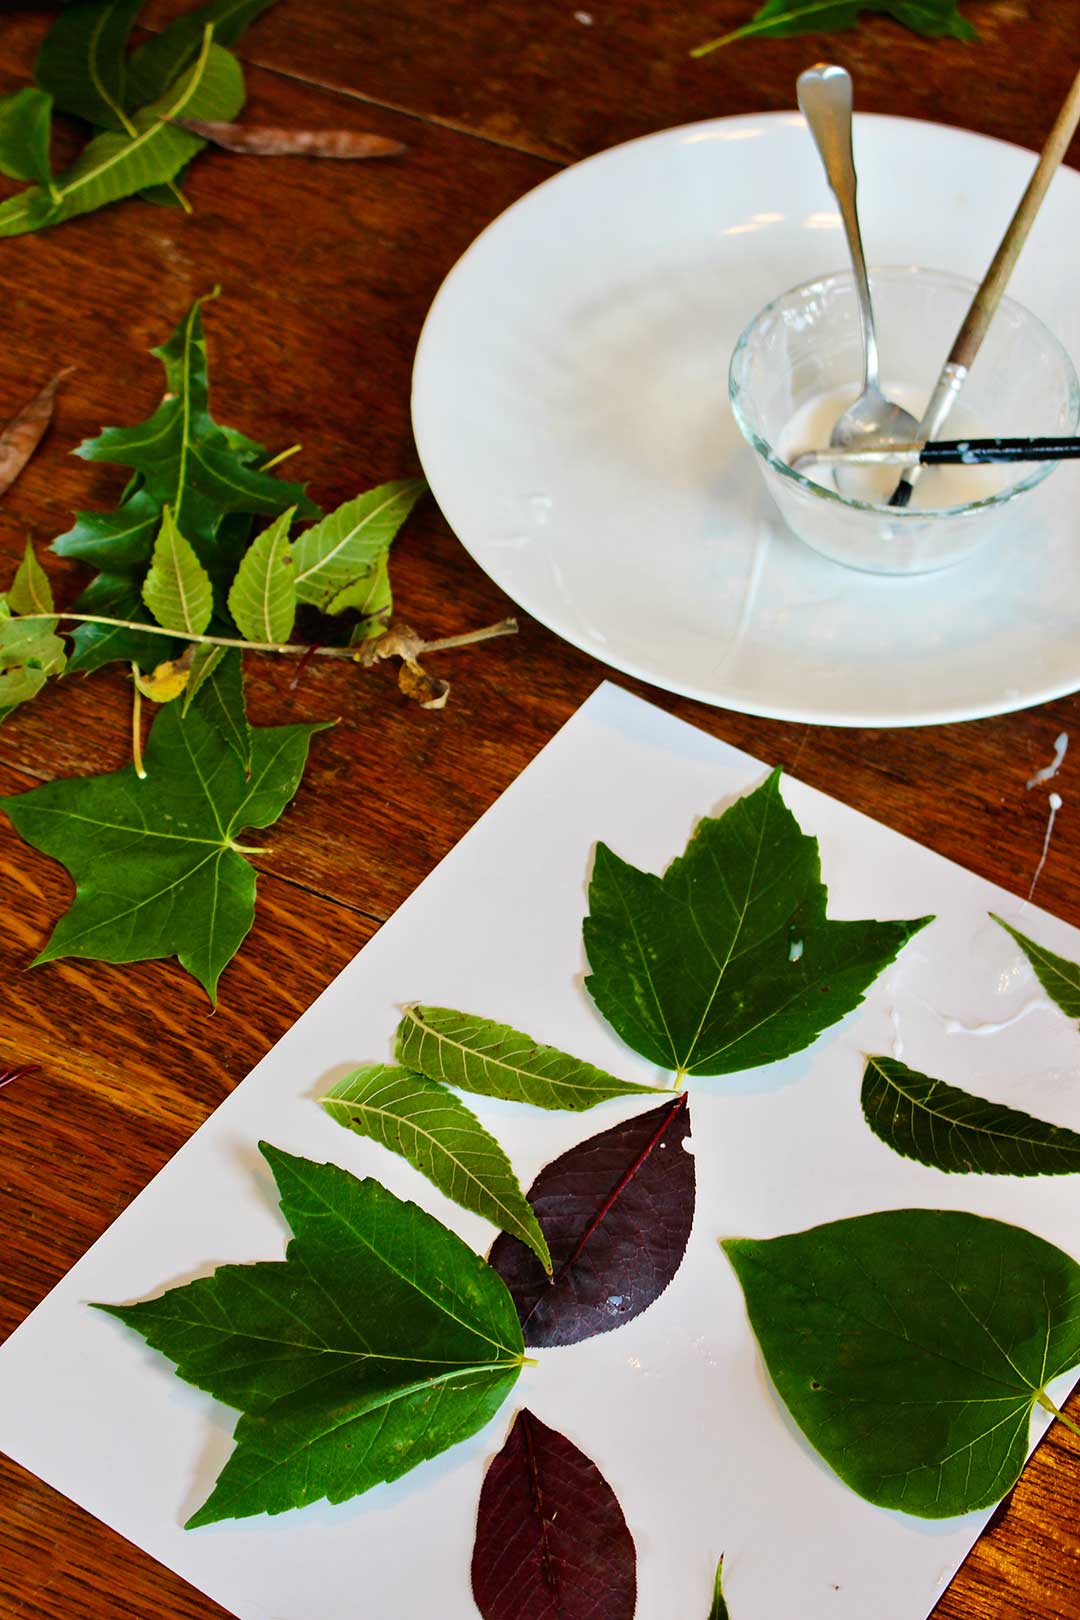
Set up for a creative leaf collage

I gave them each an 8.5x11 inch piece of Cardstock paper to design upon and later glue the leaves to. This is a heavier weight paper that works well with projects using glue.

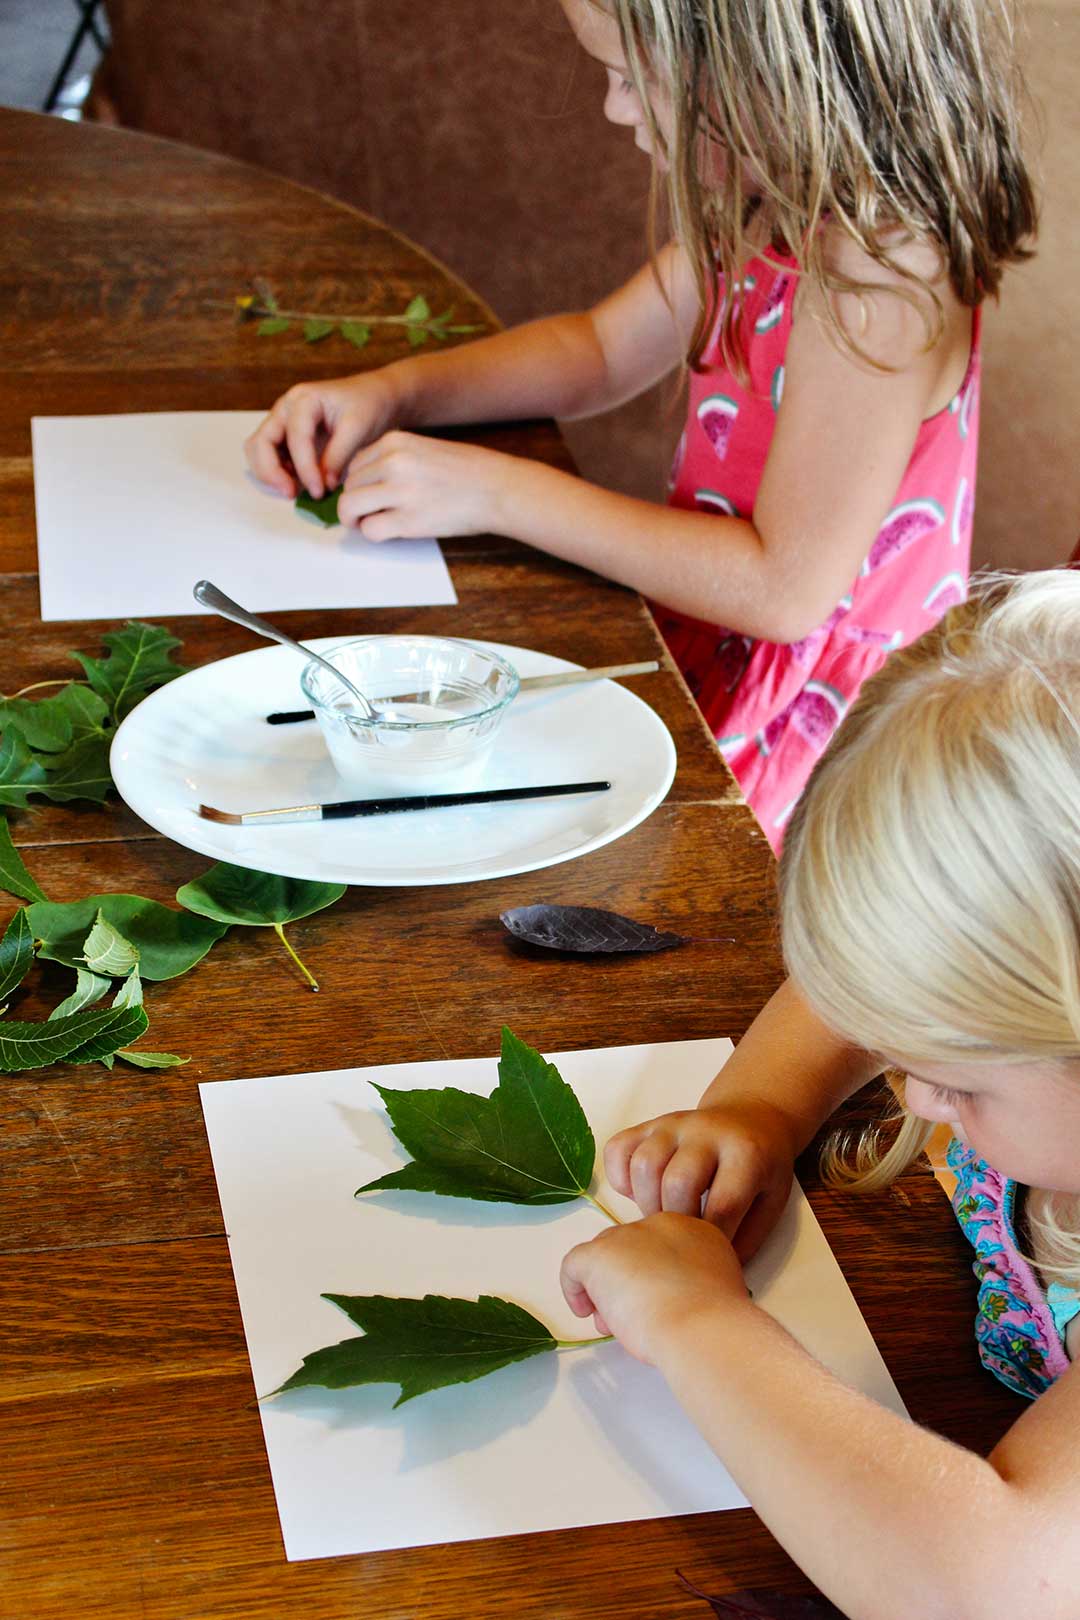
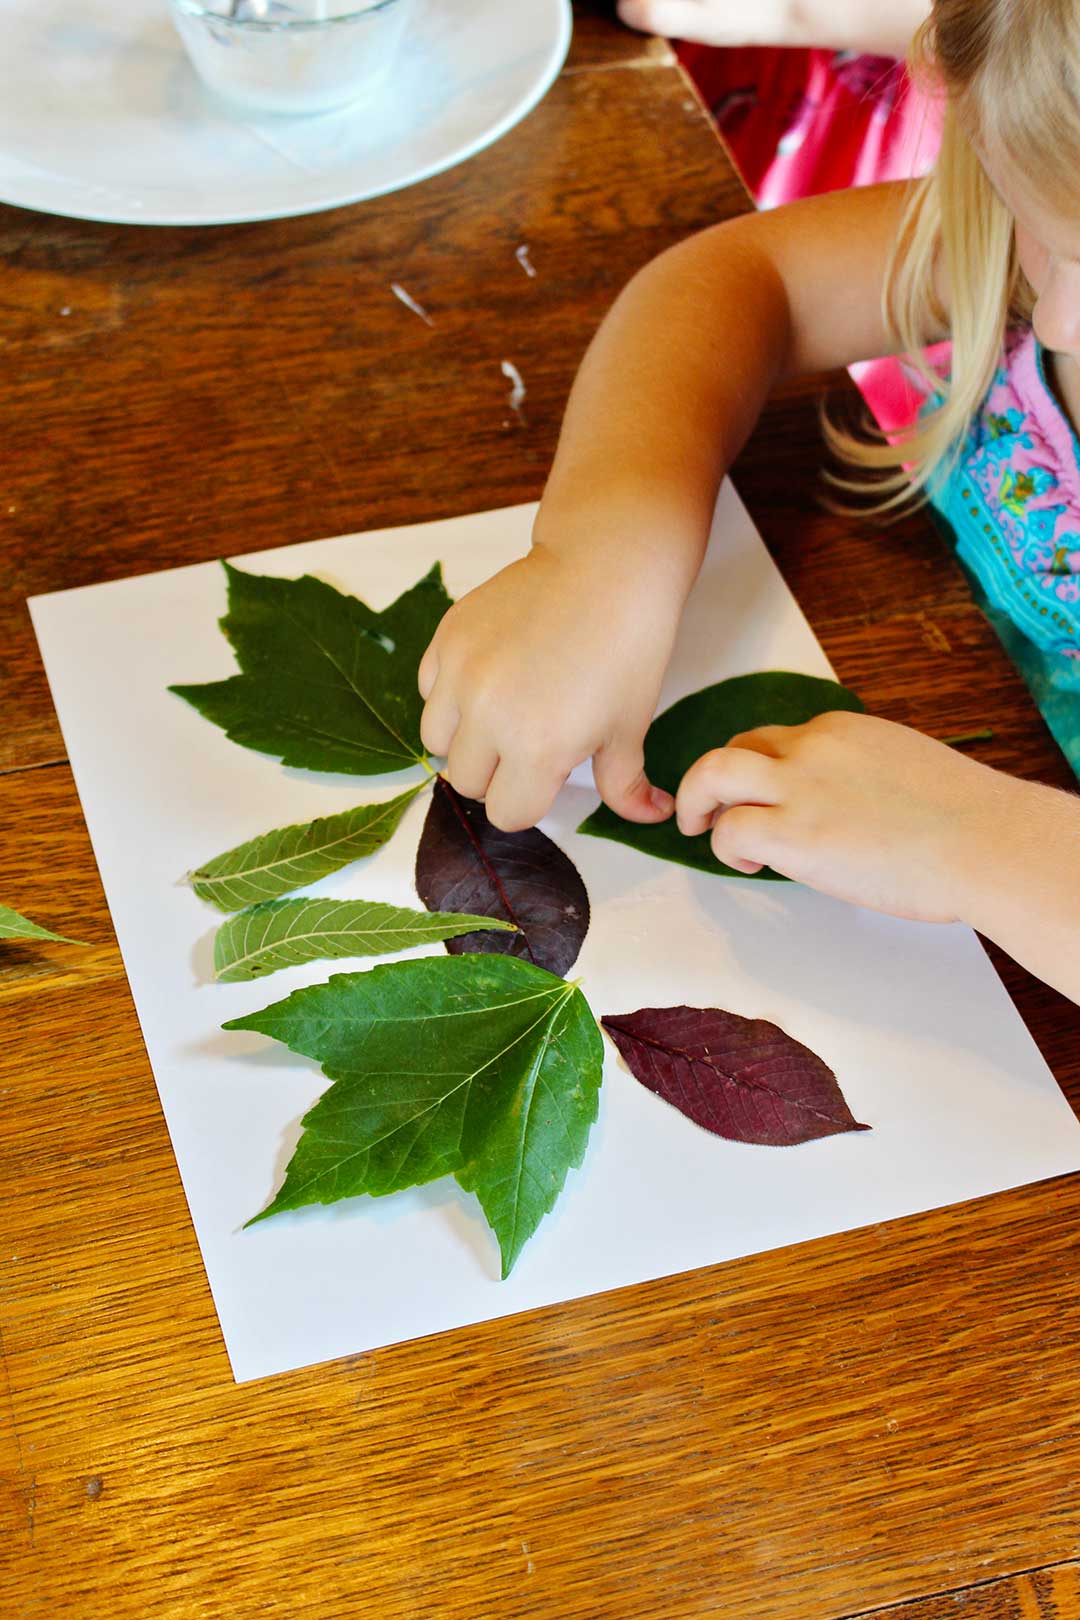
We spread our leaves out on the table and shared between the grands. 

Immediately the kids were examining the leaves and you could see the gears in their heads turning, creative ideas formulating.

Girl wearing red dress with watermelons starts putting together her leaf collage on white paper.

Leaf collage designs

Leaf collage animals are especially fun to create, but the kids can create any design that they can imagine (and that’s a lot!).

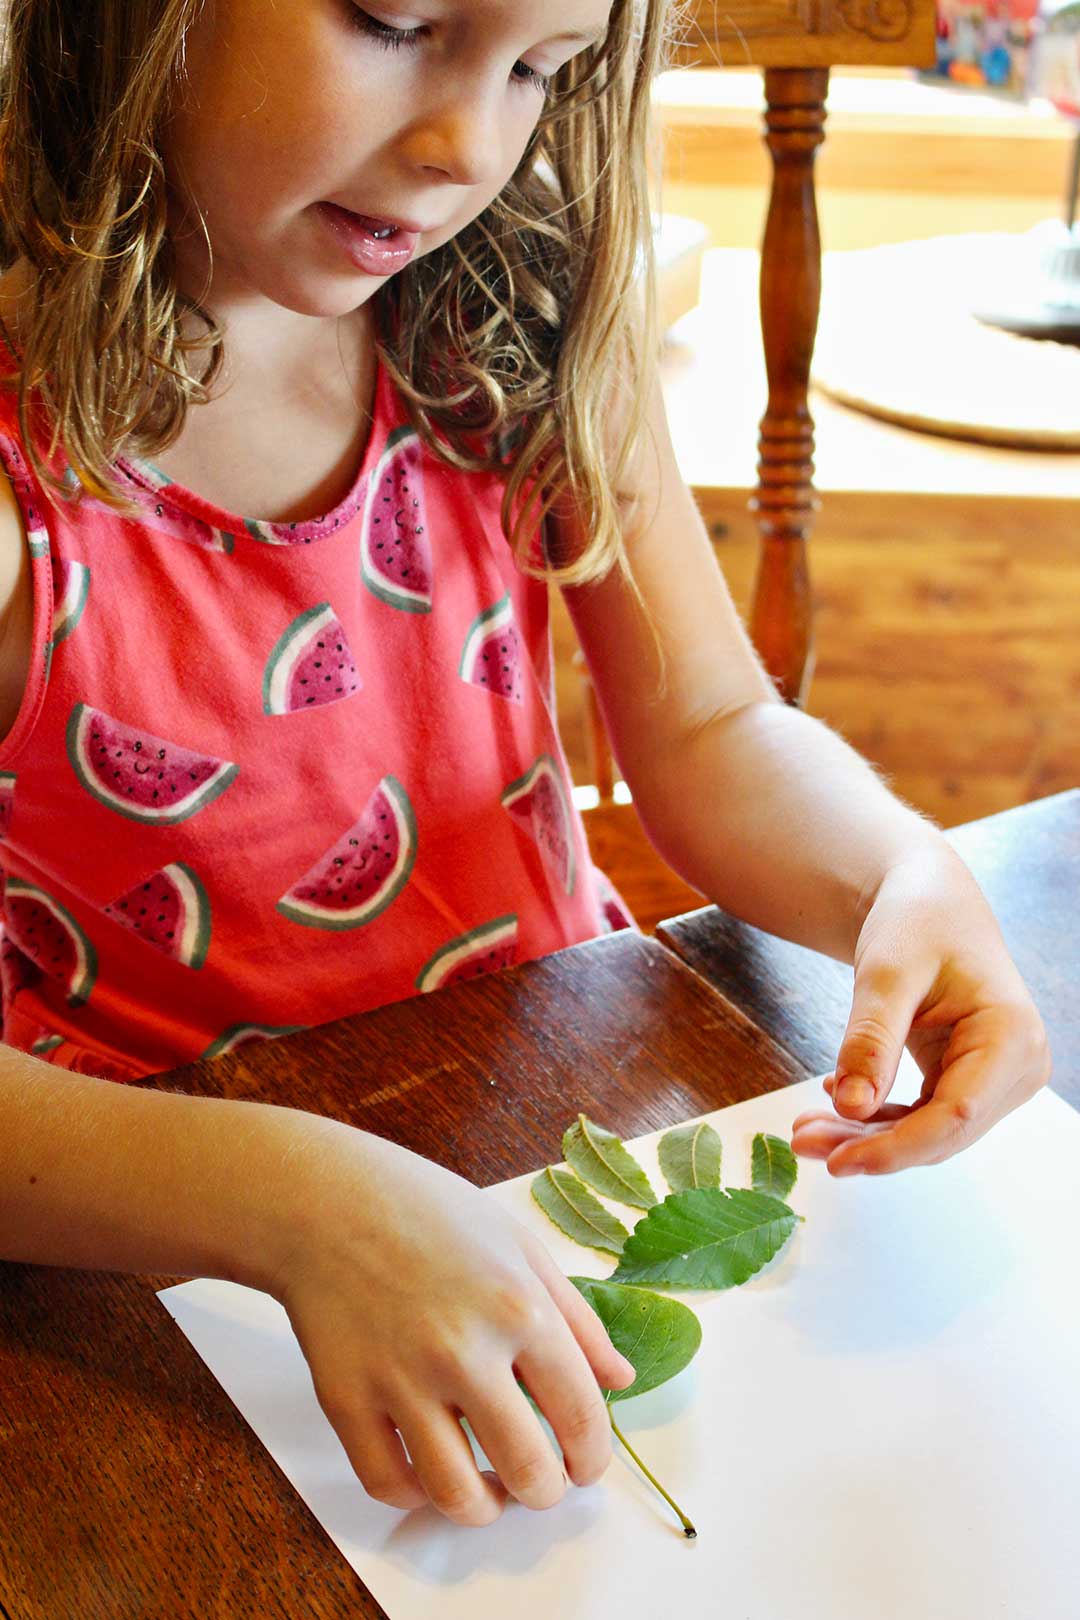
Just play around with designs for a while. What shapes of leaves work for various parts of your design? How does changing the leaves you use change your design? Can you layer the leaves to make a different design or effect? Or put leaves in a repeating pattern?

Or could you make a lion, butterfly, rabbit, dog, or a bird? Could you make a car, tree, or a person?

The pictures will be a bit wonky looking, but it is like a puzzle to get the leaves to make the pictures in your imagination!

It’s ok if the kids want to cut leaves to make an effect, like a bend in the legs of an animal, but encourage them to use them as they are if possible.

Girl with blonde hair painting the back of a leaf with paste for her leaf collage.

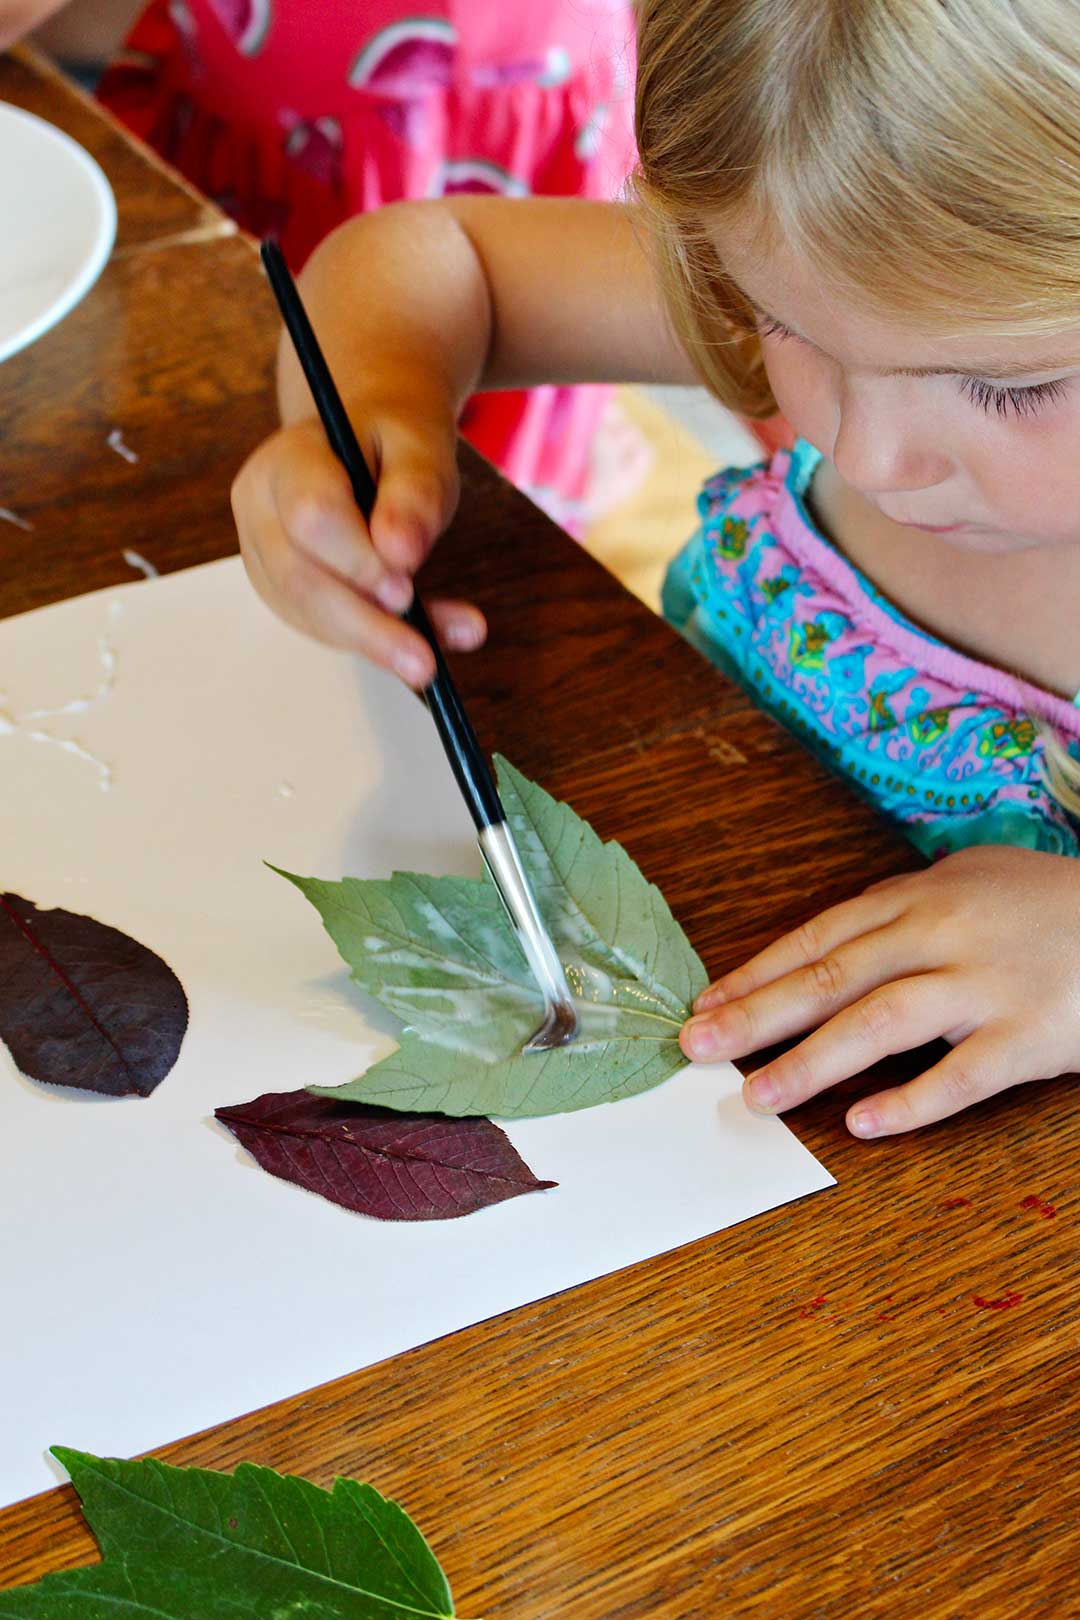
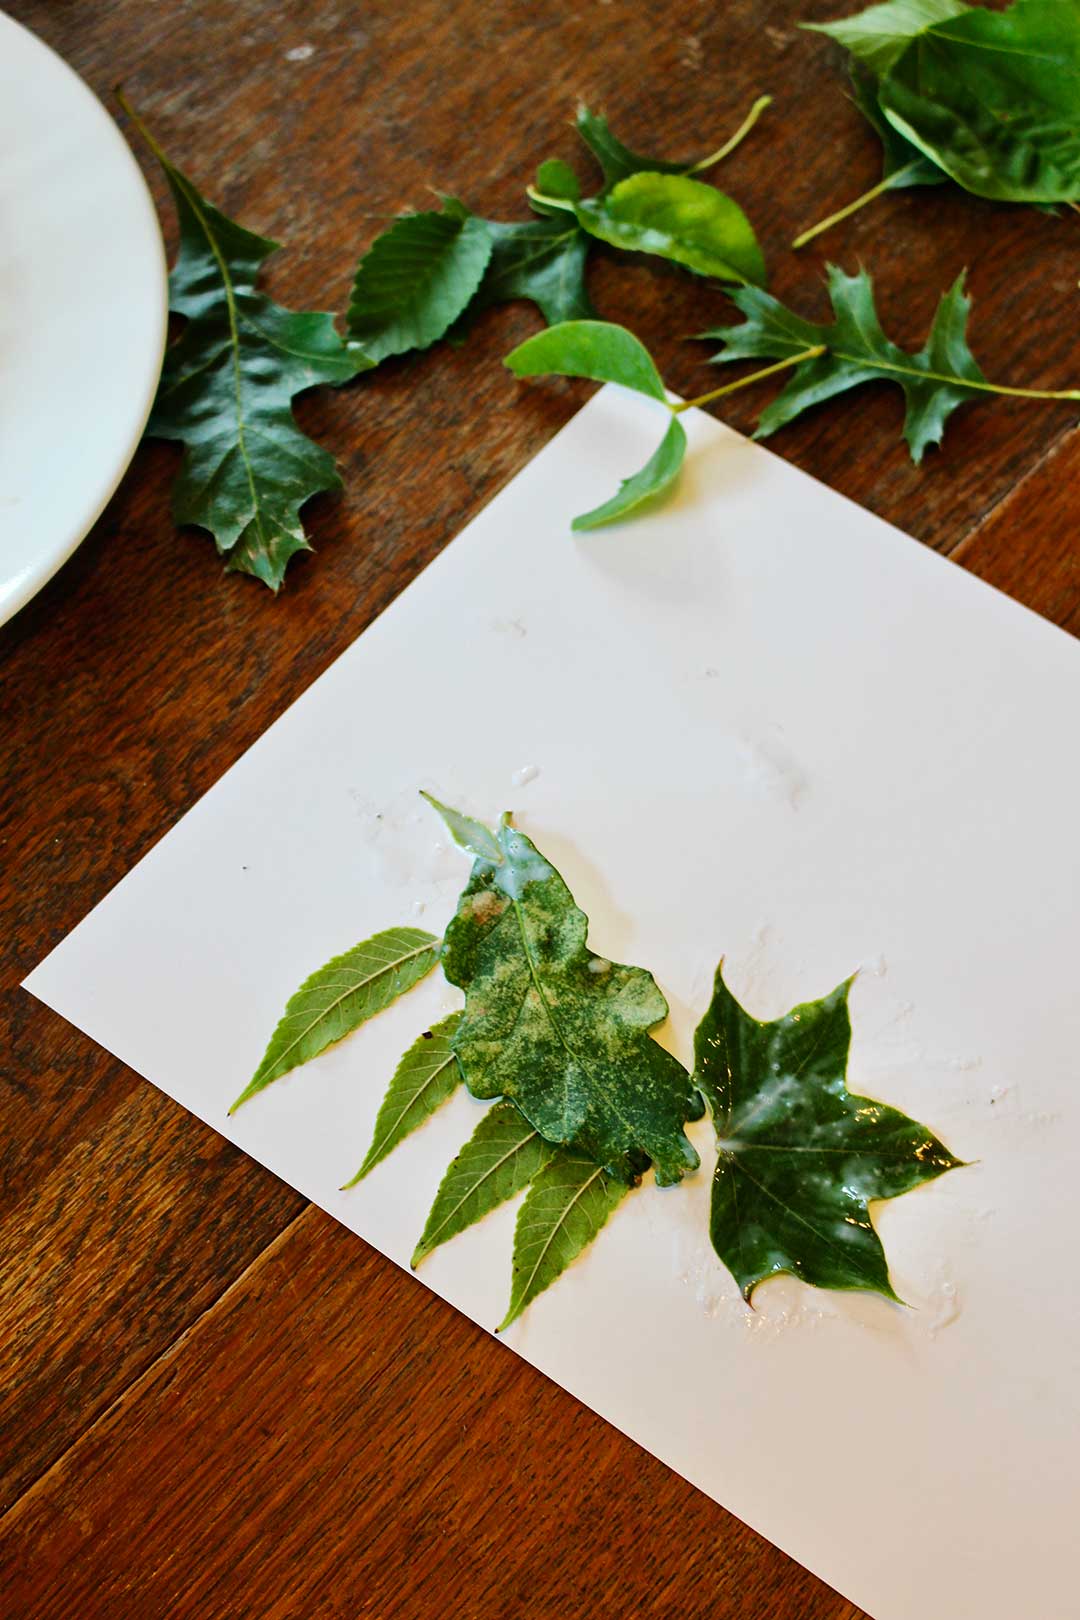
Glue down your fall leaf collage

Next, glue the leaves down to the paper. We used old paint brushes to brush glue all over the surface of the back of the leaves. Very simple.

Tip: Encourage the grands to arrange their design first and then glue them down to the paper so they can arrange things the way that they want before they are permanently affixed to the paper.

Girl pressing down leaf onto paper for her leaf collage.

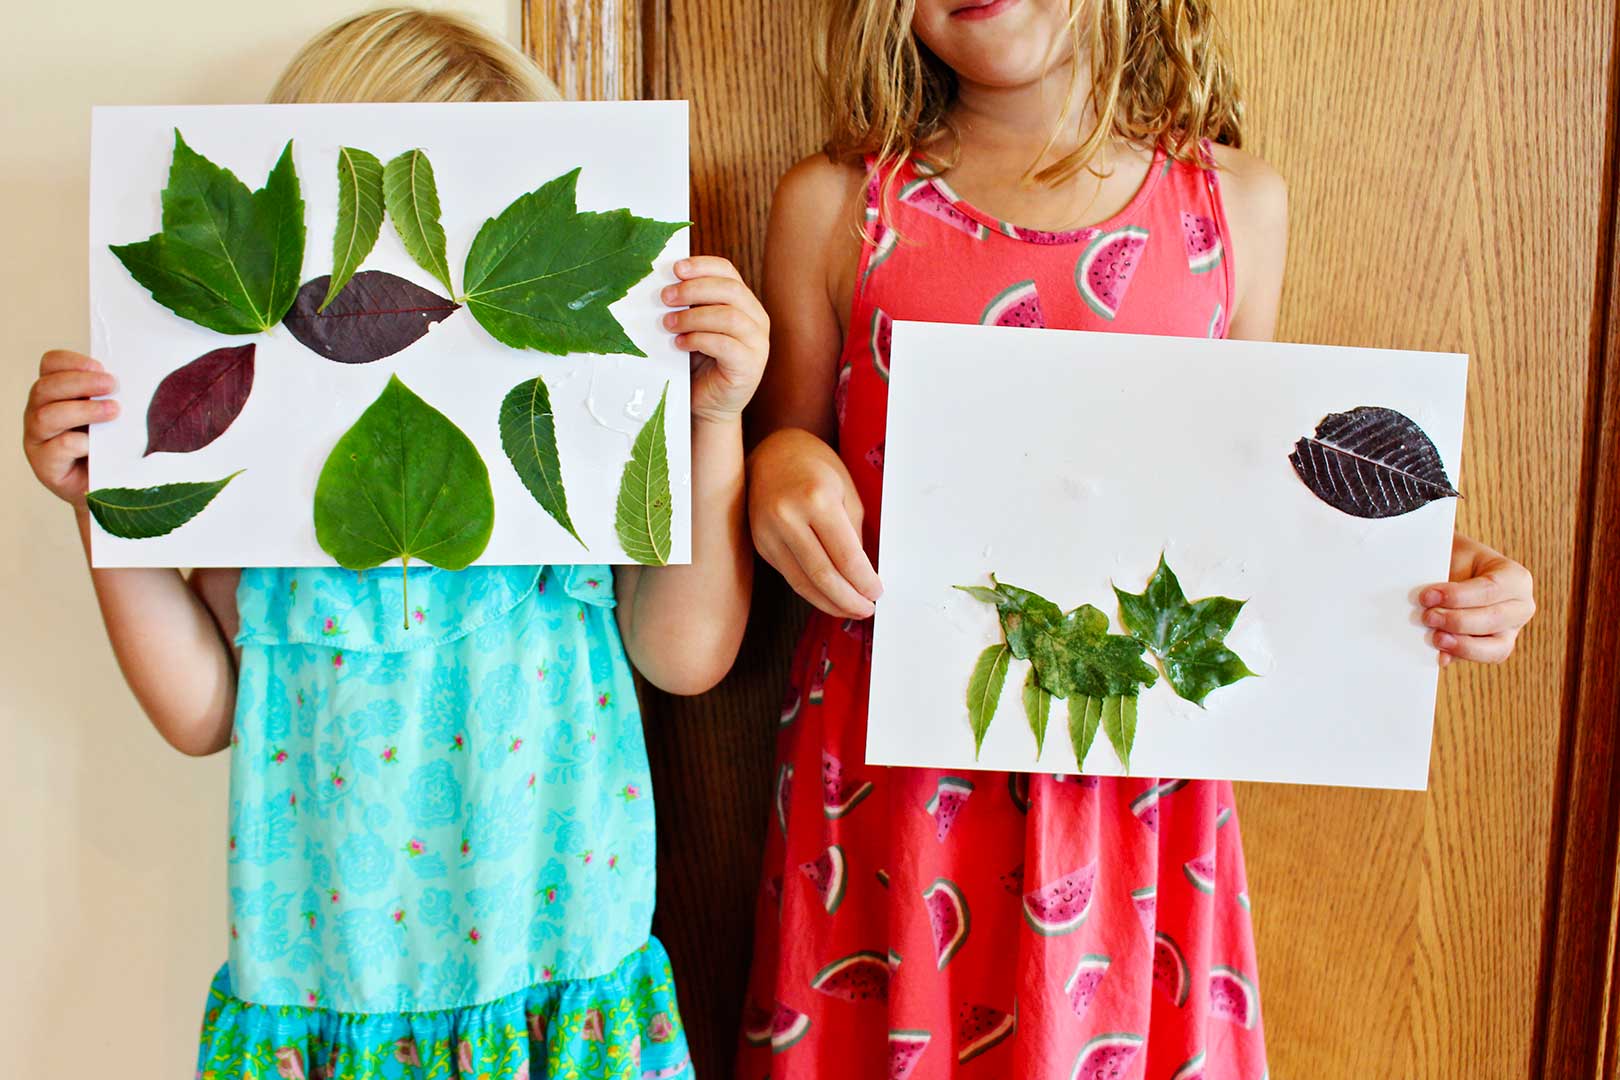
Page protector or contact paper to finish

When the glue was dry, I slipped them into Page Protectors to protect the leaves as they dried but still give a bit of air circulation. It would work fine to put Clear Contact Paper over them as well. 

In fact, it works well to place a piece of Clear Contact Paper, stick side up on the table and put the leaves directly onto the contact paper instead of using glue. Then covering the picture up with a second piece of Clear Contact Paper. This gives an entirely different effect. 

So many leaf collage ideas, so little time!! Ha!

Post your pictures after you Make a Kid’s Fall Leaf Collage. Can’t wait to see what you create!

Leaf collage on white paper on wooden table next to green leaves of various shapes.

Supplies to Make a Kid’s Fall Leaf Collage:

  • Variety of leaves
  • Glue (Elmer's Glue, Clear)
  • Paint brush (Paint Brushes Set)
  • Cardstock paper
  • Page Protectors
  • OR Clear Contact Paper

Enjoy!

Welcome to Nana’s! Where there’s fun things to do with your “grand” kids!

Come join the fun at www.WelcomeToNanas.com

Two girls standing side by side showing the camera their leaf collage.

More All Posts

  • Three 4th of July firecracker treat boxes decorated with red white and blue paper and washi tape with some scraps of festive paper scattered around.
    Easy 4th of July Craft: Firecracker Treat Boxes!
  • A person. holding a milk jug windsock with a sunshine smiley face on it with many colorful strips of fabric hanging from the bottom.
    Make a Festive Milk Jug Windsock Craft
  • Red white and blue melted beads in the shape of a star sitting on a circular piece of wood next to a bowl of blue beads.
    DIY 4th of July Melted Beads Craft
  • A salt shaker full of button flowers with a ribbon tied around it against a blue background.
    Cute DIY Button Flowers in a Salt Shaker

Leave a Reply Cancel reply

Your email address will not be published. Required fields are marked *

Recipe Rating


This site uses Akismet to reduce spam. Learn how your comment data is processed.

Hello there! I'm Shelly (Nana), an artist, previously homeschooling mother of 3, and now proud grandma (Nana) of 6. I love sharing artistically inspiring, hands-on crafts for kids of all ages. Let's go have some fun!

More about me →

Popular Crafts

  • Hand squeezing the a completed batch of light blue fluffy slime.
    How to Make the Best Fluffy Slime Recipe for Kids
  • Completed colorful tissue paper flowers, a purple and pink one resting on a glass cake stand with others underneath.
    How to Make Easy DIY Giant Tissue Paper Flowers (2 Ways!)
  • Overhead views of two different sprouts growing in glass containers.
    How to Grow a Tree from a Pine Cone
  • A sunset picture created with sharpies and alcohol on canvas, surrounded by bright sharpie markers..
    Cool Sharpie and Alcohol Painting on Canvas

Footer

↑ back to top

Privacy Policy

As an Amazon Associate I earn from qualifying purchases.

Copyright © 2025 Brunch Pro on the Feast Plugin