Turn old into new with this adorable DIY Teacup Bird Feeder! This simple kid's craft starts with just few upcycled items and ends with hours of bird watching fun.
Let's Make a DIY Teacup Bird Feeder!
This awesome Teacup Bird Feeder was a delightful and quick craft with a big outcome! For such low effort, I was super pleased with how this turned out.
Don’t you think that it would make a wonderful Mother’s Day gift, garden gift for a gardener, or be perfect for your own garden?
I have a number of friends that have been tea party people over their lifetimes.
We have had tea together many a time and so I’ve always got my eye out for items that they might enjoy that have to do with tea. These will be perfect for gifts for them.

Personalizing your DIY bird feeder
Well, I’ve seen these in peoples gardens before and I’ve had it on my mind for a while so I set off to find what I needed a thrift store.
Note: I recommend reading this entire post and deciding which option(s) you want to use to personalize your own teacup bird feeder.
I show the option of a teacup and saucer glued onto a sconce or candleholder but there are a number of options you may prefer. I give written descriptions of those options but feature only one in the pictures and video.
I easily found what I needed at our local charity shops and at yard sales and hope that you do too! You may even have these items around your home that could be upcycled to a new life in the garden.
I love upcycled crafts, like the plastic bottle bird feeder we made awhile ago! It's a great way to take things that normally would go to the trash and make them into a fun item to use or to gift.
If you would like to watch a full length tutorial video on making this craft, here is a link: How to Make a Teacup Bird Feeder Full Length Tutorial Video.
Supplies for your teacup feeders
Locating the perfect teacup and saucer
So when looking for supplies for this craft, you may already have them around your home, but if not, let me explain what you’re looking for.
First, we wanted to use a teacup (or mug) and a saucer for sure. There were lots and lots of choices in this regard at the thrift shops.
This is a personal preference item, have fun looking until you find just what you like.
You may want to find a coffee mug and a saucer that you like instead of a teacup and a saucer. Just keep looking until you find what you like personally and what would fit in your garden or what fits the person that you plan to give it to.
You will see “just the right thing” and snatch it up to be upcycled and enjoyed all over again.
Personally, I was looking for a floral ceramic teacup. And I wanted it to have a fairly good size (capacity) to it.
I will point out that in this case the cup and the saucer were not a matching pair. I really liked the teacup and then went around, looking at the different plates and saucers that I could use.
When I found this one that had the deep blue edging on it that complimented the flowers on the teacup I grabbed it to make my own set!
I thought that they looked nice and proportional. Can’t you imagine one of our little feathered friends balancing on the edge of the plate?
Finding the candleholder or sconce
I then set about looking for a candleholder or sconce that would fit the need.
The key here is that the plate and saucer set need to fit on the candle holder in a way where you can glue them all together.
I need to mention that this is going to be the type of Teacup and Saucer Birdfeeder that will be hanging either on a pole, from a garden wall, or on a shepherd’s hook.
It will not have a post that goes down into the ground by the set of directions. But I am going to tell you how to do that if that is what you prefer.
Note: If you decide to put it on a different hanging method or a pole that will go into the ground you do not need the candle holder. You will purchase the supplies needed for your option instead. Those will be described later.
So, in looking for the candle holder or sconce, it is important that the platform that holds a candle is a distance away from the back of the candleholder. That gives some room for the plate to glue onto the candle platform.
You will be able to see this in my picture and it is explained in the video as well if you want some more clarification on that.
Choosing the right glue
The last thing that you’re going to need is some glue that is made to be outdoors and is waterproof.
I chose the E 6000 glue and find it to work very well. It also happens to be clear which is good.
I don't recommend hot glue if you plan to put this outside. For inside use it would be fine.
So let’s put our Teacup Bird Feeder together
Prepping for the craft
Be sure to wash your items with soap and warm water and let them dry.
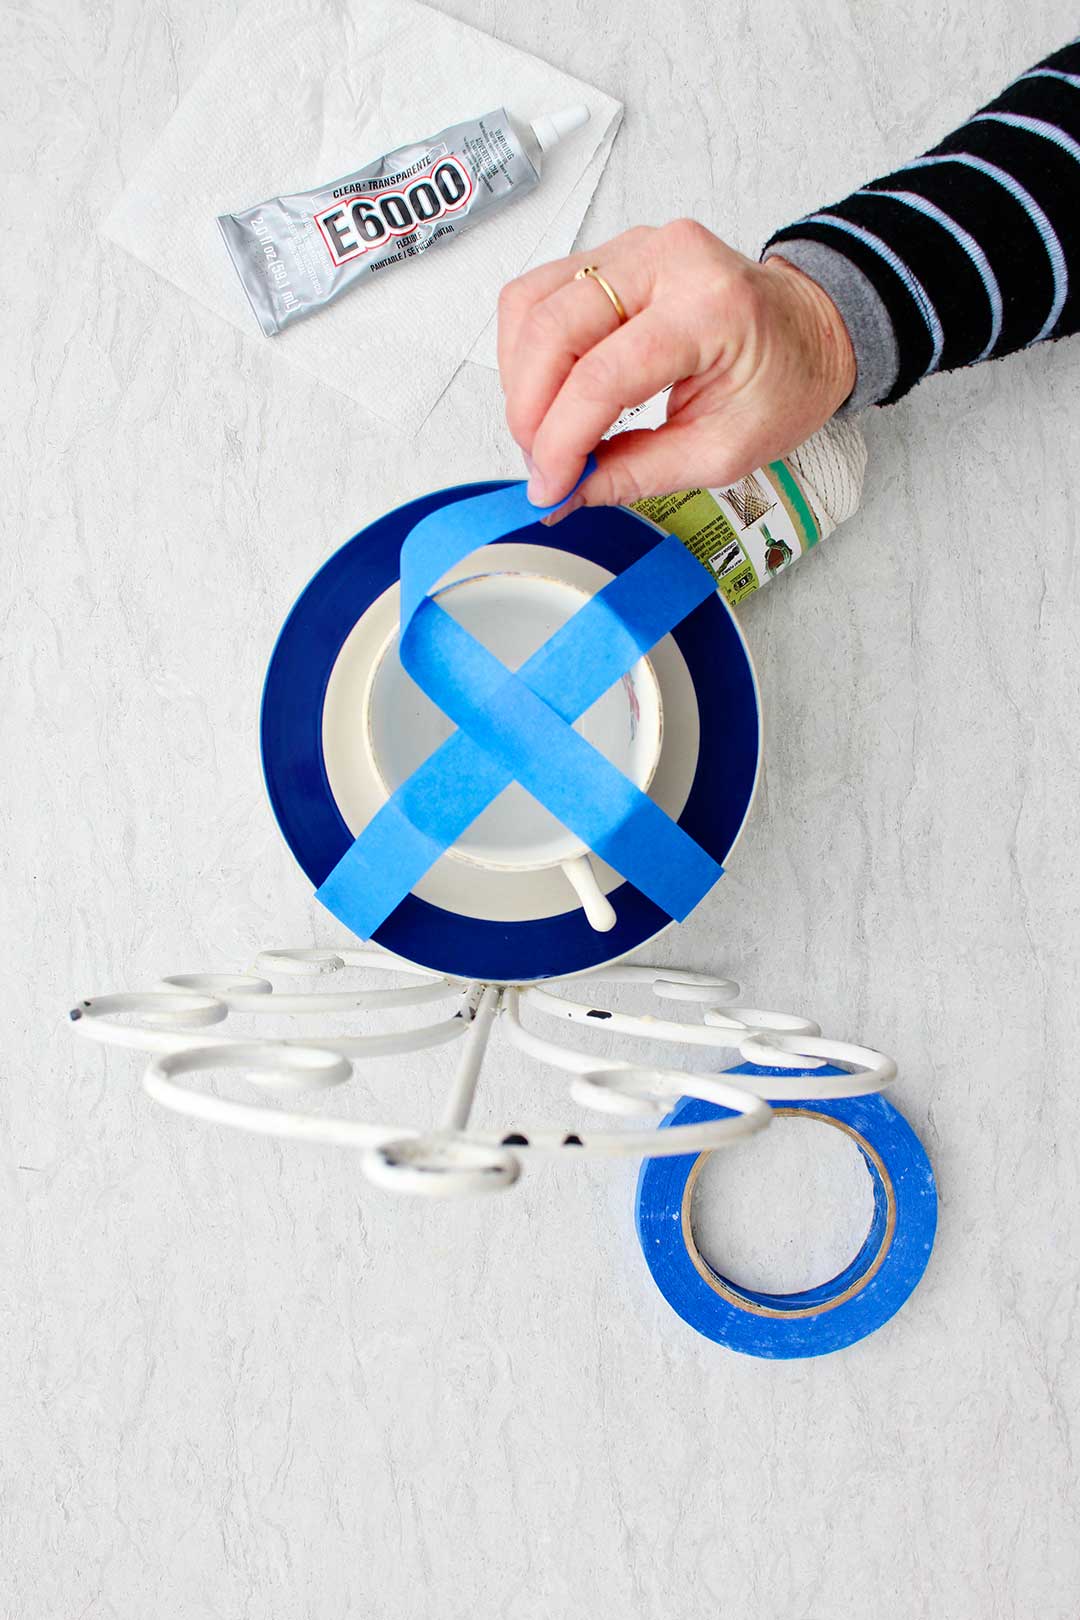
Put paper down on your work surface to keep any glue from running onto the counter and to have a place to set your glue while working.
Notice I forgot to do this and grabbed a paper towel to set the glue bottle down on as I worked! As my mom used to say, “Do as I say, not as I do.” Ha! Fortunately no glue dripped on my surface.
Glue the teacup to the saucer
First position choice for gluing the teacup to the saucer
There are a couple options on how you can glue your cup onto your saucer.
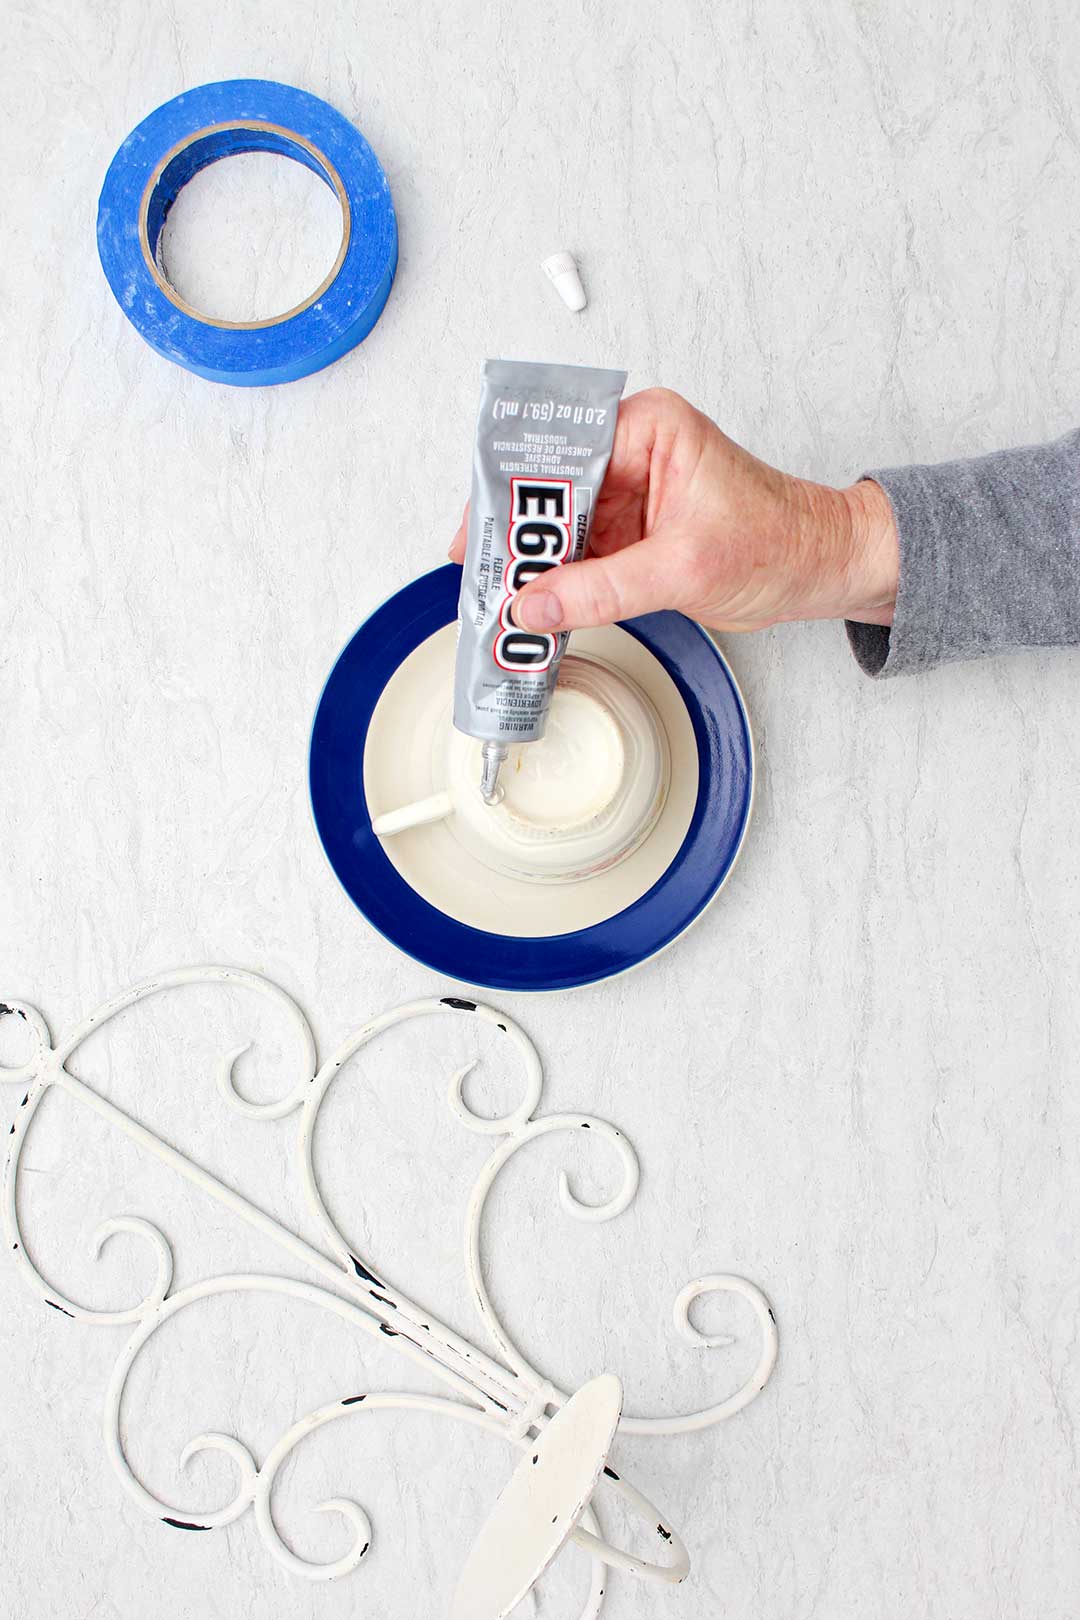
I’m planning on gluing mine in the typical fashion setting the cup upright on the saucer. I just put glue on the bottom of the cup and glue directly on the saucer as described below.
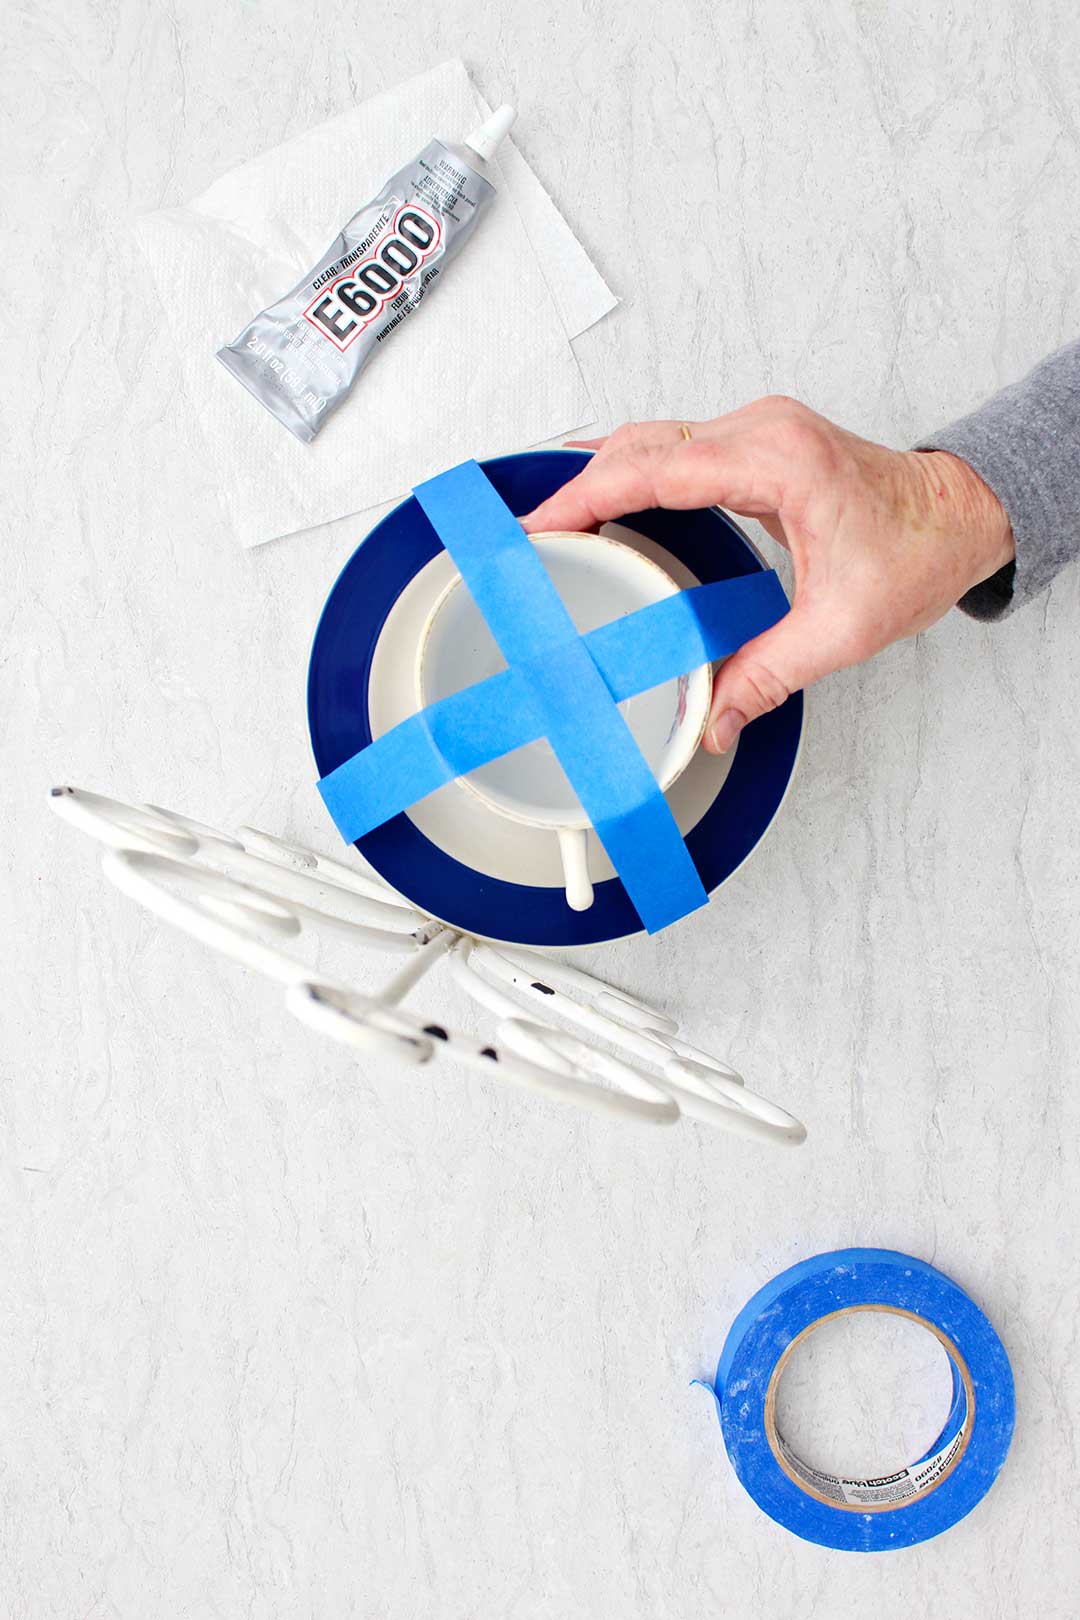
Turn your teacup upside down and apply a bead of E6000 glue around the bottom circle of the teacup’s base.
Turn the teacup right side up and place the teacup in the center of the saucer. The glue will set the teacup in this position so be sure to place it where you want it.
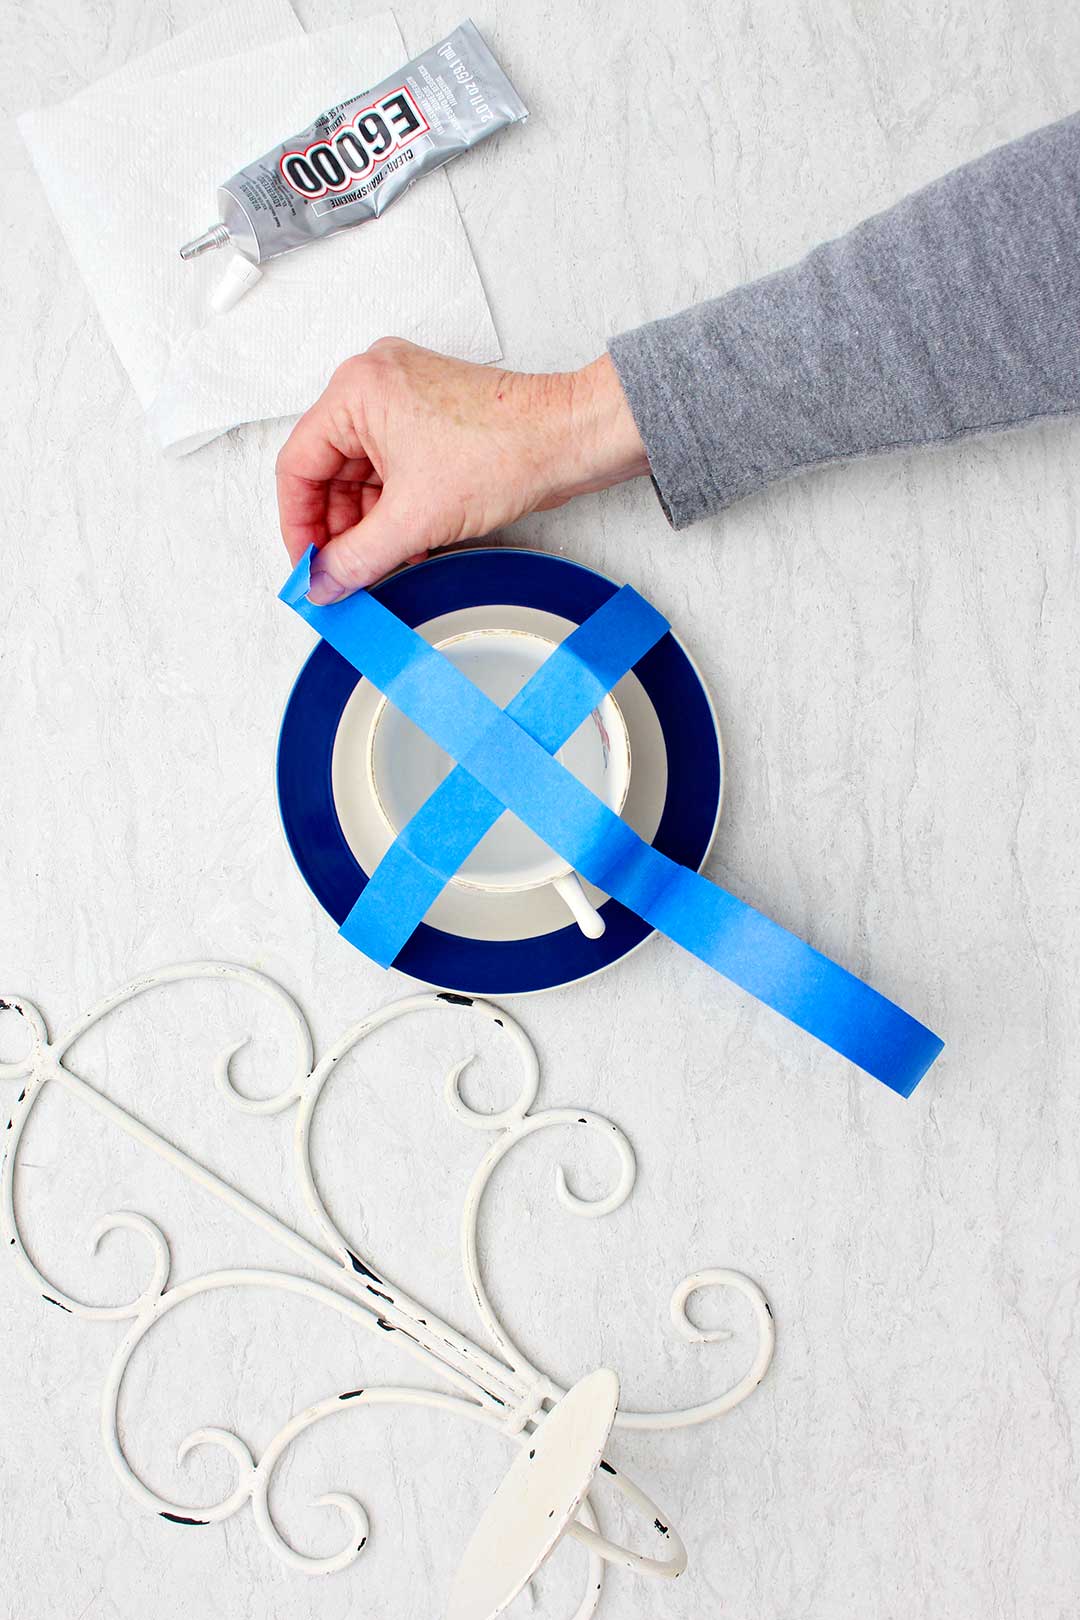
Note: It is wise to use some painter’s tape to secure the teacup in place as the glue cures. You will see the two strips of painter’s tape over the top of the teacup in the pictures and video. This is optional if you can have the teacup and saucer sitting level for several hours.
Second position choice for gluing the teacup to the saucer
But some people like to position the teacup tipped over on its side and then they glue it to the saucer. This is very cute!
It works well to have the handle of the teacup at the top if gluing it this way. Place a long bead of E6000 glue along the side of the teacup and place it on the center of the saucer.
Be sure to use the painter’s tape to hold it in place as the glue sets or it will fall over.
If you want to use the sideways teacup for a birdfeeder, you will need to add something like peanut butter to your birdseed, and then pack it into the cup for the birds. Otherwise, it won’t hold very much birdseed.
The nice feature of this option is that you could hang it with a cord from the cup handle directly to a tree branch or Shepherd’s Hook. I’m guessing that if you’re in a very windy area, it would be easily broken though.
An additional option for hanging the teacup and saucer
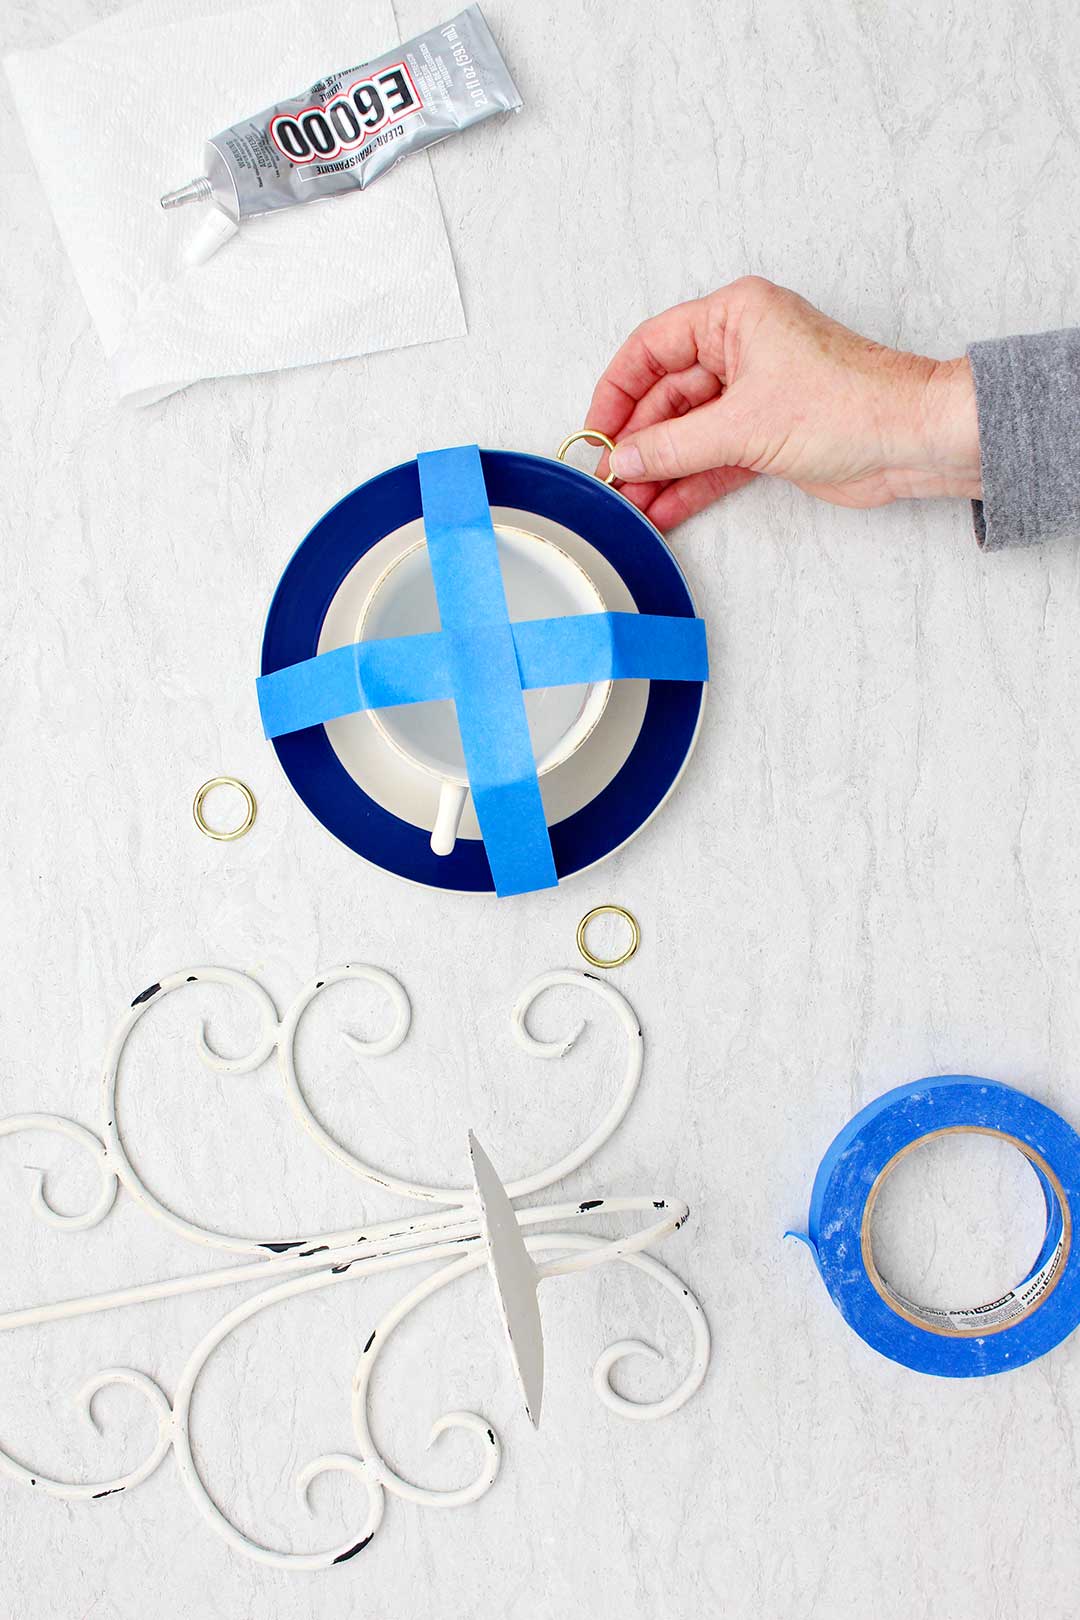
The teacup and saucer could also be hung from three cords to a tree branch or Shepherd’s Hook.
You can glue three circular hangers equal distance away from one another underneath the saucer edge so that they just poke out slightly.
Then cut equal links of chain or cord and attach them to those rings. Gather the three loose ends and attach them to another at the top with another ring.
You could hang the teacup and saucer directly from a tree from the top ring. This works very well by the way.
Glue the saucer to the candleholder
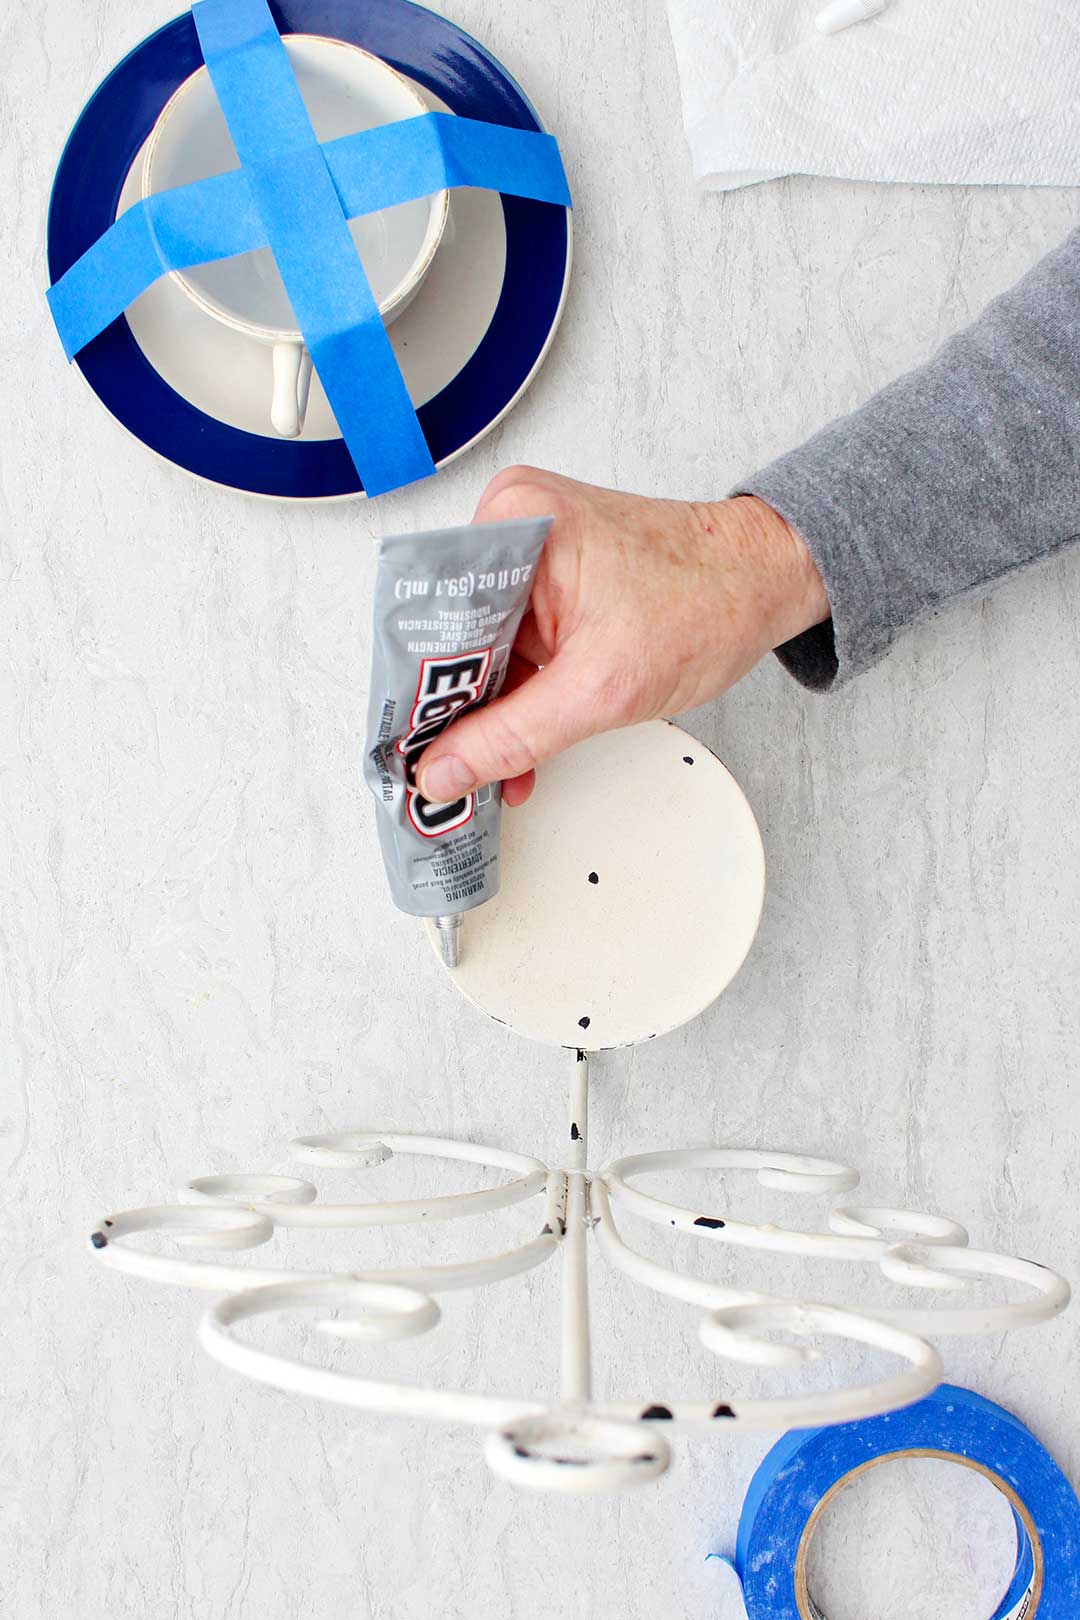
For my teacup bird feeder, the last step is to glue the teacup and saucer unit (as they are now glued together) to the candleholder.
Put a bead of E6000 glue around the area on the candleholder that holds the candle and will now hold the teacup and plate.
You chose a candleholder so that this area is far enough away from the back so that the plate will fit there.
Place the teacup and saucer onto the glued area.
Be sure to use the painter’s tape to hold it in place as the glue sets or it may fall off.
Note: Place the candleholder in an upright position so that the glue can cure. You may need to find a way to hang it or prop it upright.
If this is what you want for your bird feeder, you are finished and can skip to the bottom of the article. But be sure to check out these pole bird feeder options if just making your choice of how to make your bird feeder!
Pole bird feeder
So if all those options weren’t enough, here are two more for how to place the teacup and saucer in the garden!!
Option 1 for mounting the teacup and saucer on a pole
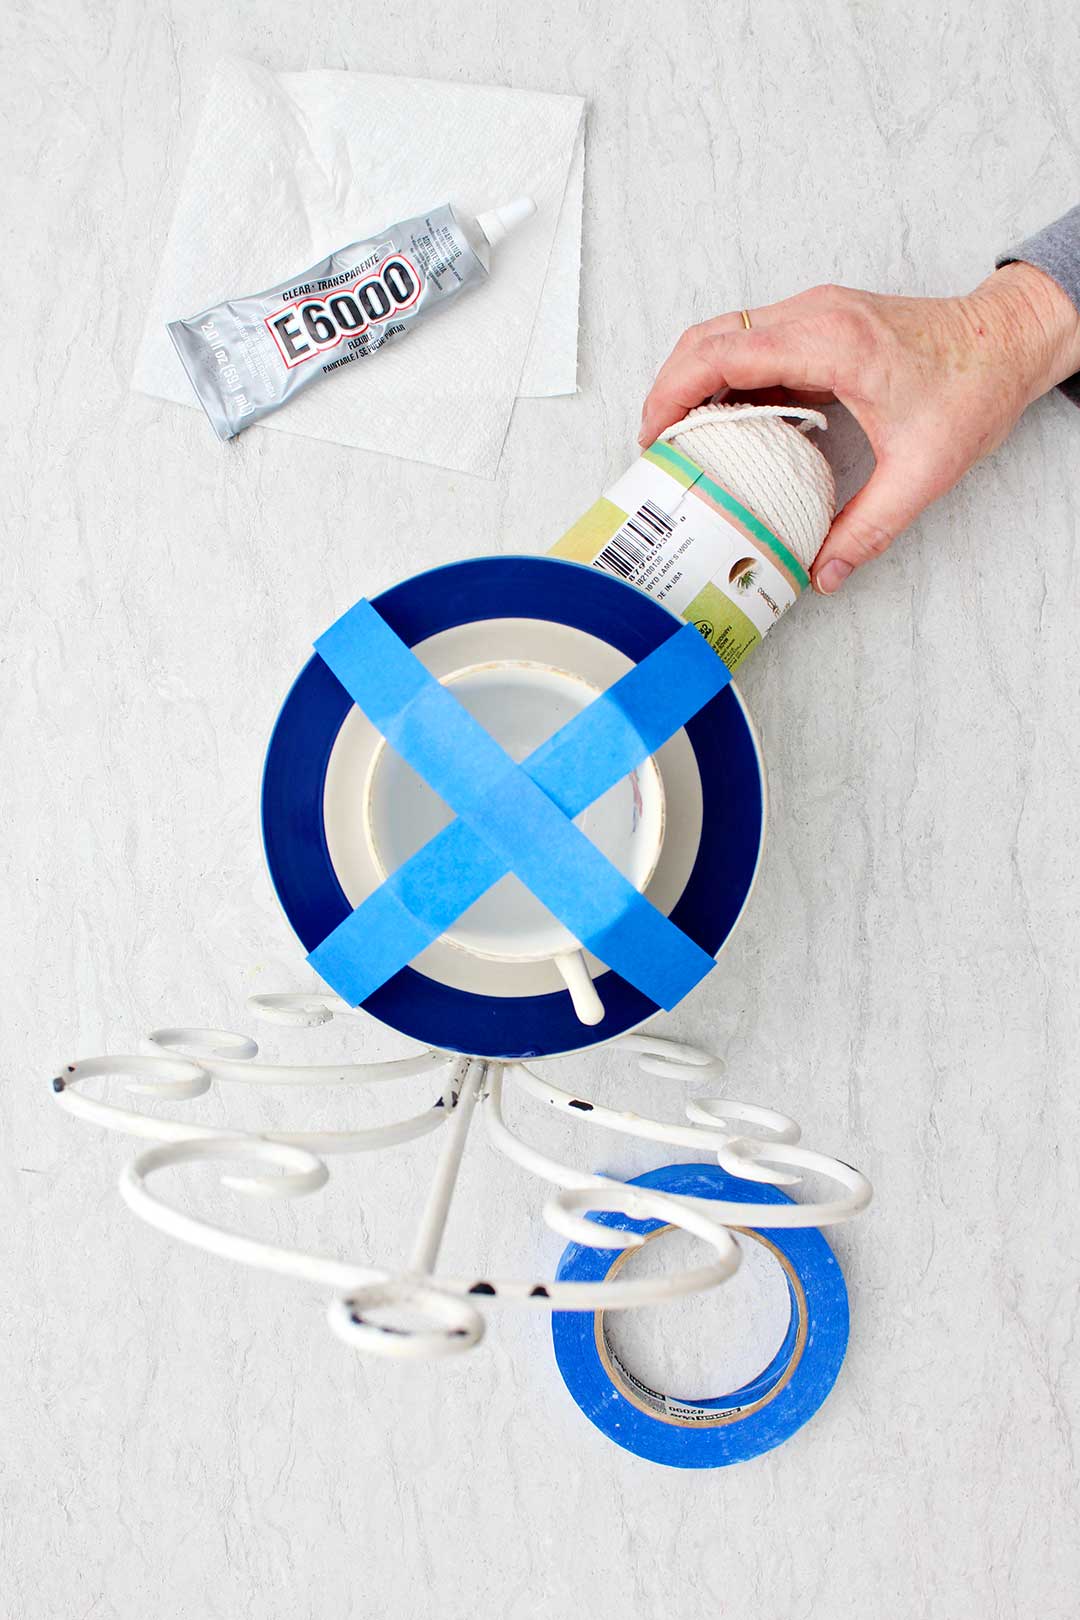
So you may want to mount your teacup and saucer on a pipe instead of a candleholder.
Then you would have the teacup and saucer sit on top of the pipe and could push the pipe down into the garden ground instead of using the hanging option.
For this option I would recommend buying a 3-foot pipe that is approximately ¾ inch in diameter.
Then purchase a cap in the same diameter as the pipe. The cap will go on the top of the pipe, covering the opening.
Many people use copper pipe and a copper cap to make it. But you could use other types of pipe as well, even a plastic pipe.
Instead of gluing your cup and saucer to the candle holder sconce, glue them to the cap that will cover the pipe. You glue the cap to the bottom of the saucer in the center.
Then you can push your pipe down into the ground to the depth you want it.
Place the cup and saucer carefully down on top with the cap (glued to the bottom of the saucer) covering the top of the pipe.
What’s handy about this option is you can take the cup and saucer off during the wintertime and leave the pipe in the ground.
Note: Be careful when you’re putting the cap on and off the pipe so that you don’t break the teacup or plate.
Option 2 for mounting the teacup and saucer on a rod
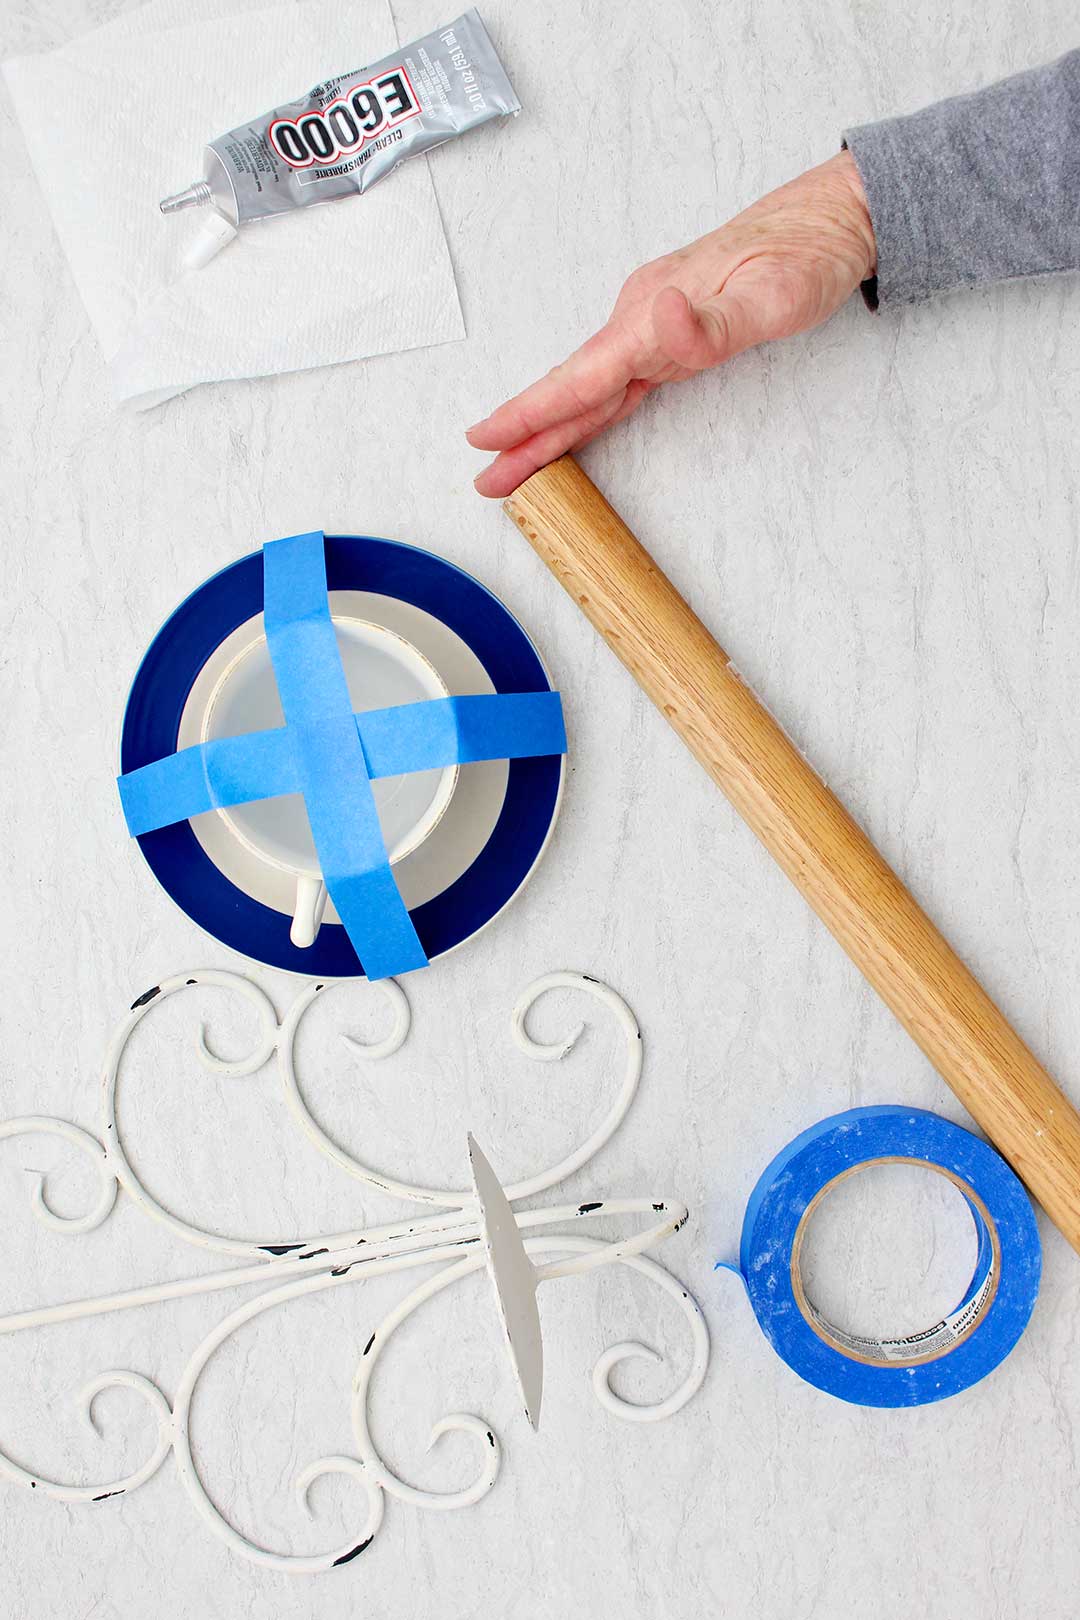
It’s also possible to use a diamond bit on a drill and to drill a hole in the bottom of the teacup in the center as well as in the center of the saucer.
Use a rubber washer on top and below the cup and saucer, and then you could screw this all onto the top of a round, wooden dowel rod.
This can also be pushed down into the garden to a level that you like.
I would recommend an inch to an inch and a half diameter wooden dowel cut to whatever length you would like to use.
Easy Peasy teacup bird feeder
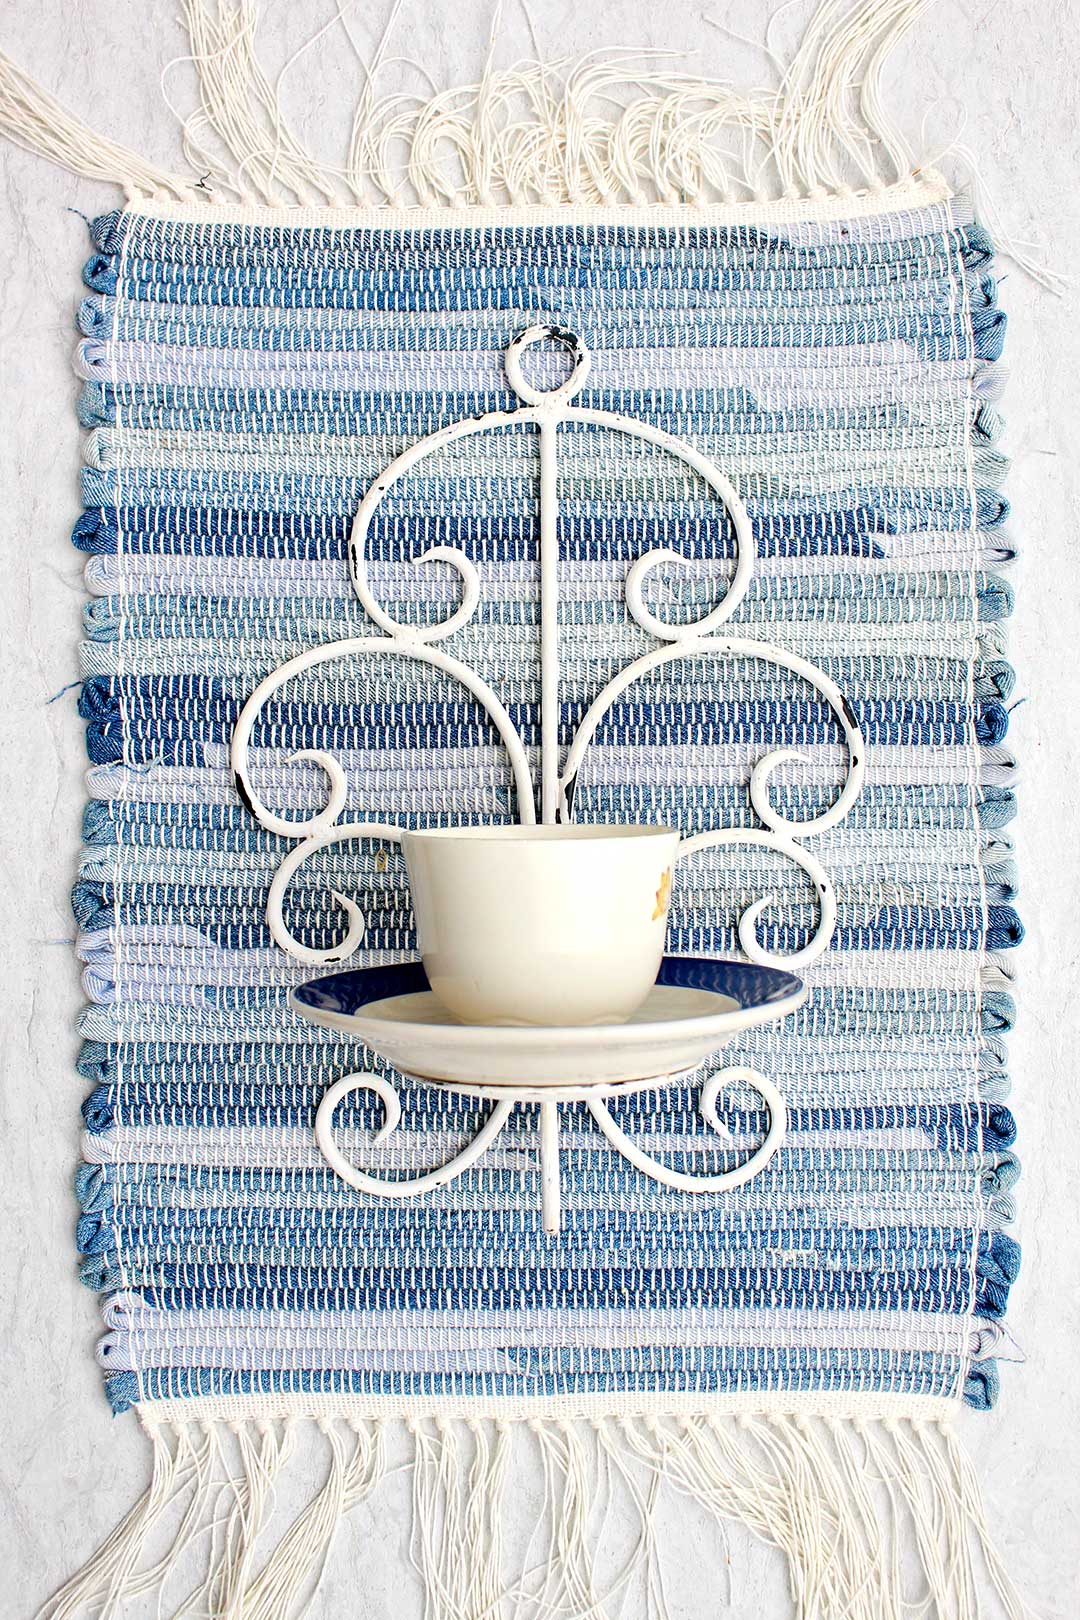
I just can’t believe how easy this craft is when it is glued to a candleholder/sconce.
If you’ve made one for yourself, all you have to do now is head outside and hang it on a garden wall or a shepherds hook and put a little bird seed in it.
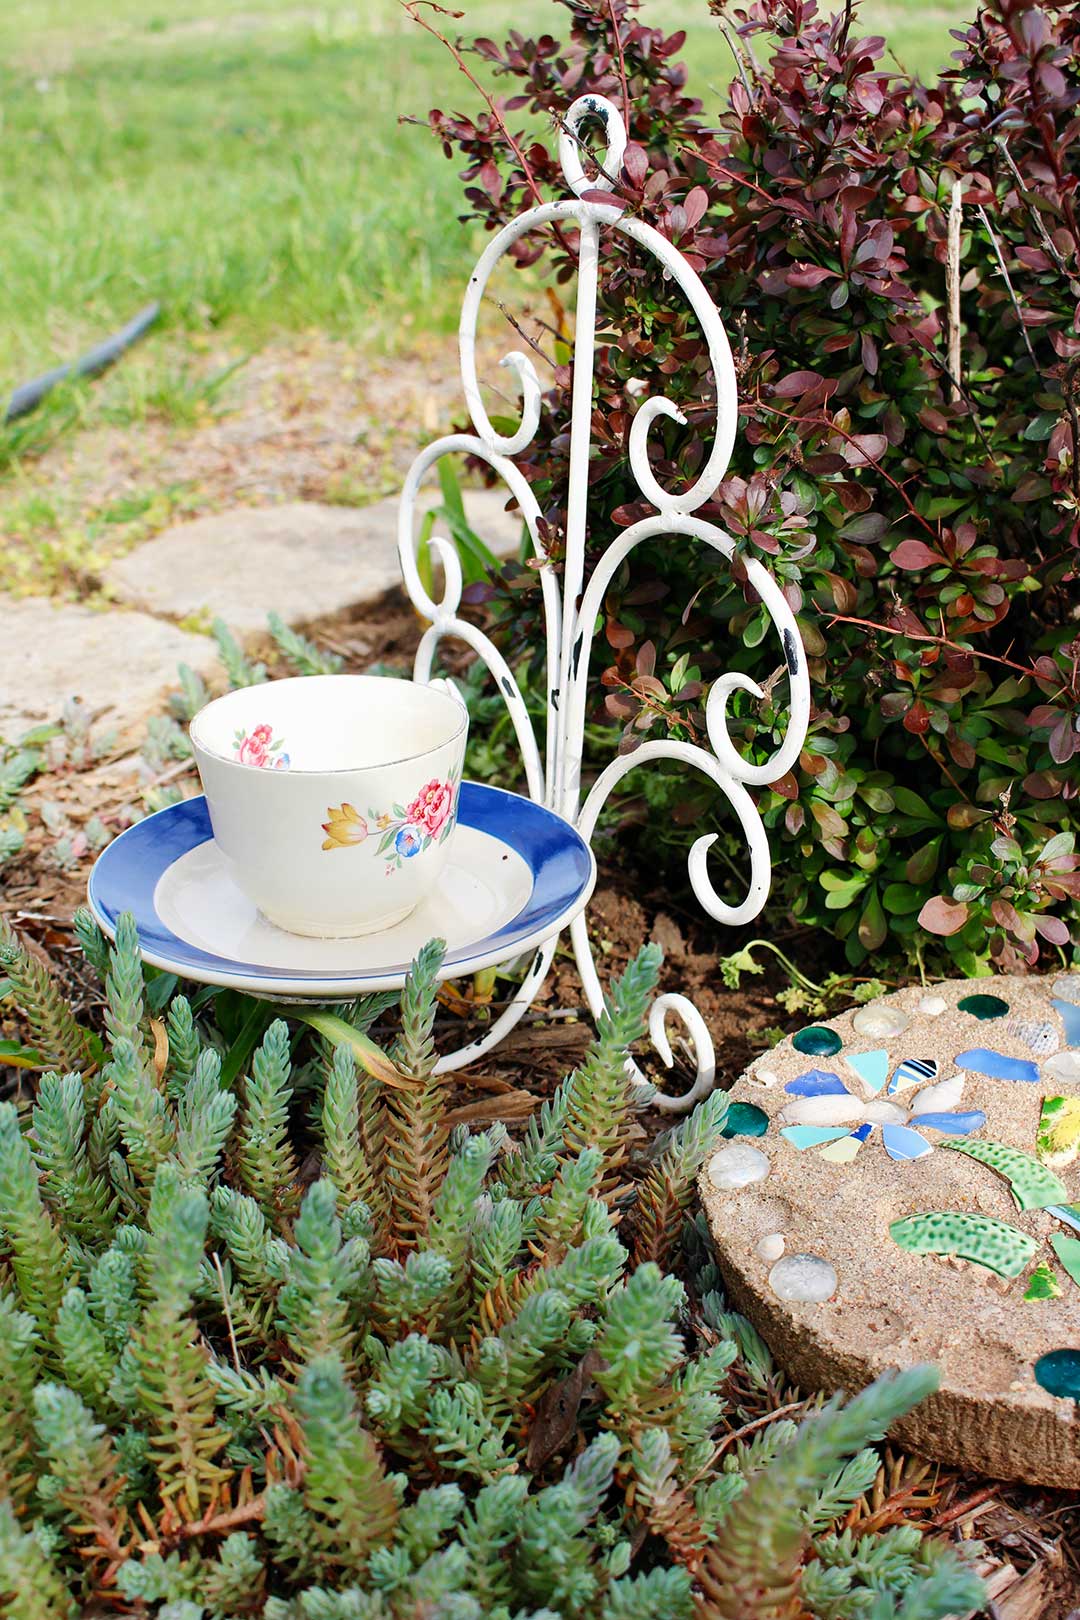
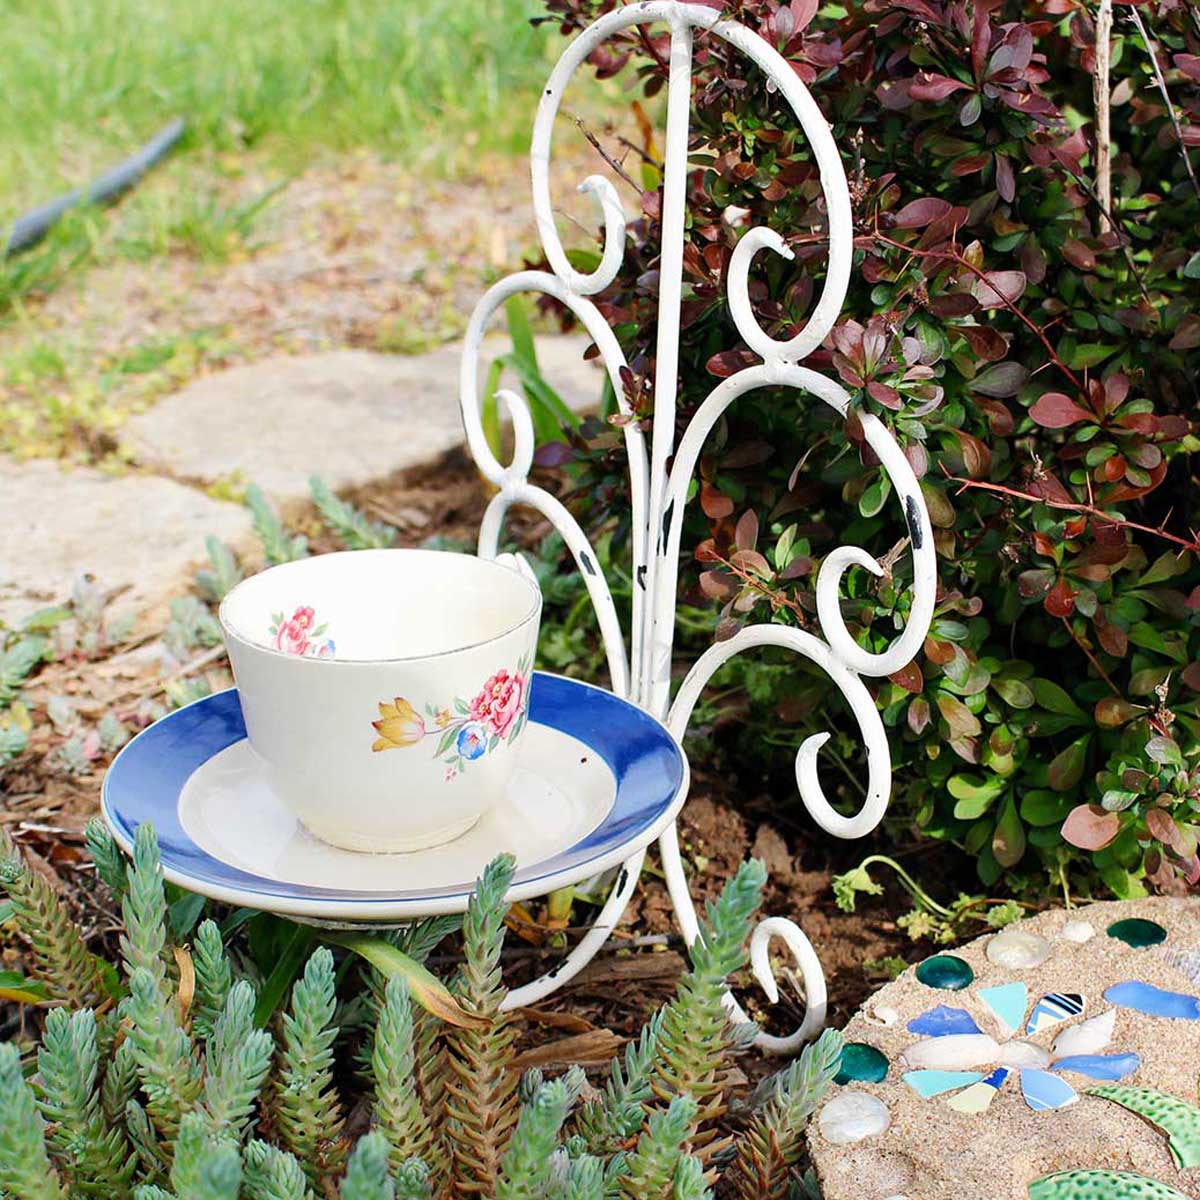
In the pictures I’m showing mine set down into the garden plants or hanging on a shepherd hook.
But where I live the wind is so strong that I plan to get a concrete hanger, embed that in the concrete, and then hang it on my retaining wall next to my flower garden.
I think that will keep it the well protected from the wind. We’ve had a number of days with 30 to 40 mile an hour gusts lately. 🙂
Using different types of seed for the birds
I may not even put any birdseed in mine and just use it decoratively, we’ll see.
If you do use birdseed one of the best choices for a variety of birds is black oil sunflower seed. Another option could be shelled or cracked corn.
There is a good article on this at this site: Feeding Birds: A Quick Guide to Seed Types from the CornellLab of Ornithology at Cornell University.
Note: If it rains, be sure to clean out the teacup so that the seeds stay dry. Otherwise it might get moldy or harbor disease, that would not be good for the birds of course.
Note: If you live in a cold climate (especially with extreme cold), take your teacup and saucer in for the winter. It is likely it will freeze with water in it and crack over the winter at some point. And we don’t want that to happen for sure!!
I hope you make several of these and enjoy giving them for gifts- like for Mother’s Day! And I hope you see lots of birds around your feeder!
Other uses for an awesome teacup birdfeeder
As I am thinking about this awesome teacup birdfeeder craft, there is a multitude of uses for it besides to feed birds. What about these ideas?
- garden art
- home decor
- ambiance with tea lights in the teacup
- great bird bath for small birds
- to use family vintage teacups and saucers as gifts to family members if the set is incomplete or to be shared
- to use a larger plate a larger serving bowl or candy dish for larger birds or as a squirrel feeder
Again, if you would like to watch a full length tutorial video on making this craft, here is a link: How to Make a Teacup Bird Feeder Full Length Tutorial Video.
Make a teacup bird feeder with just a few steps! Start by securing a teacup to the saucer with glue, making sure it dries fully. Attach the saucer to a sconce, mount on a pole, or attach rings to hang from a chain. Once mounted, add your bird seeds and hang out of the wind, then watch the birds enjoy!
To make a teacup bird feeder, you’re going to need some glue that is made to be outdoors and is waterproof. I chose the E 6000 glue and find it to work very well. It also happens to be clear which is good. I don't recommend hot glue if you plan to put this outside, but for inside use it would be fine.
Would you like some more bird themed craft ideas?
If you would like more craft ideas that feature our feathered friends, give one of these a try!
- Make a Recycled Plastic Bottle Bird Feeder
- Kids Quick Pinecone Bird Feeder
- Make a Birdnest Out of String
- How to Make a Cute Yarn Bird
Lastly, you have to try the Merlin Bird ID App!
Oh I almost forgot. My friend told me about the coolest app to download onto your phone. It is called Merlin Bird ID and it is from The Cornell Lab. (The article above about bird feed was from this same source.)
When you are outside listening to birds, you can start a recording. The app will identify the type of bird that is singing or making it's call around you.
We are really enjoying this app and heard a northern mockingbird, robin, mourning dove, bluejay, eastern meadowlark, and a brown thrasher on our walk last night! SO COOL!!

Enjoy!
If you try this craft, let me know! Go ahead and leave a comment, rate it, and tag a photo with #WelcometoNanas wherever you post.
Come join the fun at https://welcometonanas.com
Supplies for the Teacup Bird Feeder
- Teacup and Saucer- thrift these items at a charity store or use what you have
- Candleholder/sconce- with a platform for the candle that is far enough away from the back of the candleholder that it can hold the saucer (the saucer will be glued on here)
- E-6000 Glue- or a glue that is for outside use
- Painters Tape- to hold items in place while glue cures
- If making other variations of the birdfeeder from the article, the items needed are listed in the description.
How to Make a Teacup Bird Feeder (Upcycled Craft)
Equipment
- none needed
Items Required
- Teacup and Saucer- thrift these items at a charity store or use what you have
- Candleholder/sconce- with a platform for the candle that is far enough away from the back of the candleholder that it can hold the saucer (the saucer will be glued on here). Thrift this item at a charity store or use what you have
- E-6000 Glue- or a glue that is for outside use
- Painters Tape- to hold items in place while glue cures
Instructions
- First, we wanted to use a teacup (or mug) and a saucer for sure. There were lots and lots of choices in this regard at the thrift shops and yard sales. They don't have to match.Secondly, in looking for the candle holder or sconce, it is important that the platform that holds a candle is a distance away from the back of the candleholder. That gives some room for the plate to glue onto the candle platform.
- Be sure to wash your items with soap and warm water and let them dry.Put paper down on your work surface to keep any glue from running onto the counter and to have a place to set your glue while working.
- Turn your teacup upside down and apply a bead of glue around the bottom circle of the teacup’s base.Turn the teacup right side up and place the teacup in the center of the saucer. The glue will set the teacup in this position so be sure to place it where you want it.Note: It is wise to use some painter’s tape to secure the teacup in place as the glue cures. You will see the two strips of painter’s tape over the top of the teacup in the pictures and video. This is optional if you can have the teacup and saucer sitting level for several hours.
- Place a bead of glue around the area on the candleholder/sconce where the teacup and saucer will sit. Place the teacup and saucer onto this area of glue.Note: It is wise to use some painter’s tape to secure the teacup and saucer in place as the glue cures. Find a way to set the entire thing upright so that it can cure before going outside. Let sit for about 24 hours.
- If you’ve made one for yourself, all you have to do now is head outside and hang it on a garden wall or a shepherds hook and put a little bird seed in it. In the pictures I’m showing mine set down into the garden plants or hanging on a shepherd hook.


Leave a Reply