How to Make a Teacup Bird Feeder (Upcycled Craft)
Learn How to Make a Teacup Bird Feeder for your garden, for Mother’s Day, or for other garden loving friends! Upcycle a teacup and saucer.
Servings: 1 Teacup Bird Feeder
Cost: $8-10
Equipment
- none needed
Ingredients
- Teacup and Saucer- thrift these items at a charity store or use what you have
- Candleholder/sconce- with a platform for the candle that is far enough away from the back of the candleholder that it can hold the saucer (the saucer will be glued on here). Thrift this item at a charity store or use what you have
- E-6000 Glue- or a glue that is for outside use
- Painters Tape- to hold items in place while glue cures
Instructions
- First, we wanted to use a teacup (or mug) and a saucer for sure. There were lots and lots of choices in this regard at the thrift shops and yard sales. They don't have to match.Secondly, in looking for the candle holder or sconce, it is important that the platform that holds a candle is a distance away from the back of the candleholder. That gives some room for the plate to glue onto the candle platform.
- Be sure to wash your items with soap and warm water and let them dry.Put paper down on your work surface to keep any glue from running onto the counter and to have a place to set your glue while working.
- Turn your teacup upside down and apply a bead of glue around the bottom circle of the teacup’s base.Turn the teacup right side up and place the teacup in the center of the saucer. The glue will set the teacup in this position so be sure to place it where you want it.Note: It is wise to use some painter’s tape to secure the teacup in place as the glue cures. You will see the two strips of painter’s tape over the top of the teacup in the pictures and video. This is optional if you can have the teacup and saucer sitting level for several hours.
- Place a bead of glue around the area on the candleholder/sconce where the teacup and saucer will sit. Place the teacup and saucer onto this area of glue.Note: It is wise to use some painter’s tape to secure the teacup and saucer in place as the glue cures. Find a way to set the entire thing upright so that it can cure before going outside. Let sit for about 24 hours.
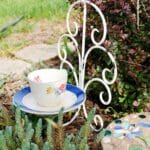
- If you’ve made one for yourself, all you have to do now is head outside and hang it on a garden wall or a shepherds hook and put a little bird seed in it. In the pictures I’m showing mine set down into the garden plants or hanging on a shepherd hook.
Video
Notes
I recommend reading the entire post on the website and deciding which option(s) you want to use to personalize your own teacup bird feeder. There are several options for hanging or mounting the bird feeder.