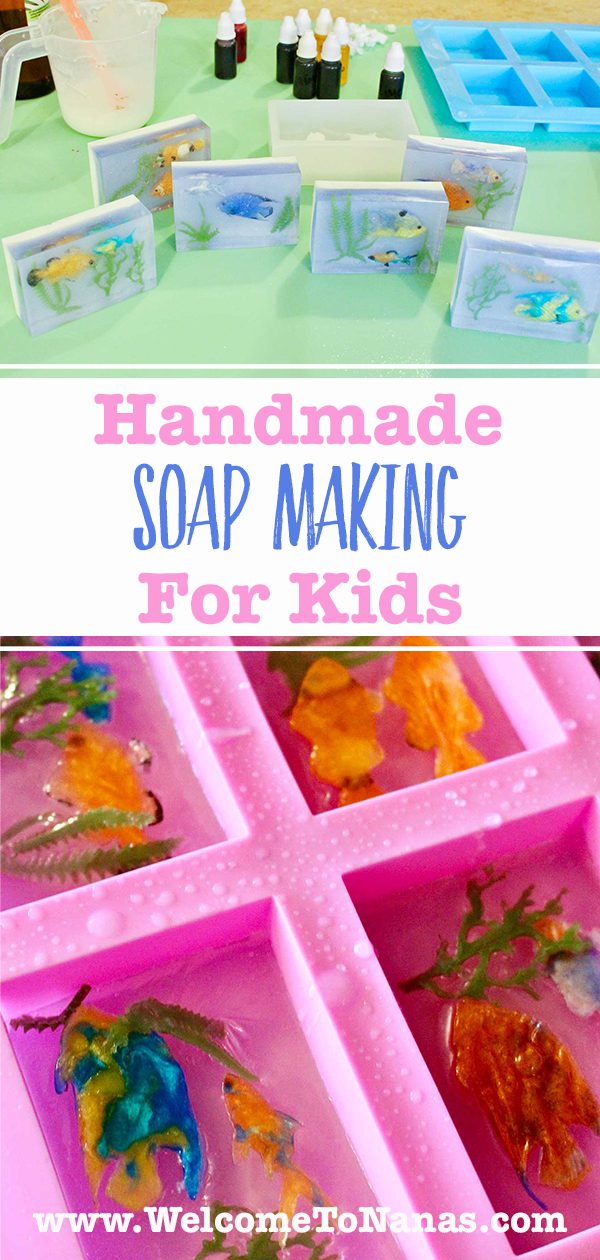
I had no idea just how much there was to learn about soap making- or how much fun it could be! Thankfully, my talented friend Kelly Sauvage gave me a crash course in kid-friendly soap making, and I soaked it all in (pun intended!).
As someone who teaches through speaking, writing, and curriculum design, I loved learning a whole new medium to share with the grands. We used the Melt and Pour technique, which is safer and simpler- perfect for getting creative with kids. And the best part? Watching those little aquarium soaps come to life like tiny works of art!
Supplies for Handmade Soap Making for Kids
Tip from Kelly: Watch the weekly ad at Hobby Lobby for sales on soap making supplies.
- Soap bases- Clear Glycerin Soap Base and/or White Soap Base
- Skin safe Fragrance (optional)
- Blue skin-safe coloring
- Biodegradable, Eco-Friendly, Skin and Eye Safe Glitter (optional)
- Very small items to add in soap- like small Plastic Fish
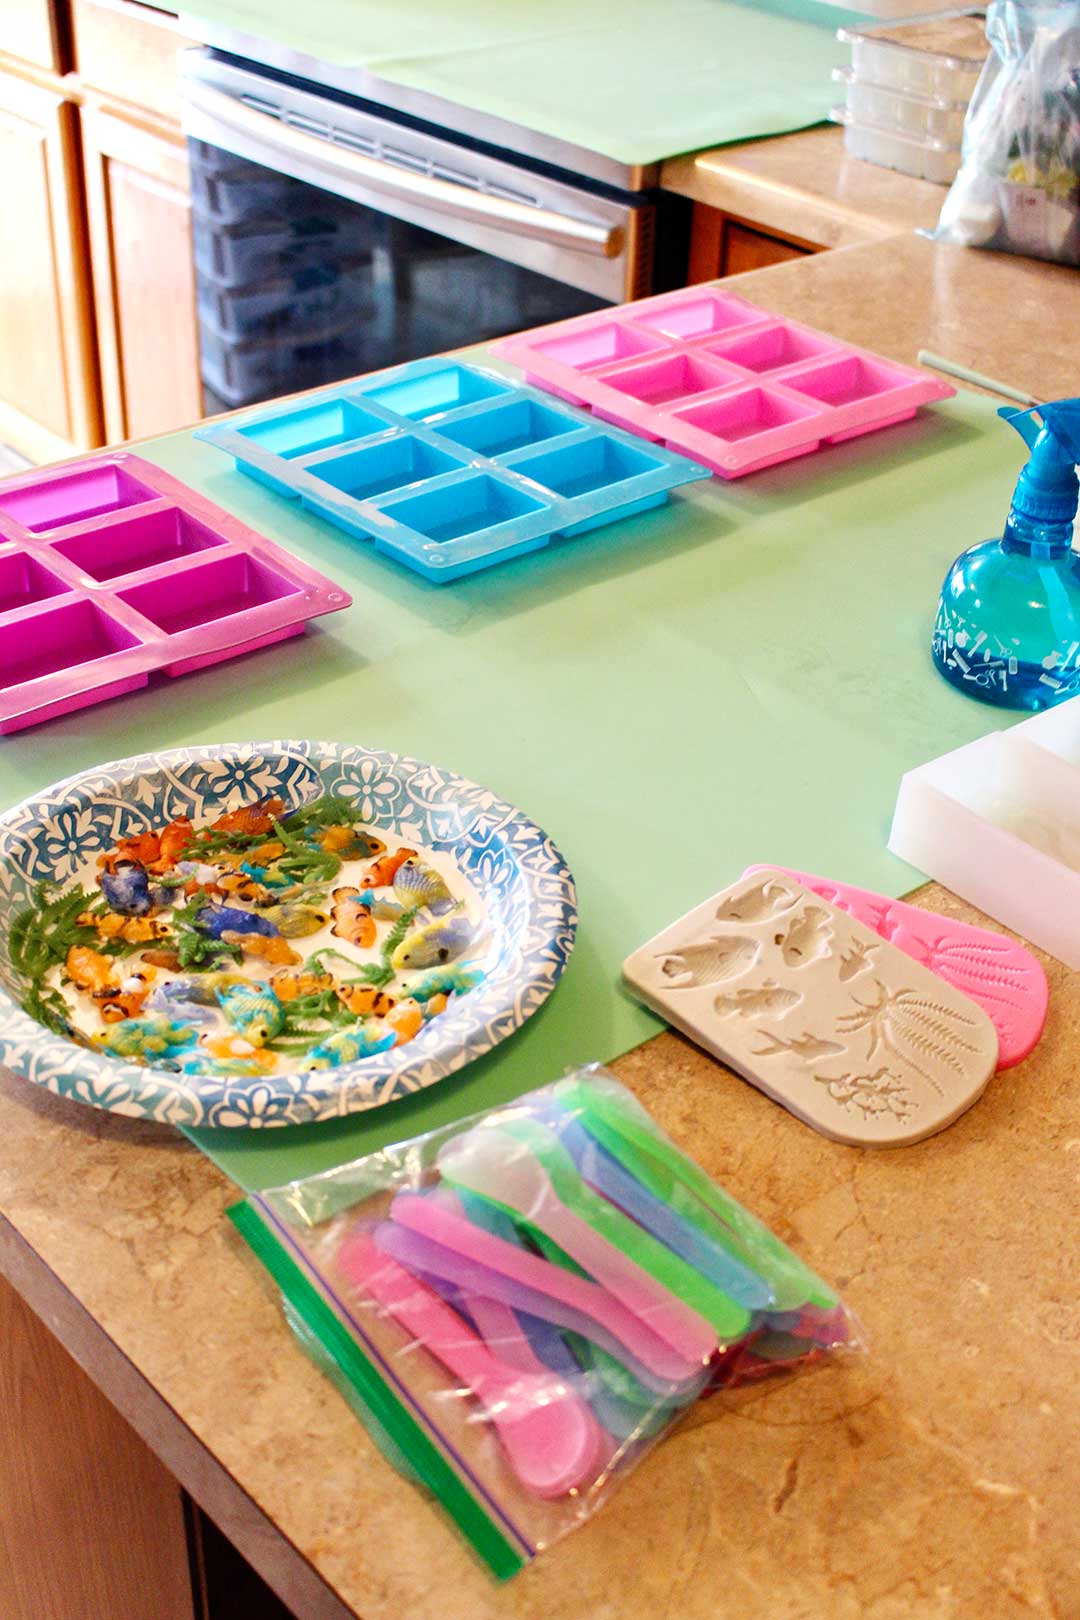
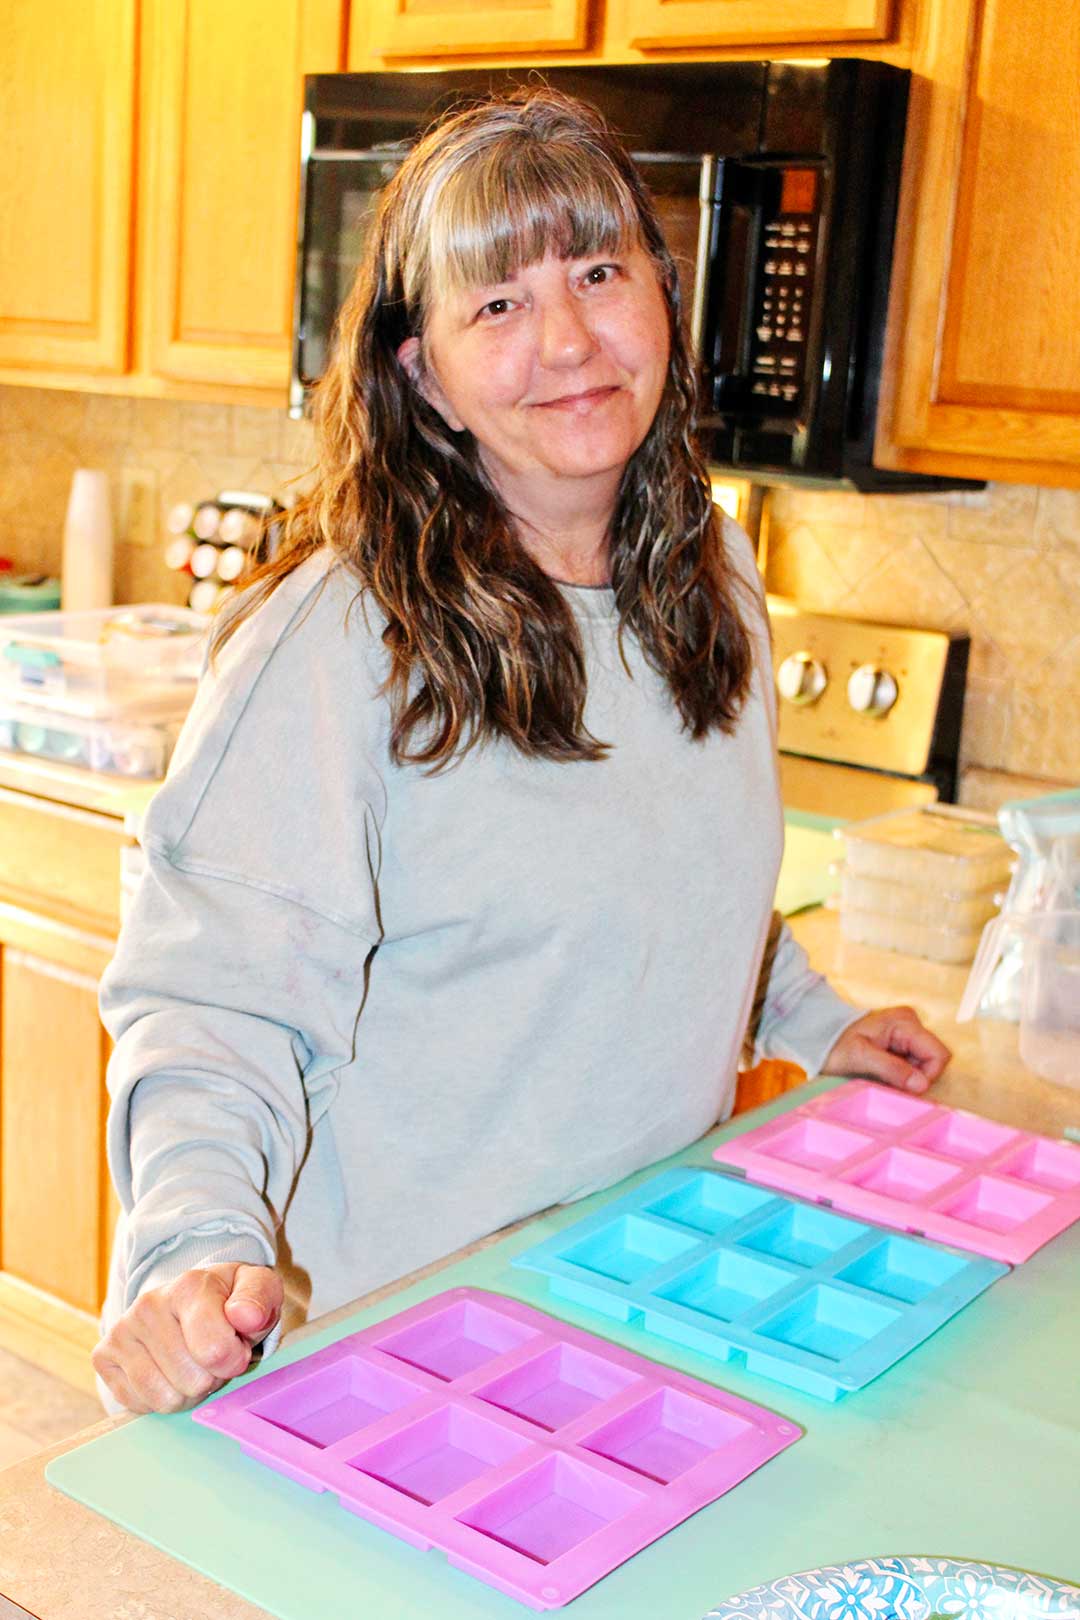
- Mold for rectangle soaps
- Isopropyl alcohol (91%)- in a spray bottle
- Rubber spatula- heat resistant
- Measuring cup that is heat-resistant
- Measuring spoons
- Microwave (or double boiler)
How to Make Aquarium Homemade Soap
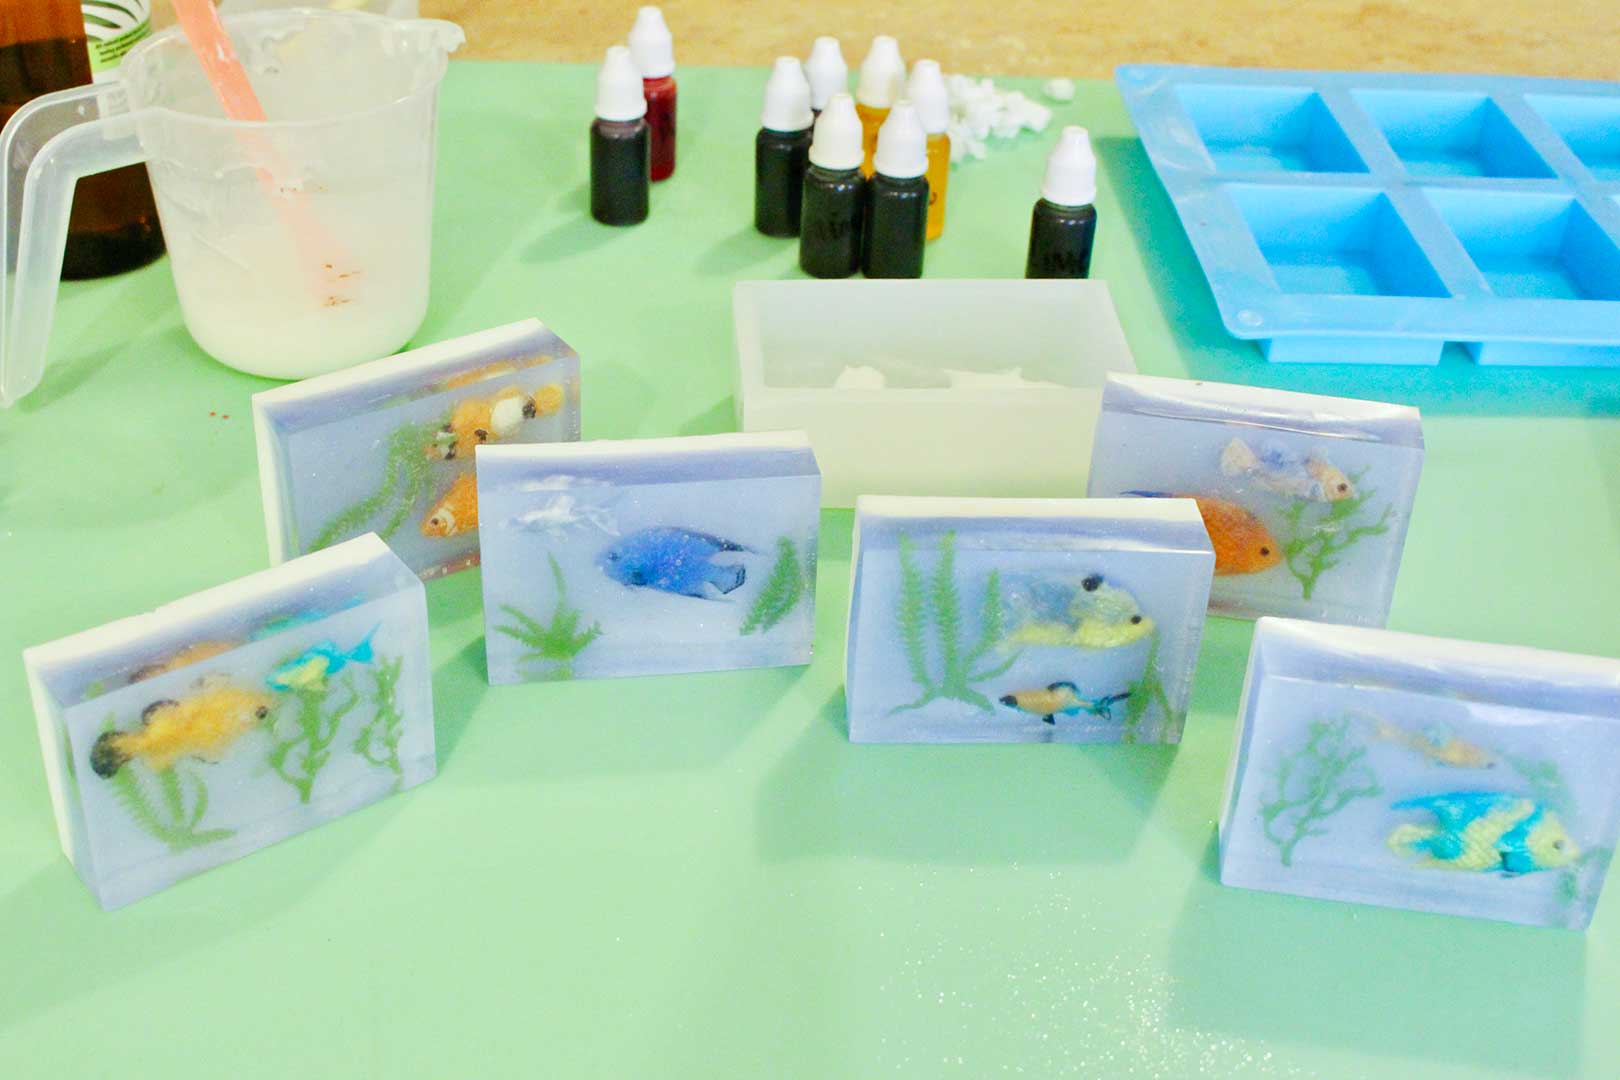
Let’s make soap- adorable, ocean-themed aquarium soap! Kelly purchased two kinds of soap base for us to use: a clear soap base and a white soap base. We ended up using both, and I have to say, these little aquarium soaps turned out SO cute.
This post will walk you through making aquarium-style soap bars, but once you get the hang of it, your imagination will be swimming with other fun soap designs to try. I can already tell… this could become a bit addictive!
Step 1: Gather your supplies
Before you melt a single cube of soap base, gather everything you plan to use- scents, colorants, add-ins, and tools. Once that soap is melted, it won’t wait for you to run and get things! Melted soap hardens quickly, but the good news is, you can gently reheat it if needed. (Psst… there’s a supply list at the bottom of this post if you want to check your stash.)
Tip: Some of the scent and color supplies can be used in both soap and candle making- hello, multipurpose! That means they’re also perfect for our Ice Candles DIY post. But I digress… (squirrel!).
Kelly, by the way, had entire totes filled with scent and color options, which made this step super fun- and just a little hard to choose!
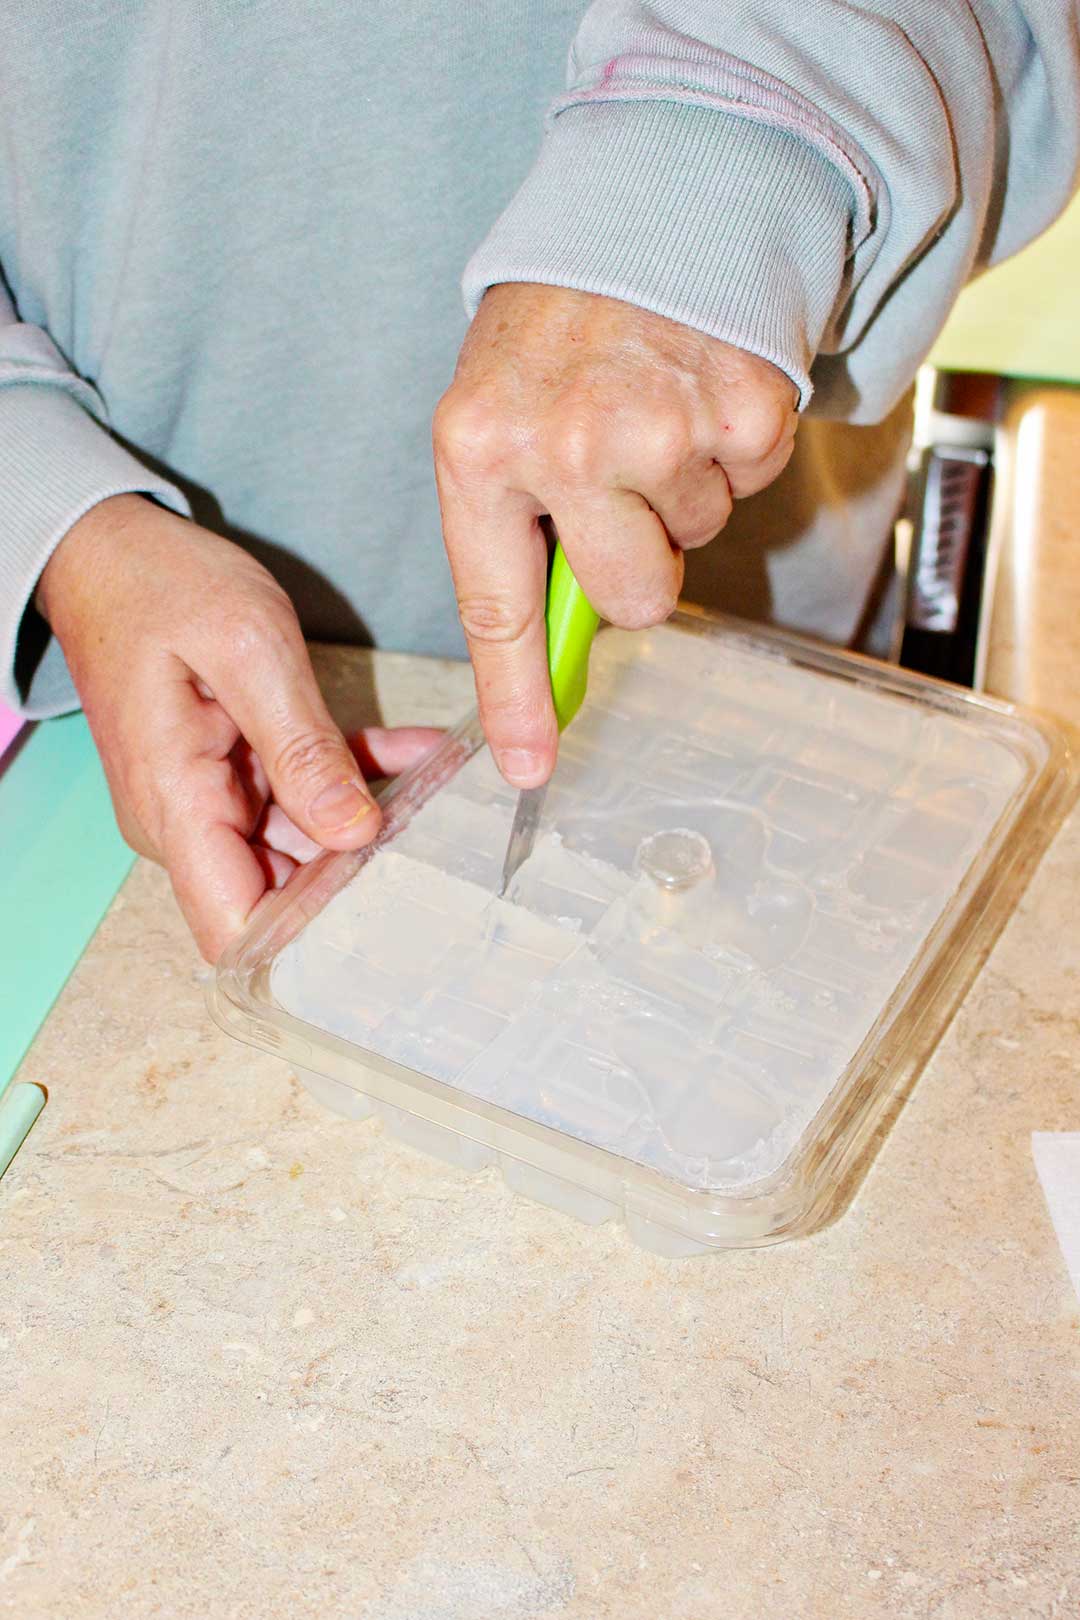
Step 2: Cut Your Soap Base
Start by cutting your soap base into smaller pieces. The blocks come sectioned, so we just sliced off what we needed to fill our 6-bar mold. The soap base is soft and easy to cut.
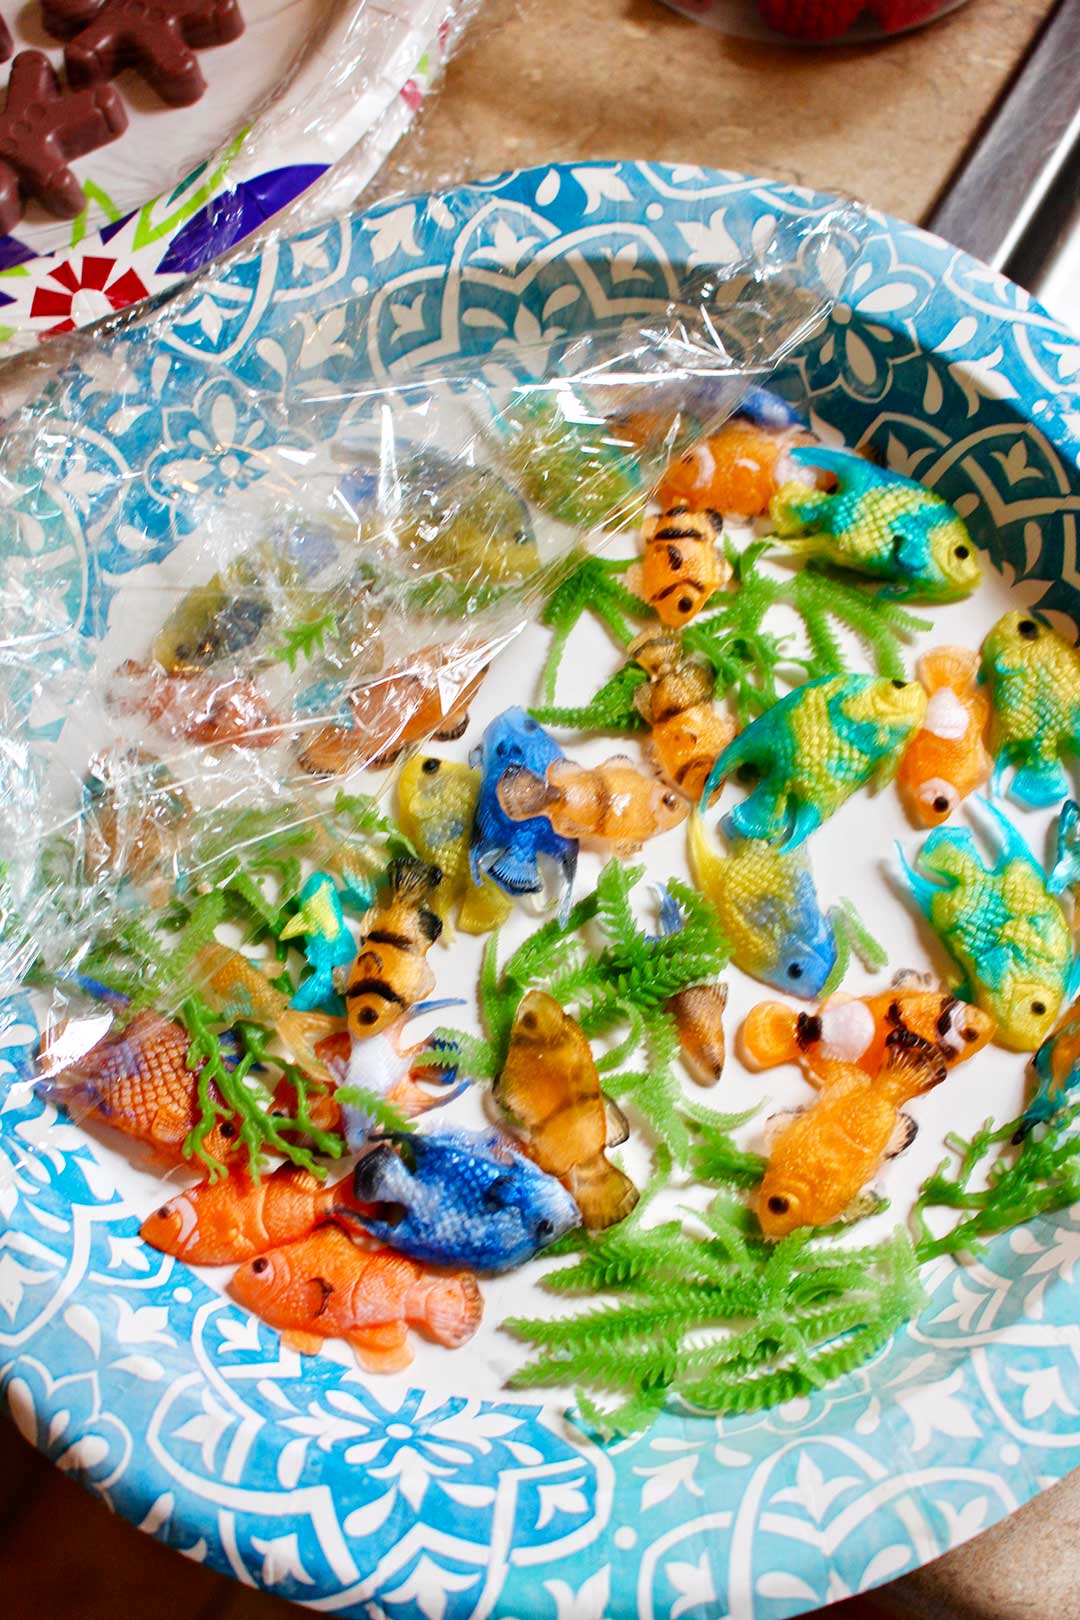
Kelly's amazing soap add-ins
Now, Kelly had been busy at work ahead of time making these amazing little fish and seaweed add-ins for us to use. She has molds for this and painstakingly added melted soap base of various colors into these tiny molds. When she makes soap, she likes to have everything in the soap be made from actual soap, nothing plastic. This is so cool.
On her counter were all kinds of items made from soap that I would have thought were real. Her husband says that he has almost popped soap berries and nuts in his mouth!! That would be shocking, for sure! But seriously, Kelly has made her own molds out of real items that when made in the actual color of the item look so real- blackberries, gum drops, pecans, small pumpkins. It is amazing, she is very talented.
But it is also fine to use small items in the soaps (like little toys) for the children to find as the soap is used up. Kelly said that kids really like this. So, when trying this soap tutorial, look for some very small plastic fish and seaweed in the craft or discount store. I had thought it would look neat to use small seashells as well.
Note: If there are small toys in the soap then they shouldn’t be used by little children that may put the small items in their mouth.
Step 3: Melt the Clear Soap Base
Place the clear soap pieces in a microwave-safe measuring cup. Melt them in short bursts according to the package instructions. We aimed for about 145–150°F, which liquifies the wax. Kelly used a heat gun to check the temp, but you can also follow the heating times listed on the clear soap base packaging.
Step 4: Add Color and Scent
Once melted, stir in a drop or two of blue coloring (go light so the “water” stays see-through!). Also add a few drops of your favorite soap-safe fragrance oil. Mix gently.
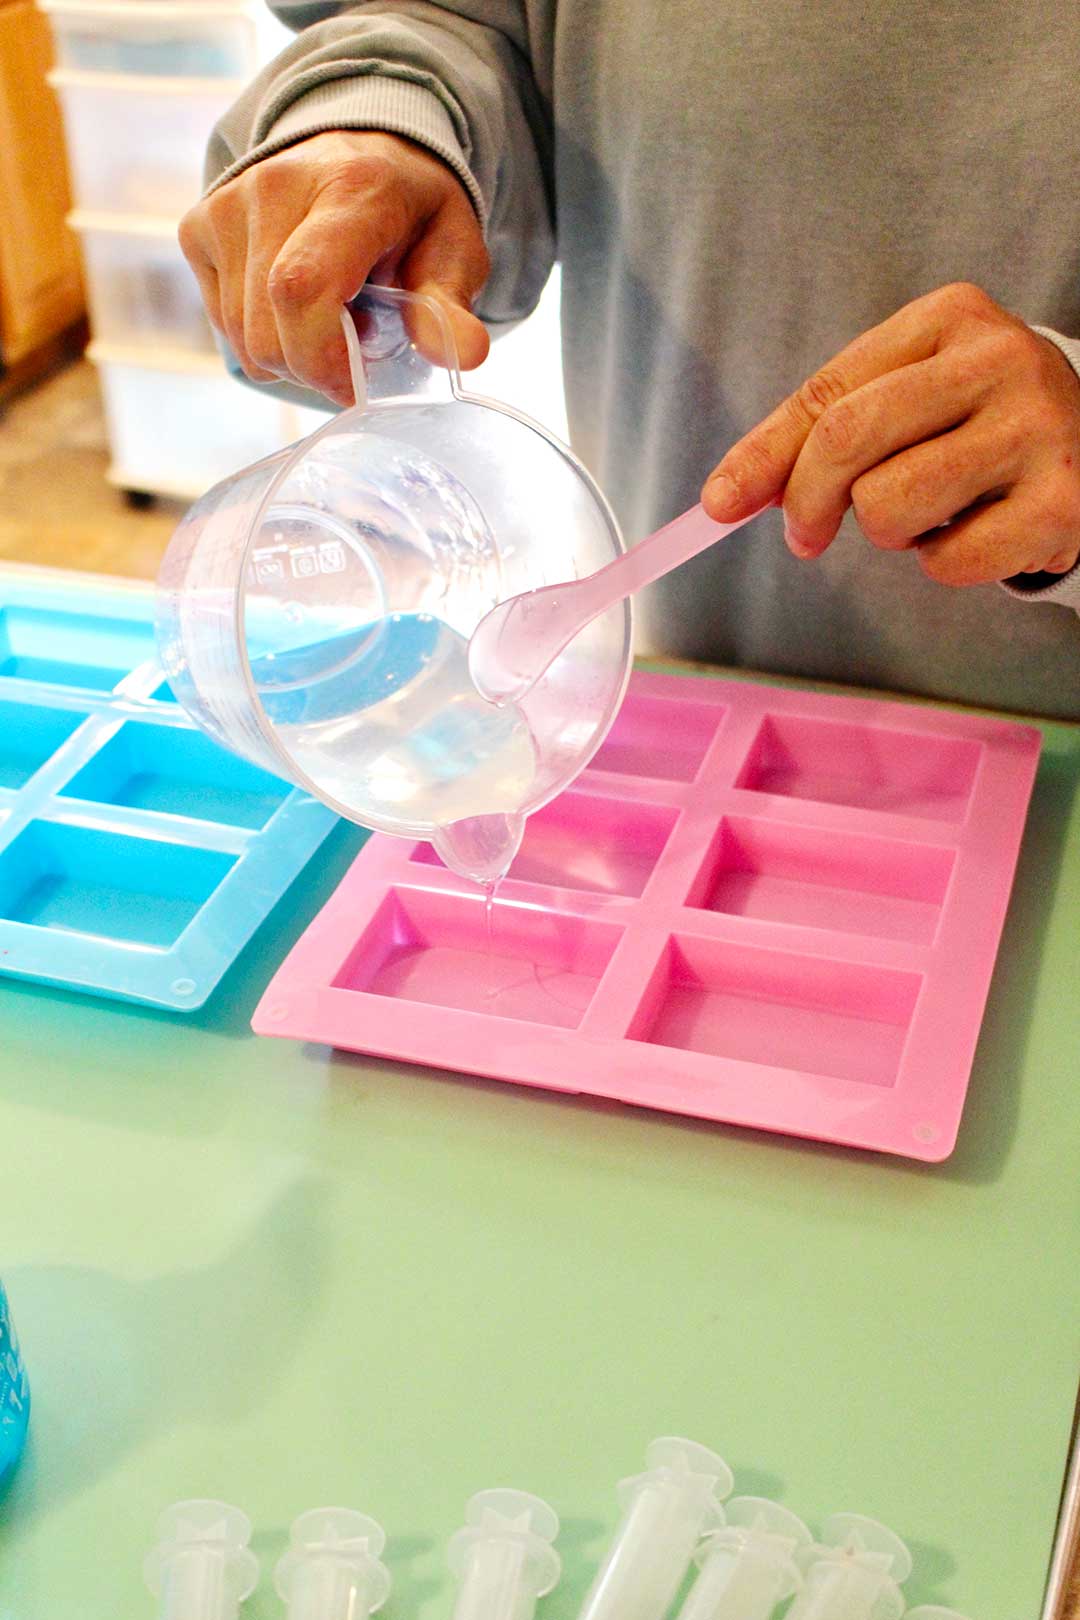
Step 5: Prep Your Mold with Alcohol
Spritz the inside of each mold cavity with isopropyl alcohol using a spray bottle. You’ll also do this between soap layers later. This helps layers bond and keeps bubbles down.
Step 6: Pour the First Layer
Pour the blue-tinted clear soap base to fill each mold about ⅓ of the way. Let it sit for a few minutes to begin setting up.
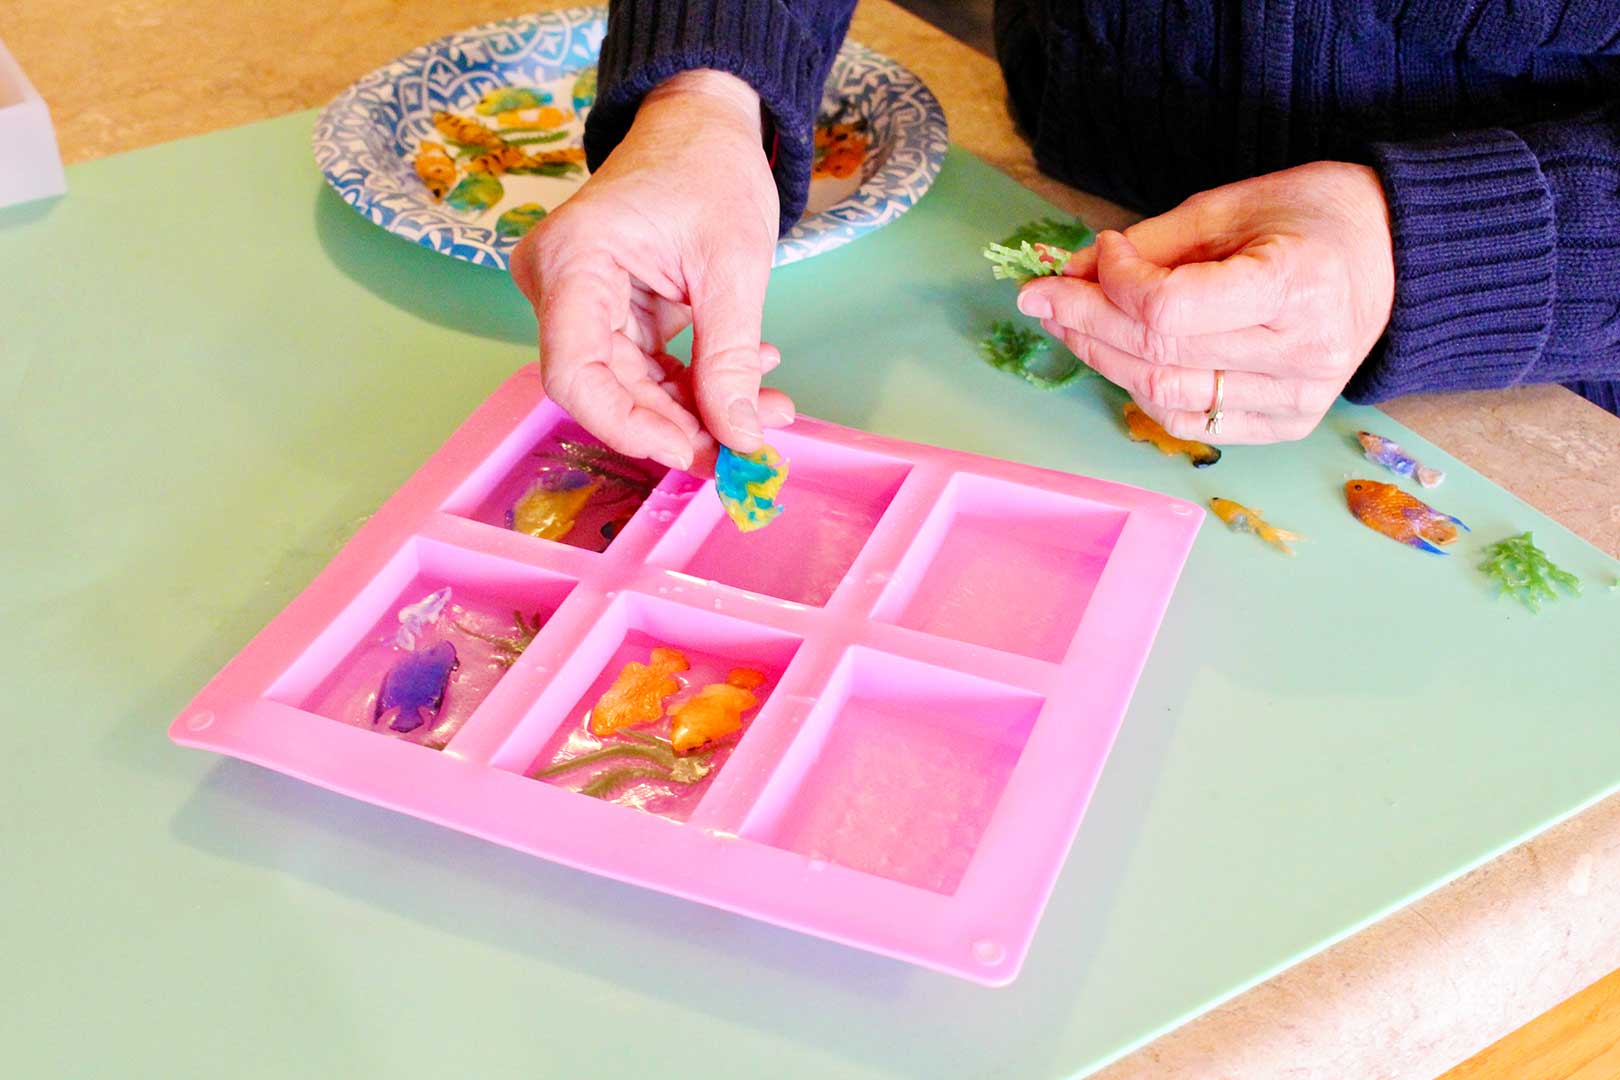
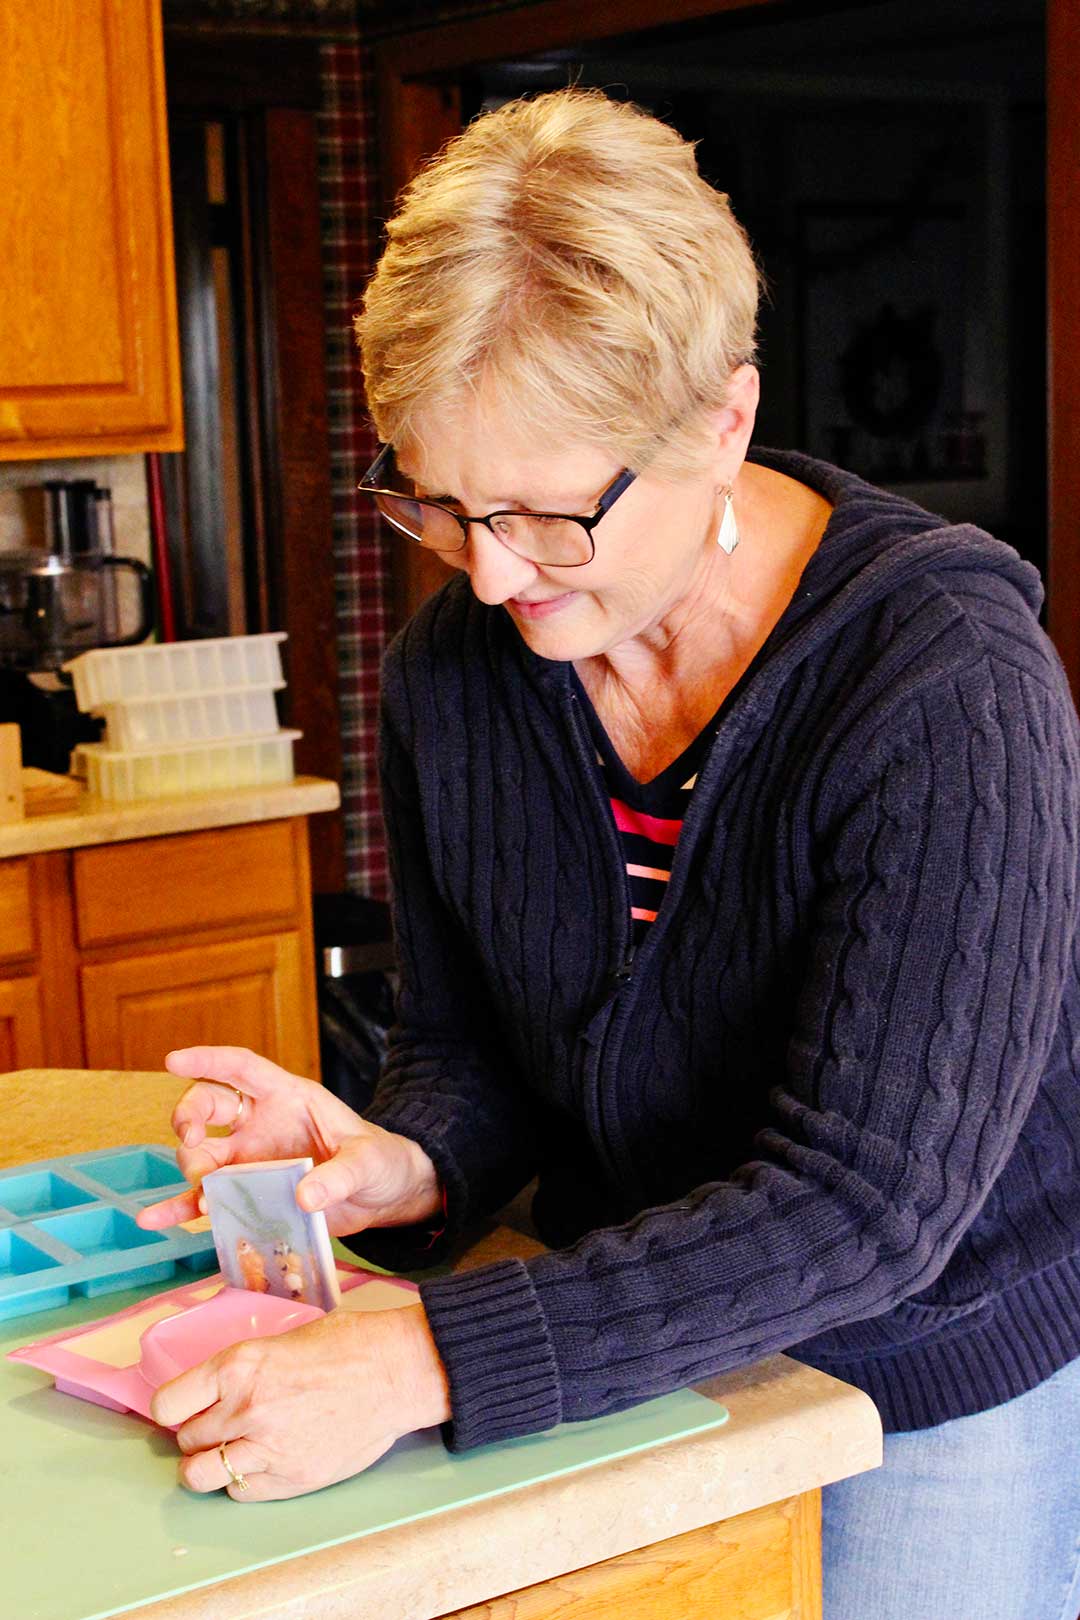
Step 7: Add Fish & Sea Life
Spritz again with alcohol, then gently place your small fish or seaweed add-ins right on the surface. Don’t press them down- just let them float! Spritz one more time to help them stay in place.
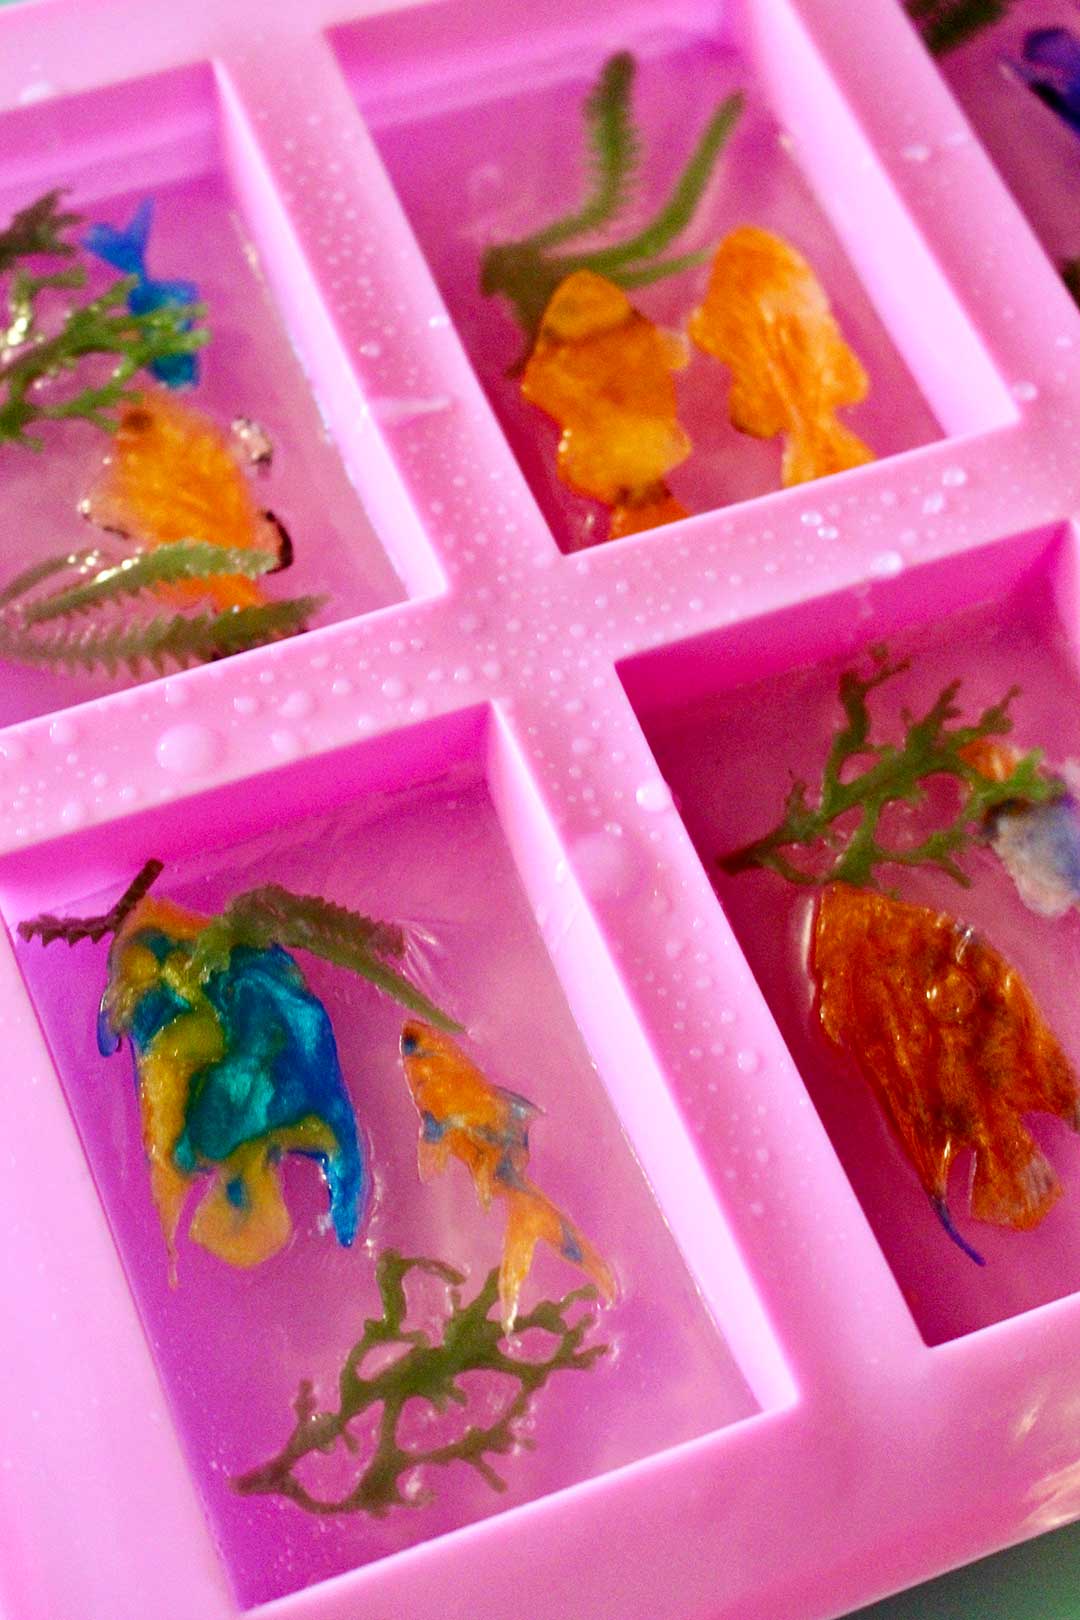
Step 8: Pour More Clear Soap
Add a little more melted clear soap over the fish, bringing the fill level to about ⅔ full. Let this layer cool and firm up.
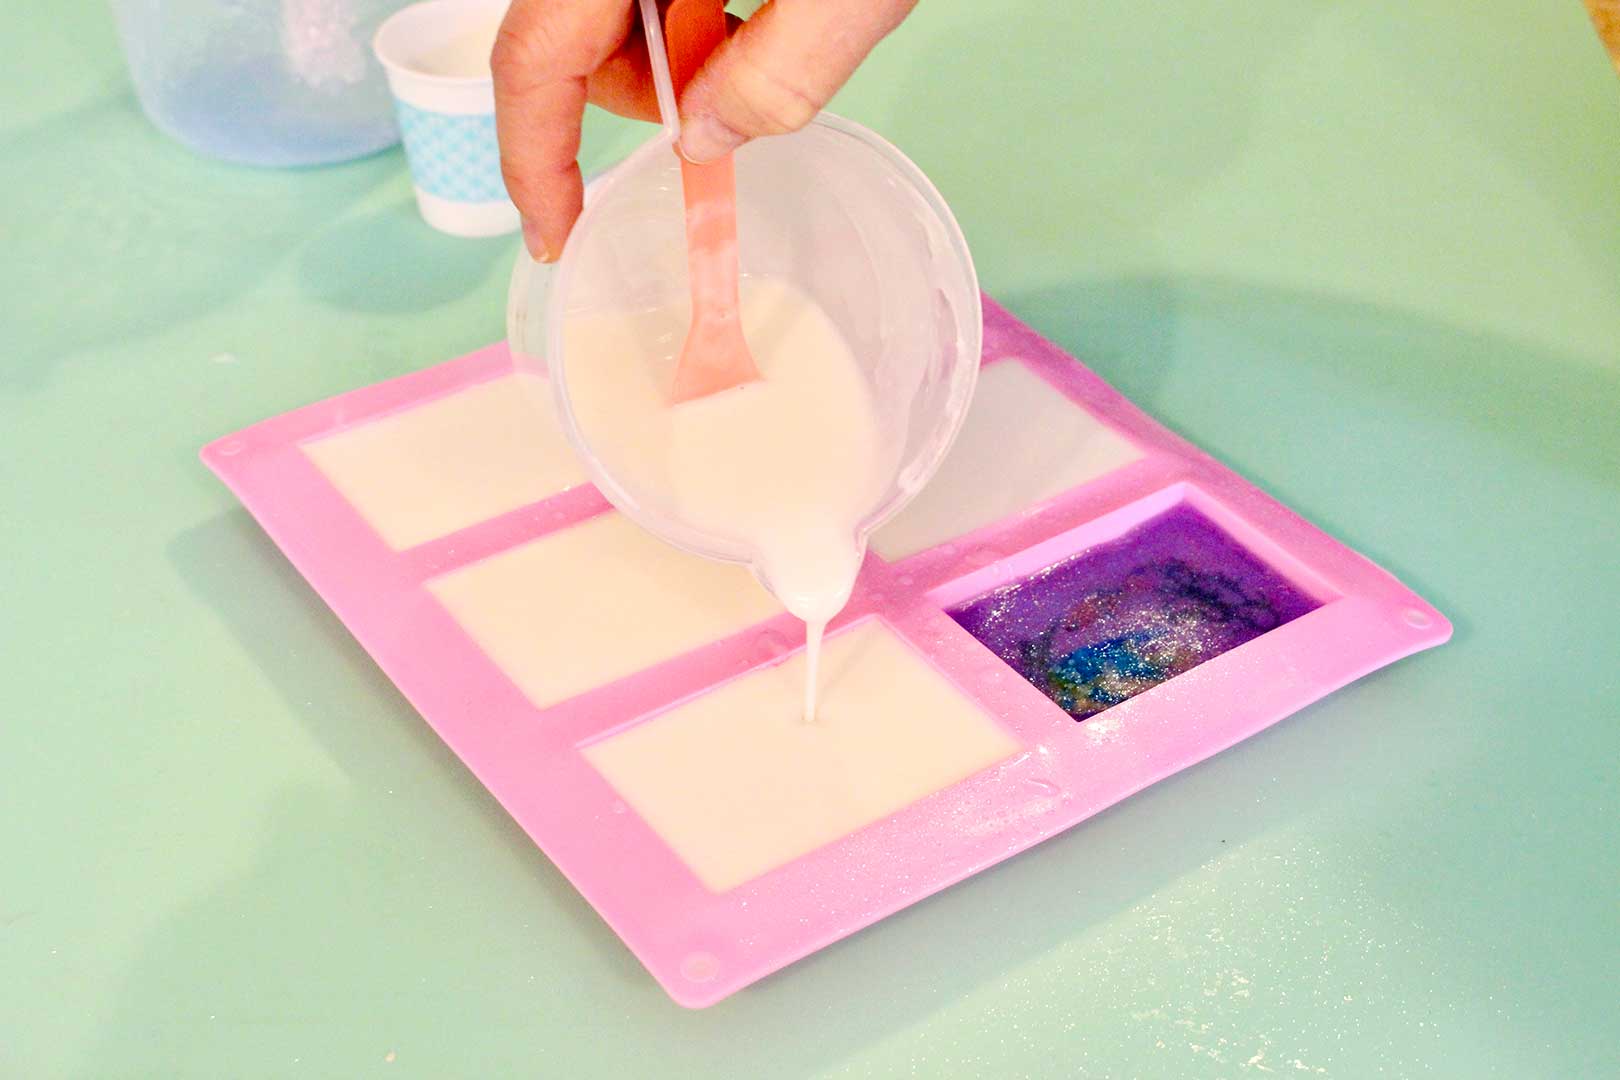
Step 9: Prepare the White Soap Base
Now it’s time for the white background layer. Clean out your measuring cup, cut a few cubes of white soap base, and melt as before. You can add more of the same scent (but no color!) and even a pinch of eco-friendly, biodegradable glitter if you want to give it a little sparkle. Totally optional, but… how fun is that?
Step 10: Pour the Final Layer
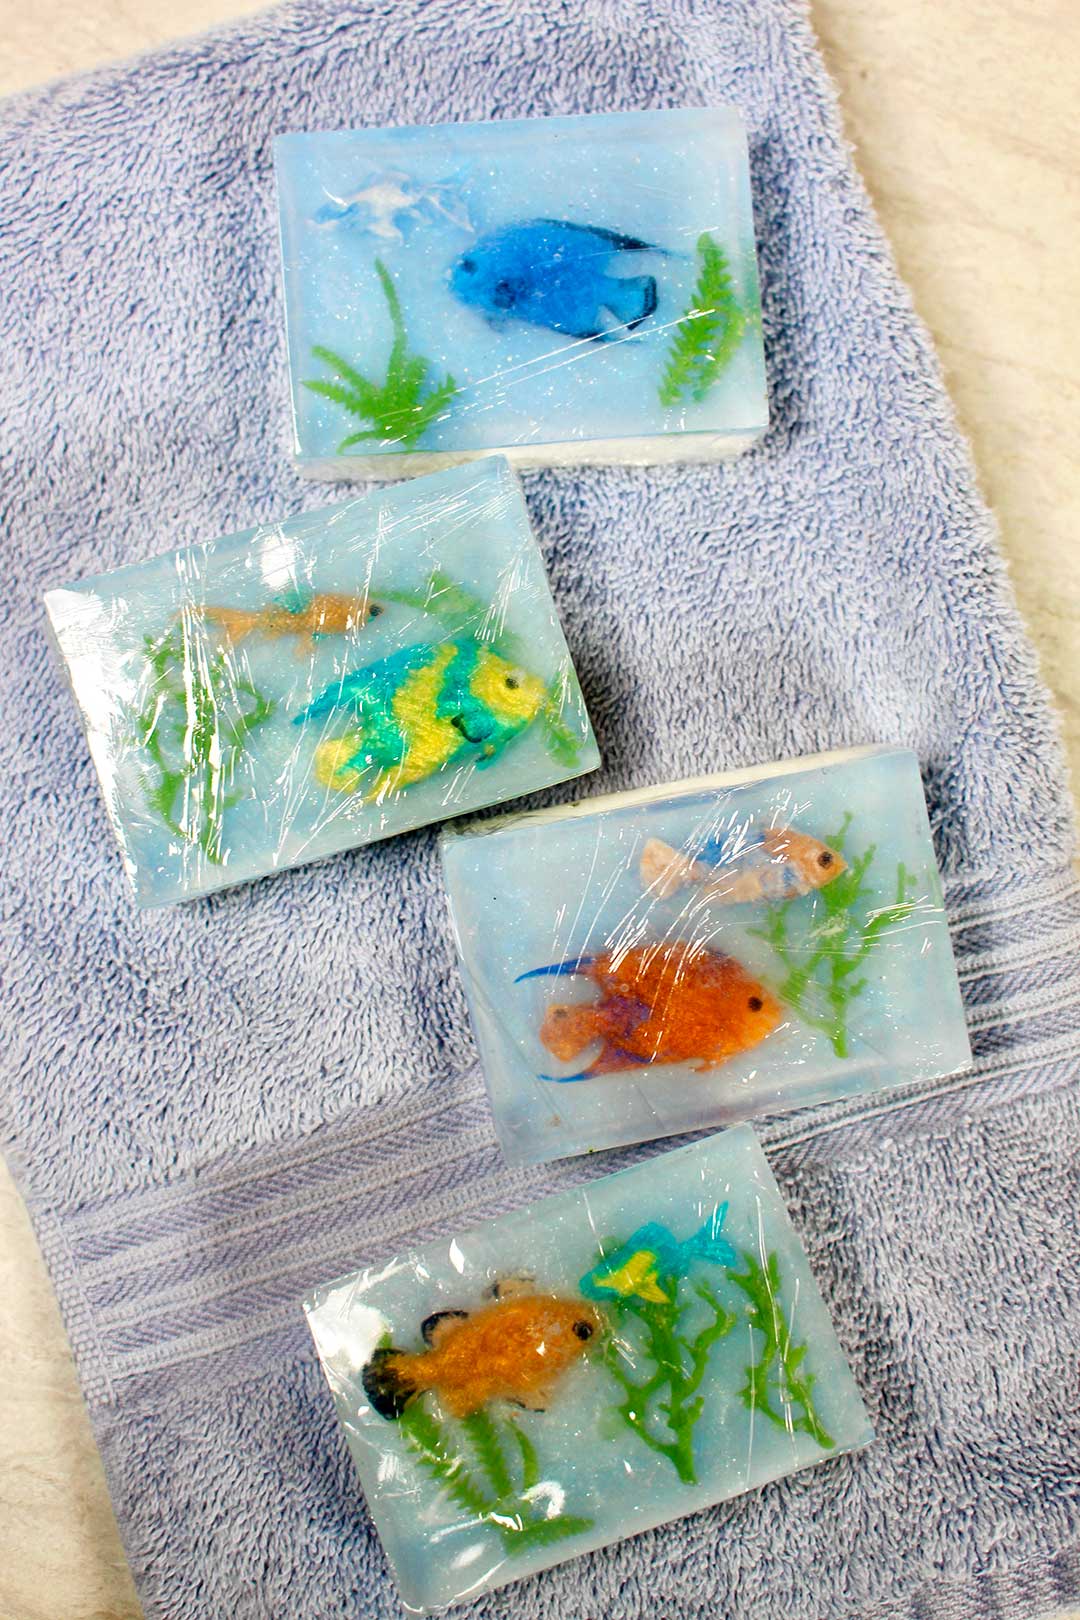
Once your white soap base has cooled slightly (so it doesn’t melt the clear layer), spritz the molds again, then slowly pour the white layer to the top of the molds. You should see a nice, distinct separation between the “water” and “background” of the soap aquarium. This makes it possible to see the fish more easily.
Step 11: Let Cool Then Remove Soap Bars From the Mold
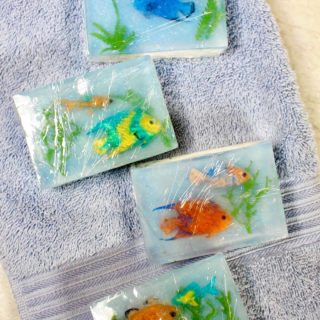
Waiting is the hardest part! But with melt & pour soap, it doesn’t take long. Once the bars are cool and firm, gently peel back the silicone mold and pop out your soaps. Cue the squeals! Seeing the colorful fish “swimming” inside the bars is so cool. These aquarium soaps are just as fun to look at as they are to use.
Kelly snapped a few photos of me during this soap session (a rare moment in front of the camera!), so don’t be surprised if you spot me in this post. Hi there!
Local handmade soap
I’m hoping that Kelly will have her Etsy shop and website up soon so I can share her amazing soapmaking with you. Her business name is Dry Creek Soap Co. She will offer her soaps and some of her soap add-ins for others to use in their soapmaking. She works primarily with Cold Press soapmaking. I’m excited for her. She was so generous with her time and her soaps are wonderful. I’m sure it will be a great success.
Thank you again, Kelly, for sharing your skills, kitchen and supplies with Welcome To Nanas. You are a dear person and friend.
Please, attach pictures of your soaps and I will share them with Kelly!!
ENJOY!
If you try this craft, let me know! Go ahead and leave a comment, rate it, and tag a photo with #WelcometoNanas wherever you post.
More from Welcome To Nana's
DIY Soap Making for Kids
Equipment
- Rectangle soap molds
- Rubber spatula- heat resistant
- Measuring cups- heat resistant
- Measuring spoons
- Microwave
- OR Double boiler
Items Required
- Clear soap base
- White/opaque soap base
- Skin safe fragrance
- Small items for soap add-ins (like plastic fish)
- Isopropyl alcohol 91%- in spray bottle
- Plastic wrap
Instructions
- Melt clear soap base in microwave according to directions, add blue coloring and scent
- Spritz mold with alcohol then fill ⅓ full with clear soap base, let set up
- Alcohol spritz- then lay add-in fish and other items
- Pour more clear soap base over fish to hold in place- mold will be about ⅔ full, let set up
- Melt white soap base in microwave according to directions add scent if desired,
- Spritz with alcohol then pour white soap base into mold till the soap bars are full. Allow to fully set
- Pop the soaps out of the mold. Wrap carefully in plastic wrap


Ilana Bar-Hai says
This is so wonderful. I have purchased it all and in a week when my grandchildren come for the yearly "Ma's summer camp, ages 2 to 12, we will do these exact soaps. Wish there were a video! Thank you from far away!
p.n. says
hi
how many soap bars does does a 2lb block of soap make?