Hammered Flower Prints on Fabric = beauty + fun + stress relief!! It’s fun to pick flowers, hammer, squish things and come out with something beautiful.
Do you have some spring or summer flowers in the yard? Hammered Flower Prints on Fabric are a great way to preserve some of that spring color and make a great gift or card. People of every age respond to this craft in making it or receiving it!
Memories...
I remember gathering flowers with the kids many years ago and making hammered flower prints on fabric. Our projects usually sprung from something we were studying, talking about or experiencing, but that memory trail is dim now. We were really into wildflowers and pressed flowers to make cards, so I’m thinking that’s where this idea came from.
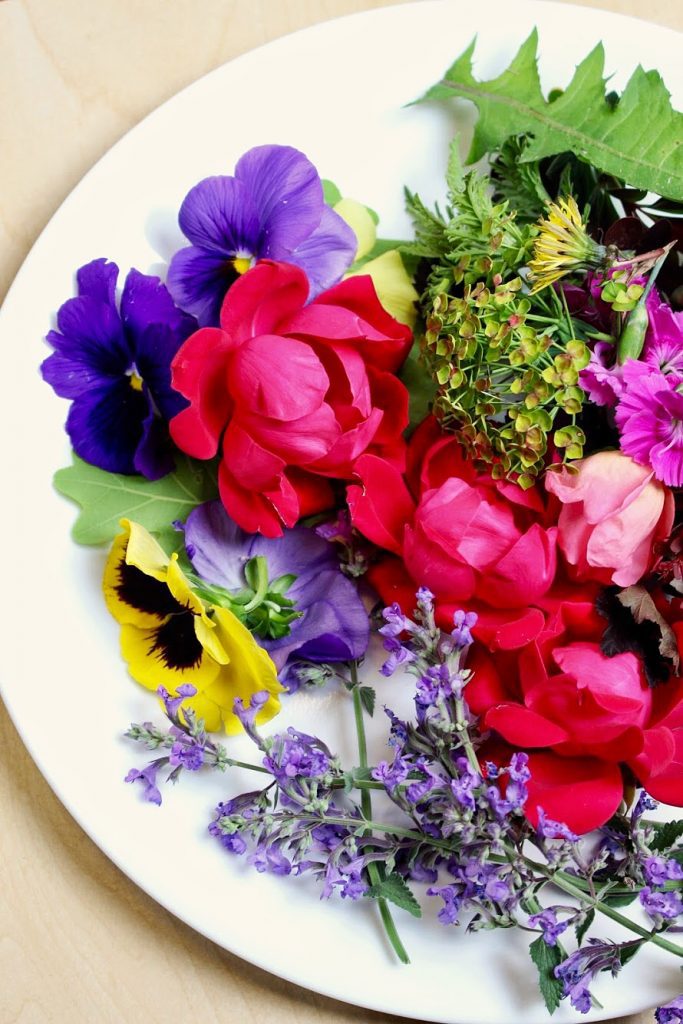
Pick Your Flowers and Leaves
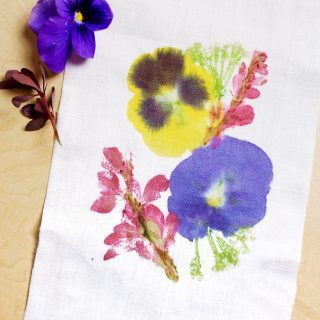
Pick a variety of flowers and leaves and place them out on the center of the table. It’s fun to take the kids around the yard and the fence lines to pick whatever we find that’s blooming. Avoid the really thick flowers, like peonies, and opt for the smaller, thinner ones, like pansies, petunias, small ground cover flowers and wild flowers. The brighter colors will work better- pinks, purples, vivid yellows. Don't forget leaves from plants and trees. Barberry bushes make amazing color!
Cut Your Fabric
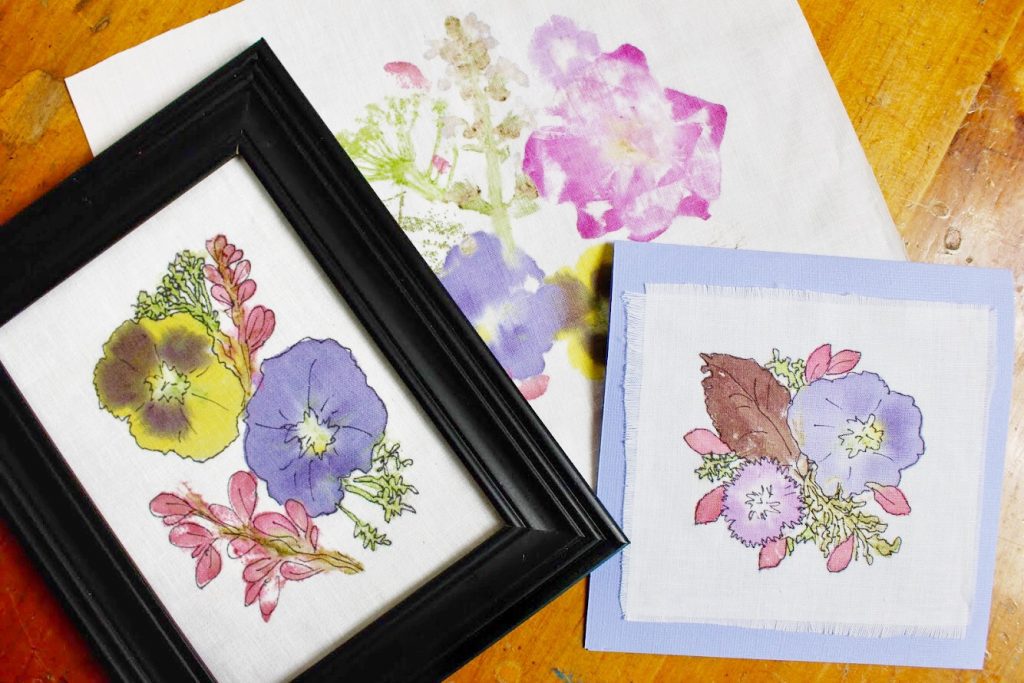
Cut your fabric to the desired size. I cut pieces 10x12 inches, 6x8 inches and 4x4 inches. My thought is to make the largest one into the center of a pillow, to place the middle sized one into a 5x7 inch black frame, and use the smallest one on the face of a card.
Tip: I’ve wondered about doing this on a pocket of a shirt or something, but it won’t withstand the washing of a garment over and over. Best left for decorative projects. I've also heard this will work on paper too. If you try this you may want to go with watercolor paper as it's heavier and made to receive colored pigment.
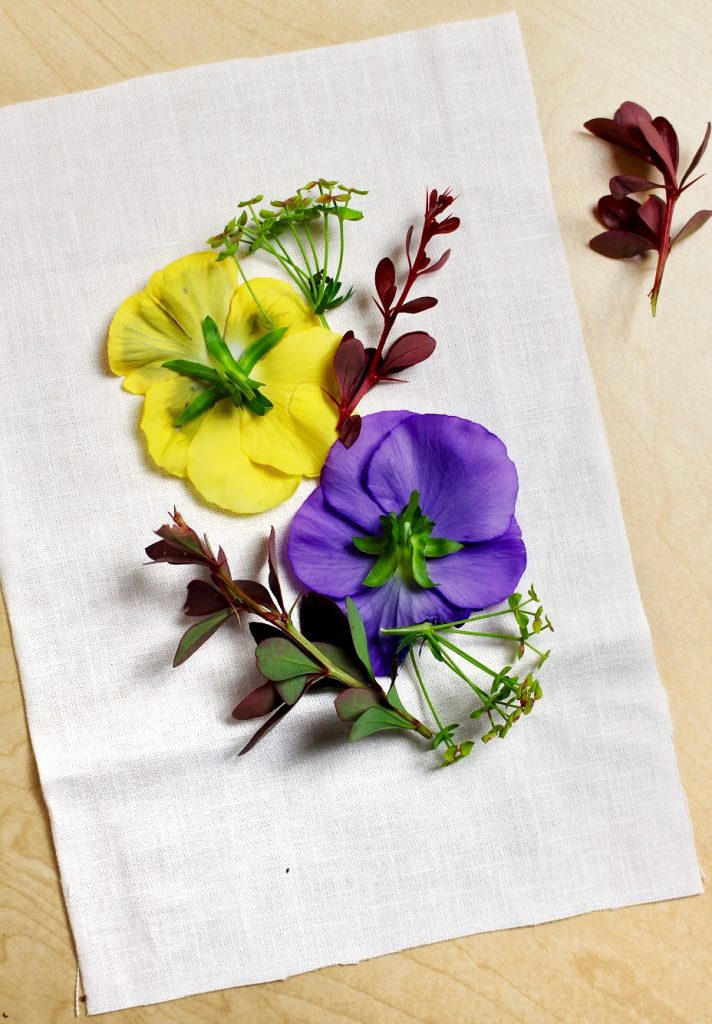
Arrange and Tape Down the Flowers on the Fabric
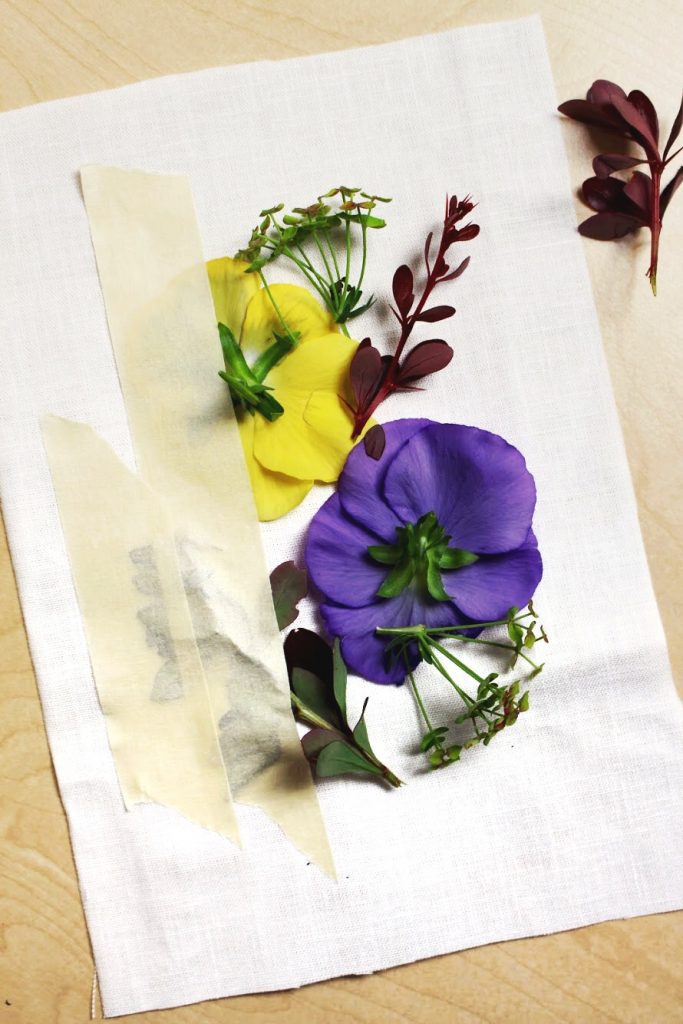
Arrange the flowers and leaves on the fabric, face down.
Tape the flowers down to the fabric with the wide masking tape. Tape around the thick part of the stems that are sticking up and then clip them off. Make sure the flower petals and leaves are under the tape, completely covered.
Prep the Surface...
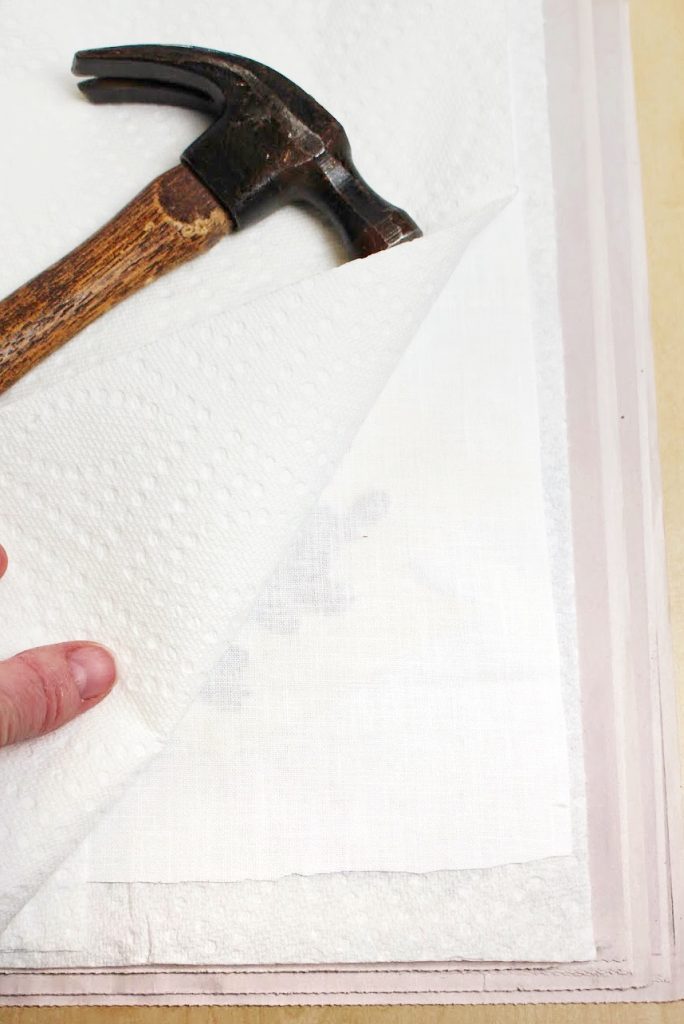
Place the board on the table to avoid hurting your table when hammering. Place several layers of newspaper on the board. Cover the newspaper with paper towel.
Lay the flowers with the tape side down and fabric side up on the prepared surface.
Lay 2-3 layers of paper towels over the fabric.
Hammer Away!
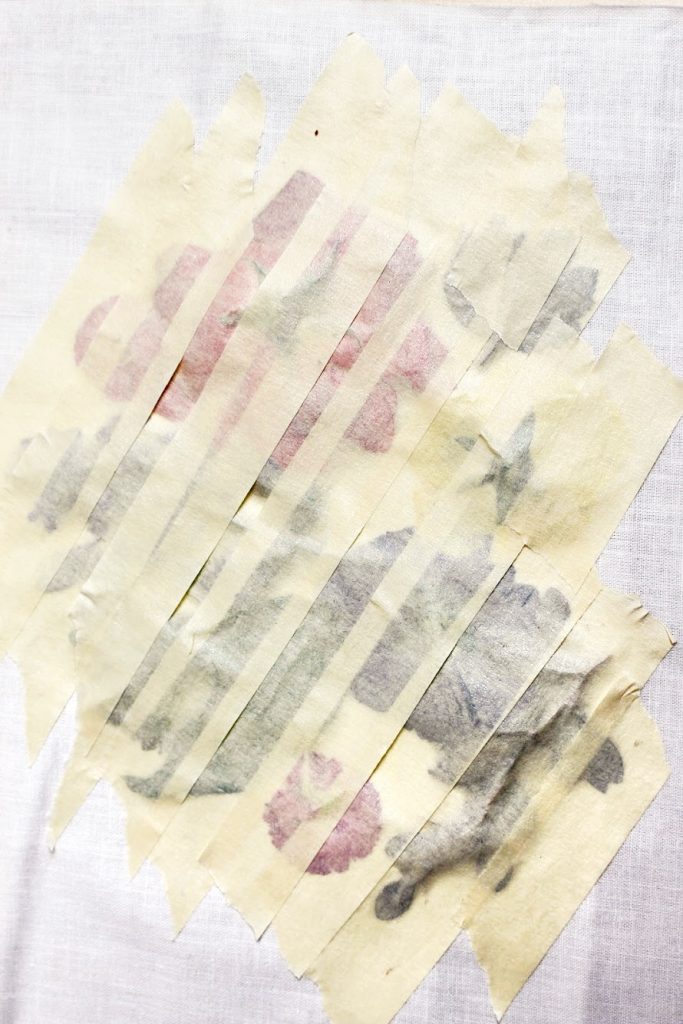
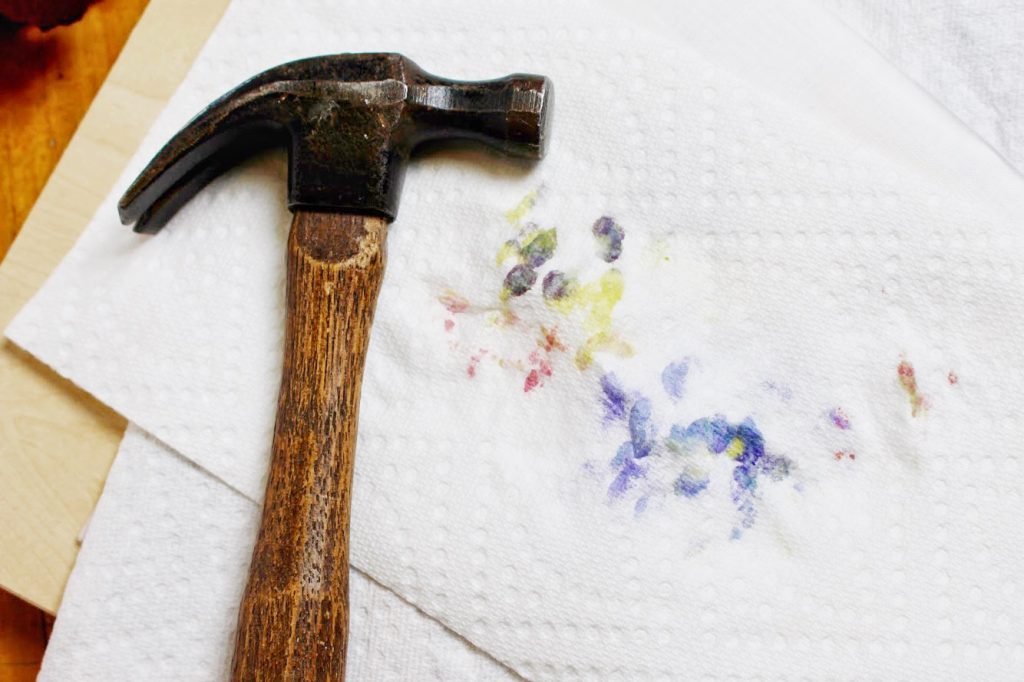
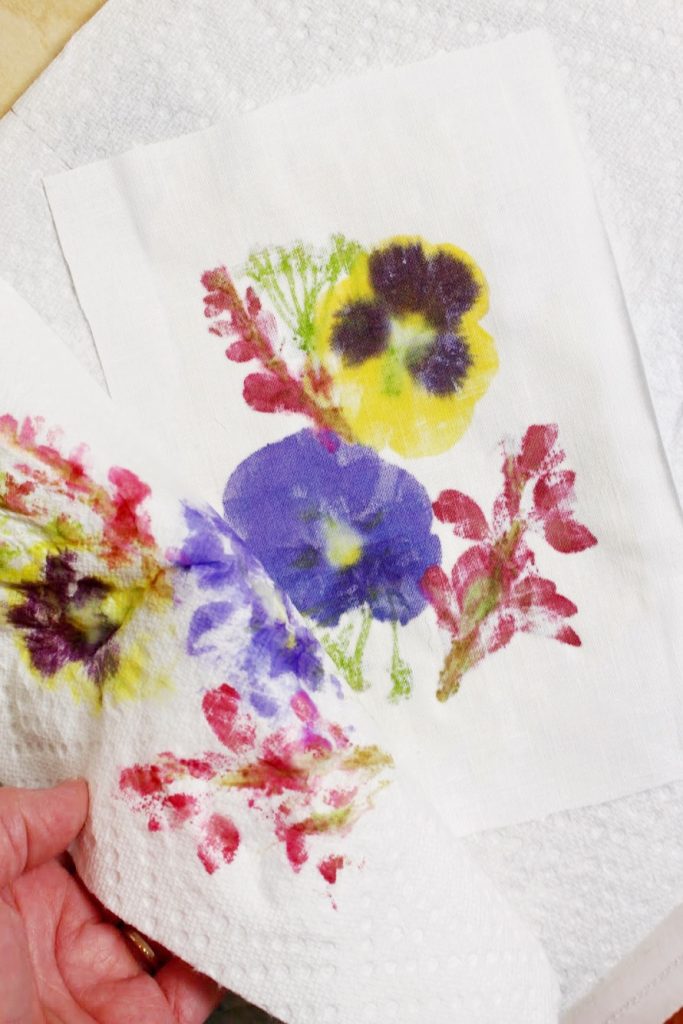
Begin to hammer all over the surface. You will start to see the dye come through the paper towel and that’s OK. Occasionally peek under the paper towel to see if the juices of the flowers and leaves clear to the edges are coming through onto the fabric. Continue to hammer in the areas that are not dyed by the flowers.
Tip: I switched to a ball peen hammer for some of the leaves. This brought the green pigment out of the leaves and dyed the fabric. It wouldn’t work with the flat surfaced hammer.
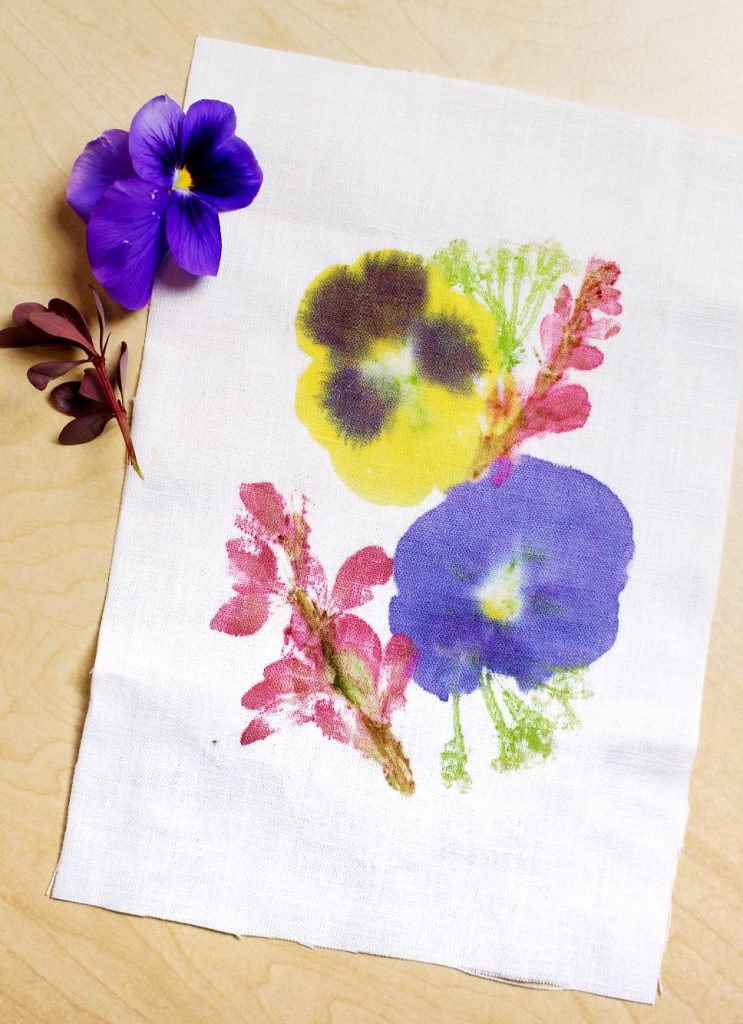
Hammered Flower Prints on Fabric Rock!
I never know exactly how the print will come out looking so it’s also an adventure and a surprise every time I peek and see what the colors look like as they are printing on the fabric.
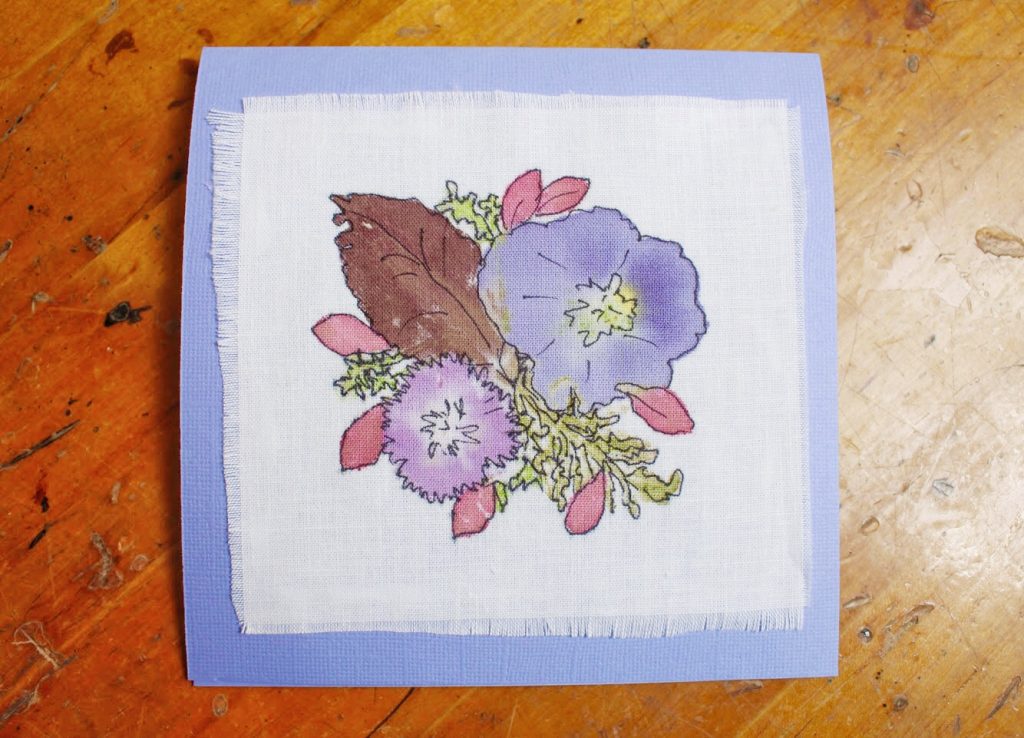
Later I tried outlining them with a black fine line permanent marker and liked how it looked. It was as fun as the hammering!!
What do you think? Have fun experimenting with the grands!! I’d love to see what you come up with. Post some pictures!
Once you get started with flower art, you may not want to stop!
Enjoy!
Welcome to Nana’s! Where there’s fun things to do with your “grand” kids!
Come join the fun!
Hammered Flower Prints on Fabric
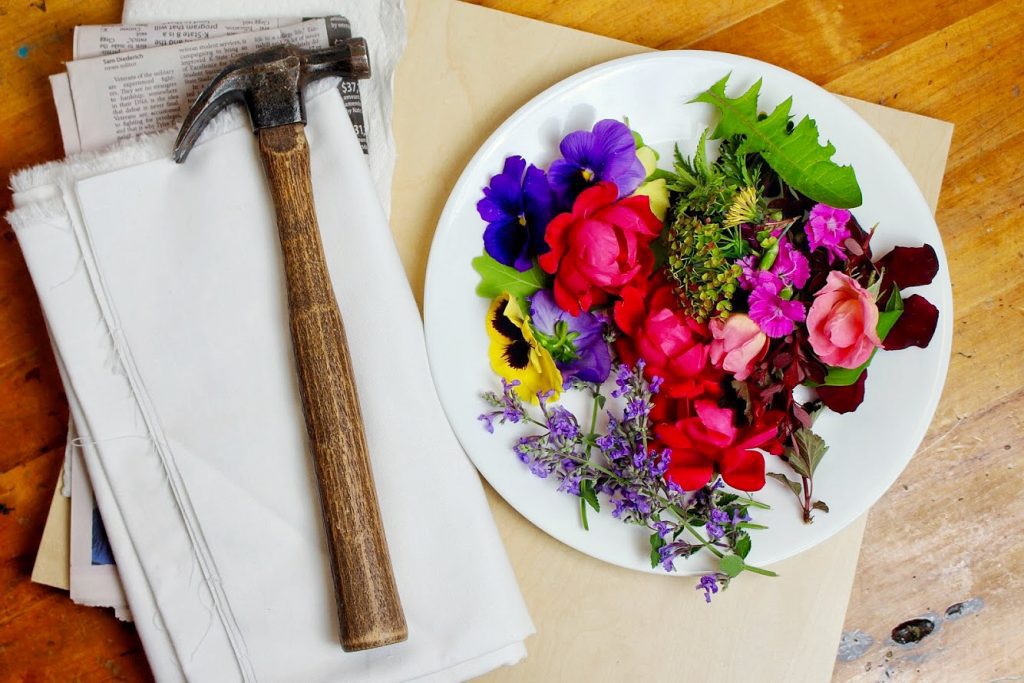
Equipment
- Hammer (more than one type if you have them, like a ball peen hammer)
- Flat board as a base to hammer on
Items Required
- 1 bunch Flowers and leaves- in a variety of colors (not too thick! Choose flowers like petunias, pansies, barberry bush leaves, knock out roses, etc.)
- 1 piece Cotton fabric white works best
- Newspaper
- Paper towels
- Wide masking tape
- Fine line permanent marker (optional)
- Cardstock (optional)
- Frame (optional)
Instructions
- Pick a variety of flowers and leaves and place them out on the center of the table. Avoid the really thick flowers. Brighter colors will work better- pinks, purples, vivid yellows, and don’t forget leaves from plants and trees!
- Cut your fabric to the desired size.
- Arrange the flowers and leaves on the fabric, face down.
- Tape the flowers down to the fabric with the wide masking tape. Tape around the thick part of the stems that are sticking up and then clip them off. Make sure the flower petals and leaves are under the tape, completely covered.
- Place the board on the table to avoid hurting your table when hammering. Place several layers of newspaper on the board. Cover the newspaper with paper towel.
- Lay the flowers with the tape side down and fabric side up on the prepared surface. Lay 2-3 layers of paper towels over the fabric.
- Begin to hammer all over the surface. Occasionally peek under the paper towel to see if the juices of the flowers and leaves clear to the edges are coming through onto the fabric. Continue to hammer in the areas that are not dyed by the flowers.
- Peel away the layers to reveal your hammered flower print! Outline with a fine line permanent marker, if you'd like.
- Keep your print as-is, or turn your creation into a gift (maybe frame it?) or card (mount it on cardstock?)!


Jan Johnson says
Love this. Am going to try this as a gift. Do you do anything to the fabric before or after?
Shelly says
Sorry for my slow response. It is always best to wash fabric before using it to get off any finish that it has. But for a gift that will not be worn it doesn't make a lot of difference. The hammered flower prints don't wash well so I don't recommend them on clothing.
Wiz says
Would you be kind enough to post a little video that follows your instructions to create the "hammered flower print"? Thank u so much ;*)
Tami D Koletsky says
My granddaughter and I loved this we stopped along the side of the road on the way home collecting anytime we saw bright colors. She loved helping to spot them and played look out for me as I crossed the road. I had some old cotton night gowns and we samwhiched the flowers between the front and back and went to town. We also discovered (the hard way) that the bigger flowers don't work well. Tiger Lilly and trumpet flowers are too wet with little color transfer. I would love to share pictures, not sure where. Love this!!
Barbara wahl says
How do I preserve the flowers on my shawl I made with flowers? Thank you