Fall Tree Craft
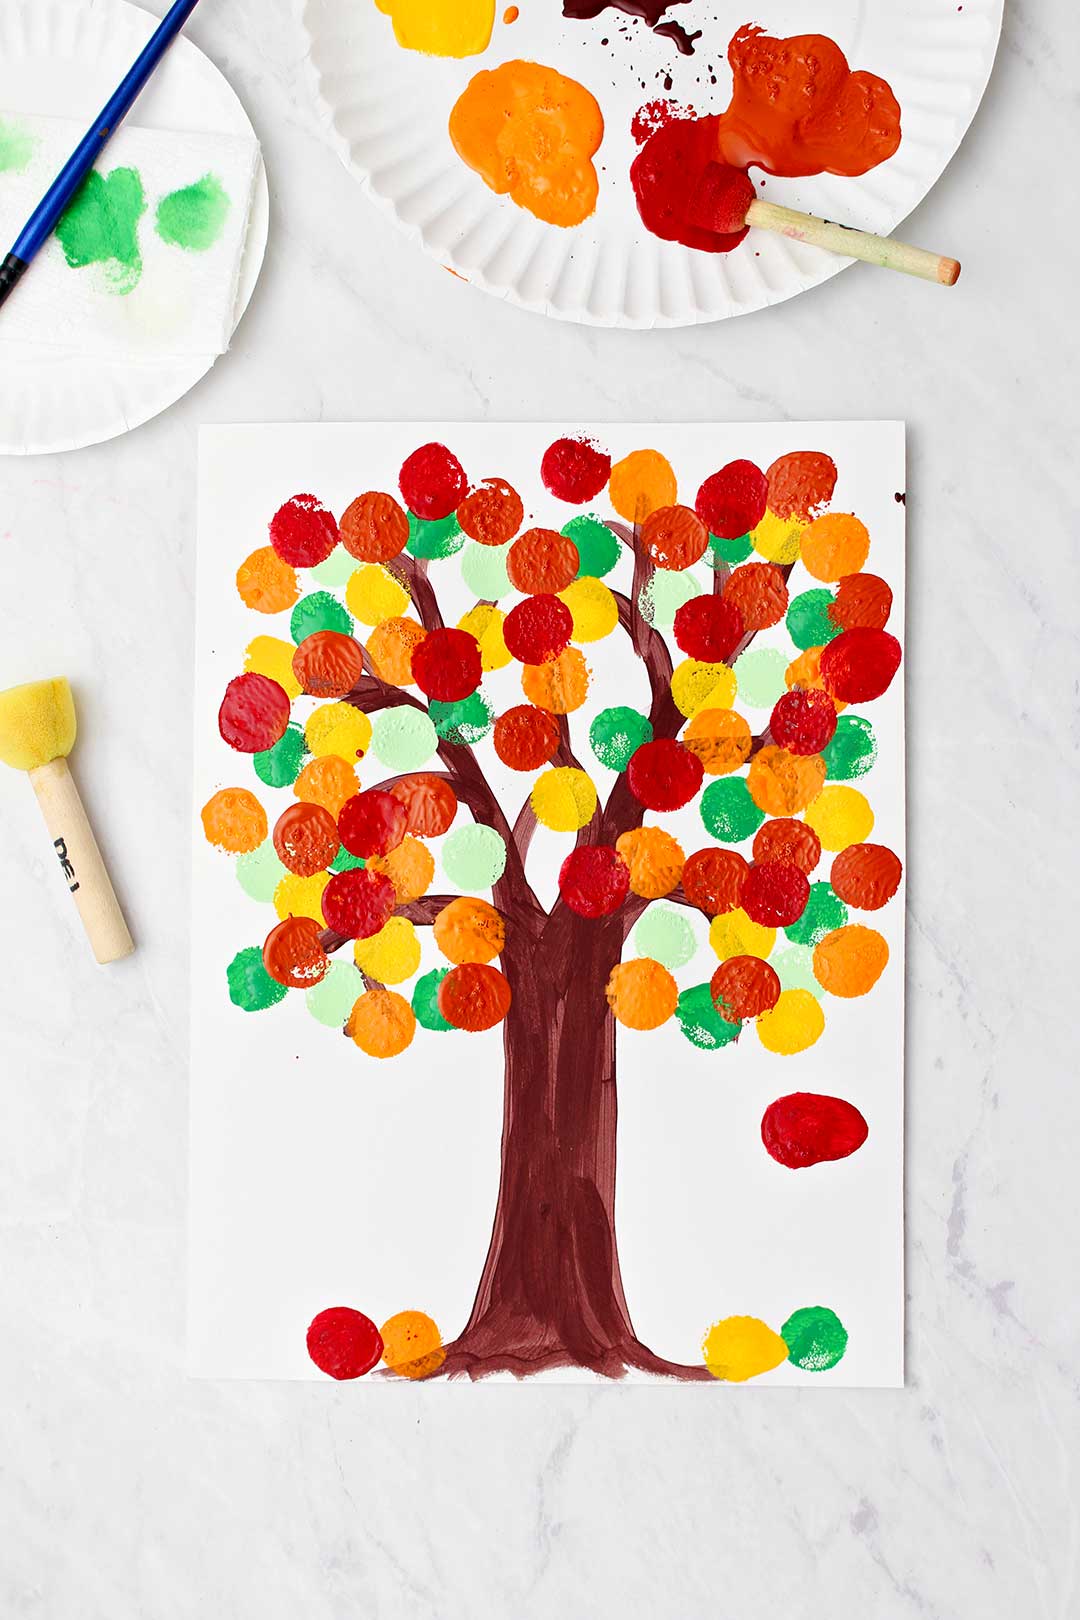
Make an Easy Painted Fall Tree Craft as the leaves fall. Simple paint dots on a trunk and branches makes a beautiful picture.
The wind is blowing, and the leaves are falling like rain here where I live in the Midwest. Even if you live where you don’t experience all four seasons, a tree with colorful leaves is a beautiful subject to paint.
Fall tree painting easy
Even the smallest children can enjoy making a beautiful picture with this easy technique. And a bonus is that even “big kids” like us can make the same picture and make it more complex. It works for all ages.
Supplies...can't get enough...ha!
You will probably have most of these supplies on hand. I do recommend having a selection of acrylic craft paints and a few paint brushes on hand. There are so many projects you can do in a jiffy if these supplies are on your craft shelf or in your craft box.
Note: OK, so you don’t need 100 of them like I have, just a few will do. Ha! And they are relatively inexpensive in the small bottles. I have painted several murals and have quite the collection of colors.

Use paper or a canvas
This project can be done on a piece of art paper like I show in this post, or on a canvas if you prefer. Either work well and make nice gifts or artwork to hang on your wall.
Paint "blobs"
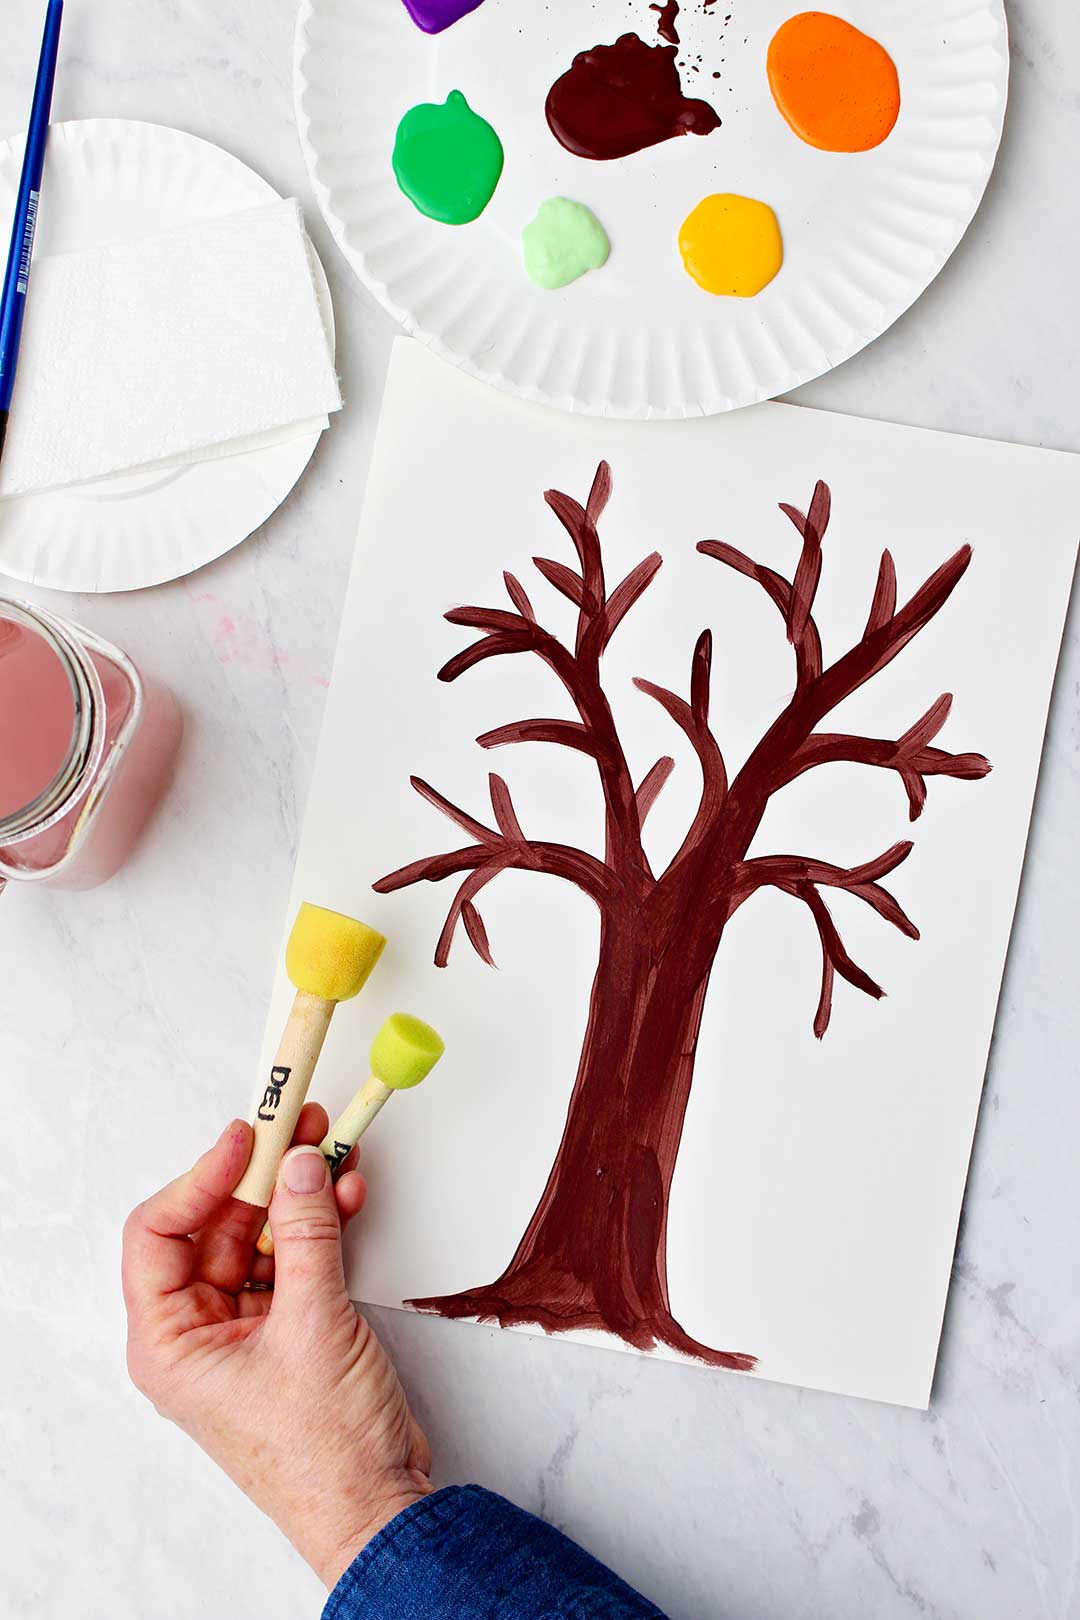
Squirt a quarter sized “blob” of paint of each tree leaf acrylic craft paint color out around the edge of a plate, paper plate or foam plate. Isn't that a technical term? Blob.
Isn’t that pretty?
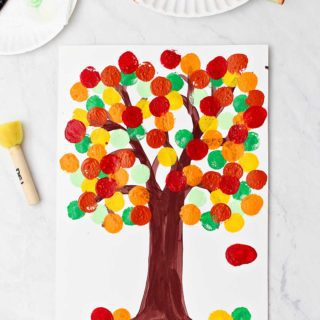
I used red, deep orange, orange, yellow, light green, green and brown for the trunk.
I just love paint on a pallet. I’ve been known to keep my plate for a while after painting just to look at the colors.
Trunk and branches
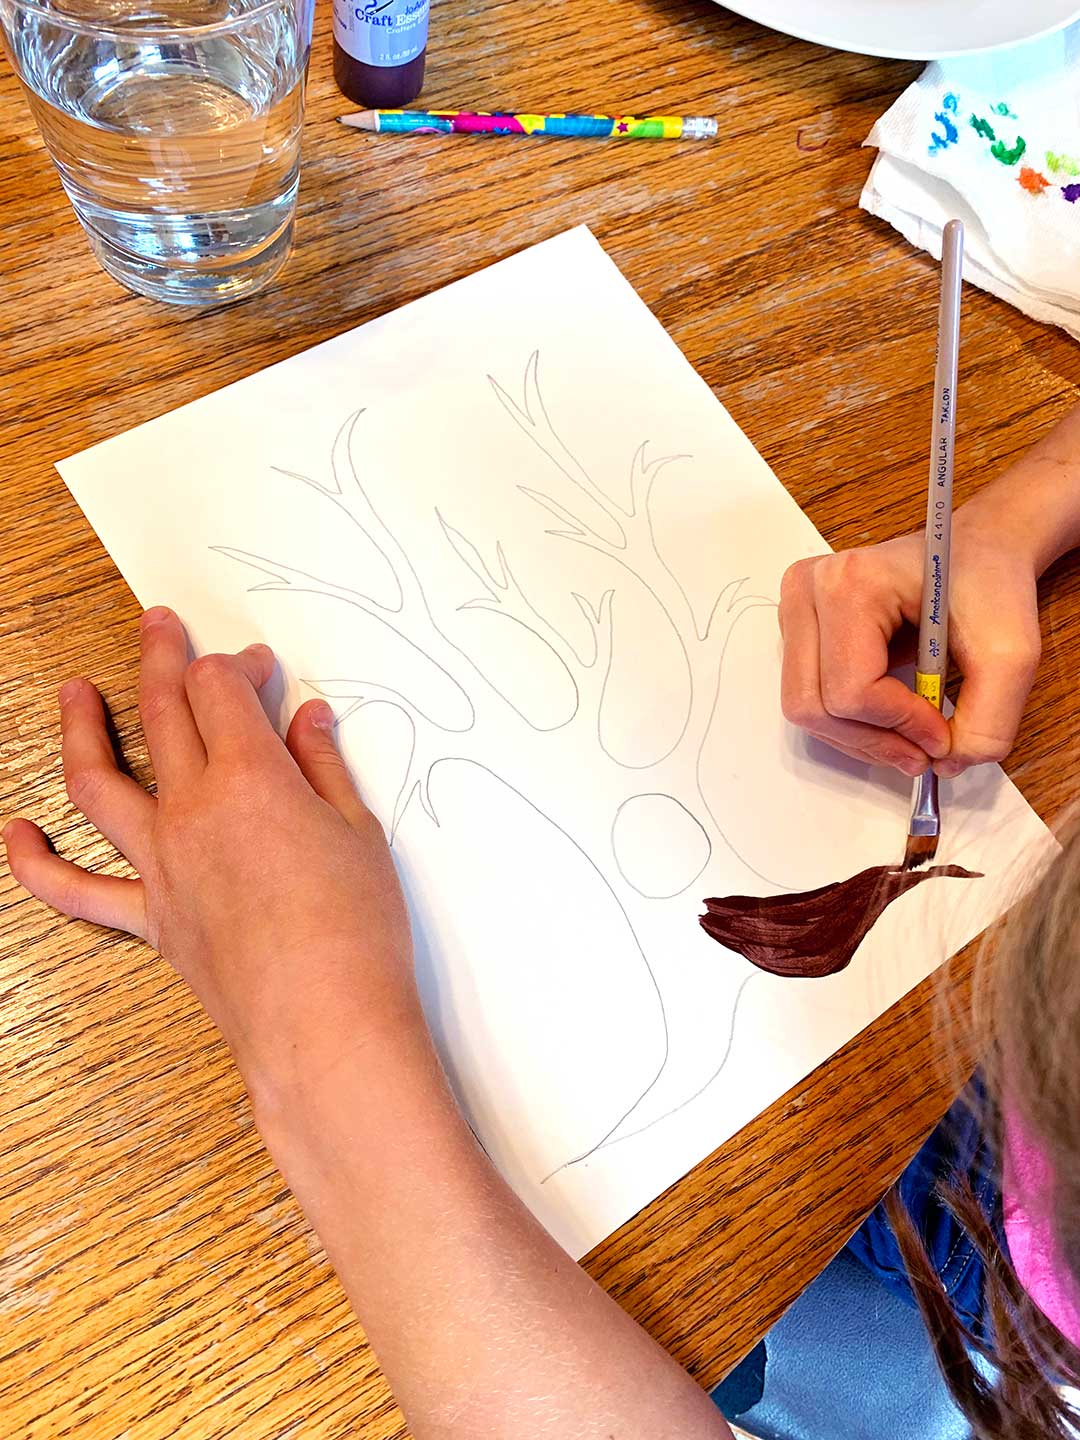
Start the painting by drawing a simple trunk at the bottom center of your art paper. Where the trunk meets the edge of the paper, draw the trunk outwards a bit as if the roots are going into the ground. This makes the tree look strong and like it won’t fall over.
Draw 2 or 3 large branches that come up out of the trunk, they start larger and taper off to a point.
Then add smaller branches and twigs that come off these large branches. These also start larger and taper off to a point.
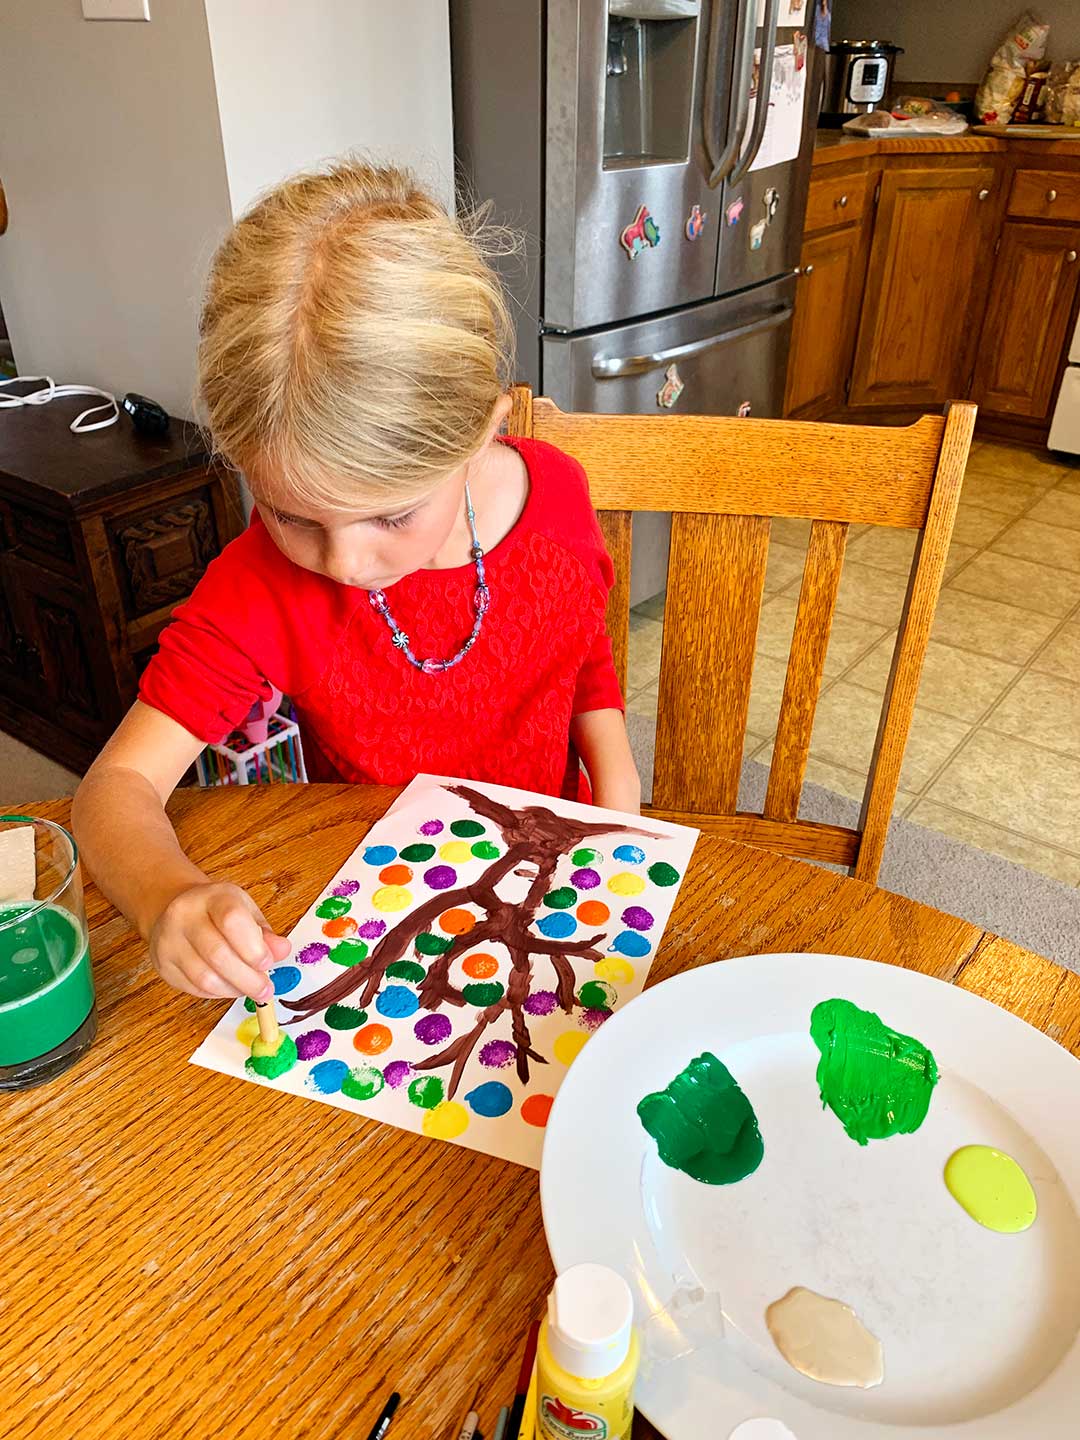
Fall free craft preschool
Tip: My younger grandkids asked me to draw a trunk for them and then they filled it in with paint. This worked great and you might consider doing this for your littles.
Use the paint brush and use brown acrylic craft paint to paint the trunk and branches.
Note: In the video I just painted directly onto the paper without drawing first. I’ve done this a lot of times and am comfortable with that. You do what is comfortable for you- draw first or paint without drawing.
Fall tree painting
Now comes the fun part!
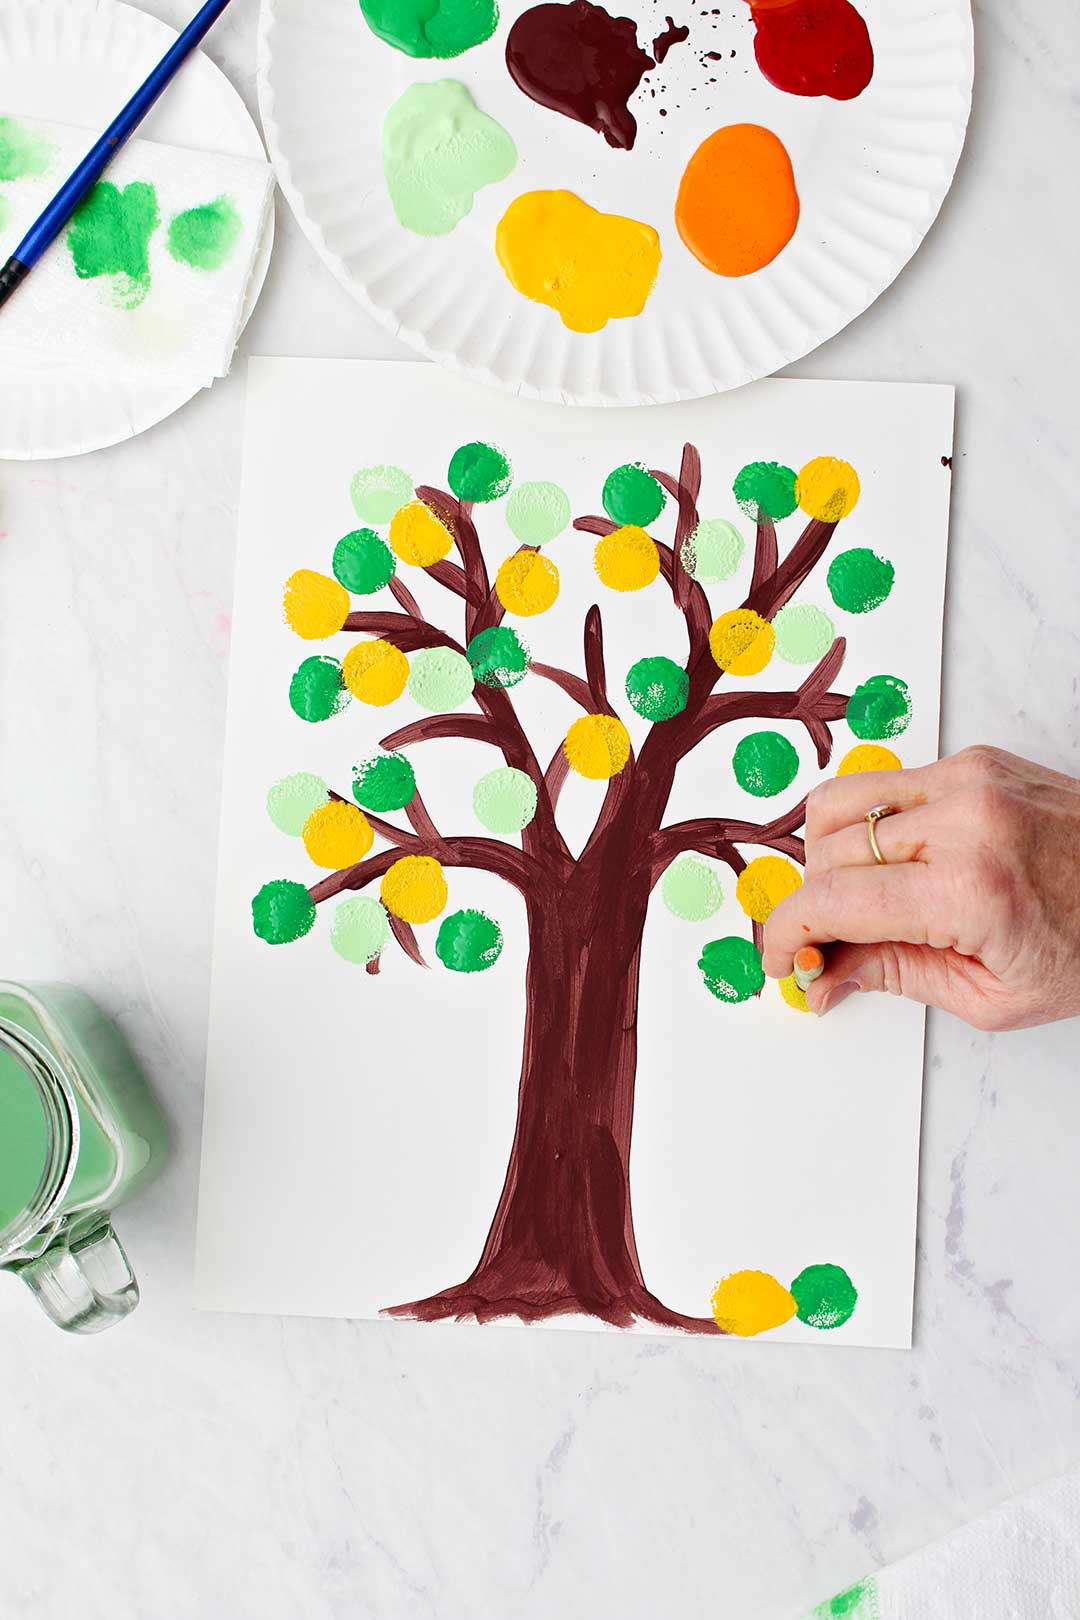
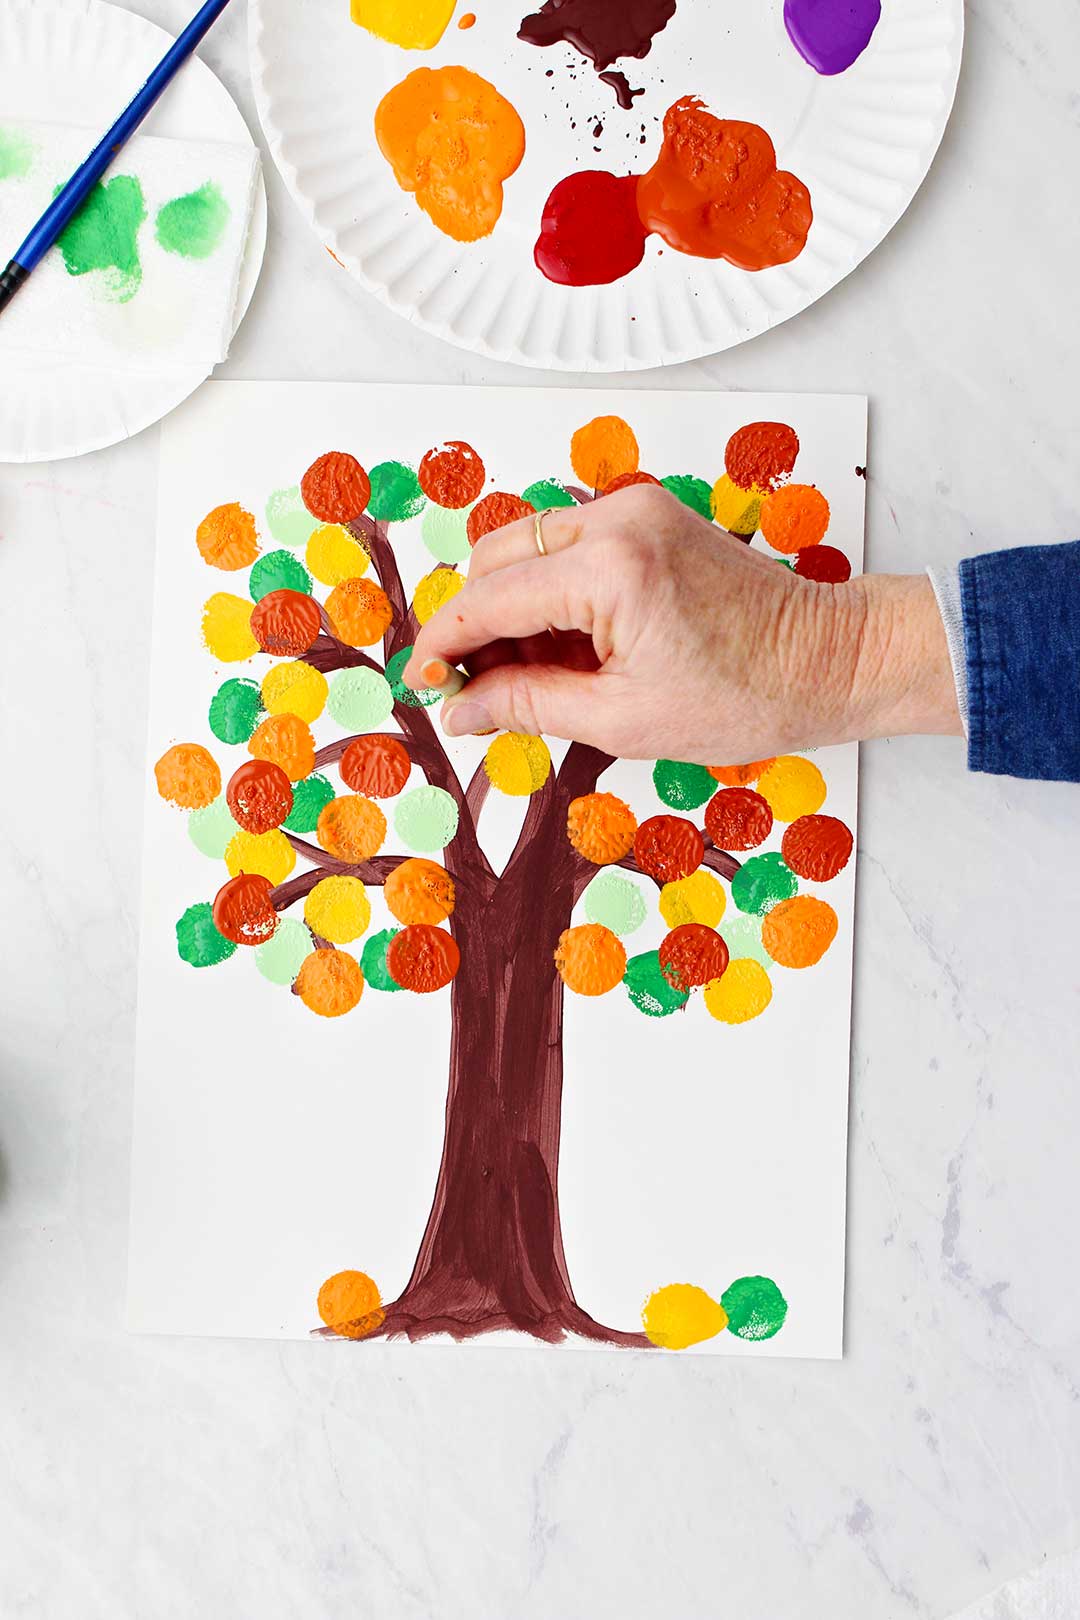
Use the round sponge brush and dip it into one color of the paint, kind of tapping it into the paint so the sponge is covered but not dripping in paint.
Touch the sponge down onto the paper in a variety of places over the branches and area of the tree that would have foliage.
Tip: Remember you will have several colors of paint to use so don’t go overboard with dots of one color. You can always add more later.
Use another round sponge brush in a second color and add dots in a variety of places over the branches and area of the tree that would have foliage. Or if you have one round sponge brush, rinse out your sponge and squeeze the extra water out then use in the next color.
Tip: It is easiest to have one sponge brush per color instead of rinsing the sponge and re-using it for each color. Kids will just start dipping into every color and then the colors get “muddy” and aren’t as vibrant. You can rinse them all at the end and reuse them!
Repeat till fall tree painting looks full
Repeat this process, making dots of color with each of your leaf colors of paint.
Go back with any color you would like and fill in extra spaces to make the leaves on the tree look as full as you would like. It’s OK if the dots overlap each other a bit.
Tip: I add a couple dots of color on the bottom of the page as if a leaf or two is on the ground.
No round sponge brush?
There are other ways to make the dots of color if you don’t have round sponge brushes.
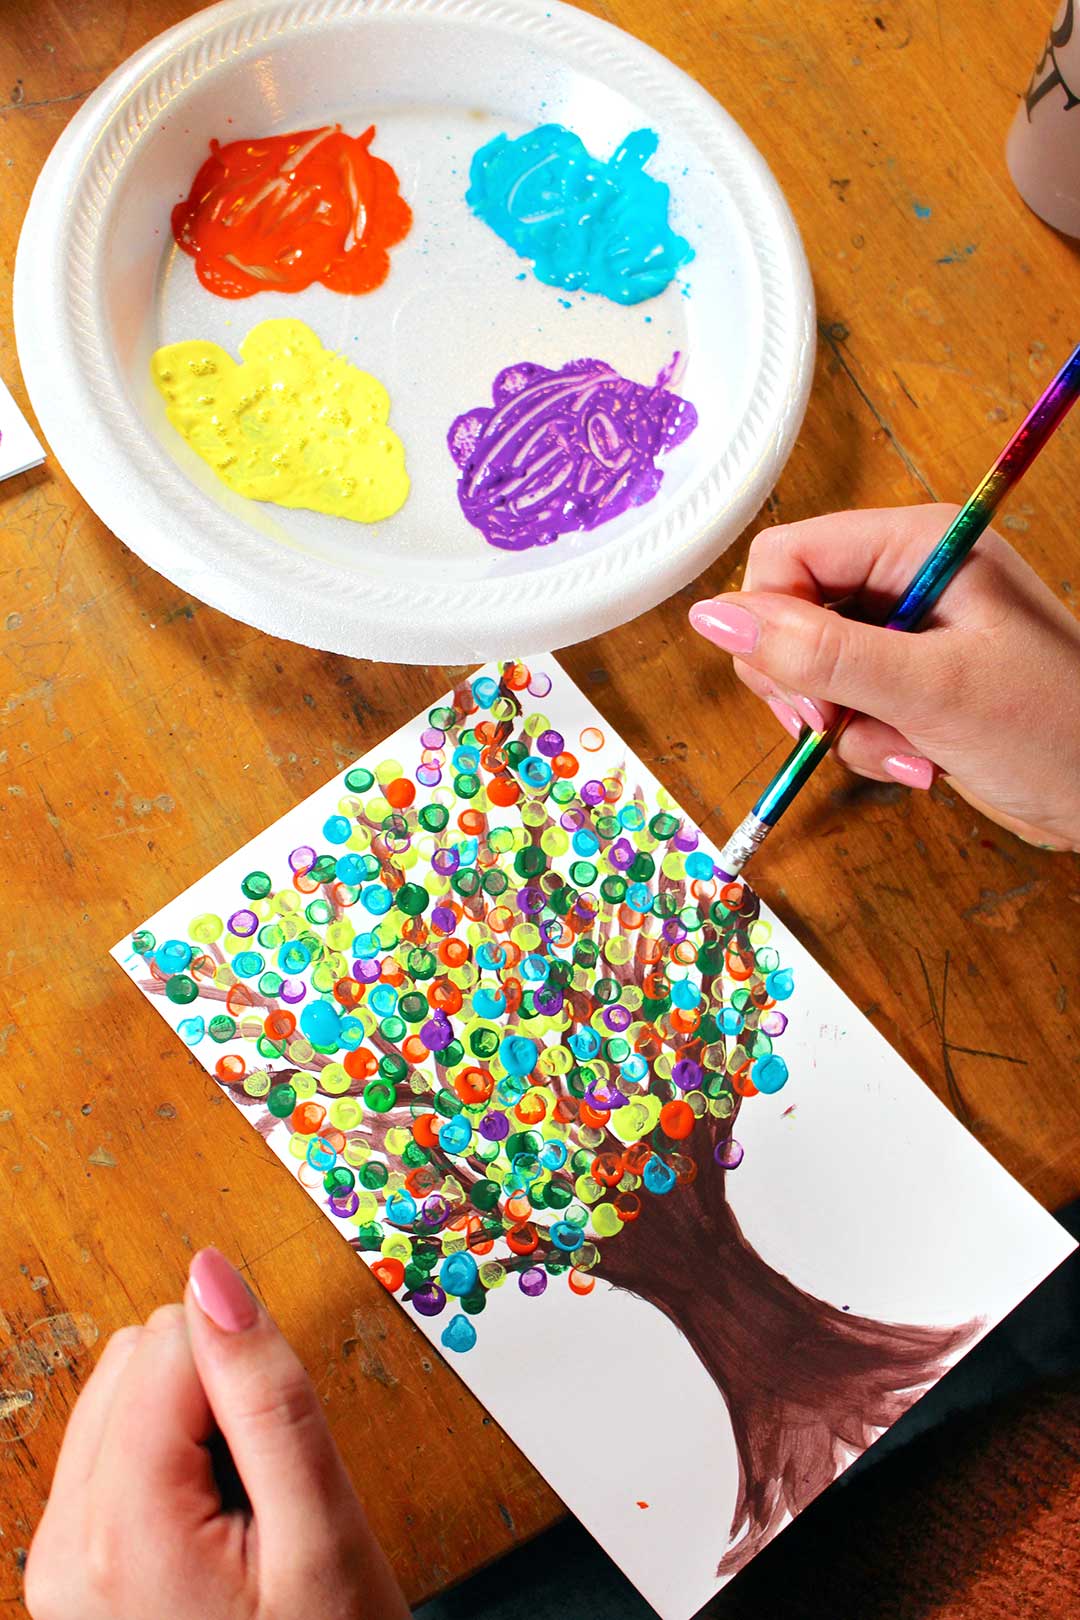
Pencil eraser for making dots
My granddaughter thought of using the tip of the eraser on a pencil. The eraser was new and still round on the end. It worked great. The dots were smaller, but she didn’t mind that and was patient in covering her picture (because it took longer with smaller dots).
Q-tip fall tree painting
You could also use Q-tips to make your dots of color. This works well but also makes smaller dots of color, so it takes more patience to make enough leaves to cover the paper well.
I’ve seen that some people make a bundle of 8-10 Q-Tips (using a rubber band to hold them together). This covers more paper area at a time.
Note: It isn’t easy to rinse Q-tips off so you may want to start with your lightest color and then work up to your darkest color if re-using the Q-tips.
Paint with broccoli
One of my most popular posts is Painting with Broccoli. You can dip a floret of raw broccoli into the paint and use it to make leaves. It is a lot of fun!! Don’t knock it till you try it!
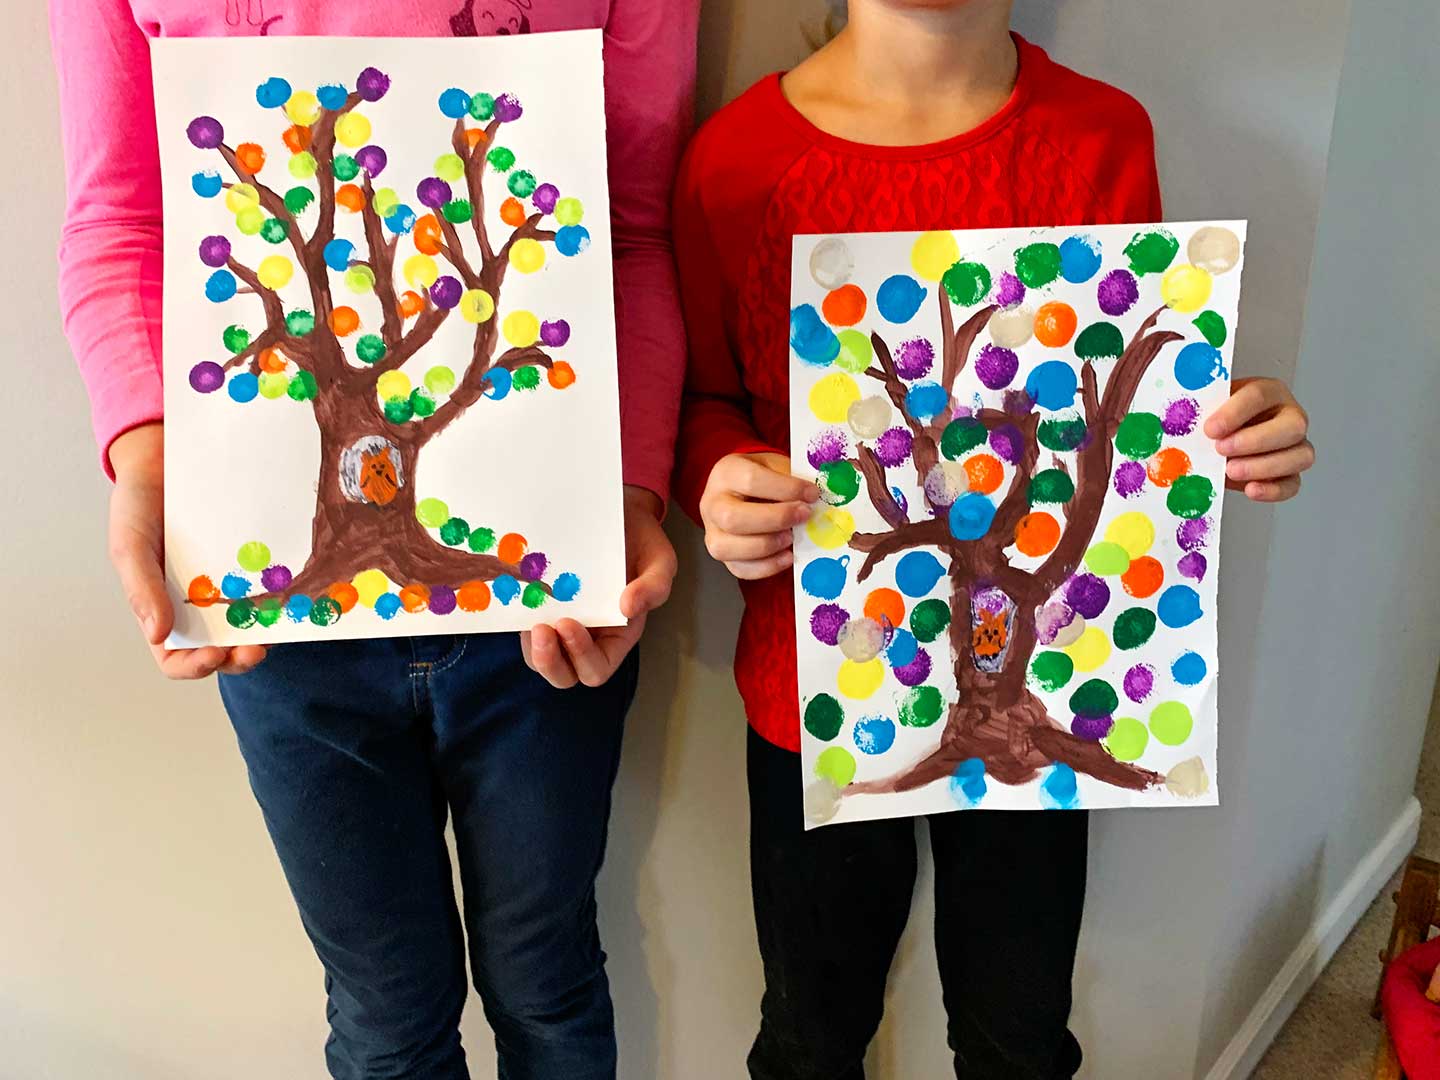
Fall tree art projects
Your pretty tree picture would make a wonderful gift to give, or you could make a card for fall using the tree design on front.
It would be cute to make a grouping of tree canvases on your wall with one tree per season on each canvas.
So many ideas, so little time!! Ha!
The video can also be found on YouTube at YouTube Easy Painted Fall Tree Craft. You can join my YouTube channel there.
Other Fall Crafts and ideas from Welcome To Nanas:
Happy Fall Ya'll!
If you try this craft, let me know! Go ahead and leave a comment, rate it, and tag a photo with #WelcometoNanas wherever you post.
Come join the fun at https://welcometonanas.com
Easy Painted Fall Tree Craft
Equipment
- Paint brush
Items Required
- Acrylic craft paints in brown, red, orange, yellow, green and purple
- Round foam brush in ½ inch size
- Craft paper OR a canvas
- OR- Q-tips, a pencil with a full eraser on the end, or one piece of uncooked broccoli
Instructions
- Start the painting by drawing a simple trunk at the bottom center of your art paper. Where the trunk meets the edge of the paper, draw the trunk outwards a bit as if the roots are going into the ground. This makes the tree look strong and like it won’t fall over.Draw 2 or 3 large branches that come up out of the trunk, they start larger and taper off to a point. Then add smaller branches and twigs that come off these large branches. These also start larger and taper off to a point.
- Use the paint brush and use brown acrylic craft paint to paint the trunk and branches.
- Use the round sponge brush and dip it into one color of the paint, kind of tapping it into the paint so the sponge is covered but not dripping in paint.Touch the sponge down onto the paper in a variety of places over the branches and area of the tree that would have foliage.
- Use another round sponge brush in a second color and add dots in a variety of places over the branches and area of the tree that would have foliage. Or if you have one round sponge brush, rinse out your sponge and squeeze the extra water out then use in the next color.
- Repeat this process, making dots of color with each of your leaf colors of paint.Go back with any color you would like and fill in extra spaces to make the leaves on the tree look as full as you would like. It’s OK if the dots overlap each other a bit.
Video
Notes
Supplies for Easy Painted Fall Tree Craft
- Acrylic craft paints in brown, red, orange, yellow, green and purple
- Paint brush
- Round foam brush in ½ inch size
- Craft paper OR a canvas
- OR- Q-tips, a pencil with a full eraser on the end, or one piece of uncooked broccoli


Shelly says
Easy and fun! Love the fall!