
Jump to:
Easy Macrame Plant Hanger DIY
Macrame takes this Nana back a few years. I learned how to make a macrame plant hanger DIY (ahem) a few years ago! Who didn’t have macrame in their house? Boy, I sure wish I had that orange macrame owl wall hanging that we got for our wedding to show you! Cool stuff. 🙂
Macrame, it's "in" again!
I am so excited that macrame has made its return and is "hip" once again. Want to learn macrame?? This Easy Macrame Plant Hanger DIY is a super simple starter project.
Great beginner project, with some help for the littles
These simple macrame plant hanger directions are suitable for beginners. There are only two knots to learn and to make so it goes together quickly for those wanting to try it out without a big commitment of time and resources.
The knot tying and the measuring that needs to be done for this project may be a bit much for the younger grands. So, it may be better for school age grands and even then, take more help from you. But that certainly depends on the child!
I can’t wait to get started.
Prefer to watch a video? Here it is!!

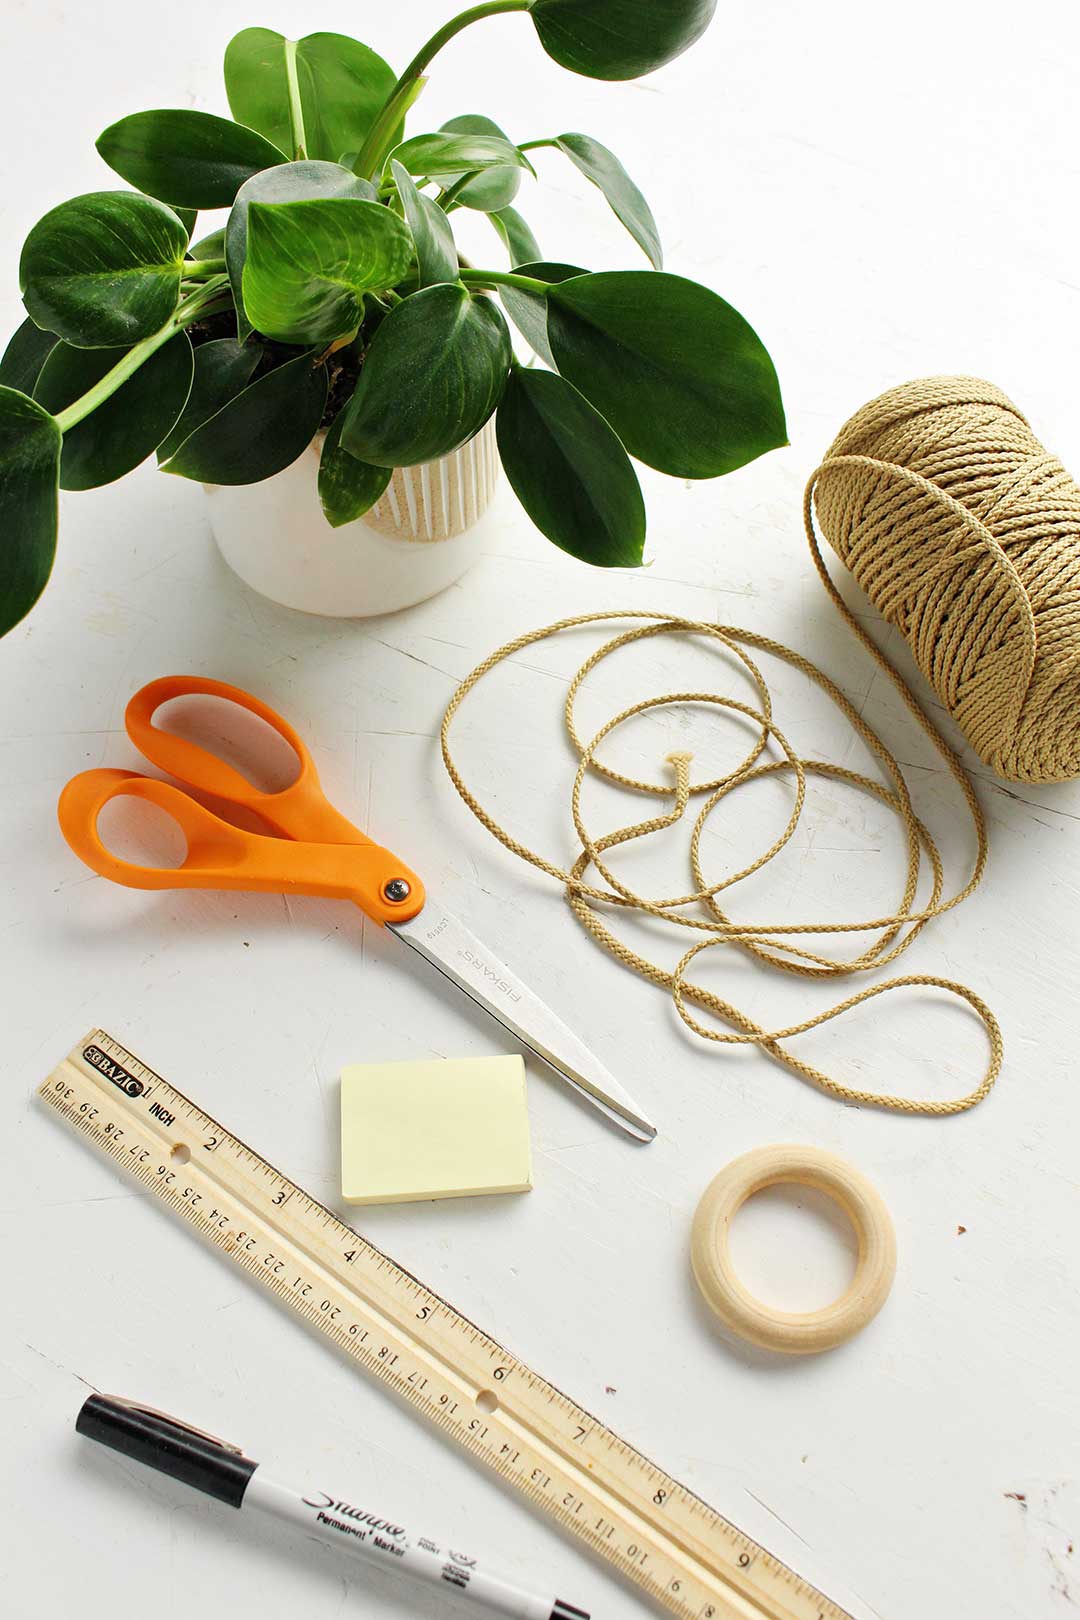
Learn macrame- first, cut the macrame cord
First, we cut our macrame cord. I must tell you that I was surprised there weren’t more options for cording in the store I went to. I’ll let you know how this cord works and wish now that I’d gone to a lumberyard and checked there for cotton cording.
Note: The cord worked well. I purchased this at Hobby Lobby, but there is an Amazon link below.
Cut 6 pieces of cord that are each 7 feet long.
Line these cords up with ends even. Fold the cords in half.
How do I tie Macrame Knots?
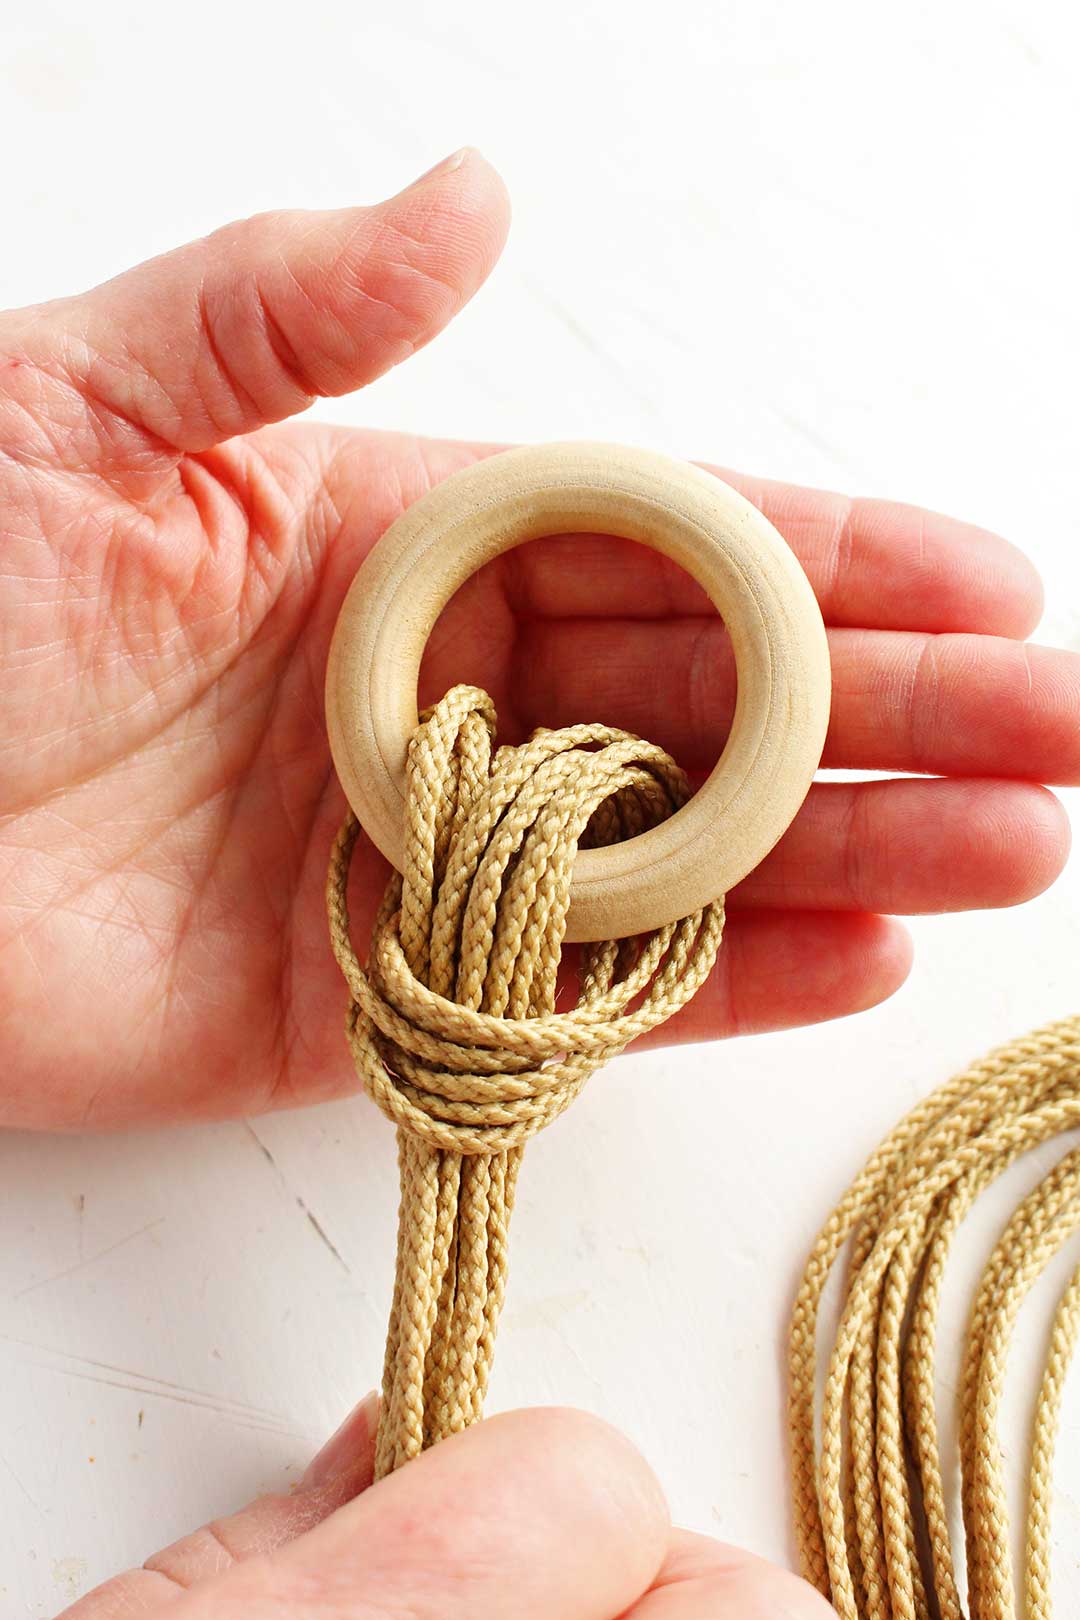
The Lark’s Head knot
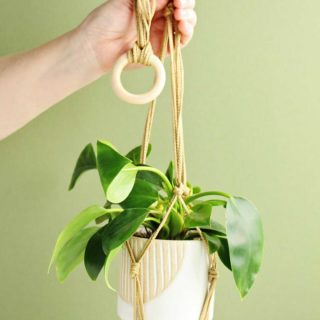
The first knot to learn is the basic starting point for many macrame projects, the lark’s head knot. This anchors the cords to the wooden ring we will use to start our project. This wooden ring is also what is used to hang up the Macrame Plant Hanger when it is finished.
Pull the folded ends of the cords through the wooden ring (all together).
Pull the cut ends of the cord through the folded “loop” made by the cord. This makes the Lark’s Head knot and keeps the cords in place, dangling off the ring.
Now you should have 12 pieces of cord to work with each about 3 ½ feet long.
We are going to number the cords so that it is easy to refer to the specific cords that we will use to make macrame knots in each step. I will talk about cords 1-4, 5-8, 9-12 for instance.
Tip: If it is confusing you can use a sticky note to fold around each cord and staple it on. Number each cord 1 through 12.

Overhand Knot
An overhand knot is one you have tied many times but just don’t usually give it a name. Make a loop with the cord then take the end of the cord and pull it through the loop from behind. Pull both ends of the cord to the loop grows smaller and then makes the knot. We do this all the time. Now you just know the name!
So, let's tie the macrame knots!
First Series of Overhand Knots
You will be tying an overhand knot with cords 1-4, all four cords at once.
Remember, you want this overhand knot to be 5 inches down from the wooden ring.
Repeat this step with cords 5-8 and then repeat again with cords 9-12.
Second Series of Overhand Knots
Now take cords 3 and 4 (from the first group of cords) and cords 5 and 6 (from the second group of cords and tie an Overhand Knot 7 inches below the first Overhand Knots that you made in the last step.
Repeat this step with cords 7-8-9-10 and then with 11-12-1-2.
Third series of Overhand Knots
Now take cords 1-4 and tie an overhand knot 3 inches down from the last set of knots.
Repeat this step with cords 5-8 and again with cords 9-12.
Last Overhand knot
Lastly, tie an overhand knot with all the cords (1-12) 3 inches down from the last set of knots.
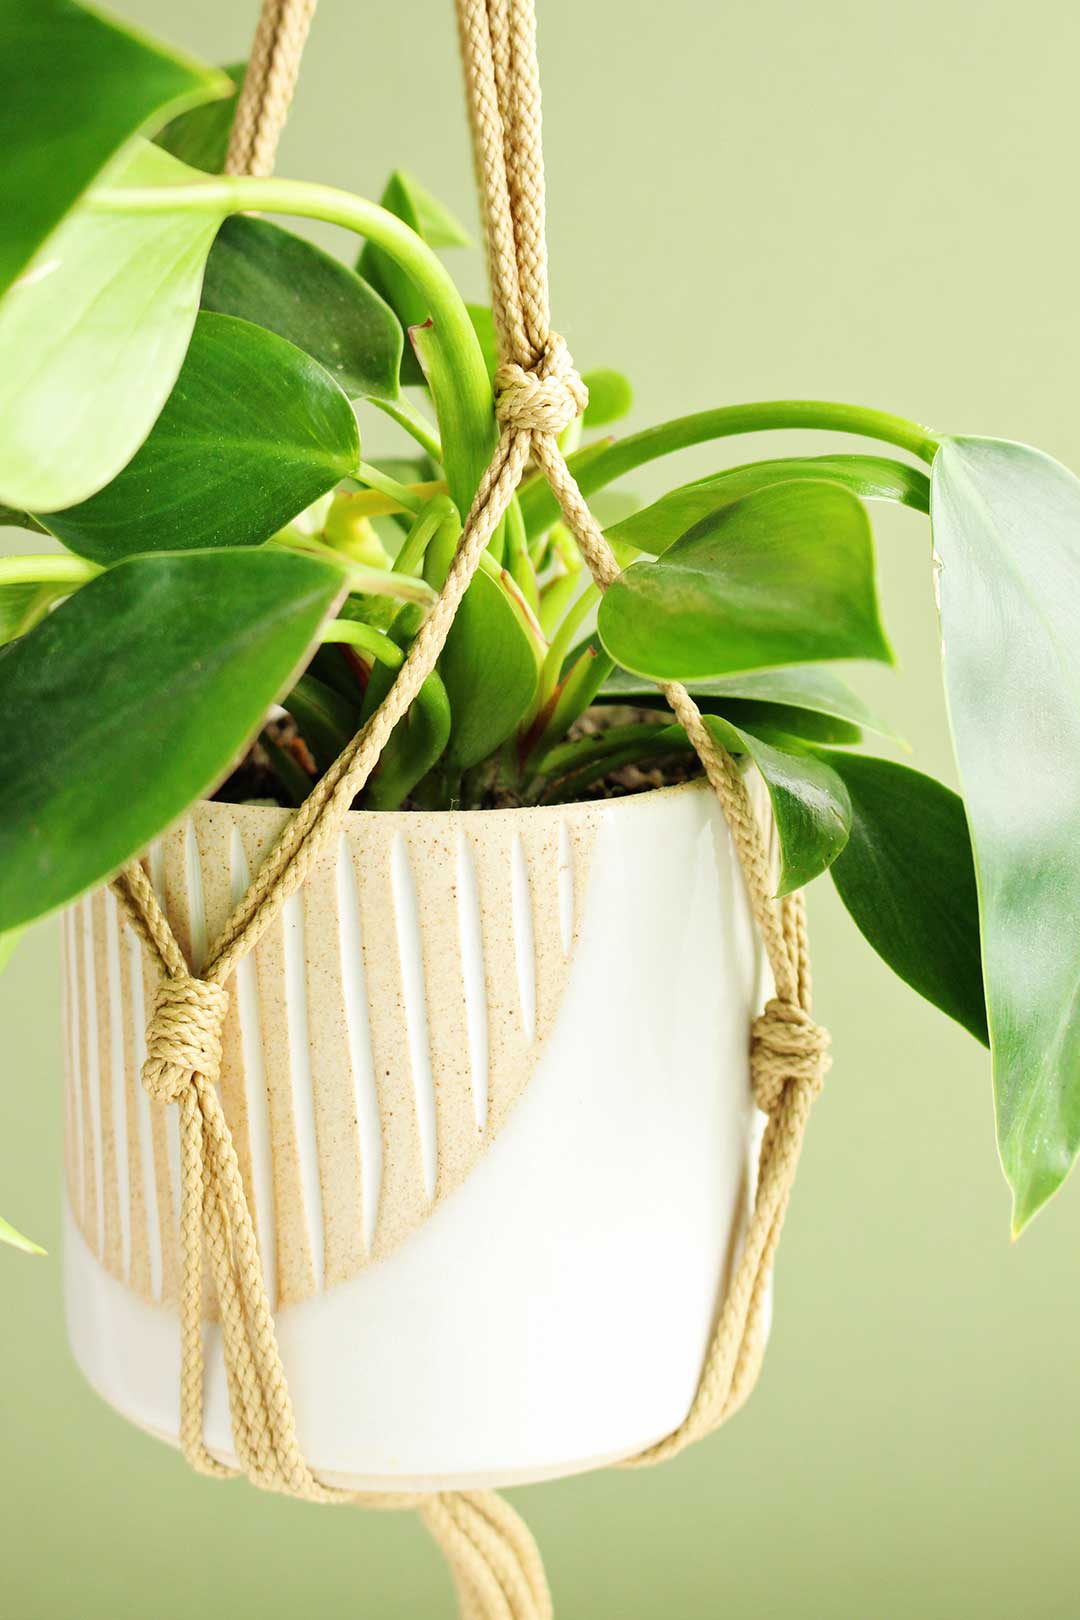
This is the knot that will ultimately hold the plant and pot in the bottom of the plant holder.
Trim the cords 6 inches below this knot. Boom, you are done.
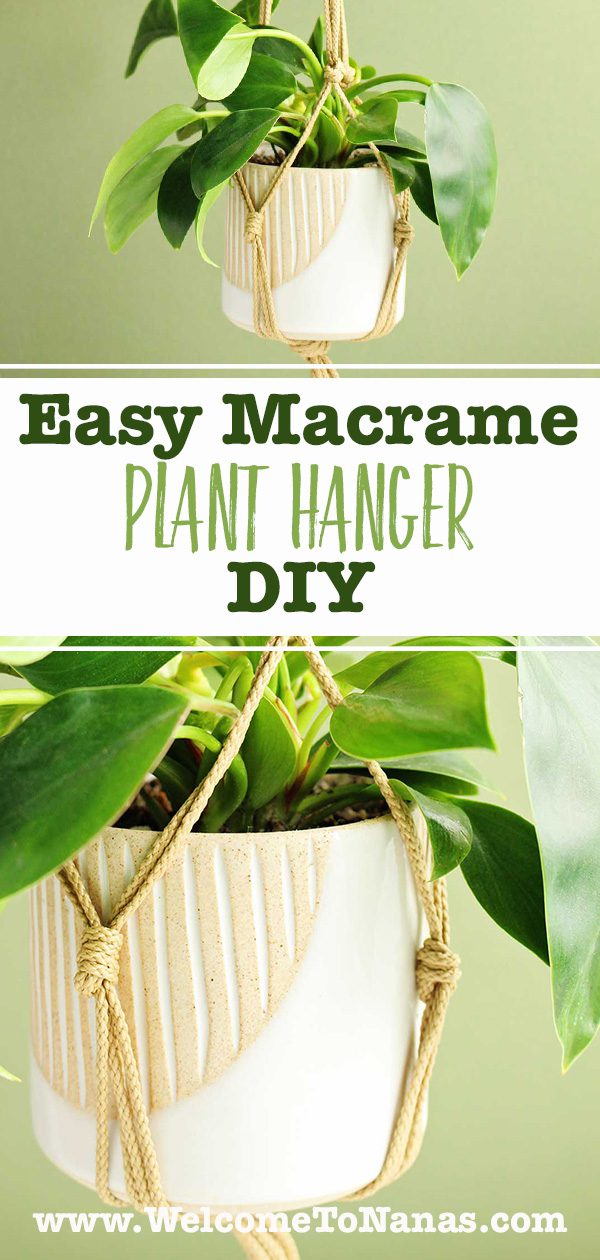
Beginner macrame plant hanger
This is a great beginner project- easy and fast. It makes a wonderful gift too, people love them.
This macrame plant hanger fits smaller pots and plants. You can adapt this project to be larger for larger pots and plants. Just cut longer cords and tie the knots at a greater distance from one another.
DIY Macrame- I want to do more, how about you?
I’m hoping to try a few larger scale macrame projects in the future. Are you game to join me?
And even more fun!!??
Wanting a few more project ideas with plants for spring? Try:
- DIY 2-liter Bottle Ecosystem Project
- Planting Spring Flower Seeds
- 3 DIY Garden Labels
- How to Grow Spring Flower Bulbs Inside
Enjoy!
If you try this craft, let me know! Go ahead and leave a comment, rate it, and tag a photo with #WelcometoNanas wherever you post.
Come join the fun at www.WelcomeToNanas.com
Easy Macrame Plant Hanger DIY
Equipment
- 1 Scissors
- 1 Measuring ruler or yardstick
- 1 Flower Pot or a jar to put in the plant holder
Items Required
- 1 set Set of Macrame cord and Rings OR buy separately below
- 1 Macrame Wooden Rings
- 1 roll Macrame Cord
Instructions
- Cut 6 pieces of macrame cord that are each 7 feet long.
- Line these cords up with ends even. Fold the cords in half.
- Pull the folded ends of the cords through the wooden ring (all together).
- Number the cords so that it is easy to refer to the specific cords that we will use to make macrame knots in each step. I will talk about cords 1-4, 5-8, 9-12 for instance. Label them if you want.
- You will be tying an overhand knot with cords 1-4, all four cords at once 5 inches down from the wooden ring. Repeat this step with cords 5-8 and then repeat again with cords 9-12.
- Now take cords 3 and 4 (from the first group of cords) and cords 5 and 6 (from the second group of cords and tie an Overhand Knot 7 inches below the first Overhand Knots that you made in the last step. Repeat this step with cords 7-8-9-10 and then with 11-12-1-2.
- Now take cords 1-4 and tie an overhand knot 3 inches down from the last set of knots. Repeat this step with cords 5-8 and again with cords 9-12.
- Lastly, tie an overhand knot with all the cords (1-12) 3 inches down from the last set of knots. This is the knot that will ultimately hold the plant and pot in the bottom of the plant holder.
- Trim the cords 6 inches below this knot. Boom, you are done.
Notes
Supplies for Easy Macrame Plant Hanger DIY
Flower Pot or a jar to put in the plant holder


Leave a Reply