DIY Craft Foam Stamps are so simple to make from craft foam and just a few other items! Use and reuse to print cards and pictures with your own fun designs!
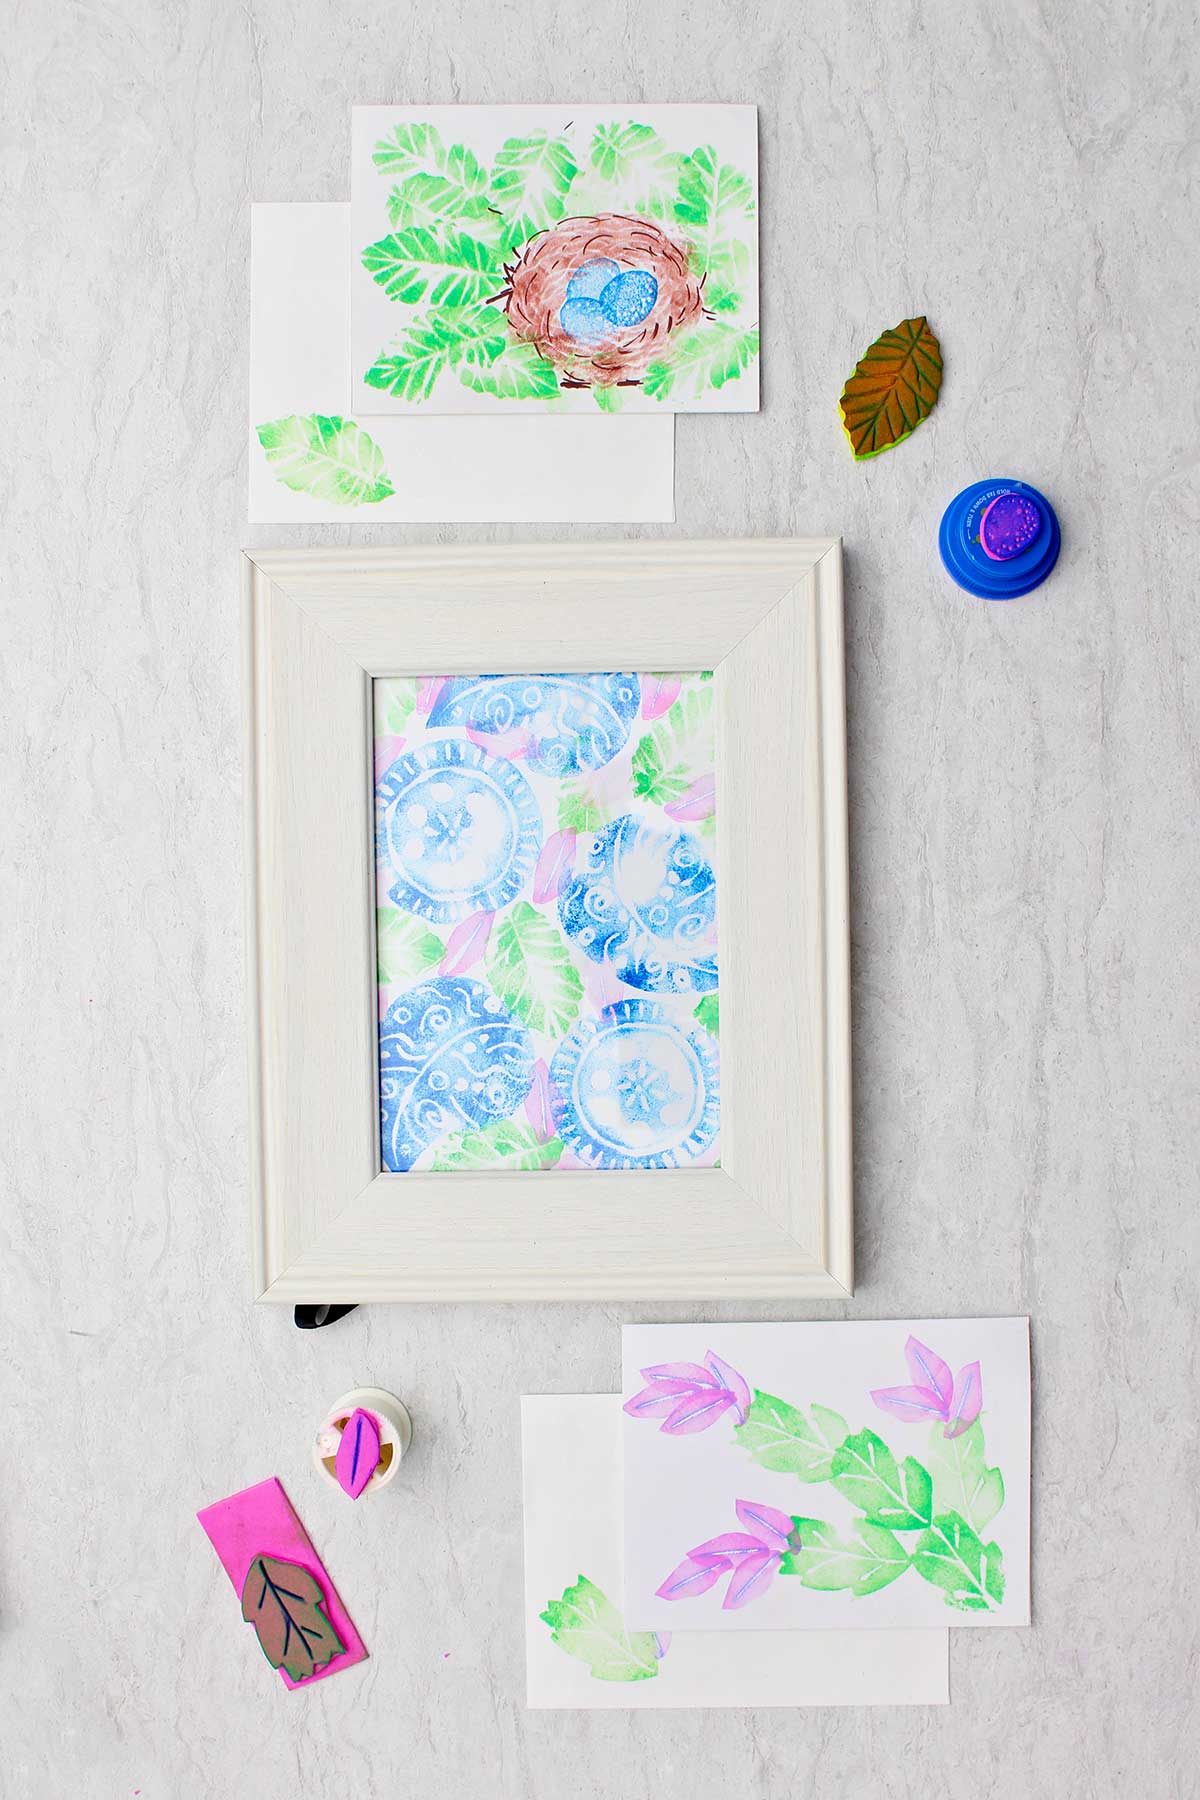
DIY Craft Foam Stamps for Awesome & Easy Printing
So the DIY Craft Foam Stamps are going on the Nana’s favorite list. This truly was an awesome and easy printing technique and I plan on using it more myself after creating this post.
You can make your own stamps so easily and also use this as a craft idea with kids. It's an easy one to pack and take places to use with others or use at home to make your own cards for example.
A stamping confession
I’ve always been intrigued by printing. In the basement is a small collection of Stamping Up stamps that I collected back in the day to make cards and such.
We also have two or three sets of little alphabet stamps that were for the kids to use as they were learning to read and doing that type of creative projects many moons ago. 🙂
I pull them out quite regularly to use in various crafts along with stencils that I have collected as well. Making stencils is going to be a post in the future, spoiler, alert!
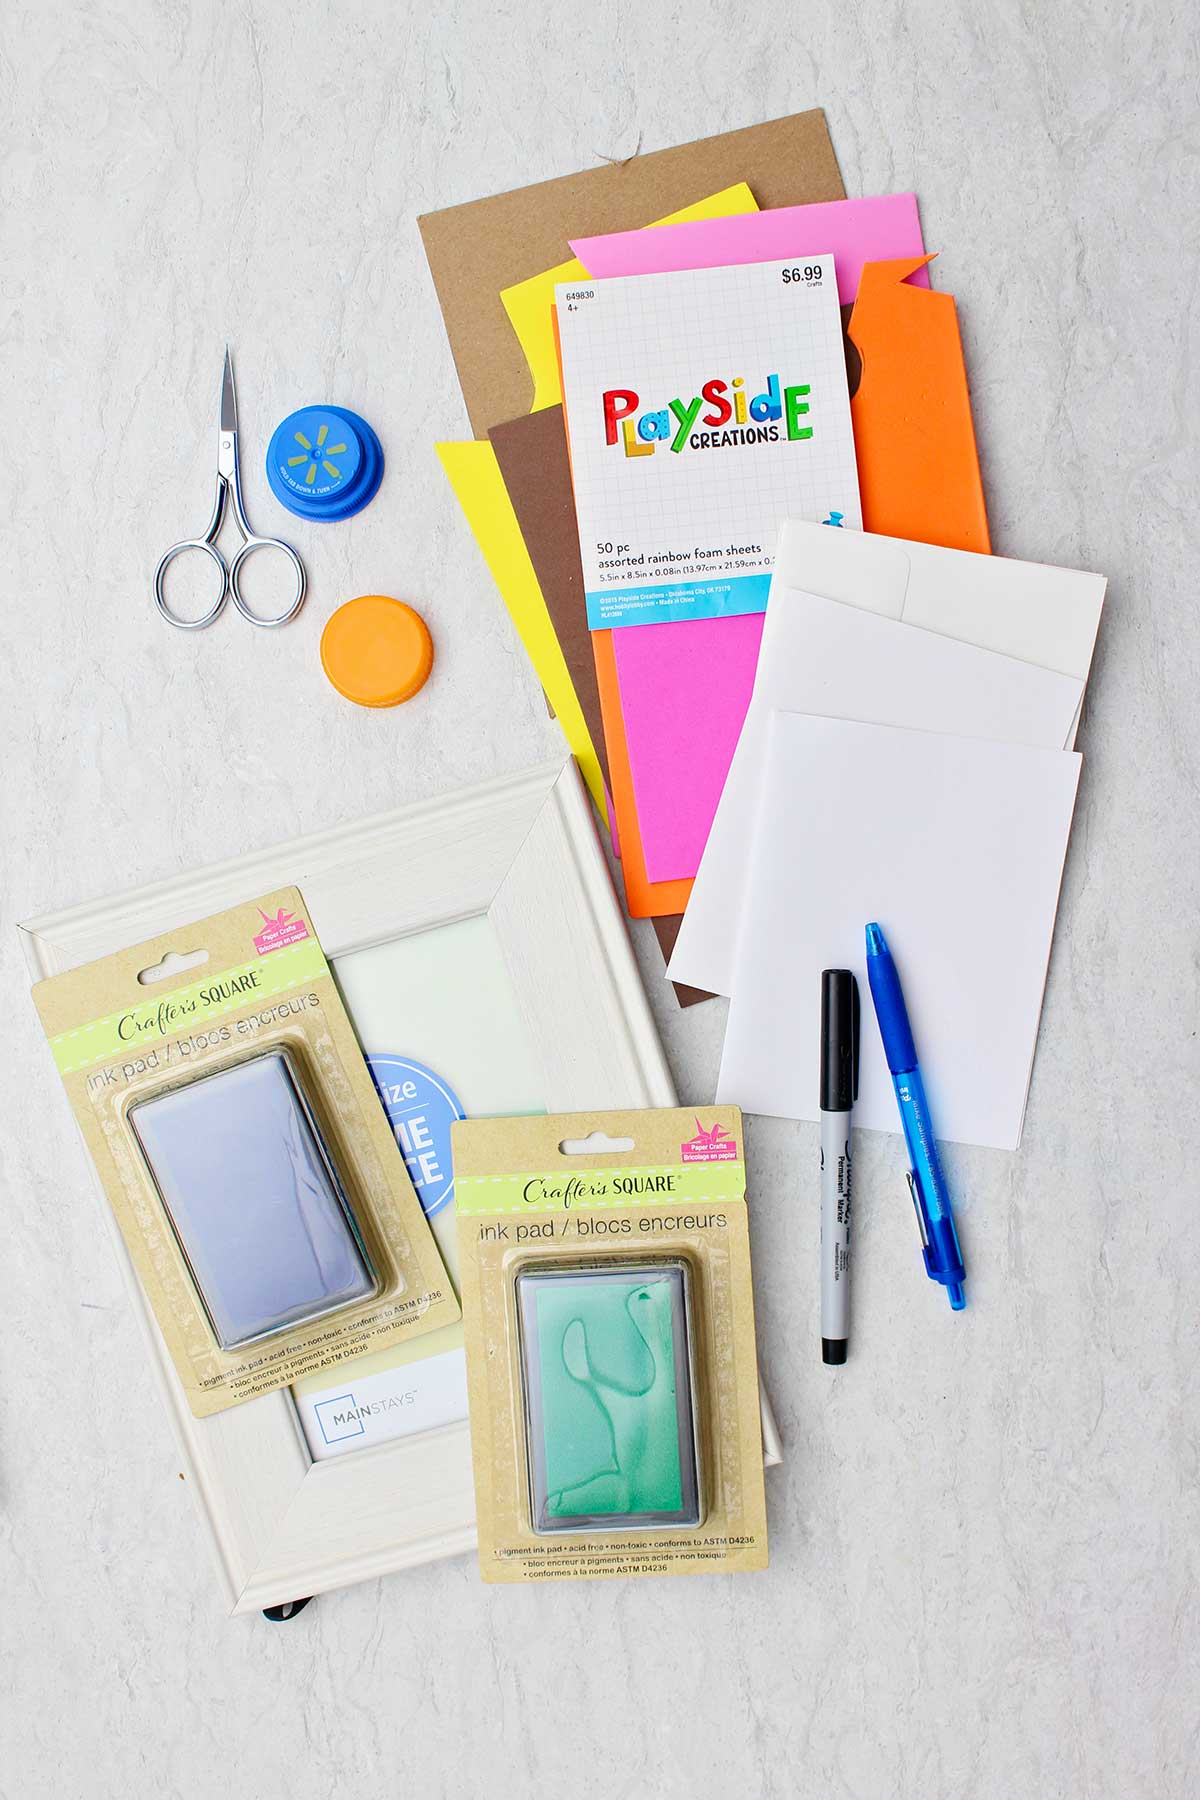
Hmmm what shall I make?
Craft foam is inexpensive and can be picked up at most craft stores or even in discount houses with a craft section. My grandkids often use it and I have lots of little scraps so that’s what I pulled out for this purpose.
The first thing is to think about what you would like to create. It works well to use several stamps to make an item instead of one large stamp. It’s hard to get even ink distribution over a large stamp, and then to get it to stamp well onto the paper.
Think about what you would like to do and how you could break it up into several parts.
DIY Craft Foam Stamps Examples
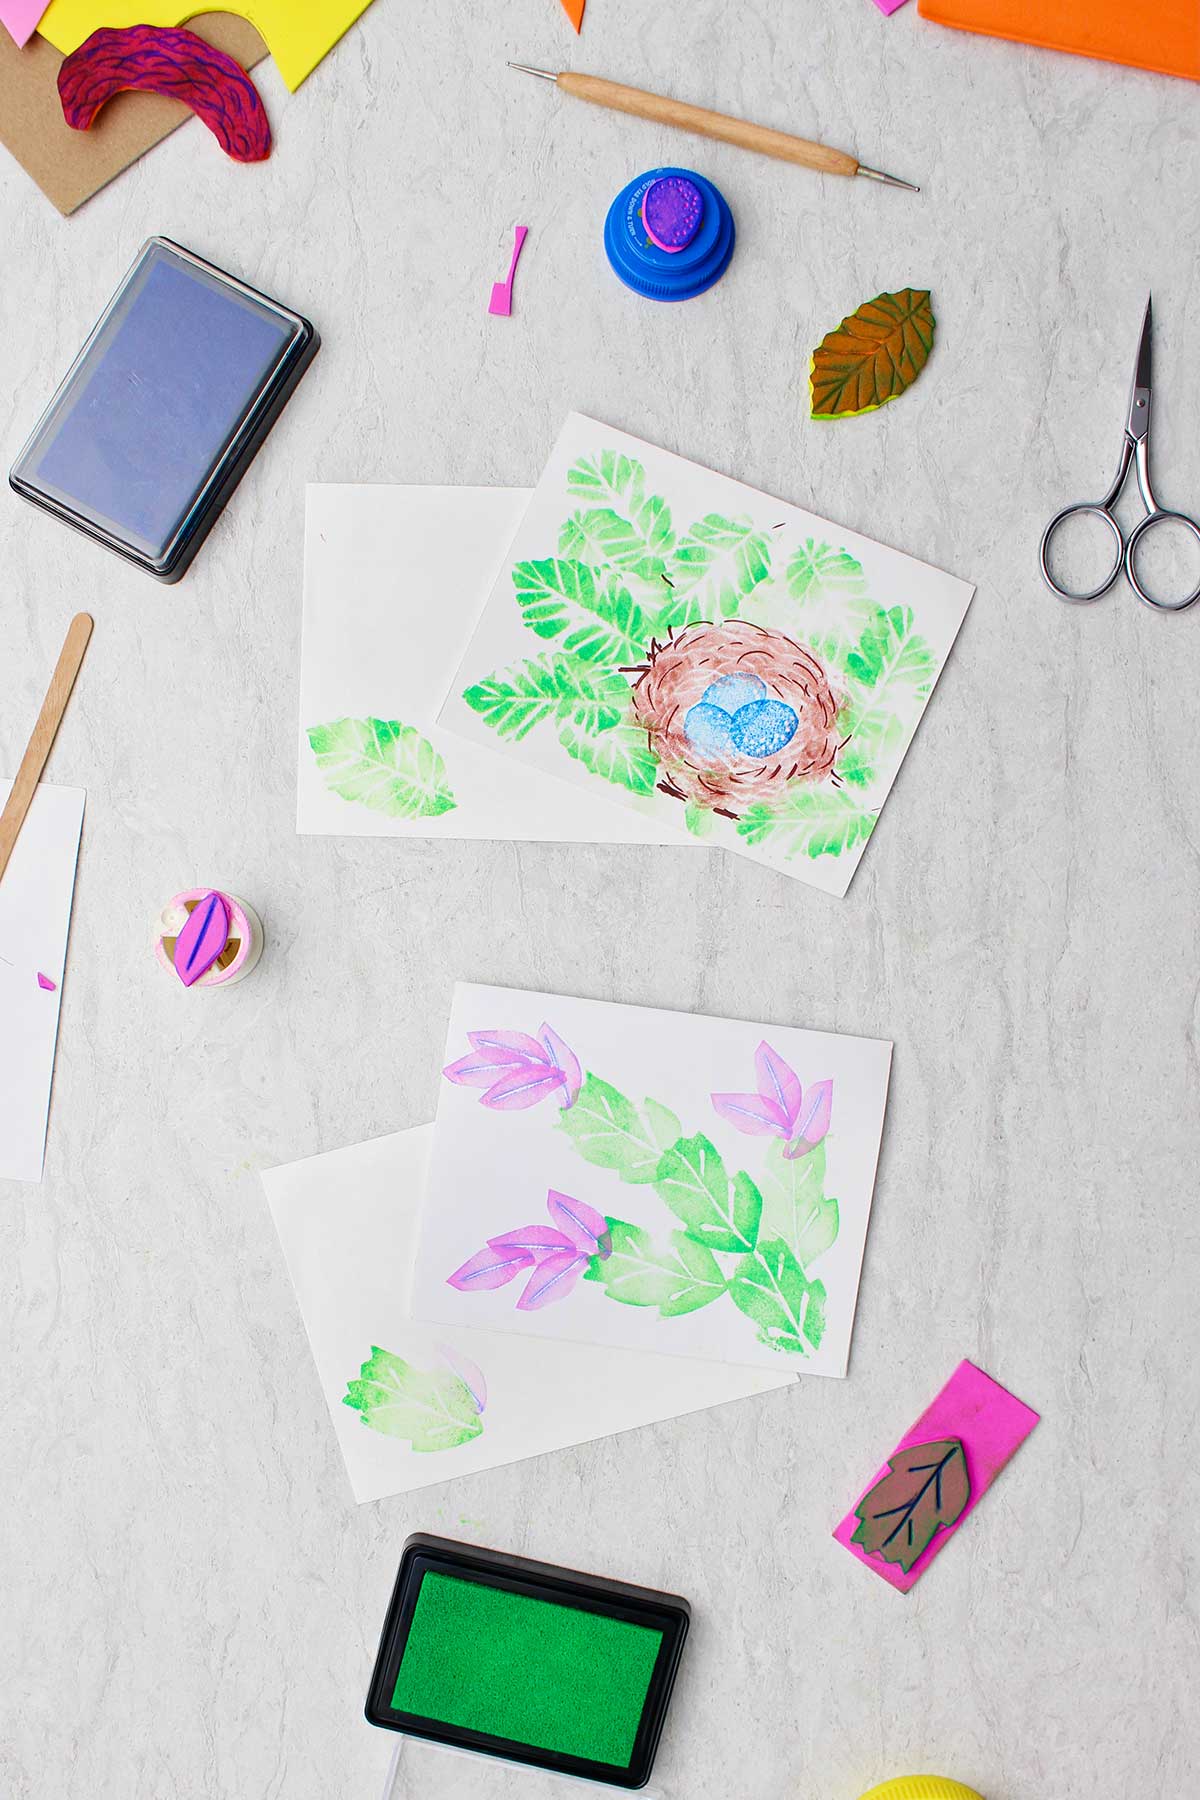
I’ve done three examples for you here that might get your creative juices flowing.
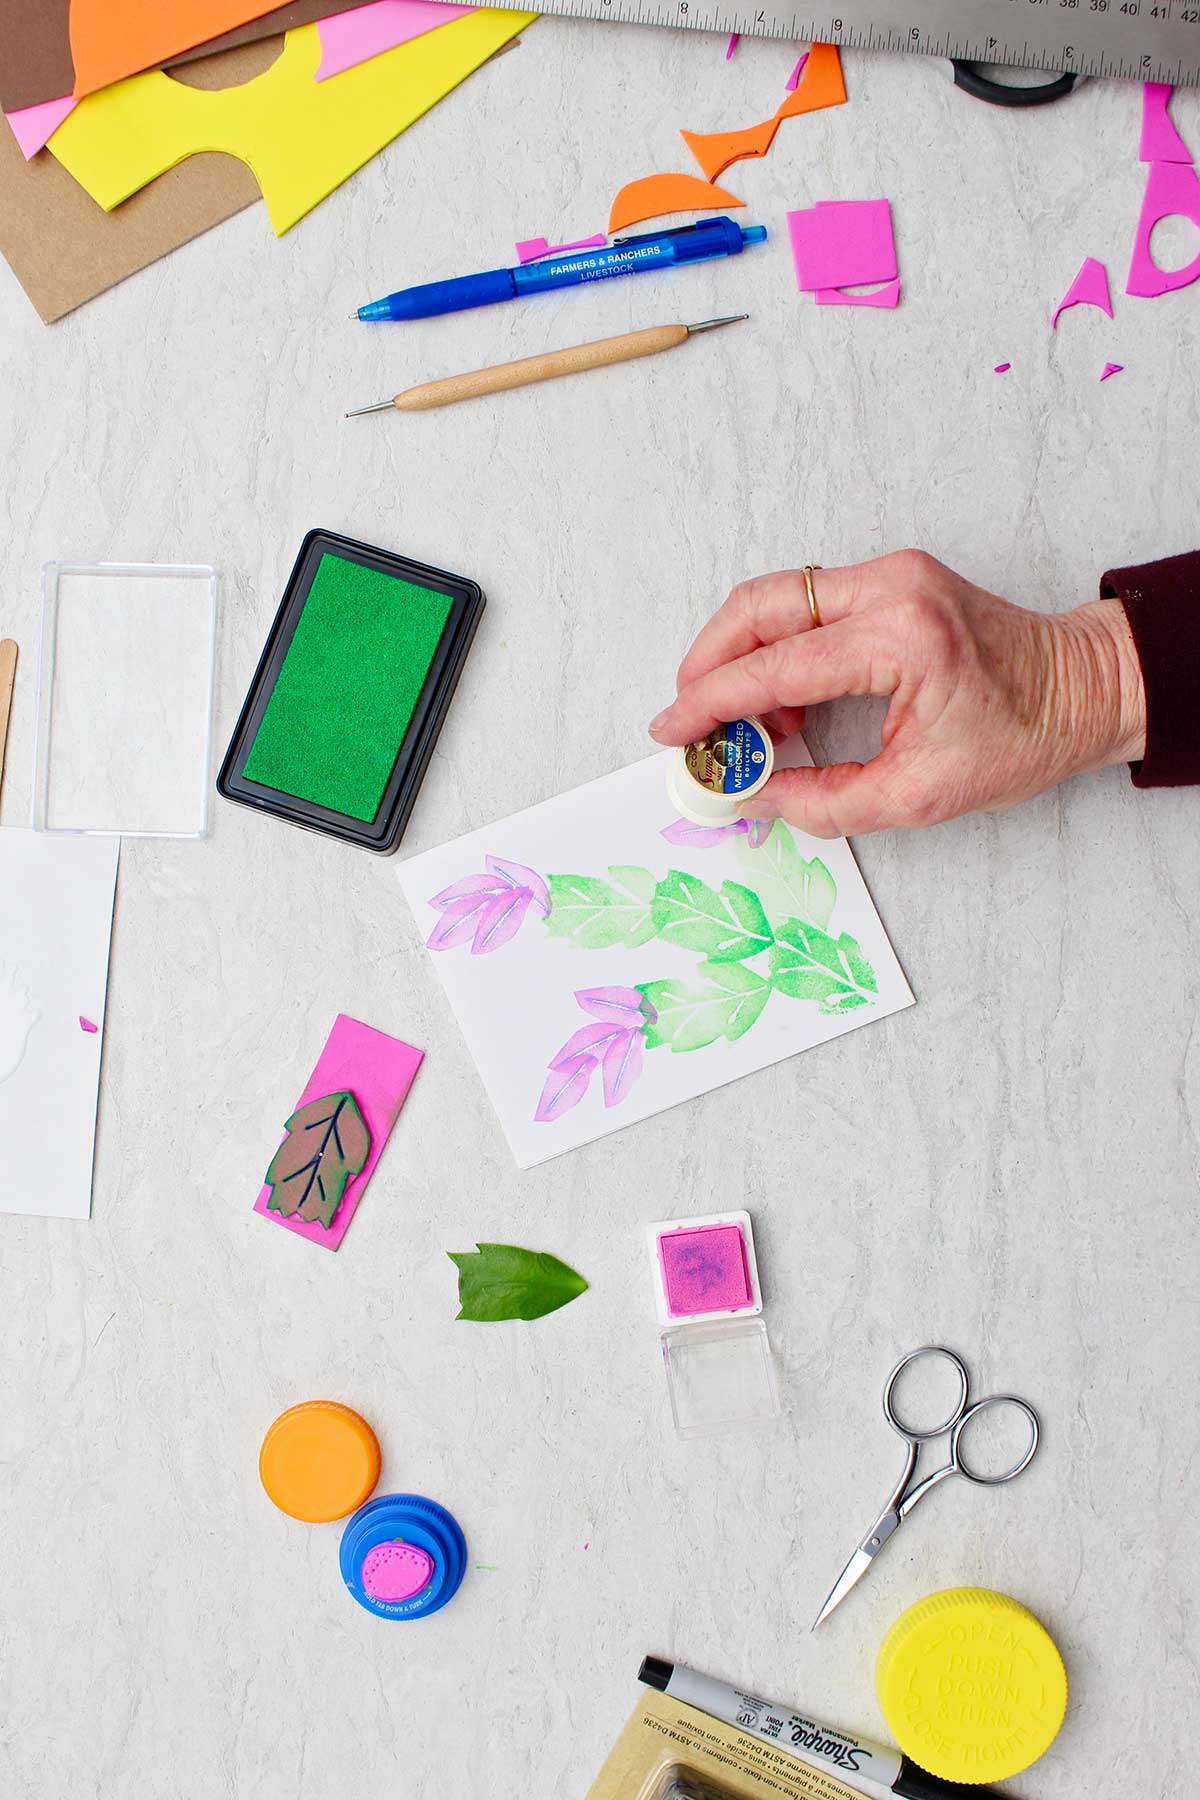
First, I did Christmas cactus craft foam stamps, which is a good example of creating stamps to make a flower and its leaves.
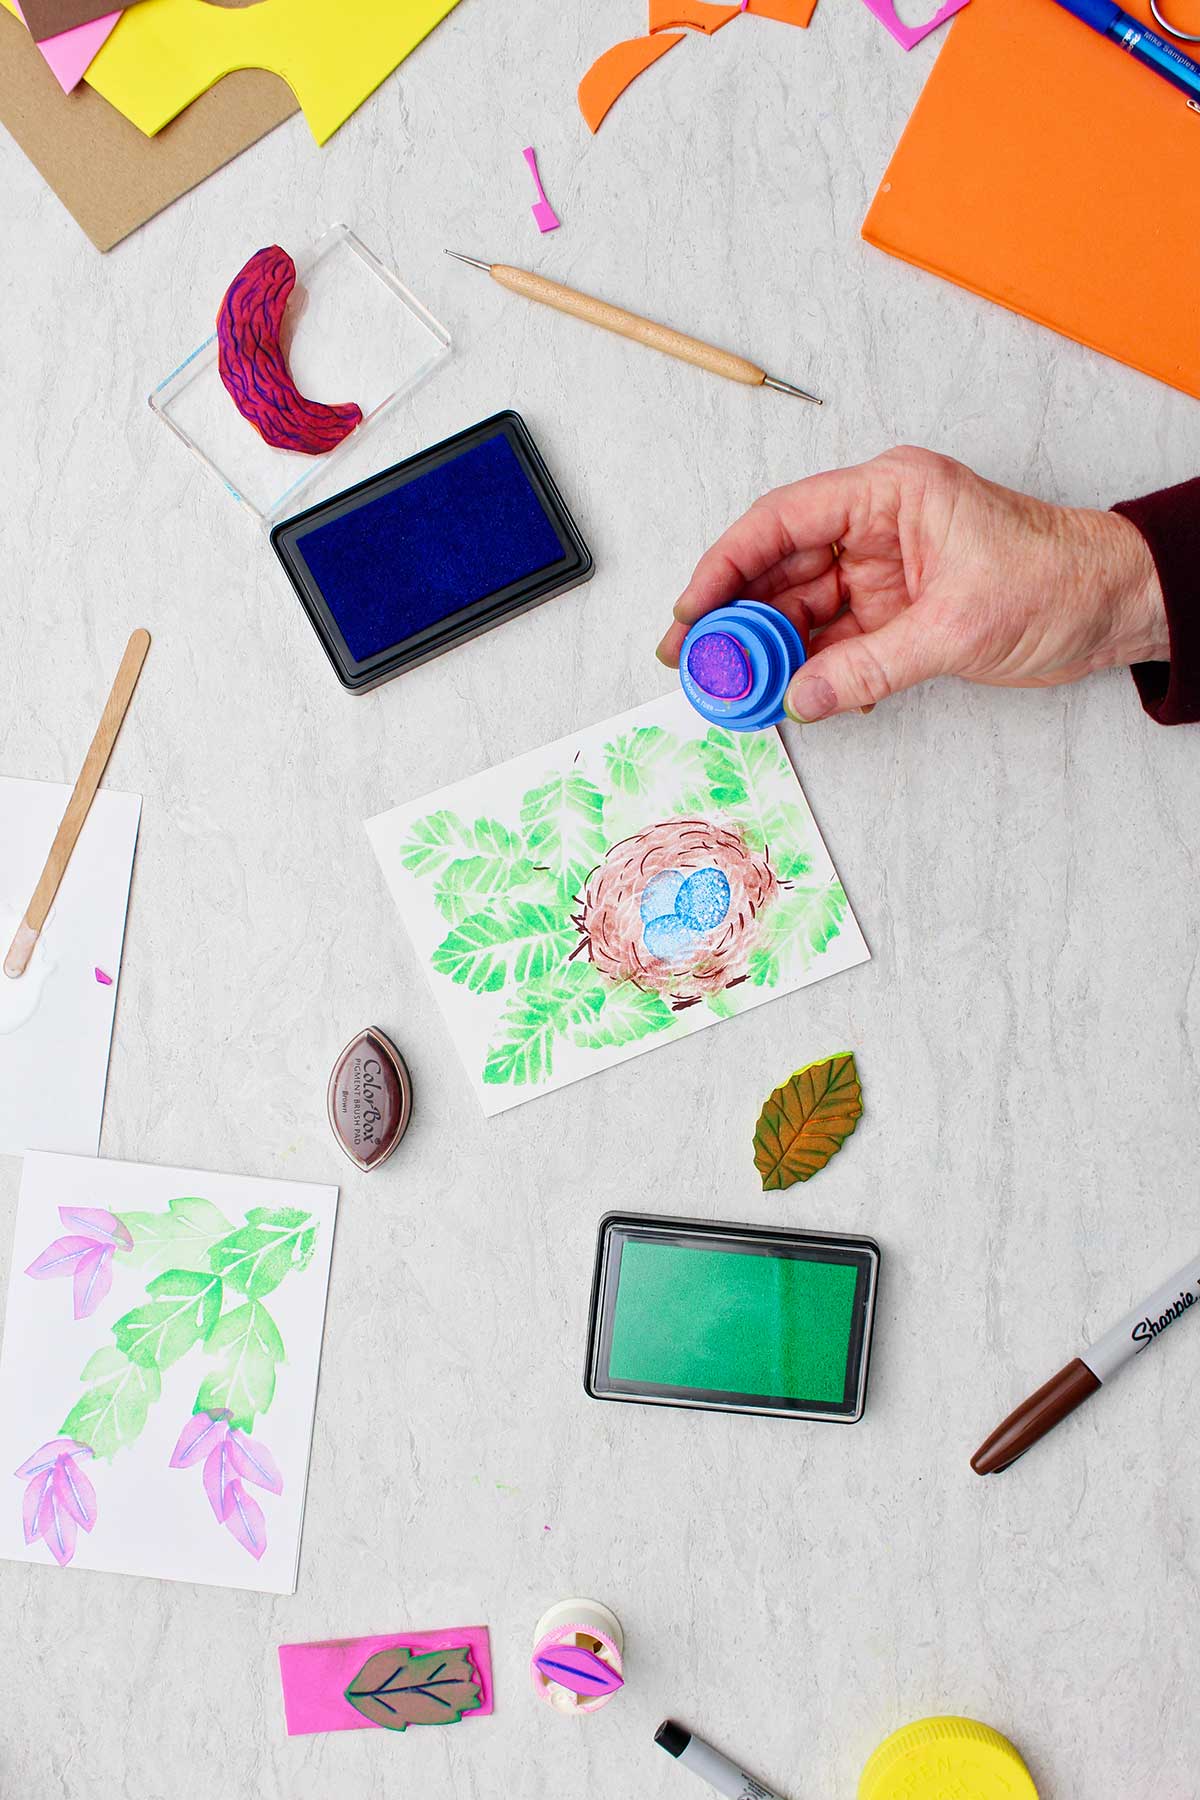
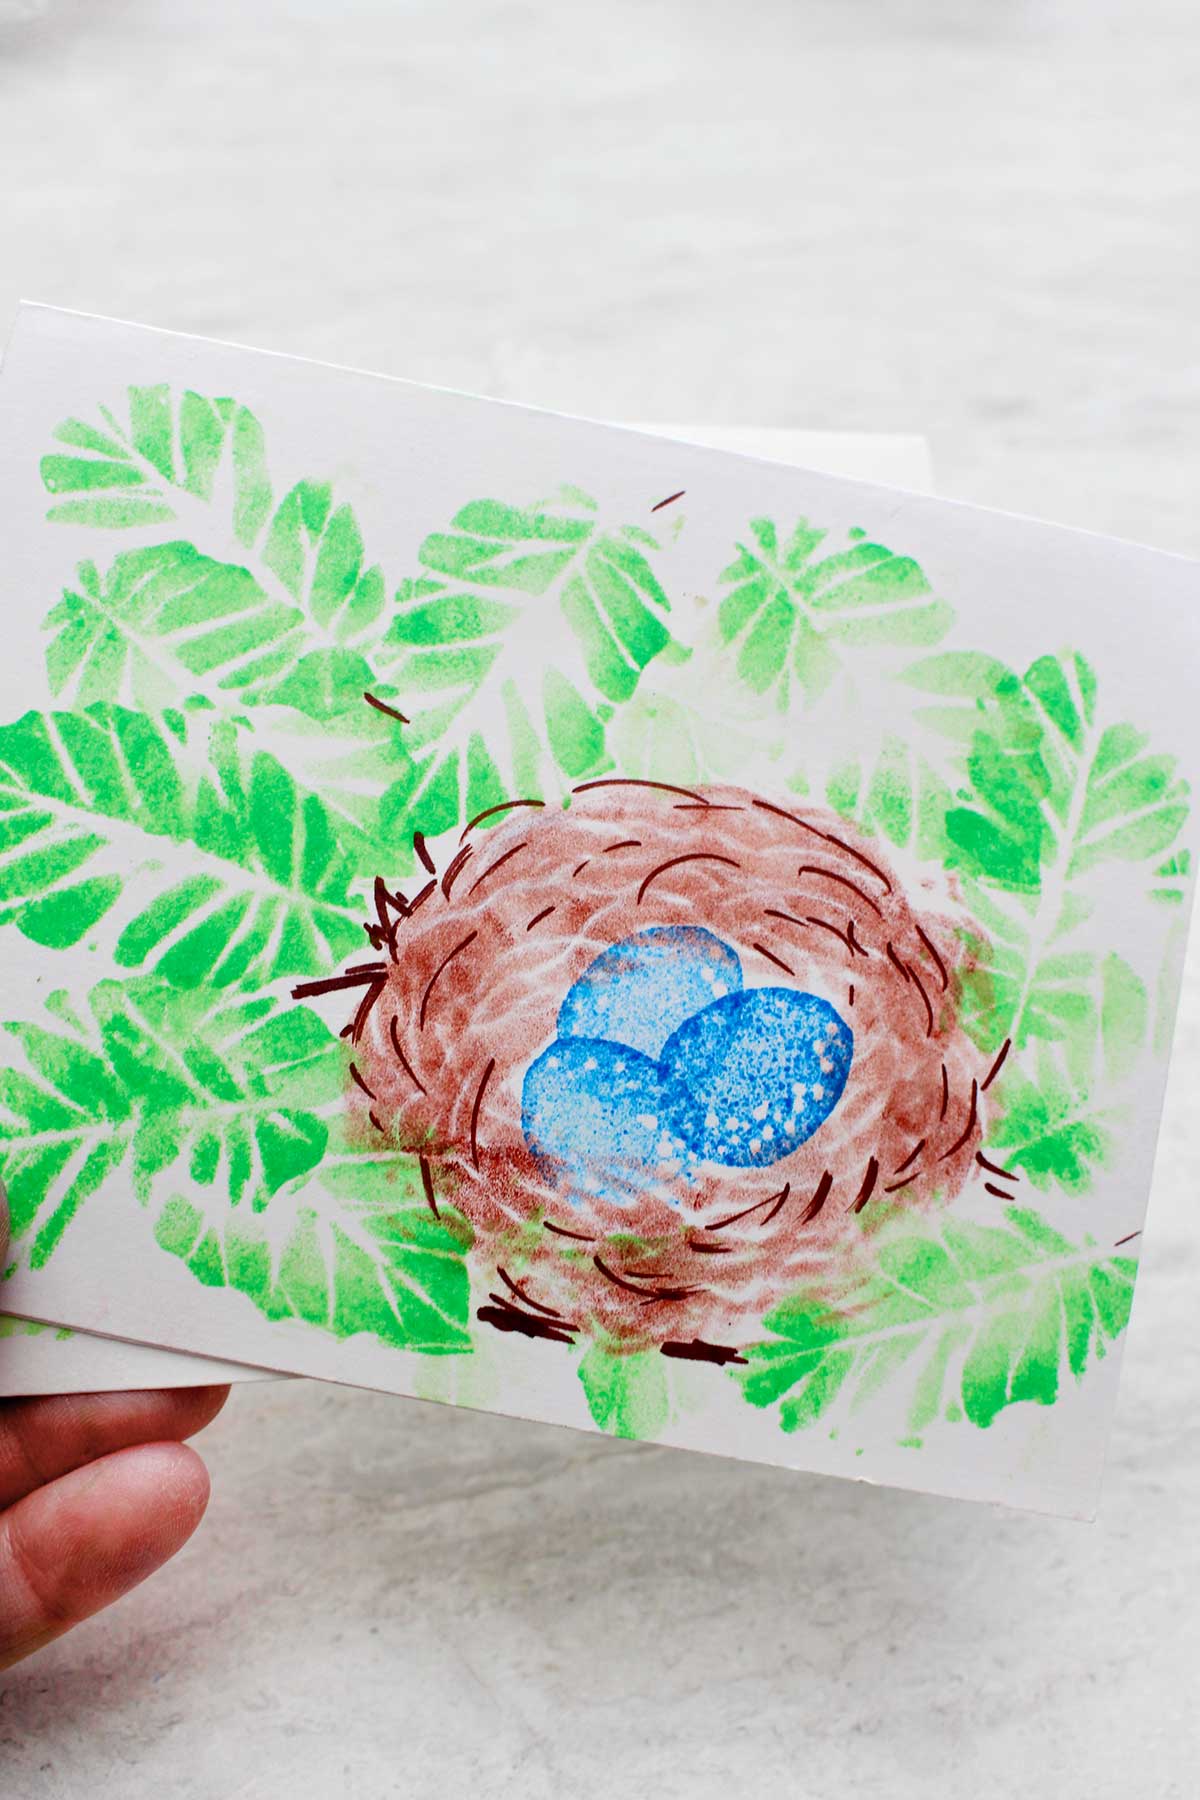
I also created foam stamps that would make a birds nest, the eggs in the nest and leaves in the tree.
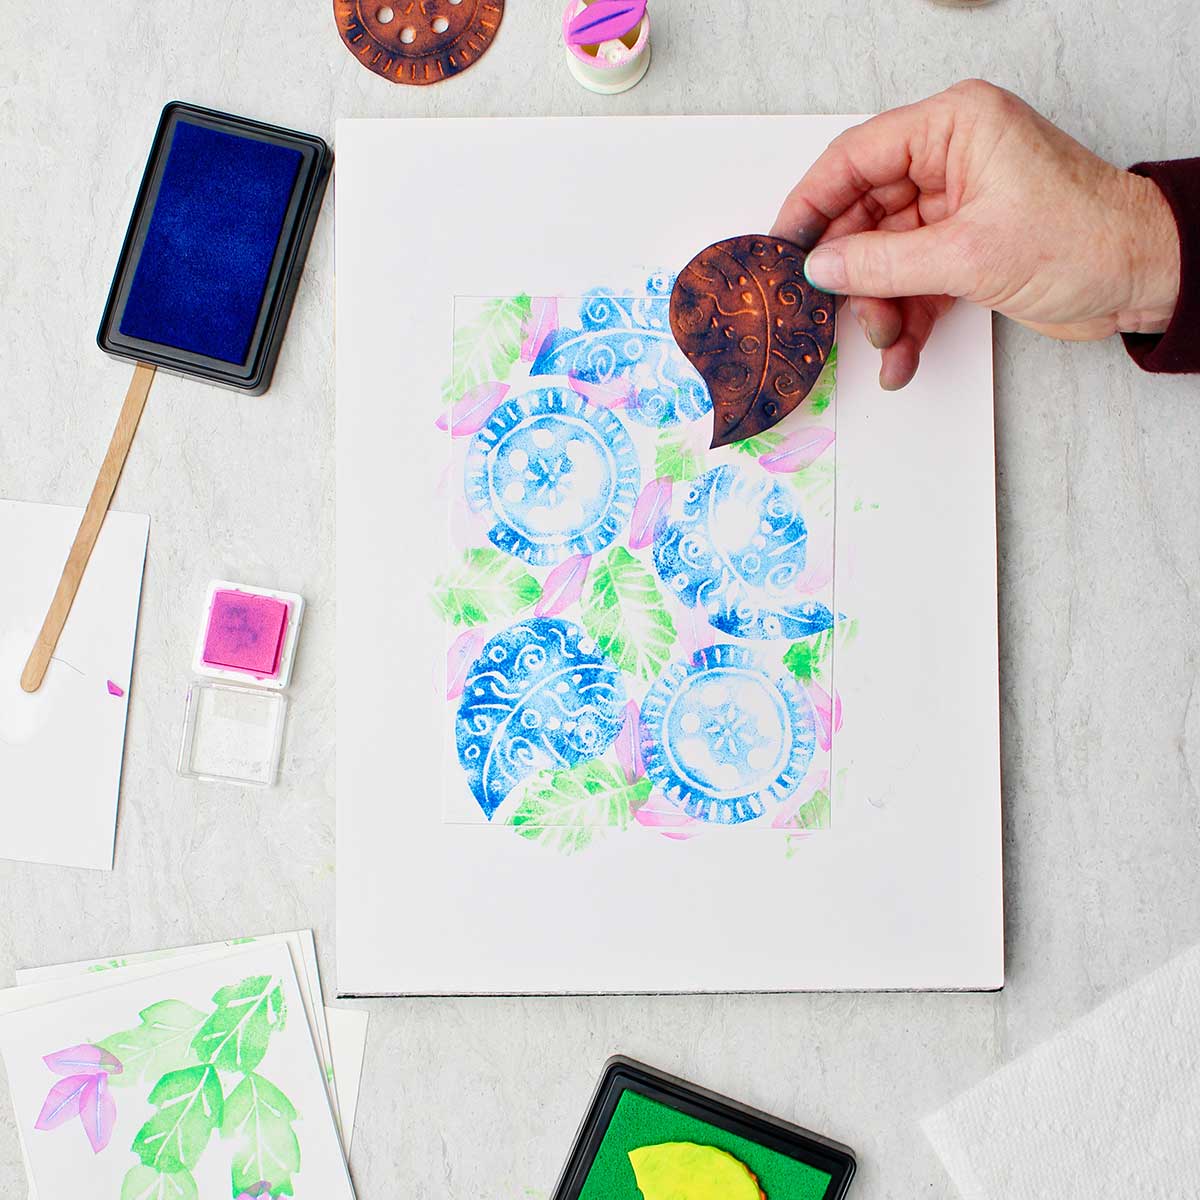
Lastly, I did stamps that were just designs and put them together along with a couple of the previous stamps to create an intriguing design.
If you would like to watch the whole process, you might want to go to the full length video tutorial found at this link: DIY Craft Foam Stamps Full Length Tutorial Video.
Your own ideas for making foam stamps
When you look at these pictures, perhaps you can think of some things that you would like to do.
Here are a few ideas:
- Two stamps that would go together to make a flower pot.
- A variety of flower stamps to go in the flower pot.
- Alphabet letters for birthday cards. Alphabet letters that are slightly larger with designs on them. You could make one for each of the kids or grandkids, for instance.
- Fish and seaweed
How do I make stamps from craft foam?
Well I'm glad you asked! Let's get going.
Use craft foam sheets
Once you have your idea in mind, it’s time to create your stamp out of foam.
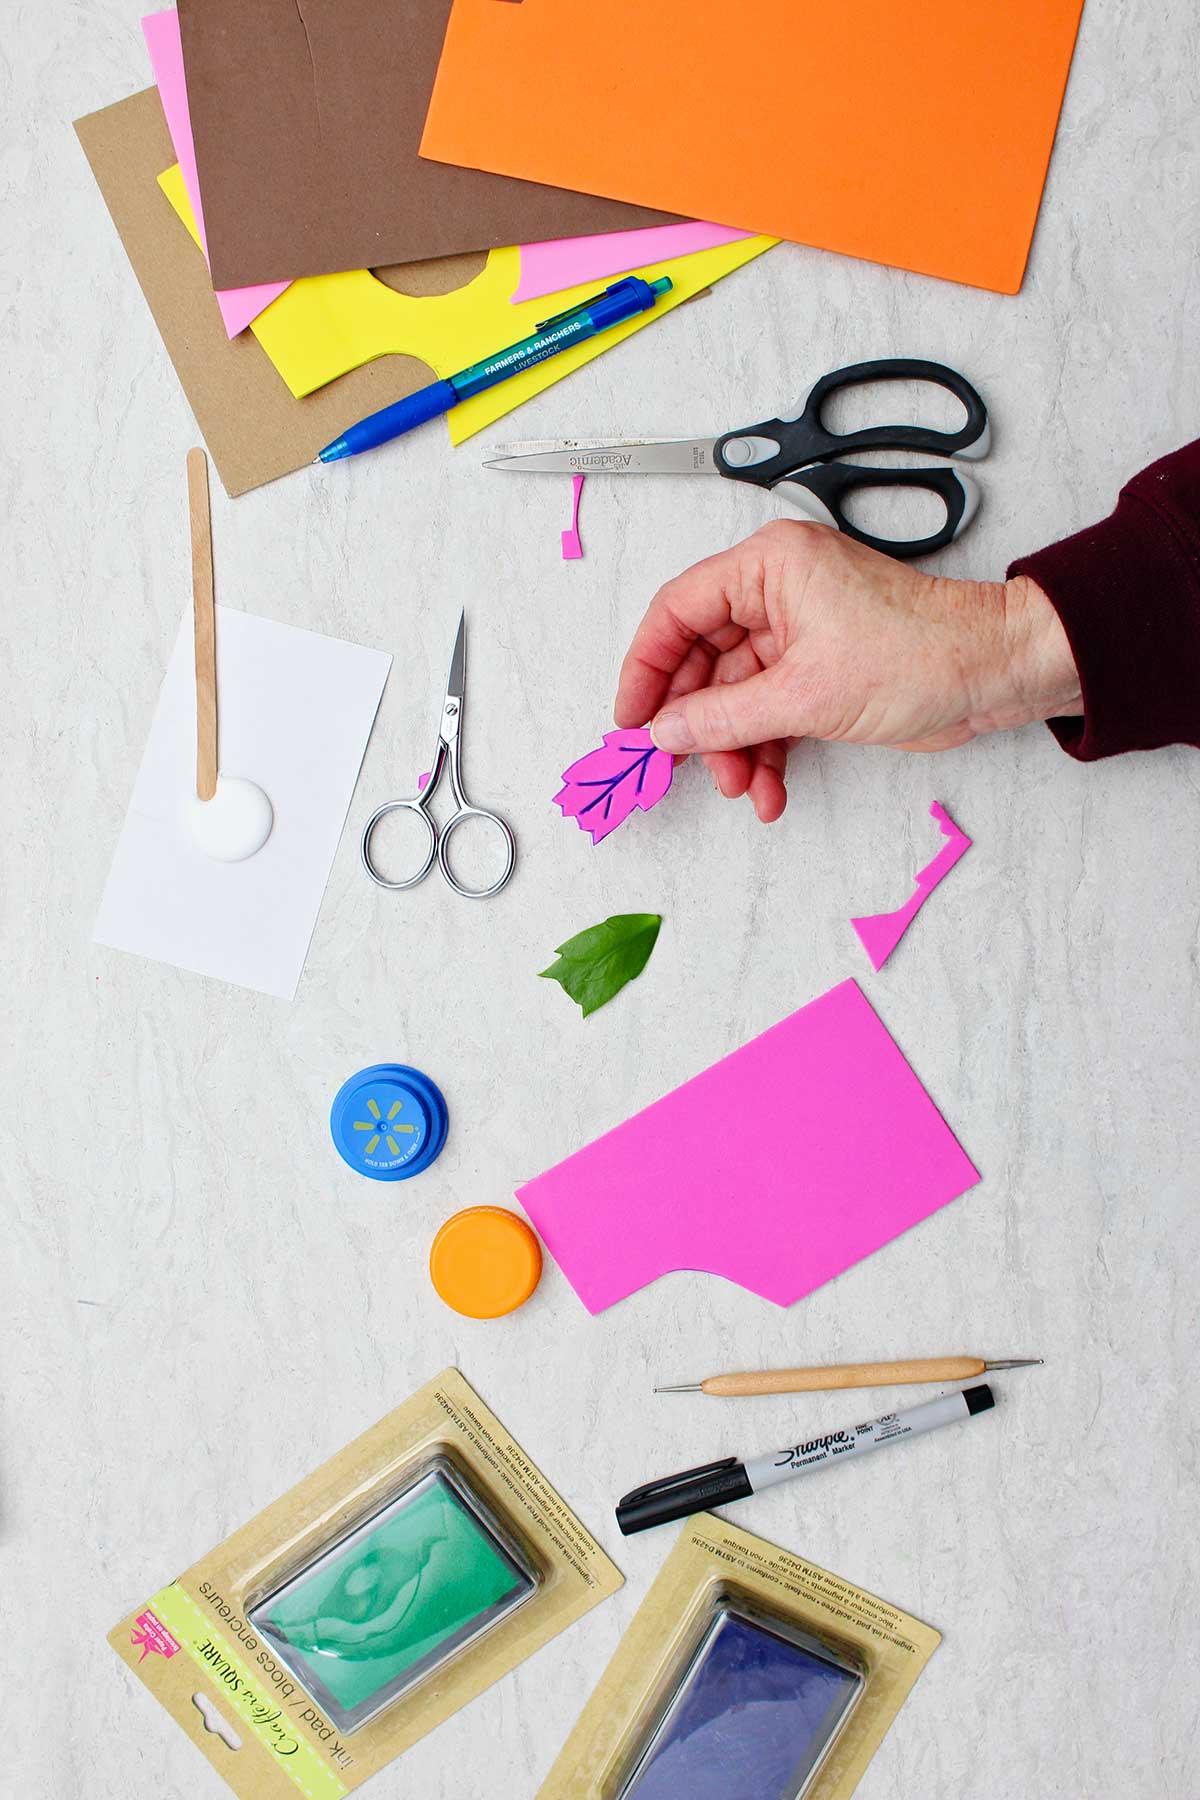
Get your foam craft sheets out, especially those little scraps that have been left from other craft projects. This is a perfect way to use them up.
Draw simple shapes
Use a permanent marker or a pencil or a ballpoint pen to draw the outside border of the shape onto the craft foam.
Again, I recommend not making them too large. My larger pieces were about 3 inches long by two inches wide.
It may help to simplify the shape of your object as much as possible.
For example if you make a flower pot, the rim could be one stamp in a rectangle shape. The bottom part could be second stamp in a rectangle or I should say a trapezoid shape which has two slanting sides.
You would then stamp them one at a time to build the picture that you want. And that’s it!
Craft foam shapes precut
You can purchase (or you might have) craft foam shapes that are pre-cut. Some are foam stickers. A craft foam shape would work well as a stamp too. Just an idea.
Christmas cactus craft foam stamps
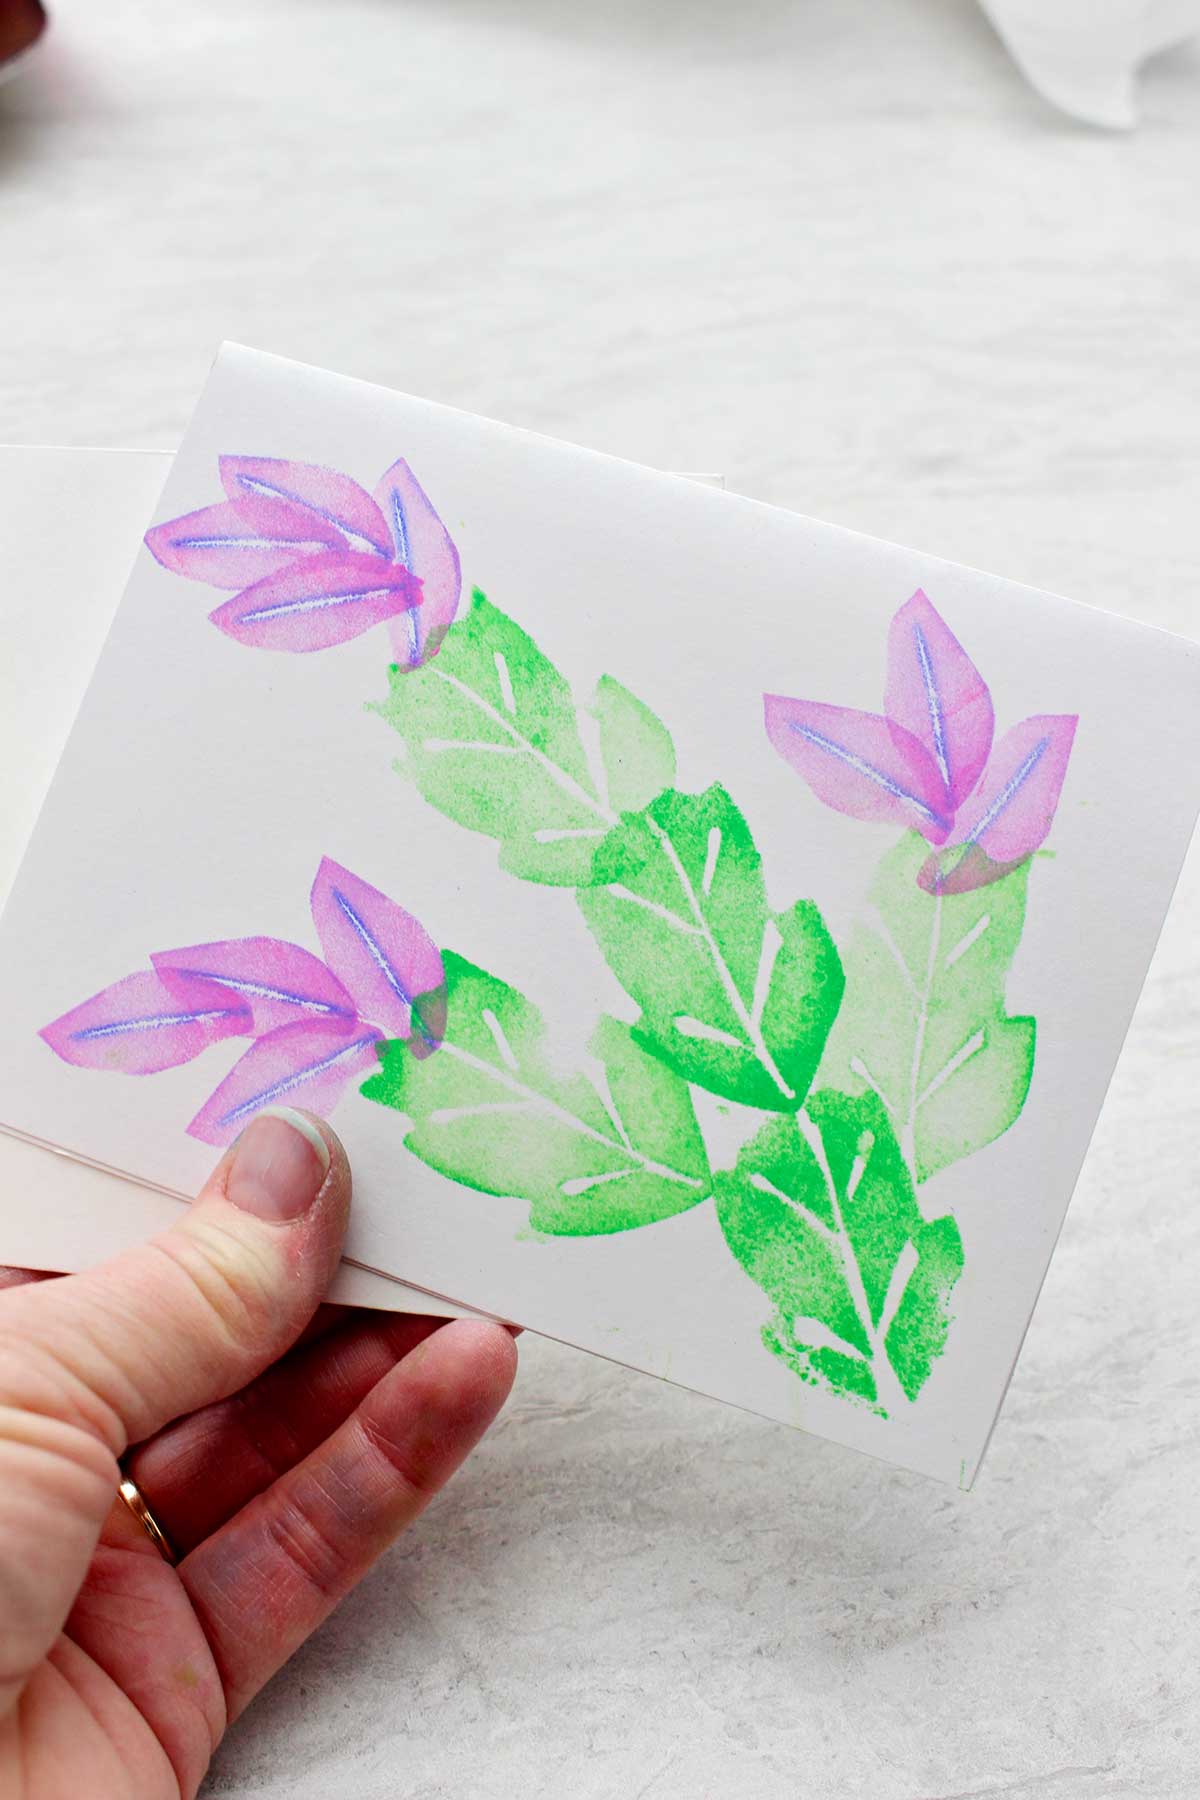
I simplified my Christmas cactus by just making one section of the cactus and using it repeatedly. Then I just made one petal of the flower and used it repeatedly to create the full flower design.
This makes a very stylized and whimsical look to your stamping project, instead of trying to make it look exactly realistic.
Designs on your craft foam shapes
Once you have drawn your shape, then think about what design you may want on the center of your shape (which will be your stamp).
If you will look at the design on the Christmas cactus leaf, there is a center line and a couple lines radiating out of that to look like the veins on the leaf.
For these lines, use either a ball point pen or a stylus (it's an embossing tool like you might use in scrapbooking) to press these lines into the stamp.
Where you draw and press these lines, the indention will keep the printing ink from showing in that area. This will cause there to be a white line on the stamped design where you draw this line on the stamp.
Make the line fairly heavy without cutting through the stamp.
Cut out the stamp shape
When you are finished drawing the shape and the lines that you would like for details on the inside of the shape, go ahead and cut out the shape on the outside line.
Small scissors are helpful
I found it helpful to use a small scissors to cut out the stamps. The craft foam is very easy to cut so I used my small sewing scissors that I use for cutting thread.
But what I would suggest getting is a curved, sharp point, cuticle scissors. This would be a nice thing to have in your craft supplies to use for this purpose. It gets into the small little areas easily for small details.
Of course it’s fine to use your larger scissors as well if you want.
Woo-hoo! You have just created your own stamps!
Foam stamp mounting options
There are several options of what you can do at this point.
Layering for thickness
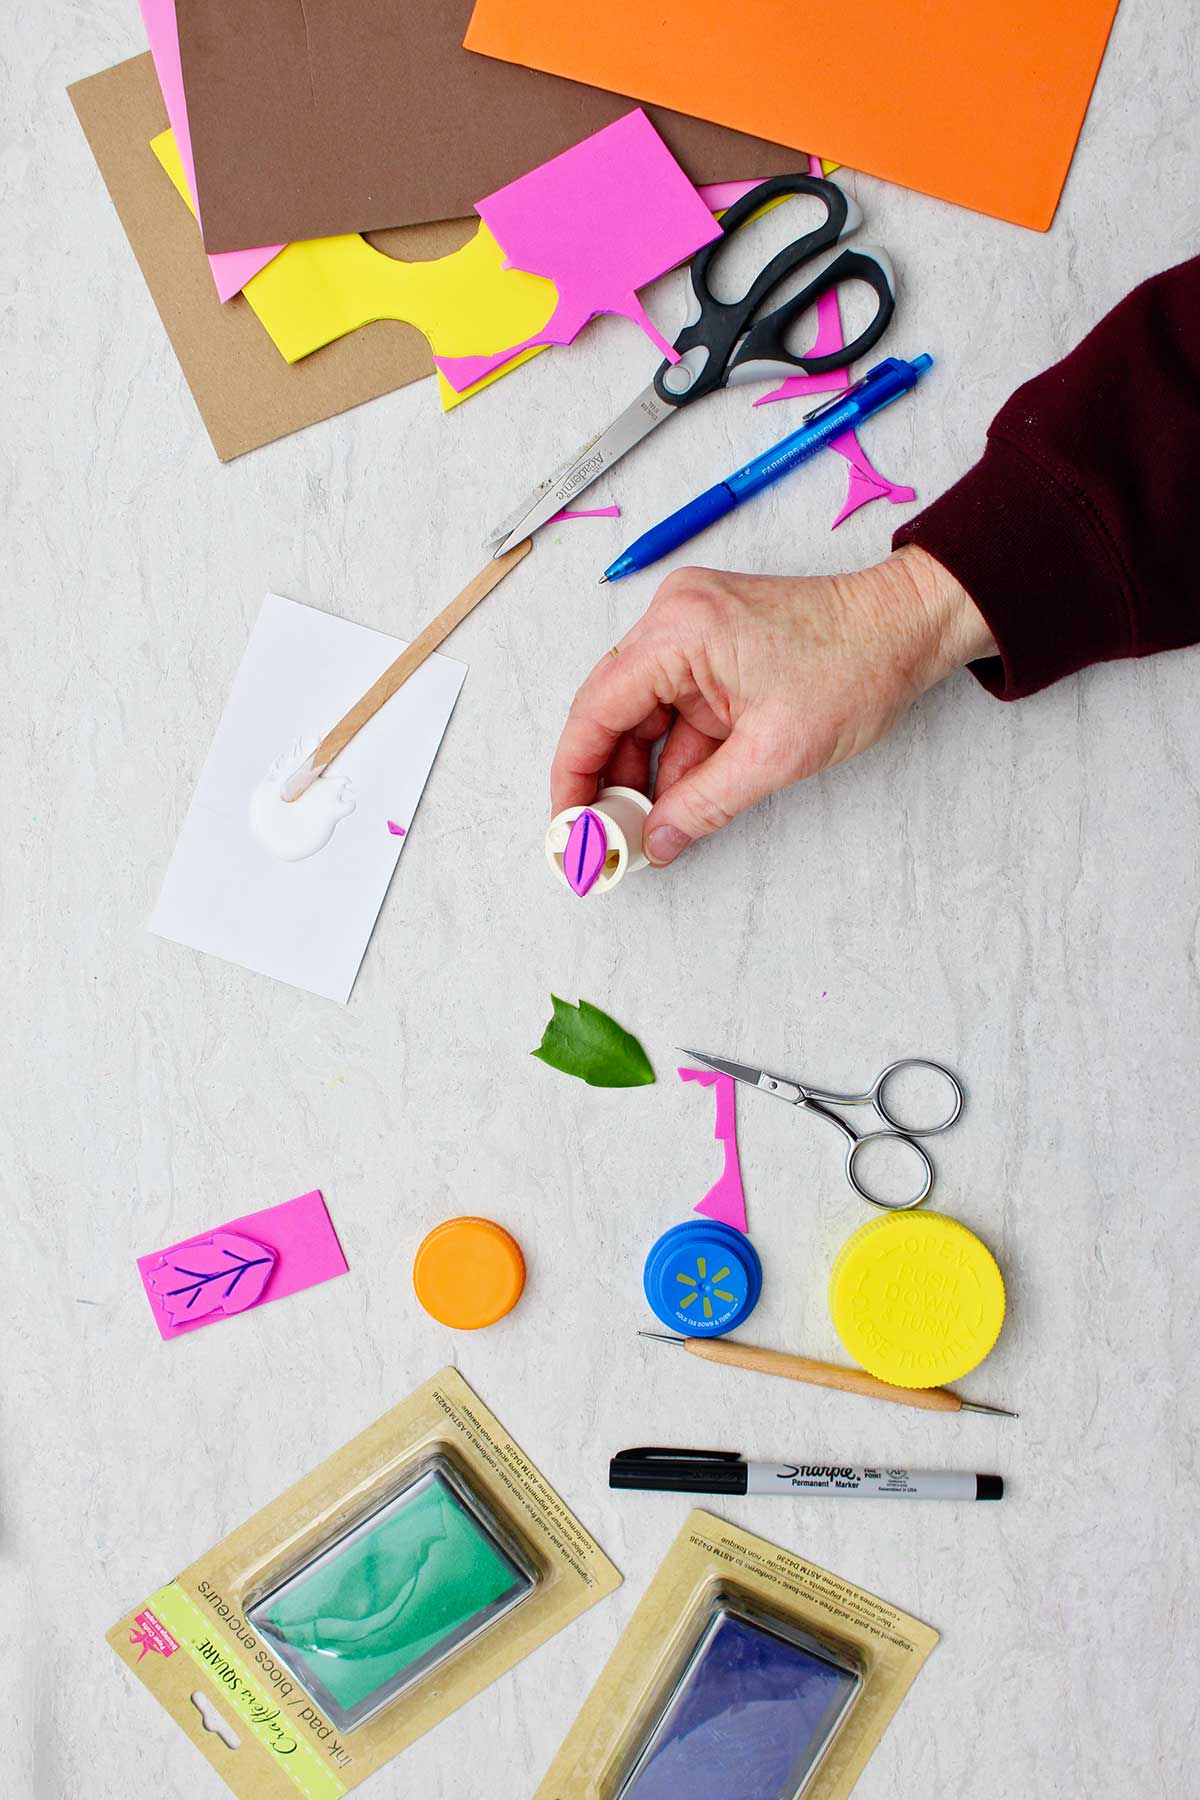
The foam is not very thick. So on a couple of my stamps I spread a thin layer of glue on the back, and I glued it to another piece of craft foam. Then I cut out the second foam layer. This makes the stamp twice as thick and easier to handle. It's nice when the stamps are a thicker foam.
Adding a "handle"
On one stamp (the Christmas cactus leaf), I then again spread glue on the back and placed it on a rectangle piece of foam to use as kind of a handle.
Another option for a smaller stamp is to glue it to the end of a spool (from thread), or a jar lid, or the lid of a pill bottle.
This is especially nice for a small children as they are able to grab a hold of the spool easily and stamp with it.
Wood block mounting
For more permanent stamps it would be nice to mount them on small piece of wood or wooden blocks, but that is more than I wanted to do for a quick project. I might try a piece of foam core board instead next time, that would be easier to cut.
You can experiment with these options. You may want to leave your stamps with just one layer of foam like I did on my designed stamps at the end. But there is a greater tendency to get more ink on your hands with that option.
Bird nest craft foam stamps
I told you about how I made my flower with one leaf and one petal. But I also broke down the birds nest into parts and used stamps repeatedly in order to create that design.
The nest was made from a small crescent shape with uneven edges. This was to be one section of the bird nest, about ¼ of the circular edge of the nest. And then I drew lines on the inside of that shape that I hoped would look like grasses or twigs. They were just wavy irregular lines.
Use the stamp several times in a circle shape to make it the full rim of the nest. I even went over the nest a second time with the stamp because the brown ink wasn't very dark.
The eggs were small, and I pressed some little dots with the end of the ink pen into them to make it look like it had texture.
The egg foam stamp was mounted on the lid of a pill bottle and was easy to use.
The leaf stamp for the nest was a more traditional tree leaf shape with veins drawn in the center. There was only one leaf stamp used repeatedly to get the foliage look around the nest.
I really like the way they turned out when all together on the note card.
Ink pads for stamping
I had two or three ink pads that I’ve used in the past that I pulled out for these. They were getting dried out.
Being in a hurry I ran into a dollar store (the Dollar Tree I think) and picked up two or three colored ink pads that they had in their scrapbooking sections. The ink stamp pad on these was very thin and I don’t expect them to last long. But I will say that they did work well for this purpose.
Hobby Lobby had several more ink color options that I will be using when I do this craft with the grandkids. There are other ink color options online as well.
Use the ink pad to pat along the entire surface of your stamp, making sure that the entire surface area is well inked.
Stamping with the stamps
For best results, set the stamp down on the paper and using your fingers, make sure that the entire surface of the foam comes in contact with the paper. That helps so that the ink is transferred over the whole stamp to the paper.
The foam stamps are light enough so that they don’t make surface contact with the paper without a little bit of help.
If you use your stamp more than once without re-inking it, the second time that you stamp the design will be lighter.
I used this technique when making the tree leaves on the nest picture. I liked the way that some of the leaves were darker and some lighter. It made them look closer and farther away.
This same technique was used with the flower petals on the Christmas cactus. It just gives some variety.
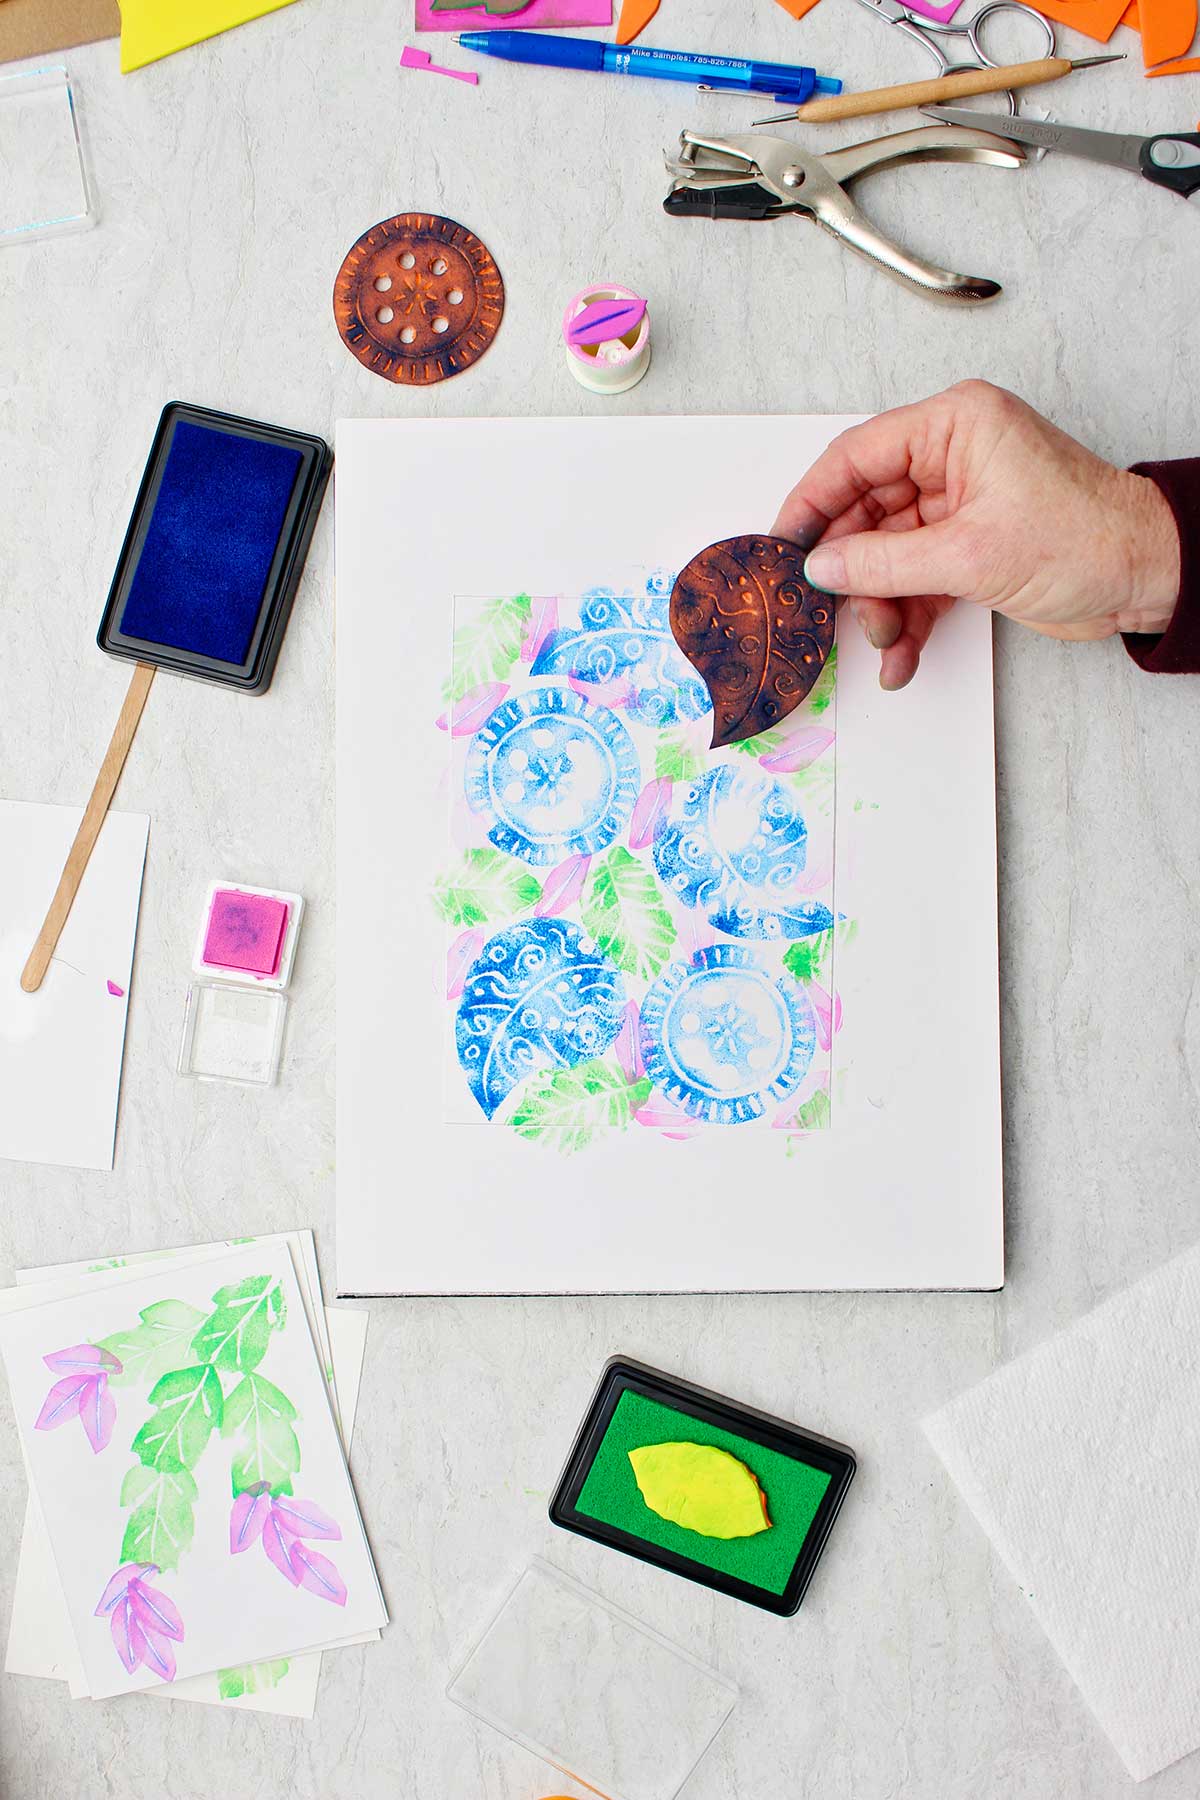
Making "design" craft foam stamps is fun to do
One designed stamp was made by tracing the circle off of a jar lid for the shape. I drew a symmetrical design on it, and also used a hole punch to make circles cut from it in the middle.
The teardrop design shape (or paisley shape) had just designs pressed into it.
I love the way that both of these came out as far as stamps go. They were both slightly larger and it did make it a little bit harder to get an even level of ink when I used them to print.
Paper for stamping projects
Stamping on note cards
So both the Christmas cactus and the birds nest set of stamps were used on paper that was the right size to use for a note card.
I cut an 8 ½ x 11 sheet of sketch paper in half (hamburger style). And then folded those pieces in half.
The printing went on one outer section of the note card.
Envelope can be stamped too
But I did also use the stamps on the envelope for fun. That was a cute little extra that I think people will enjoy when they receive it in the mail. Be sure not to stamp where you need to put the address though!
The envelope size is an A4. This is a standard size that you can usually buy in the stationary section or craft section of stores. They are often used for invitations.
Stamping paper to use in a frame
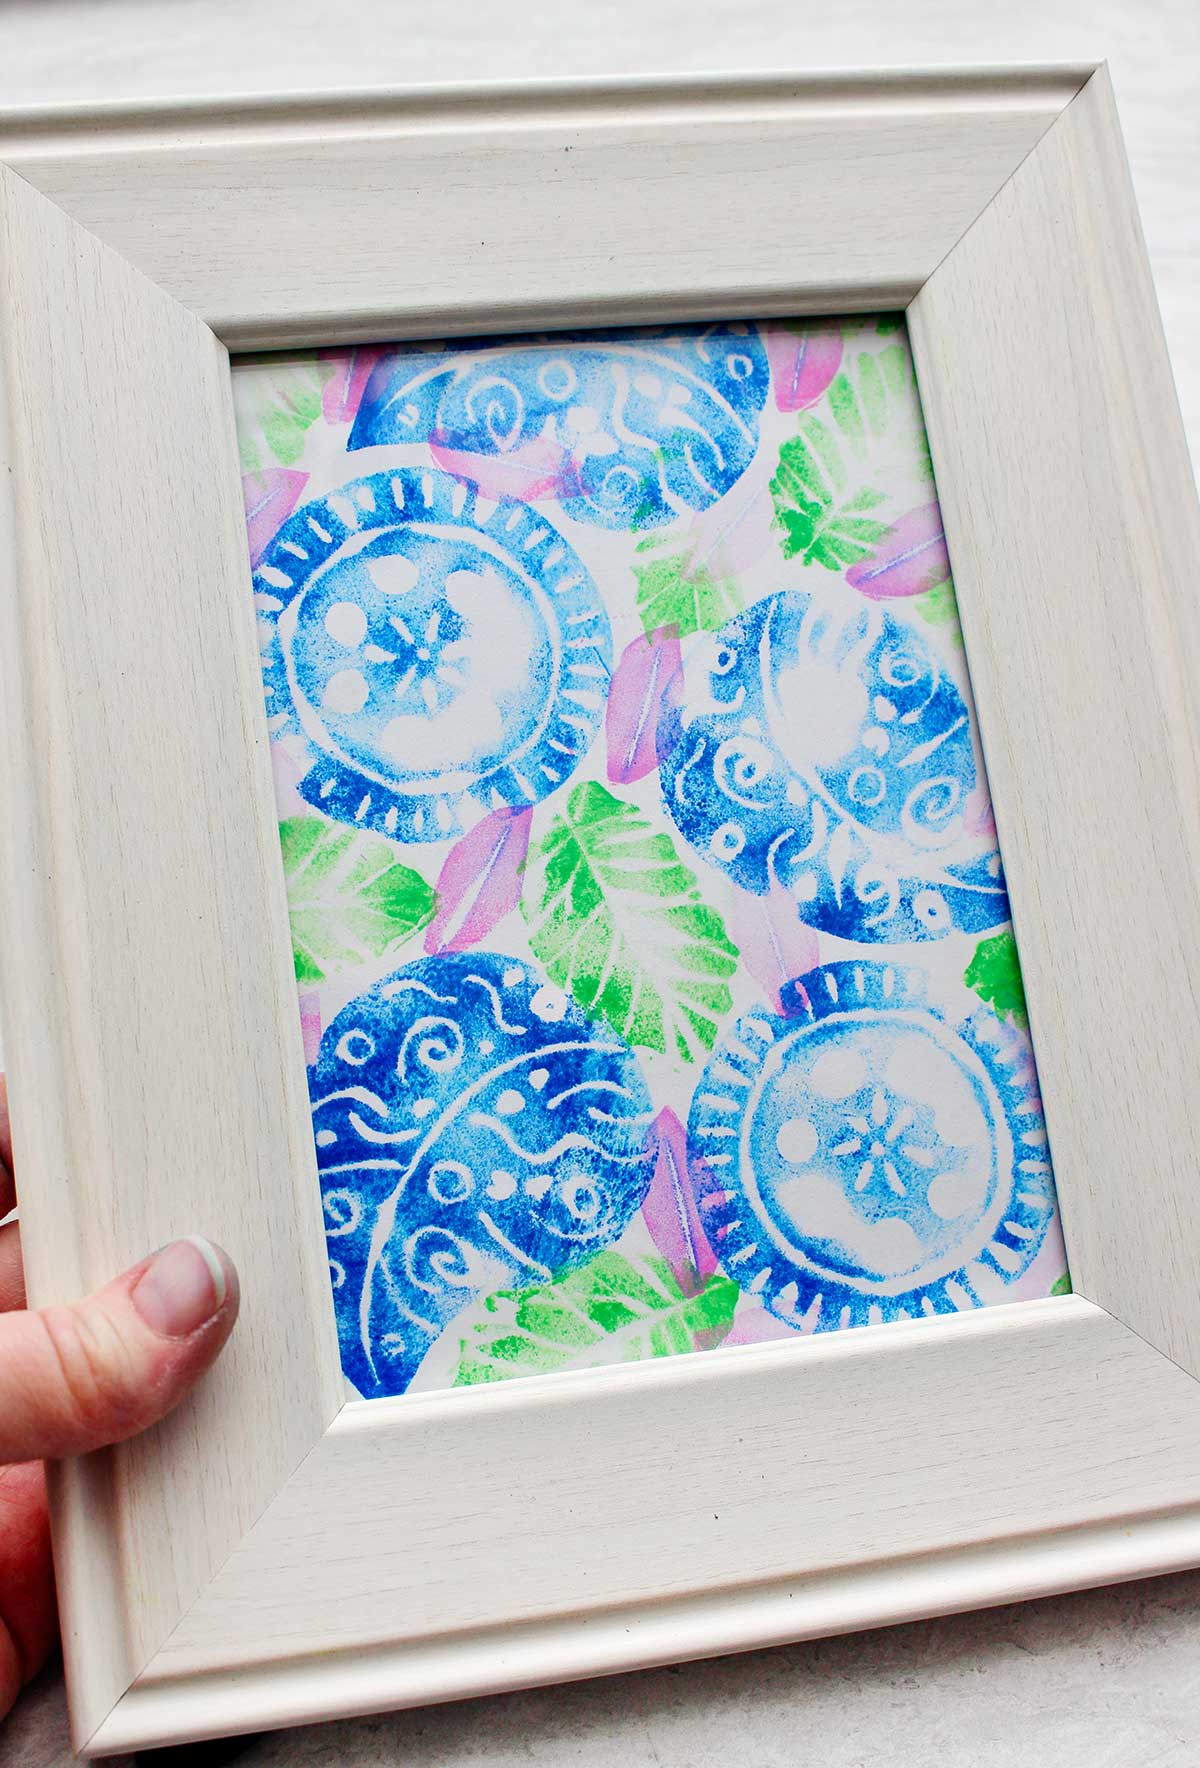
The last piece that I did was on paper that was cut to 5” x 7” and then placed in a standard 5x7 inch frame that was purchased at a discount house. I slipped it into the frame and was very pleased with the final results. I’m going to use it as a gift!
Like I said earlier, I am definitely going to be using this technique again for my own use in making cards in particular. I have several ideas lined up and I enjoy making my own cards. It’s creative and it is also economical.
I am pondering trying fabric paint and stamping fabric too. Would you like to try that in another post?
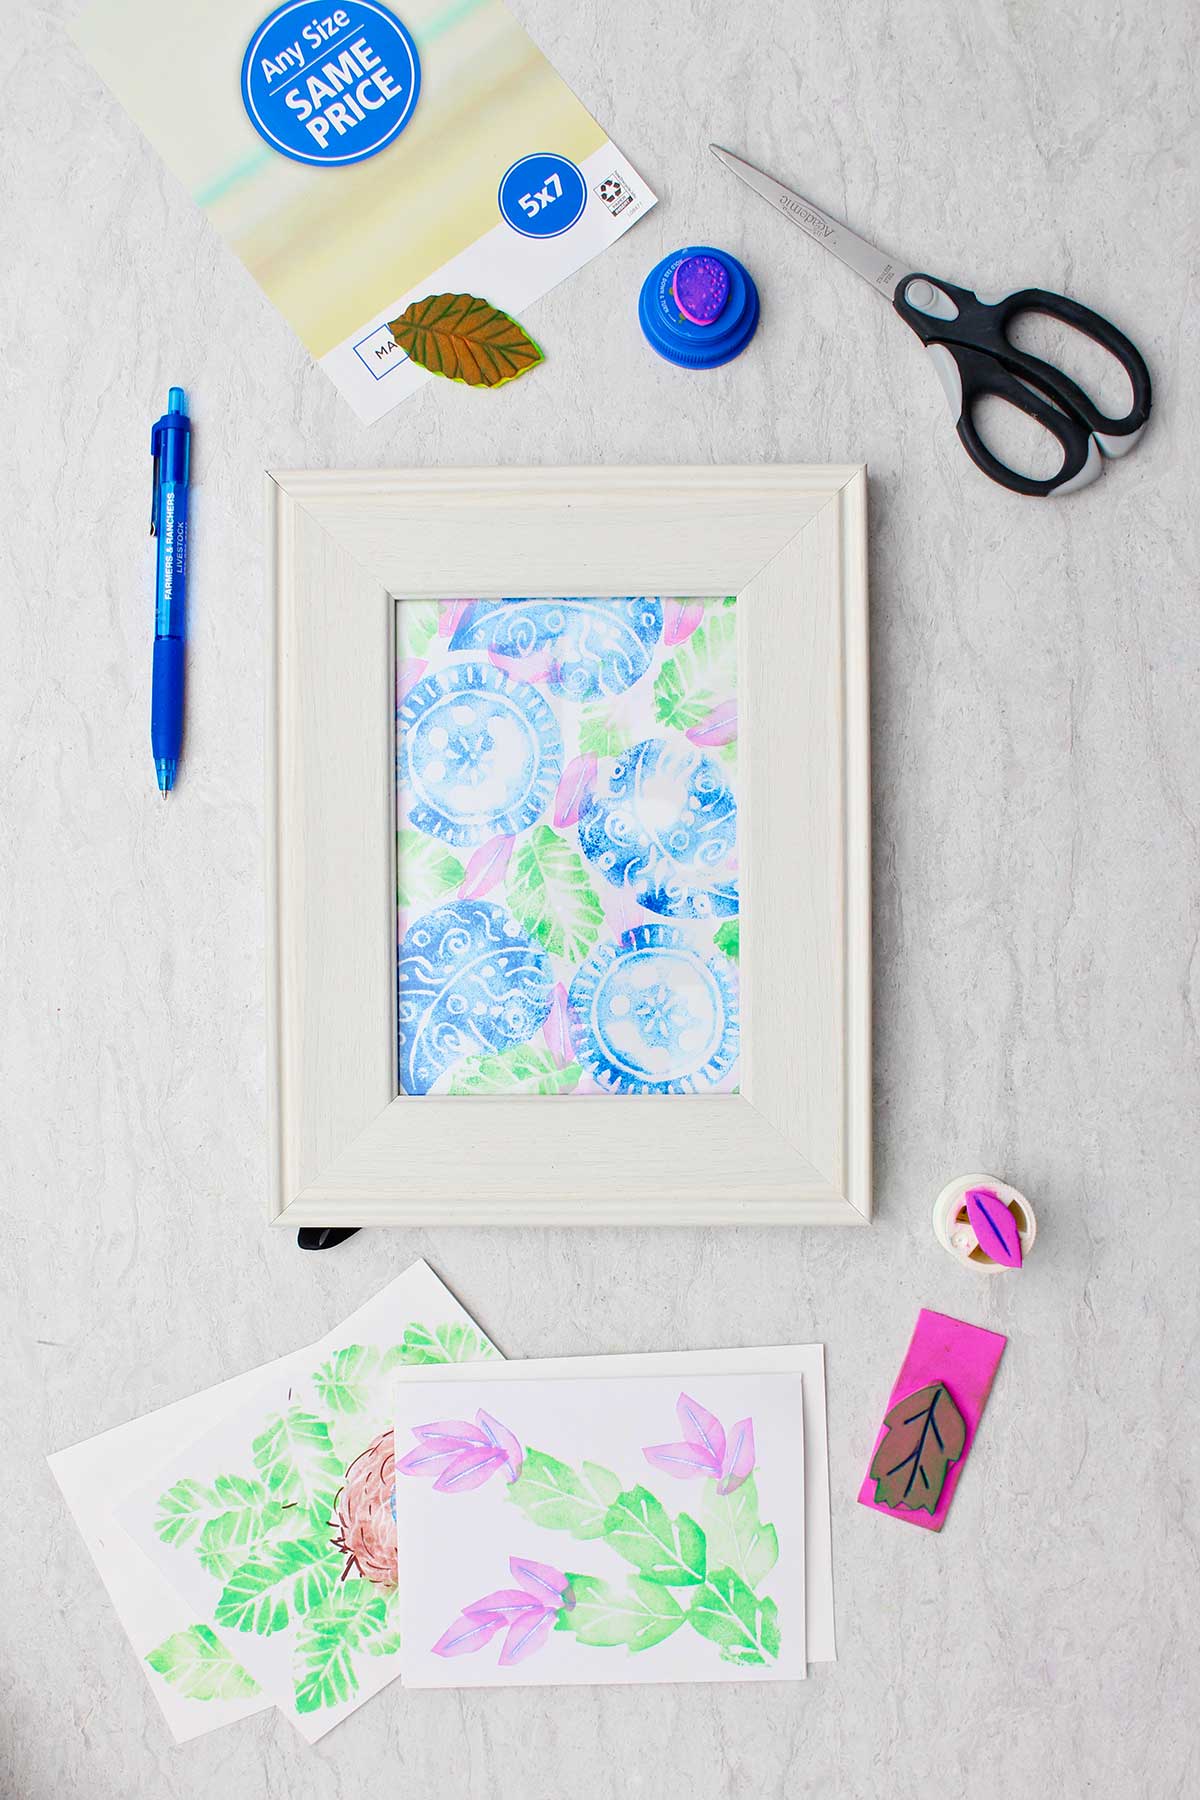
Re-using craft foam stamps
Your stamps can be used repeatedly. You may want to try cleaning some of the ink off of them when you’re done stamping. Use a wet, paper, towel or a baby wipe works as well. I’ve also used a little bit of Windex on them before for good results.
I do think that it would be best if you use the same color ink the next time you use the stamp. It is likely that some of the first color would leak off onto your next design.
I must say that a little bit of the ink from the ink pen used to press in designs on my flower petal also came off on my design. You might want to try a stylus if you don’t want that to happen.
Again, if you would like to watch the whole process, check out the full length video tutorial found at this link: DIY Craft Foam Stamps Full Length Tutorial Video.
How can I use my own DIY foam stamps?
This would be a wonderful way for your kids to make:
- Mother’s Day cards
- Cards for their teachers at school or at Sunday school.
- Gifts for special occasions
- A party activity- think of a birthday party craft idea for example
- Idea to do with grandparents- these supplies would travel easily if kids are at a distance
- Stamped gift wrap or gift bags
More card ideas?
If you would like more ideas for making cards, here are a few that I think you’ll like:
- Mother’s Day Card Mobile
- Mother’s Day Pop Up Card
- DIY Alphabet Photography Art & Cards
- Easy DIY Watercolor Flower Card for Mom
- DIY Hand Embroidered Card
- Awesome Origami Shirt Father’s Day Card

Making stamps with craft foam is easier than you might think! Simply draw and cut out your shapes, drawing lines over the foam where you don't want the ink to reach. Mount your foam, then use and reuse as you would a rubber stamp!
If you want to make your own stamps, using craft foam is a great option! It's easy to create and cut any shape you would like, plus you can indent the foam where you don't want the ink to reach. Use blocks, spools, or more layers of foam to add a handle, making these DIY stamps easier to use.
Enjoy!
If you try this craft, let me know! Go ahead and leave a comment, rate it, and tag a photo with #WelcometoNanas wherever you post.
Come join the fun at https://welcometonanas.com
Supplies for making DIY Craft Foam Stamps
- Craft foam sheets
- Craft foam shapes (optional)
- Embossing stylus or ballpoint pen
- Scissors or Curved sharp point cuticle scissors
- Jar lids, pillbox lid, spool from thread (optional)
- Ink pads of various colors of choice
- Sketchbook paper
- X-acto knife (optional)
- Cutting mat (optional)
- Hole punch
- Glue
- A4 envelopes (optional)
- 5 x 7 photo frame (optional)
DIY Craft Foam Stamps (Awesome & Easy Printing!)
Equipment
- Embossing stylus or ballpoint pen
- Scissors or Curved sharp point cuticle scissors
- Hole punch
Items Required
- Craft foam sheets
- Embossing stylus or ballpoint pen
- Scissors or Curved sharp point cuticle scissors
- Jar lid, pillbox lid, spool from thread (optional)
- Ink pads of various colors of choice
- Sketchbook paper
- Hole punch
- Glue
- A4 envelopes (optional)
- 5 x 7 photo frame (optional)
Instructions
- First off, think about what you would like to create. It works well to use several stamps to make an item instead of one large stamp. It’s hard to get even ink distribution over a large stamp, and then to get it to stamp well onto the paper.Think about what you would like to do and how you could break it up into several parts.
- Get your foam sheets out, especially those little scraps that have been left from other craft projects. Use a permanent marker or a pencil or a ballpoint pen to draw the outside border of the shape onto the craft foam.It may help to simplify the shape of your object as much as possible.For example if you make a flower pot, the rim could be one stamp in a rectangle shape. The bottom part could be second stamp in a rectangle or I should say a trapezoid shape which has two slanting sides. You would then stamp them one at a time to build the picture that you want.
- Once you have drawn your shape, then think about what design you may want on the center of your shape (which will be your stamp).If you will look at the design on the Christmas cactus leaf, there is a center line and a couple lines radiating out of that to look like the veins on the leaf.For these lines, use either a ball point pen or a stylus (like you might use in scrapbooking) to press these lines into the stamp.Where you draw and press these lines, the indention will keep the printing ink from showing in that area. This will cause there to be a white line on the stamped design where you draw this line on the stamp.Make the line fairly heavy without cutting through the stamp.
- When you are finished drawing the shape and the lines that you would like for details on the inside of the shape, go ahead and cut out the shape on the outside line.
- The foam is not very thick. So on a couple of my stamps I spread a thin layer of glue on the back, and I glued it to another piece of craft foam. Then I cut out the second foam layer. This makes the stamp twice as thick and easier to handle.On one stamp (the Christmas cactus leaf), I then again spread glue on the back and placed it on a rectangle piece of foam to use as kind of a handle.Another option for a smaller stamp is to glue it to the end of a spool (from thread), or a jar lid, or the lid of a pill bottle.This is especially nice for a small children as they are able to grab a hold of the spool easily and stamp with it.
- Use the ink pad to pat along the entire surface of your stamp, making sure that the entire surface area is well inked.
- Set the stamp down on the paper and using your fingers, make sure that the entire surface of the foam comes in contact with the paper so that the ink is transferred over.The foam stamps are light enough so that they don’t make surface contact with the paper without a little bit of help.If you use your stamp more than once without re-inking it, the second time that you stamp the design will be lighter.
- So both the Christmas cactus and the birds nest set of stamps were used on paper that was the right size to use for a note card.I cut an 8 ½ x 11 sheet of sketch paper in half (hamburger style). And then folded those pieces in half.The printing went on one outer section of the note card.
- The last piece that I did was on paper that was cut to 5” x 7” and then placed in a standard 5x7 inch frame that was purchased at a discount house. I slipped it into the frame and was very pleased with the result. I’m going to use it as a gift!
- Your stamps can be used repeatedly. You may want to try cleaning some of the ink off of them when you’re done stamping. Use a wet, paper, towel or a baby wipe works as well. I’ve also used a little bit of Windex on them before for good results.


Leave a Reply