Hey, Buckaroos!
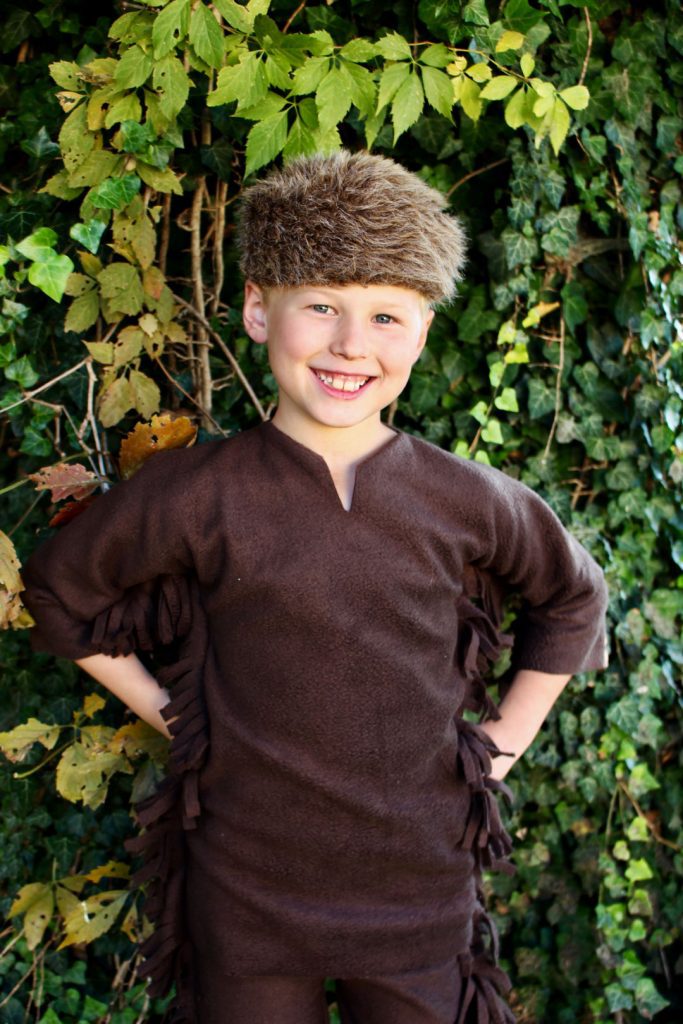
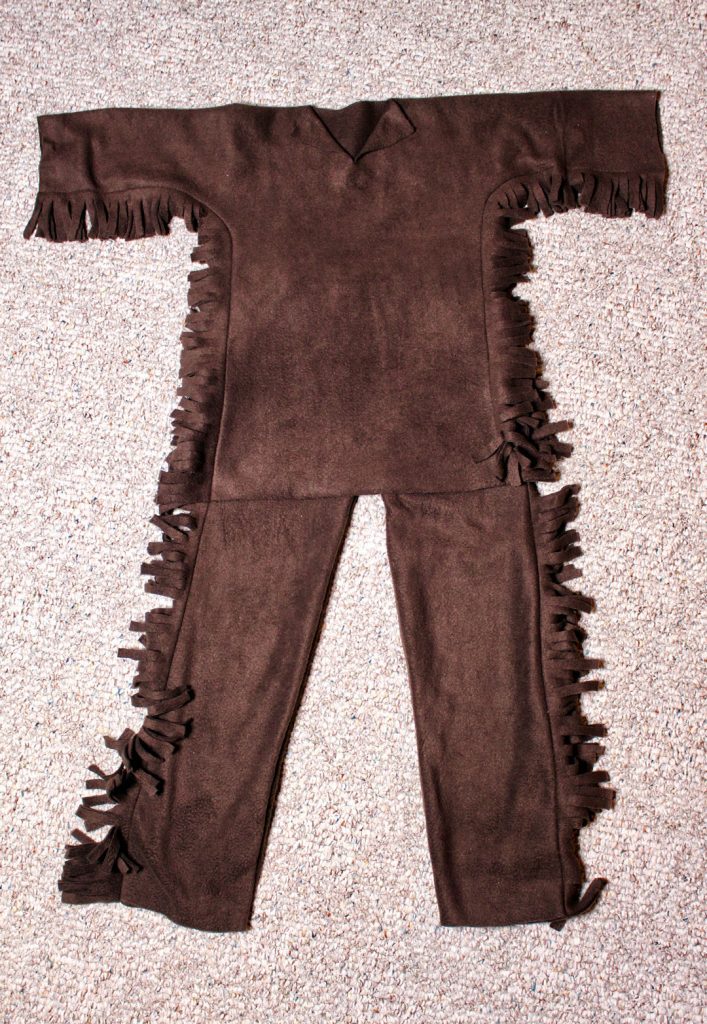
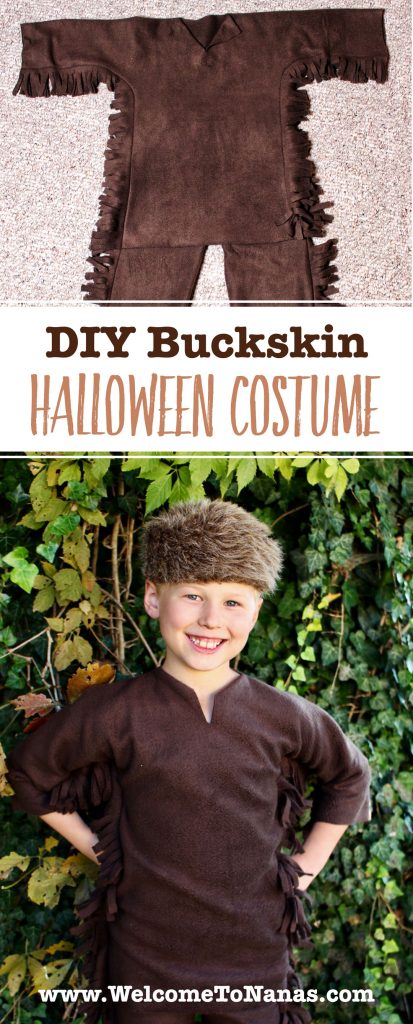
How about rustling up a DIY Buckskin Halloween costume for those grands? A buckskin outfit, complete with fringe, is perfect for any child that wants to be an explorer or settler from the old West for Halloween. This costume can be made for any age grand!
Costumes for Dress Up
After the holiday the costume is great to have in the dress up clothes for whatever imaginative play may happen during the day.
I can’t count how many of these DIY Buckskin Halloween costumes I’ve made over the years. They weren’t always for Halloween, they were also for Christmas and birthday gifts or for plays. One even traveled to Africa with a relative!! Closer to home, the one I made for my son provided unlimited hours of play in the creek. It was the coveted dress up outfit for visiting friends I might add!
Finding the fabric
Click here for a free drawn pattern/guide to help guide you through these steps.
Purchase a brown or beige knit or fleece fabric that is 60 inch wide. Buy the length that measures twice your child’s height. For example, if your grand is 3 feet tall, purchase 2 yards of fabric. The brown fleece I used in this DIY Buckskin Halloween costume was in the bargain bin! Score!!

How to Make a Buckskin Costume
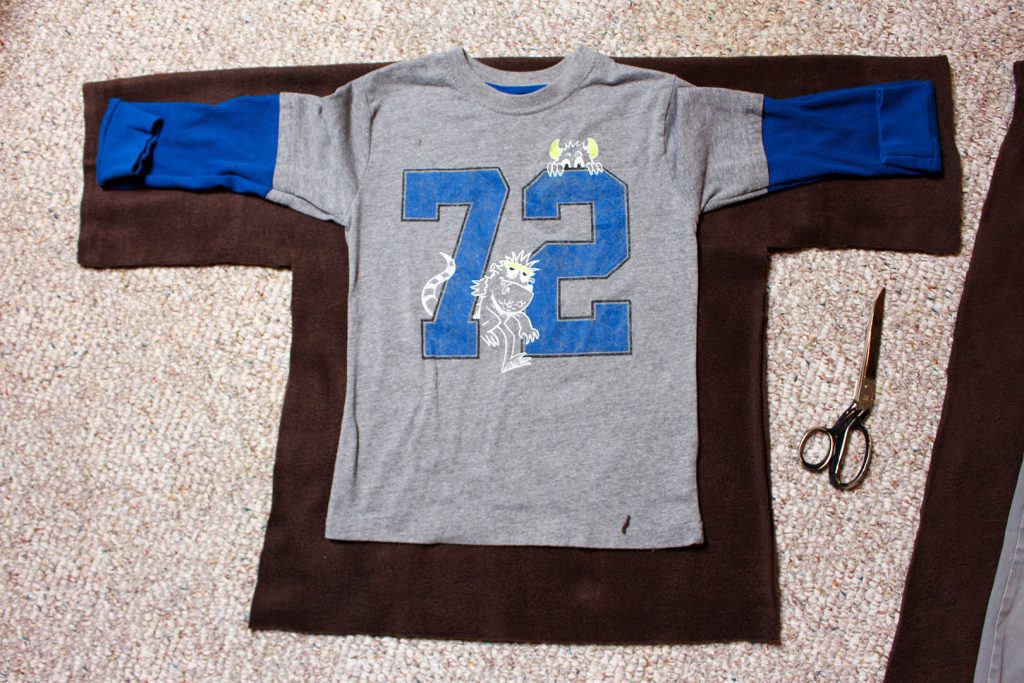
The costume is easy to make and uses one of the child’s outfits (a long sleeved t-shirt and a pair of long pants) as a pattern. There is some sewing that needs to be done but it is minimal.
Open the fabric up and refold it (wrong sides together) with a crosswise fold instead of a lengthwise fold.
Lay out a shirt and pair of pants for a costume
Lay the grand’s pattern shirt on one side of the fabric with the neckline on the fold and the arms straight out to the side. Then lay the grand’s pattern pants on the other side of the fabric, you will not use the fold this time, but cut through both layers of fabric to make two pants pieces.
Cut out the fabric
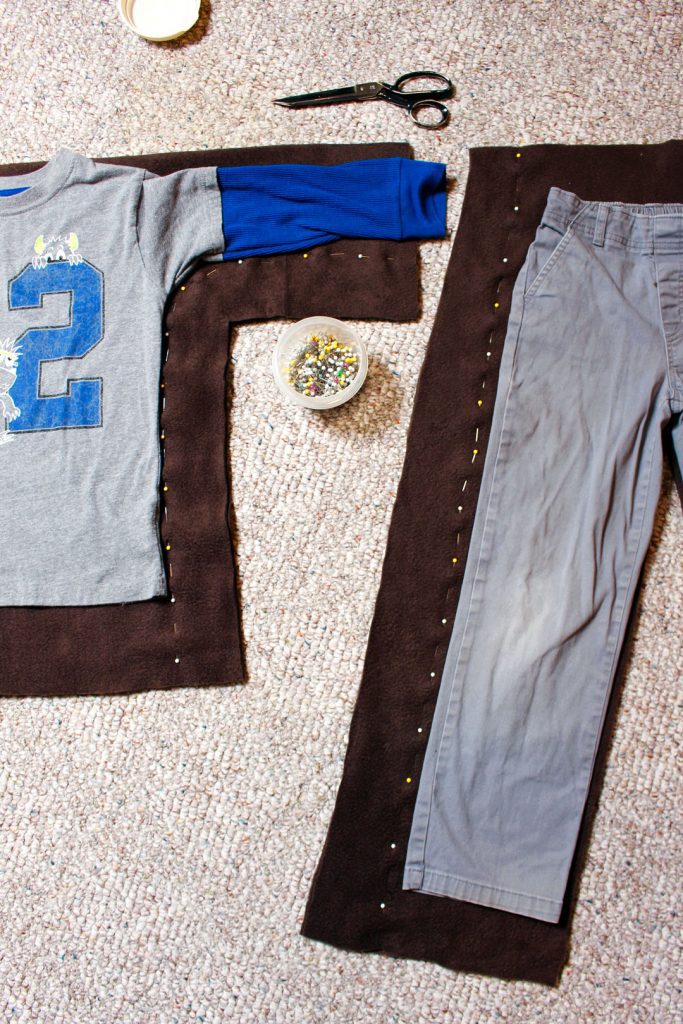
Cut around the pants leaving about 3 ½ extra inches on either side of the pattern pants, 1 ½ extra inches on the top and about ½ extra inch on the inseam of the pattern pants. I made them about 1 ½ inches longer because my grand is growing and the pants pattern is too short for him now!!
Cut around the top leaving about 3 ½ extra inches under the arms and on either side of the pattern shirt. I left about 3 inches extra length on the bottom to give it more of a tunic look. DO NOT CUT THE FOLD ON THE TOP!!!
Pin the pieces together
Using the pants pattern and the shirt pattern for a guide, pin down the sides of the pant fabric and around the underarm and side of the top fabric as shown in the picture. Then take off the shirt pattern and the pants pattern.
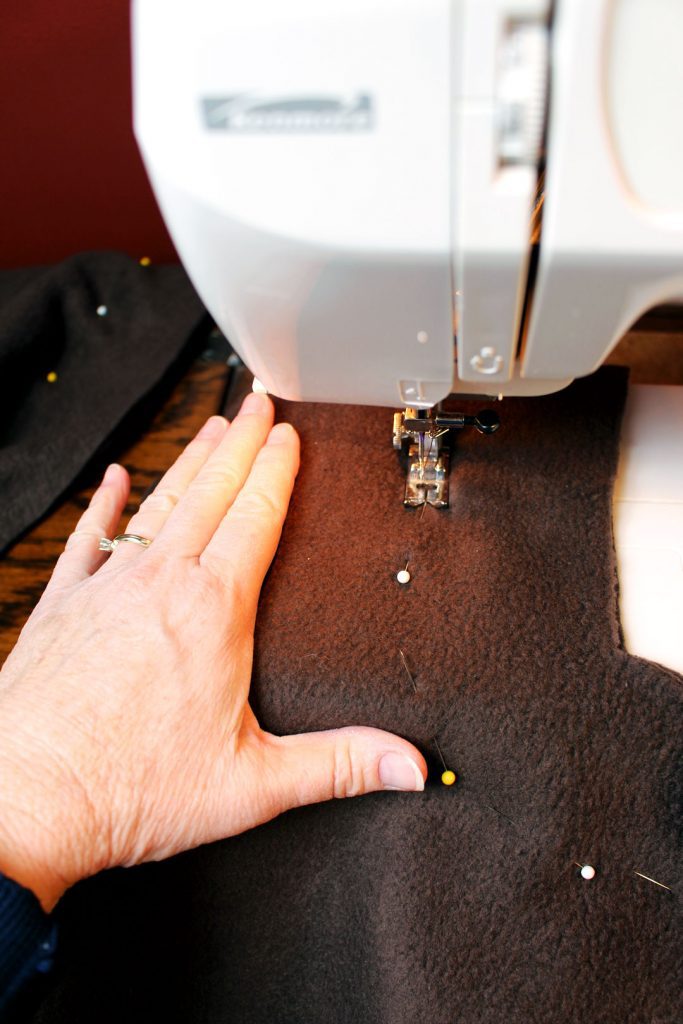
Sew the pieces together
Sew the seam marked by these pins under the arms of the top and on either side of the pants (removing the pins as you stitch). Set the machine stitching to be a small zig zag stitch with a normal stitch length. This gives the seam the ability to stretch a bit along with the fabric.
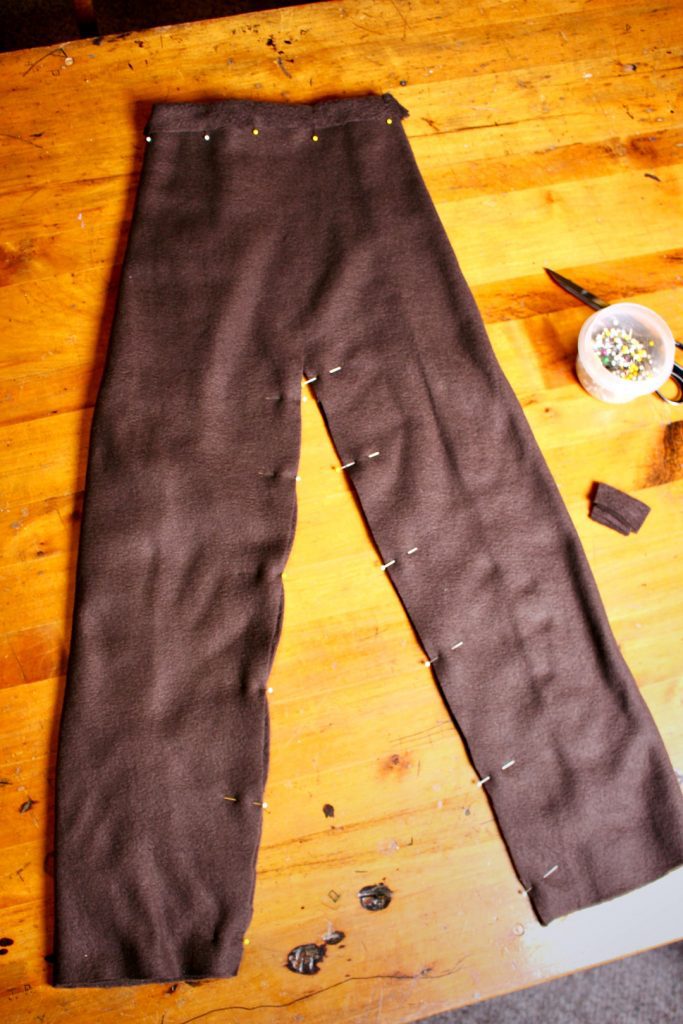
Turn the pants inside out and sew the inner leg seam with a ½ inch seam.
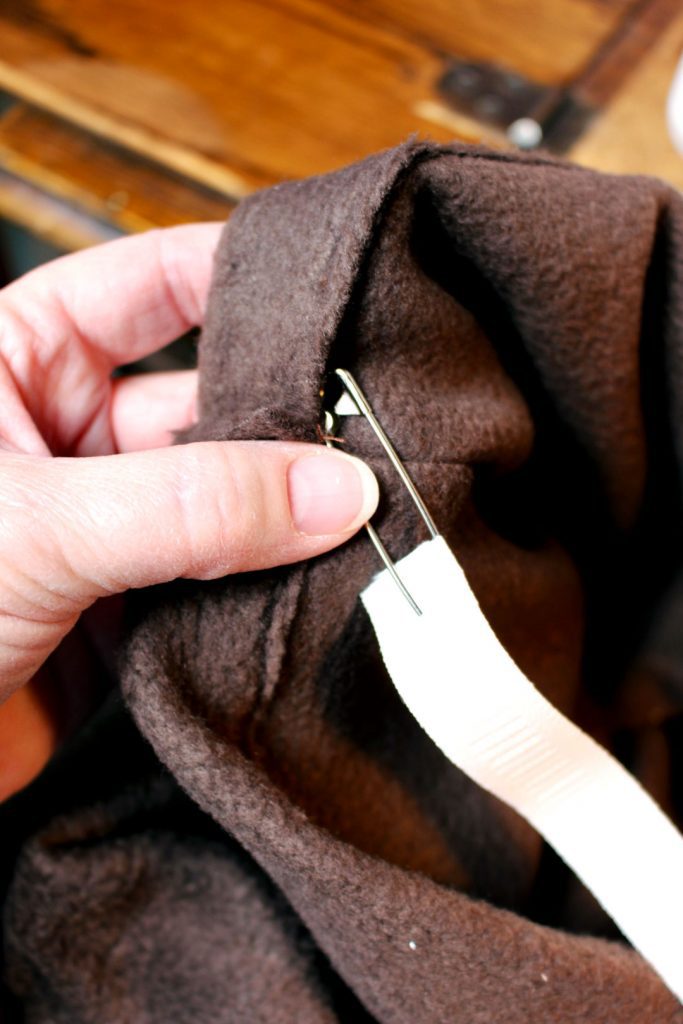
Make a casing
Turn under 1 ½ inches on the top of the pants and stitch it down close to the cut edge (not the folded edge) leaving a 1 inch opening. Run the elastic through the casing. Pull the elastic up to fit the grand’s waist. Cut the elastic with an extra ½-¾ inch on each end. Overlap the ends of the elastic by an inch and sew them together. Stitch over the opening in the casing.
Leave a tip as a guide
Tip: I use a safety pin on the end of the elastic to use as a guide while running the elastic through the casing. It is easy to feel and move through the casing. This technique works great for pushing a drawstring through a casing in sweats or a sweatshirt as well. You’re welcome for that tip!! Ha!
Turn the pants right side out again.
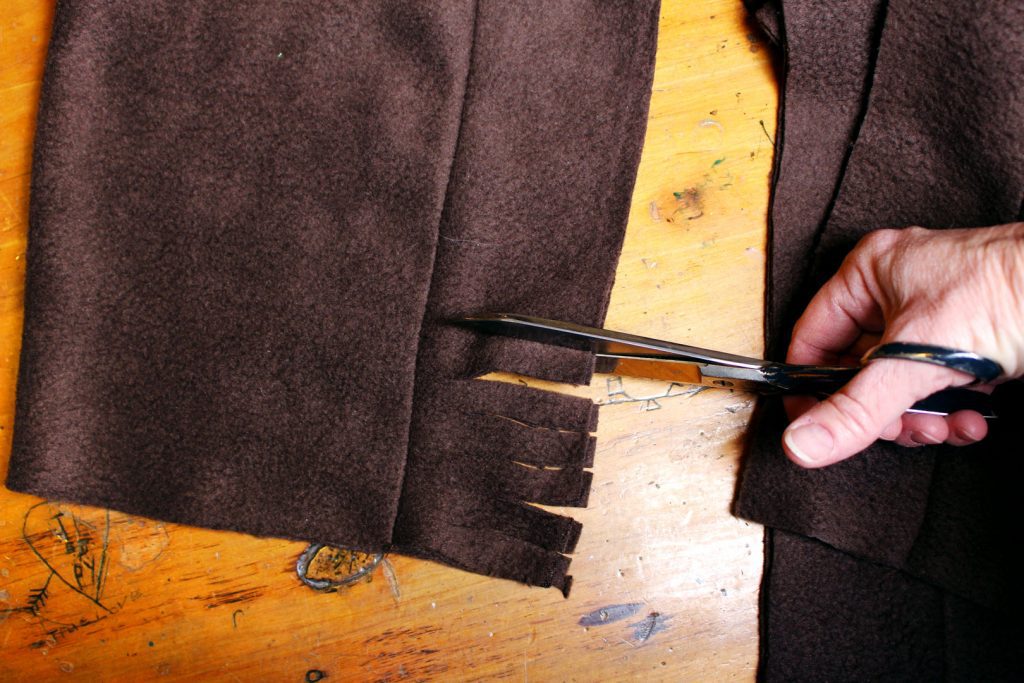
Now the fun part, cut the fringe!
Cut the fringe in about ½ inch pieces. Cut towards the seam but do not cut throughthe seam!! The two places to cut fringe are under the arms on the top and on the sides of the pant legs where you left the 3 ½ extra inches.
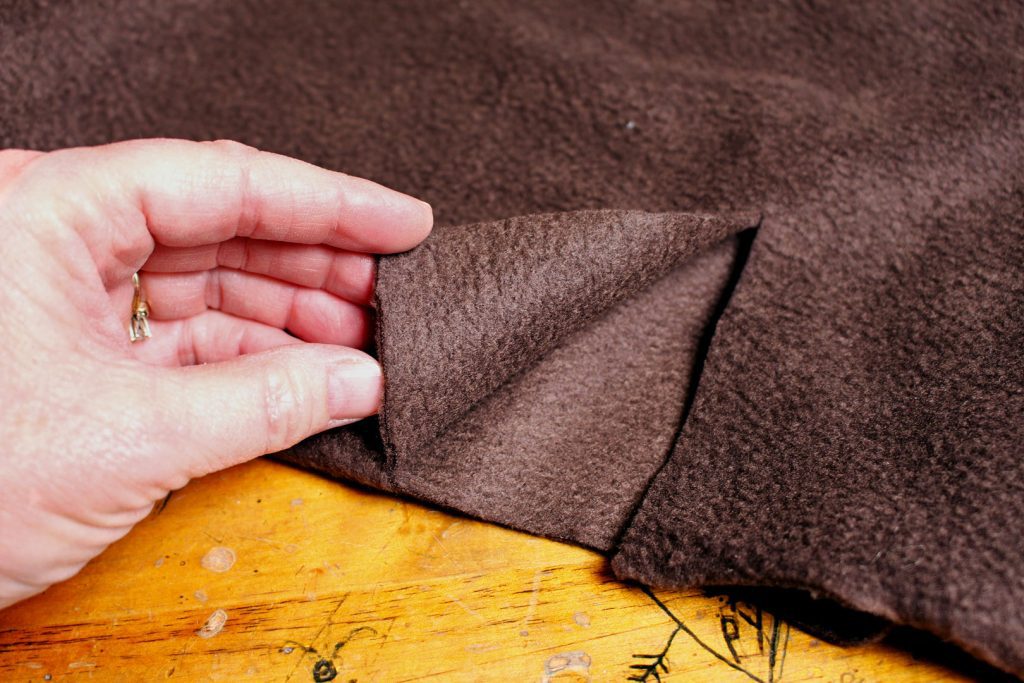
Cut a neck hole
The neck hole is made by cutting a slit in the center of the folded neck edge of the top. Start by cutting the slit about 5 inches long. In the front fabric only, cut a slit down the front that is about 5 inches long. Try the top on the child and see if this is big enough to make it slip over their head. If too small, increase the length of the slits until the neck hole is large enough to fit the head through.
Now try it on!
If you would like to make a dress instead of a top, just use the same technique but lengthen it to right above or below the child’s knees. Skip making the pants if you want and just wear the dress.
Make a costume for every grand if they are interested. Add a coon skin cap, a pack over the shoulder, a bandana and a beard for fun.
Here is that free drawn pattern/guide link again to help you visualize this process.
DIY Buckskin Halloween Costume for Adults
Guess what? You can use this same basic idea and create a DIY Buckskin Halloween costume for an adult too!
I was just thinking. By changing the fabric you use this could be made into so many other costume themes. With leopard print someone could be Pebbles and Bam Bam from the Flintstones, for example. Add a cape and a logo and your grand is their very own super hero!
What are you waiting for!! Ready, set, GO!
I sure hope your grands enjoy the DIY Buckskin Halloween Costume. Send some pictures!
Hey, would you like to have a tutorial on how to make a coon skin cap?
More DIY Halloween Costumes
Looking for more Halloween costume idea inspiration? Check out these fun tutorials and patterns, all of which you can make yourself!
- DIY Animal Masks from Craft Foam
- Super Kid Cape
- Woodland Owl Halloween Costume
- Woodland Deer Halloween Costume
- DIY Black Cat Halloween Costume
Supplies for a Buckskin Costume
- Dark Brown Fleece Fabric Polyester 58-60"
 , in a length that is 2 times your grand’s height)
 - All-Purpose Polyester Brown Thread in the same color as the fabric.
- Scissors
- ¾-Inch White Elastic
Enjoy!
Have a safe time trick-or-treating! If you try this craft, let me know! Go ahead and leave a comment, rate it, and tag a photo with #WelcometoNanas wherever you post.
Come join the fun at https://welcometonanas.com


Blanks says
Beautiful Halloween costume ideas. Kids will definitely love this.
Shelly says
I love homemade costumes! glad you do too!