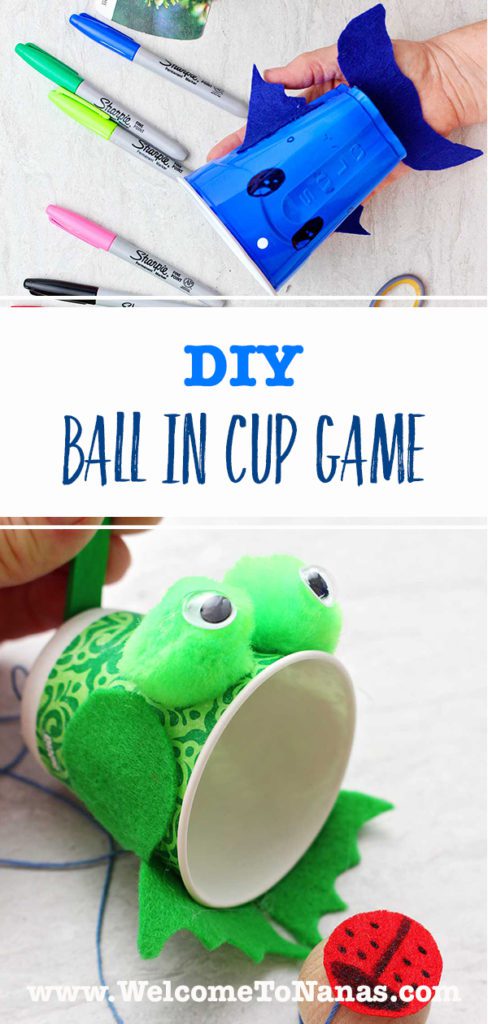
A DIY Ball in Cup Game
This DIY Ball in Cup Game provides both a fun game and a way to upcycle! Use any sized cup, add a handle, and add a small ball on a string. Then put the game into action.
This would be a great craft for a birthday party, holiday party, or as a group activity for school or church. It goes together quickly and is inexpensive.
You could have a competition between kids (young or old) after finishing making the craft. Who can get the ball on a string to land in the cup?
Oldie but a goodie game!
The Ball in Cup Game is a very old game. It has been passed around the world and improved along the way. It is most commonly a wooden cup and ball but let’s put our own twist on it!
What’s great about this craft is that you can upcycle items around the house. Let’s look at some options. Then you can try making several Ball in Cup Games using a variety of item types to see what works best for you.
Let’s start with choosing a cup-
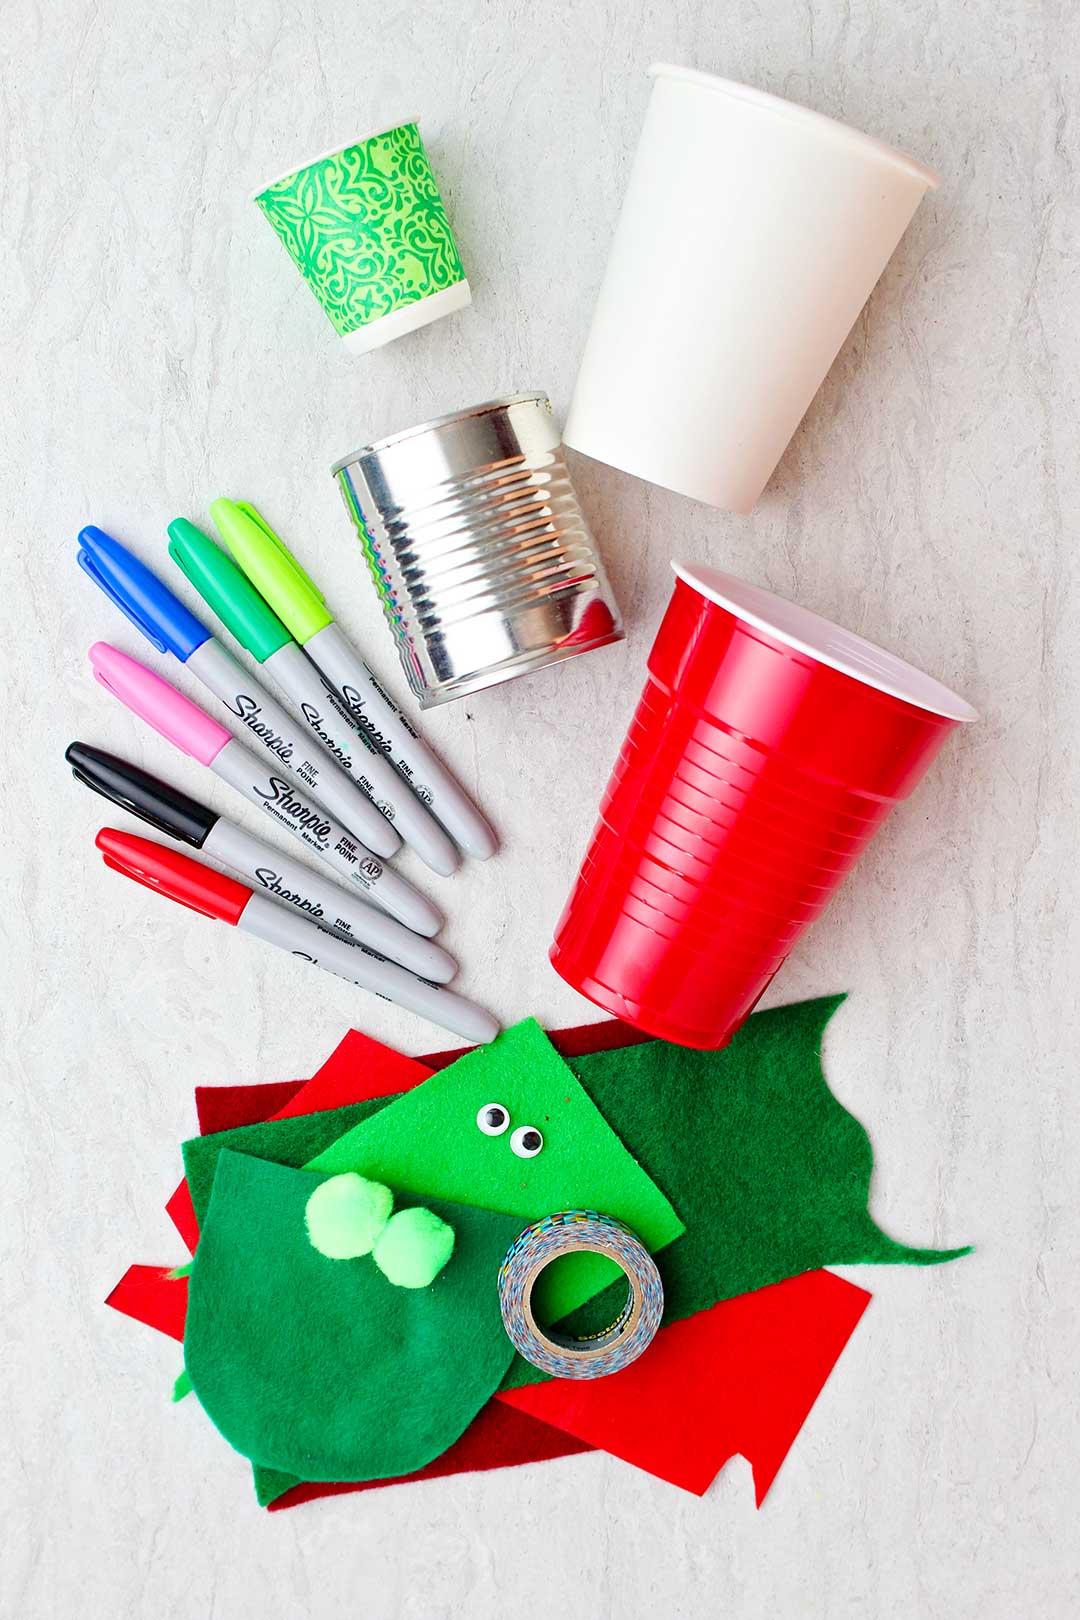
You can use any type or size of cup you would like. Look in your recycle bin and see what’s available. Do you have a lid of an aerosol can, a Dixi cup, a paper or foam cup from the coffee shop, a small food container (like yogurt), or a laundry soap scoop for example?
Keep in mind that the smaller the cup that is used, the harder the game will be.
We started with a recycled plastic Solo cup, so playing the game was simpler because it is a larger cup. But I liked how we could decorate it easily and it is already a bright and cheerful color.
OK, so choose the cup of your choice and then move on to the next choice you need to make.
Decorate your DIY Ball in Cup Game!!
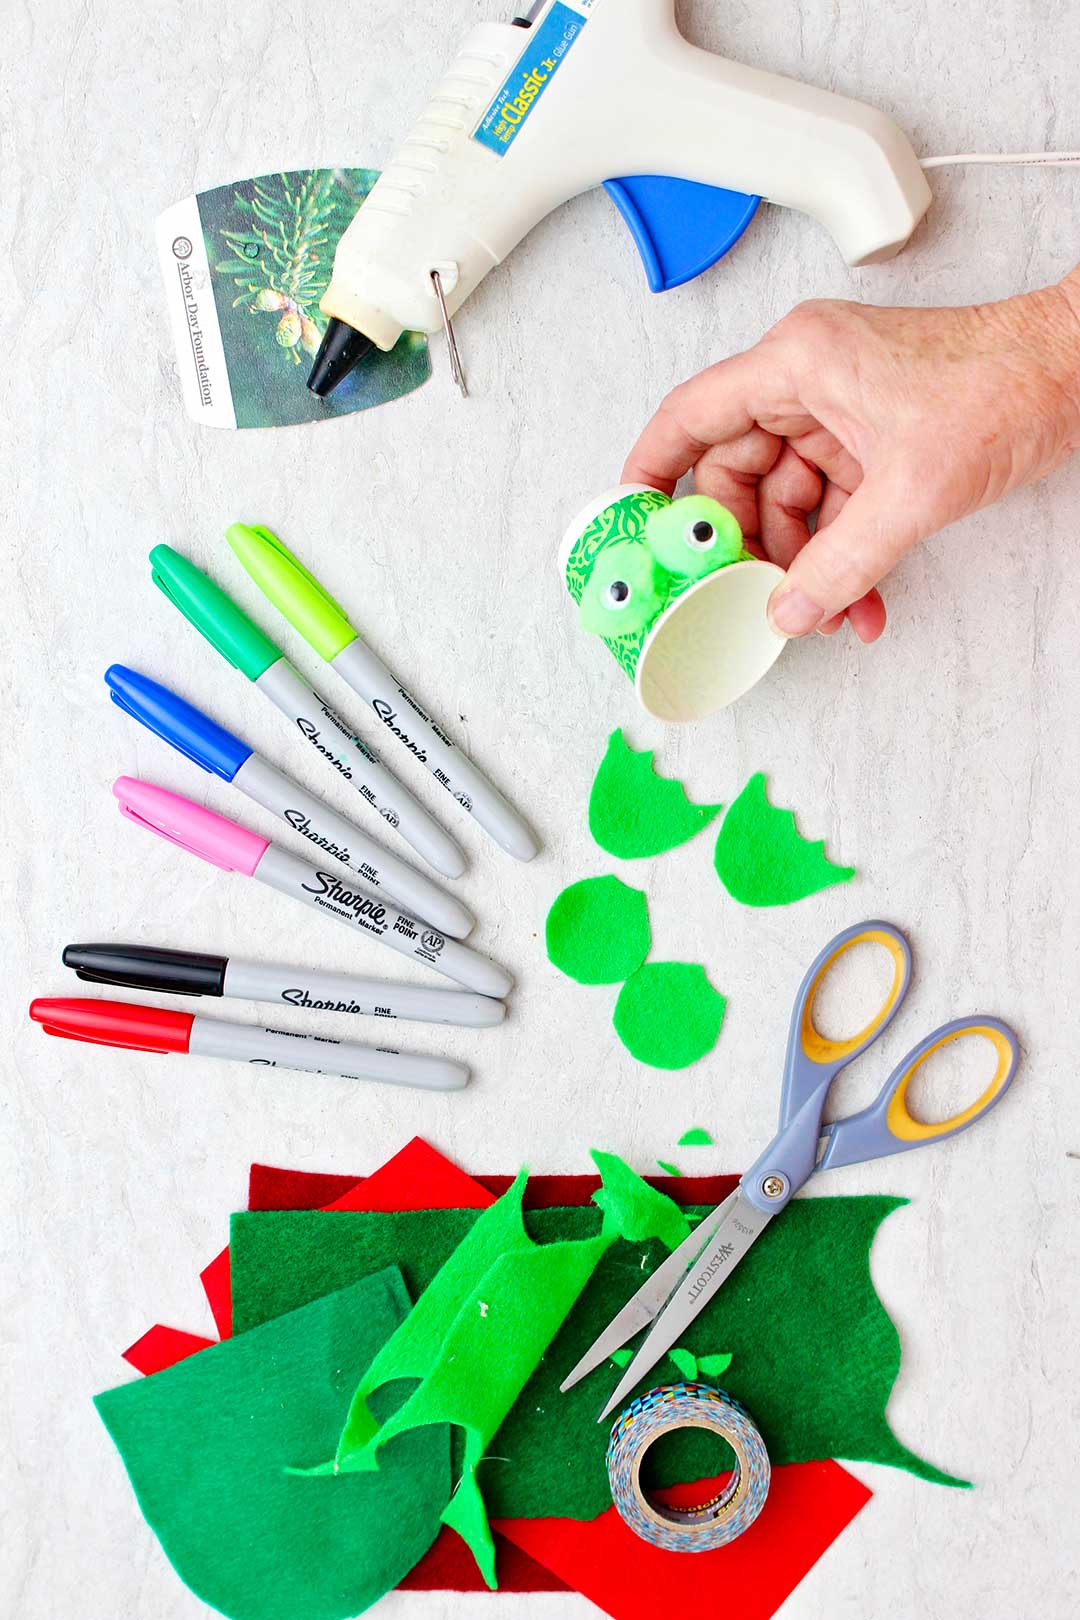
It is usually easiest to decorate your cup before adding the handle and such.
Permanent markers work well on a variety of surfaces (unless the cup is wax covered, like a Dixie cup). You can use stickers, washi tape, cut out pieces of felt, pom-pom balls, googly eyes, construction paper, etc.
Make designs or make the cup look like animals or faces. Whatever you want!
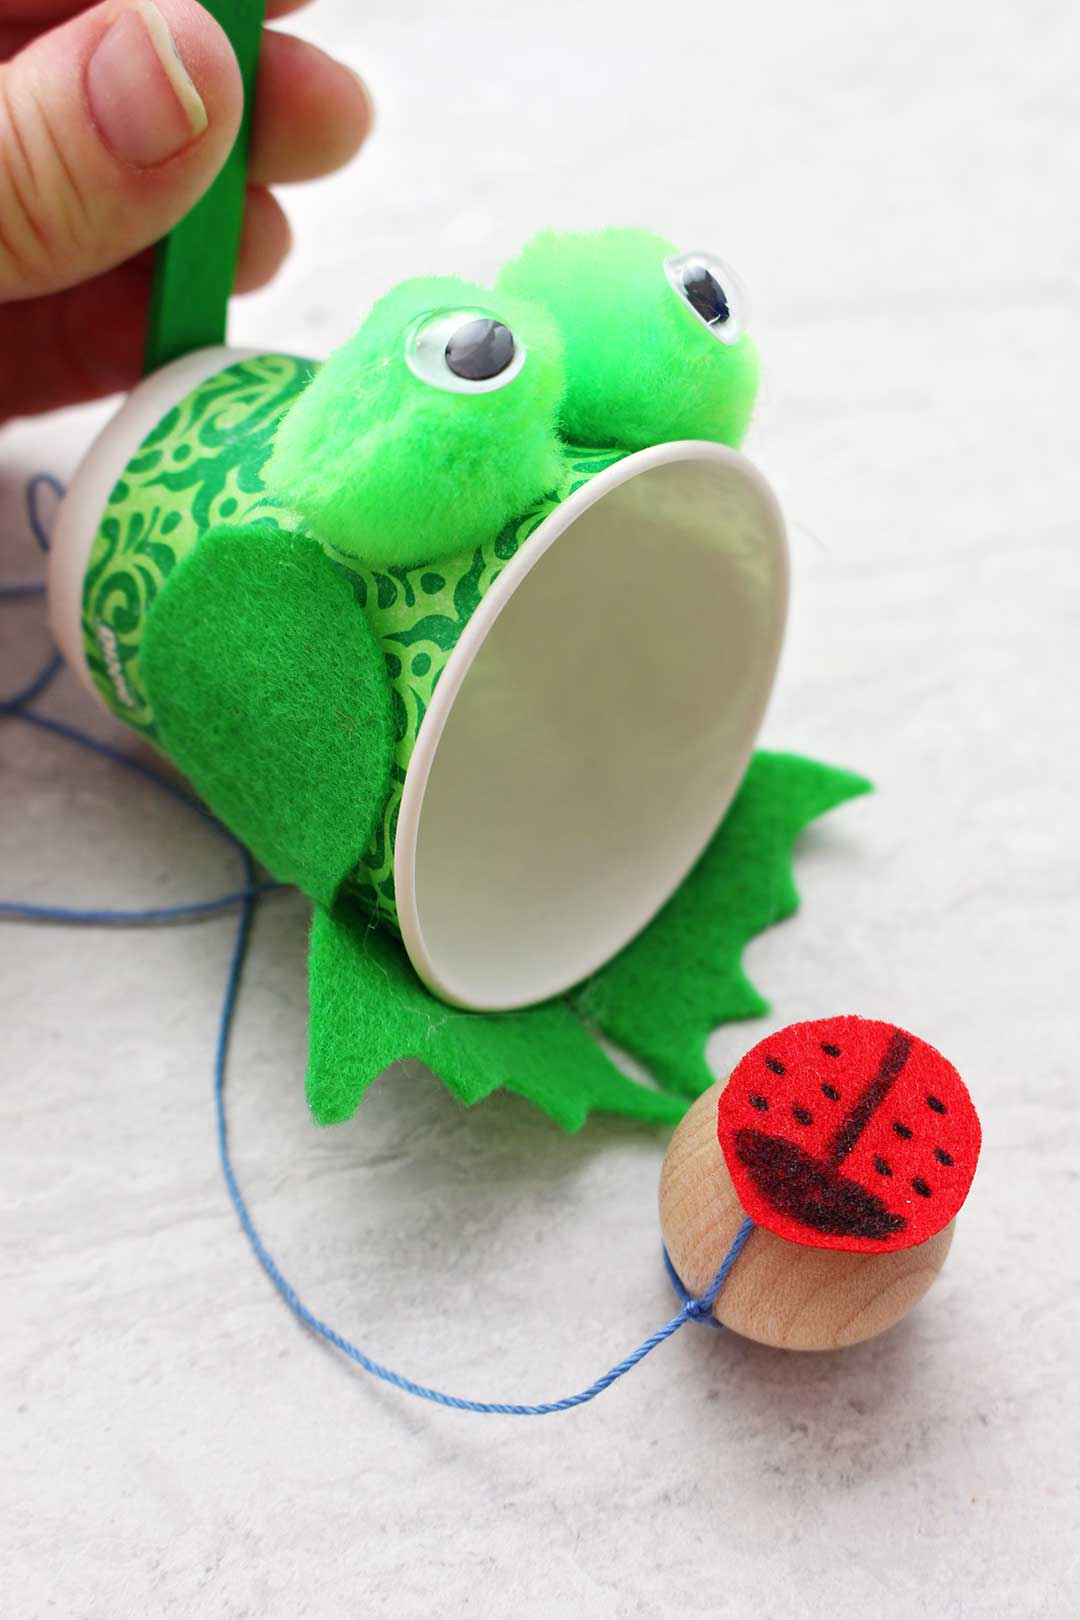
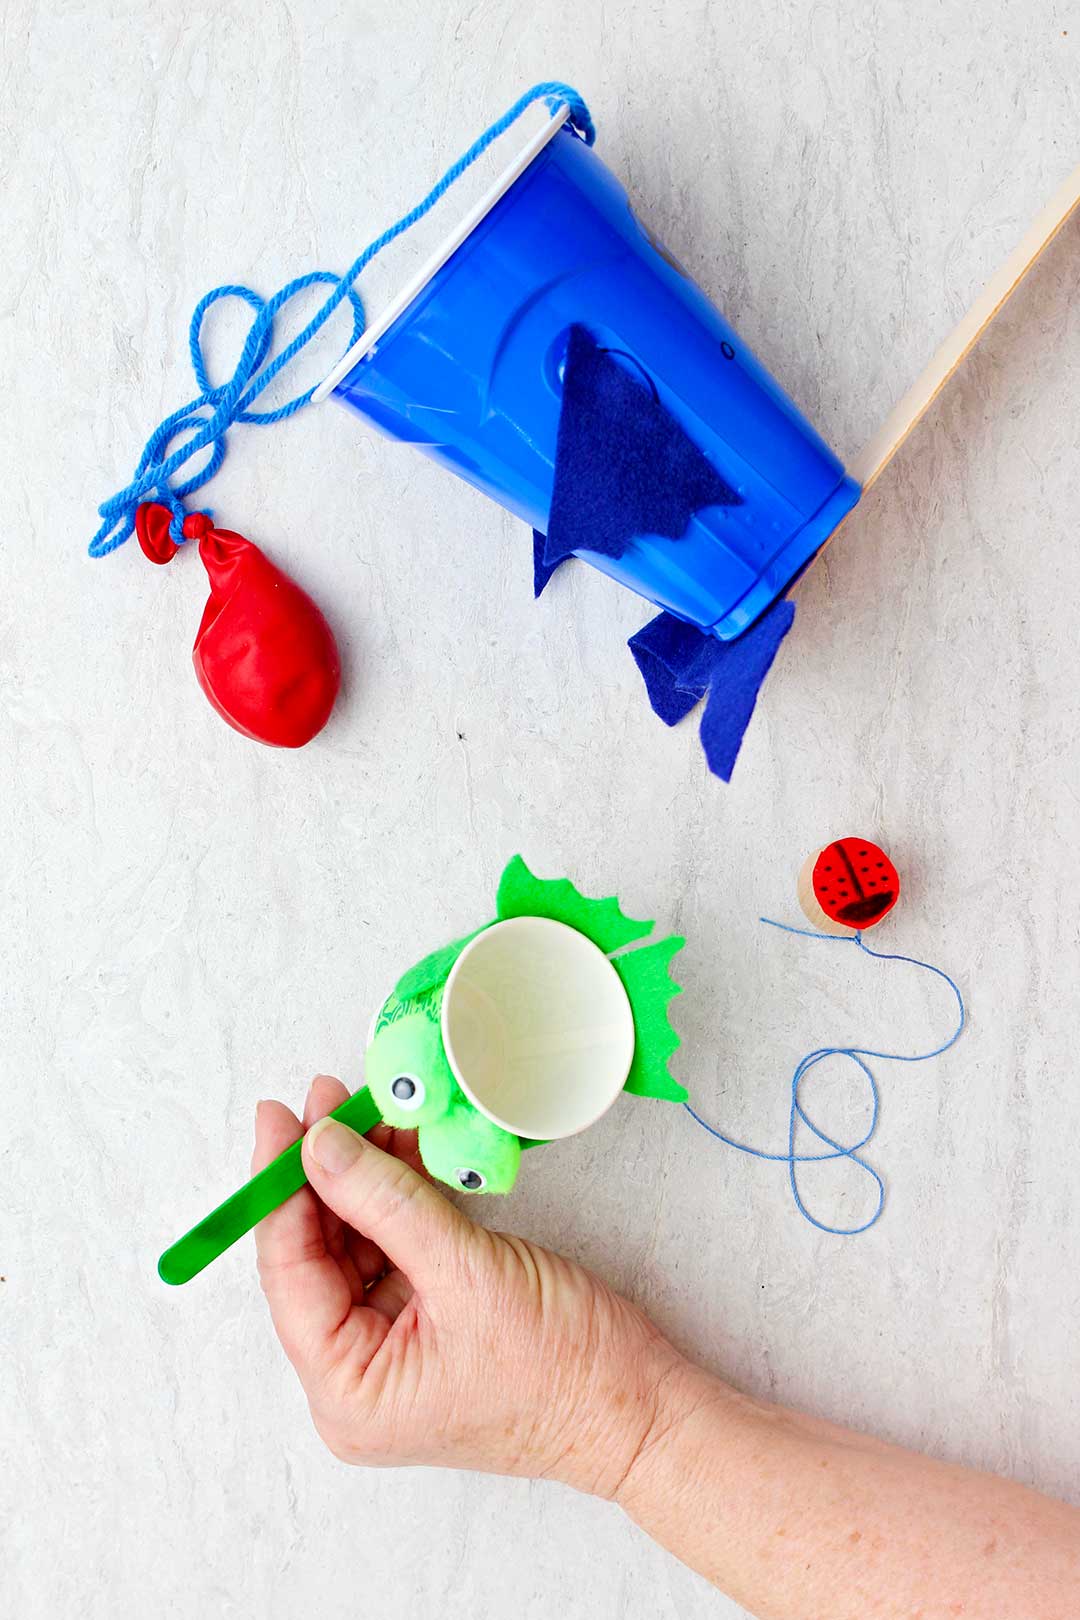
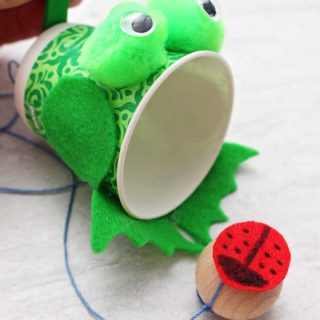
The green patterned Dixi cup should be a frog, don't you think? A couple pom-poms and googly eyes make great frog eyes. And some little cut out webbed feet and legs from felt finish it up. So cute.
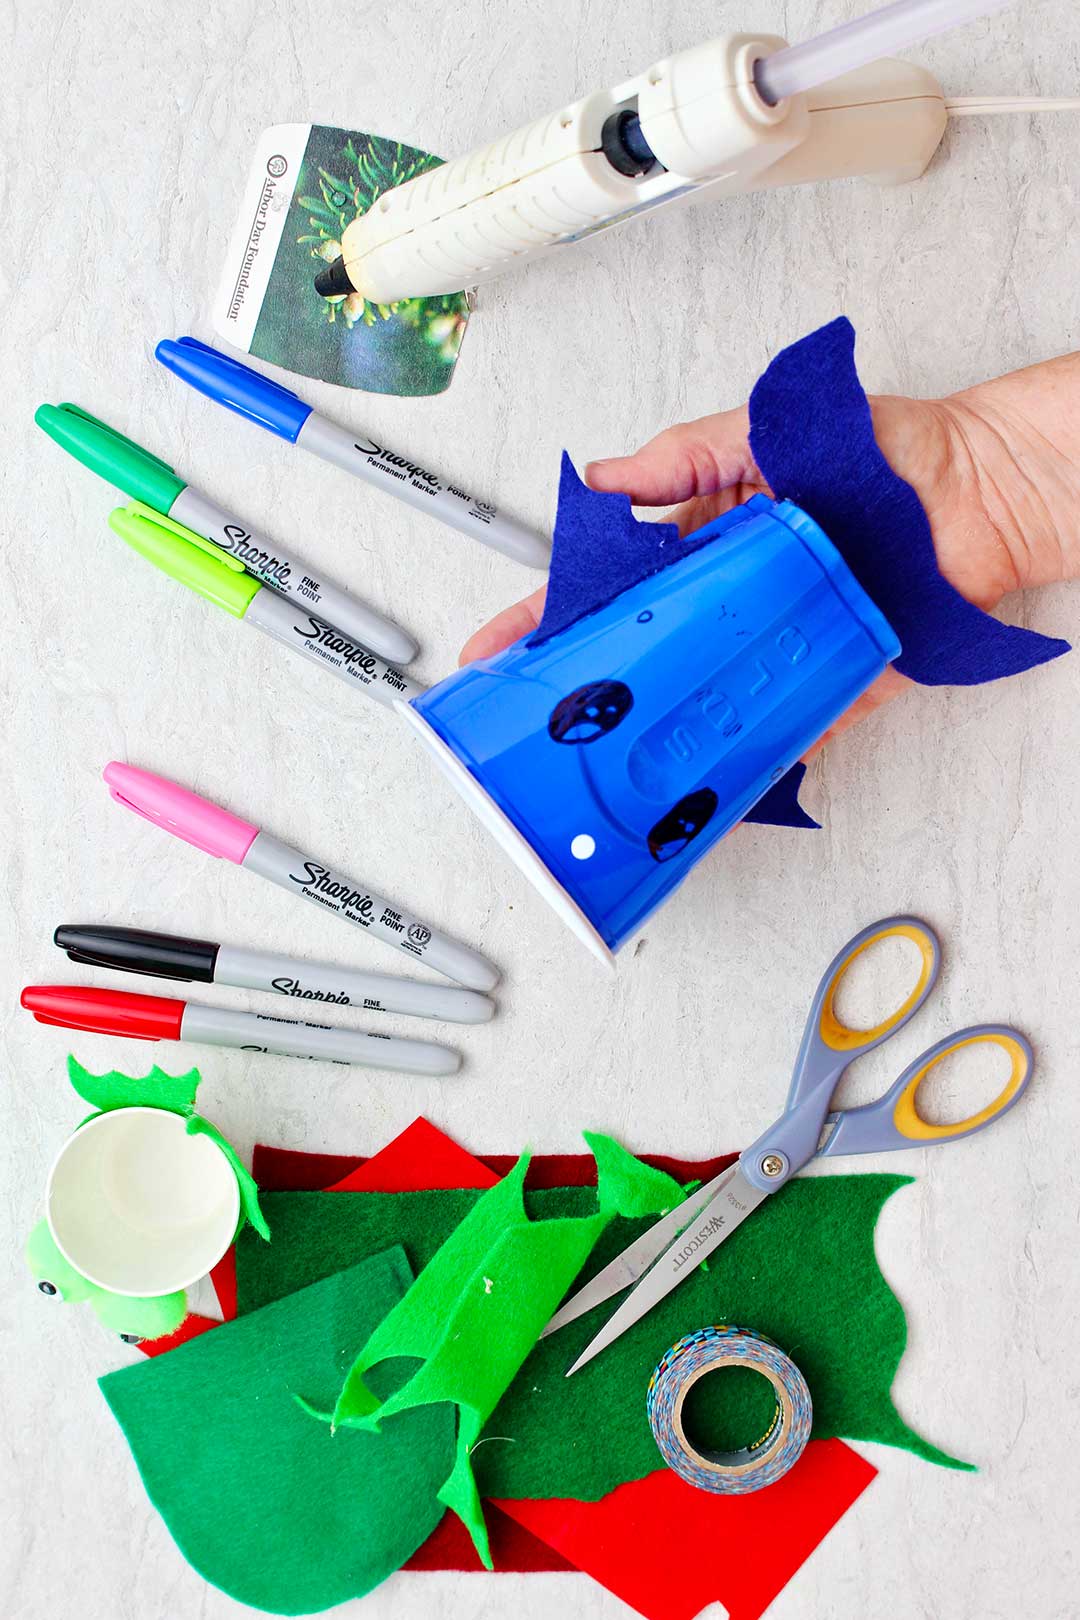
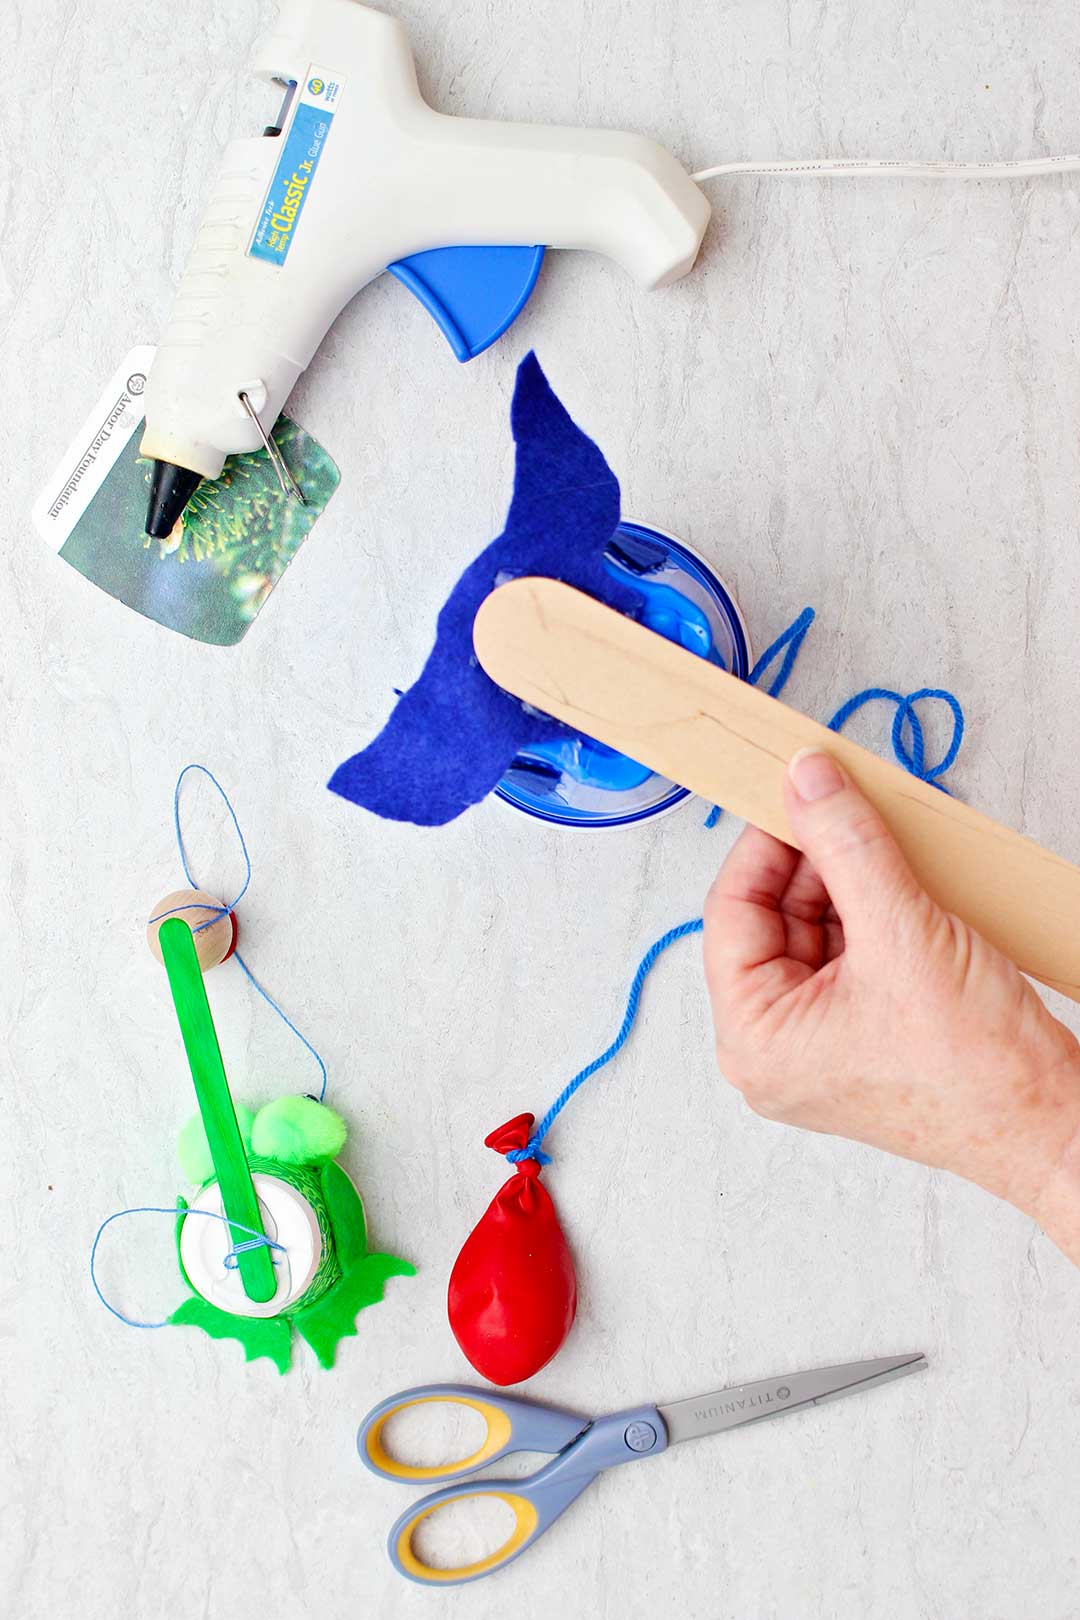
The opening of the blue Solo cup reminded me of a fish, so we added felt fins, a tail, and eyes. Then the fish “ate” the ball when it swung around and went into its’ “mouth”!
Decorating could be designs made with stickers, washi tape, and markers too.
I’m eager to see your decorating ideas!! Be sure to attach pictures.
Next is the string-
Either string, yarn or very light twine will work to connect the ball to the cup. Grab what you have on hand.
You will cut a piece that is between 2-3 feet long. A longer string makes the game more challenging.
The game ball-
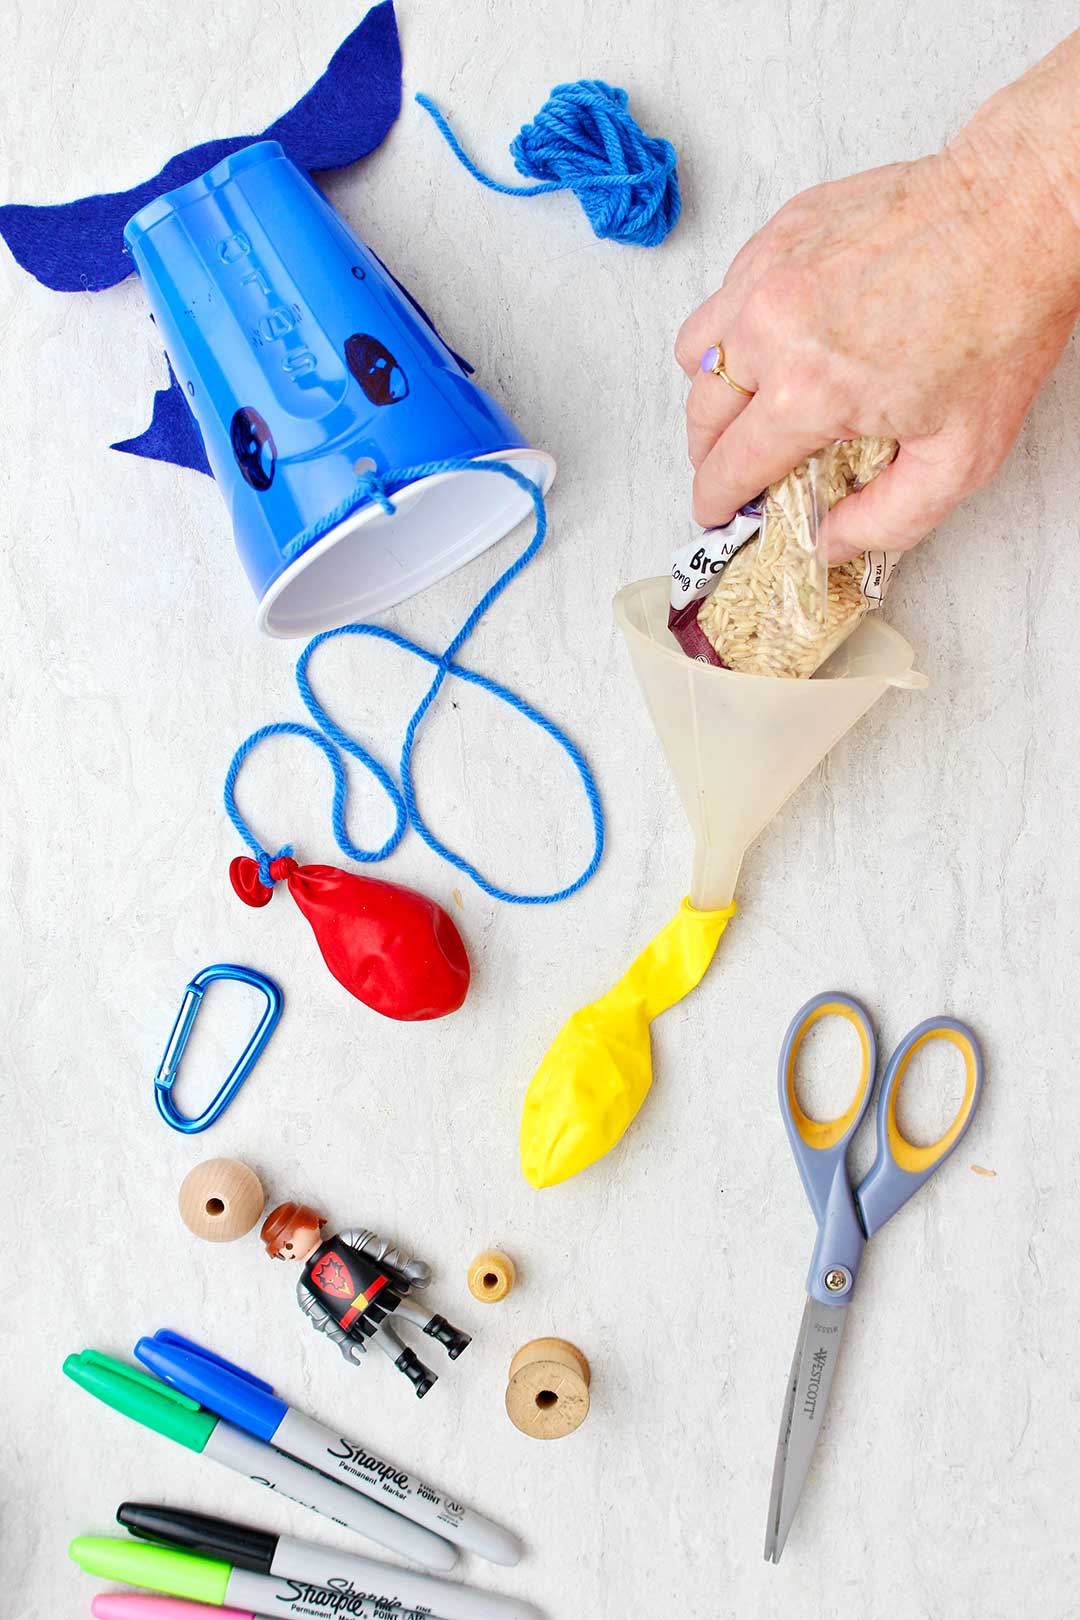
The ball for this game works best if it has a bit of weight to it so a large wooden bead is a great choice. But other options could be a large piece of tube pasta, a small nut or washer, a small toy, or a wadded-up piece of aluminum foil.
I’ve placed about two tablespoons of rice in a balloon and tied a knot in the end and used that for the “ball”. The balloon option worked really well. A small funnel made it possible to get the rice in the balloon. I'll use that for the blue fish ball in cup game.
My choice for the frog cup is a wooden bead.
It’s nice if the object naturally has a hole in it so it can easily be tied to the cup, but you can improvise.
Lastly, the handle for the cup-
This ball in cup game usually places the cup on a handle that you hold so you swing the ball and cup as you play. See what you have that could work as a handle. A wooden tongue depressor, paint stirrer, wooden skewer (we will cut the point off for safety), popsicle sticks (for a small cup), or a pencil are all options.
Putting it all together-
So depending on what your upcycled items are, you will need to adapt these instructions to work for you. Again, try making more than one to see what you like best.
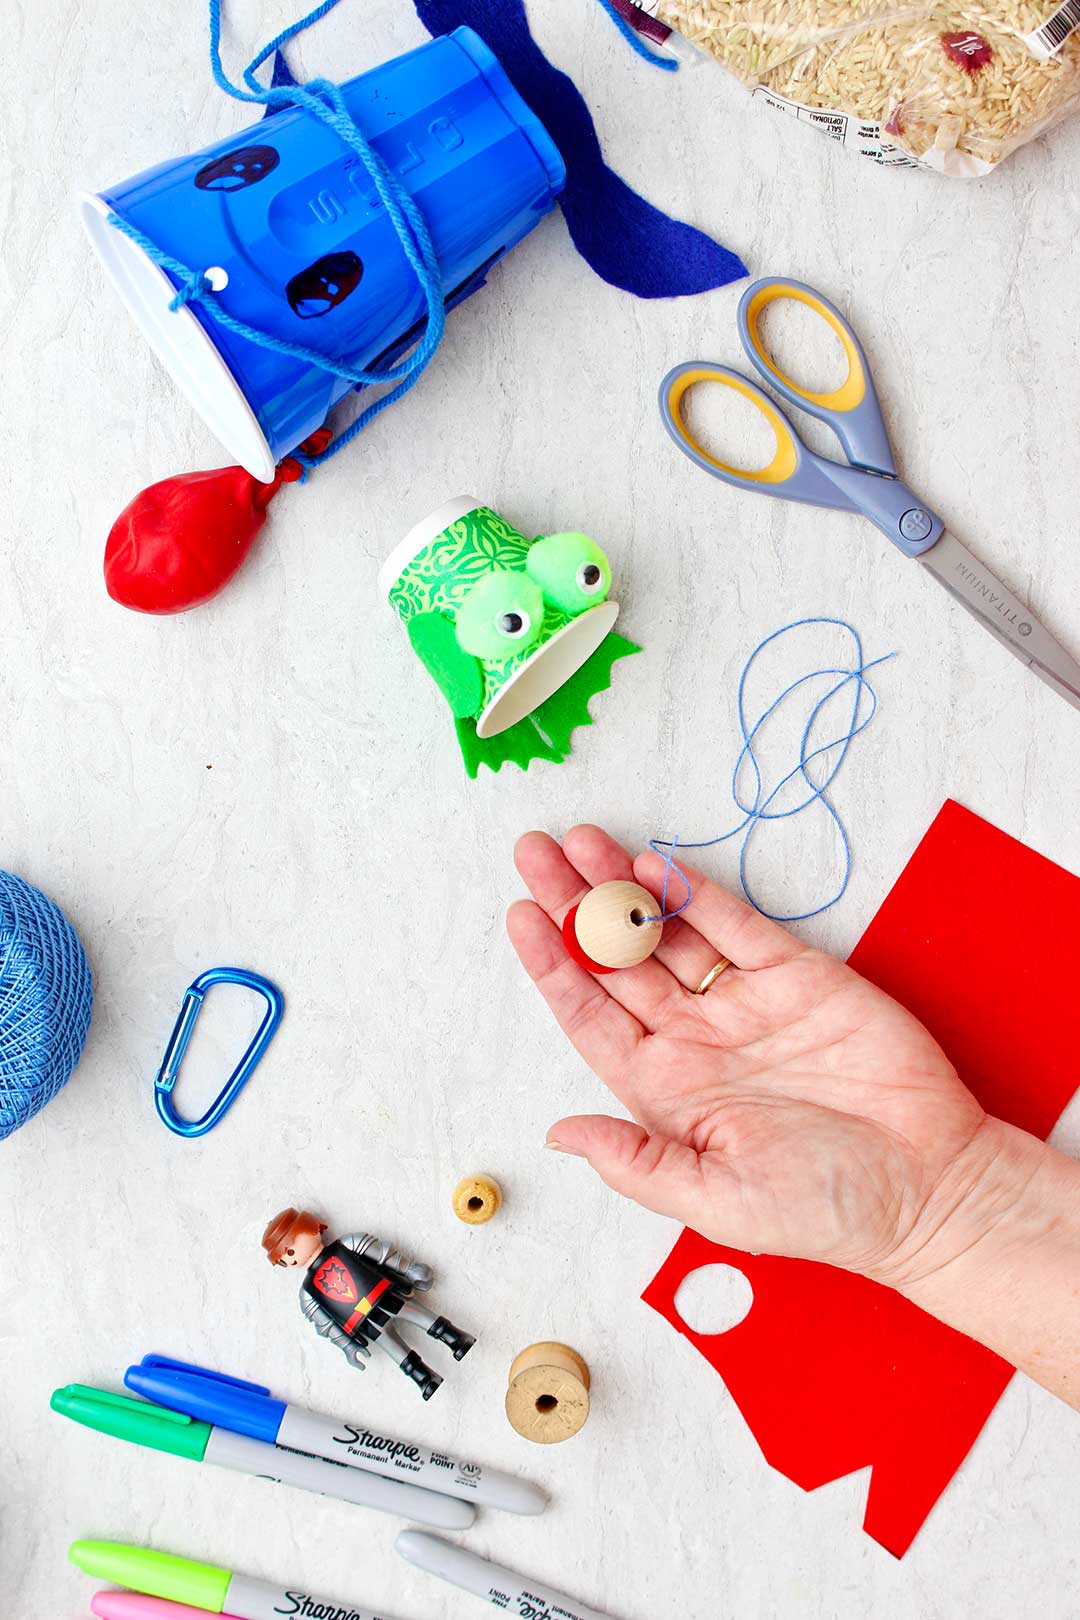
First let’s tie the ball to the string and get it ready to glue in with the handle.
I have a container of wooden beads from a previous project so I’m going to try that with the frog cup. I’m also going to try a balloon with some rice in it for the fish cup.
Cut about two to three feet of string and tie your bead (or other object) to one end. Tie it well so it doesn’t fly off easily.
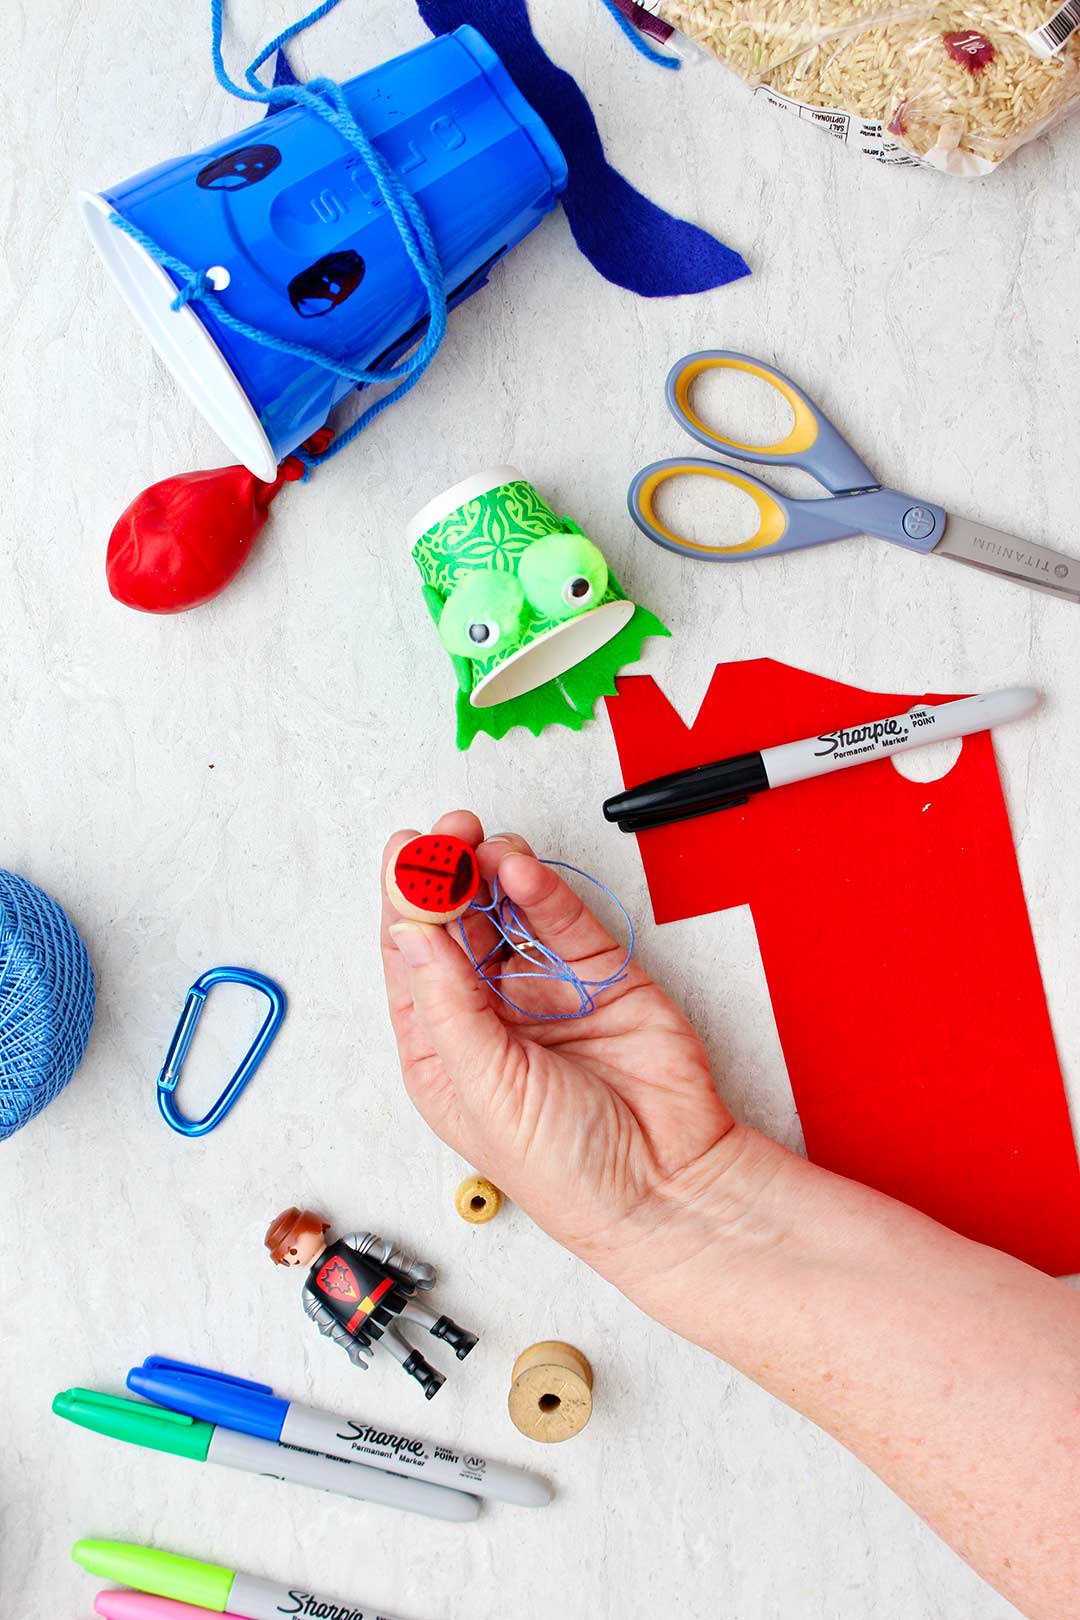
I couldn't help adding a little red piece of felt to be a "bug" for the frog to eat when the bead goes in the cup.
You will glue the other end to the cup as you add the handle.
Note: If you do choose to use the washer or metal nut, it would be good to cover it well with tape as padding after it is tied onto the string.
Adding the handle-
Adding a handle to the cup can be done in two different ways.
You can cut a slit or poke a hole in the bottom or sides of the cup, stick the handle of choice through, along with the string that will attach to the ball and then hot glue it in place.
Obviously, this is a step that kids will need help to do as it takes both a sharp item to poke a hole and a hot glue gun.
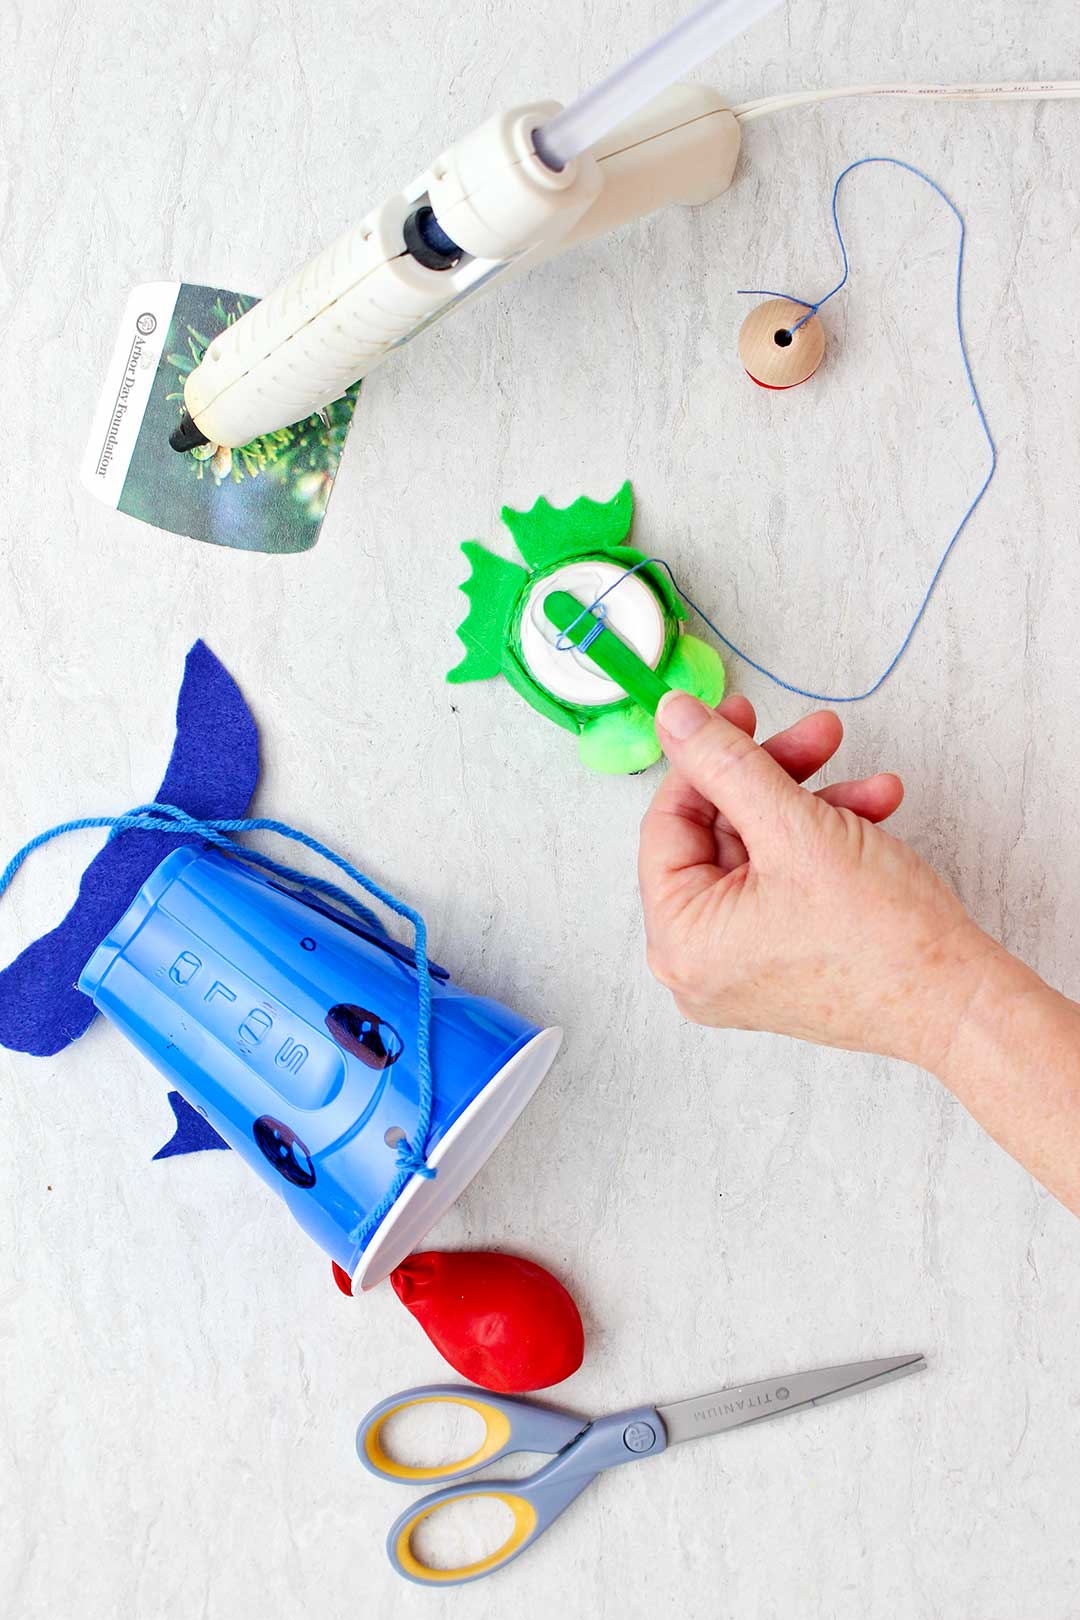
Or you can hot glue the bottom of the cup onto the end of the flat handle of choice (like the tongue depressor), along with the string. This is the choice that I think is the easiest for kids to do themselves if they are old enough to use a glue gun.
Add some hot glue to the bottom of the cup and lay the string over the glue. Then add a bit more glue and press the tongue depressor over it.
Note: I like to tie the string to the handle before gluing them down to the cup to add a bit of help holding the string to the cup.
Let the glue completely cool before starting to use the game.
Note: It works best to use a low-temp glue gun. The glue and end of the glue gun are still hot but less so than the traditional hot glue gun. This is less likely to melt the plastic of your cup. Be sure to teach your kids about how to handle a glue gun.
No handle-
It is also an option to just leave the handle off and hold onto the cup itself instead of a handle. I did this for younger kids with the Solo cups and that worked well. This makes the game easier, but it also made it more simple for the littles to make. Your choice.
With no handle you can attach the string to the cup by poking a small hole in the top or bottom of the cup and pulling the string from the outside into the inside of the cup. A hole puncher works well. Tie a small bead to this end of the string and then hot glue the bead to the bottom of the cup.
You can try making several of the Ball in Cup Games using different choices of cups and designs.
Now let the competition begin!! How many times can you swing the ball and get it into the cup in a minute? If you make these at a party, you could have a prize for the winner!
We had a wooden one of these when I was a kid that we picked up in a souvenir shop on vacation. It got used until it fell apart. Sure is fun to know how to make our own!!
Want some other game crafts to make? Try these:
- DIY Carnival Game Bean Bag Toss
- Custom Pin the Tail Party Game
- License Plate Bingo Game
- DIY Paper Fortune Teller Cootie Catcher
- DIY Yarn Laser Maze Indoors
Enjoy!
If you try this craft, let me know! Go ahead and leave a comment, rate it, and tag a photo with #WelcometoNanas wherever you post.
Come join the fun at https://welcometonanas.com
DIY Ball in Cup Game from Recycled Cup
Equipment
- Hole puncher (optional)
- Hot glue gun and glue sticks- dual temp so there is a low temp setting
- Scissors
Items Required
- Cup (any size and recycled is great)
- String or yarn
- Small ball (large wooden bead, small ball, or balled up piece of aluminum foil, balloon with rice in it, etc.)
- Tongue depressor, paint stick, or pencil (optional)
- Items to decorate with (optional- permanent markers, googly eyes, pom-poms, felt, construction paper, washi tape, felt, stickers)
Instructions
- You can use any type or size of cup you would like. Look in your recycle bin and see what’s available. Do you have a lid of an aerosol can, a Dixi cup, a paper or foam cup from the coffee shop, a small food container (like yogurt), or a laundry soap scoop for example?
- It is usually easiest to decorate your cup before adding the handle and such.Permanent markers work well on a variety of surfaces (unless the cup is wax covered, like a Dixie cup). You can use stickers, washi tape, cut out pieces of felt, pom-pom balls, googly eyes, construction paper, etc. Make designs or make the cup look like animals or faces. Whatever you want!
- The ball for this game works best if it has a bit of weight to it so a large wooden bead is a great choice. But other options could be a large piece of tube pasta, a small nut or washer, a small toy, or a wadded-up piece of aluminum foil. I’ve placed about two tablespoons of rice in a balloon and tied a knot in the end and used that for the “ball”. The balloon option worked really well. A small funnel made it possible to get the rice in the balloon.
- This ball in cup game usually places the cup on a handle that you hold so you swing the ball and cup as you play. See what you have that could work as a handle. A wooden tongue depressor, paint stirrer, wooden skewer (we will cut the point off for safety), popsicle sticks (for a small cup), or a pencil are all options.
- So depending on what your upcycled items are, you will need to adapt these instructions to work for you. Again, try making more than one to see what you like best.First let’s tie the ball to the string and get it ready to glue in with the handle.Cut about two to three feet of string and tie your bead (or other object) to one end. Tie it well so it doesn’t fly off easily.
- Adding a handle to the cup can be done in two different ways. You can cut a slit or poke a hole in the bottom or sides of the cup, stick the handle of choice through, along with the stringthat will attach to the ball and then hot glue it in place. Obviously, this is a step that kids will need help to do as it takes both a sharp item to poke a hole and a hot glue gun. Or you can hot glue the bottom of the cup onto the end of the flat handle of choice (like the tongue depressor), along with the string. This is the choice that I think is the easiest for kids to do themselves if they are old enough to use a glue gun.Add some hot glue to the bottom of the cup and lay the string over the glue. Then add a bit more glue and press the tongue depressor over it.Note: I like to tie the string to the handle before gluing them down to the cup to add a bit of help holding the string to the cup.
- It is also an option to just leave the handle off and hold onto the cup itself instead of a handle. I did this for younger kids with the Solo cups and that worked well. This makes the game easier, but it also made it more simple for the littles to make. Your choice.With no handle you can attach the string to the cup by poking a small hole in the top or bottom of the cup and pulling the string from the outside into the inside of the cup. A hole puncher works well. Tie a small bead to this end of the string and then hot glue the bead to the bottom of the cup.
Video
Notes
Supplies for the DIY Ball in Cup Game:
- Cup (any size and recycled is great)
- String or yarn
- Small ball (large wooden bead, small ball, or balled up piece of aluminum foil, balloon with rice in it, etc.)
- Hole puncher (optional)
- Tongue depressor, paint stick, or pencil (optional)
- Hot glue gun and glue sticks- dual temp so there is a low temp setting
- Items to decorate with (optional- permanent markers, googly eyes, pom-poms, felt, construction paper, washi tape, felt, stickers)


Leave a Reply