Learn how to draw a Simple Volleyball Drawing with good instructions from an experienced teacher! With easy step by step instructions I’ll guide you through drawing a 2D line drawing to use for a coloring sheet or a 3D drawing with shading.
Jump to:
- Cute Craft Alert: Draw a Volleyball Easy!
- The History of Volleyball
- Equipment for How to Draw a Volleyball Easy
- Supplies for a Simple Volleyball Drawing
- How to Draw a Volleyball Step by Step
- Craft Tips to Make a Volleyball Easy to Draw
- Craft Variations for this Volleyball Ball Draw
- FAQ to Make Volleyball Drawing Simple
- More Fun "Round" Drawing Tutorials for Kids!
- Come Join the Fun at WTN!
- More Crafts Please!
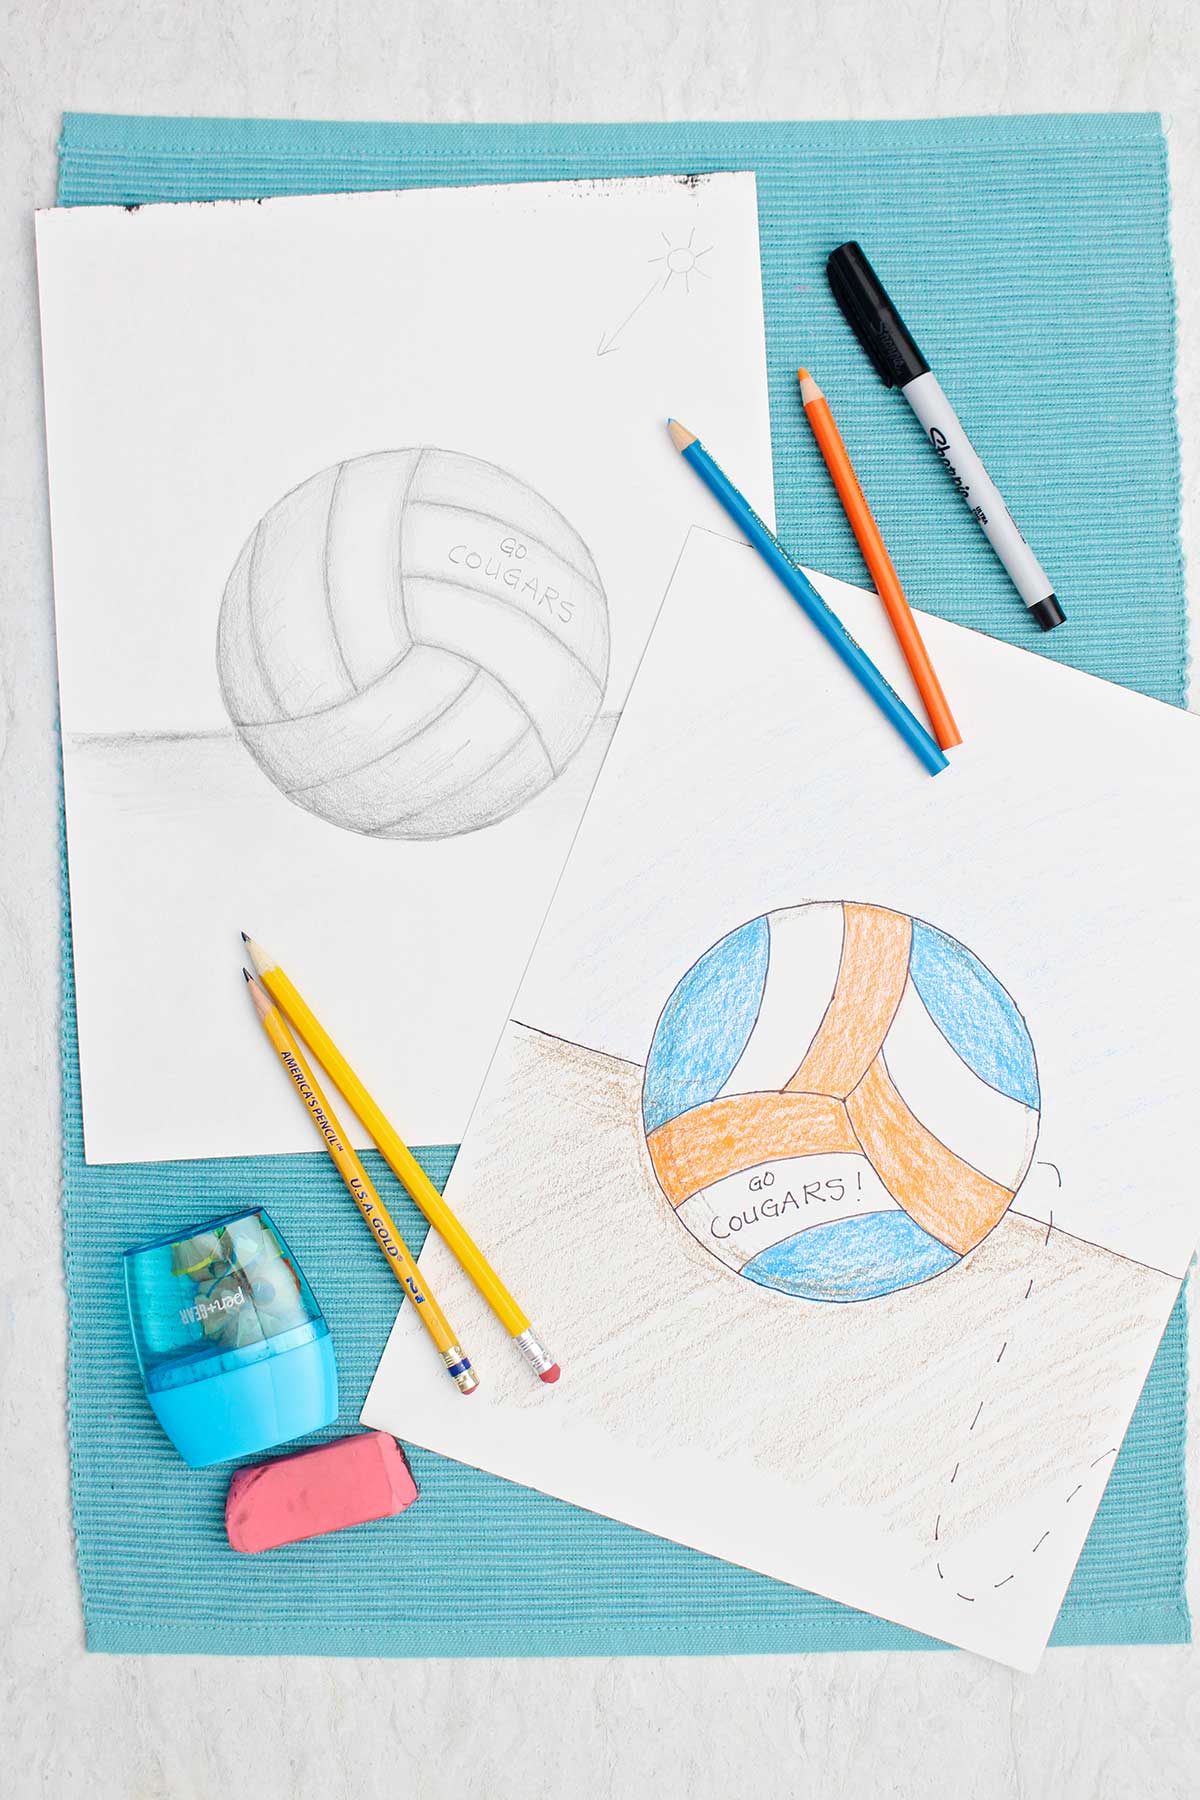
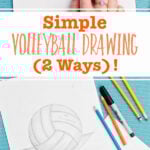
- Simple Volleyball Drawing (2 Ways)!
Cute Craft Alert: Draw a Volleyball Easy!
Kids love to play sports and volleyball is at the top of the list of one of my favorite people, our granddaughter!
She loves team sports and she loves crafts. Of course I need to have a post on making drawing volleyball balls easy! But this is for you, too, whether you play on a volleyball team or on a beach outside! Let me know what you think.
Learn how to draw a volleyball in two different styles, made easy with me as a tutor by their side. 27 years in classrooms comes in handy, huh?

The History of Volleyball
Check out this interesting story...
A man named William G. Morgan invented a new game in 1895 that he called mintonette (because it had similarities to badminton). William was the head of physical education in the Holyoke, Massachusetts YMCA. He wanted a game that was less strenuous than basketball for the older or less athletic businessmen in his program at that YMCA.
He invented a set of rules and regulations and the game was published in a YMCA handbook. The rules evolved over time into the rules of the sport we know today.
Even the ball had to be specially invented to be the right size and weight. He asked Spalding & Co. to make the ball (that we are drawing today!).
The game spread to other YMCAs across the United States and gained in popularity worldwide over time. When others saw the ball being “volleyed” across the net they began calling it volleyball. It is now an international sport and included in the Olympic competitions.
Morgan had known James Naismith in Springfield college, Naismith was the inventor of basketball! How’s that for some inspiration? Naismith started the basketball program at Kansas University- I had to get a plug for Kansas in here!
Equipment for How to Draw a Volleyball Easy
- Protractor- A protractor is small tool for drawing circles (optional). This is a cool device that makes small circles with a pencil around a center point. You can change the size of the circle to fit your paper.
Supplies for a Simple Volleyball Drawing
You don’t need much to bring these cute volleyball drawings to life!
- Drawing paper- Use drawing paper or a sketch book to try this tutorial.
- Pencil, pen, or marker- Use a pencil or marker to draw a butterfly.
- Eraser- Have an eraser handy when drawing with pencil
- Colored pencils- Use colored pencils or crayons to color in the butterfly drawing (optional).
- Lid, small plate, or protractor- for help in drawing a circle (optional)
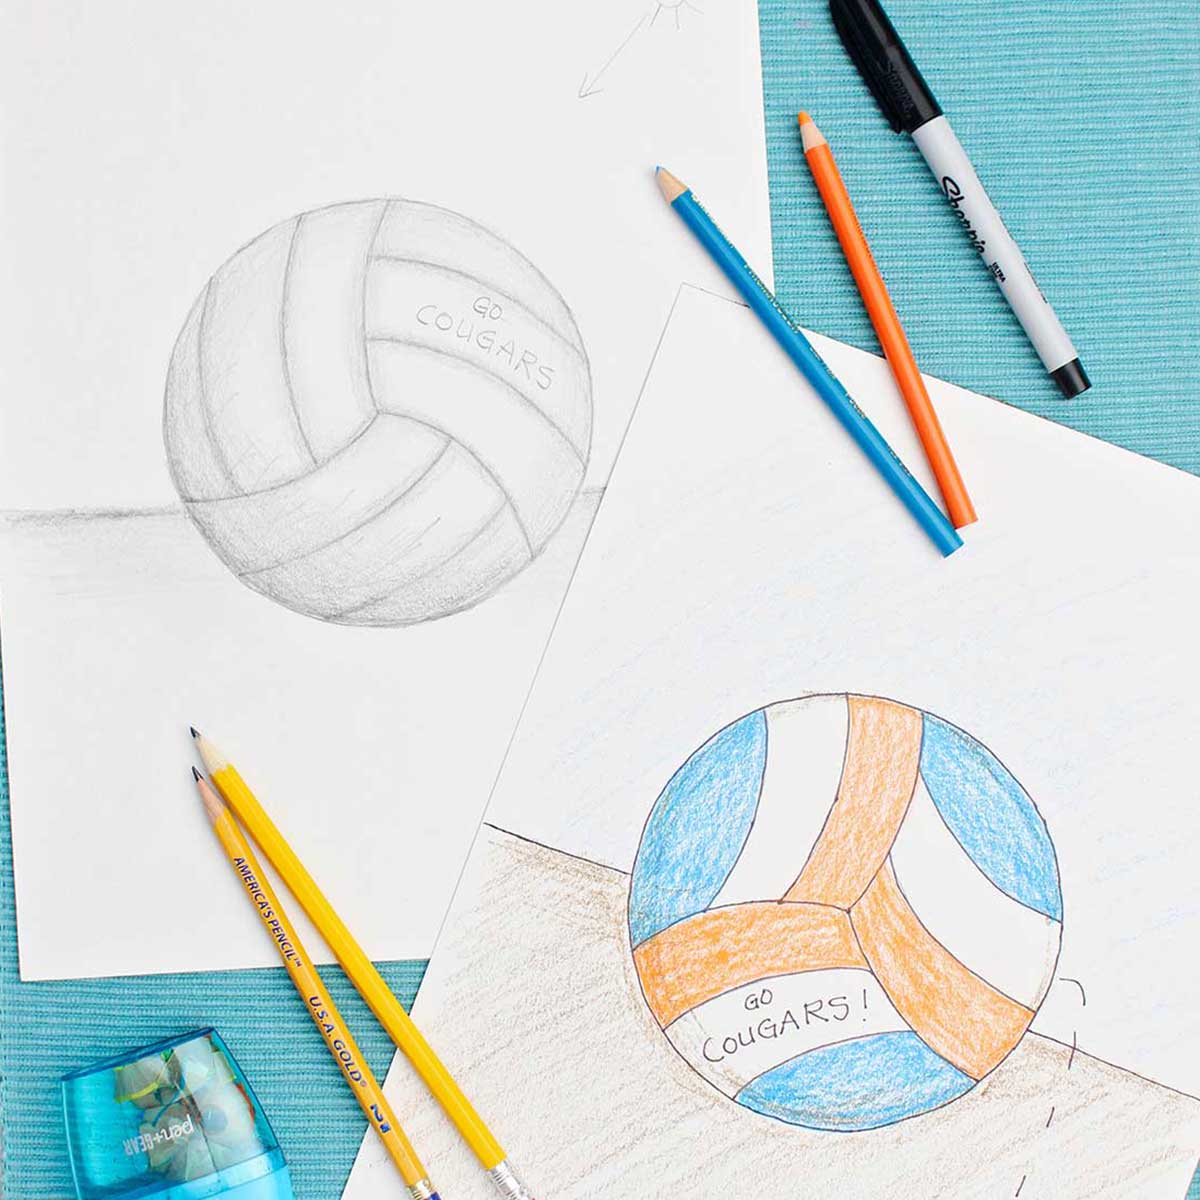
How to Draw a Volleyball Step by Step
Steps for a 2D Volleyball Easy Drawing
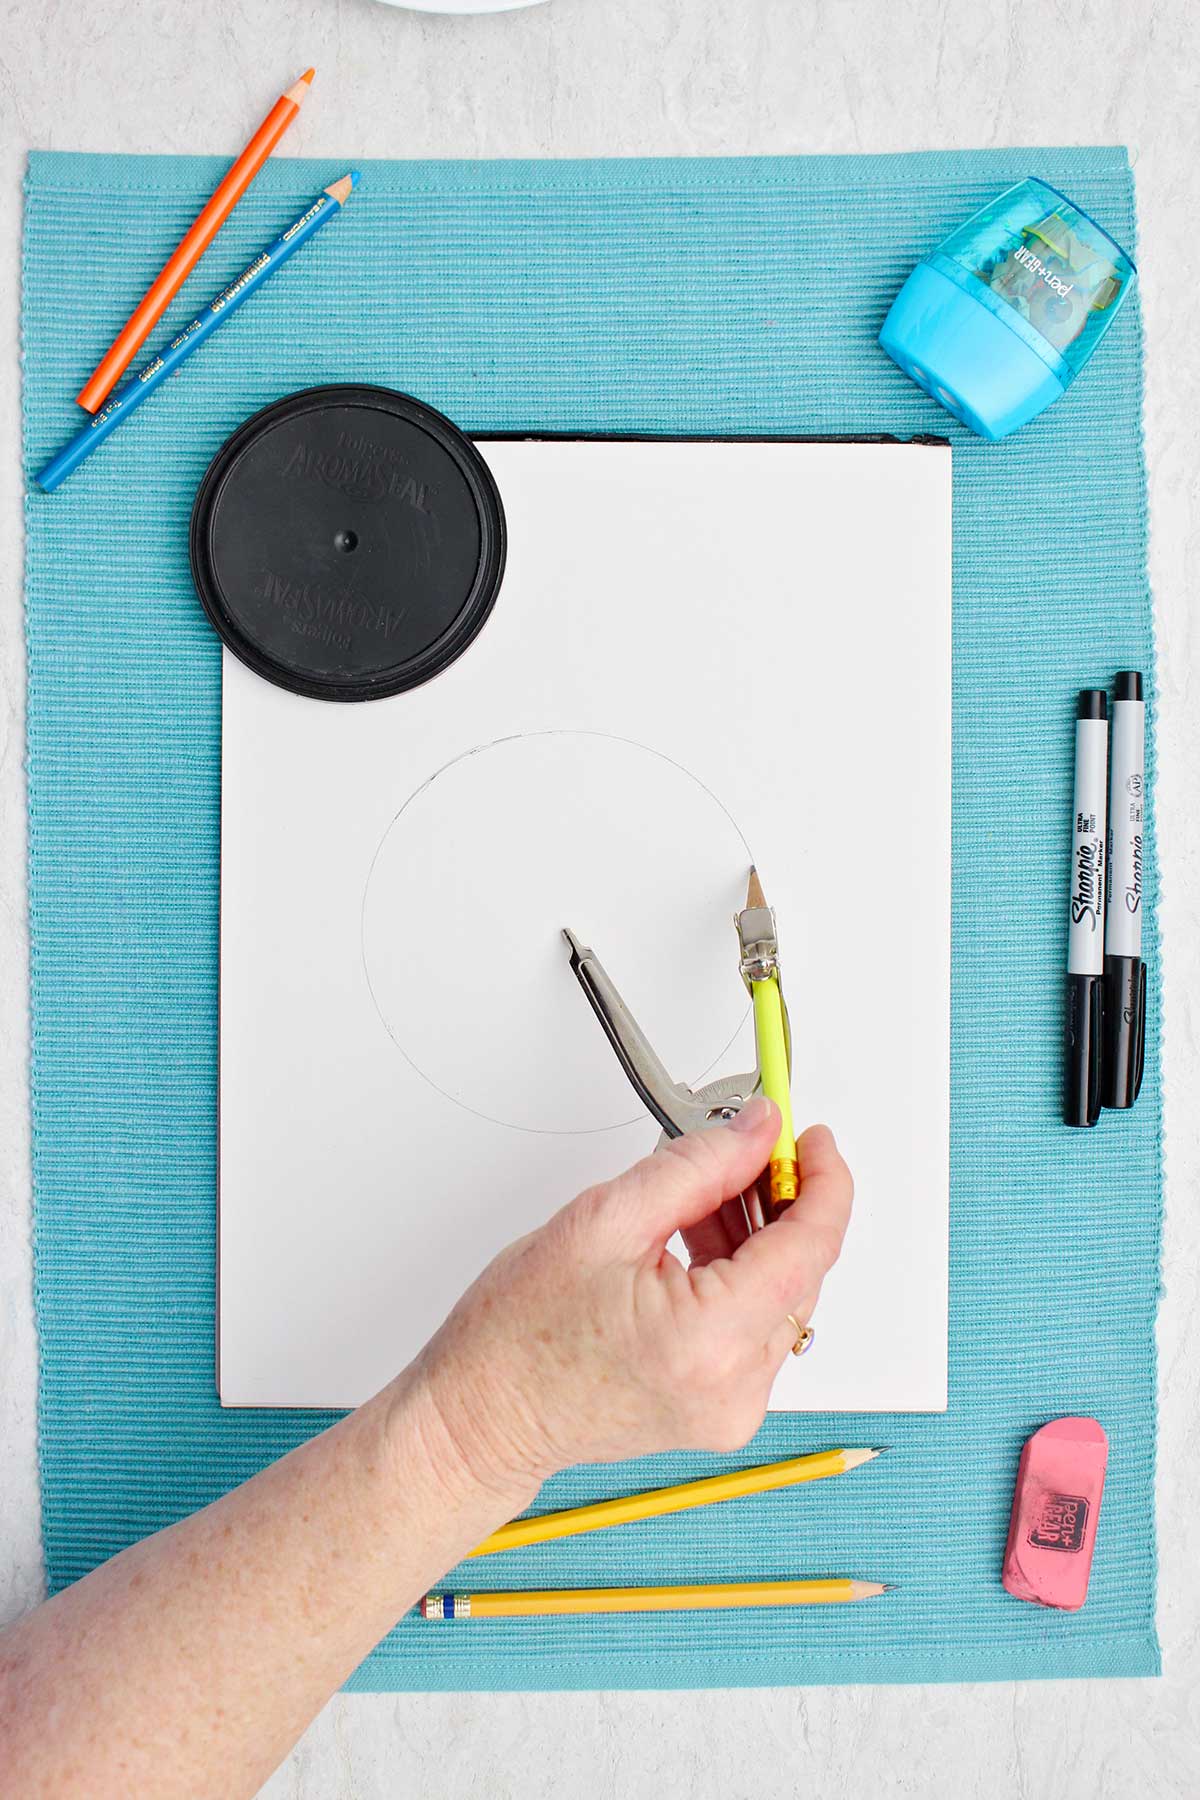
- Draw a circle by hand or by drawing around a lid, small plate, or using a protractor.
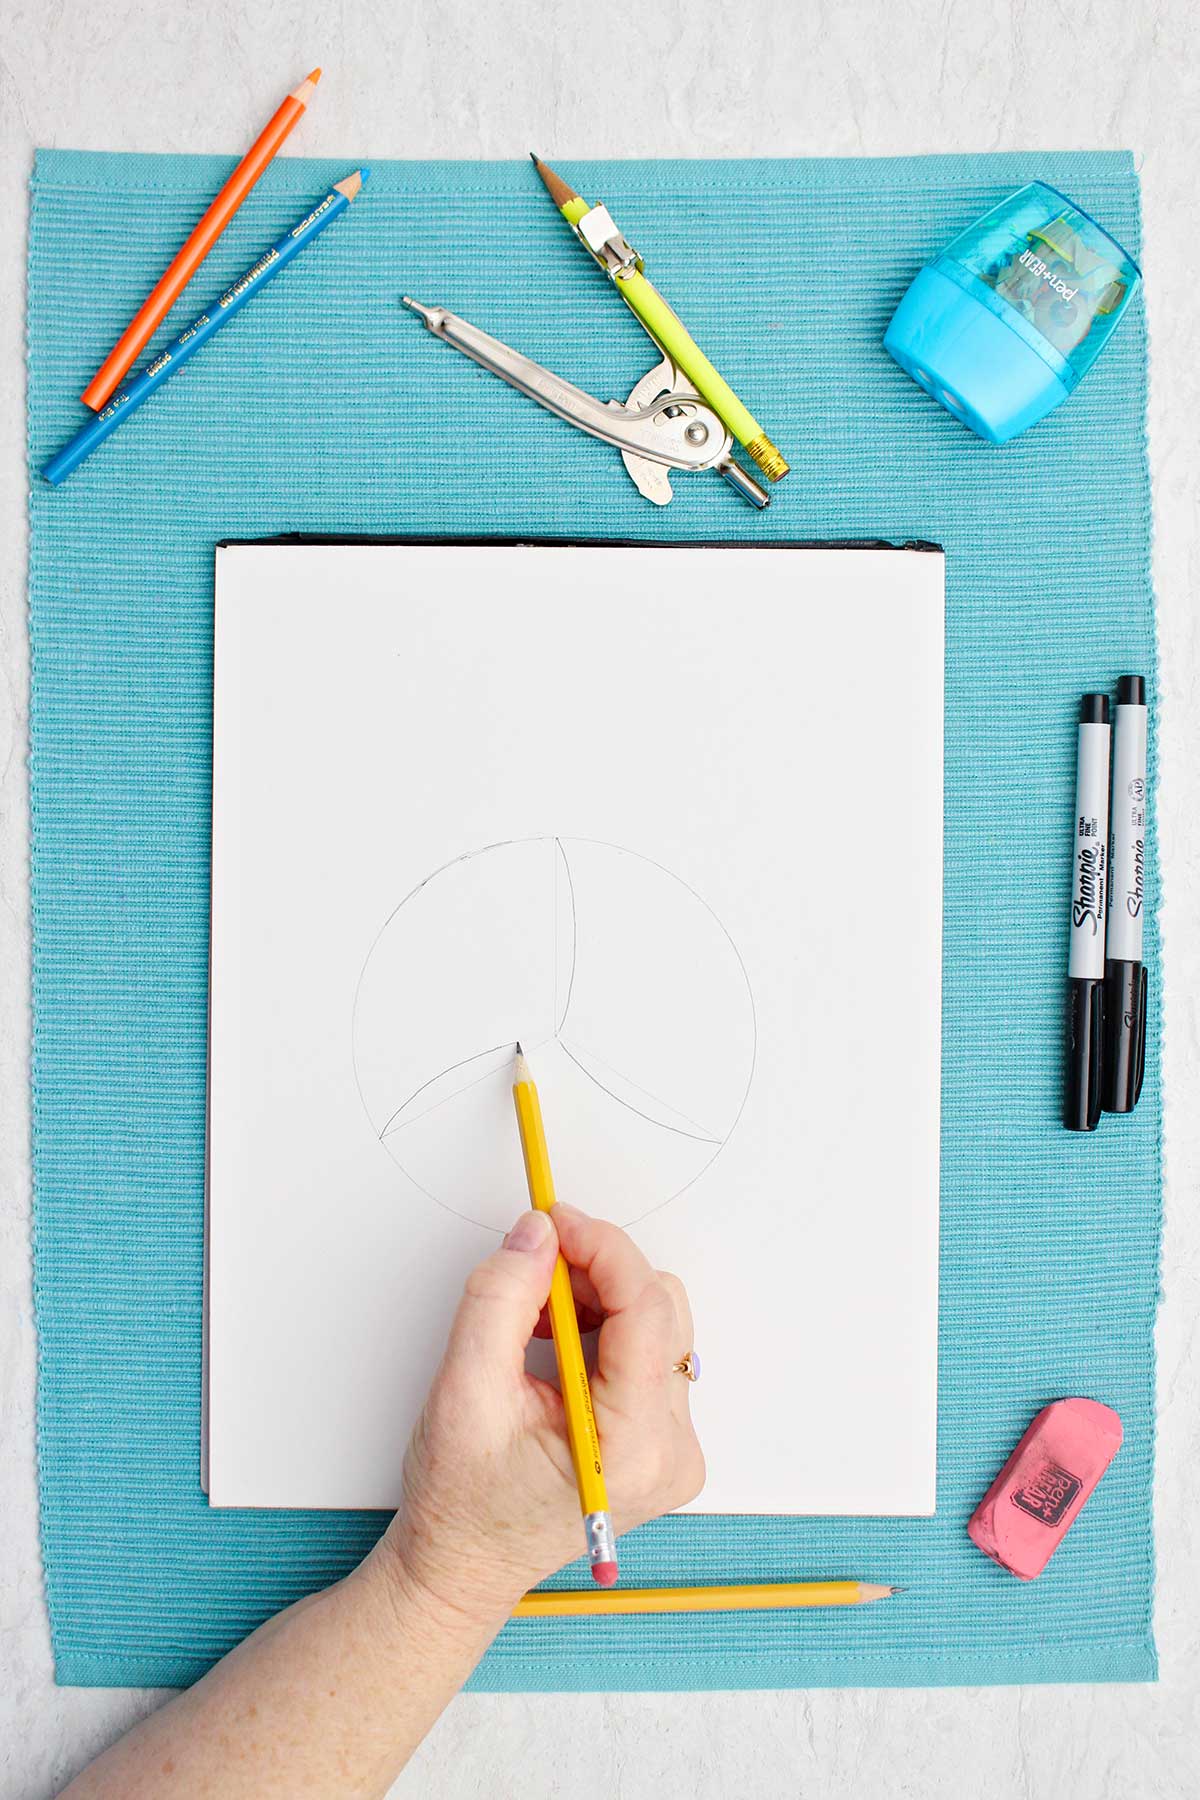
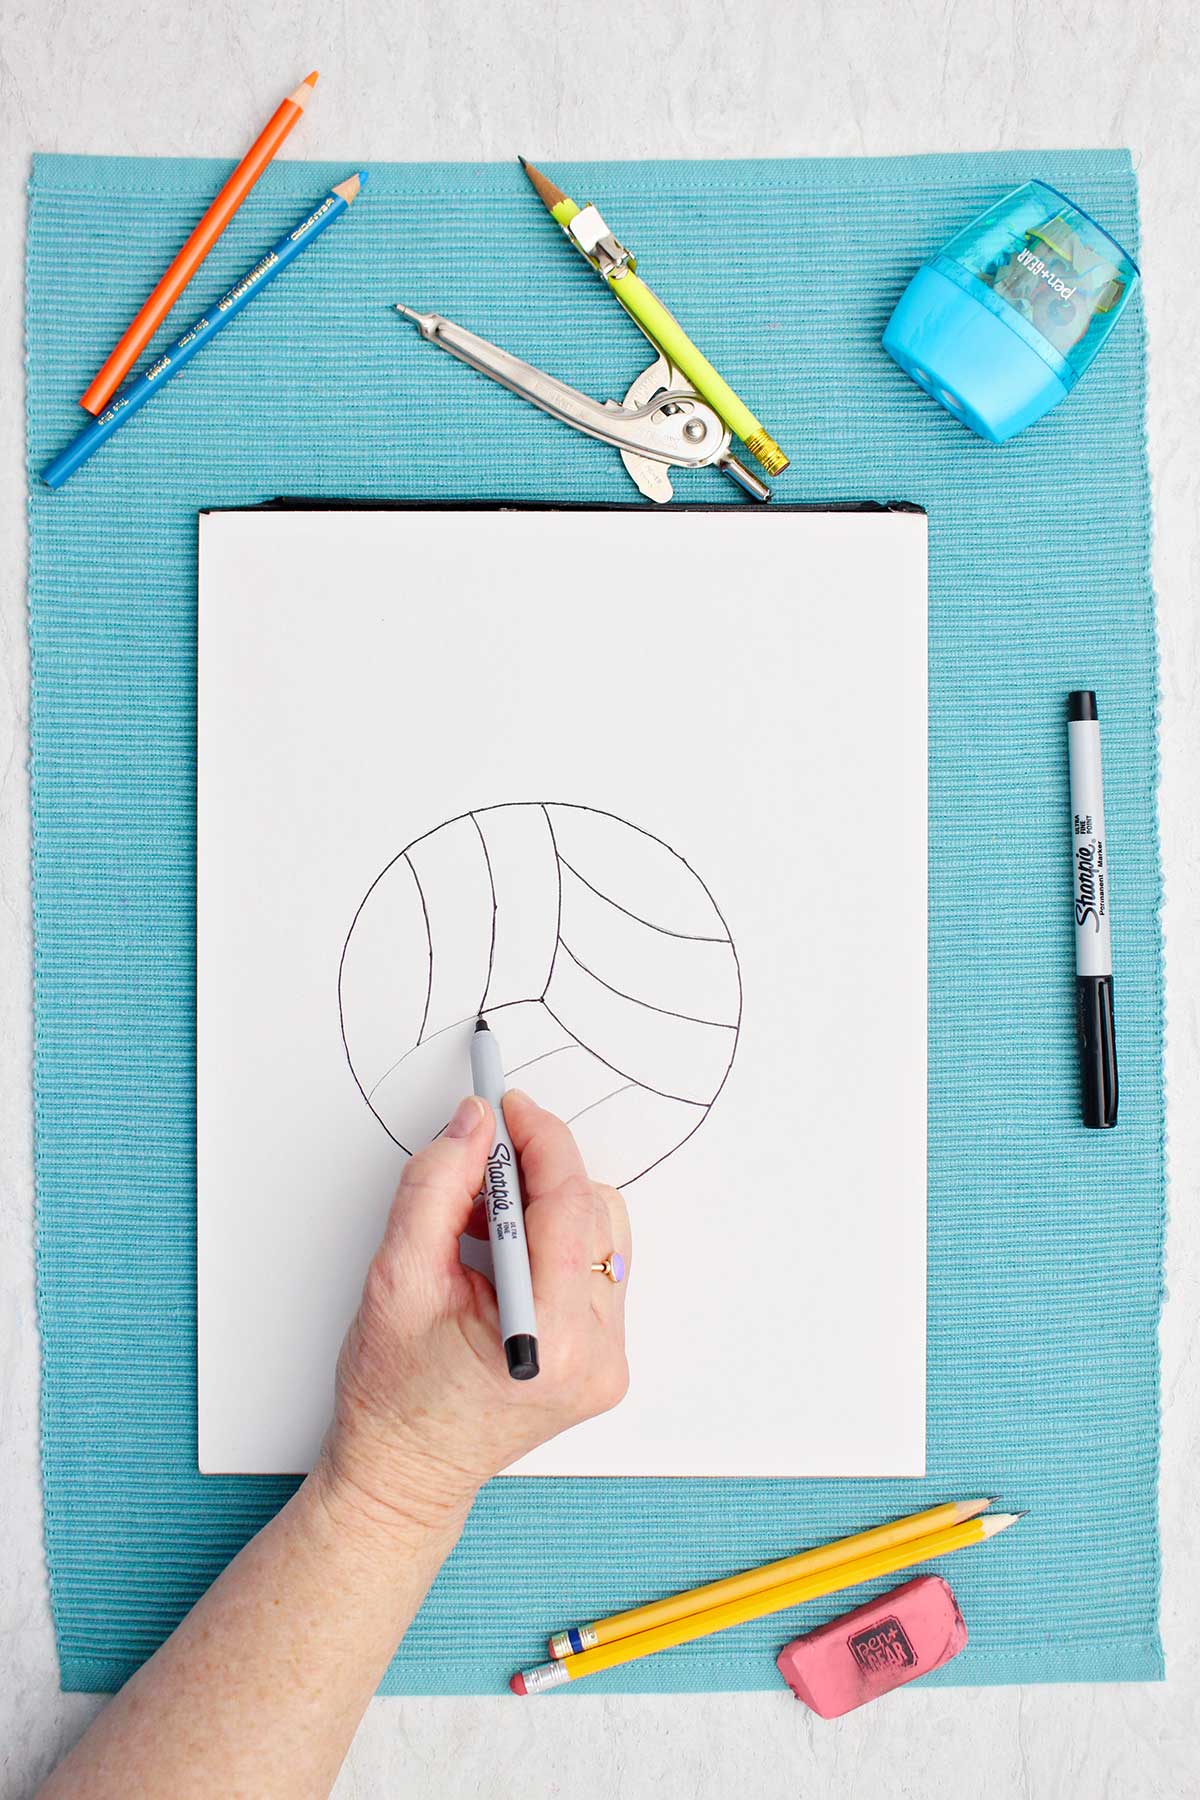
- Place a small dot in the middle of the circle. Lightly draw three lines out from the center of the circle to the edge of the circle. Divide the circle into three similar sized pieces.
- Then draw three curved lines from the center out to the edge of the circle, one in each circle section alongside the straight lines. Use the straight lines to give you starting and ending places in the circle, then erase the straight lines.
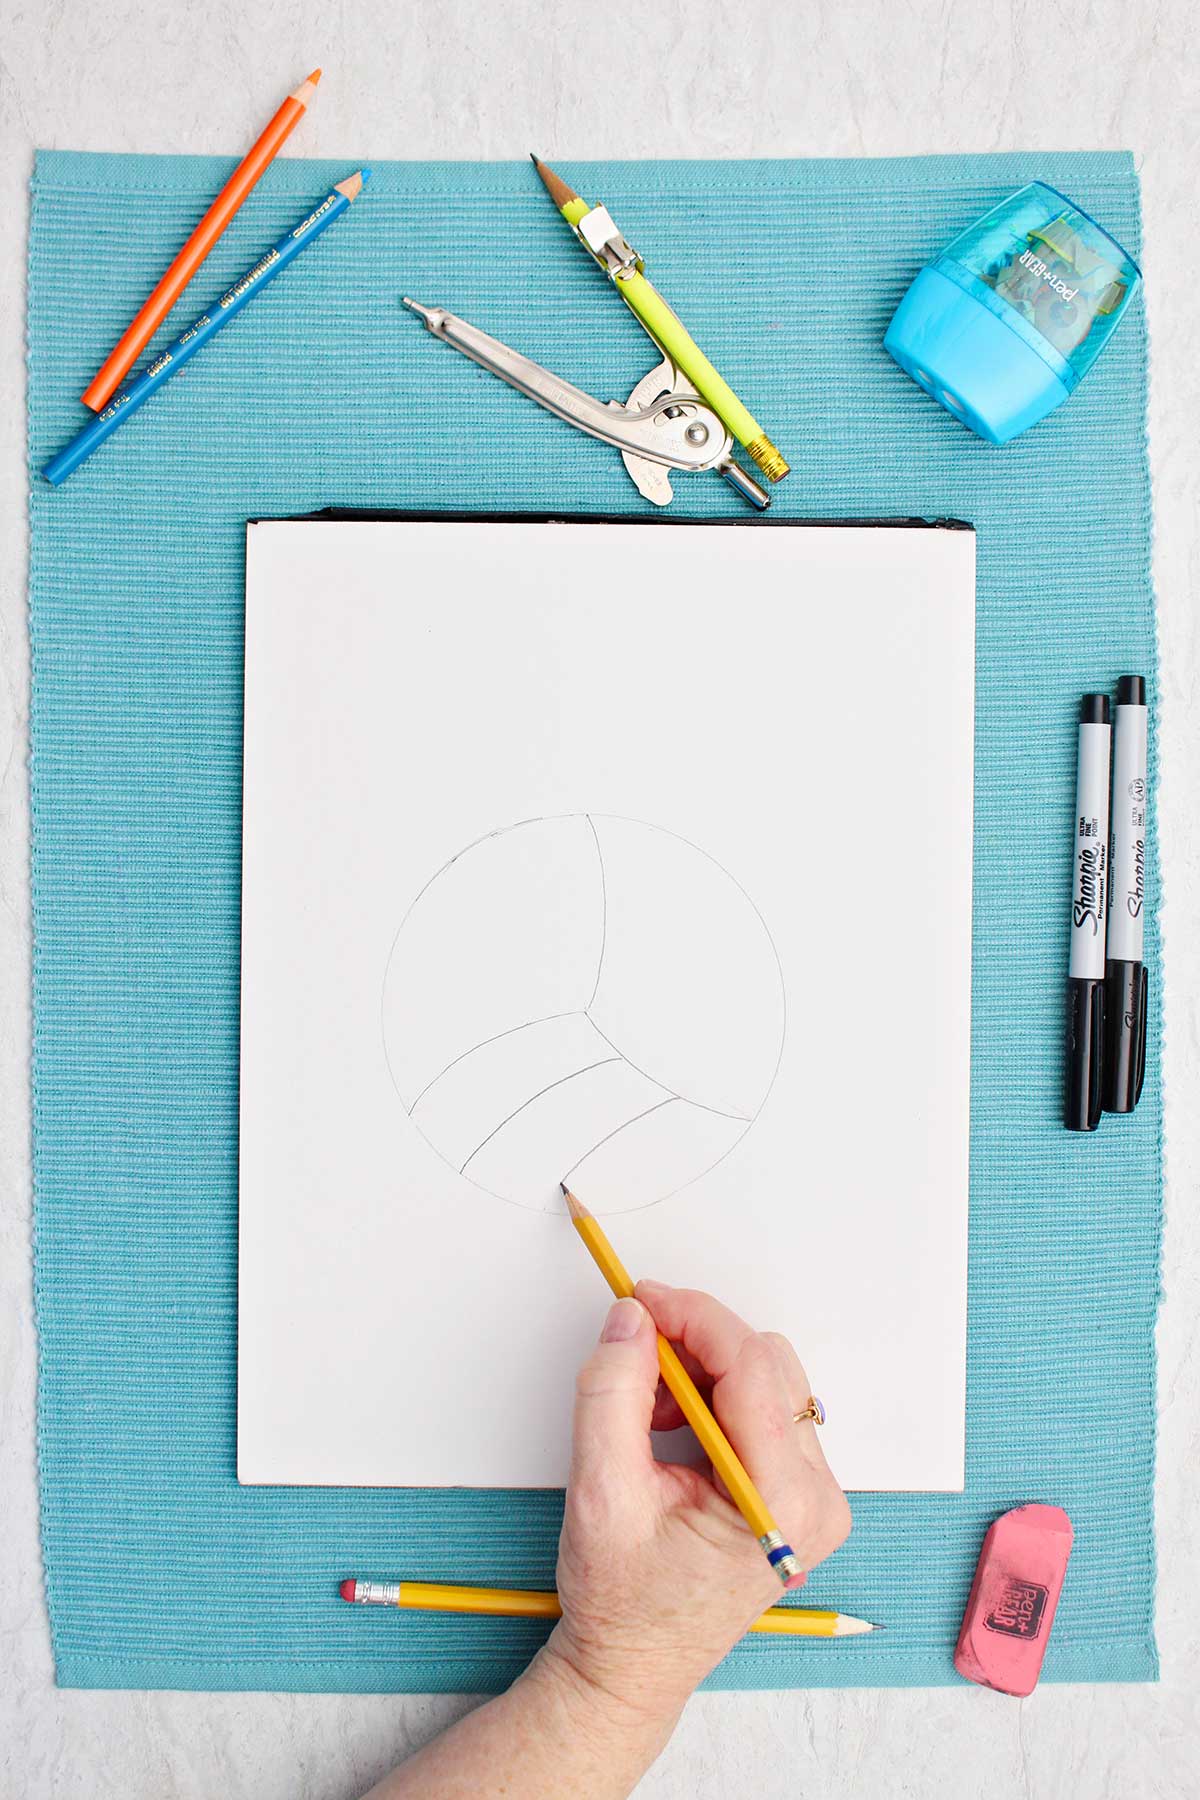
- Divide each section into three sections by drawing two curved lines that match the curved line you already drew (see the picture).
- Make a line from one side of the paper to the other to represent the floor, the line stops and starts on either side of the volleyball.
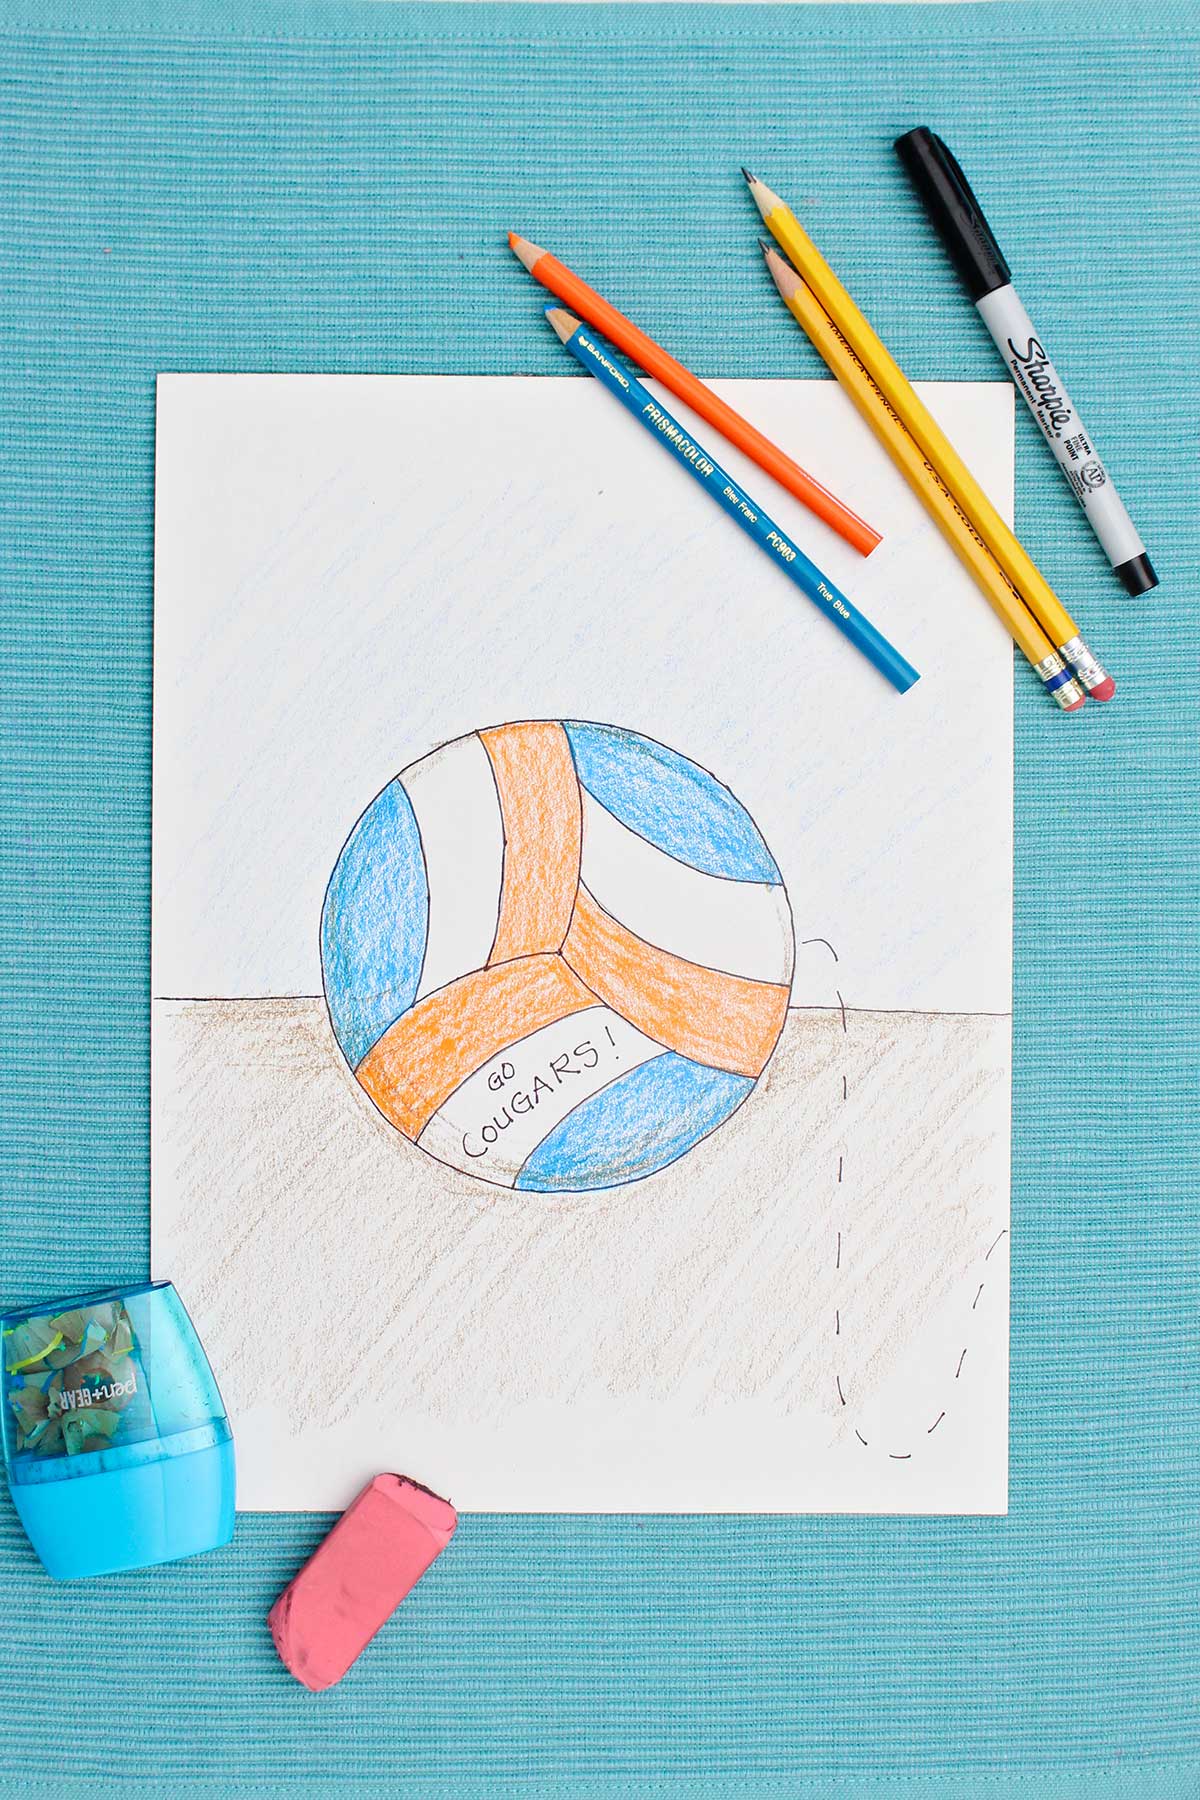
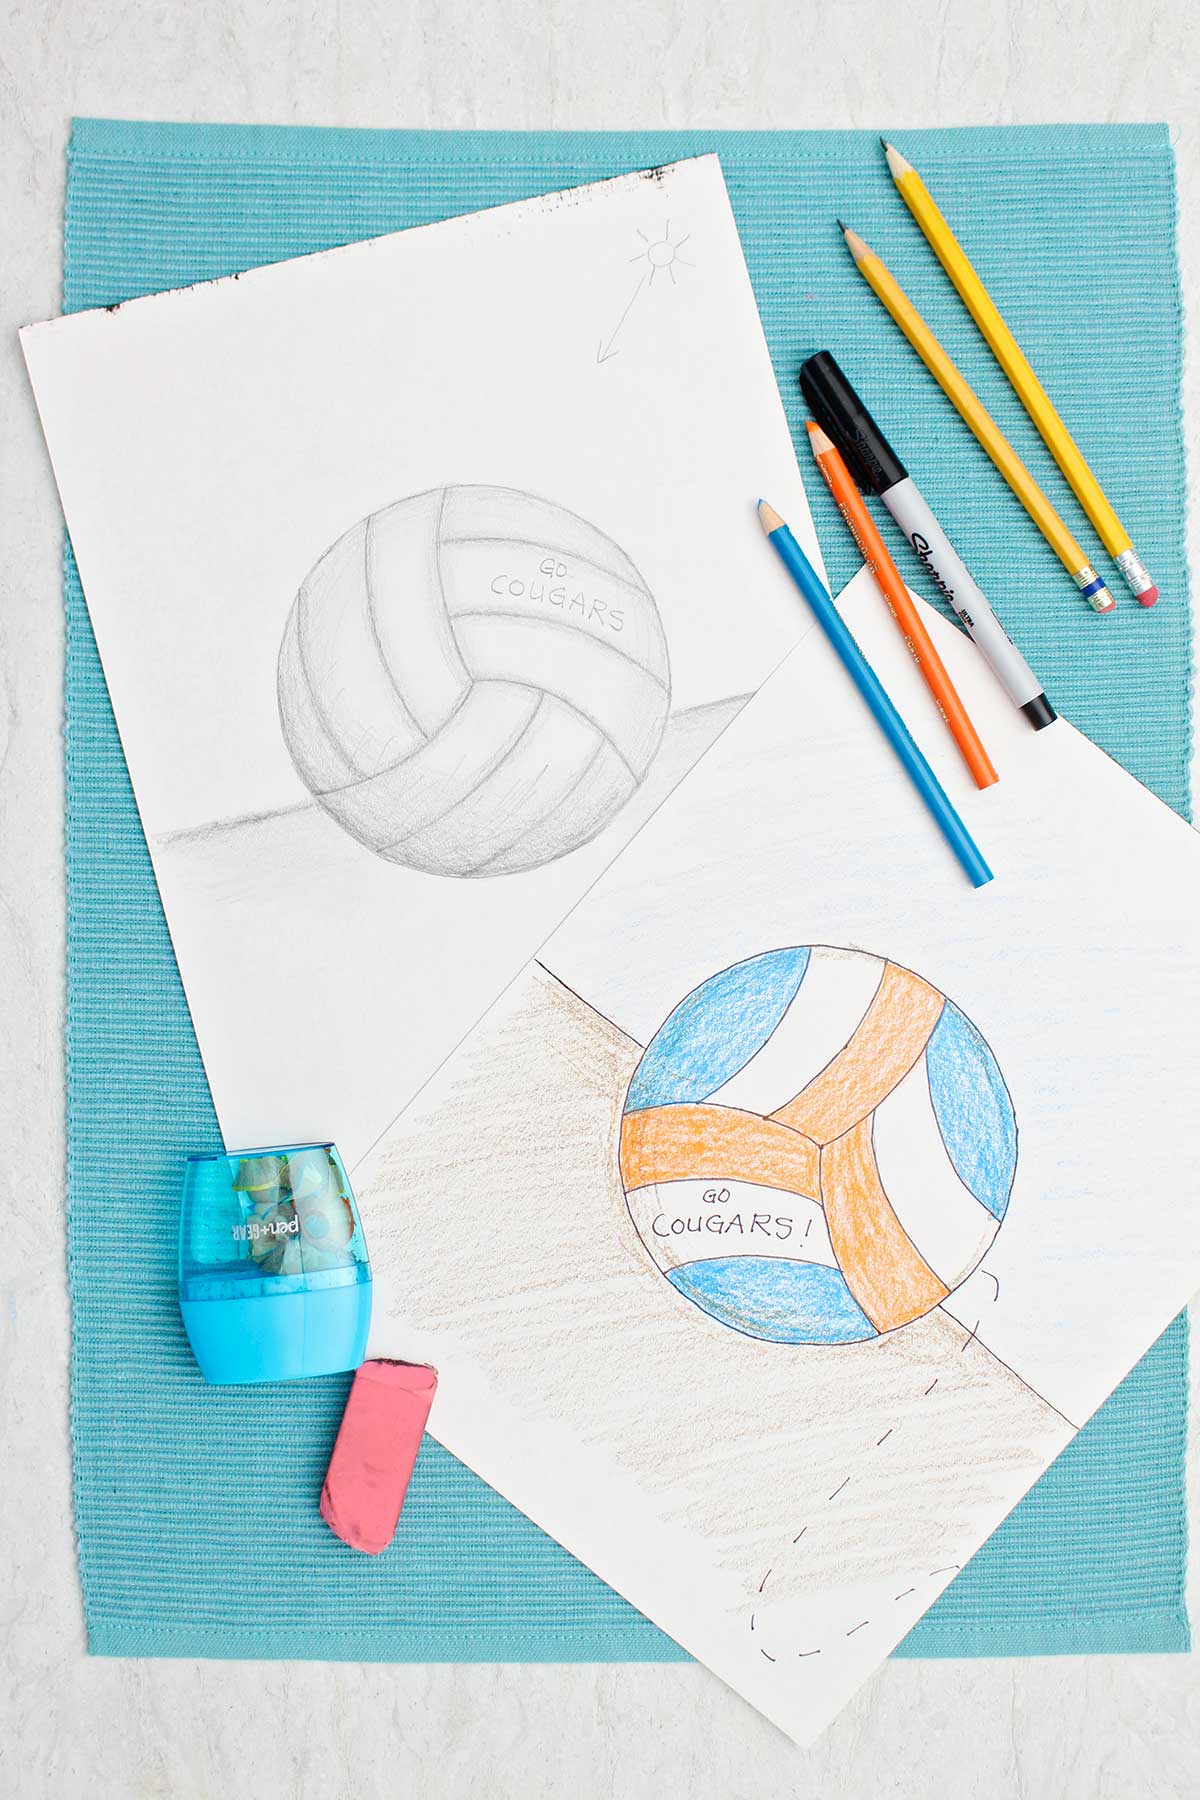
- Write a team name on the volleyball and add details behind the volleyball if you would like.
Steps for a 3D Sketch of a Volleyball
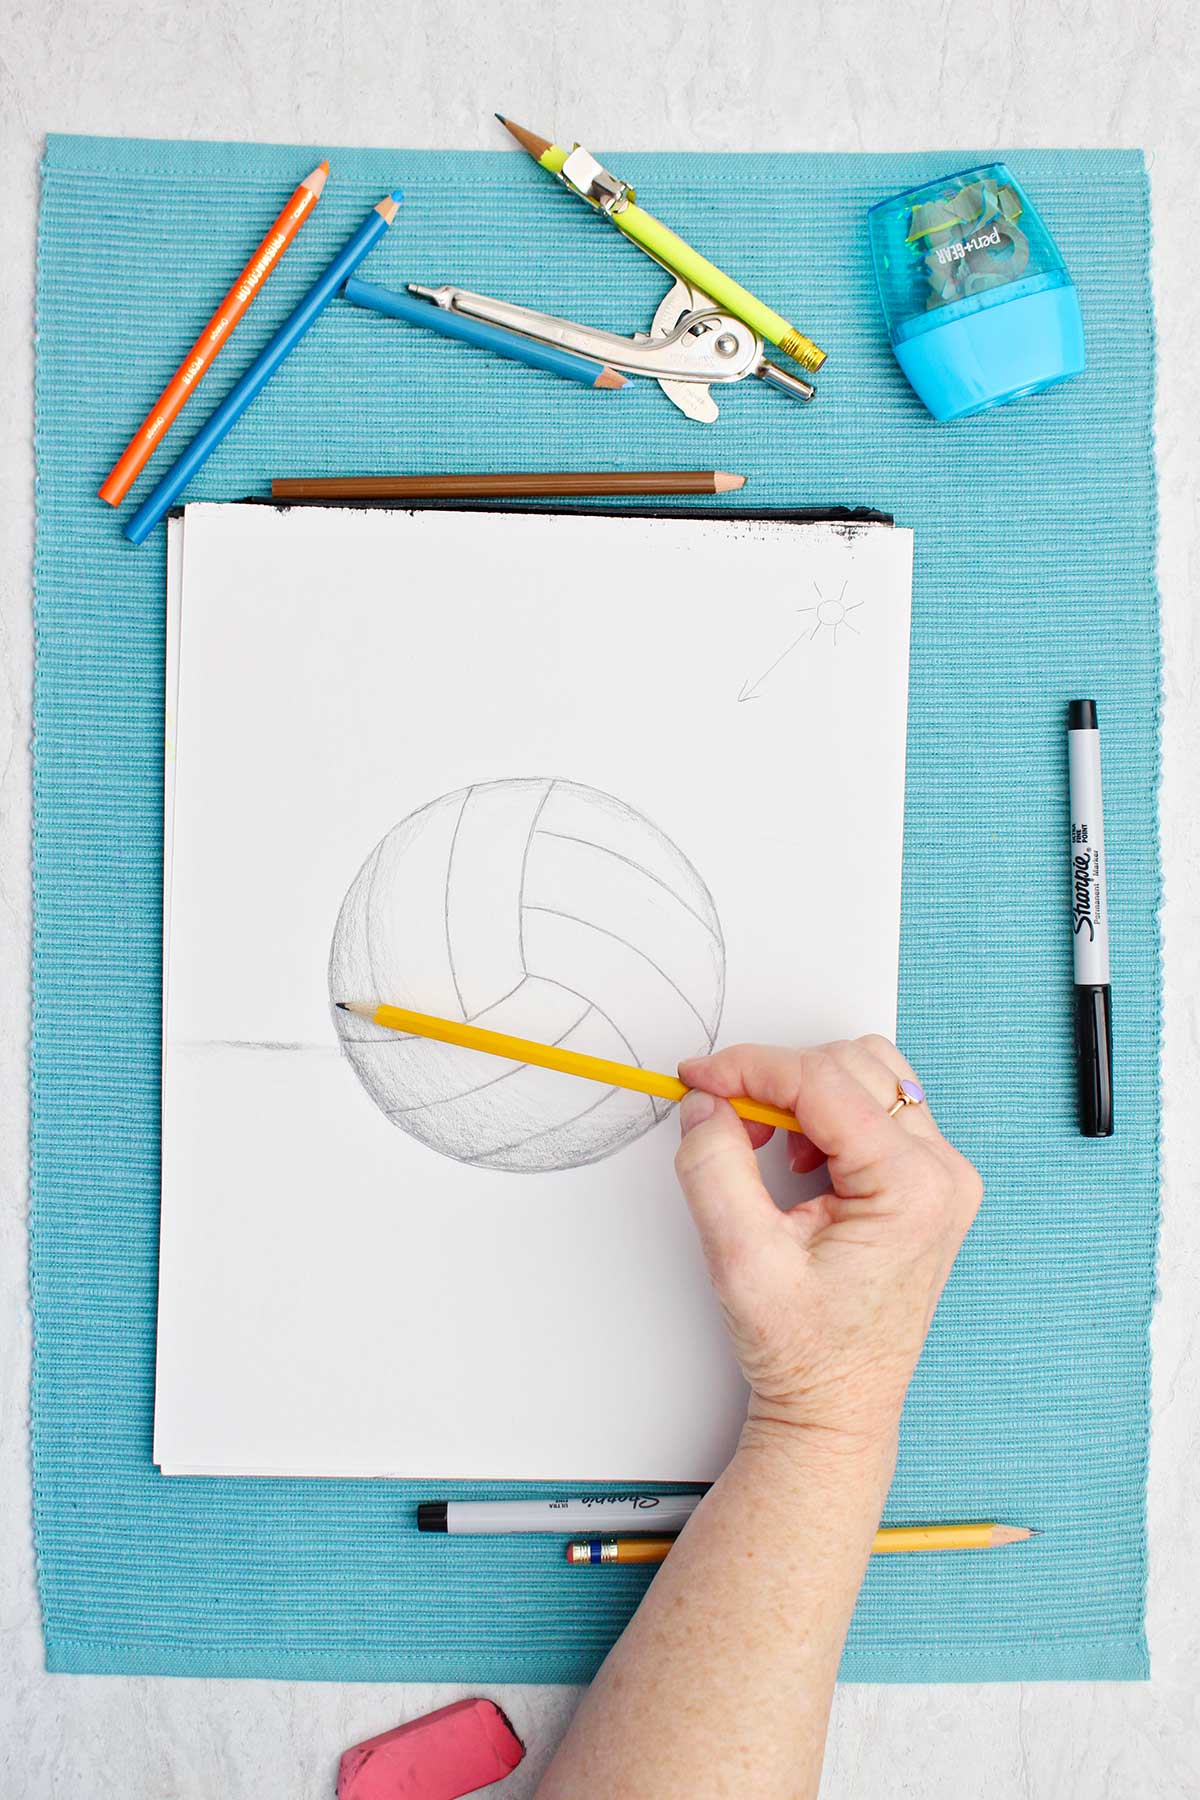
- Draw the volleyball in the same way you did for a 2D volleyball.
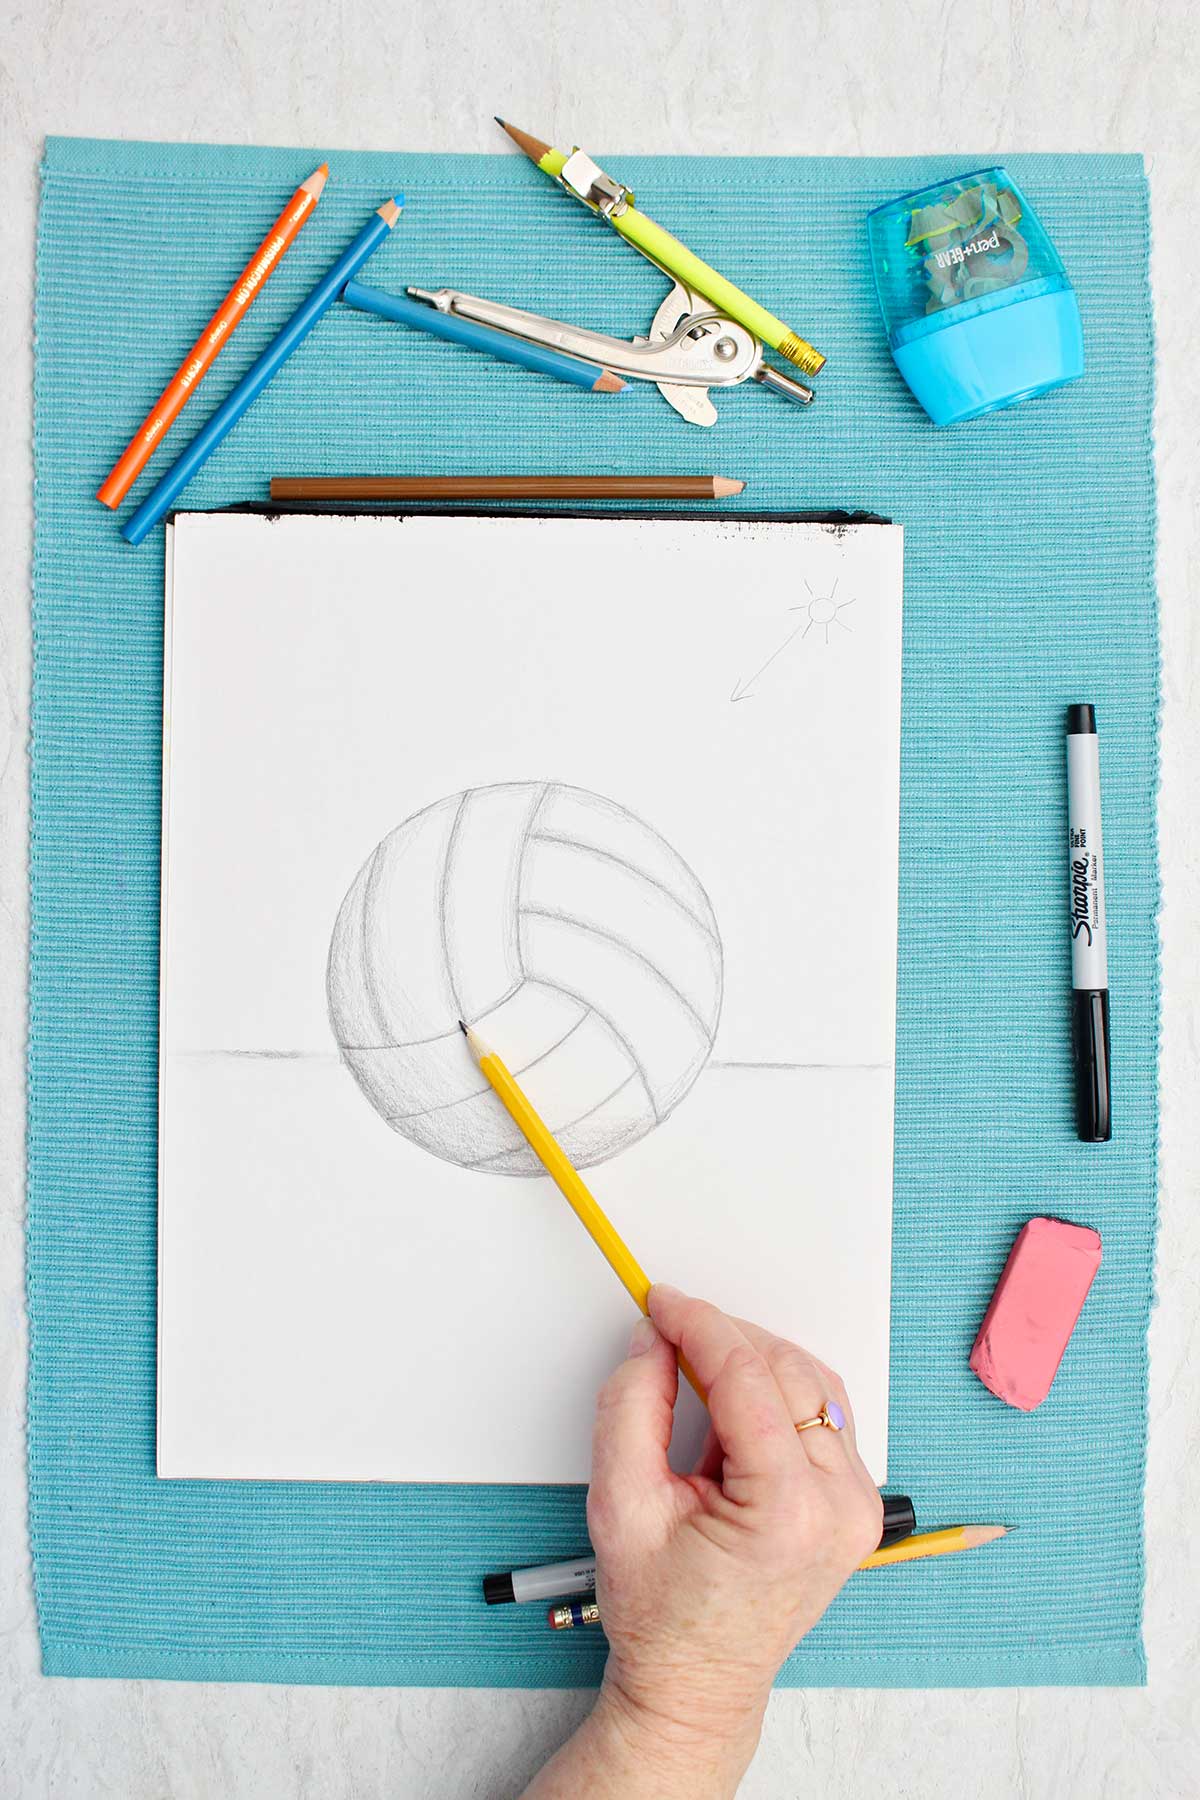
- Next we add shading to the ball. The video helps with this step. Use the side of the pencil lead to shade the edge of the ball away from the light source. Darken the edge of about half of the volleyball, lighten the shading as you come inwards about one third of the way.
- Shade each seam of the volleyball, each of the inside lines you have drawn. Darken the lines with the side of the pencil lead.
- Add a few contour lines one the shaded side of the ball. These are curved lines( like “smile lines”) that help the ball look rounded.
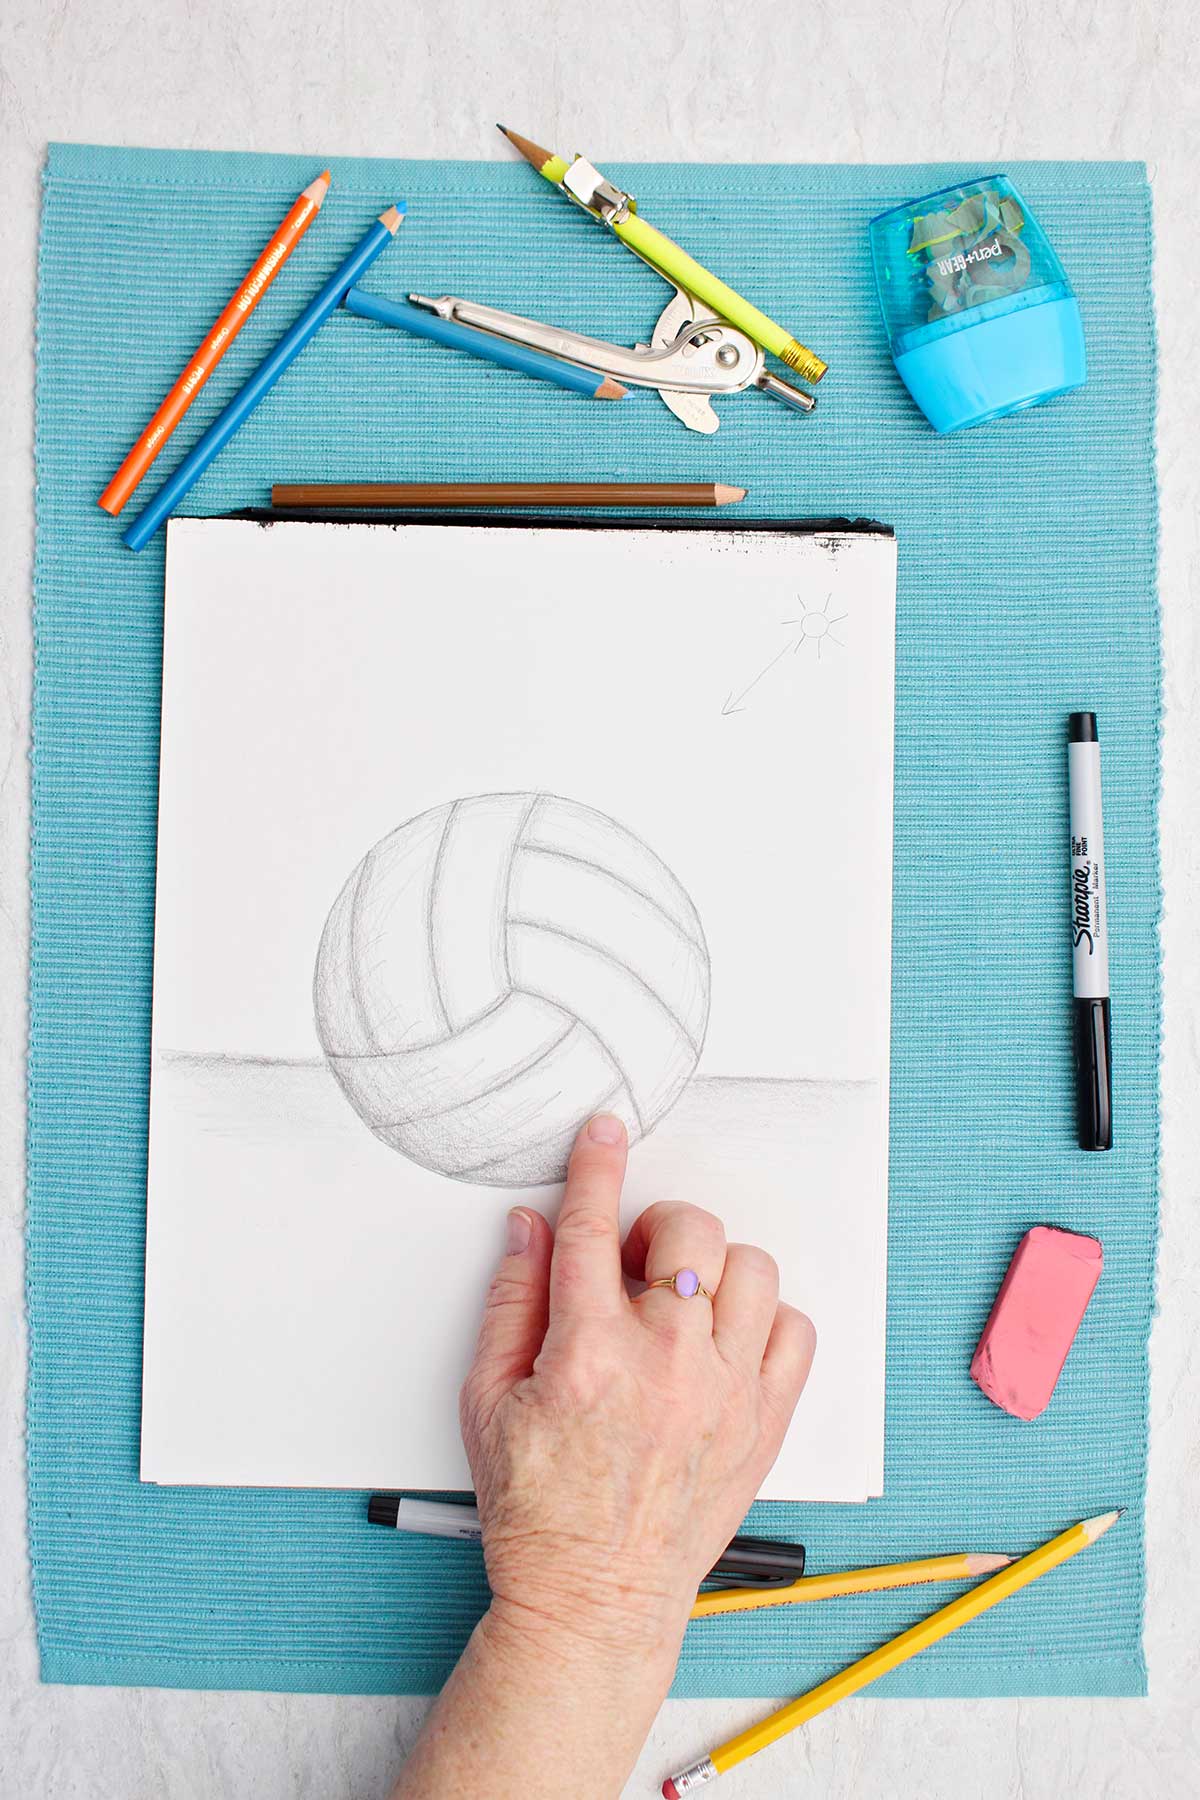
- Use your finger to blend the shading a bit. This drawing is of the volleyball in the air so there is no shading outside of the volleyball itself.
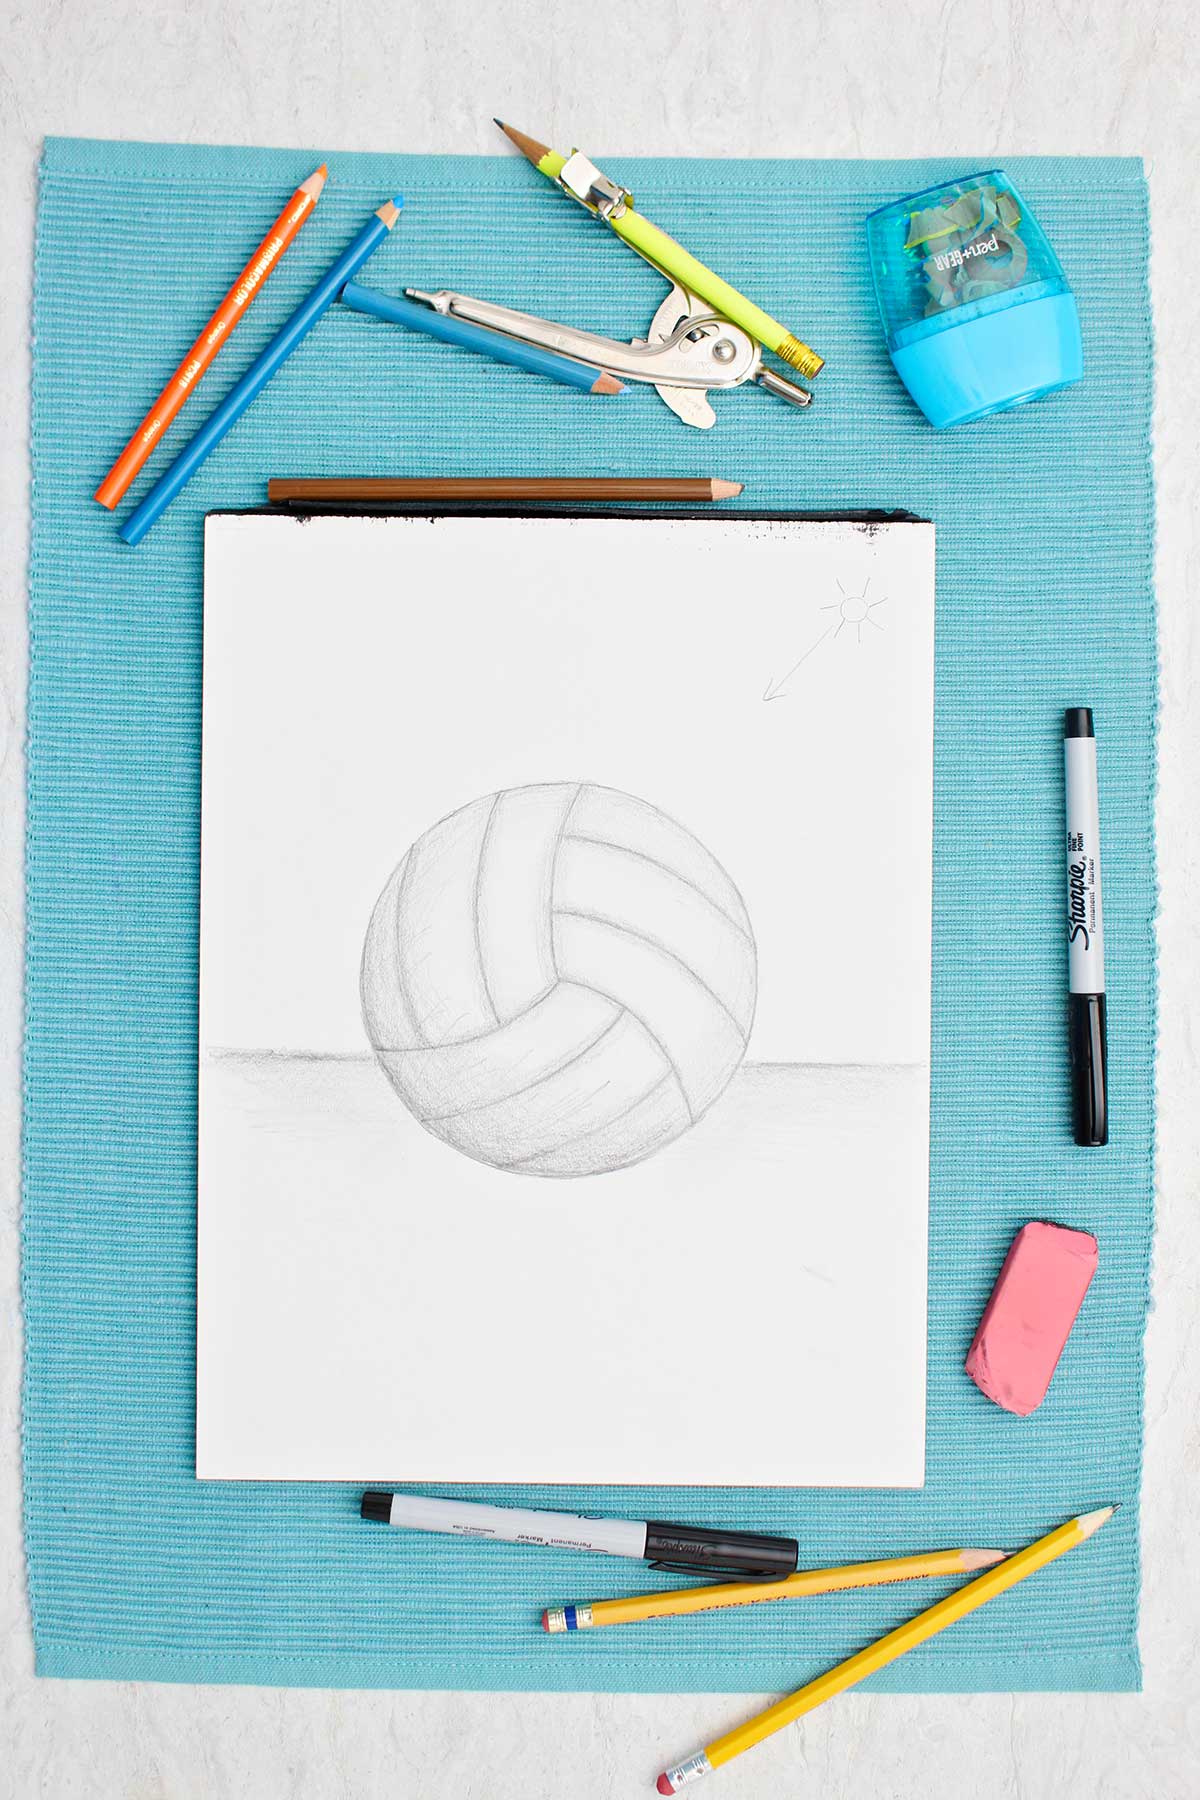
- Add a team name and details behind the drawing if you wish.
Craft Tips to Make a Volleyball Easy to Draw
These tips can help make a volleyball drawing even easier!
- When you have practiced drawing a volleyball several times you won’t need to draw the straight lines to guide the curved lines.
- Draw a small sun in the top right of the paper to remind you of your light source.
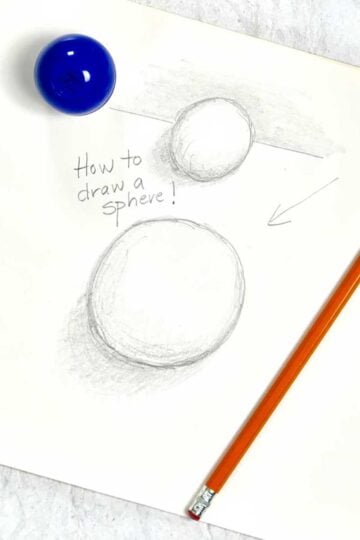
- Click on this link to review the post on shading a sphere (in a circle drawing it is called a sphere): How to Draw a Sphere.
- Purchase a blending stick if you don't want to use your finger to blend the shading on the volleyball.
- A full length video is found on YouTube at: Simple Volleyball drawing (2 Ways) Video
Craft Variations for this Volleyball Ball Draw
Here are a few variations you’re welcome to try with this volleyball drawing:
- Add details in the background of your drawing such as a net, the wall of the gym, or an outdoor scene!
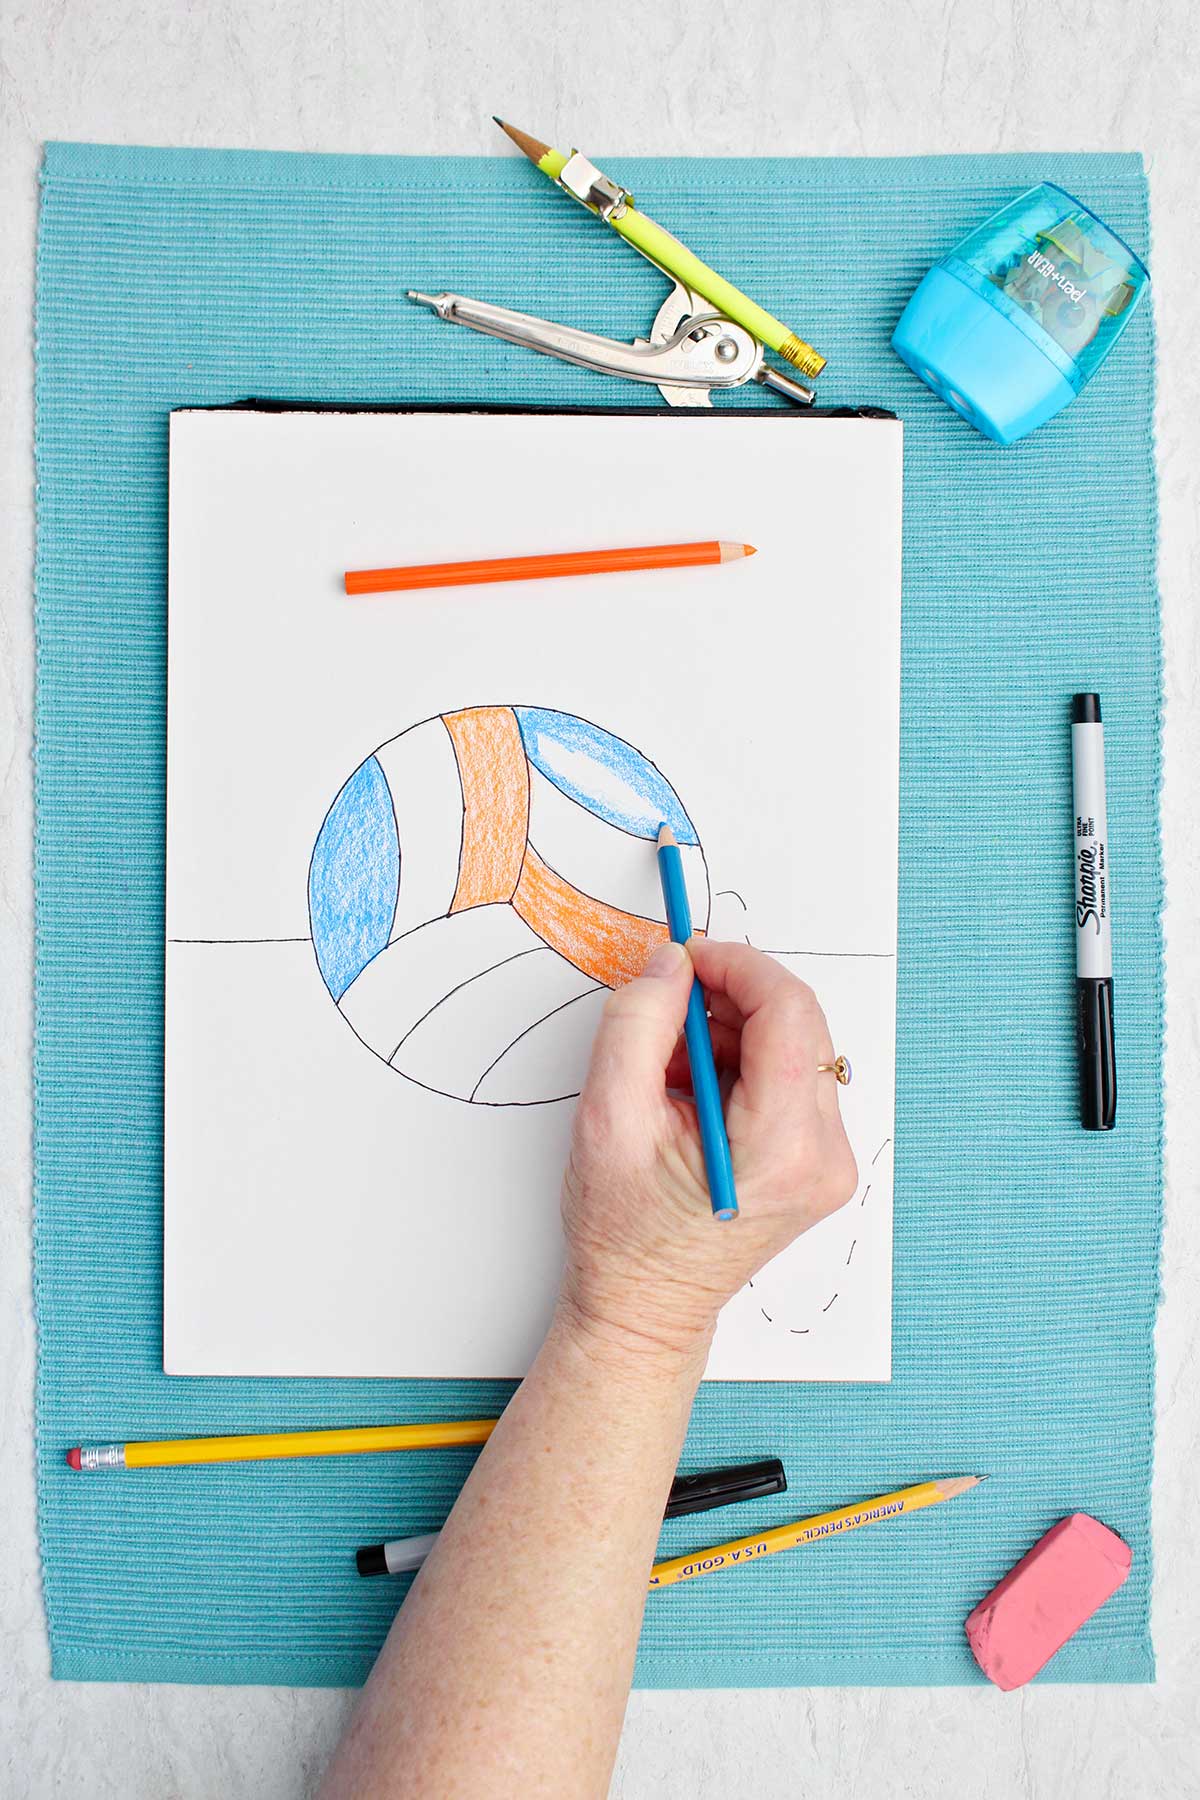
- Color the three sections of your volley ball in three repeating patterns of color.
- Shade the volleyball to look like it’s sitting on the floor by adding a half circle section of shading outside the ball in the area farthest from the light source. Watch the video on drawing a sphere that is mentioned above.
FAQ to Make Volleyball Drawing Simple
The 2D volleyball drawing works best for younger children and the older children can be challenged with the 3D drawing of a volleyball. This will build two sets of skills and allow you to adapt the tutorial to older children as well as younger children.
A volleyball can be drawn with a marker or a pencil. The marker works best when drawing a 2D line drawing (like a coloring page). The pencil works best with the 3D drawing of a volleyball and can make shading. Follow the instructions on this post where both options are available.
To draw a realistic 3D volleyball follow the second step by step set of directions above. This adds shading to the volleyball that makes it look round with shaded shadows and blending.
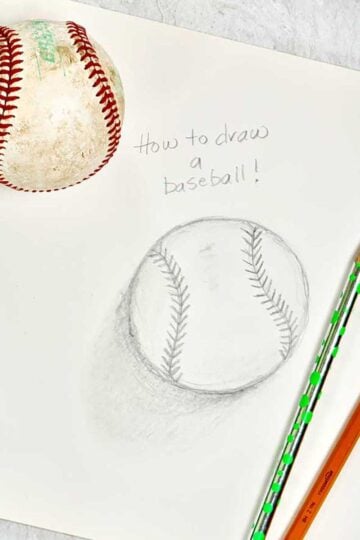
More Fun "Round" Drawing Tutorials for Kids!
Looking for more great DIY drawing tutorials of round objects for kids? Here are a few good ones for you to try:

Come Join the Fun at WTN!
Try this craft, leave a comment, rate it, and tag a photo with #WelcometoNanas wherever you post.
More Crafts Please!
Love getting crafts straight to your inbox? Sign up to receive a weekly email and get a free gift!
Simple Volleyball Drawing (2 Ways)!
Equipment
- A protractor small tool for drawing circles (optional).
Items Required
- drawing paper or a sketch book
- a pencil or marker
- an eraser
- colored pencils or crayons
- Lid, small plate, or protractor
Instructions
Steps for a 2D Volleyball Easy Drawing
- Draw a circle by hand or by drawing around a lid, small plate, or using a protractor.
- Place a small dot in the middle of the circle. Lightly draw three lines out from the center of the circle to the edge of the circle. Divide the circle into three similar sized pieces.
- Then draw three curved lines from the center out to the edge of the circle, one in each circle section alongside the straight lines. Use the straight lines to give you starting and ending places in the circle, then erase the straight lines.
- Divide each section into three sections by drawing two curved lines that match the curved line you already drew (see the picture).
- Make a line from one side of the paper to the other to represent the floor, the line stops and starts on either side of the volleyball.
- Write a team name on the volleyball and add details behind the volleyball if you would like.
Steps for a 3D Sketch of a Volleyball
- Draw the volleyball in the same way you did for a 2D volleyball.
- Next we add shading to the ball. The video helps with this step. Use the side of the pencil lead to shade the edge of the ball away from the light source. Darken the edge of about half of the volleyball, lighten the shading as you come inwards about one third of the way.
- Shade each seam of the volleyball, each of the inside lines you have drawn. Darken the lines with the side of the pencil lead.
- Add a few contour lines one the shaded side of the ball. These are curved lines( like “smile lines”) that help the ball look rounded.
- Use your finger to blend the shading a bit. This drawing is of the volleyball in the air so there is no shading outside of the volleyball itself.
- Add a team name and details behind the drawing if you wish.

Leave a Reply