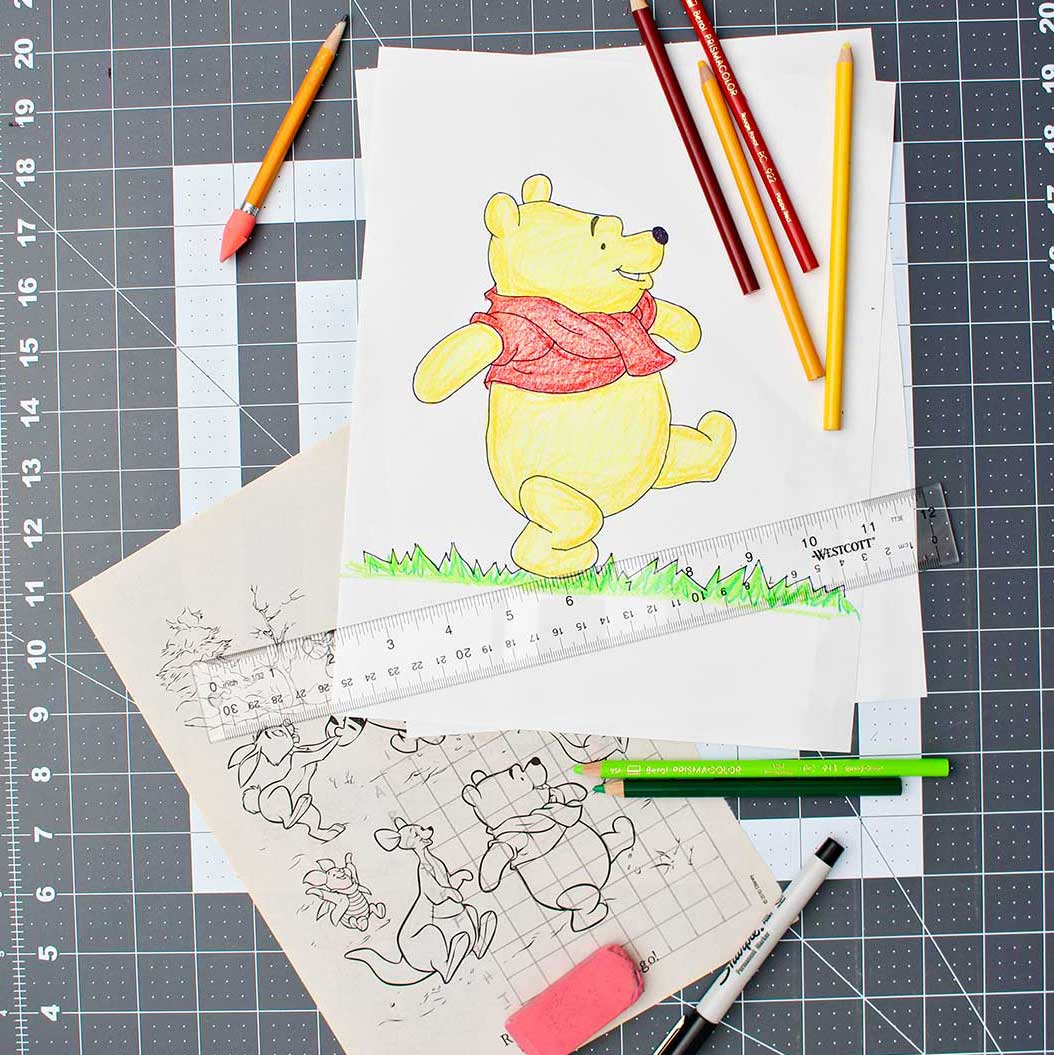
Learn how to enlarge a drawing using the grid technique, recreating any drawing in any size! You can use the grid technique to transfer a picture onto a canvas, a piece of paper, or even a wall for a mural or photo backdrop!
How to Enlarge a Drawing to Scale Using a Grid
Would you like to learn how to enlarge a drawing? How about using a grid for transferring a picture onto your paper or canvas for your art project?
The grid technique is an easy way to enlarge any drawing, to any size! You can use it to transfer a picture for any art project, like a canvas painting, a wall hanging, or even a large mural or photo backdrop!
Who uses the grid technique?
The masters used it
I’ve read that a grid technique was used on The Last Supper painting done by Leonardo da Vinci. It was also used in parts of the Sistine chapel by Michelangelo.
And even further back, much further back, it was used by Egyptians in some of their an ancient artwork.
They can see the remains of the grid lines on the paintings. Cool huh? It's such a good idea that I wish I'd invented it!

Mural painters use the grid technique
Mural painting is a huge fad right now in towns and cities. The grid system would work wonderfully for this purpose.
I have a friend that paints outdoor murals in St. Louis. She uses this method to transfer her drawings onto the buildings!
Little old me uses it!
I can’t tell you the number of times I’ve needed to transfer a picture from one surface to another.
Sometimes it is for small projects- like drawing a picture on a larger canvas to use for a birthday party.
Some have been large paintings- like a 4x8-foot wood panel painting for the local park. Also a 8x20-foot mural on the wall in our church nursery.
What can I enlarge my drawing onto?
Are you ready to learn a simple technique used by the masters (and little old me)? Well, this is easy so no pressure or anything. Then after learning how to enlarge a drawing, you will like having this tool in your drawing toolbox!
So your drawing can be transferred onto a variety of surfaces as you can see. The original image can be drawn via the grid method onto another surface like:
- Watercolor paper
- Drawing paper
- Cardstock
- Stretched canvas
- Poster board
- A wall
- Even the side of a building.
You can use your sketch with a grid to transfer it onto any larger surface by using a larger grid.
That’s what we’re going to look at here today primarily.
Note: This will also work with a reference photo instead of a drawing.
Making a grid to transfer your drawing
Enlarging a drawing to scale involves making grids. A grid is a set of vertical and horizontal lines that intersect to make squares.
The first grid is over the top of the original drawing that you want to transfer. Then you make a second grid on the surface you want to transfer that drawing to. But this time the grid is in a larger scale with larger squares.
The contents of each of the small squares on the first grid is transferred to the second surface to the corresponding larger grid squares.
Block by block the drawing is transferred over to the new surface. It’s not a perfect match, but you will find your results to be quite accurate.
It’s almost like a fun game if you think about it. In fact, I’ve even seen this in game books as a little fun thing to do. It's for entertainment- like a crossword puzzle or sudoku puzzle.
If you would like to follow along on a full length video tutorial you can find it at this link: How To Enlarge a Drawing With a Grid.
How big you want each grid square to be?
So the first thing that a person needs to think about is the size of the original drawing. Then you'll think about the size of the surface where you want to transfer that drawing.
We want to make the two grids to scale. Meaning we want both grids in the same proportion. So we enlarge each square on the original grid up in a way that does not distort the picture.
If the original grid is four squares wide, and five squares tall, the new surface grid needs to be the same grid size but with larger squares.
So the new surface could be drawn into grid squares that are two times as big as the first. This grid can also be three times as big, or four times as big. If the first grid had squares that were 1“ x 1“., The second surface would have squares that would be 2“ x 2“, or 3“ x 3“ for example.
Ideally, the second grid would have the same number of squares as the first grid. So the second drawing would still be on grid that is 4 x 5, just larger squares.
This means that a square drawing cannot be drawn accurately on a rectangle new surface without distorting the picture.
But a person could draw that square drawing in a large square on the second surface. Then fill the extra surface area of the new rectangle surface with additional drawing features.

Drawing the grid on your original sketch or photo
So to learn how to enlarge a drawing we start with the original drawing or reference picture that you want to transfer.
Use a line drawing sketch
If you have drawn a sketch as a line drawing that is ideal.
If you want to start with a photo of some sort, first make it into a line drawing. Use a computer program to make it into a line drawing. Or just draw lines around the outside edges of the main parts of the picture.
For instance, if drawing a house in the reference photo, draw lines around the:
- outside edges of the house
- windows
- doors
- trees
- anything else that you would like to transfer
The more detail that's in each square, the more accurately your drawing will transfer over.
Note: if you do not want to draw on your original picture, copy off the picture on your own printer. Draw the grid on the copy instead of the original.

Measuring and marking your first grid
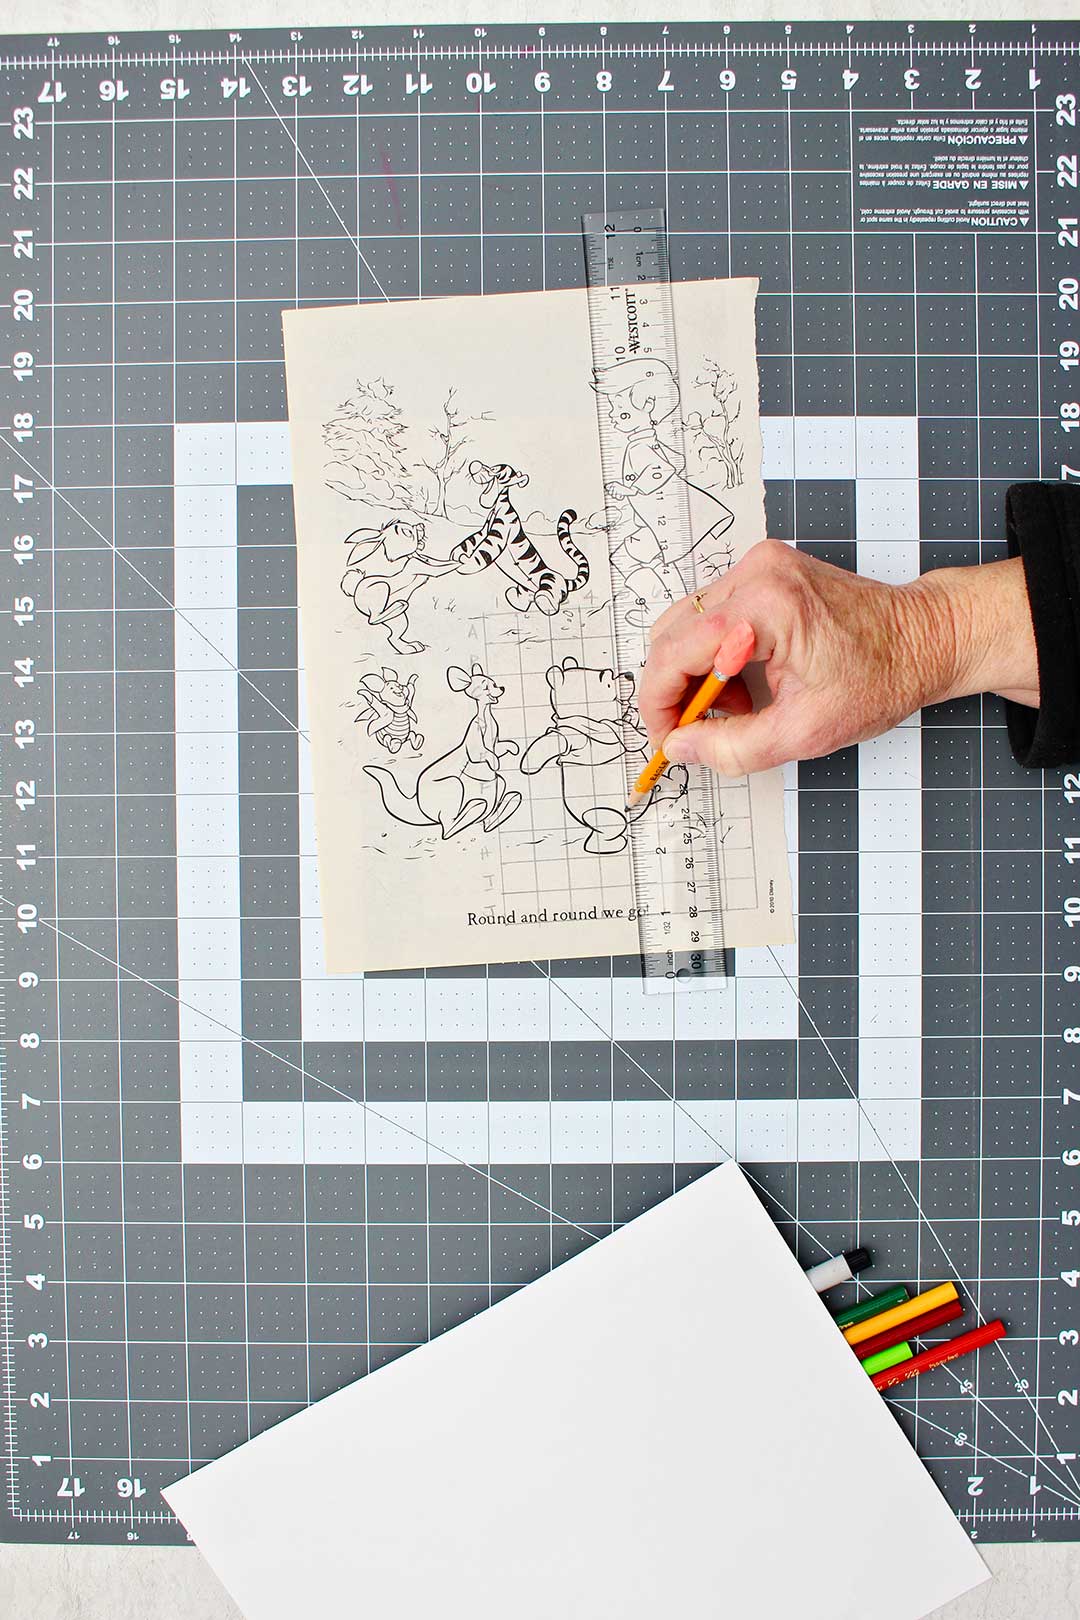
So next we’re going to draw that grid on top of the original drawing or picture.
I usually start with a grid that creates ½x1/2-inch squares or 1x1-inch squares on my smaller image. The more detailed the picture, the smaller I make the blocks on my original grid.
In the grid example in my pictures and video I have drawn ½x1/2-inch blocks in the first grid.
Draw horizontal grid lines
Take a ruler and place it on one side of your drawing. Draw small marks ½ inch apart all the way down the side of the drawing (like small dots).
Next repeat that on the opposite side of the drawing.
Draw horizontal lines between the ½-inch marks on either side of the paper. This will make parallel lines that go across the picture in one half inch increments.
Draw vertical grid lines
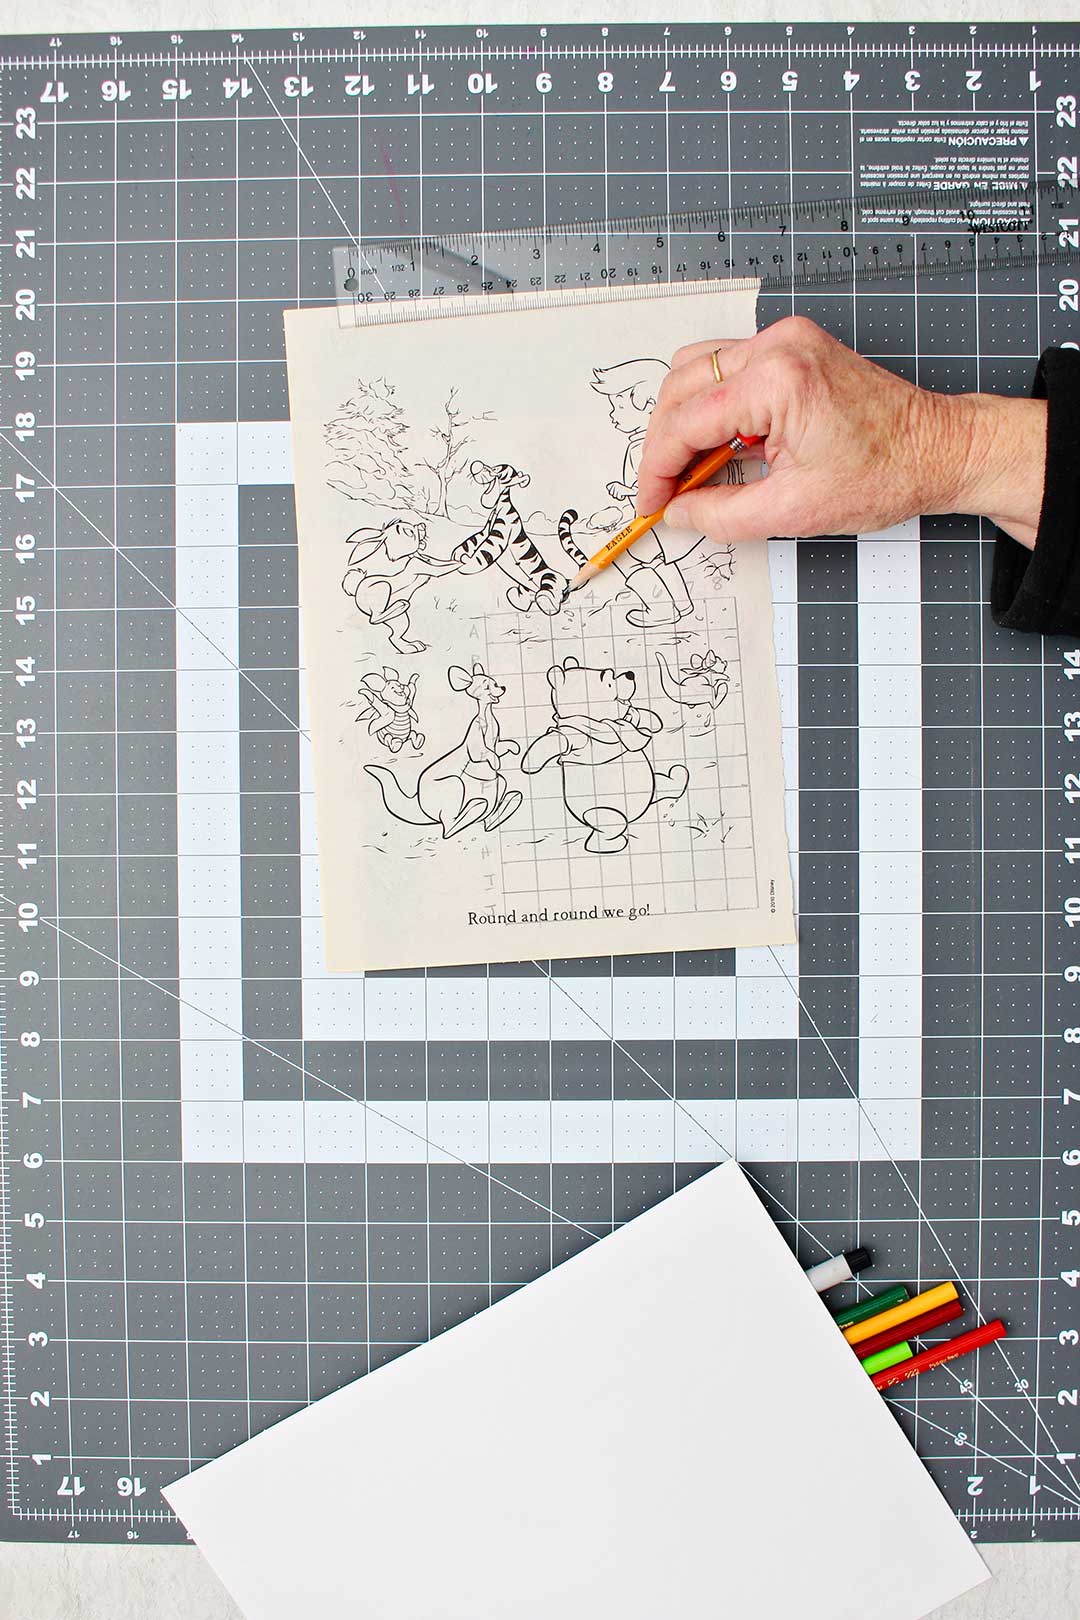
Turn your picture on its side and draw small ½-inch marks across the top edge of the picture. Do the same on the bottom edge of the picture
Draw vertical lines between the half inch marks from top to bottom on the picture.
This will make one half inch small blocks across the entire picture.
Make corrections on the grid if needed
If the lines don’t look parallel, go back and check your measurements.
Erase and redraw to make sure the grid lines are straight and parallel. If they aren't accurate the picture will be distorted when transferred.
Make the second grid next
Next you want to make a grid on the surface that you want to transfer the drawing onto.
Remember that you’re hoping to make the same number of squares on the surface. So count the number of squares on your original grid. Count the number of squares wide and the number of squares tall.
Now calculate how to make the squares on your second surface.
For example:
- If your original piece was 4"x5" with ½x1/2-inch squares
- Make an 8” x 10” with squares that are 1"x1".
- The second grid will be the same number of squares wide and tall as the first grid
- That doubles the size of the new drawing.
- This will also easily transfer to a 16 x 20” canvas by making squares that are 2"x2" in size.
Easy rectangle sizes to enlarge are 4"x5", 8"x10", 12"x15", 16"x20".
Drawing the second grid on your new surface
Making the second grid is done by repeating the exact same process as for the grid on your original piece.
So on the second surface, make marks on either side of the canvas that are 1 inch apart.
Note: Or whatever measurement you have decided upon for the second grid.
Then draw lines across the canvas or paper that connect those marks and make parallel lines that are 1 inch apart.
Do the same thing vertically as well.
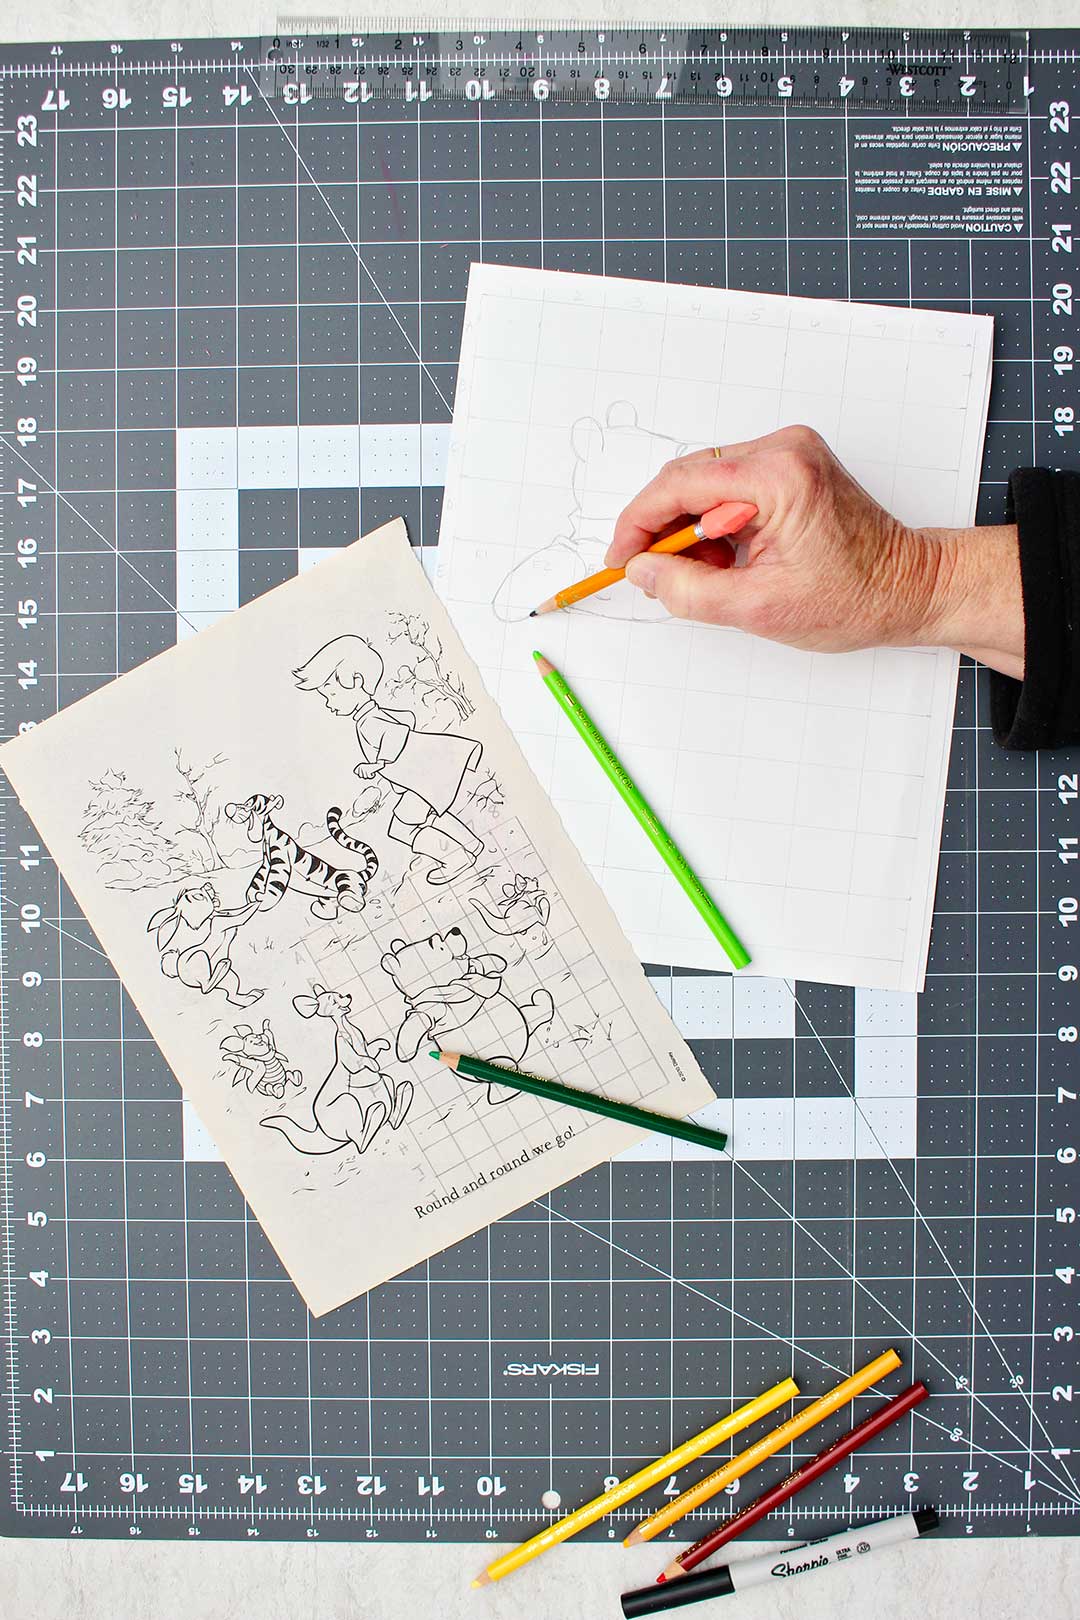
Draw the lines lightly!!
It’s important that you draw these lines lightly. Then you can erase them from the new drawing surface after you are done drawing. You don’t want all of those lines to show through on a watercolor painting for example. So make the marks light so they’re easily erased.
Transfer the drawing block by block
Next is what I think is the really fun part in learning how to enlarge a drawing, actually transferring the drawing!
Numbering the grid squares (optional)
If you would like to you can number all of the grid squares on your first drawing. Then make the same corresponding numbers on the second drawing paper grid.
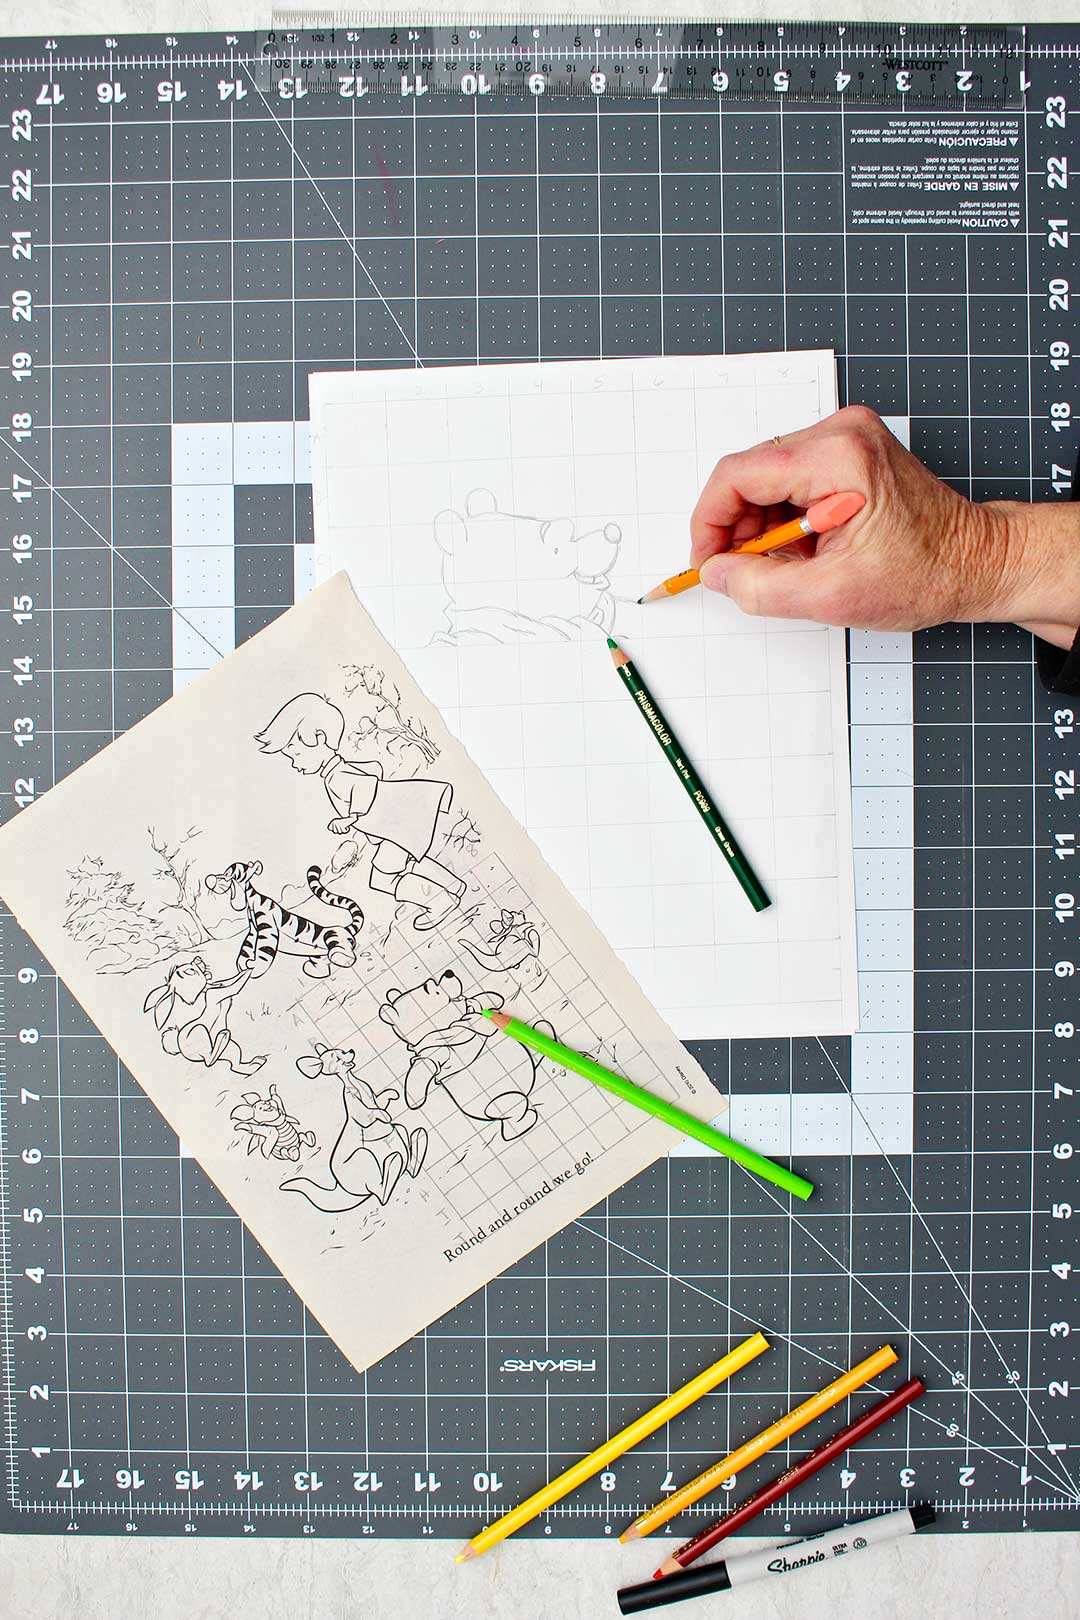
On my drawing, I wrote numbers across the top on the first drawing. Then I wrote letters down the side. So I ended up with squares that were numbered A1, A2, A3, and so forth. Then when you go down to the second line it would’ve been B1, B2, B3 and so forth.
Numbering the squares makes it easy to make sure that you are drawing the correct contents of each box of your original grid onto the correct box in your second grid. This is especially true for children as they learn how to enlarge a drawing.

This is an optional step and you will see that I did not use it on my second surface. But if my drawing would have had a lot of details I would have numbered the squares.
Transferring a drawing from grid to grid is an excellent skill. It's good for a child to learn and for adults to practice! 🙂 This develops observational skills as well as good eye and hand coordination. That's why these grids are often found in puzzle and mind bender books.
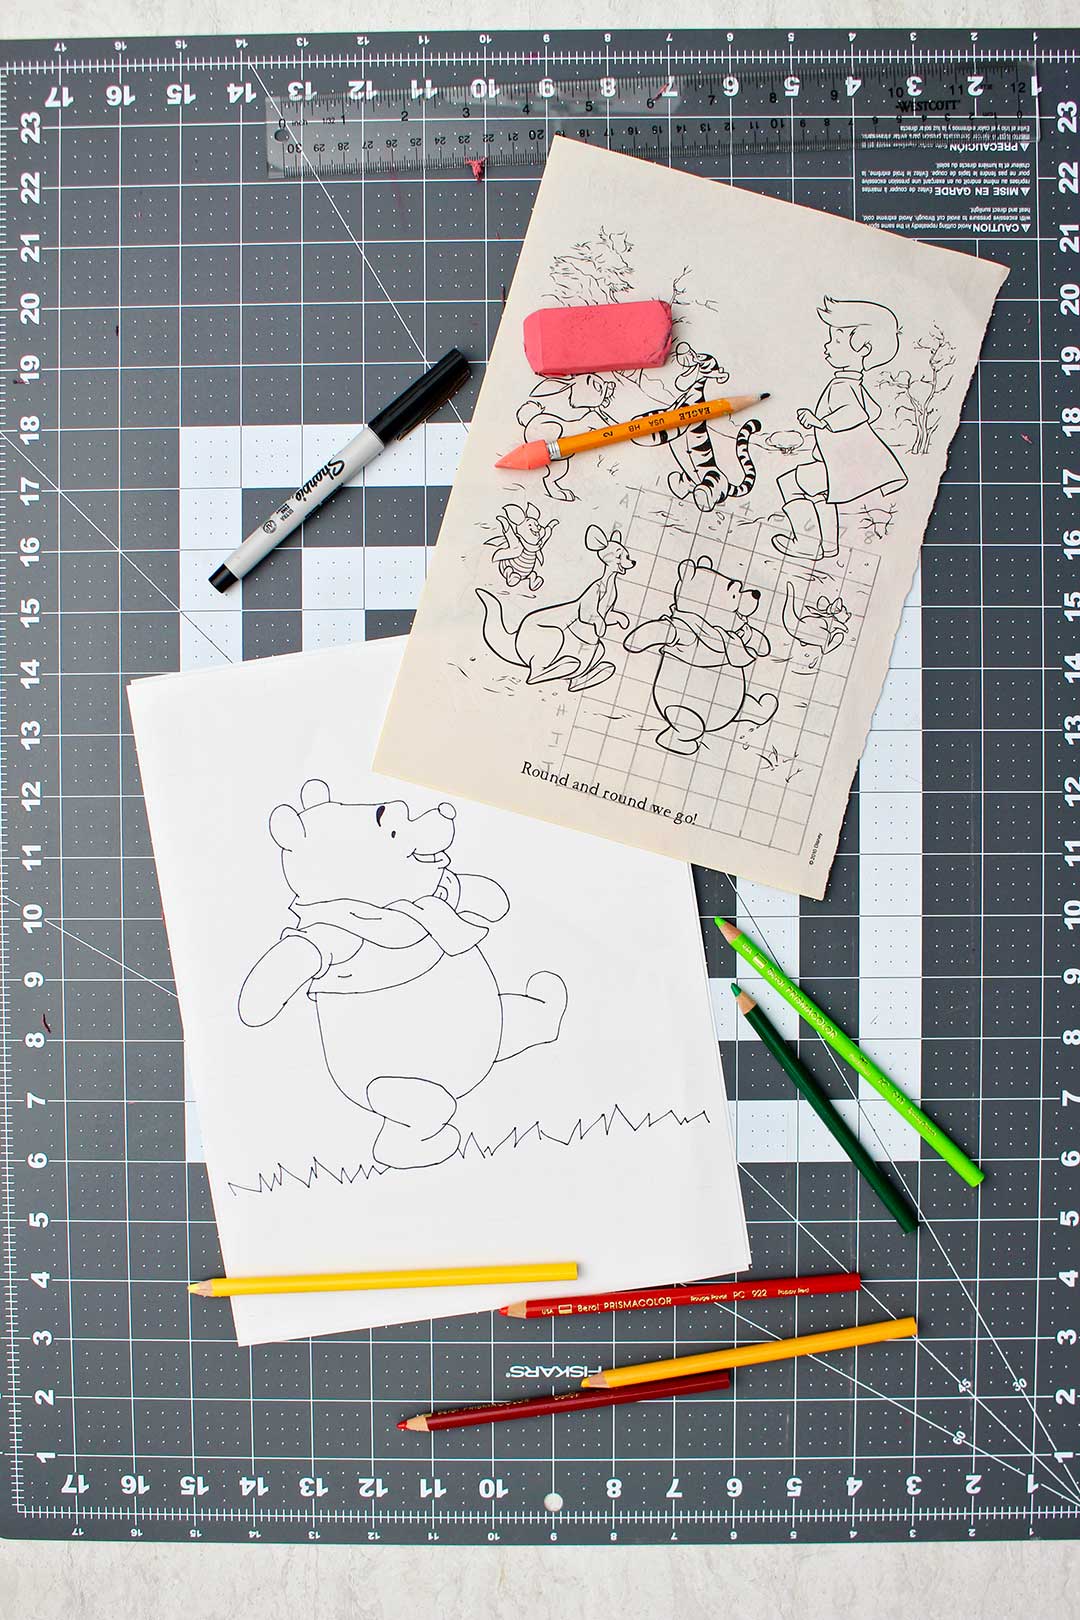
So now it just takes the time to systematically and carefully draw what is in each square on the first surface into the square of the corresponding new surface.
Block A1 contents drawn to block A1 on second grid
Take a moment to look at what is in the A1 block of your original grid.
Draw everything that you see in the first block (A1 square) of the original drawing into the first block (or A1 square) of the second drawing.
You do not need to think about what’s in any other square at this point in time. Just draw what is in one square at a time as accurately as you can.
It’s helpful to use the sides, top and bottom of the first square to estimate where to start and stop the lines you will draw on the second grid square you're transferring the drawing to.
For example, I see a line that moves across the square that I’m going to transfer. I make note that it starts halfway up the left side of the square. It ends ¼ of the way down the right hand side of the square.
I mark those points on the second grid square. Then I make the line look the same as it does on my drawing in my new square. I mimic how it goes up or down between those two points.

Block A2 to A2 then wash and repeat
When I’m content with that, I will move on to drawing what's in the next square and copying it into the second grid.
When you move onto the next square in the drawing, you will have drawing in connecting boxes to use as a help to start and stop your lines in the new box.
So if a line continues from A1 onto A2 you can see where that line starts from the last box and then continue it into the box that you’re drawing now.
This is fun!
I find this fun. I’m always surprised after drawing a few boxes on my new surface how much it looks like the original.
Be as patient and accurate as you can. Transfer what is in each box on the original into the corresponding grid on the new surface. Be careful to observe and then copy.
I do find it works best to do the boxes in order. A1 and then A2 and then A3 and so on, not jumping all around the picture. But even if you jump around between squares the drawing will still work. As long as you copy every square and don’t miss any!
Enjoy coloring or painting your enlarged drawing!!!!
Reducing a drawing size
I want to mention that drawings can be made smaller by reversing this technique.
To reduce the drawing size, draw a grid on your original drawing. Then make a grid of smaller squares on the surface of a smaller paper or canvas.
As you transfer the drawing square by square you will make the drawing smaller on the second surface.

Transferring the same sized drawing
It's obvious, but you can transfer a drawing in the same size as the original too.
Make a grid of the same exact size as the one on your original. Just transfer the picture over to the grid on the new surface in the same size.
You could use a transfer paper or tracing paper made for this purpose (not carbon paper). This can be purchased in the drawing section of a craft store or online. A drawing that you have done could be transferred a number of times with this method.
I’m sure that there are also computer generated ways to do this. But I’m sticking with the hand drawn methods right now.
I love this how to enlarge a drawing technique, it's just the simplest method and I truly think it's fun.
If you would like to follow along on a full length video tutorial here is that link again: How To Enlarge a Drawing With a Grid.
Distorting a grid drawing
I have taught that the squares on the second grid should be the same shape (except larger) as those on the first grid.
But to do something unusual you could vary the sizes of your second surface grid squares.
In fact, they wouldn’t have to be squares at all. You could make the grid lines wavy instead of straight for example. Then kind of distort your original drawing to fit into those unusual spaces on your new drawing.
Or you could make the second grid with taller and narrower boxes. This would distort the drawing into being stretched and elongated. It just might be kind of fun to experiment with that!
It would make a distorted drawing, but could be a fun experiment to do with interesting results.
I digress.
How to enlarge a drawing with a projector
Back in the olden days, we would use an overhead projector to enlarge a very large art piece. The clear plastic transparency pages (projector pages) were used to trace the drawing. Then it projected that drawing up on the wall to trace using light.
An opaque projector is still something that is available now but the old overhead projector is kind of a dinosaur. It's hard to find one!
Classroom teamwork grid idea
Hey, this could be a really fun group activity in a classroom.
Give each student a square with the markings of the original drawing. They have to work together with their classmates to transfer each of their squares onto the new surface to make a drawing! Wouldn’t that be fun? I think I’m gonna try using this idea myself.
The grid technique is an easy way to enlarge any drawing, to any size! You can use it to transfer a picture onto a canvas, a piece of paper, or even a wall for a mural or photo backdrop!
If you need to enlarge a drawing and transfer it to another surface, try using the grid technique! Simply draw a grid over your original picture, then use a grid on your new surface to copy the image.
Needing to enlarge a photo, but don't have a projector? Use the grid technique! Draw a grid on your original photo, as well as your new surface. Then simply copy the shapes within the grid to recreate your image in a larger size!

More projects that use the grid technique
If you would like projects that use the grid technique give these a try!
- Photo Frame Prop for a Woodland Theme Party
- DIY Butterfly Wings Photo Backdrop
- Custom Pin the Tail Party Game
Enjoy!
If you try this craft, let me know! Go ahead and leave a comment, rate it, and tag a photo with #WelcometoNanas wherever you post.
Come join the fun at https://welcometonanas.com
Supplies needed for How To Enlarge a Drawing
- Reference image- a drawing or picture you want to enlarge
- Paper, canvas, or any larger paper or surface on which to enlarge the reference image
- Pencil
- Ruler
- Eraser
- Colored pencils (optional)

How to Enlarge a Drawing to Scale Using a Grid
Equipment
- Ruler
Items Required
- Reference image- a drawing or picture you want to enlarge
- Paper, canvas, or any larger paper or surface on which to enlarge the reference image
- Pencil
- Ruler
- Eraser
- Colored pencils (optional)
Instructions
- To learn how to enlarge a drawing we start with the original drawing or reference picture that you want to transfer.If you have drawn a sketch as a line drawing that is ideal. If you want to start with a photo of some sort, first make it into a line drawing. Use a computer program to make it into a line drawing. Or just draw lines around the outside edges of the main parts of the picture.
- So next we’re going to draw that grid on top of the original drawing or picture. I usually start with a grid that creates ½x1/2-inch squares or 1x1-inch squares on my smaller image. The more detailed the picture, the smaller I make the blocks on my original grid.Take a ruler and place it on one side of your drawing. Draw small marks ½ inch apart all the way down the side of the drawing (like small dots).Next repeat that on the opposite side of the drawing.Draw horizontal lines between the ½-inch marks on either side of the paper. This will make parallel lines that go across the picture in one half inch increments.Turn your picture on its side and draw small ½-inch marks across the top edge of the picture. Do the same on the bottom edge of the pictureDraw vertical lines between the half inch marks from top to bottom on the picture.This will make one half inch small blocks across the entire picture.
- Next you want to make a grid on the surface that you want to transfer the drawing onto.Remember that you’re hoping to make the same number of squares on the surface. So count the number of squares on your original grid. Count the number of squares wide and the number of squares tall.Now calculate how to make the squares on your second surface. For example: If your original piece was 4"x5" with ½x1/2-inch squaresMake an 8” x 10” with squares that are 1"x1". The second grid will be the same number of squares wide and tall as the first gridThat doubles the size of the new drawing. This will also easily transfer to a 16 x 20” canvas by making squares that are 2"x2" in size.
- Making the second grid is done by repeating the exact same process as for the grid on your original piece.So on the second surface, make marks on either side of the canvas that are 1 inch apart.Note: Or whatever measurement you have decided upon for the second grid. Then draw lines across the canvas or paper that connect those marks and make parallel lines that are 1 inch apart. Do the same thing vertically as well.
- If you would like to you can number all of the grid squares on your first drawing. Then make the same corresponding numbers on the second drawing paper grid.On my drawing, I wrote numbers across the top on the first drawing. Then I wrote letters down the side. So I ended up with squares that were numbered A1, A2, A3, and so forth. Then when you go down to the second line it would’ve been B1, B2, B3 and so forth.
- Take a moment to look at what is in the A1 block of your original grid.Draw everything that you see in the first block (A1 square) of the original drawing into the first block (or A1 square) of the second drawing. When I’m content with that, I will move on to drawing what's in the next square and copying it into the second grid.When you move onto the next square in the drawing, you will have drawing in connecting boxes to use as a help to start and stop your lines in the new box. Copy what's in block A2 to A2 then wash and repeatI do find it works best to do the boxes in order. A1 and then A2 and then A3 and so on, not jumping all around the picture. But even if you jump around between squares the drawing will still work. As long as you copy every square and don’t miss any!


Leave a Reply