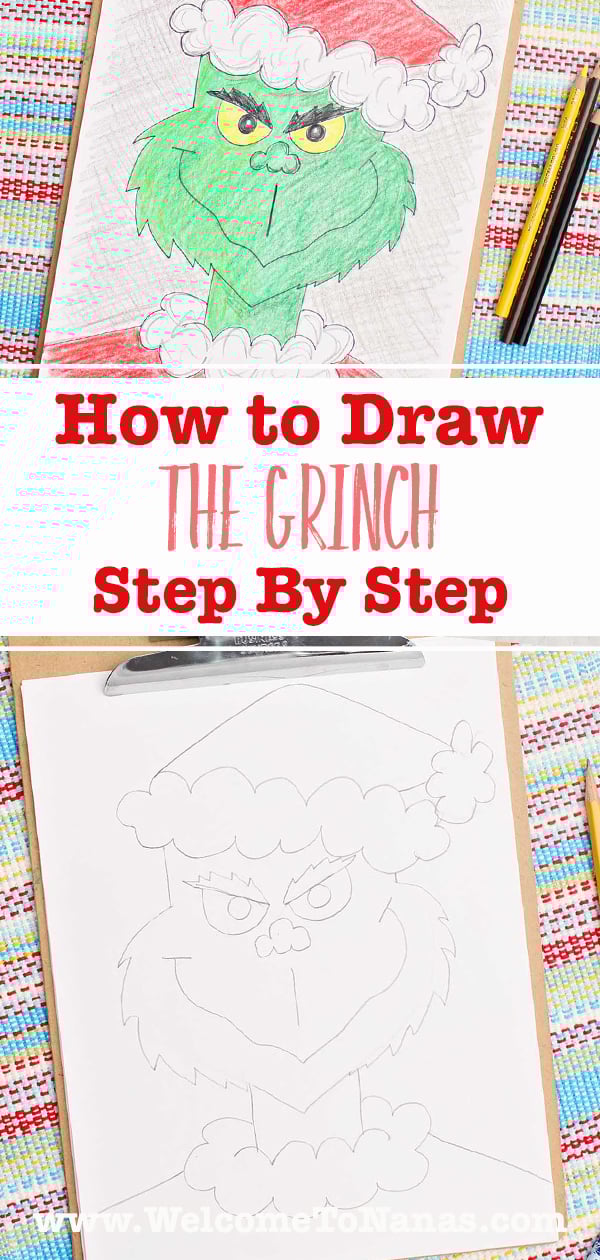
How would you like to learn How to Draw the Grinch Step by Step? I’ll use my many years of drawing experience (over 50!) to break the drawing down into bite sized pieces so you’ll master it even if you haven’t drawn much before.
Jump to:
- How to Draw the Grinch Step by Step
- Cute Craft Alert: How to Draw the Grinch
- How do you draw the Grinch?
- Craft Tips to Make How to Draw the Grinch Easy
- Craft Variations on the Grinch
- Grinch drawing FAQ
- More DIY How to Draw Lessons for Kids
- Merry Grinch-mas!
- Did You Like This Craft?
- How to Draw the Grinch Step by Step
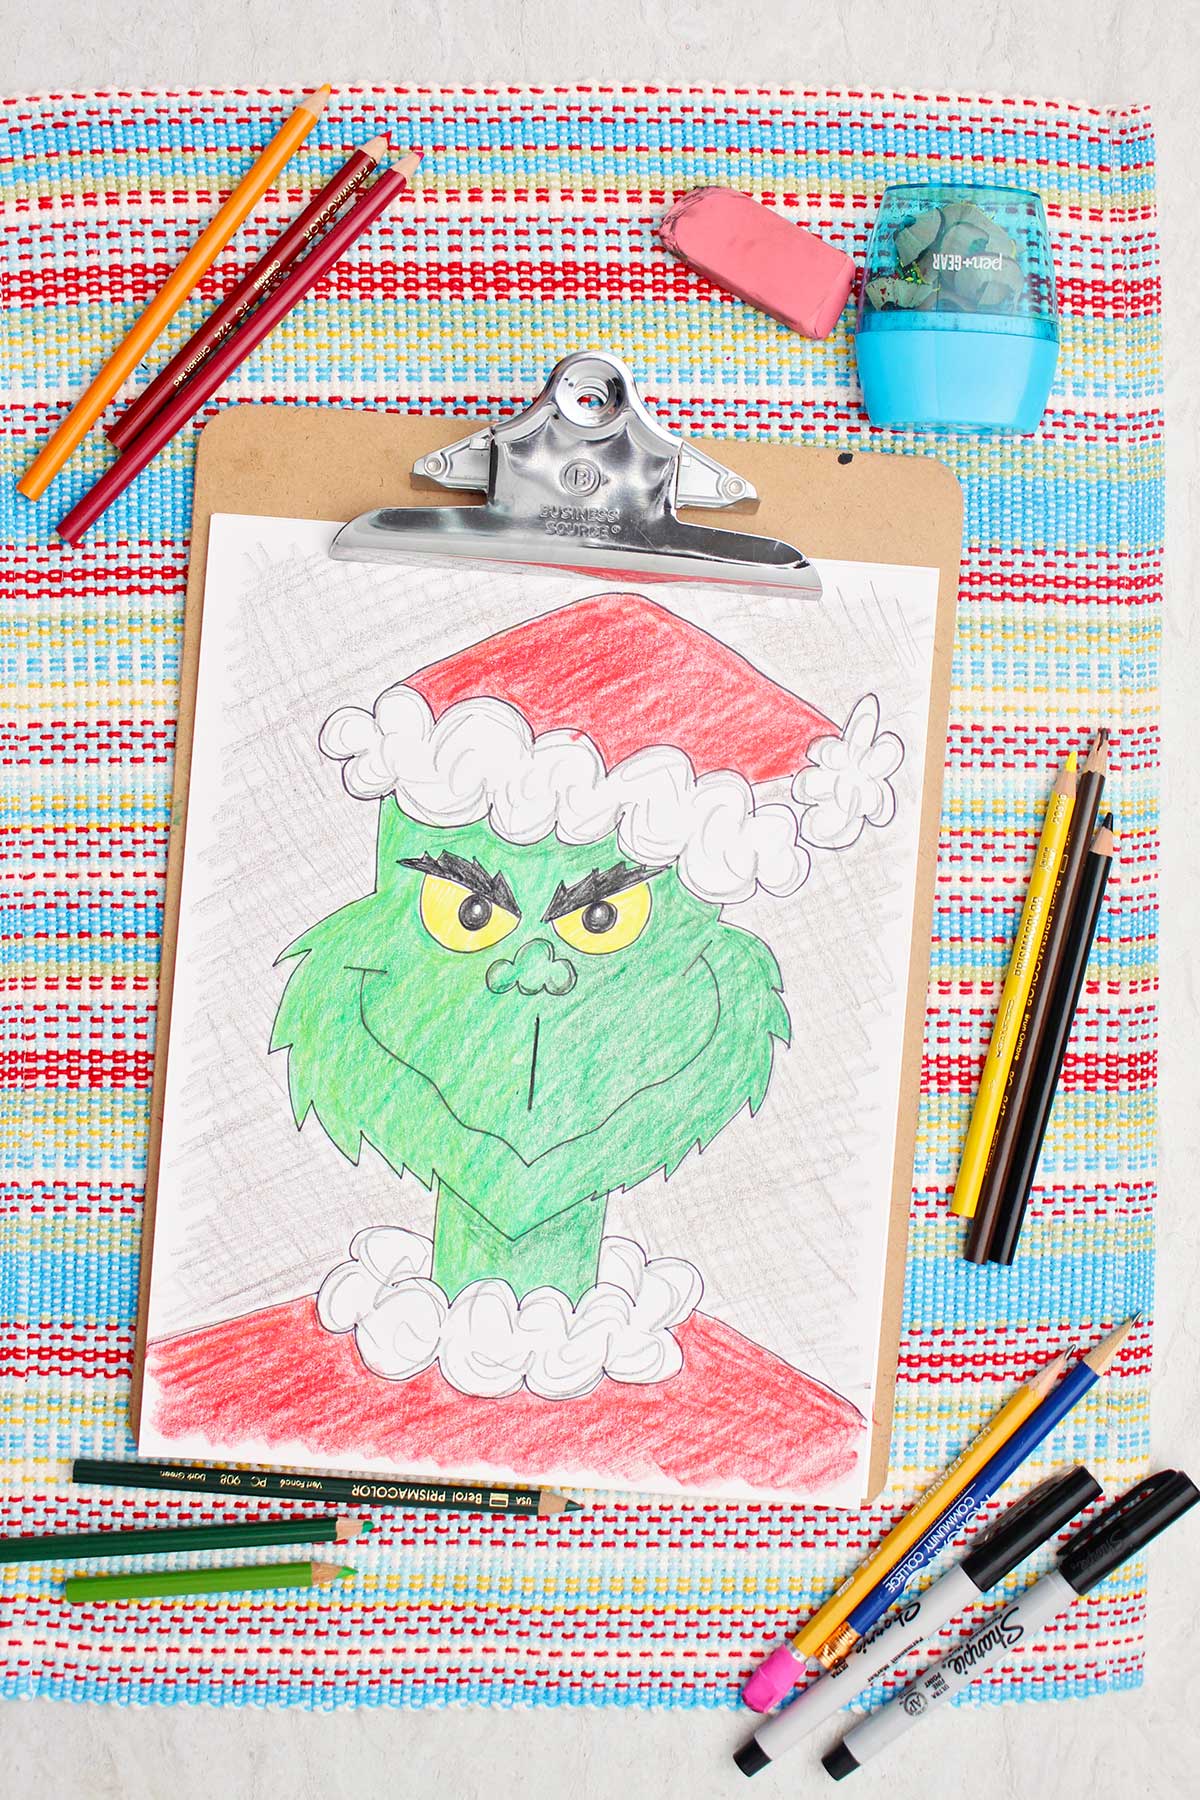
How to Draw the Grinch Step by Step
The Grinch is such a famous Christmas character so it will be fun to know how to draw his face and smirky smile!
I’ll be alongside to help with each step, the video is really helpful. Be sure to stop the video at any time to finish a step.
Cute Craft Alert: How to Draw the Grinch
My brother and I have watched the original "How the Grinch Stole Christmas" cartoon since it first aired on television in 1966. I loved how the green Grinch started out unhappy with the people of Whoville for being so excited about Christmas. It bothered him so much that he decided to steal Christmas and keep it from coming.
His plan backfires and…well you will need to read the book or watch the movie to hear about how his heart goes from small to large before it’s all over! I never get tired of the story and Papa and I watch that original Grinch cartoon show every year- How the Grinch Stole Christmas.
Go get a pencil and a piece of paper because we're going to draw the Grinch's famous face together, step-by-step. I promise, you'll be amazed at the picture you draw even if you haven’t drawn much before! We’ll do it all together and the most important part is just to have fun. Be sure to watch the video for this tutorial, stopping it whenever you want to complete a step. Let’s go get started!
The Simple Art Supplies Needed for this Drawing
Here’s the supply list for this Grinch How to Draw activity- you probably already have them on hand.
- How To Draw the Grinch Step by Step Full Length Video on YouTube- which may be helpful as you follow along step-by-step. How to Draw the Grinch Video link.
- Paper- It’s nice to work in a sketchbook but even white copy paper works fine.
- Pencil- Just a simple pencil like you bring to school will get you started drawing. Later you can get actual drawing pencils if you want to experiment with the different types of leads in pencils (hint, they draw lighter and darker lines).
- Black permanent marker- We will go over our pencil lines with permanent black marker to complete the cartoon look and then use the drawing to color.
- Eraser- You’ll need an eraser to erase mistakes as well as erase pencil lines after we use the black marker. I use a pink soft eraser that doesn’t smudge the pencil lead.
- Colored pencils, markers or crayons- We will color our drawing at the end with Colored Pencils or Colored Markers, Crayons. If you want the actual Grinch colors you’ll need green, red, yellow and black.
- How the Grinch Stole Christmas DVD (optional but fun!)
How do you draw the Grinch?
Follow these steps and watch the video to learn!
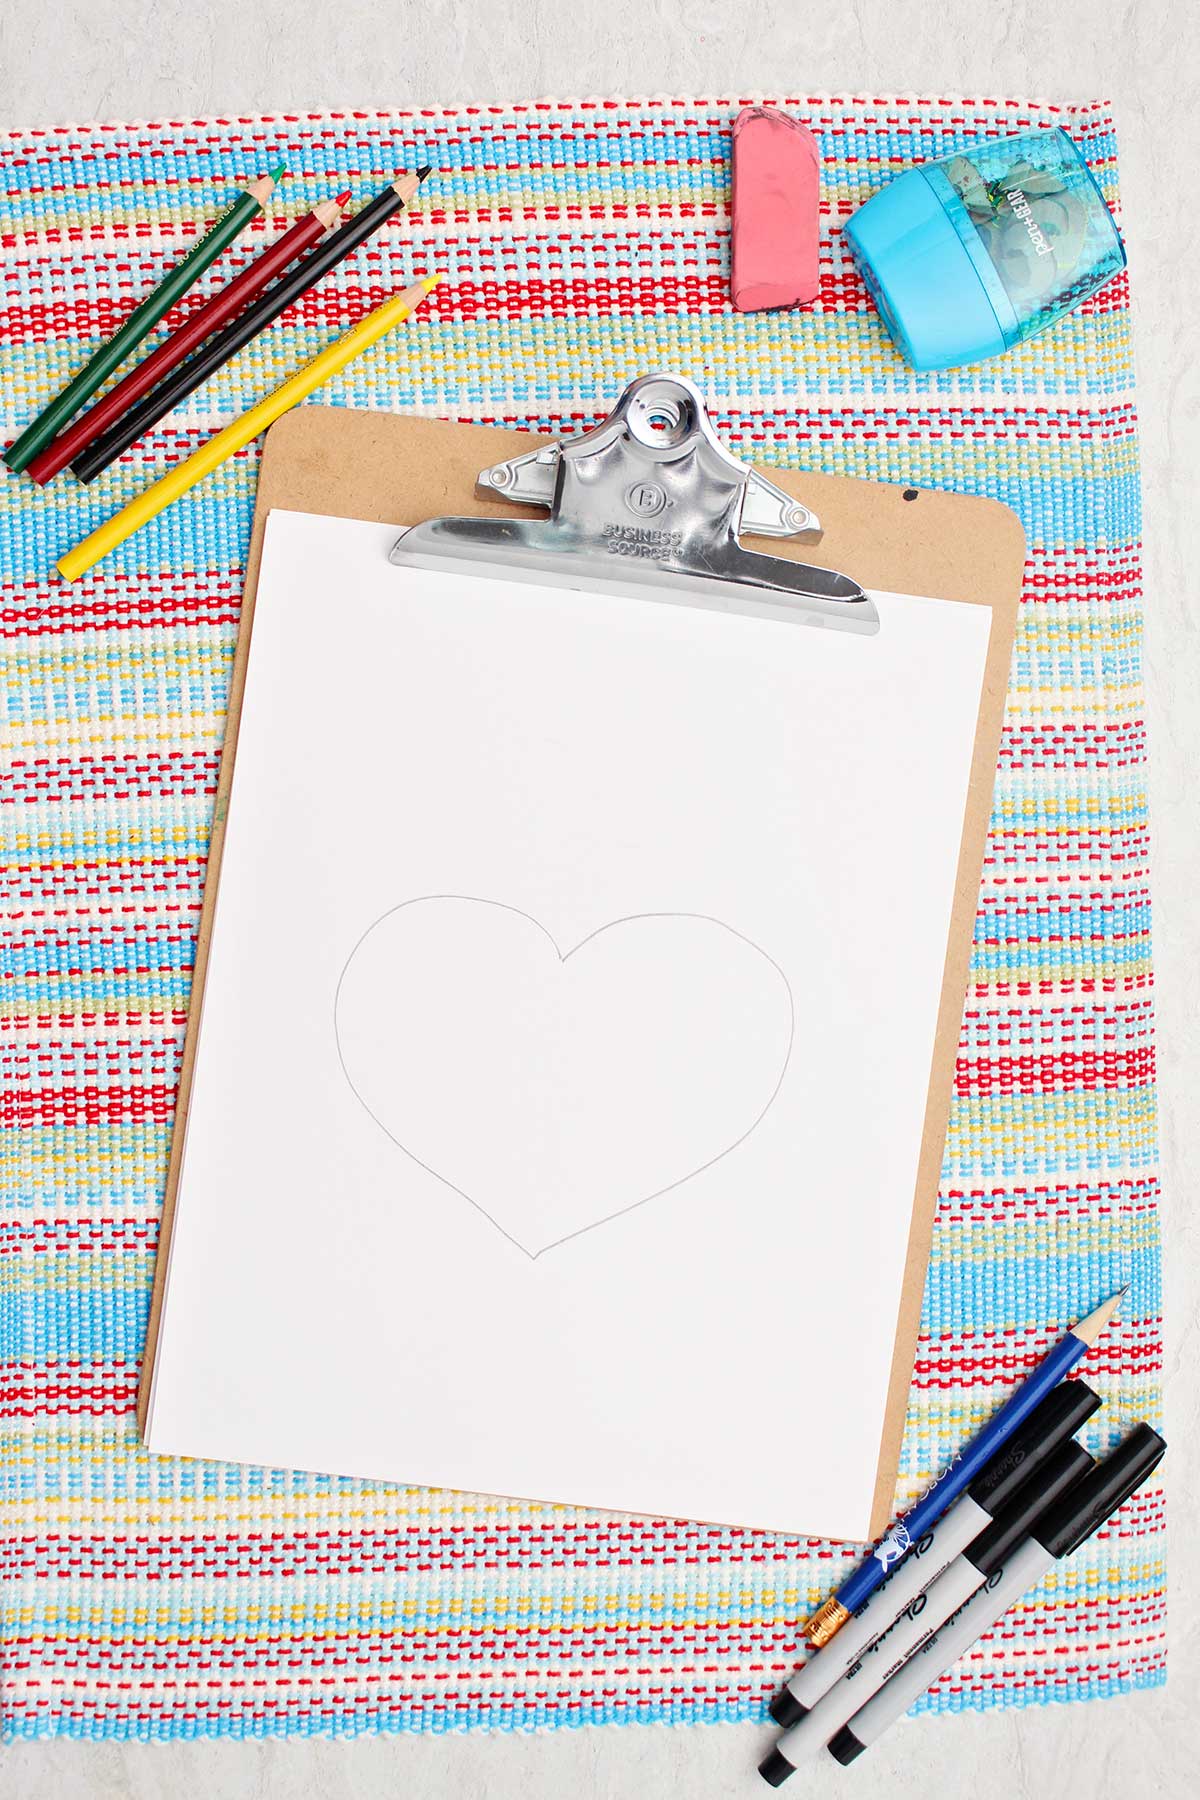
Step 1: How to Draw the Grinch Face Easy
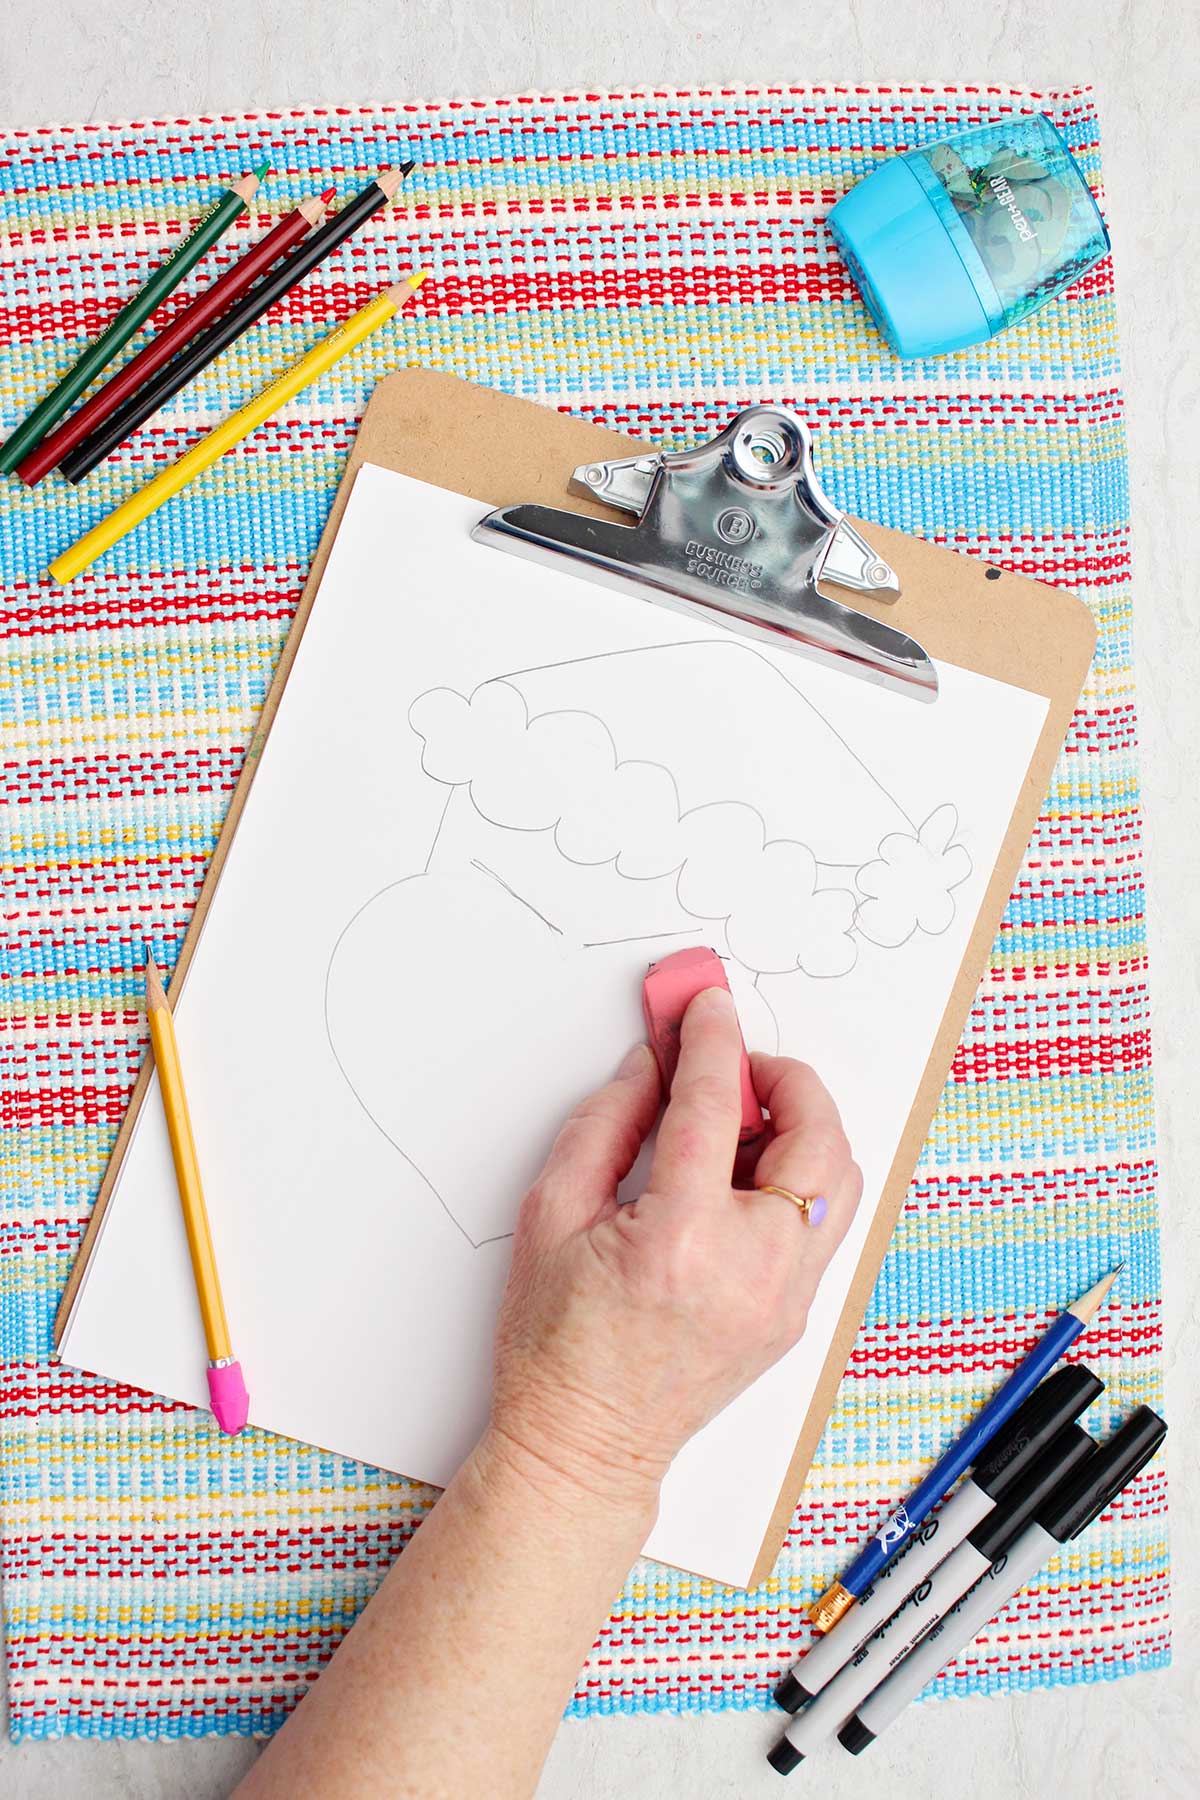
For the Grinch face we are going to start with a heart shape. So draw a heart in the middle of the page as evenly as you can. It doesn’t need to be perfect because the Grinch’s face isn’t perfectly shaped. You can use a sketchbook or just white copy paper if that is what you have.
A drawing tip is to start by making light pencil lines. A light line is easier to erase and then you can go back over the line with a darker line when you are happy with the shape.
On the top right side of the heart, draw a line that goes up about an inch.
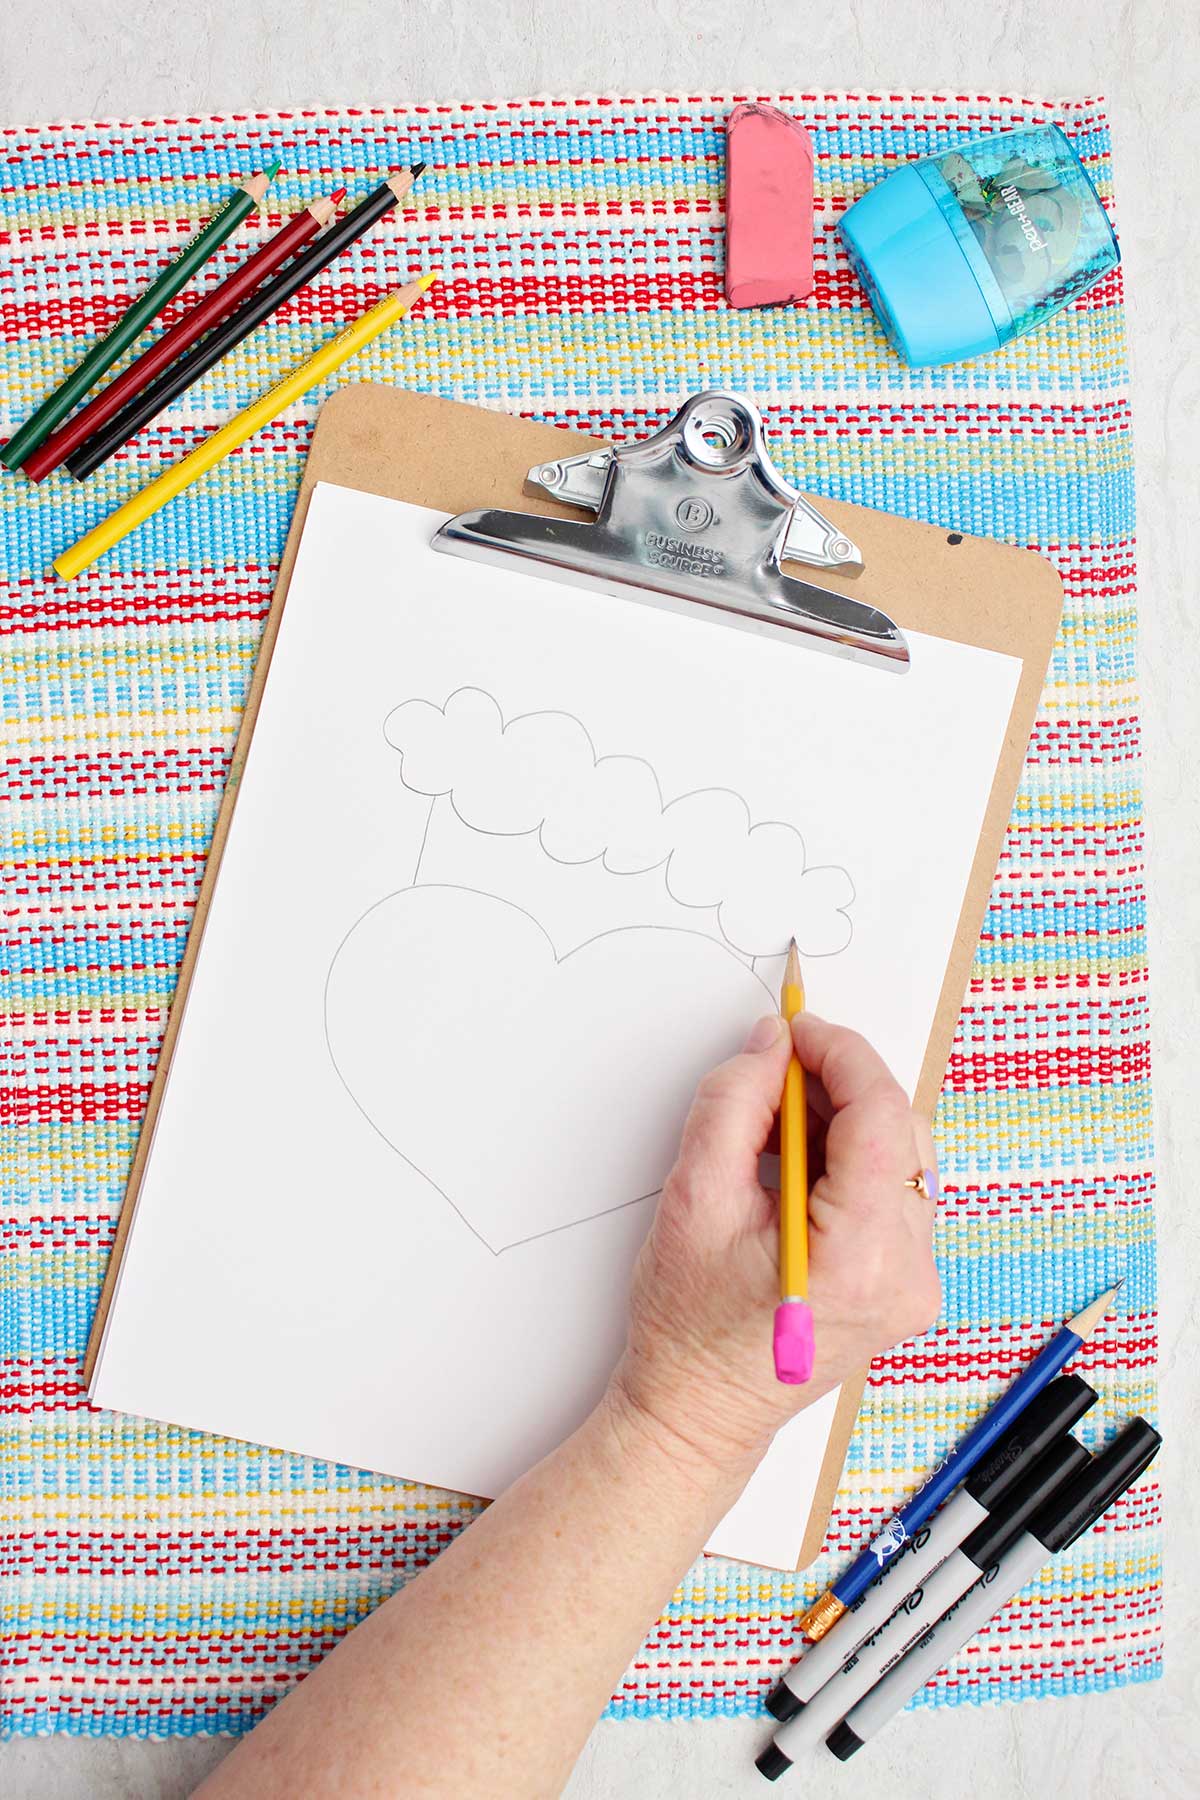
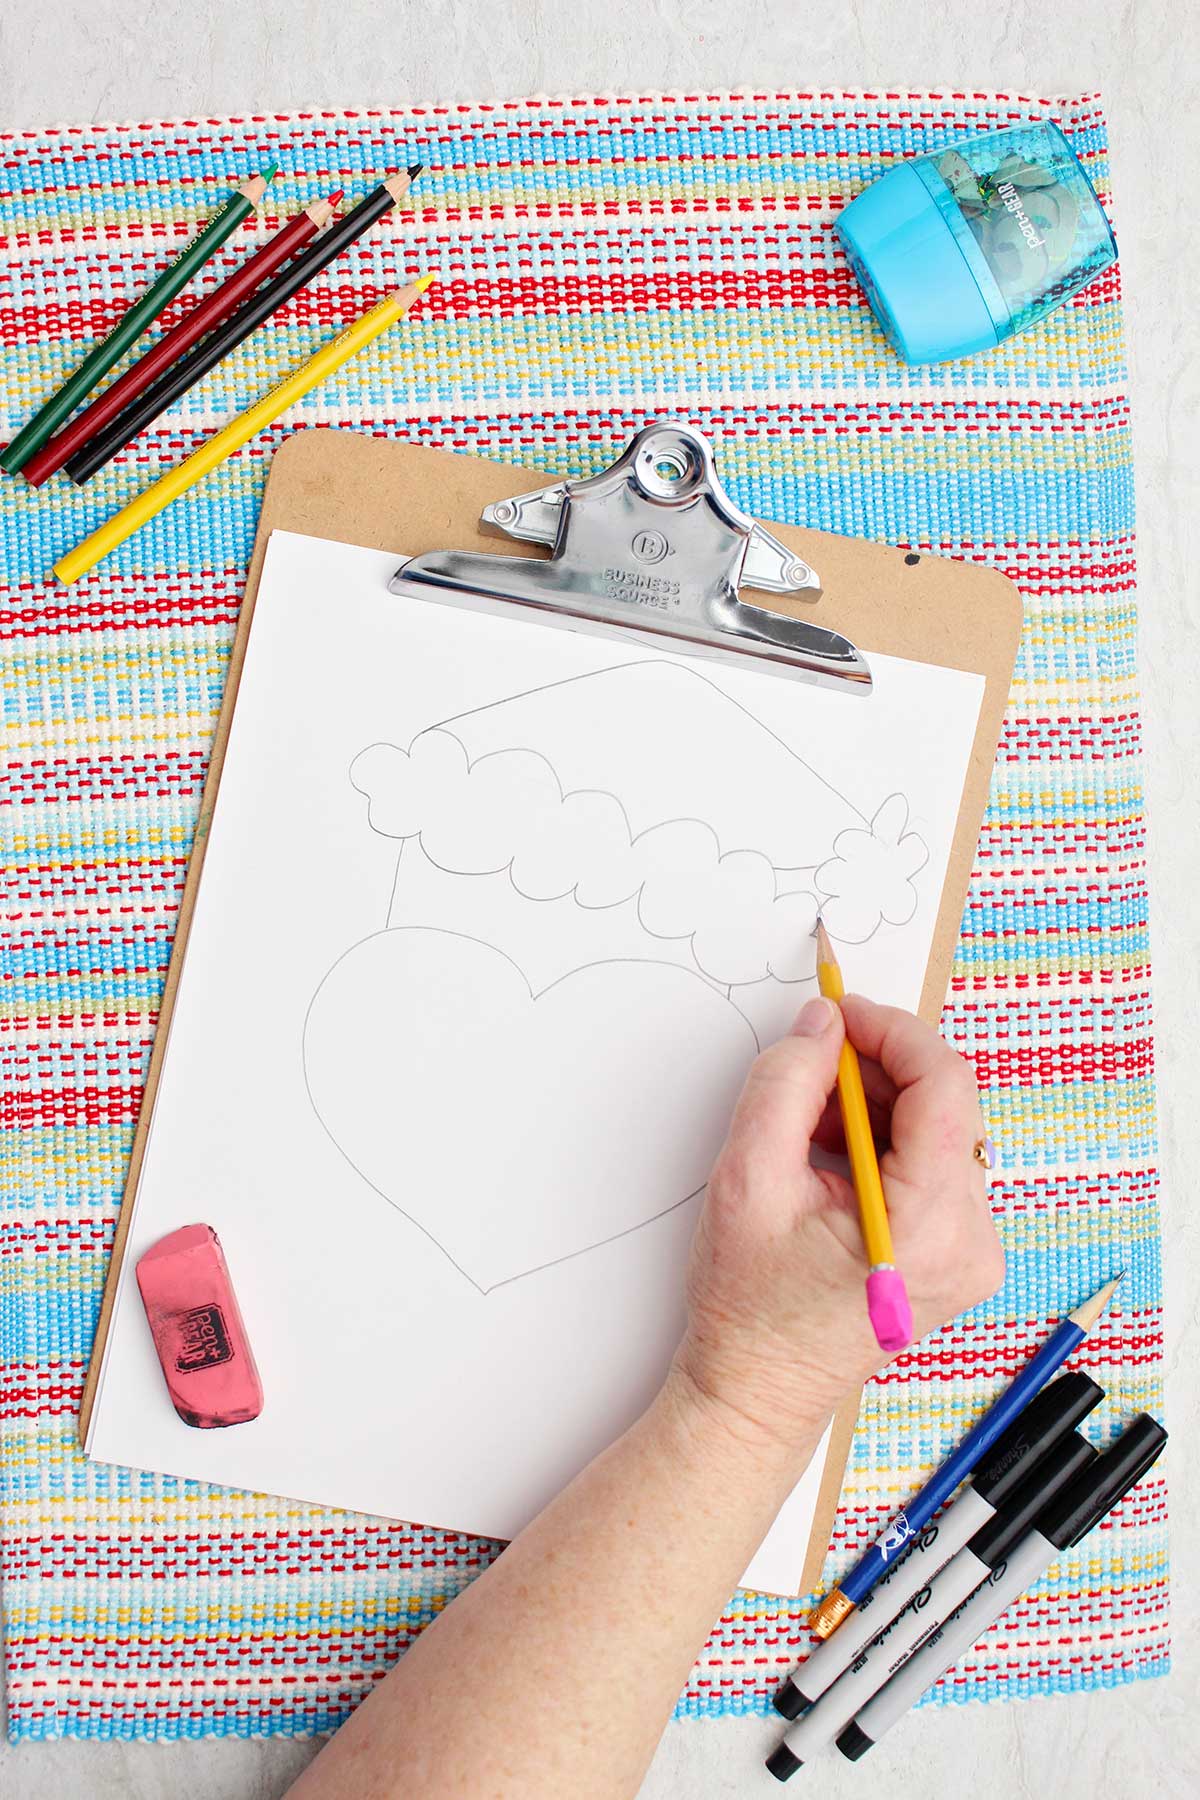
Step 2: Drawing the Santa Hat
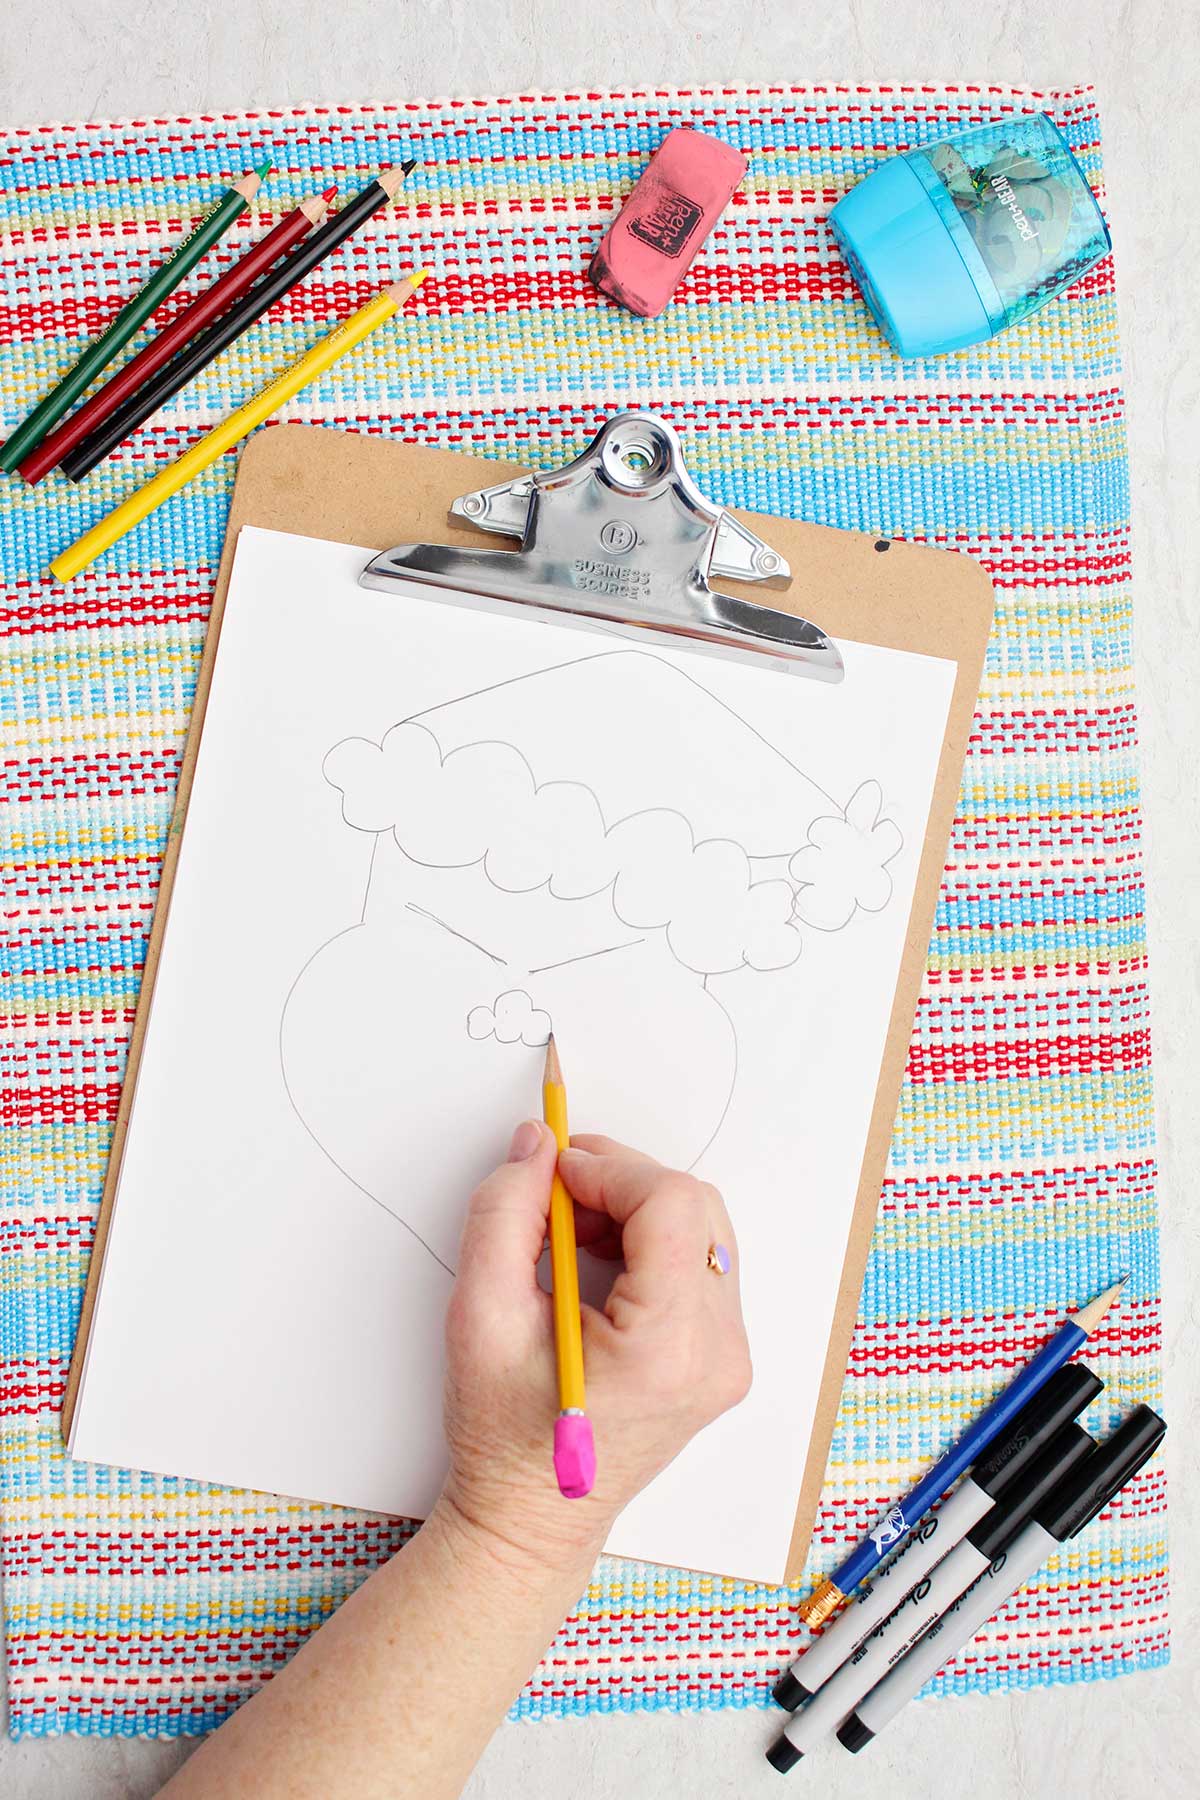
Next we will add the fluffy white trim of the Santa hat. Draw a cloud like line from the top of the line you just drew, slanted down to the right. The line is bumpy, like the edge of a cloud. Then draw another cloud like line over the top of the first one that connects with it on both ends. It helps to watch the video for this tutorial.
Over this line we’ll draw the top of the hat. Draw a mountain like line from the left to the right, starting on the left end of the trim. This line will moves up then down. Then draw a short line from the other end of the trim towards the right end of the mountain line.
At the end of these two lines we’ll draw a pom-pom at the tip of the hat. It will have the same cloud like bumps as the trim.

Step 3: How to Draw a Grinch Face and Expression
Drawing the face is where we truly bring our Grinch character to life. It is helpful to start and stop the full length video in this section- How to Draw the Grinch Step by Step Video link.
The Grinch is all about his wonderfully mean expression, from his scheming eyes to his broad smirk. Let’s do it right!
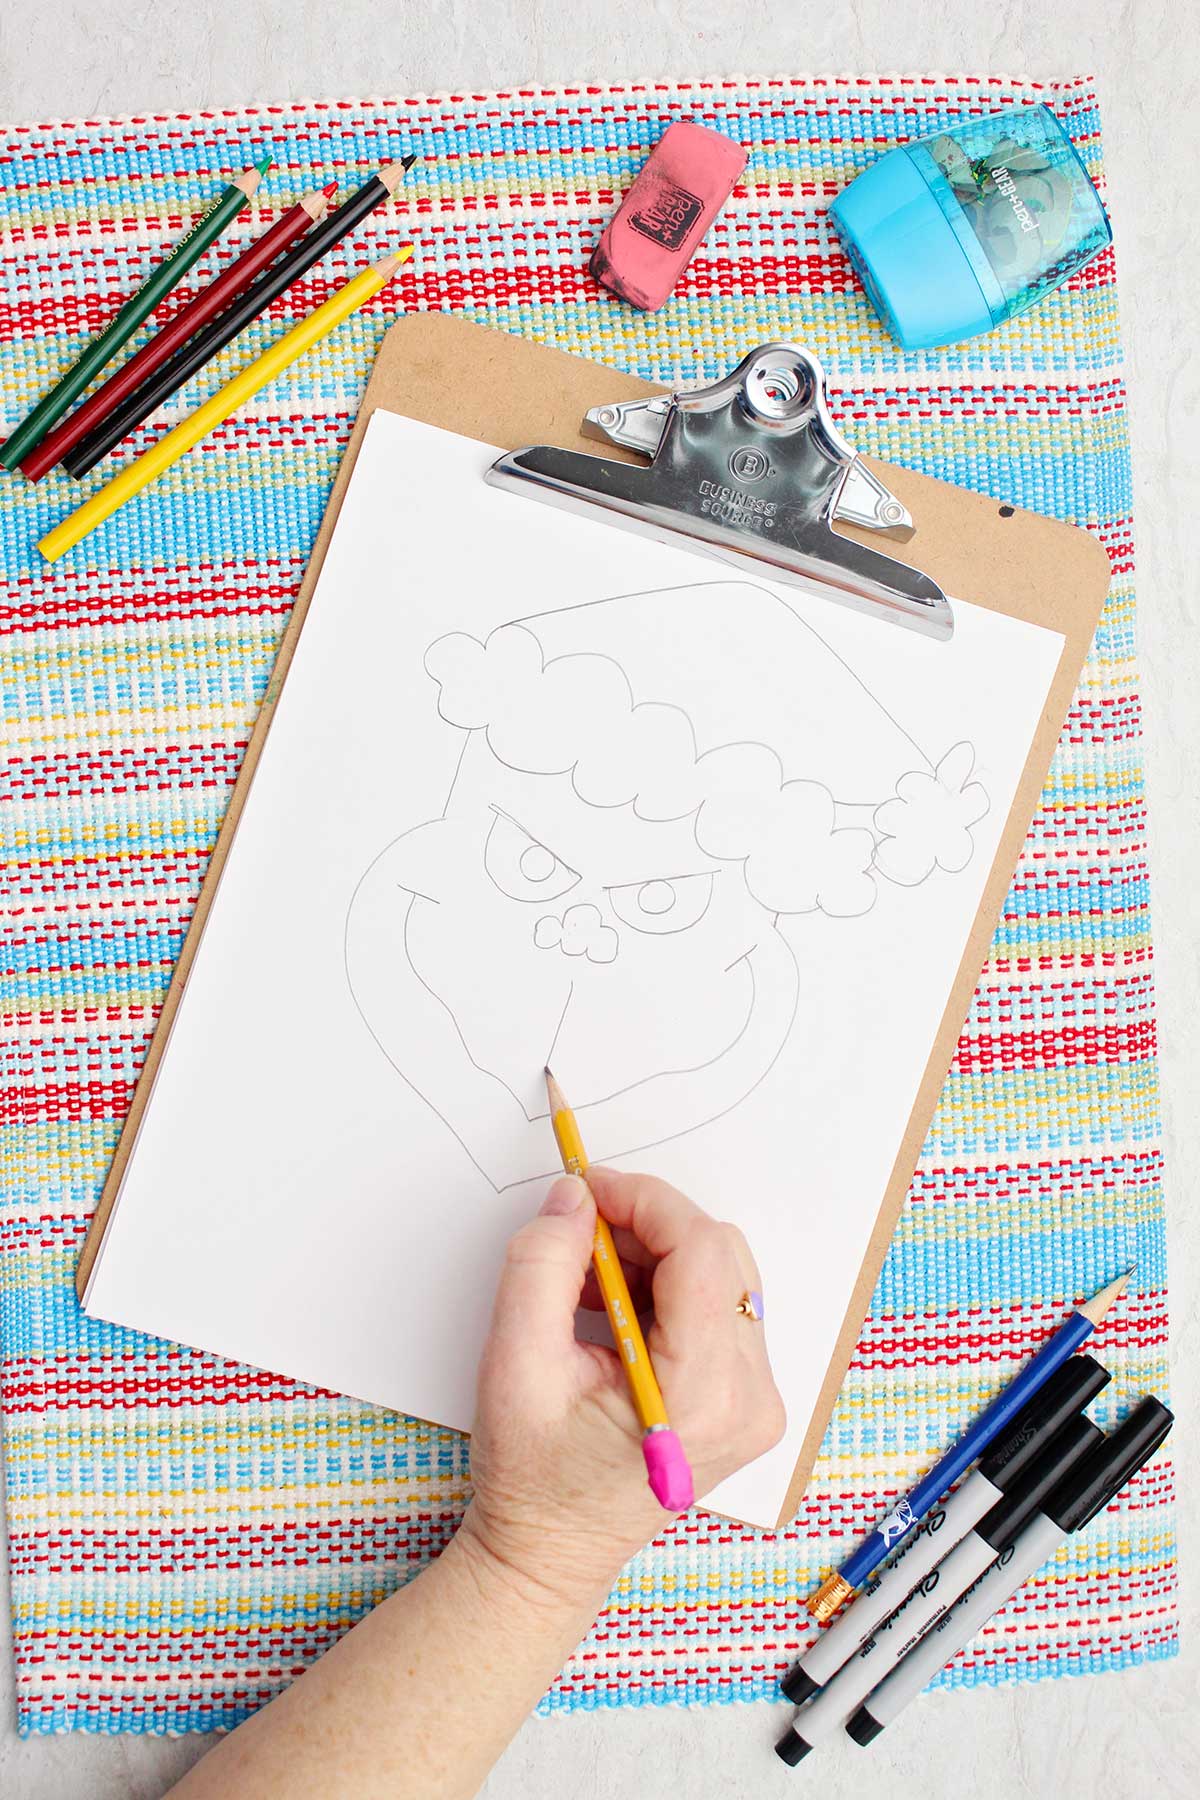
Start by drawing two lines on the top two humps of the heart shape. The two lines will slant down towards each other and are going to be the bottom line of the eyebrows.
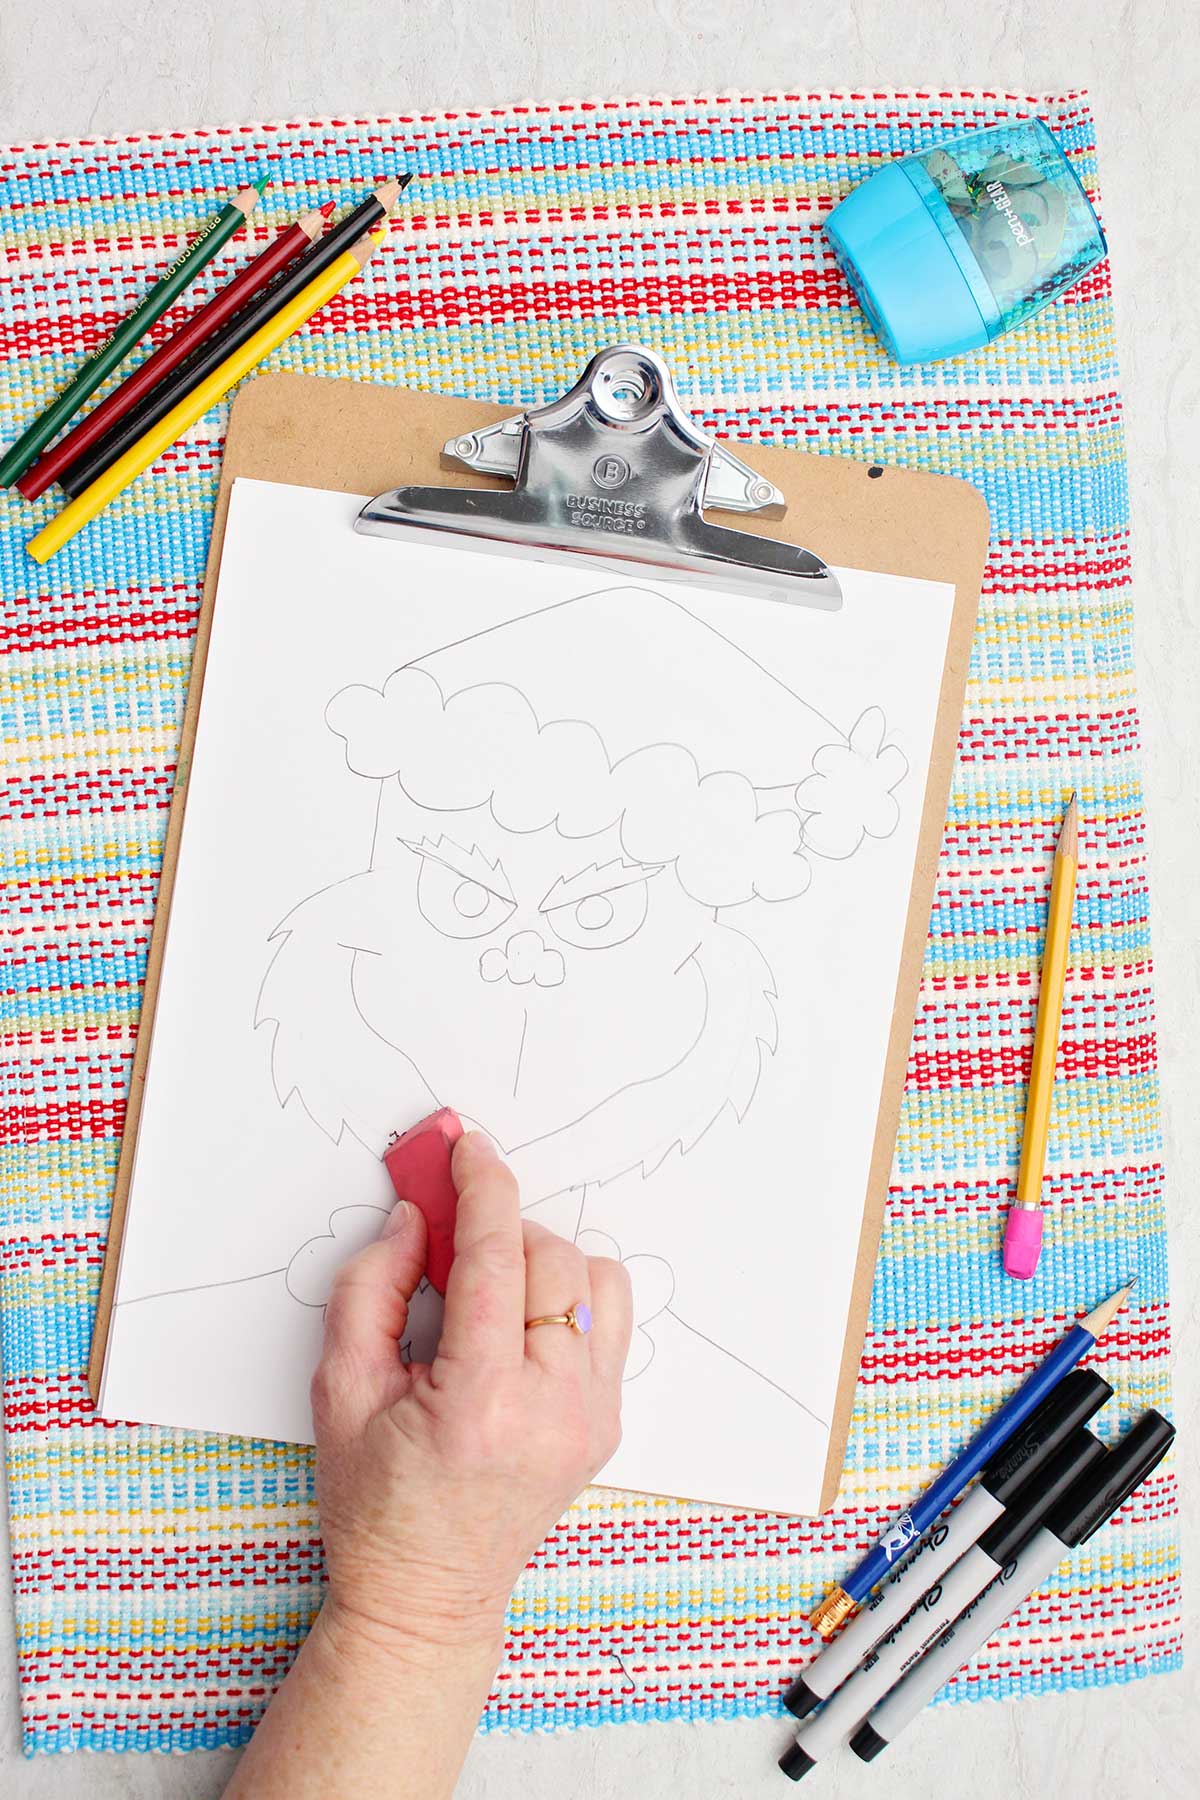
Then take an eraser and erase the top part of the heart lines from around the brow lines from one side of the Grinch face to the other side (leaving the brow lines of course).
Next we’re going to draw the nose, kind of a little button nose. The bottom of the nose is below the center of the two eyebrow lines. It has three scooped “bumps” and mine is about one inch long total. Then draw a second line (starting from the same spot as the first line) that goes upwards. It also has three bumps but this time they go upwards and the center bump is taller than the two outer side bumps.

Back to the eyes. Draw two semi circle lines under the brow lines to make eyes for the Grinch. Draw circles inside to be the pupils. Hmmm- they are kind of mischievous looking eyes.
And here’s a trick to make his eyes sparkle with mischief- leave a tiny, uncolored dot in each pupil. This represents a light reflection and brings a “sparkle” to his eyes.
The Grinch wide grin is drawn along and matches the bottom “V” shape of the heart- except the smile line is squiggly. Draw two short lines on either end of the smile line to make it look like a “smiling” smile. Finish it up with a line that goes straight up and down in the area between the nose and the mouth. This represents the little line we have above our lips.
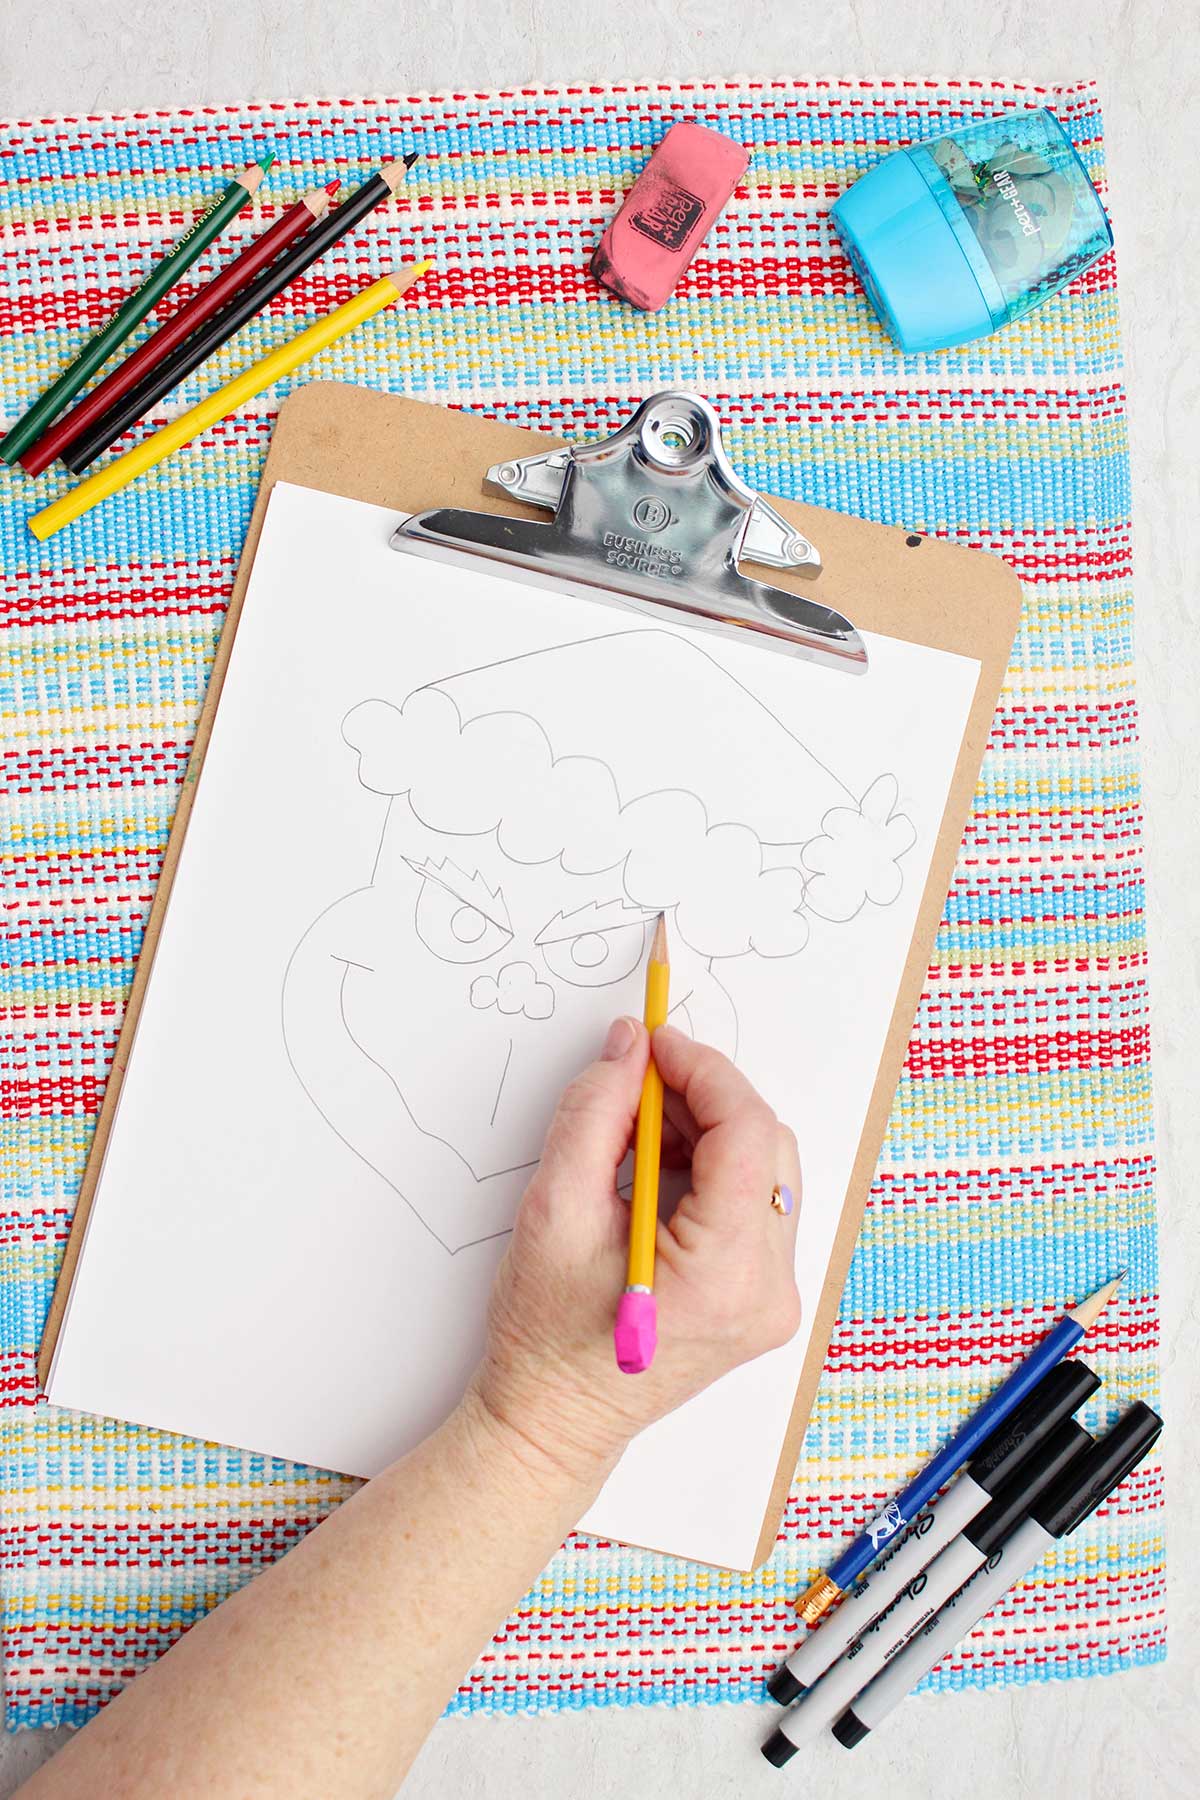
Let’s go back and finish his eyebrows. Draw a zig-zagged lightning looking line above each of the brow lines we made earlier. They should look thick and bushy! You can even add a few short, feathery lines inside the brows if you want.
Lastly, the Grinch needs some shaggy fur on the sides of his face! Let’s change the smooth cheek lines to some fur lines. Let’s start with the fur on the sides of his face. We’re going to make the same type of lines we did on the eyebrows. Draw little zig-zag or lightning looking lines down the sides of the Grinch face, right outside the existing lines. Then erase the original cheek lines. This instantly adds fur texture!
Step 4: Neck and body
For a neck, draw two straight, parallel lines downwards under his chin. Mine were about 2 inches long.
Next let’s add the fur around the collar of the Santa suit. Draw another cloud like bumpy line that starts on the left side of the neck, curves down under the neck lines and back up to the right side of the neck. This is the bottom edge of the fur Santa suit collar.
Then draw a straight cloud like line (with the bumps going up) going straight across the bottom of the two neck lines drawn earlier. Look at the picture I drew. See how that makes it look like the collar is going around his neck? Cool, huh?
We are not drawing the Grinch’s whole body, just his shoulders. Draw two lines, one coming out of each side of the fur collar, that slant down to the edge of the paper. This makes the drawing look more complete instead of the head looking like it’s floating in the middle of our paper!!
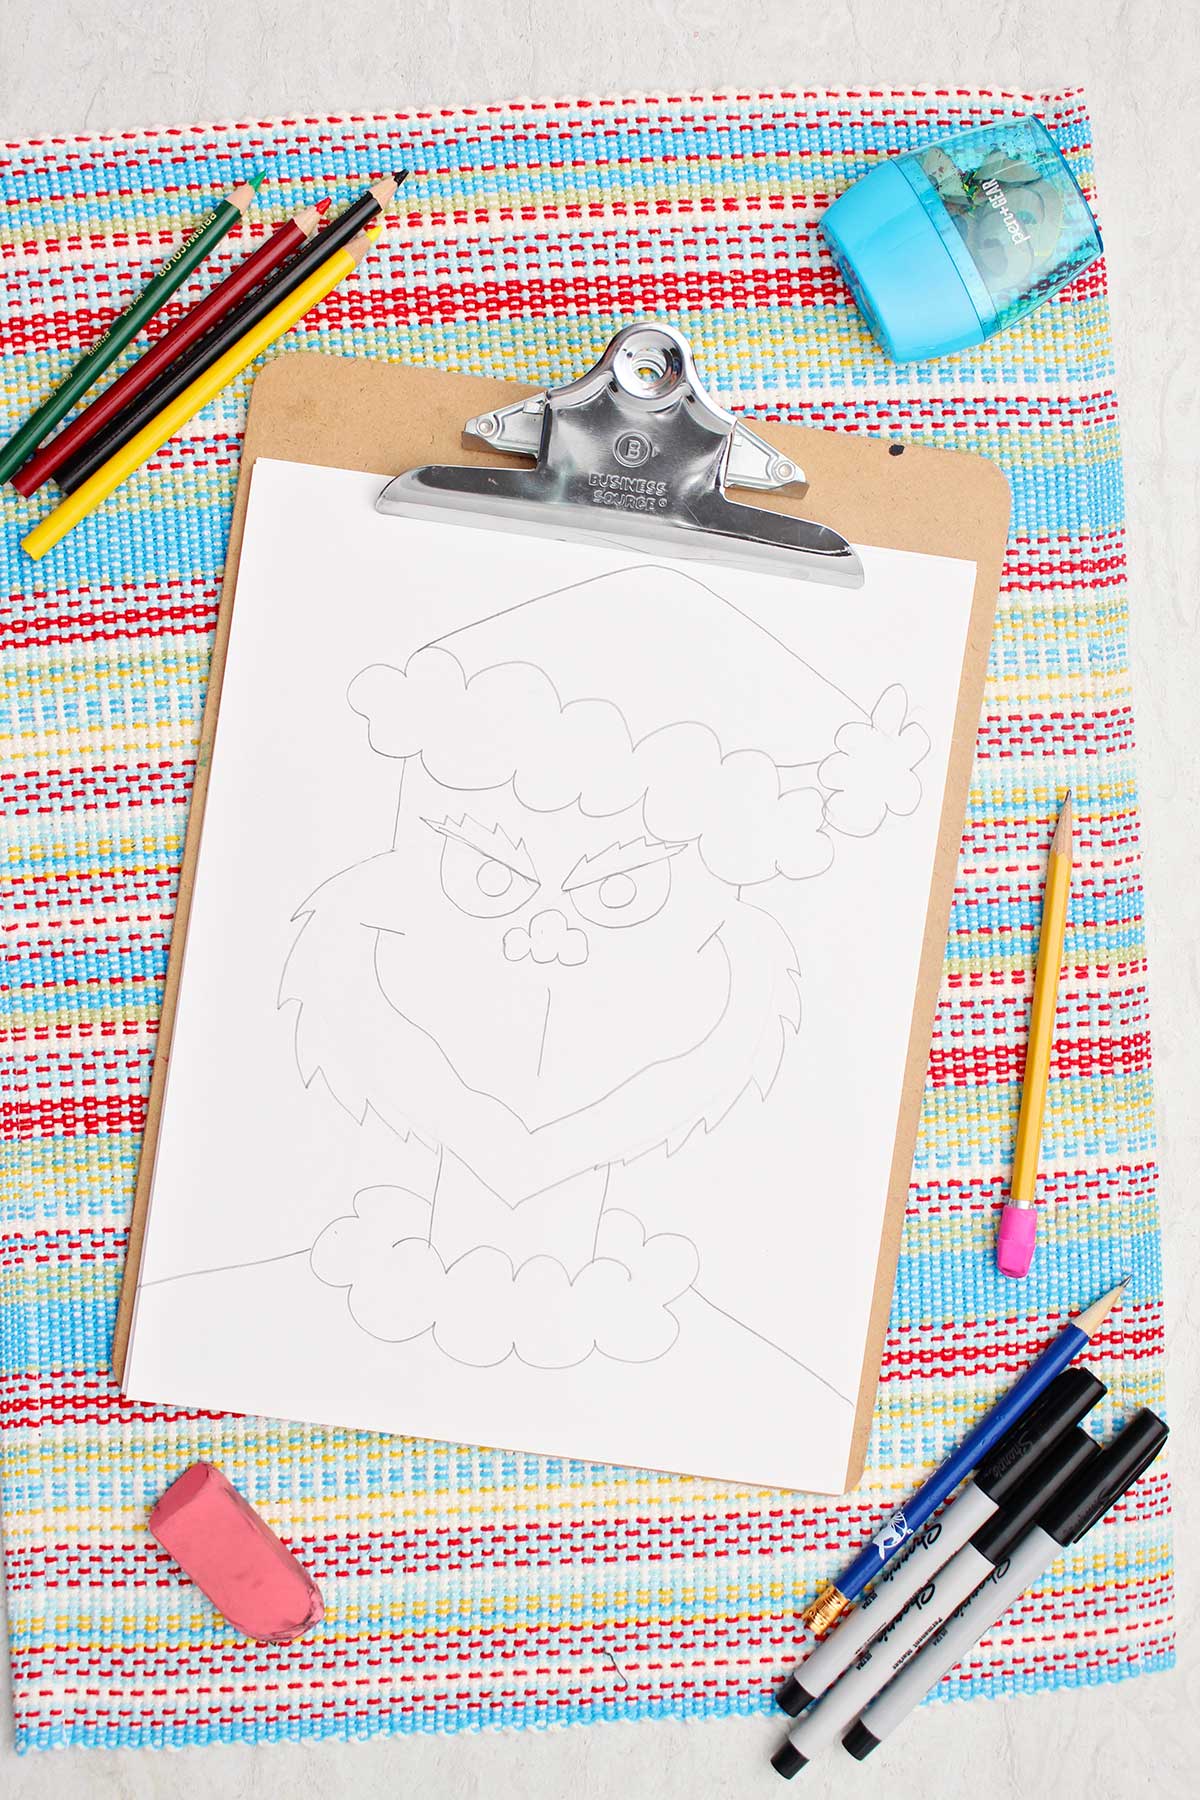
You did it! Take a step back and look. You’ll see that grumpy, sneaky, Grinch character looking back at you!
Step 5: Inking and Preparing to Color
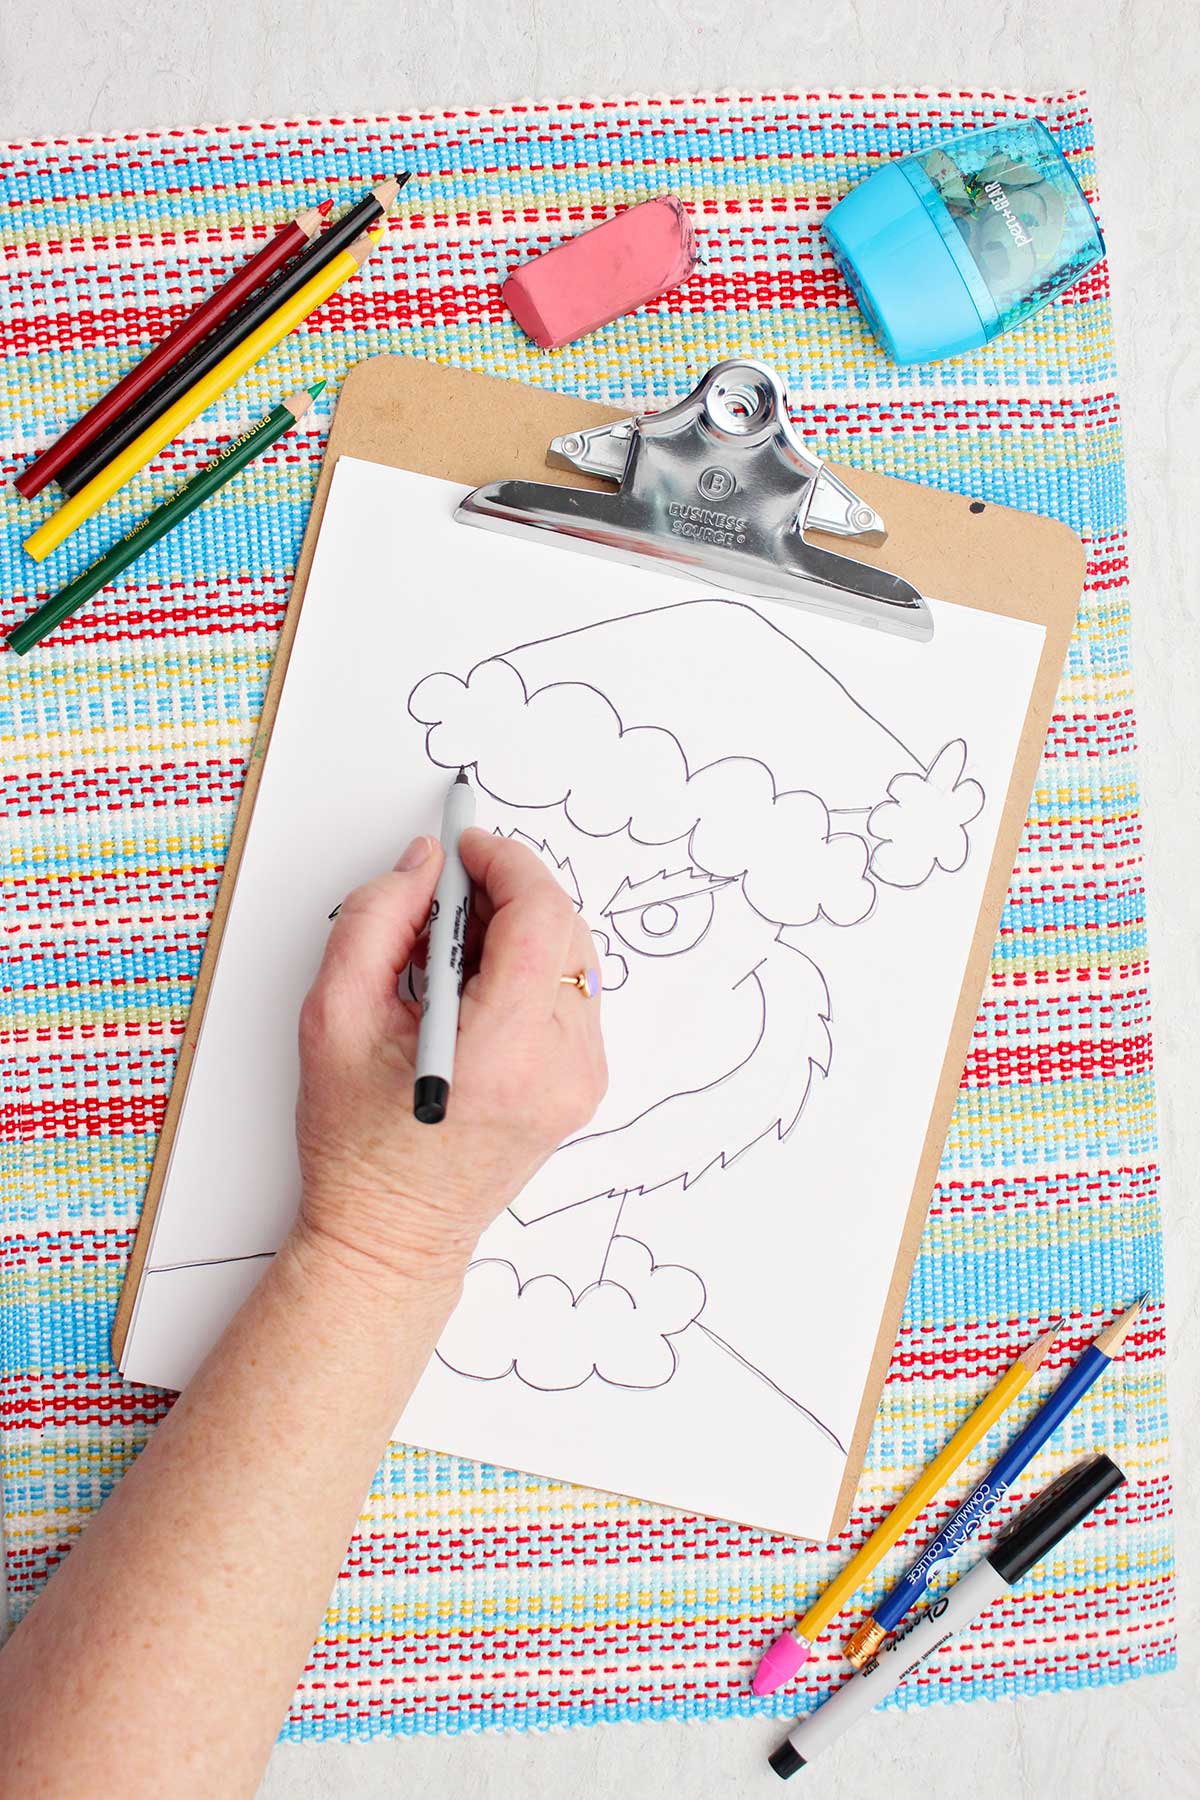
Now that our pencil sketch is done, we’ll trace over the pencil lines to make them black, bold and permanent. I recommend using a permanent black marker for this. Make sure there is something under the paper to protect the table in case it soaks through.
Carefully and confidently, trace over the main lines of your drawing. Take your time to create clean, solid outlines. You can also make some lines thicker than others for emphasis if you want. Remember, it doesn’t have to be perfect, relax. The Grinch is kind of a scruffy guy so a few jiggly lines are OK!
Let the ink dry for a couple of minutes so it doesn’t smudge and then use your eraser to erase the pencil lines you can still see. This makes a clean drawing for you to color. With the black outlining it looks like a real comic or a coloring book picture doesn’t it? Good job!
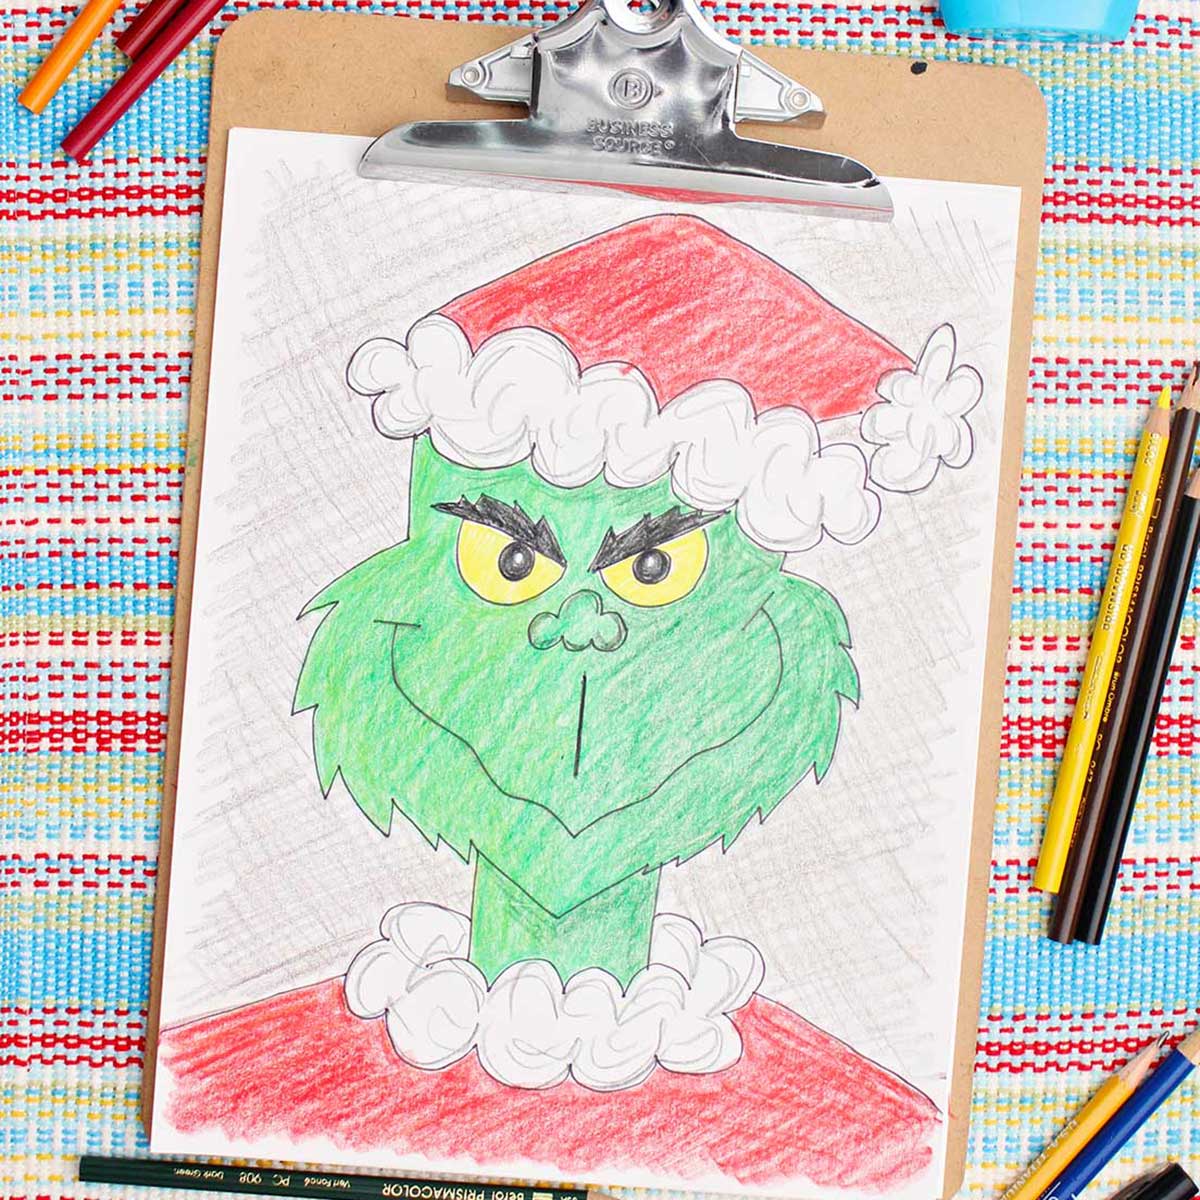
Step 6: Bringing the Grinch to Life with Color
Now it's time for ANOTHER of my favorite parts: adding color! Get out the Colored Pencils or Colored Markers, Crayons.
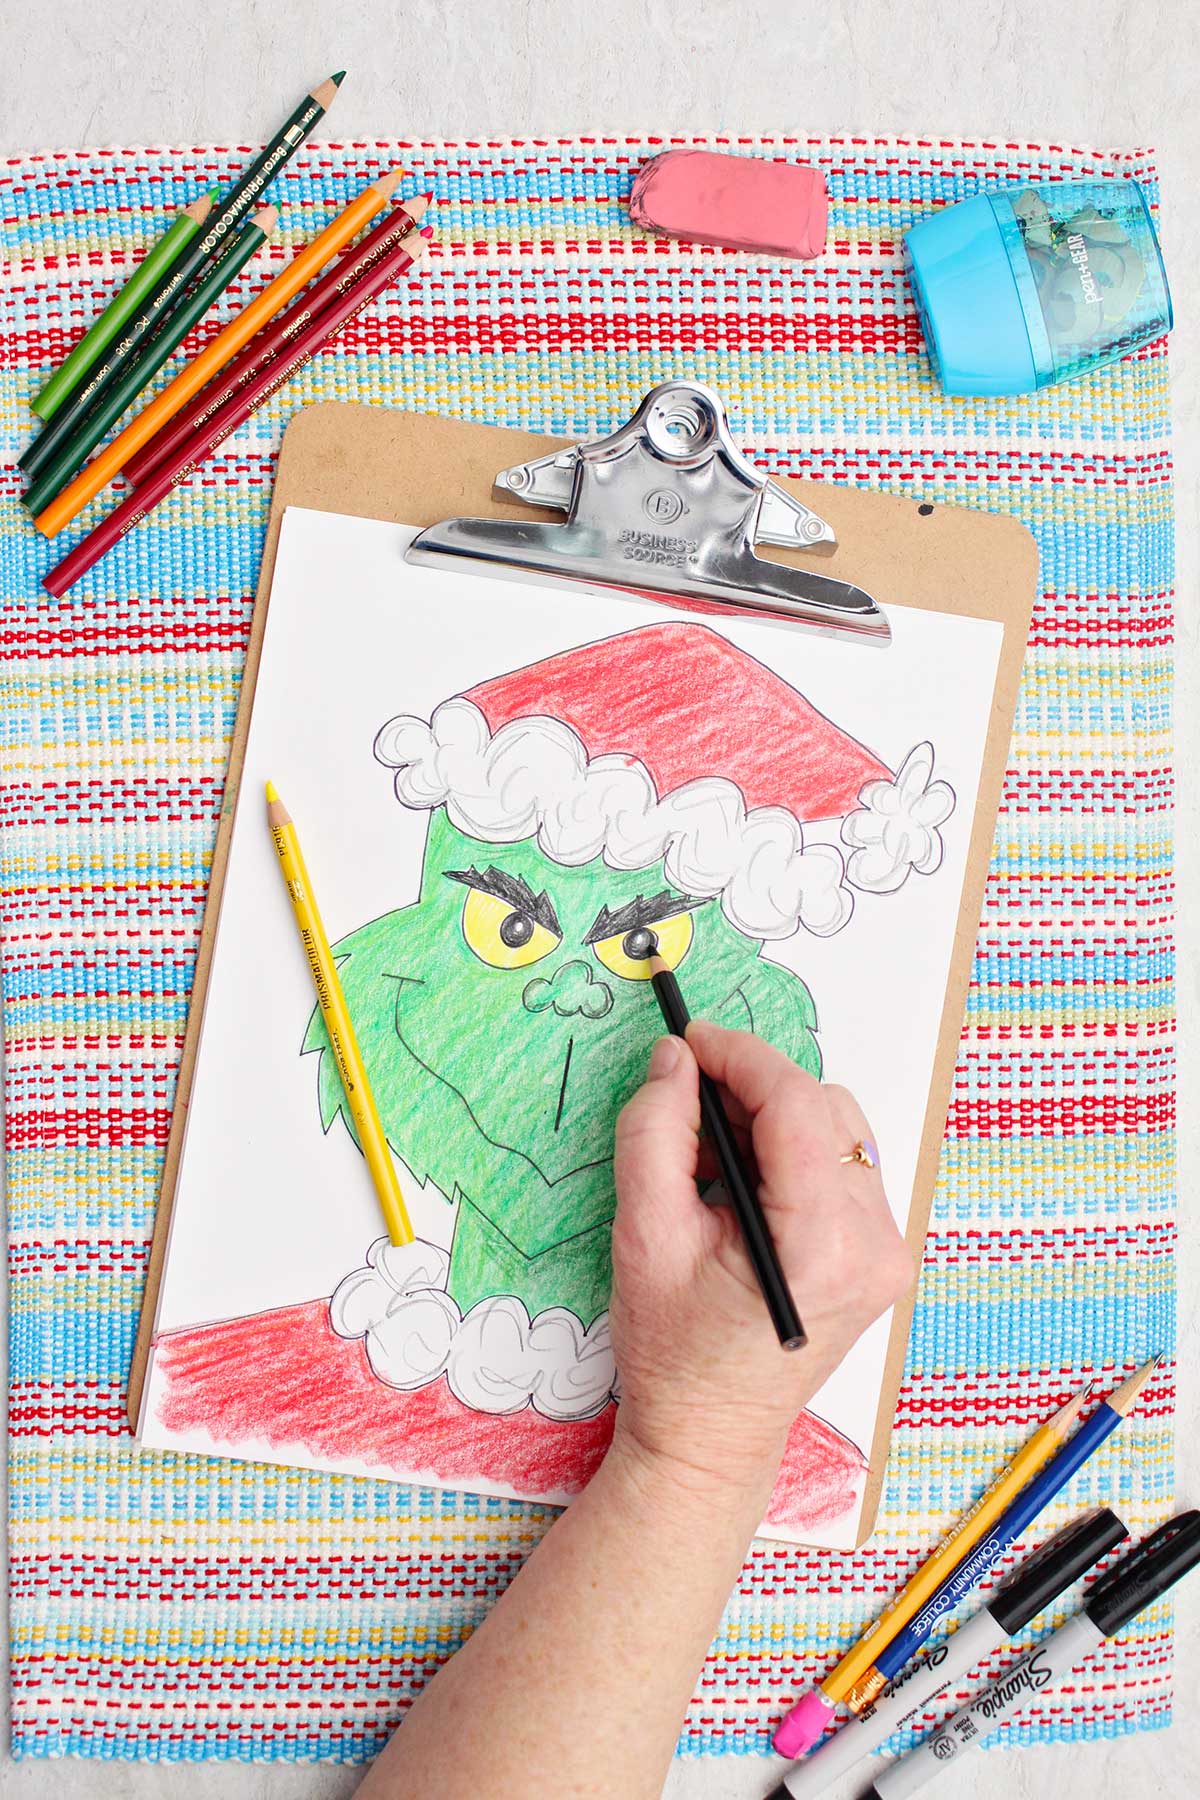
First, let's find our green colored pencil, marker or crayon. You’ll want a bright green in that classic Grinch look. Color in his face and neck.
Next, find a bright, festive red for his hat and jacket. When you’re coloring the hat, be careful to color around the white pom-pom and trim. A vibrant red will make his green face stand out even more.
If you're using colored pencils, you can make it look more 3D by adding some simple shading. Color some yellow on the left side of the face and hat as if there is light coming from that direction. Then take a slightly darker green and color some on the left side of the face to add a little shadow. A little shading makes his face look more rounded.
One thing you really notice about the Grinch is the eyes- they are yellow instead of white. Color the eye yellow and the pupil black. That makes the eyes pop against the green.
Finally, what about the white parts of his hat and coat? One choice is to just leave them white. Another choice is to draw a few cloud lines in random places to make it look like 3D fluffy texture. Lightly use the black or a blue color for this.
If you’re like me you’re ready to go watch How the Grinch Stole Xmas!

Craft Tips to Make How to Draw the Grinch Easy
These tips can help make sketching even easier!
- When coloring with colored pencils, use the side of the pencil lead and draw in small circles to make a more consistent color. With crayons or markers color in one direction with as consistent pressure as possible to get even color.
- Outline the edge of what you are coloring with your color of choice. Then fill in the area with that color. This keeps a person from going outside of the lines as easily.
- Fluff lines on collar- To make the plain white area of the collar look fluffy, draw some cloud like lines with scoops and bumps. Don’t fill the whole area in, just random cloud lines. This creates a look of texture. See the video or pictures for clarity on what this looks like.
- When coloring in the pupil leave a little circle of white, that makes it look like the light is reflecting in the eye.
Craft Variations on the Grinch
Want to switch things up? Here are a few ways you can customize and play with this drawing.
- Cotton balls- Glue cotton balls on the collar to give a 3D fluffy look.
- Glitter glue- Use glitter glue on certain areas to give the picture some sparkle.
Grinch drawing FAQ
I find it easy to start a Grinch drawing with a heart shape. It gives the basic shape of the face with a shape most people know how to draw or have drawn many times. Then the placement of the face features and hat will be easy.
This tutorial and video will help you to make a Grinch face easily. I think a key is to start with the heart shape to set the outline of the Grinch's head. With this shape as the base the hat is a cloud shape fur trim and a mountain shape for the cap (with a pom pom on the end). The facial features are described in this post and shows how to draw the grinch step-by-step: furrowed eyebrows, button nose and "V" shaped squiggly mouth. Check it out!
More DIY How to Draw Lessons for Kids
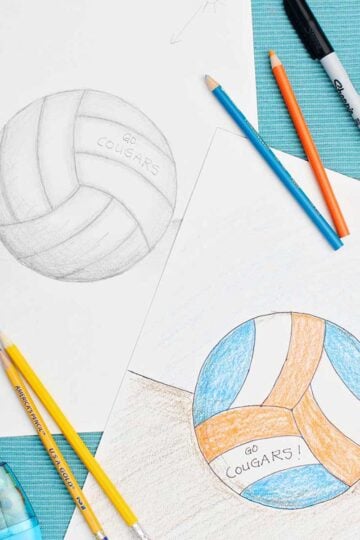
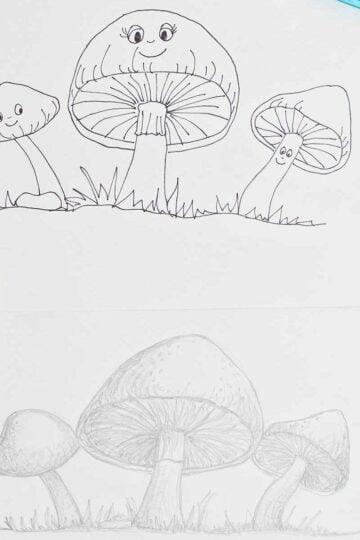
Looking for more easy drawings to try? Here are a few of our favorites:
Merry Grinch-mas!
I would be so excited to see your wonderful Grinch drawings! If you’d like to share them, you can post them on social media using #WelcomeToNanas. I just love seeing your creativity at work.
Did You Like This Craft?
If you had fun drawing with me, please consider subscribing for more step-by-step art lessons and crafts. We have so many more fun characters and drawings planned!
How to Draw the Grinch Step by Step
Equipment
- none needed
Items Required
- How to Draw the Grinch Video link to watch as you go through the tutorial (optional)
- sketchbook but even white copy paper
- simple pencil
- permanent black marker
- an eraser
- Colored Pencils or Colored Markers, Crayons
- How the Grinch Stole Christmas DVD (optional but fun!)
Instructions
- Face shape: Draw a heart in the middle of the sketchbook page as evenly as you can. On the top right side of the heart, draw a line that goes up about an inch. It helps to watch the video for this tutorial.
- Hat: Draw a cloud like line from the top of the line you just drew, slanted down to the right. The line is bumpy, like the edge of a cloud. Then draw another cloud like line over the top of the first one that connects with it on both ends.Over this line we’ll draw the top of the hat. Draw a mountain like line from the left to the right, starting on the left end of the trim. This line will moves up then down. Then draw a short line from the other end of the trim towards the right end of the mountain line.At the end of these two lines we’ll draw a pom-pom at the tip of the hat. It will have the same cloud like bumps as the trim.
- Grinch face: Start by drawing two lines on the top two humps of the heart shape. The two lines will slant down towards each other and are going to be the bottom line of the eyebrows.Then take an eraser and erase the top part of the heart lines from around the brow lines from one side of the Grinch face to the other side (leaving the brow lines of course).Next we’re going to draw the nose, kind of a little button nose. The bottom of the nose is below the center of the two eyebrow lines. It has three scooped “bumps” and mine is about one inch long total. Then draw a second line (starting from the same spot as the first line) that goes upwards. It also has three bumps but this time they go upwards and the center bump is taller than the two outer side bumps.Back to the eyes. Draw two semi circle lines under the brow lines to make eyes for the Grinch. Draw circles inside to be the pupils. Hmmm- they are kind of mischievous looking eyes. And here’s a trick to make his eyes sparkle with mischief- leave a tiny, uncolored dot in each pupil. This represents a light reflection and brings a “sparkle” to his eyes.The Grinch wide grin is drawn along and matches the bottom “V” shape of the heart- except the smile line is squiggly. Draw two short lines on either end of the smile line to make it look like a “smiling” smile. Finish it up with a line that goes straight up and down in the area between the nose and the mouth. This represents the little line we have above our lips.Let’s go back and finish his eyebrows. Draw a zig-zagged lightning looking line above each of the brow lines we made earlier. They should look thick and bushy! You can even add a few short, feathery lines inside the brows if you want.Lastly, the Grinch needs some shaggy fur on the sides of his face! Let’s change the smooth cheek lines to some fur lines. Let’s start with the fur on the sides of his face. We’re going to make the same type of lines we did on the eyebrows. Draw little zig-zag or lightning looking lines down the sides of the Grinch face, right outside the existing lines. Then erase the original cheek lines. This instantly adds fur texture!
- Body: For a neck, draw two straight, parallel lines downwards under his chin. Mine were about 2 inches long.Next let’s add the fur around the collar of the Santa suit. Draw another cloud like bumpy line that starts on the left side of the neck, curves down under the neck lines and back up to the right side of the neck. This is the bottom edge of the fur Santa suit collar. Then draw a straight cloud like line (with the bumps going up) going straight across the bottom of the two neck lines drawn earlier. Look at the picture I drew. See how that makes it look like the collar is going around his neck? Cool, huh?We are not drawing the Grinch’s whole body, just his shoulders. Draw two lines, one coming out of each side of the fur collar, that slant down to the edge of the paper. This makes the drawing look more complete instead of the head looking like it’s floating in the middle of our paper!!

Leave a Reply