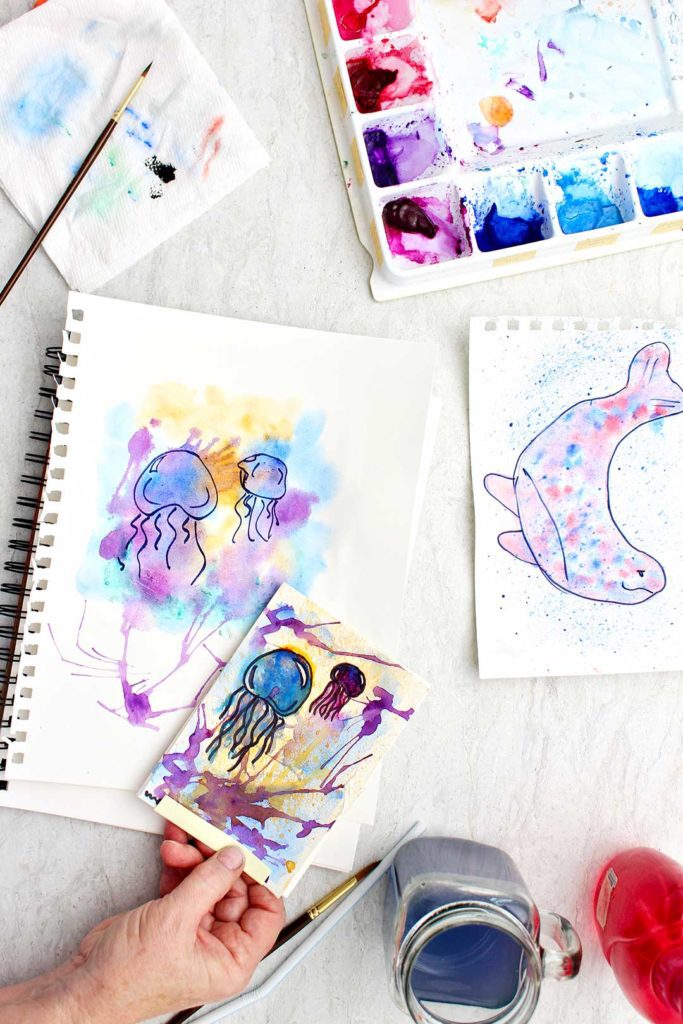
Fun Watercolor Ideas to relax by!
An art play day is the perfect time to try these Fun Watercolor Ideas on paintings you make while relaxing and visiting.
Art Play Day
Come on, plan a time when you can invite a family member or friend to experiment with paint and painting ideas and enjoy being together. I think you will have as much fun as we did!!
What do you want to do today?
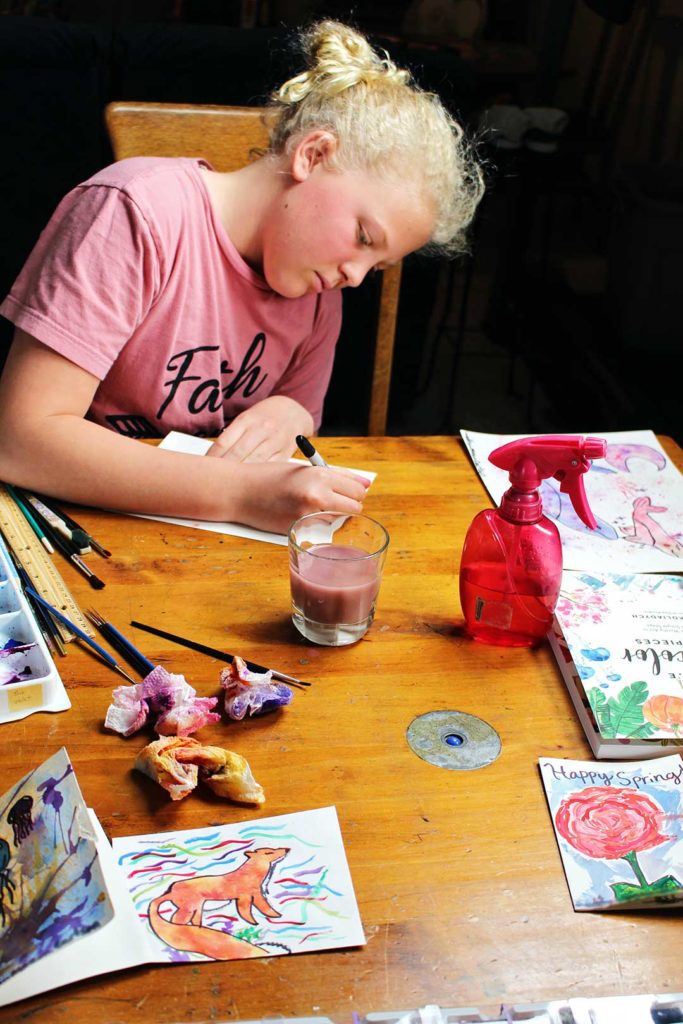
I invited my granddaughter to spend a day together. When I asked what she would like to do she said paint. Painting is my love language. How could I say no? 🙂
Our art play day was the perfect time to try these Fun Watercolor Ideas as well as have time for free experimenting. Let me tell you about the things we tried. We invite you to join us in trying these fun ideas.
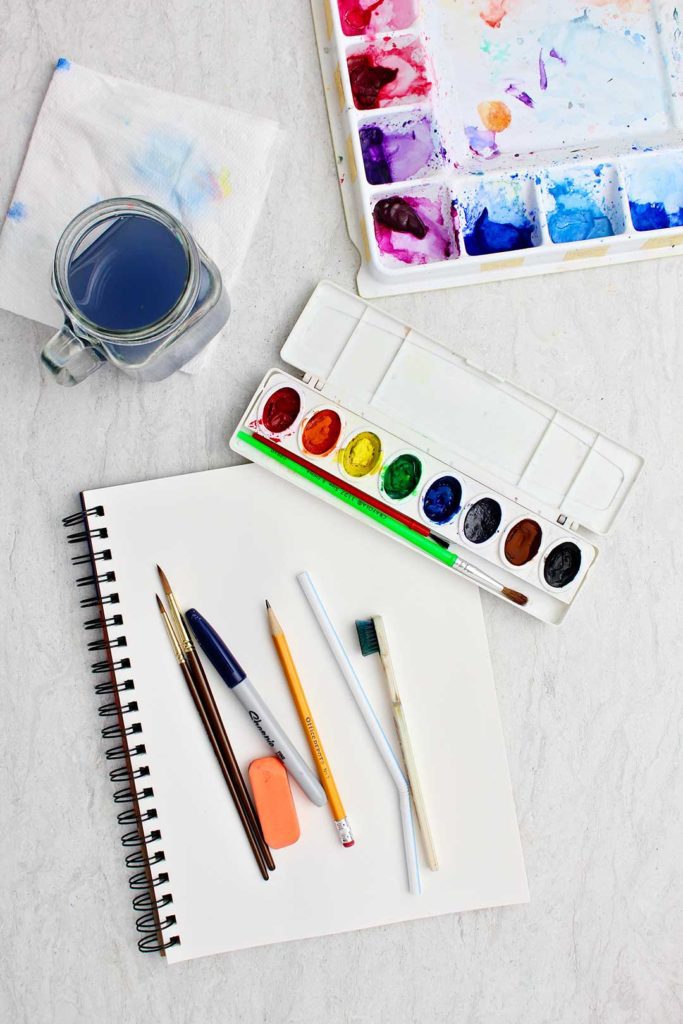
Get out your pad of watercolor paper, watercolor paints, and brushes. Let’s go have some fun!!
If you want to have nana join you step by step you can watch the full length video. The link is found at here!
For the full length tutorial video click here: Fun Watercolor Ideas on an Art Play Day Full Length Video!
Fun Watercolor Ideas #1- Dry on dry
Painting a flower and leaves
We’re going to start with an idea that uses dry paper and paint with a low amount of water. Don’t add too much water to the paints with your brush on this one.
Choose your colors
This flower can be any color and is so easy to make. Choose the main color you would like your watercolor flower to be. You will be using that color plus several more that you mix with other colors that are in your paints (color wheel colors).
The flower example here is primarily pink. But we also used shades of red, shades of orange and even a bit of purple.
If you choose blue as your main color you can add shades of purple, shades of yellow, even some red.
Experiment with mixing your colors
You can experiment with mixing colors and trying them out on a separate paper if you want. Mix the paints in the lid of your paint box. Take some of your main color and add a little bit of another color to it.
Note: Using watercolor paper is very helpful when painting with watercolor paints as it is thicker and doesn't go to pieces when wet. Using plain typing paper is frustrating!!
If you are using paints that come in tubes it's nice to have a pallet like I do in the pictures but it also works to mix the paints on a slick dinner plate or disposable foam plate.
Have fun with this, the colors will look good together when you are all done!
Painting your flower
Start by mixing some water into your main color. The paint will not be real watery, we want a slightly wet paint on a dry watercolor paper. The paint is brushed on the paper and pretty much stays put where it is brushed. It also dries quickly.
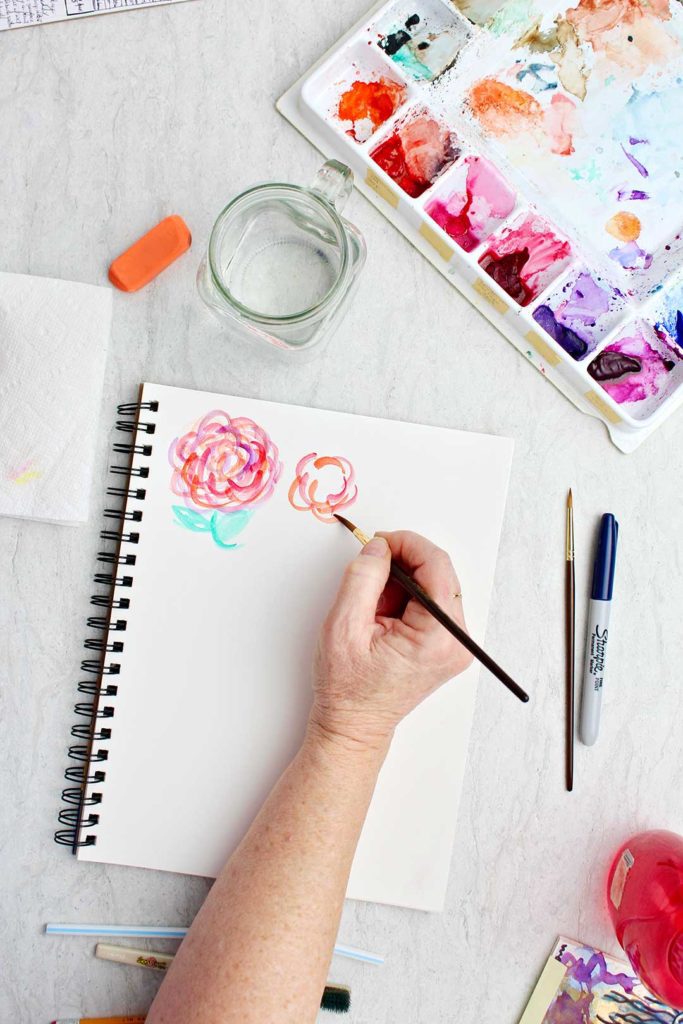
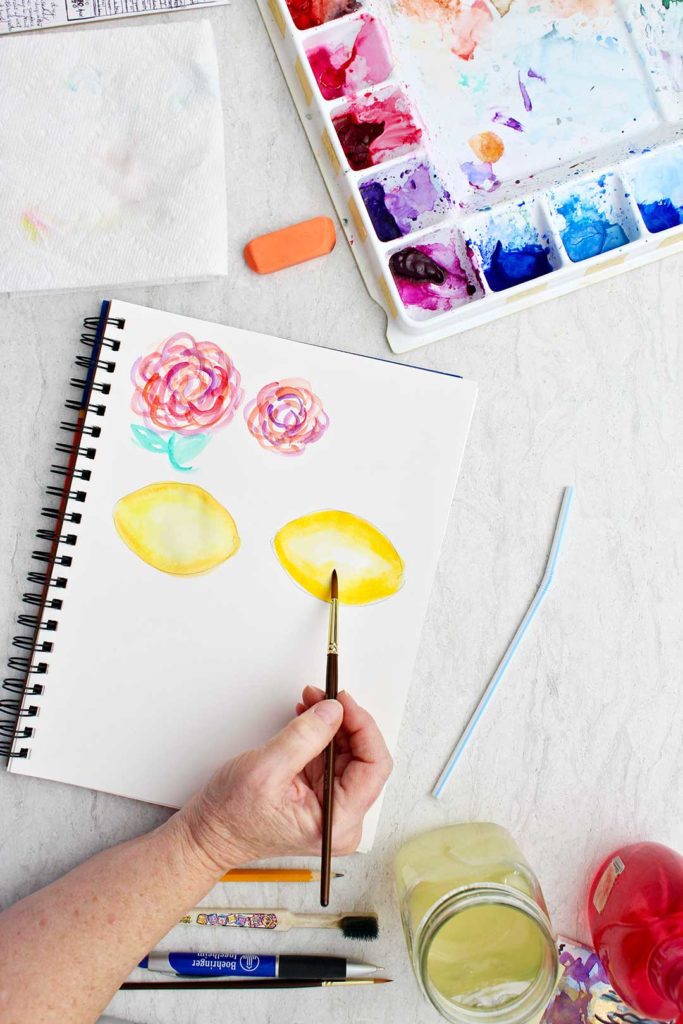
Use a medium round paint brush and paint a series of small “C” shapes in a circle that’s about the size of a quarter. Each “C” is made with a separate stroke and they won’t connect.
Make a few more smaller “C” shapes inside those first ones and also another set outside the first set. You can make the flower as large as you want by adding more rings of "C" shaped brush strokes.
Add another color
Clean your brush and repeat this with a second color from your paints or one that you mix.
Repeat again with a third color and then a fourth color.
The “C” shapes will overlap and begin to look like petals.
Add a stem from green and a couple leaves in a leaf shape with a line down the center. A leaf shape looks like a small football. You can fill these in with another green you mix with a bit more yellow into the green.
What do you think?
I think these flowers look like chrysanthemums or marigolds depending on the colors you use. What do you think?
We made ours into a card but you don't need to use it for anything if you don't want to. This is just a fun experiment to learn what watercolor paints do. This is using dry paper and watercolor paint with a low amount of water.
Keep this Fun Watercolor Idea in mind for when you want to paint flowers or other things with a dry paper and not so wet paint technique in the future.
Fun Watercolor Idea #2- Wet on Wet Watercolor Wash
This technique is a watercolor wash which means you cover an area with plain water and then put watercolor paint into it to spread.
This works great on an area of your painting where you want to cover an area in a color. But what’s cool about this wash of color is that it can be darker in certain areas then others. that's what we will do in this case around the edge.
Draw a lemon shape
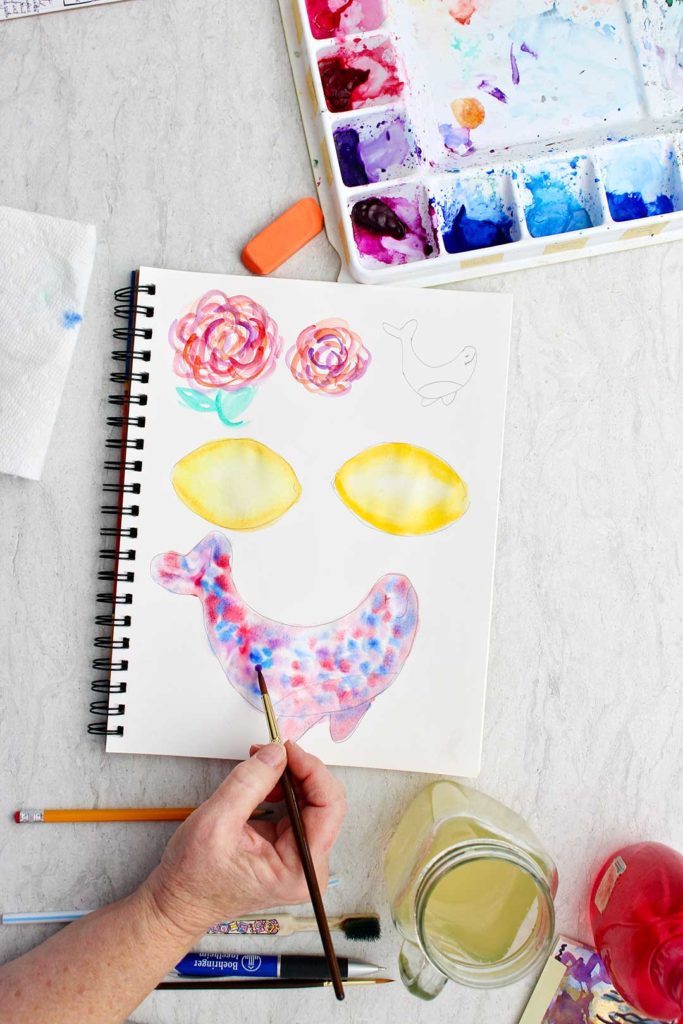
Start by drawing an object or shape to wash with color. We drew a lemon to start with. A lemon is kind of a football shape.
For this Fun Watercolor Idea you need to be working on a flat surface, you'll see why in a minute!
Paint the shape with water
Use clean water and a medium/large round paintbrush to “paint” the whole lemon with water only. It should be wet enough to shine but not dripping wet so it runs out of the shape and all over your paper.
The water will let the paint spread in the wet area but it will not go onto the dry area. This isn’t a technique that you can fully control so have fun experimenting! Don’t get uptight (says one who sometimes does).
Load your brush with color
Now wet the yellow paint with water and get a good amount of paint onto your brush. This is called loading your brush.
Run your brush along the edge of the wet area of the lemon. You are leaving a good amount of yellow color in the water along the edge. Stop and add more paint to your brush if you want.
Watch the paint spread
The paint will begin to spread into the center of the lemon shape. Isn't that cool?
You can help this process a bit by adding more clean water in the center of the lemon. Or by cleaning your brush from most of the paint and then running it through the area on the edge of the paint and kind of pulling a bit more color into the center of the lemon.
Only do this a little bit as you don’t want to just make the whole lemon the same color. You want it to spread from dark on the edge to a very light yellow it the center of the lemon. Do you see it is coming from all edges inward?
Be curious...
Part of experimenting with this Fun Watercolor Idea is seeing what happens when you add more paint, more water, or more strokes with your paint brush.
You can draw another lemon and try again if you want. Just be curious and don't worry if it turns out like what you want the first, second or even third time! Learn what you can do with the paint.
Once satisfied, let this dry.
Fun watercolor ideas on top of fun watercolor ideas!
This fun watercolor idea works great when you would like your shape to be a solid color, or when you want it to be a blending of color from lighter to more intense color.
You can paint more on top of this area and it will not run if the watercolor wash paint is dry. So you could paint an area of your paper this way. Let it dry. And then use the flower technique above on top!
Can you think of some ways you could use this in a painting you would like to do?
Fun Watercolor Ideas #3- Whale of a good technique!
So let’s experiment with a variation on the watercolor wash technique we just did.
Draw a whale shape
Draw the shape of a whale. If you notice, the main body of the whale is shaped like a banana. One end has tweeven blended in some places to make a purple color!
Draw another whale and see what this technique looks like with just an area of clean water and then dropping in 2-3 different colors. I love watching the color in the water spread and swirl.
I finished this off by dropping in some purple as well. This is a wet on wet technique meaning that the paper is wet and the paint is wet as well (more water in it) so it spreads in the water.
Fun Watercolor Ideas #4- Wet on Wet on the whole paper
This is just a variation of the wet on wet watercolor technique.
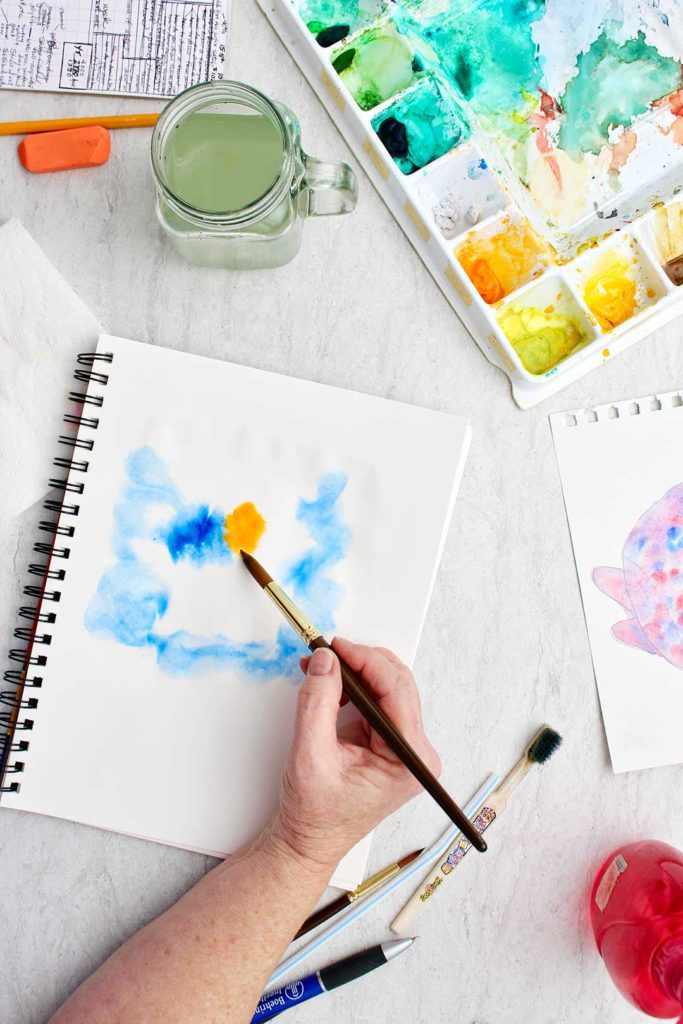
Wet a large area on your watercolor paper. It helps to use your largest round brush.
Before we have just used the water inside of a shape. This time we are going to cover a large area. You can even wet the entire paper if you want.
Make a watercolor wash with blobs of purple, yellow, green and blue (with the most blobs of blue paint).
Let the colors spread and let it dry. We are going to use this in another technique a bit later!
Fun Watercolor Ideas #5- add marker lines on your painting
When experimenting, remember you don't have to just use watercolor. You can add markers or colored pencils for example. This is called mixed media.
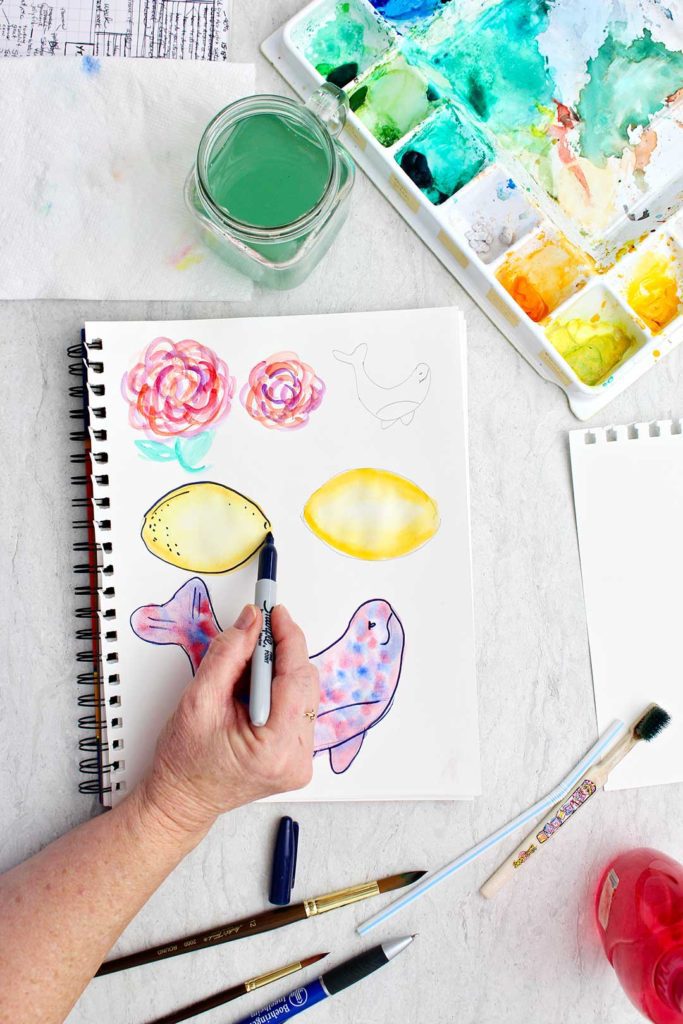
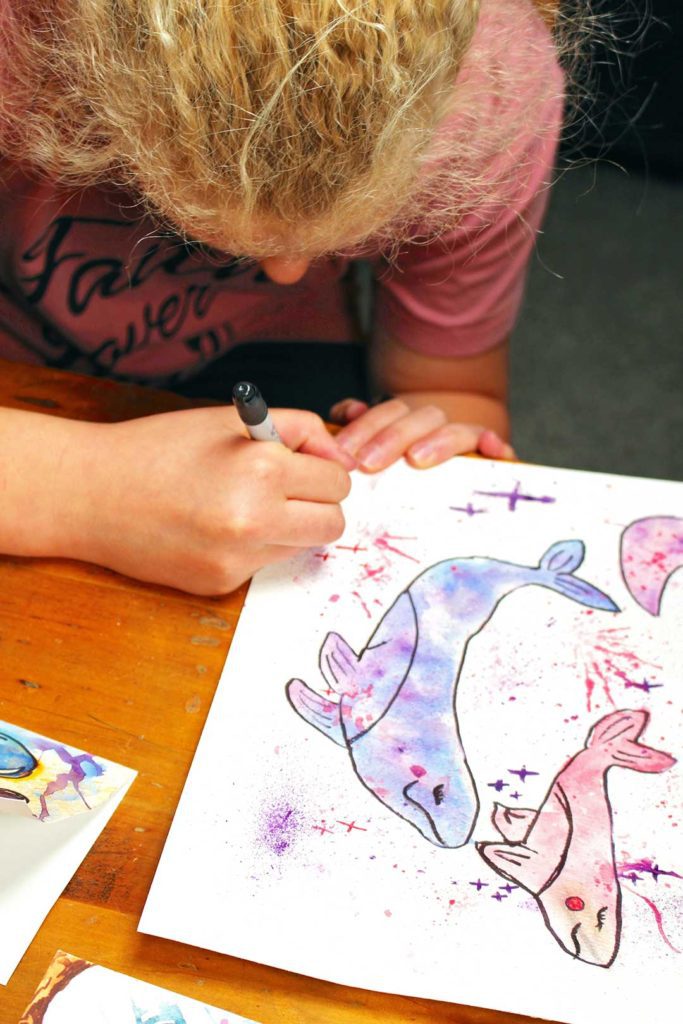
My granddaughter used a permanent marker to make some black lines on her paintings. This gave boarders to some of her designs and made them “pop” off the paper I thought.
This is something you can experiment with on your paintings and see what you think about it. Make sure you wait until the paint is dry before using the permanent markers on them.
Fun Watercolor Ideas #6- Toothbrush spattering
Wait...first a straw and now a toothbrush? I've gotta' see this!
So this is another cool technique to try and use in various ways on your paintings.
OK, so be sure to have some paper under your painting when you do this one, it can get a bit messy.
Fun Watercolor Ideas #7- Straw with wet paint
Use a straw? What?
I remember doing this next technique when I was in high school art class. I still love it! It is using a straw to blow some of the wet paint on the paper around.
Let's use this technique on the bottom of the watercolor wash we did earlier in idea #4.
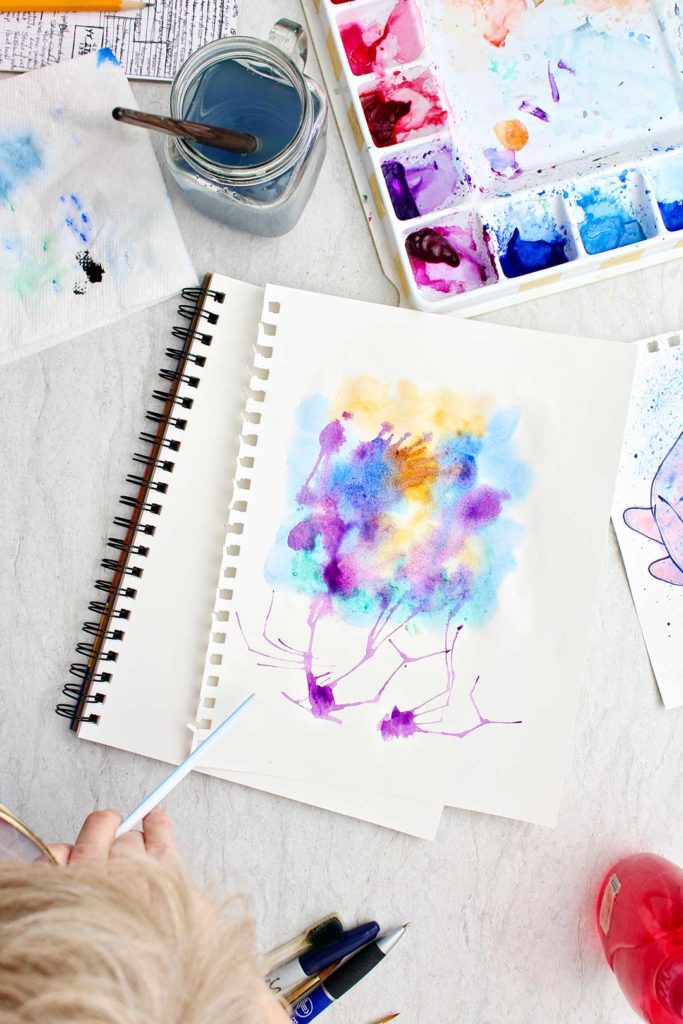
Place some paint on your paper, paint mixed with enough water to make a droplet when you put it on the paper.
This is fun!
Lean over and place the straw close to the paint droplet and blow. The paint will move in a funny line from the droplet area. Come from a different direction and blow again. It will move in branch like directions making a cool design.
Keep changing directions and blowing the paint until you are out of paint or satisfied with how it looks.
Isn't this cool? This is a favorite technique! Try the straw with wet paint several times just because you can. Enjoy the process.
Use an OLD toothbrush- not your good one!!
Take an old toothbrush and dip it into paint that you have previously wet with water. You will need to experiment a bit to see how much water and paint you want on your brush. too much water and it drips, too little water and the paint won't flick. You'll see what I mean when you try it.
Hold the toothbrush close to your painting with the bristles up. Use your thumb to flick the bristles from clost to the painting up towards the handle of the toothbrush.
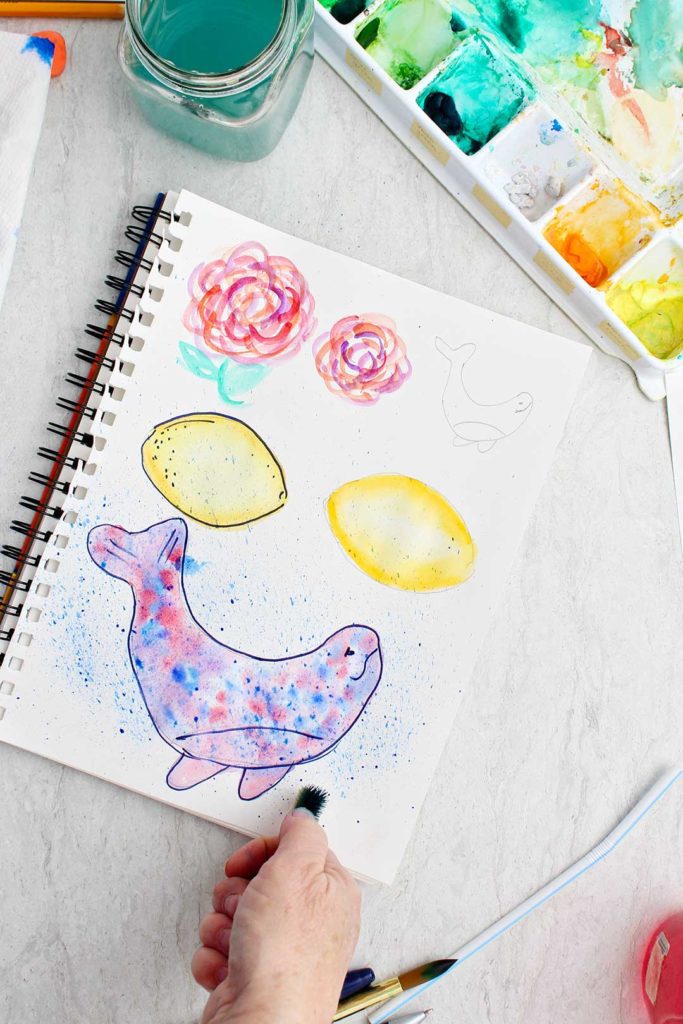
This will flick a fine mist of paint onto your painting. You don’t want big blobs or drips, just a fine mist. The look of this gets better the more you practice it.

When do I use this in a real painting?
This technique creates a great look on areas of grass in your painting or to make an area look kind of misty. You will notice this technique in watercolor paintings you look at now.
I flicked a mist of blue over the whale and thought it looked water like. Give that a try if you want!
You can also tap your paint brush over the painting to get a smattering of drips on your painting. These are usually bigger droplets. I find them harder to aim and get in a certain area so I don’t use a paint brush very often.
Fun Watercolor Ideas #8- Jellyfish??
Let's use two different techniques together in this next experiment. OK?
Start with a watercolor wash
Grab the wet on wet watercolor wash we did earlier with the blue, purple and yellow blobs. We are going to add something on top.
Add permanent marker on top
Now take a black permanent marker and draw an oval on top of one of the purple or yellow colored blobs.
Draw several squiggly lines down from the oval to be "tentacle arms" of a jellyfish.
Repeat this on a couple more of the purple or yellow blobs of color.
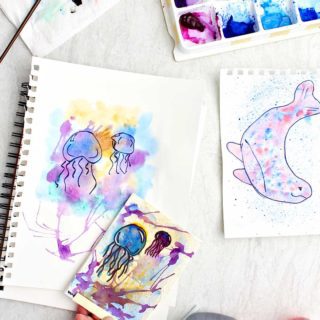
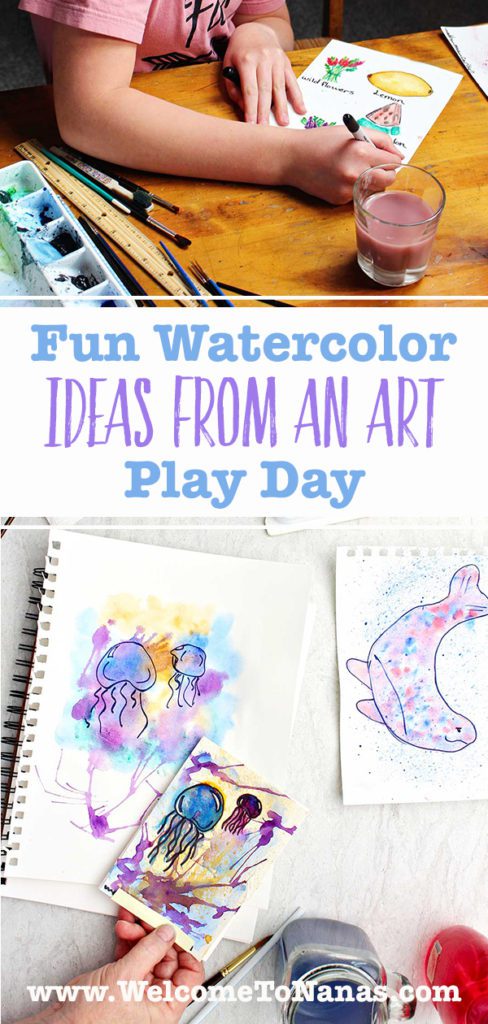
This was one of my granddaughter's experiment ideas. She let me keep her picture and that's what you see in my photo here.
What else could we make this way?
I loved the jellyfish shapes she made on her painting from the spots of color. Aren’t those cool??
What other things could you make in your paintings by mixing techniques?
I thought of using the straw technique to make coral at the bottom of the jellyfish picture. That could work well.
Also we could use a toothbrush to flick a mist of color over the jellyfish picture to look a bit like bubbles. The ideas are endless!
Time to play with watercolors
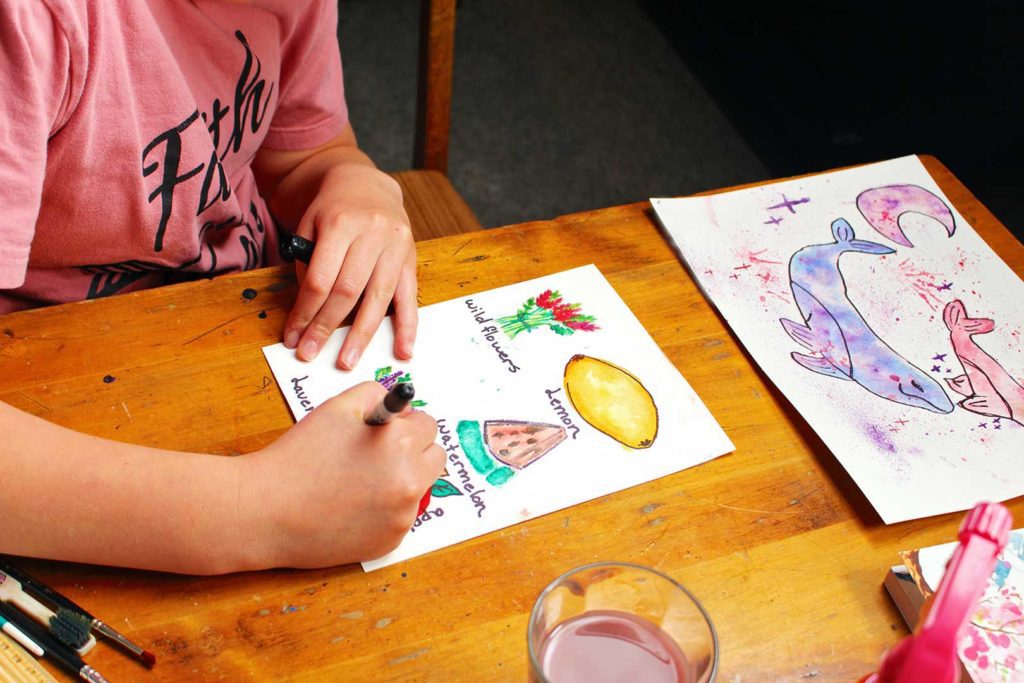
After doing a few small practice pages with these painting ideas we then just had a fun time for experimenting with paint. My grand made several cards for her friends, one whom was having a birthday.
I like to paint a lot…but I love, love, love spending time with the grandkids. Who would you like to spend time with? Ask them to join you for an art play day (or just an hour).
I’m hoping you take these ideas and run with them yourself and pull in someone that you will love spending time with over some paper and paint!
Please leave a photo and show off some of your fun practice paintings!
More Painting Ideas for Kids!
Want to keep the painting party going? Check out these fun painting ideas for kids from around the blog:
- Tiny Canvas Painting Ideas
- Easy Watercolor Resist Flower Card
- DIY Easy Abstract Heart Painting
- Easy Toilet Paper Roll Flower Painting
- Watercolor Resist Painted Windsock
Enjoy!
If you try this craft, let me know! Go ahead and leave a comment, rate it, and tag a photo with #WelcometoNanas wherever you post.
Come join the fun at https://welcometonanas.com
Fun Watercolor Ideas on an Art Play Day
Equipment
- Brushes
- Old toothbrush
Items Required
- Watercolor paints in a box (like Prang)- this has a brush in it
- Watercolor paper
- Pencil
- Permanent markers
- Straw
Instructions
- Fun Painting Idea #1- Dry on Dry, Painting a flower and leavesWe’re going to start with an idea that uses dry paper and paint with a low amount of water. Don’t add too much water to the paints with your brush on this one. This flower can be any color and is so easy to make. Choose the main color you would like your watercolor flower to be. You will be using that color plus several more that you mix with other colors that are in your paints (color wheel colors). The flower example here is primarily pink. But we also used shades of red, shades of orange and even a bit of purple. If you choose blue as your main color you can add shades of purple, shades of yellow, even some red. You can experiment with mixing colors and trying them out on a separate paper if you want. Mix the paints in the lid of your paint box. Take some of your main color and add a little bit of another color to it.Note: Using watercolor paper is very helpful when painting with watercolor paints as it is thicker and doesn't go to pieces when wet. Using plain typing paper is frustrating!!If you are using paints that come in tubes it's nice to have a pallet like I do in the pictures but it also works to mix the paints on a slick dinner plate or disposable foam plate. Have fun with this, the colors will look good together when you are all done!Start by mixing some water into your main color. The paint will not be real watery, we want a slightly wet paint on a dry watercolor paper. The paint is brushed on the paper and pretty much stays put where it is brushed. It also dries quickly.Use a medium round paint brush and paint a series of small “C” shapes in a circle that’s about the size of a quarter. Each “C” is made with a separate stroke and they won’t connect. Make a few more smaller “C” shapes inside those first ones and also another set outside the first set. You can make the flower as large as you want by adding more rings of "C" shaped brush strokes. Clean your brush and repeat this with a second color from your paints or one that you mix.Repeat again with a third color and then a fourth color. The “C” shapes will overlap and begin to look like petals.Add a stem from green and a couple leaves in a leaf shape with a line down the center. A leaf shape looks like a small football. You can fill these in with another green you mix with a bit more yellow into the green.Choose your colorsExperiment with mixing your colorsPainting your flowerAdd another color
- Fun Watercolor Idea #2- Wet on Wet Watercolor WashThis technique is a watercolor wash which means you cover an area with plain water and then put watercolor paint into it to spread. This works great on an area of your painting where you want to cover an area in a color. But what’s cool about this wash of color is that it can be darker in certain areas then others. that's what we will do in this case around the edge.Start by drawing an object or shape to wash with color. We drew a lemon to start with. A lemon is kind of a football shape. For this Fun Watercolor Idea you need to be working on a flat surface, you'll see why in a minute!Use clean water and a medium/large round paintbrush to “paint” the whole lemon with water only. It should be wet enough to shine but not dripping wet so it runs out of the shape and all over your paper.The water will let the paint spread in the wet area but it will not go onto the dry area. This isn’t a technique that you can fully control so have fun experimenting! Don’t get uptight (says one who sometimes does).Now wet the yellow paint with water and get a good amount of paint onto your brush. This is called loading your brush.Run your brush along the edge of the wet area of the lemon. You are leaving a good amount of yellow color in the water along the edge. Stop and add more paint to your brush if you want.The paint will begin to spread into the center of the lemon shape. Isn't that cool? You can help this process a bit by adding more clean water in the center of the lemon. Or by cleaning your brush from most of the paint and then running it through the area on the edge of the paint and kind of pulling a bit more color into the center of the lemon. Only do this a little bit as you don’t want to just make the whole lemon the same color. You want it to spread from dark on the edge to a very light yellow it the center of the lemon. Do you see it is coming from all edges inward?Draw a lemon shapePaint the shape with waterLoad your brush with colorWatch the paint spread
- Fun Watercolor Ideas #3- Whale of a good technique!So let’s experiment with a variation on the watercolor wash technique we just did. Draw the shape of a whale. If you notice, the main body of the whale is shaped like a banana. One end has two fins for the tale and there are two fins underneath as well.Place your project on a flat surface, we are doing a wash again.The way we will do the painting of the whale is to first “paint” the entire whale area with clean water with a medium round brush. But this time we won't cover the whole area with one color. We will add dots of several colors. So choose the 2-3 colors you would like to use.Use your brush to add some water to the first color paint you would like to use and load your brush. You won’t paint strokes with your brush but just touch the wet surface with the brush full of color. Drop the spots of paint into water area and let it spread. Do this over the surface of the whale and enjoy how the color “blooms” out. You can clean your brush and then do the same process with another color. Repeat with another color too if you want. I used red and blue to make my dots of color. Isn’t it cool how the colors ran together and even blended in some places to make a purple color!Draw another whale and see what this technique looks like with just an area of clean water and then dropping in 2-3 different colors. I love watching the color in the water spread and swirl.I finished this off by dropping in some purple as well. This is a wet on wet technique meaning that the paper is wet and the paint is wet as well (more water in it) so it spreads in the water.Draw a whale shapePaint with waterChoose your colorsEnjoy watching the colors spread
- Fun Watercolor Ideas #4- Straw with wet paintUse a straw? What?I remember doing this next technique when I was in high school art class. I still love it! It is using a straw to blow some of the wet paint on the paper around.Place some paint on your paper, paint mixed with enough water to make a droplet when you put it on the paper.Lean over and place the straw close to the paint droplet and blow. The paint will move in a funny line from the droplet area. Come from a different direction and blow again. It will move in branch like directions making a cool design.Keep changing directions and blowing the paint until you are out of paint or satisfied with how it looks. Isn't this cool? This is a favorite technique! Try the straw with wet paint several times just because you can. Enjoy the process.This is fun!
- Fun Watercolor Ideas #5- add marker lines on your paintingWhen experimenting, remember you don't have to just use watercolor. You can add markers or colored pencils for example. This is called mixed media.My granddaughter used a permanent marker to make some black lines on her paintings. This gave boarders to some of her designs and made them “pop” off the paper I thought. This is something you can experiment with on your paintings and see what you think about it. Make sure you wait until the paint is dry before using the permanent markers on them.
- Fun Watercolor Ideas #6- Toothbrush spatteringWait...first a straw and now a toothbrush? I've gotta' see this!So this is another cool technique to try and use in various ways on your paintings.OK, so be sure to have some paper under your painting when you do this one, it can get a bit messy.Take an old toothbrush and dip it into paint that you have previously wet with water. You will need to experiment a bit to see how much water and paint you want on your brush. too much water and it drips, too little water and the paint won't flick. You'll see what I mean when you try it.Hold the toothbrush close to your painting with the bristles up. Use your thumb to flick the bristles from clost to the painting up towards the handle of the toothbrush. This will flick a fine mist of paint onto your painting. You don’t want big blobs or drips, just a fine mist. The look of this gets better the more you practice it. Use an OLD toothbrush- not your good one!!
- Fun Watercolor Ideas #7- Jellyfish??Let's use two different techniques together in this next experiment. OK?Make a watercolor wash with blobs of purple, yellow, green and blue (with the most blobs of blue. Let the colors spread and let it dry.Now take a black permanent marker and draw an oval on top of one of the purple or yellow colored blobs.Draw several squiggly lines down from the oval to be "tentacle arms" of a jellyfish.Repeat this on a couple more of the purple or yellow blobs of color. This was one of my granddaughter's experiment ideas. She let me keep her picture and that's what you see in my photo here.
Video
Notes
Supplies for Fun Watercolor Ideas on an Art Play Day
- Watercolor paints in a box (like Prang)- this has a brush in it
- Brushes
- Watercolor paper
- Pencil
- Permanent markers
- Straw
- Old toothbrush


Leave a Reply