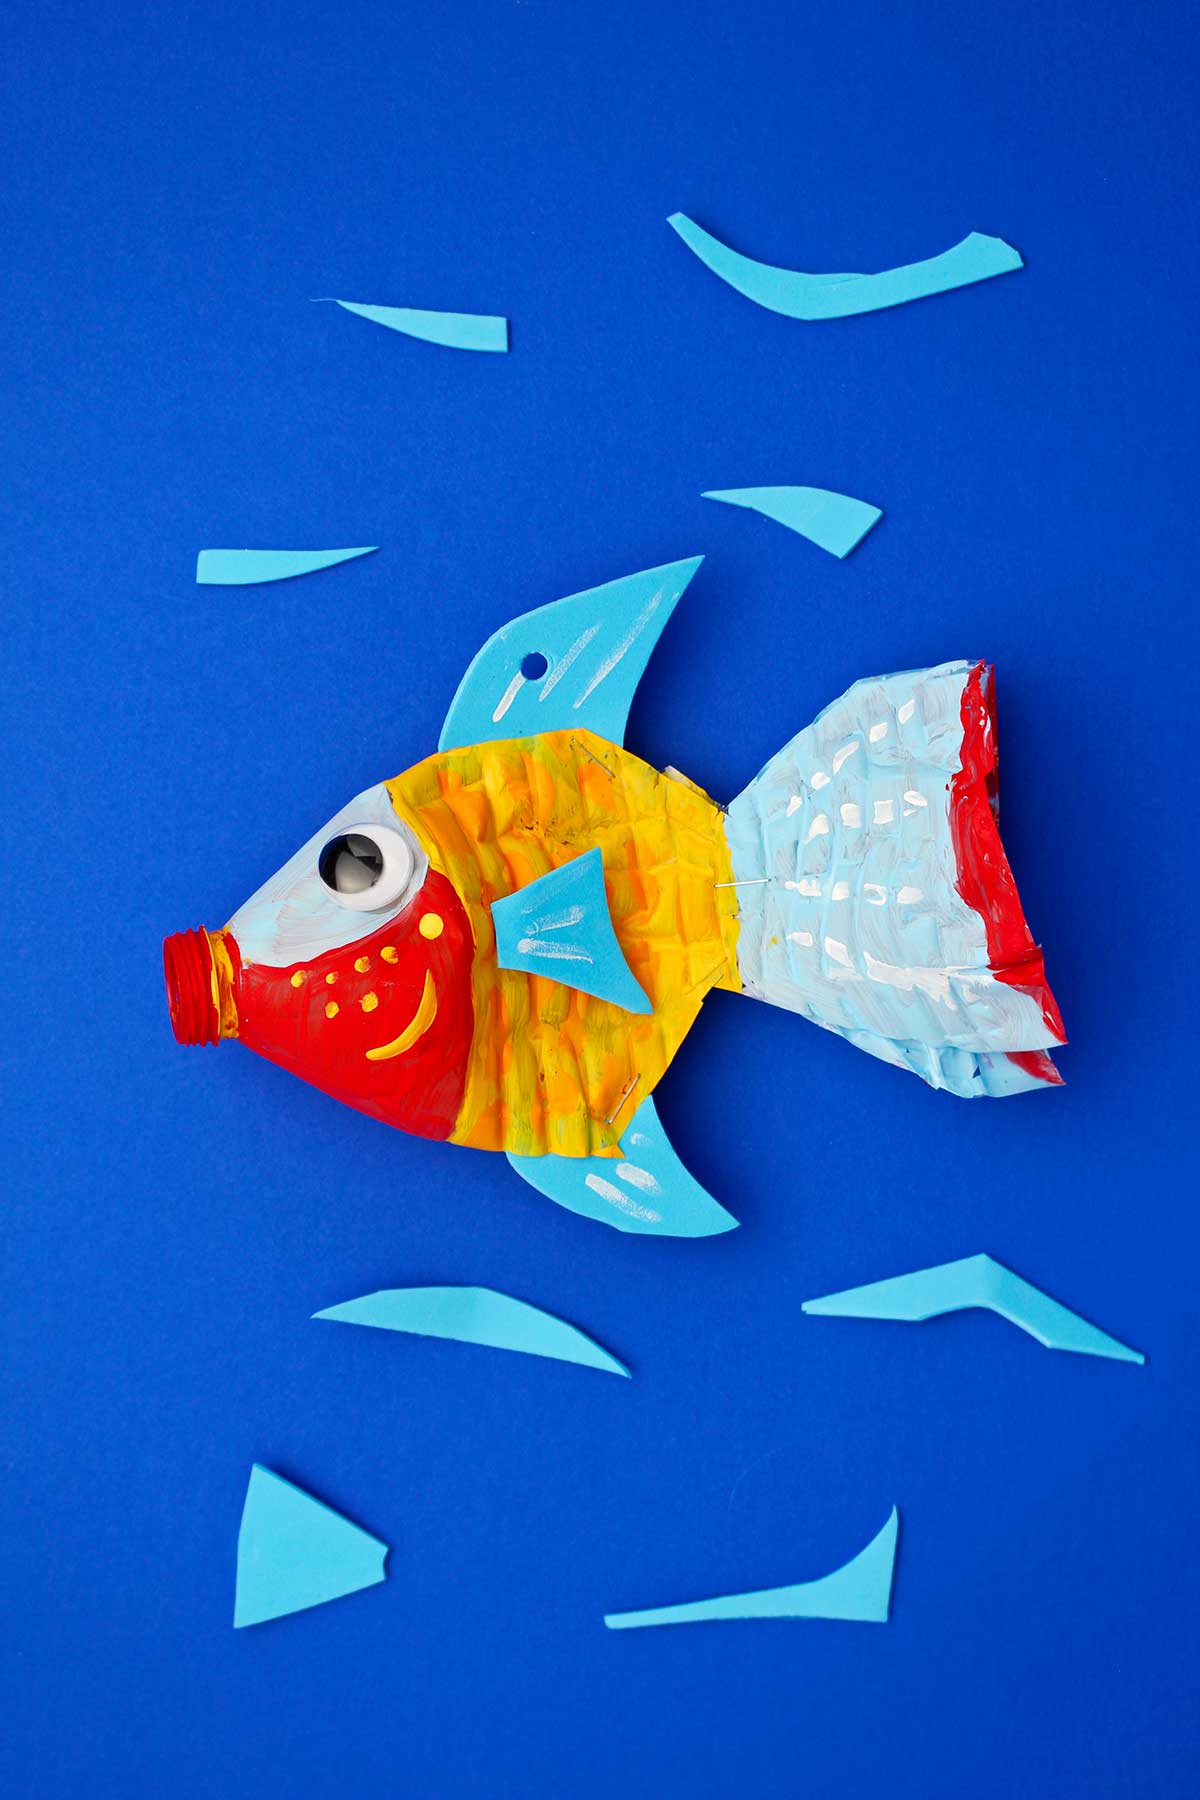
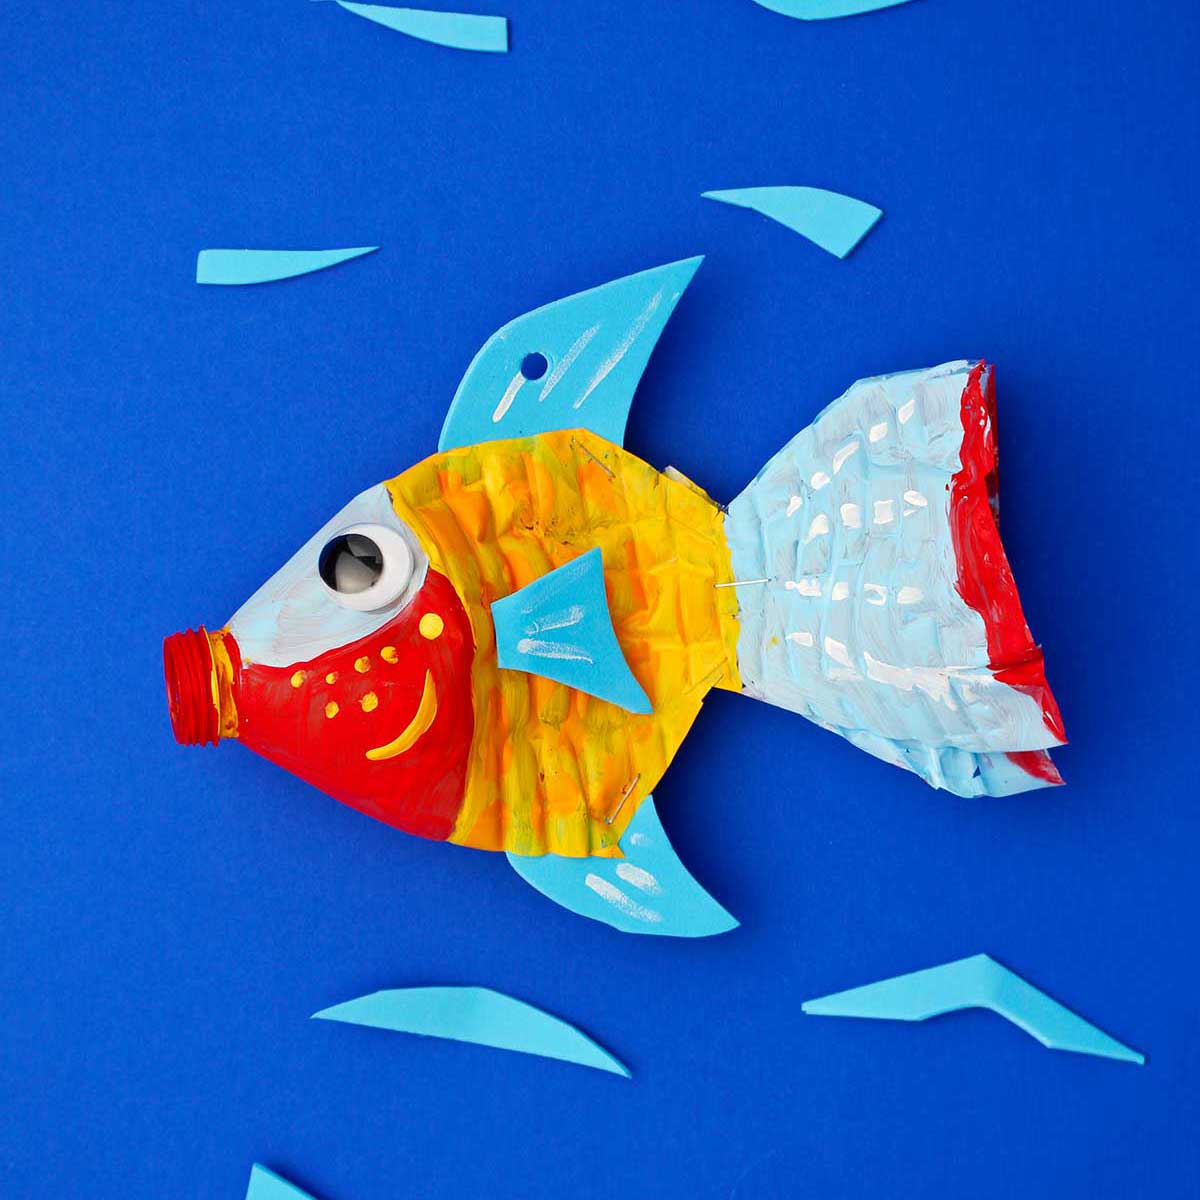
You’re going to love this plastic bottle fish craft made from recycled, plastic water bottles! Kids of all ages will have fun with this project that saves something from the recycling bin and turns it into a creative, colorful and decorative idea!
Jump to:
CUTE CRAFT ALERT: DIY WATER BOTTLE FISH
I love a colorful fish, especially one that I don’t have to use a worm to catch! These cute and recycled fish make a great craft for kids during the summer. They can hang them as a mobile to "swim" around, or play with them as a DIY toy.
Our puppy got a hold of a plastic water bottle and crunched it flat. He chews on everything.
When I picked it up to put it in the recycling, that spurred the idea of making a craft with flattened or partially flattened empty water bottles!
Of course, the one that Tucker (our pup) got a hold of won’t be useful, but there’s a couple other water bottles in the recycling bin that need a new life.
Let’s go fishing in the recycling bin then make a fun plastic bottle fish craft! Be watching for some other things you could hang along with these fish coming up soon to a blog near you...
SUPPLIES TO MAKE A WATER BOTTLE FISH FOR KIDS!
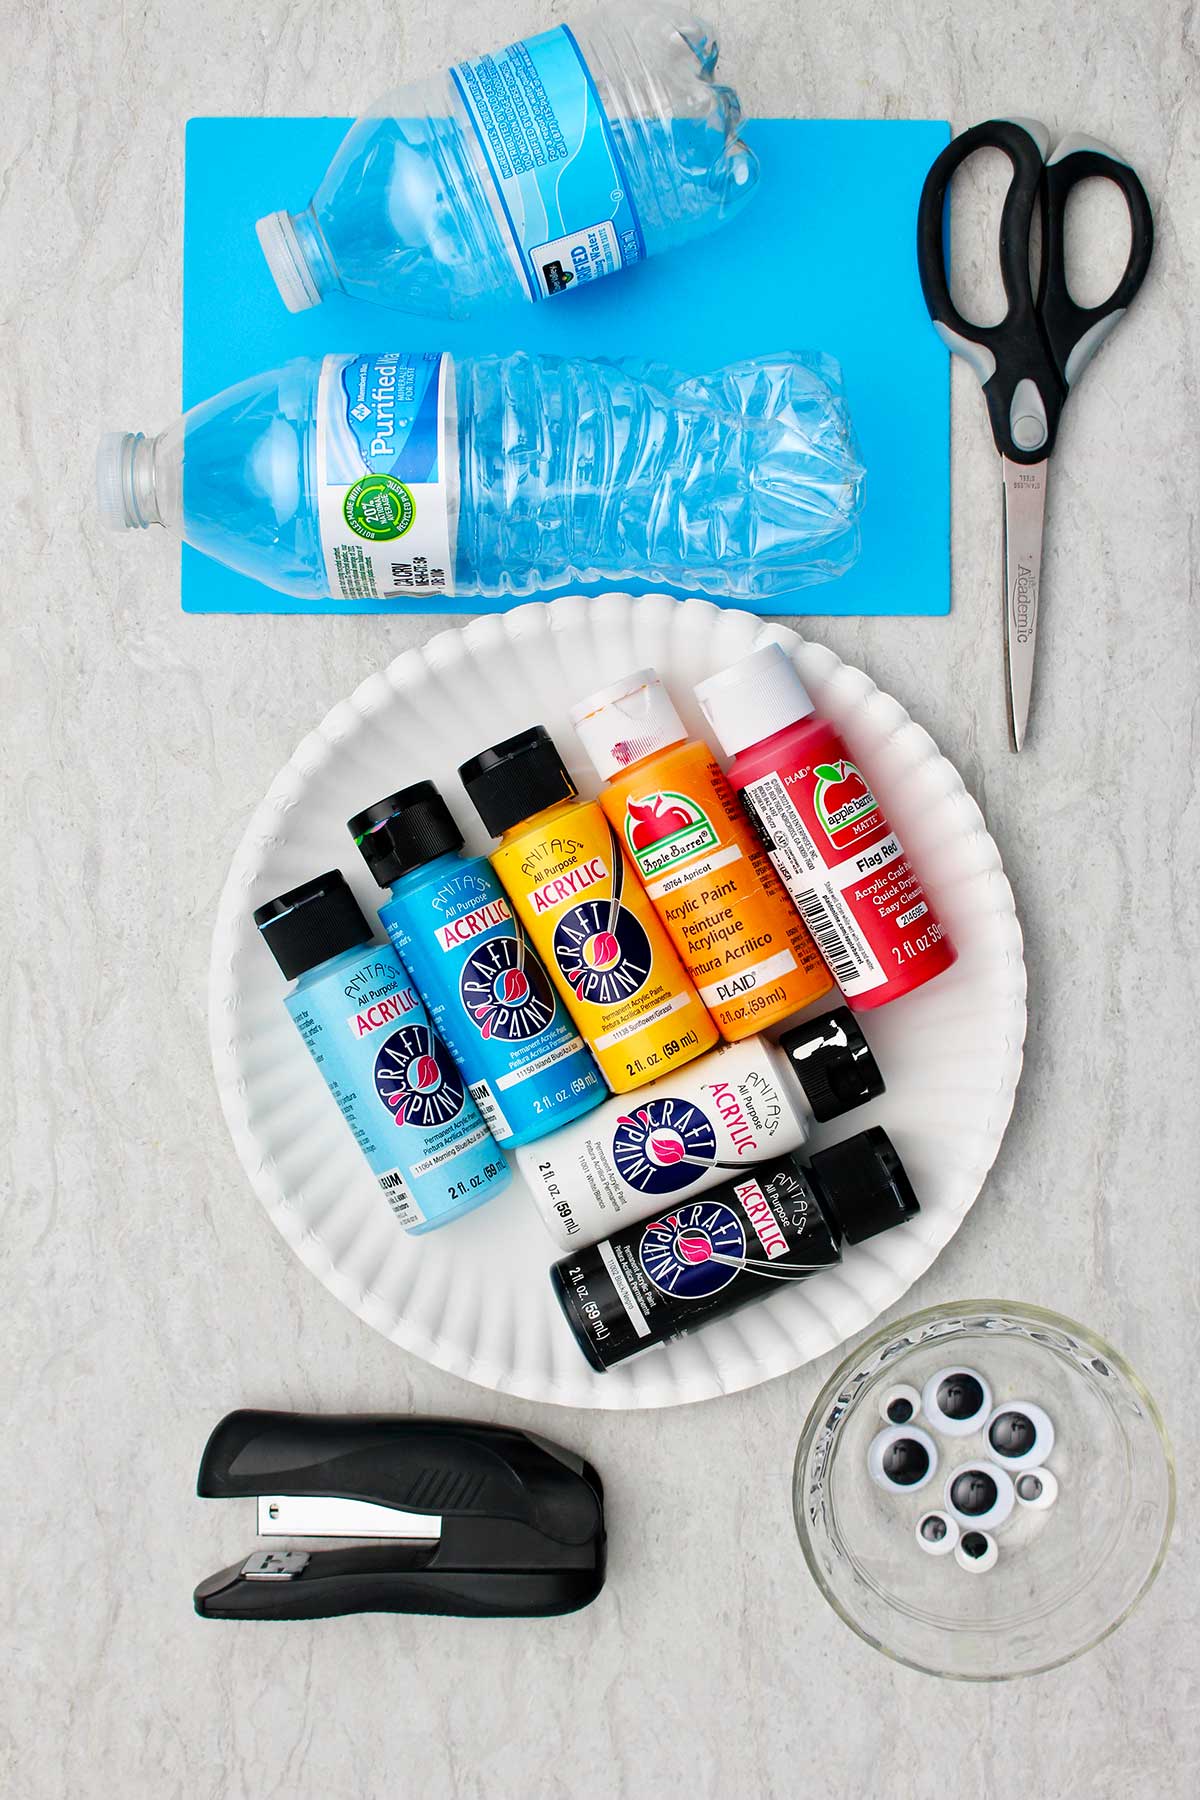
You don't need much to bring these cute water bottle fish to life!
Acrylic paints: a set of acrylic paints is one of my go to Staples in my craft stash. I can’t tell you how often I use them and use them with my grandkids. You can purchase them by the bottle, they are not very expensive. Or you can start your collection by buying a set either in a store or online. I recommend getting the whole set to start with one way or the other.
Googly eyes: who doesn’t love googly eyes? It’s nice to have a collection of a variety of sizes. You can purchase them this way and place them in a plastic bag and pull them out regularly for crafting
Craft foam: I first bought craft foam for what I thought was a one time craft. I am pleasantly surprised at how often I pull it out to use. This is a wonderful material to use for any 3-D or flat project. Craft foam is about an eighth of an inch thick, soft and pliable. But it doesn't tear easily. It’s wonderful to work with.
Plastic water bottles: We don’t use bottled water very often. But I do keep it on hand for occasional quick needs in the field or on a picnic. There are usually a couple empty plastic water bottles in my craft supplies (that I use for things like recycled bottle bird feeders!) if there isn't one in the recycling bin. They are light plastic and crinkly!
STEPS TO MAKE A PLASTIC BOTTLE FISH CRAFT
Prep the plastic bottle
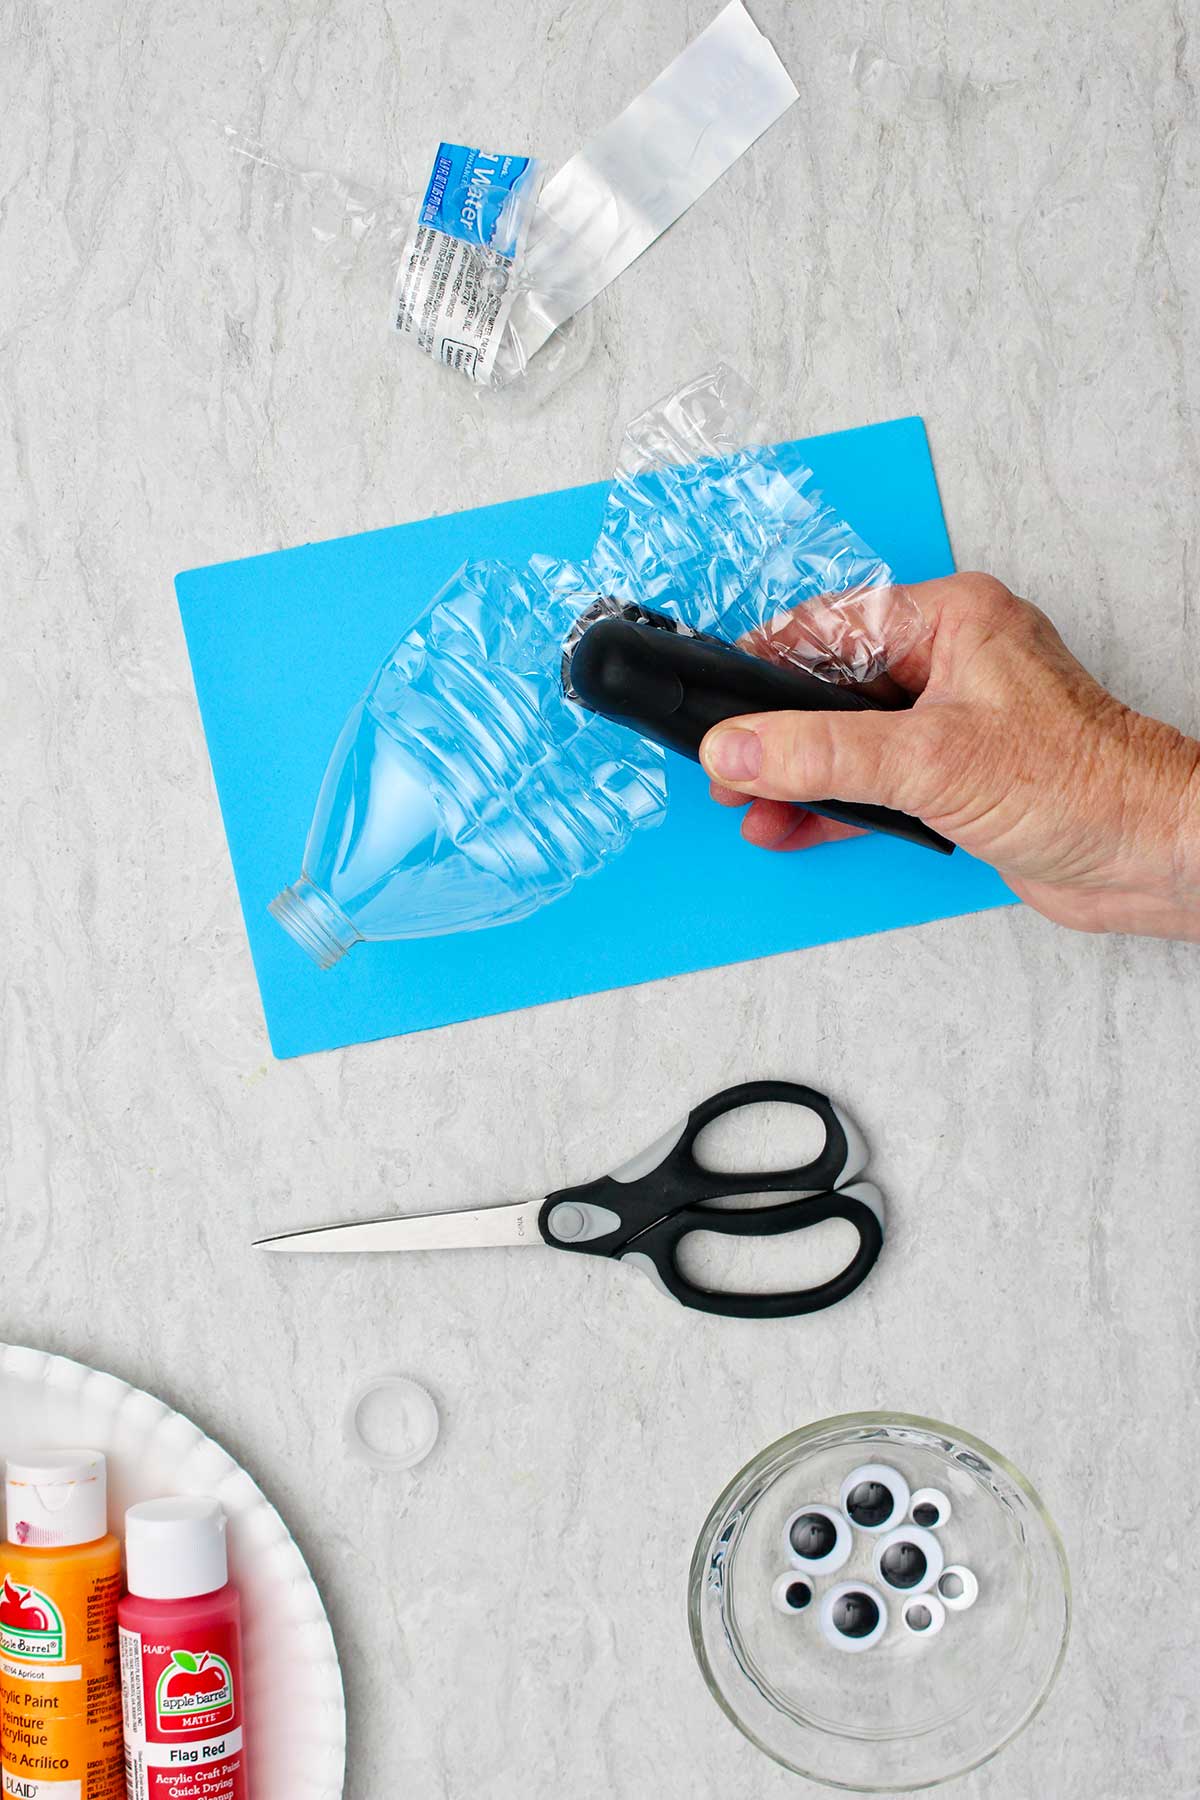
Take the lid off of the bottle and set aside. Cut off the bottom of the bottle. Smash down the bottom end of the water bottle leaving the top half more 3-D.
Cut two triangle shapes out, one down into the bottle from the top and one from the bottom. This is done about halfway down the flattened sides of the bottle.
Staple the area between these two points of your triangles to hold this in shape. Can you see the outline of a fish?
Cut the two edges of the bottle that are along the edge of the tail so that the two flaps of the tail are separate
Paint the fish
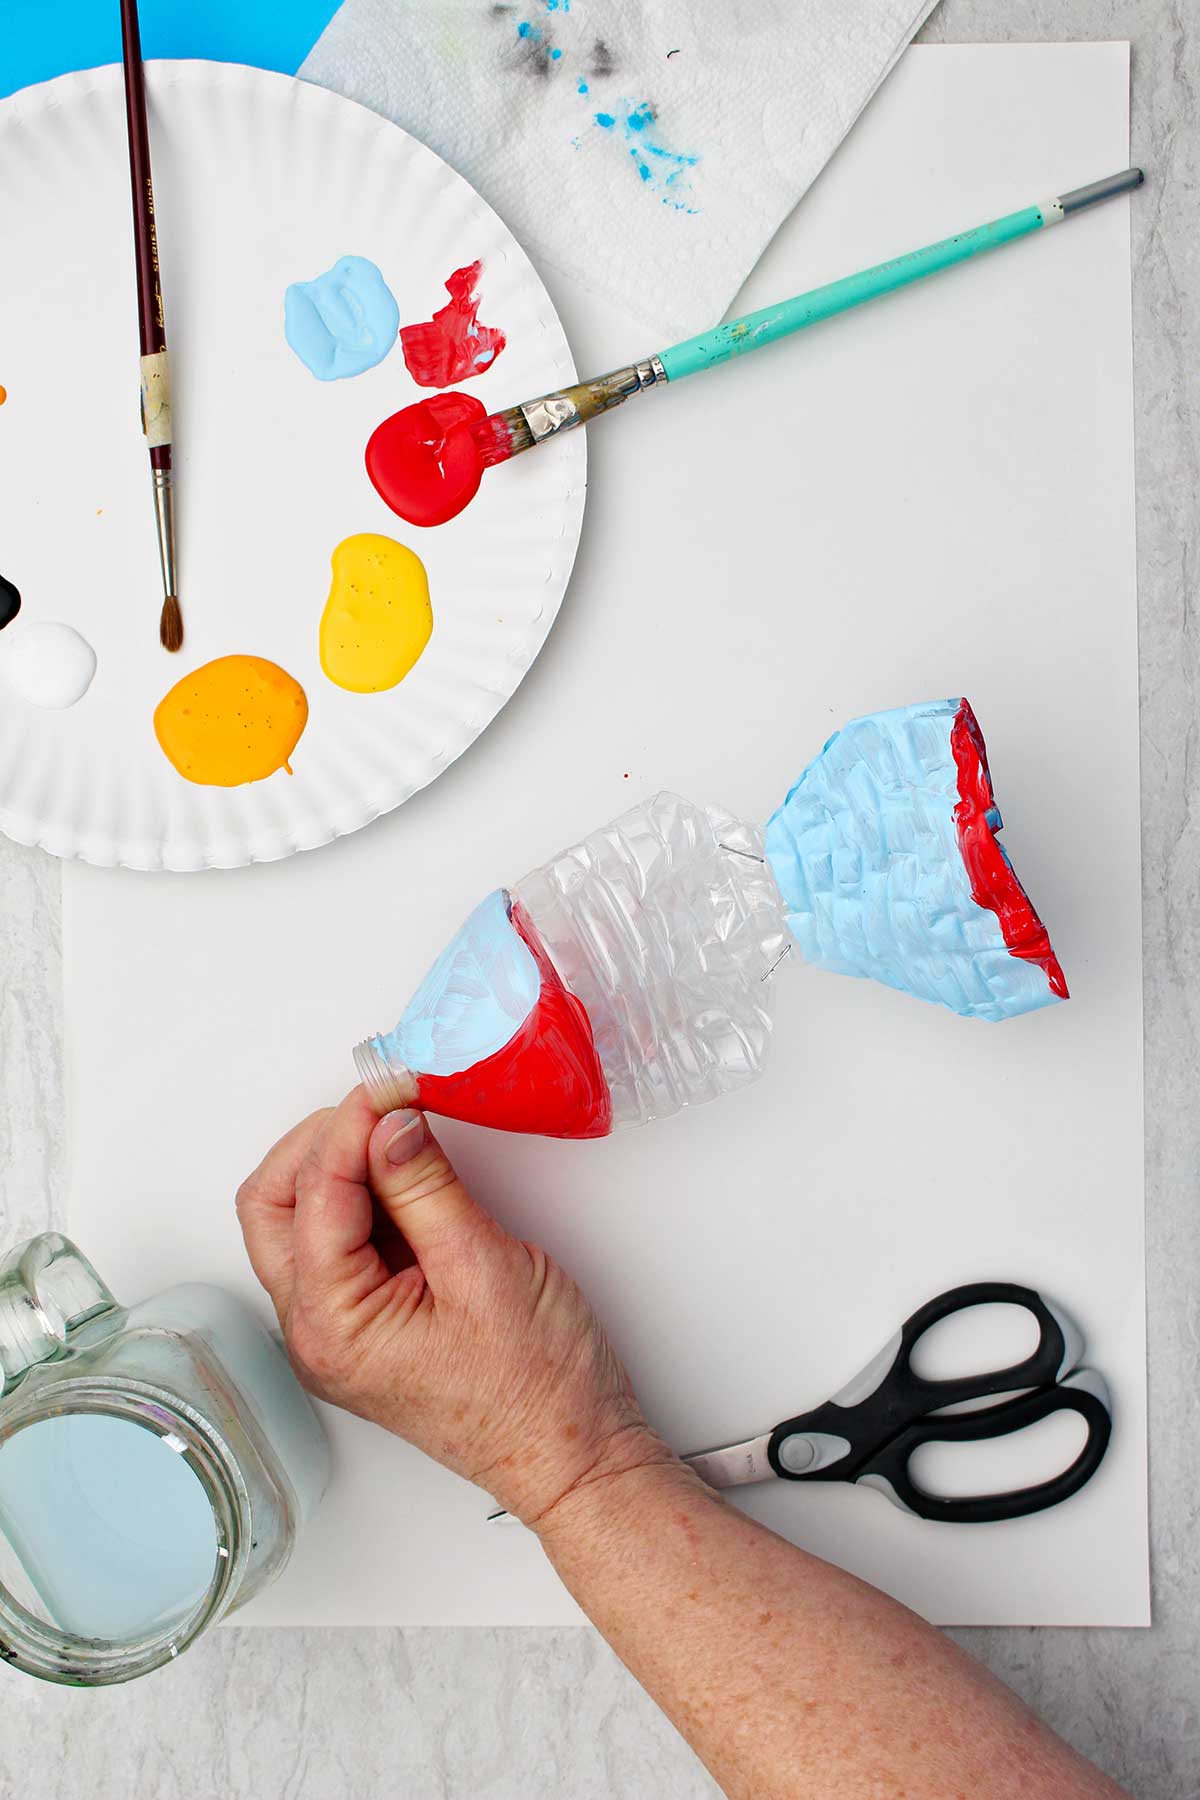
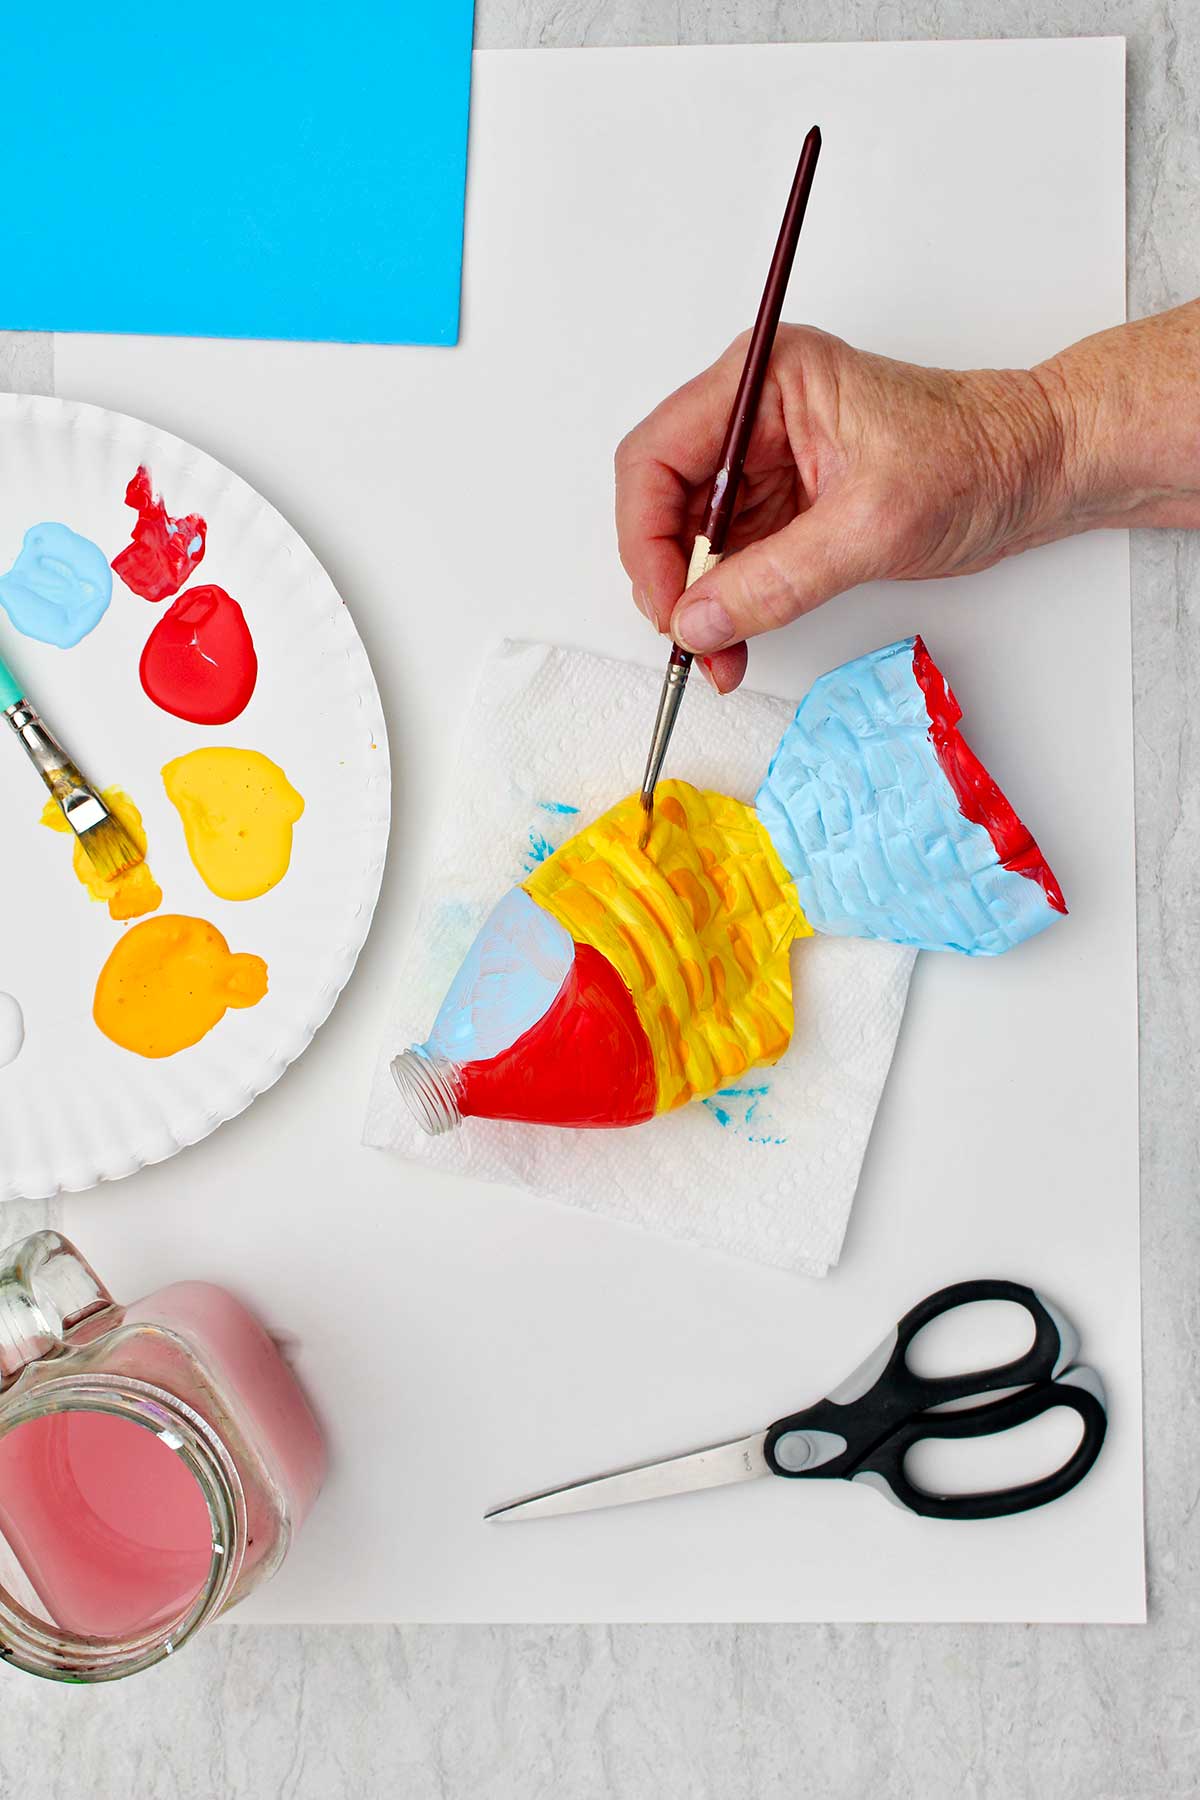
Holding the plastic water bottle from the opening, paint your fish with the acrylic paint in colors of your choice. Set the fish down on the bottle opening so that the body the fish goes straight up. Allow it to sit and dry this way. This will probably take about 15 minutes.
Add fins
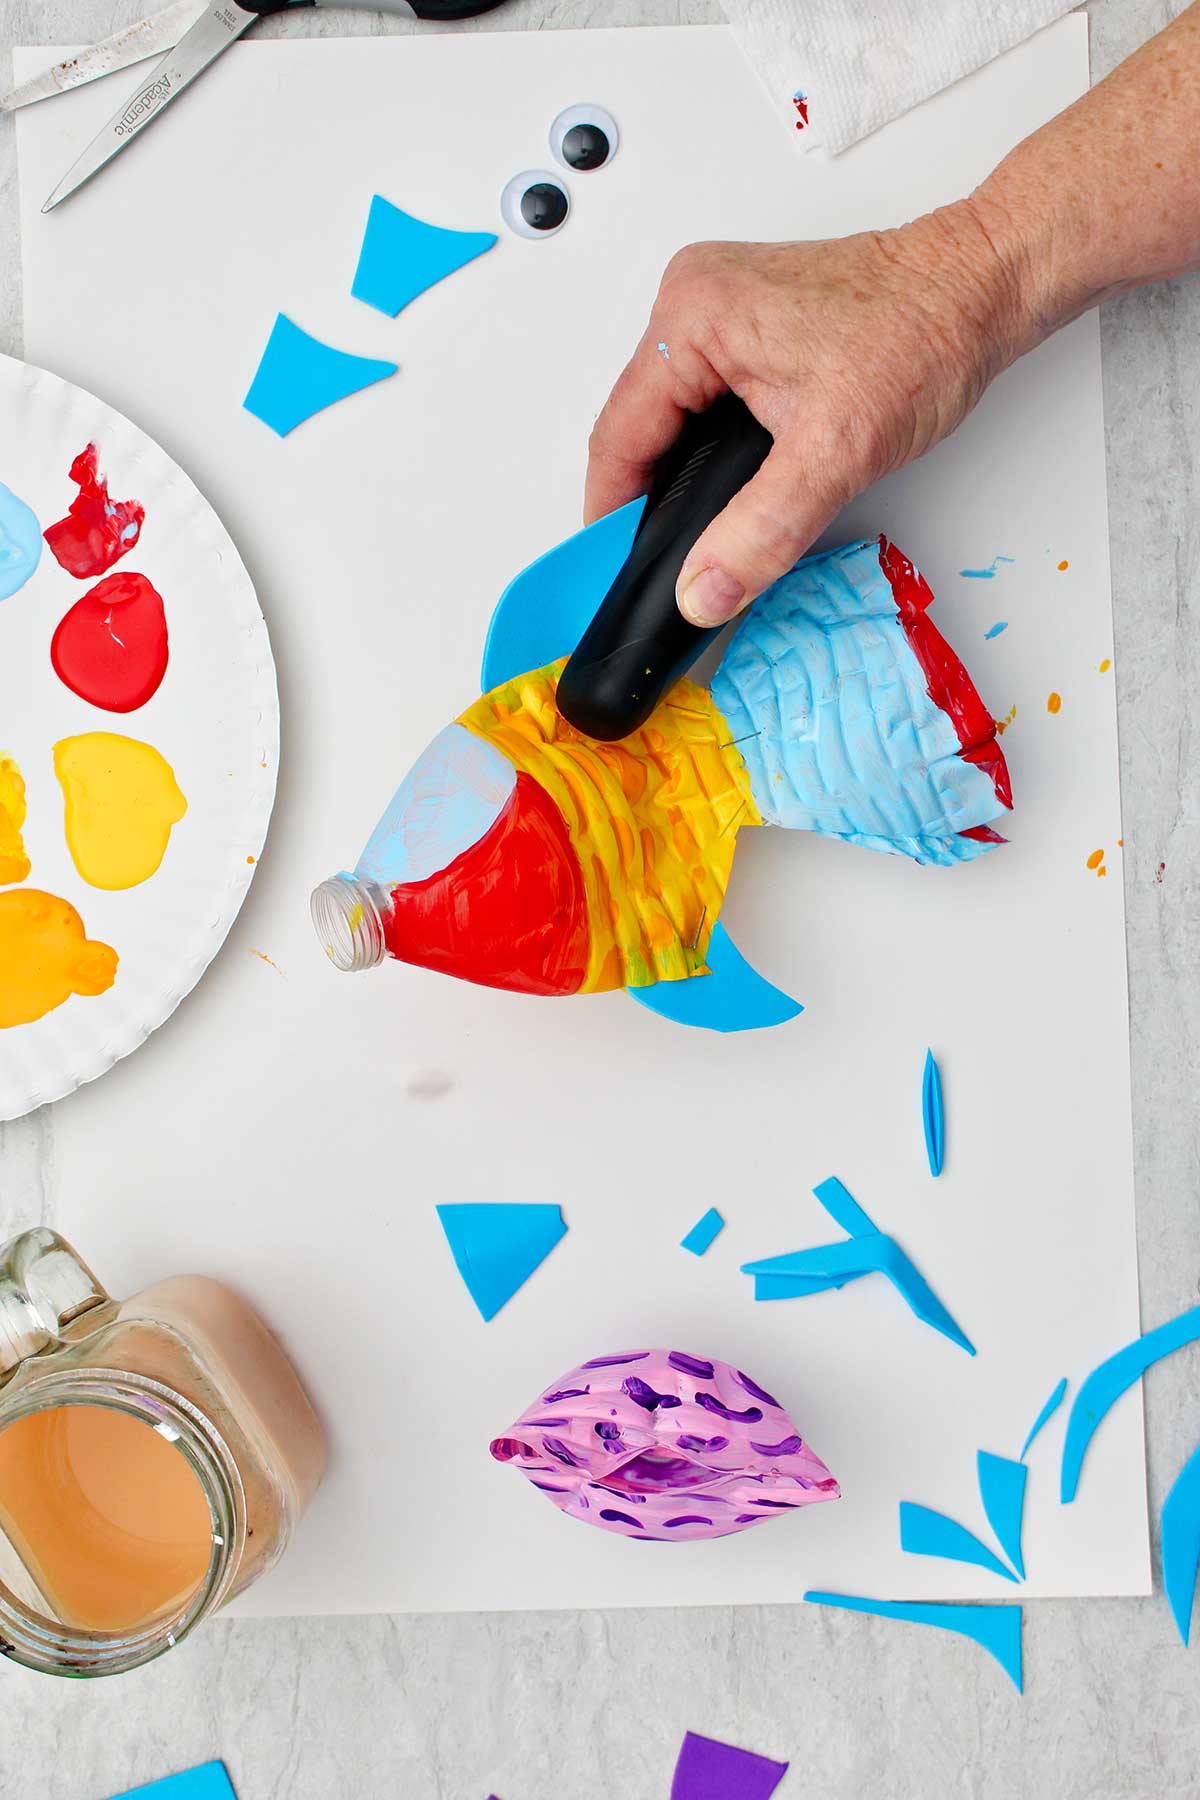
While that is drying, cut out some fins from the craft foam. If you don’t have craft foam, you could use colored cardboard or just plain cardboard and then paint it after it is put on the fish.
Cut a top and bottom fin that are similar in shape, one larger (top) and one smaller (bottom). Then cut two small side fins.
Cut a slit along the top edge of the fish, insert the piece of craft foam, and staple it in place. Repeat this for the bottom fin.
Use a hot glue gun to glue the side fin on either side of the fish.
Have fun adding details
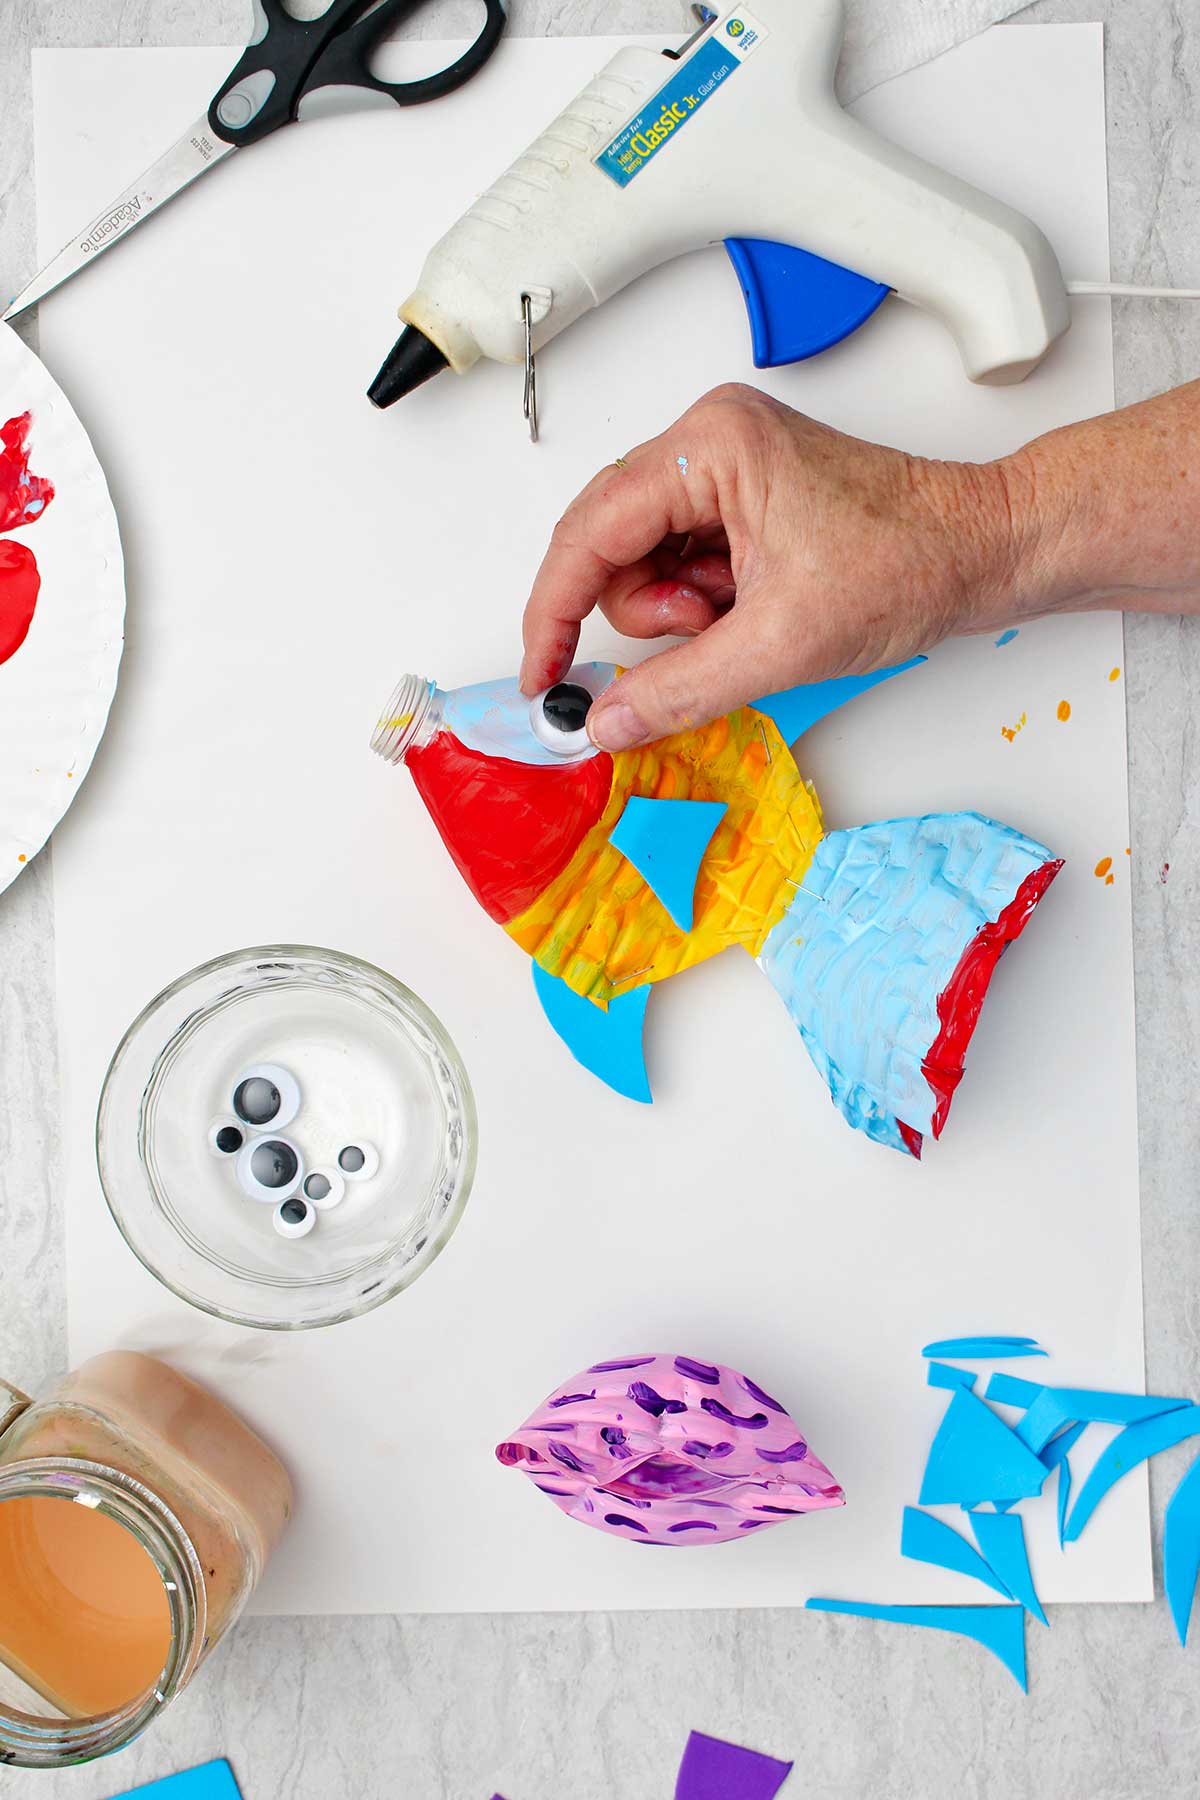
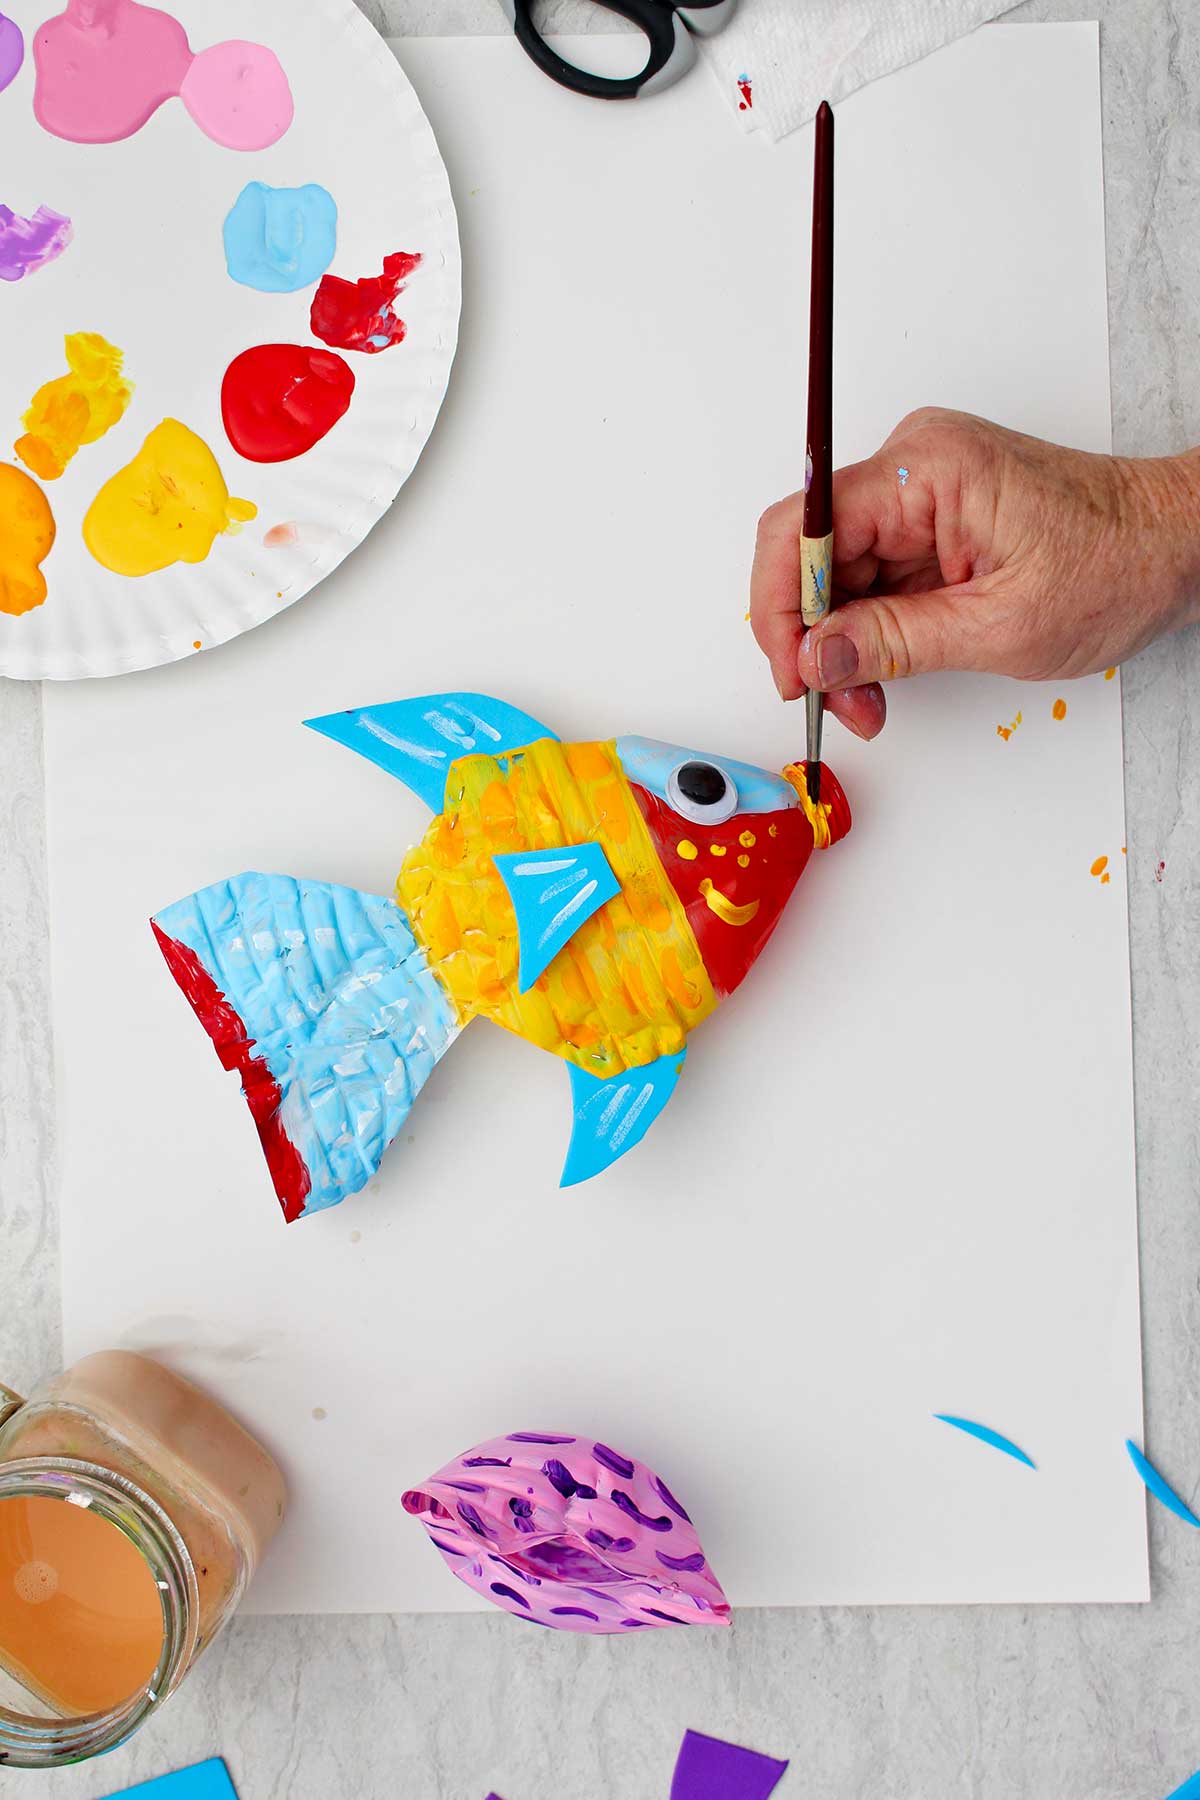
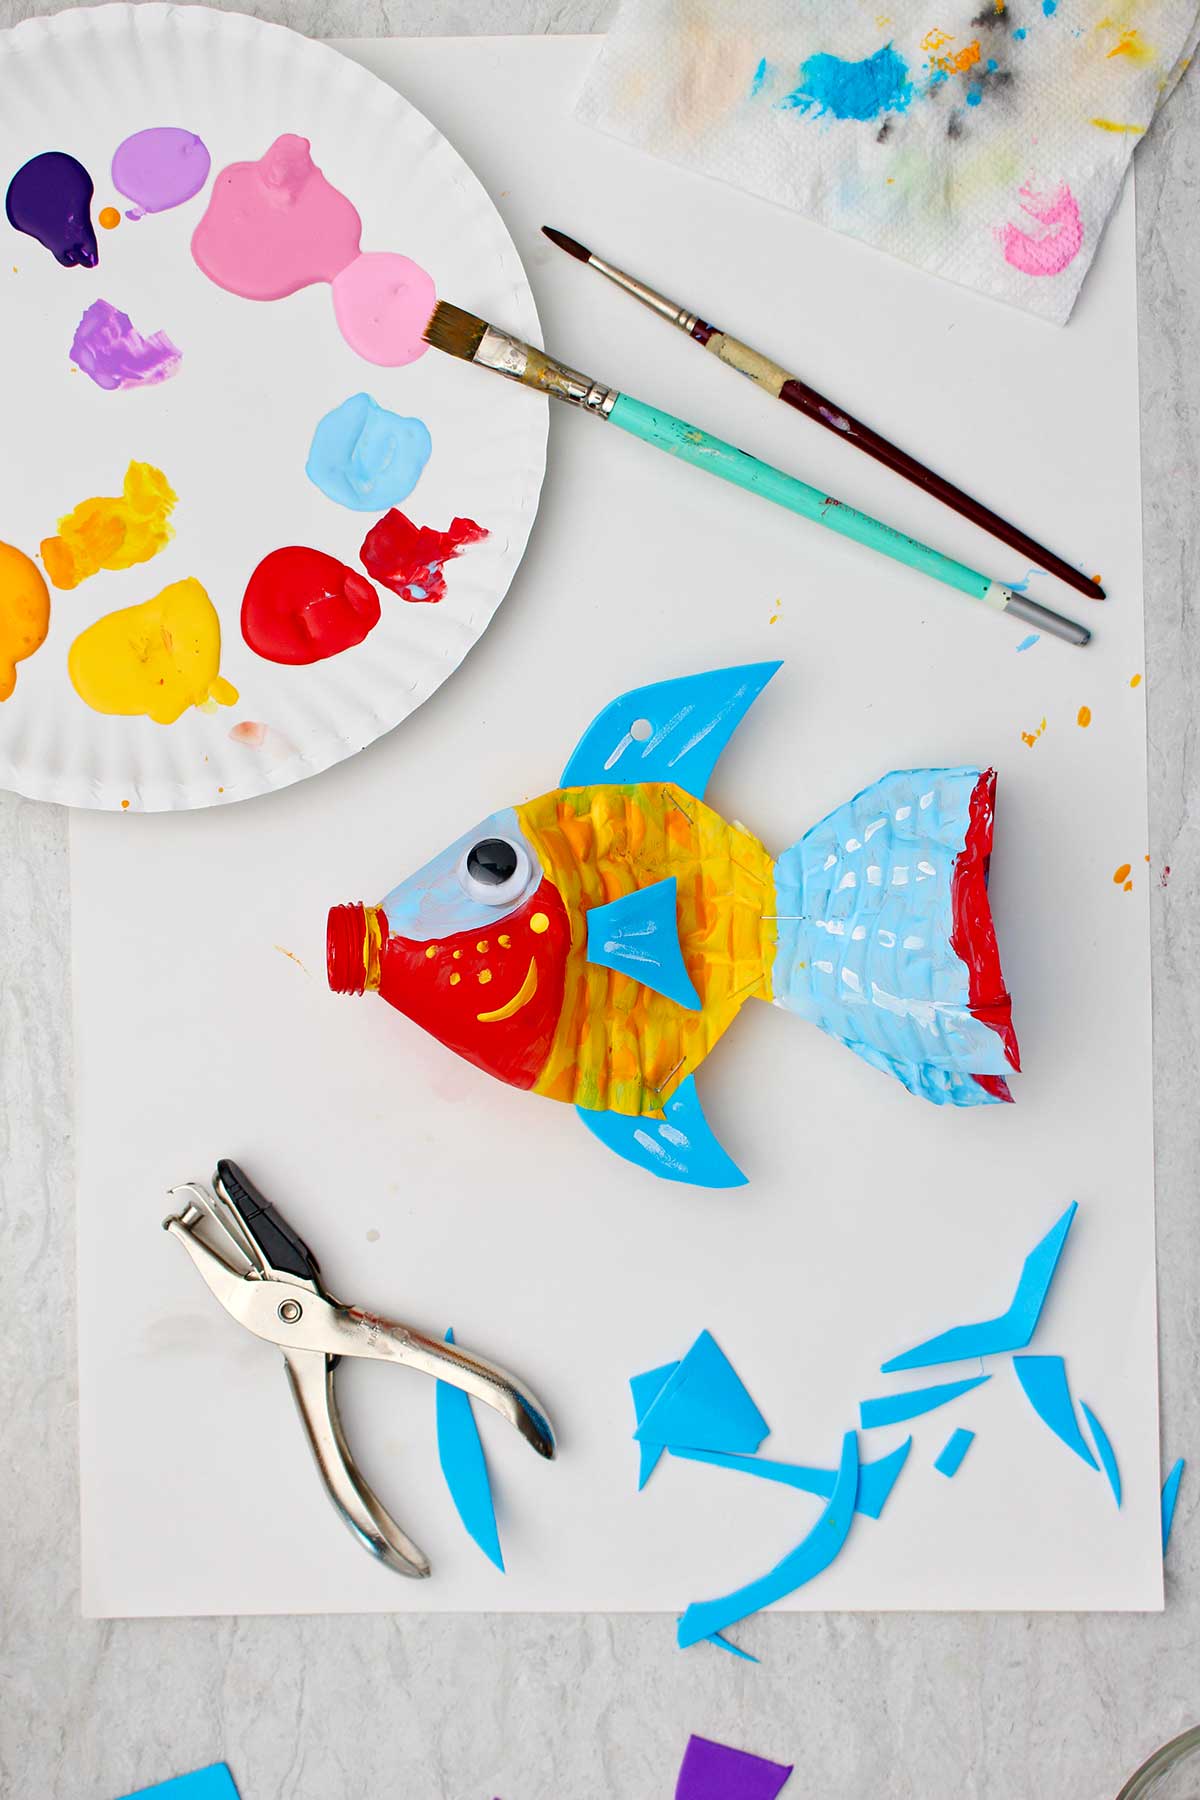
Use hot glue to put on googly eyes. Or you can paint eyes on your fish if you prefer. Use paint to make more detail designs on your fish. Add spots, stripes, eyelashes, additional markings on the mouth, whatever you would like!
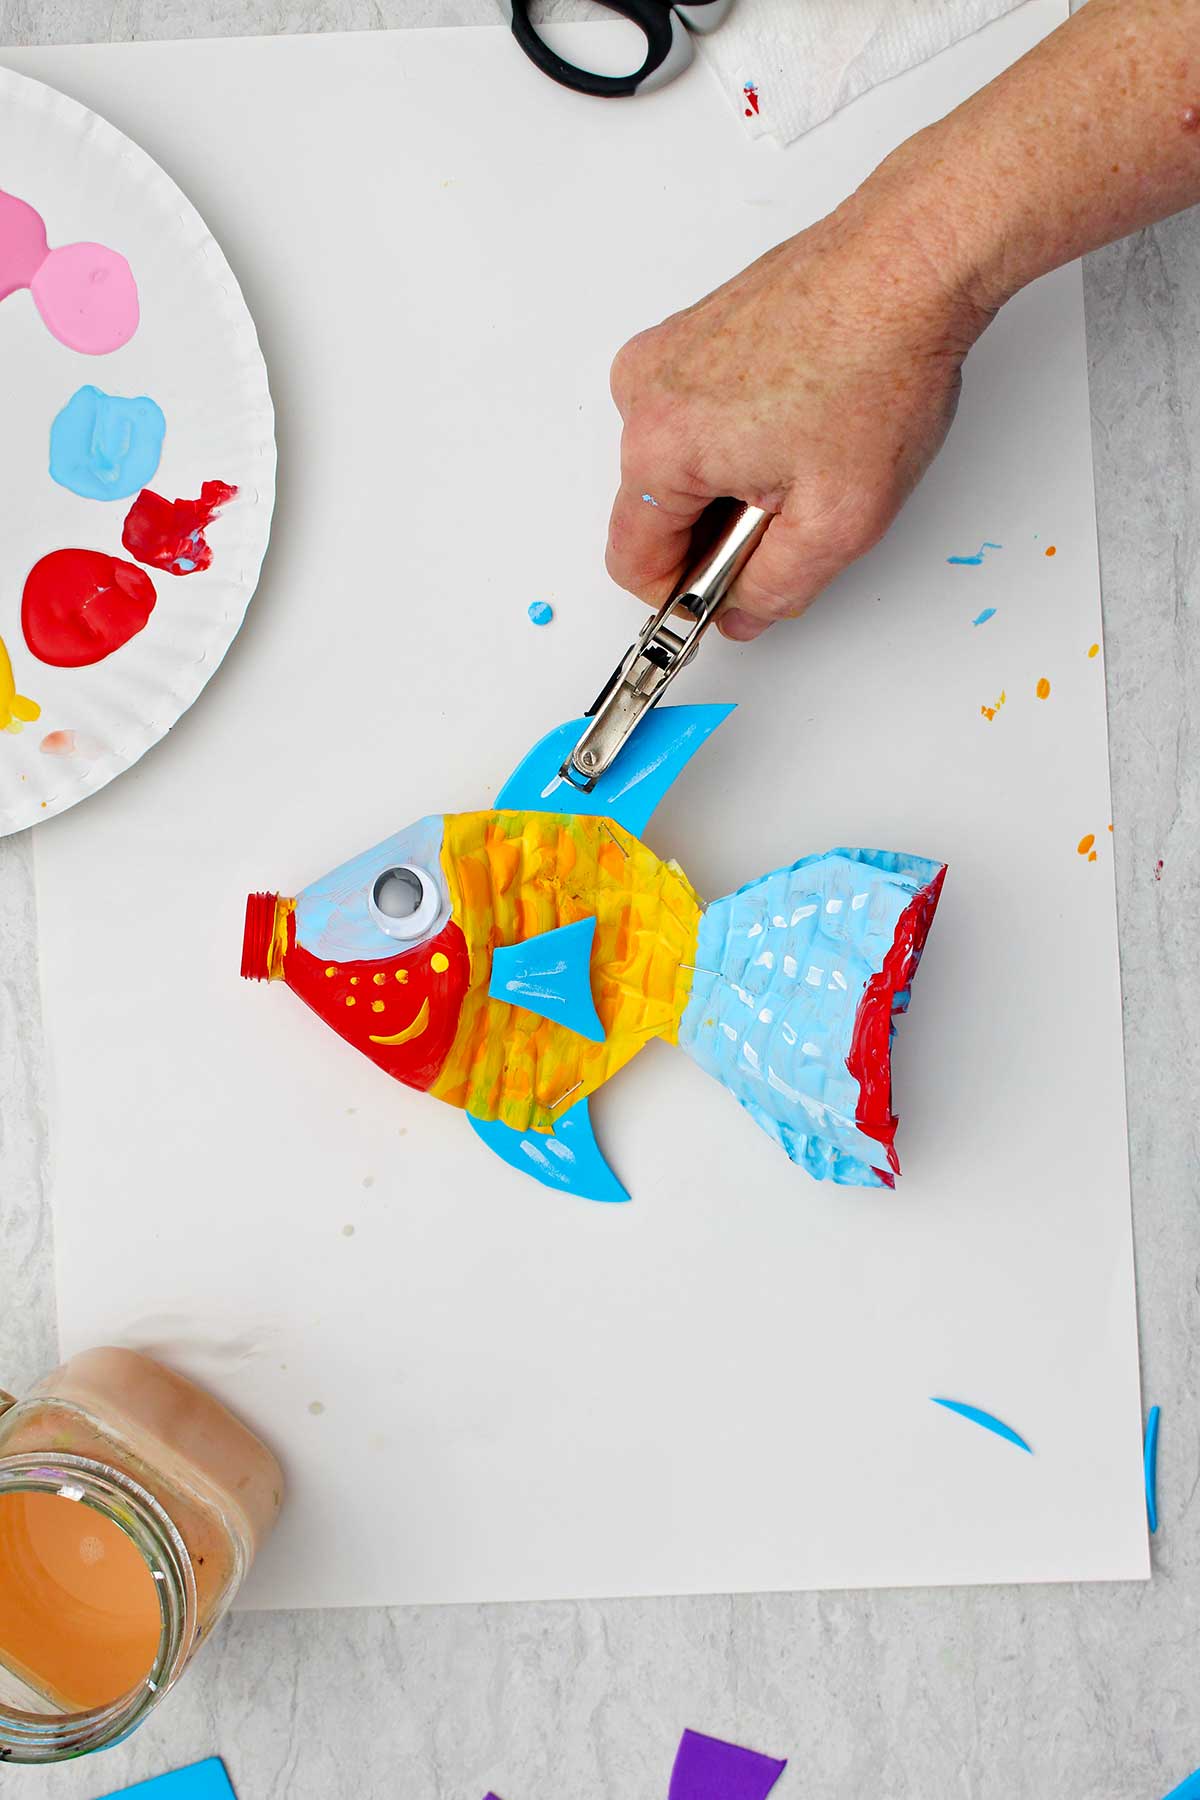
To hang your fish, use a hole punch to punch one hole in the top fin. Fishing line works well to hang these because you can’t see it. But you could also use string or thread.
These would look nice hung on a rod, stick, or an embroidery hoop. Make a grouping of fish if you are making a mobile and hang the fish at different heights.
CRAFT TIPS
The full recipe instructions can be found below, but here are a few tips to help you along the way!
- Way to grip the bottle while painting: Take the cap off of the water bottle. You can put your finger into the hole and hold the bottle easily while painting it on both sides. Then set it up on the mouth of the container and it will stand up so the bottle can dry on both sides at once!
- Wax coated paper plates: I use wax coat paper plates as a paint pallet. It works great! Don’t put very much of each color paint on the plate at a time. You will be surprised at how far these acrylic paints stretch when painting. I usually start with a nickel sized area of paint and then add more paint as needed.
- Younger children: Younger children may have a hard time stapling through the plastic bottle and craft foam. You may need to help them hold this in place or do the stapling for them. A quick, hard squeeze with the hand usually works best when stapling this.
- Hot glue: Go light on the hot glue as the plastic is so lightweight you will hear it crinkle and melt a bit.
If you would like to follow along with me to make this craft, check out the tutorial video on YouTube: Plastic Bottle Fish Craft Full Length Video.
CRAFT VARIATIONS
Want to switch things up? Here are a few ways you can customize and play with this craft.
- Make it Look Real: I made up a design for my fish, but some kids may want to make it look like a real fish. This could work into a fun research moment when you look up a certain variety of fish and then try to choose your colors to match the pattern on the fish.
- Vary the Colors: You can try many different color schemes. I’m always a sucker for blue and orange. So I used a variety of those colors.
- Make it "Swim": After using a hole punch in the top of the fish, tie a piece of fishing line or string on it and you can hang it up anywhere. I suggest using a stick or dowel and hanging several in a row. Another option would be to use an embroidery hoop and hang several down in a circle. I thought this would be a great way for teachers to decorate their rooms they go back to school! Hang them from the ceiling along with a fishing net. A "school" in a school...buh, dum, bum.
- Add Jewels: I was thinking how nice it would look to put jewels on these fish. Or use streamers or ribbons for the tail. You could also glue on pieces of tissue paper and cover the fish. There’s so many things you could do to make it look like a different type of fish. Use your imagination and create several!
- Change the Bottle Size: You could use other bottle sizes to make this fish. I’d even thought it would be neat to make one out of a 2 liter beverage bottle. There are also small sized water bottles. You could have a whole variety of fish sizes!
FAQ
Your acrylic craft paints will work fine for this craft. They adhere to the plastic quite well. They probably would not last well outdoors for very long. You can also try putting a clear acrylic coat over the top either with a spray or a liquid that you brush on. You would purchase these either online or in your craft store where the acrylic paints are found.
I think this craft would work with any size plastic beverage container as long as the plastic is not too heavy to bend flat. A 2 liter clear plastic bottle would work and there’s also a half size plastic water bottle size that would work for small ones.
Yes, you can! To make a different type of tail shape, cut off the triangular tail that you see in the picture or video. Use ribbons or streamers or other flexible plastic recycled materials cut into strips. Staple this into the tail area so it kind of fans or feathers out. You can also cut various shapes of a side fin to look like specific fish. Match them to a picture that you find online.
MORE DIY RECYCLED BOTTLE CRAFTS FOR KIDS
Looking for more easy plastic bottle crafts to make with kids? Here are a few favorites for you to try:
- Make a Recycled Plastic Bottle Bird Feeder
- Upcycled Plastic Bottle Airplane Craft
- Easy DIY Halloween Recycled Milk Jug Ghost Luminaries
- 3D Elephant Craft from a Milk Jug
EQUIPMENT FOR THIS CRAFT
There is no special equipment needed for this plastic water bottle fish.
A long armed stapler: But it is nice to have a stapler that has a longer arm on it than the one I’m showing in this picture. Then it can reach deeper into a project and staple more areas easily. Being able to staple the bottle makes this a faster craft, especially in a group.
Enjoy!
If you try this craft, let me know! Go ahead and leave a comment, rate it, and tag a photo with #WelcometoNanas wherever you post.
Come join the fun at https://welcometonanas.com
Make a Fun Plastic Bottle Fish Craft (recycled)
Equipment
- Paint brushes
- Hot glue gun
- Hole punch
Items Required
- Acrylic paints in the colors that come in a set or that you choose for your fish
- Paper plate for a pallet
- Googly eyes
- Craft foam
- Fishing line or string, embroidery hoop or rod, if making a mobile
- Paint brushes
- Hole punch
- Hot glue gun
Instructions
- Take the lid off of the bottle and set aside. Cut off the bottom of the bottle. Smash down the bottom end of the water bottle leaving the top half more 3-D.
- Cut two triangle shapes out, one down into the bottle from the top and one from the bottom. This is done about halfway down the flattened sides of the bottle.
- Staple the area between these two points of your triangles to hold this in shape. Can you see the outline of a fish?Cut the two edges of the bottle that are along the edge of the tail so that the two flaps of the tail are separate
- Holding the plastic water bottle from the opening, paint your fish with the acrylic paint in colors of your choice. Set the fish down on the bottle opening so that the body the fish goes straight up. Allow it to sit and dry this way. This will probably take about 15 minutes.
- While that is drying, cut out some fins from the craft foam. If you don’t have craft foam, you could use colored cardboard or just plain cardboard and then paint it after it is put on the fish. Cut a top and bottom fin that are similar in shape, one larger (top) and one smaller (bottom). Then cut two small side fins.
- Cut a slit along the top edge of the fish, insert the piece of craft foam, and staple it in place. Repeat this for the bottom fin.Use a hot glue gun to glue the side fin on either side of the fish.
- Use hot glue to put on googly eyes. Or you can paint eyes on your fish if you prefer. Use paint to make more detail designs on your fish. Add spots, stripes, eyelashes, additional markings on the mouth, whatever you would like!
- To hang your fish, use a hole punch to punch one hole in the top fin. Fishing line works well to hang these because you can’t see it. But you could also use string or thread.
- These would look nice hung on a rod, stick, or an embroidery hoop. Make a grouping of fish if you are making a mobile and hang the fish at different heights.



Leave a Reply