Welcome To Nana's

  • All Crafts
  • Arts & Crafts
    • Drawing
    • Painting
    • Sewing
    • Paper craft
    • Nature
    • Recycled
    • Coloring Book
    • 3-D Project
  • Activities
    • Indoor
    • Outdoor
    • Science
    • Trip Activities
    • Recipes
  • Holiday
    • Christmas
    • Thanksgiving
    • Halloween
    • Easter
    • Fourth of July
    • Father's Day
    • Flag Day
    • May Day
    • Midsummers Day
    • Mother's Day
    • New Years
  • About
menu icon
go to homepage
  • All Crafts
  • Arts & Crafts
    • Drawing
    • Painting
    • Sewing
    • Paper craft
    • Nature
    • Recycled
    • Coloring Book
    • 3-D Project
  • Activities
    • Indoor
    • Outdoor
    • Science
    • Trip Activities
    • Recipes
  • Holiday
    • Christmas
    • Thanksgiving
    • Halloween
    • Easter
    • Fourth of July
    • Father's Day
    • Flag Day
    • May Day
    • Midsummers Day
    • Mother's Day
    • New Years
  • About
search icon
Homepage link
  • All Crafts
  • Arts & Crafts
    • Drawing
    • Painting
    • Sewing
    • Paper craft
    • Nature
    • Recycled
    • Coloring Book
    • 3-D Project
  • Activities
    • Indoor
    • Outdoor
    • Science
    • Trip Activities
    • Recipes
  • Holiday
    • Christmas
    • Thanksgiving
    • Halloween
    • Easter
    • Fourth of July
    • Father's Day
    • Flag Day
    • May Day
    • Midsummers Day
    • Mother's Day
    • New Years
  • About
×
Home » Arts & Crafts

One More Way to Make a T-shirt Tote Bag!

Published: May 24, 2020 · Modified: Sep 5, 2020 by Shelly · This post may contain affiliate links · 2 Comments

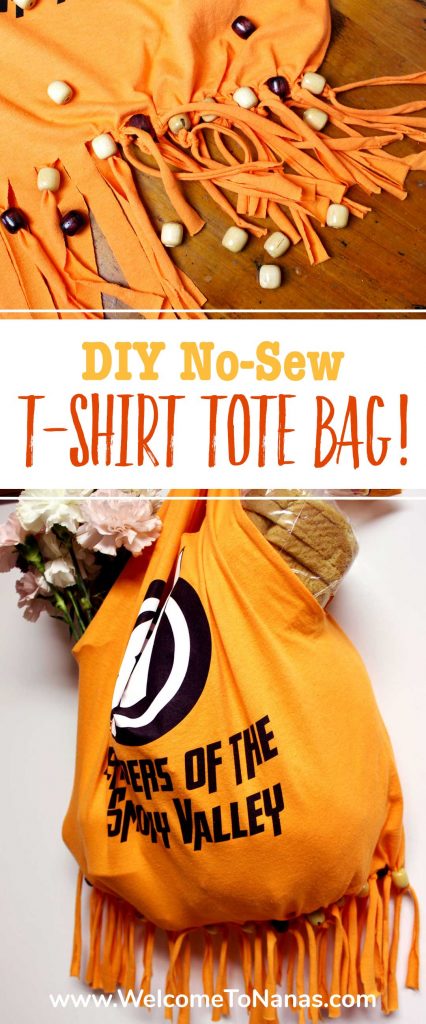
Another no-sew way to make a t-shirt tote bag!

So here is another no sew way to show your grands how to make a T-shirt tote bag. I forgot all about the possibility of tying off the bag. Aren’t the beads on the bottom so cool? It finishes off the bag and gives it a whole different look.

Prep the t-shirt

For this t-shirt tote bag you will prep the shirt the same way as shown on the How to Make a T-shirt Tote Bag post. Check out that post for specific instructions.

But the short story is cut off the t-shirt sleeves and bottom hem, then use a plate to cut off the area around the neck.

Cut some fringe-

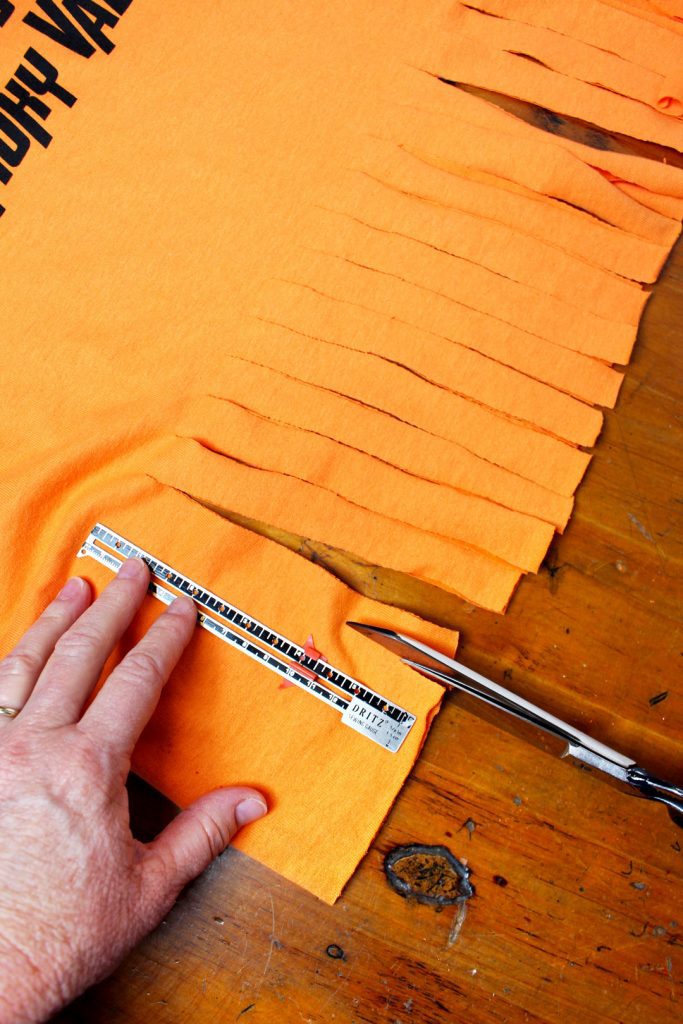
Lay the t-shirt down on a flat surface. Line up the bottom edges of the shirt and get the whole shirt to lay flat upward from that bottom edge. 

Cut one inch wide slits up the shirt about 6 inches. The two outside strips need to be cut along the side seam to make them have two parts like the others do.

Tie each set of strips-

You can just tie each of the sets of strips together (like you do when making a fleece blanket).

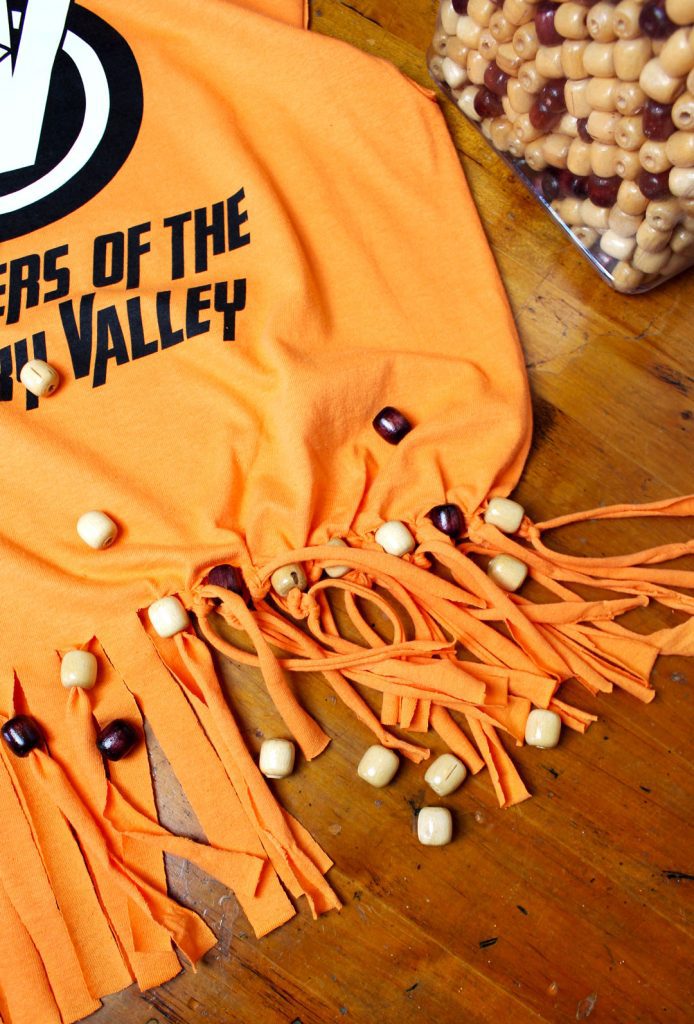
Add a bead to every other set of strips-

Or you can add a large bead to every other set of strips.

Tip: The beads need to have a really big hole, about ¼ inch in size or you can’t get the t-shirt fabric through the hole. 

I had these beads from one of those beaded seat covers I found at a garage sale. Don’t be impressed and don’t encourage me. I have had them for years and never used them till now.

You can purchase something similar at a craft store in the macramé section. I used about 15 of them for this project. Mine will sit on my shelf for another 10 years till I use them again. Ridiculous, but that’s my only ONLY vice- ha!

A crochet hook does the trick-

Use a crochet hook to pull one of the strips from each set of strips through the bead. This is a bit challenging, but works if the bead hole is large enough. 

Then go ahead and tie the set of strips. Oh, I tied each set of strips three times. Remember to only use a bead on every other set of strips to give enough room for the beads along the bottom of the t-shirt tote bag.

Impress the grands!

I’ll bet your grands will be impressed by how easy and fast these are to make!

I’m keeping this one (it is calling to my '70s vibes) but plan to let the grands make one of their choice the next time we are together.

Supplies for the t-shirt tote bag:

  • T-shirt
  • Plate
  • Scissors
  • Ruler
  • Marking pen
  • Beads with at least a ¼ inch hole

Enjoy!

Welcome to Nana’s! Where there’s fun things to do with your “grand” kids!

Come join the fun at www.WelcomeToNanas.com

More Arts & Crafts

  • Three 4th of July firecracker treat boxes decorated with red white and blue paper and washi tape with some scraps of festive paper scattered around.
    Easy 4th of July Craft: Firecracker Treat Boxes!
  • A person. holding a milk jug windsock with a sunshine smiley face on it with many colorful strips of fabric hanging from the bottom.
    Make a Festive Milk Jug Windsock Craft
  • Red white and blue melted beads in the shape of a star sitting on a circular piece of wood next to a bowl of blue beads.
    DIY 4th of July Melted Beads Craft
  • A salt shaker full of button flowers with a ribbon tied around it against a blue background.
    Cute DIY Button Flowers in a Salt Shaker

Leave a Reply Cancel reply

Your email address will not be published. Required fields are marked *

Recipe Rating


This site uses Akismet to reduce spam. Learn how your comment data is processed.

Hello there! I'm Shelly (Nana), an artist, previously homeschooling mother of 3, and now proud grandma (Nana) of 6. I love sharing artistically inspiring, hands-on crafts for kids of all ages. Let's go have some fun!

More about me →

Popular Crafts

  • Hand squeezing the a completed batch of light blue fluffy slime.
    Homemade Slime
  • Completed colorful tissue paper flowers, a purple and pink one resting on a glass cake stand with others underneath.
    How to Make Tissue Paper Flowers
  • Overhead views of two different sprouts growing in glass containers.
    How to Grow a Tree from a Pine Cone
  • A sunset picture created with sharpies and alcohol on canvas, surrounded by bright sharpie markers..
    Cool Sharpie and Alcohol Painting on Canvas

Footer

↑ back to top

Privacy Policy

As an Amazon Associate I earn from qualifying purchases.

Copyright © 2025 Brunch Pro on the Feast Plugin