In my 12 years of teaching FACS (Home Ec) classes, my students consistently listed “Learn to Make an Omelet” as one of their favorite lessons of the year. Then they would say, "Now we won’t starve out on our own!" Ha!
They were initially afraid of trying an omelette but by putting my years of teaching experience to work (not to mention the countless omelettes I’ve made at home for my own family), the directions were clear and easy for them to follow. Let me give you that same set of easy steps so your kids won’t starve out on their own either! Come and give this hearty protein based yummy breakfast idea a try.
Making the perfect omelet
In the movie, 100 Foot Journey, they talk about learning to make the perfect omelet. In fact, that was the test for the main character to become a gourmet chef. Well…I’m here to tell you that I am NO gourmet chef and I don’t pretend to make a perfect omelet!
But, I do love making and eating omelets. And it’s one of my favorite things to fix for people that come for an overnight visit. I don’t know why, but an omelet just feels so much fancier than scrambled eggs.
Come on grands!!
This would be the perfect time for the grands to learn to make an omelet. Give them the link to this post if you can’t be with them in person. Then they won’t starve out on their own someday either!
So we are going to make a three egg omelet. You can make any size you want, but this makes a nice sized one for a larger breakfast or to divide in two.
1. Prep Omelette Ingredients
Before you get the eggs in the pan it is good to have all the ingredients ready for the center of the omelet. There won’t be time to slice, dice or fry ingredients once the omelet itself is cooking. The ingredients are listed in the recipe at the end of the post.
So I have listed bacon bits and shredded cheddar cheese as the two center ingredients to start out very simply. If you use purchased bacon bits and shredded cheddar cheese there is no preparation needed.
But later as you start experimenting, now would be the time to get the center ingredients ready. You can prepare chopped peppers, diced onion, salsa, crumbled bacon, mushrooms, browned sausage, spinach, other varieties of cheese and whatever else you would like to try!! It’s a great way to use up small bits of things that were extra from another recipe.

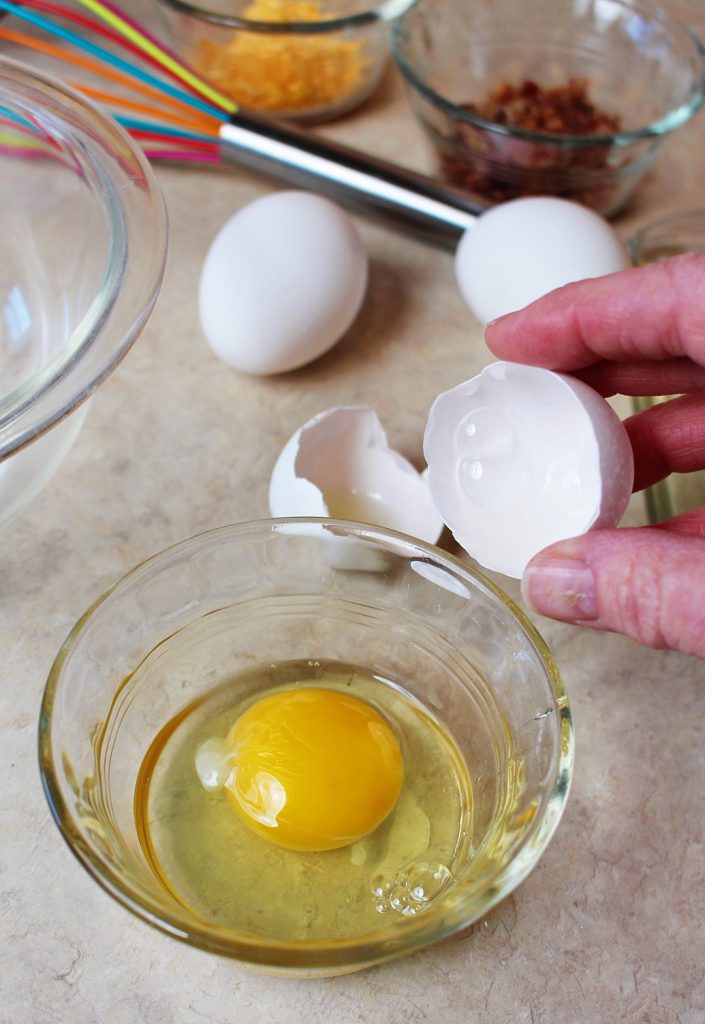
2. Break the Eggs
Break the three eggs, one at a time, into a small custard cup or bowl.
Tip: Remember that if you get a bit of egg shell in there, it is easier to fish it out of the egg with the edge of the broken egg shell half than with your finger or a spoon. Also, very occasionally there will be a bad egg and this will prevent getting it dumped in with the others.
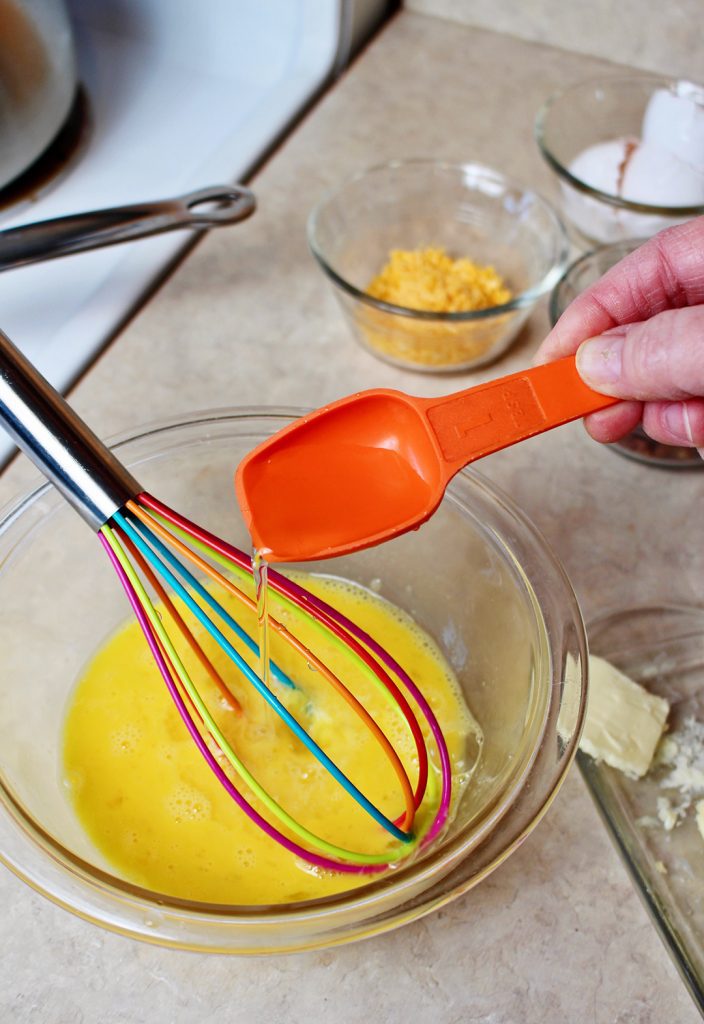
3. Whisk the Eggs
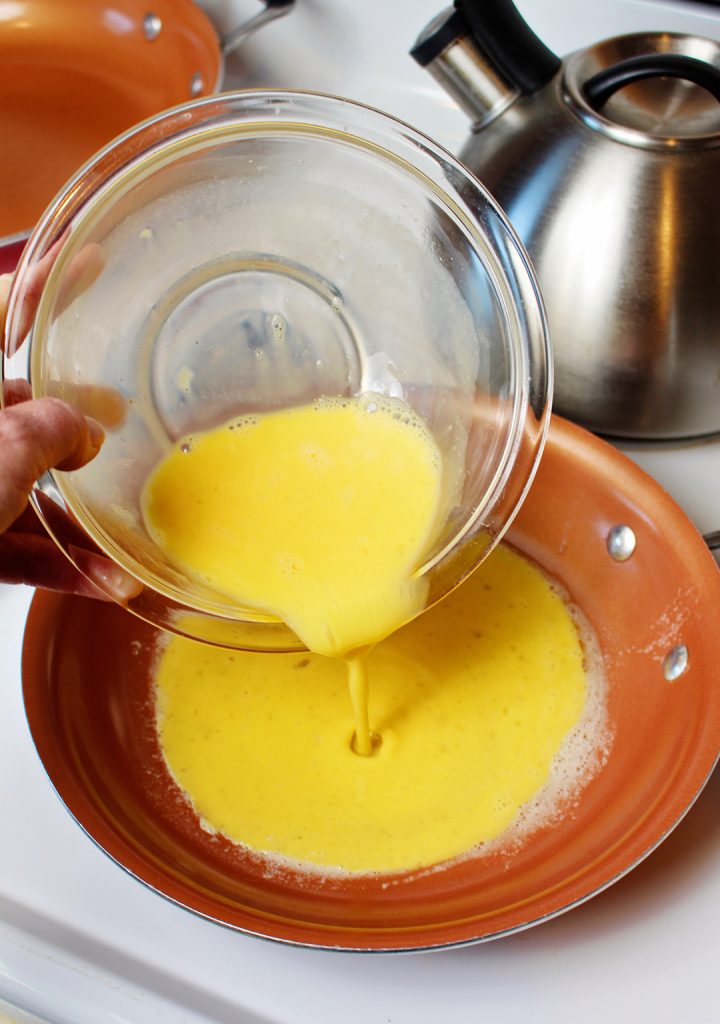
Pour the broken eggs one at a time into a small mixing bowl.
Add the Tablespoon of water to the egg and mix well with a Whisk![]() or a fork. The water makes the egg more fluffy. After you learn to make an omelet you can experiment and add a little more or less water till you find just the right amount of “fluffiness” for you.
or a fork. The water makes the egg more fluffy. After you learn to make an omelet you can experiment and add a little more or less water till you find just the right amount of “fluffiness” for you.
4. How to Cook an Omelette
Some time ago I purchased a 10 inch Ceramic Copper Infused Frying Pan![]() that is the perfect size for a three or four egg omelet. It’s a no stick pan and is supposed to allow foods to slide right out of the pan and onto the plate. The smaller sized pan works better for this size omelet as it spreads out too thin in a larger skillet.
that is the perfect size for a three or four egg omelet. It’s a no stick pan and is supposed to allow foods to slide right out of the pan and onto the plate. The smaller sized pan works better for this size omelet as it spreads out too thin in a larger skillet.
Place the pan on the burner and turn it onto a medium heat. Be patient and let the pan warm up well before starting or the egg mixture will stick big time. The pan will feel very warm as you carefully hold your hand over the surface.
Tip: You don’t want to set the heat on high as the bottom part of the egg will cook and brown too fast and the center will stay uncooked.
Gotta' have a bit of butter!
When the pan is nice and warm, put the butter in. Let it melt and push it around the surface of the pan. When the butter bubbles up well, give the eggs one more whisk and then pour them in.
Be patient, don't stir
There are different opinions on this next step, but I don’t stir the eggs once they are in the pan except to occasionally slit the center when it begins to bubble up.
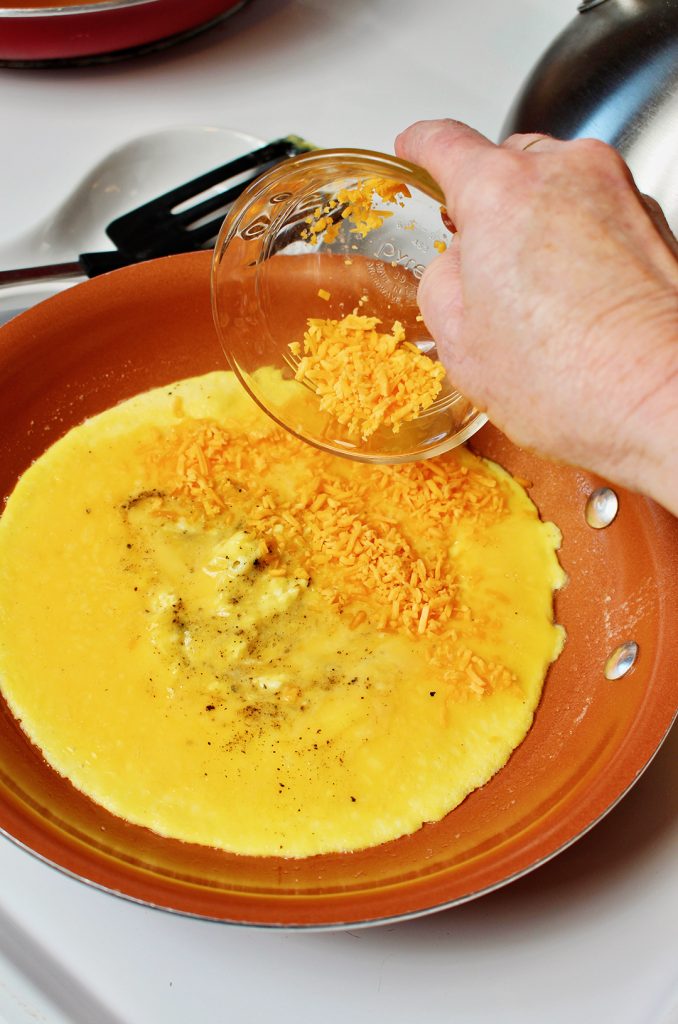
You will notice that the edges of the omelet begin to set up first. Now is when I like to shake salt and pepper over the surface of the eggs.
Add the toppings, yum!
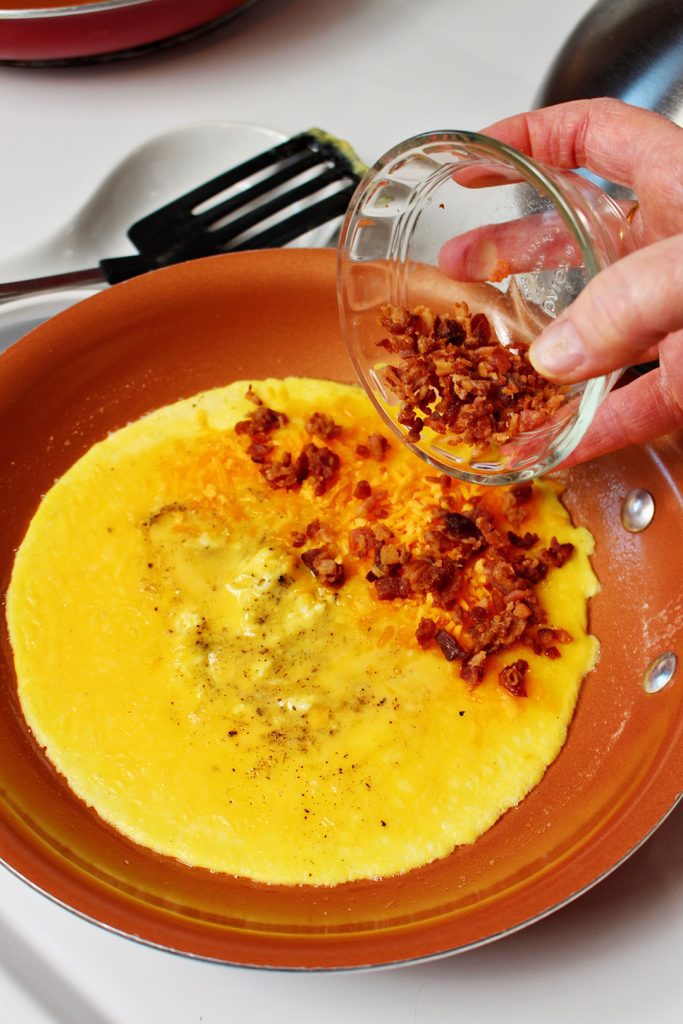
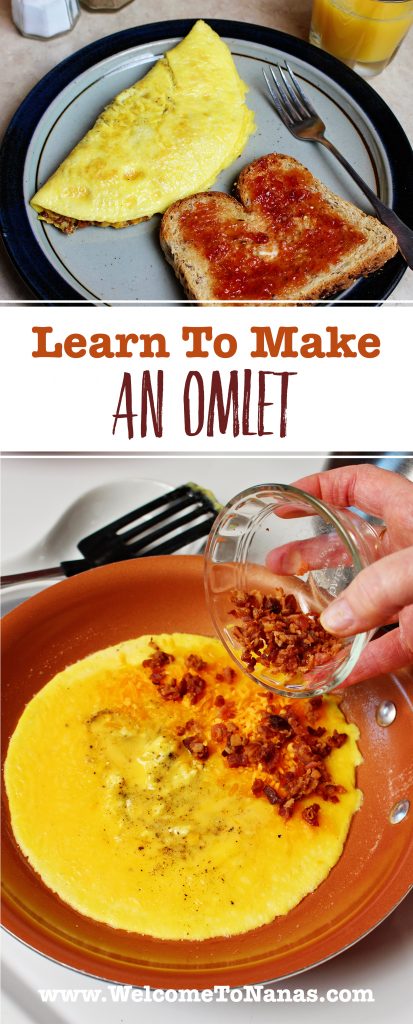
When the center starts to look as if it is beginning to firm up, sprinkle the cheese on one half of the eggs and then the bacon bits on top of the cheese.
Tip: Keep all the ingredients on one half of the omelet. Then they don’t spill when the omelet is folded in half. Also, it’s nice to put the cheese on first so it melts better.
5. How to Flip an Omelette
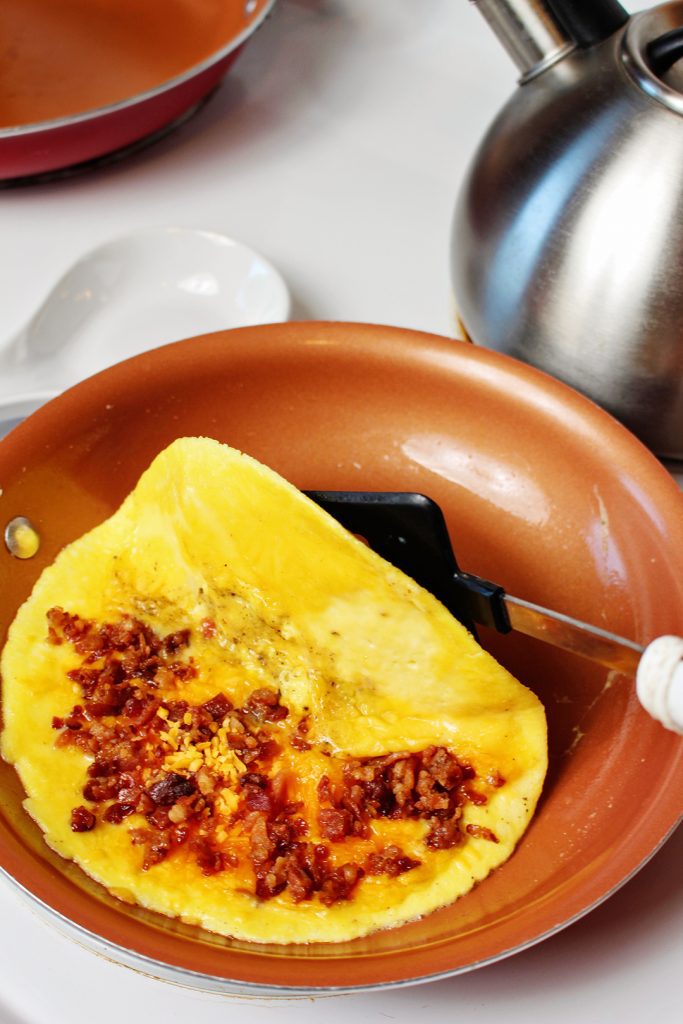
When the eggs firm up a bit more, turn the pan so you can slip the spatula under the half of the omelet without the toppings. Gently lift this half up and fold it over the half that does have the toppings.
Tip: If you really goof up and it goes to pieces, no worries! Just make scrambled eggs out of it and try again another time!!
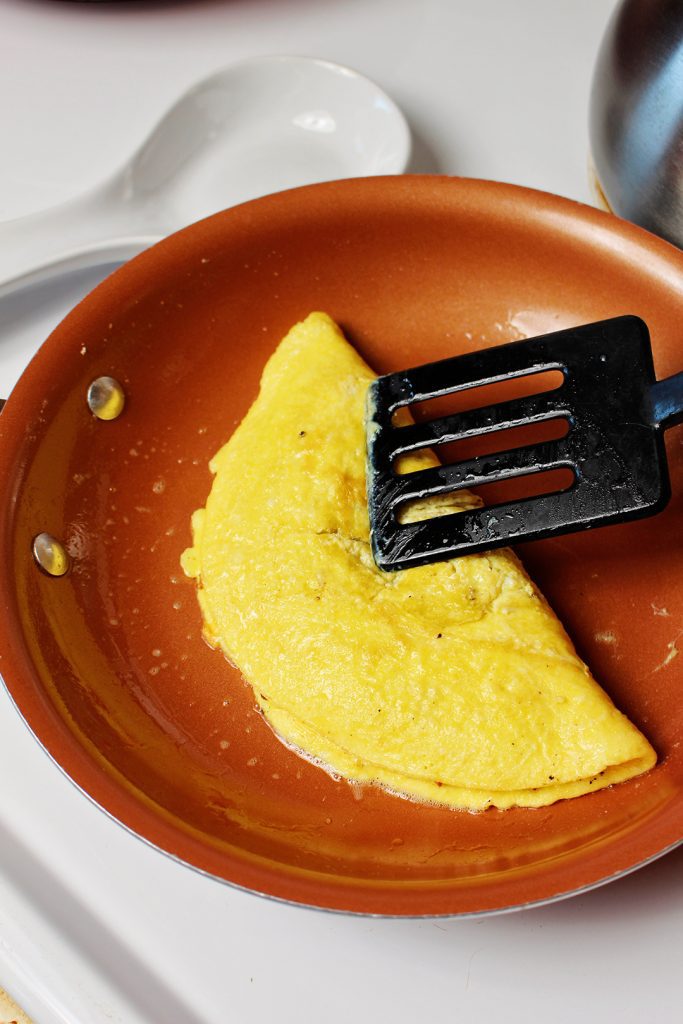
Allow the omelet to cook a bit longer in order to finish the center and really warm the toppings that are now in the center.
Serve it up like a gourmet chef
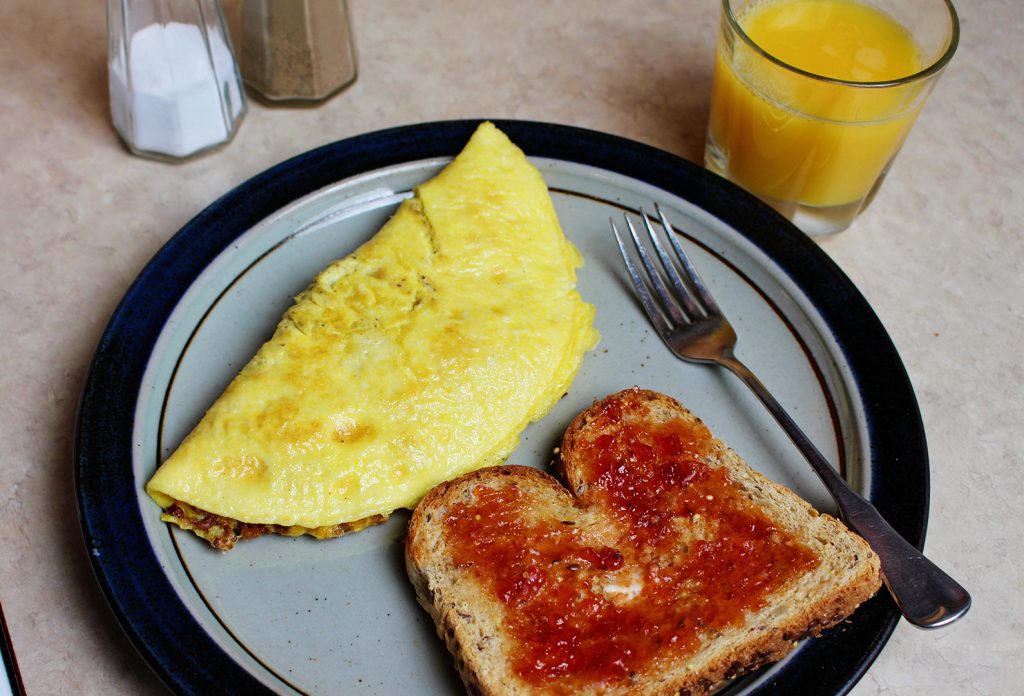
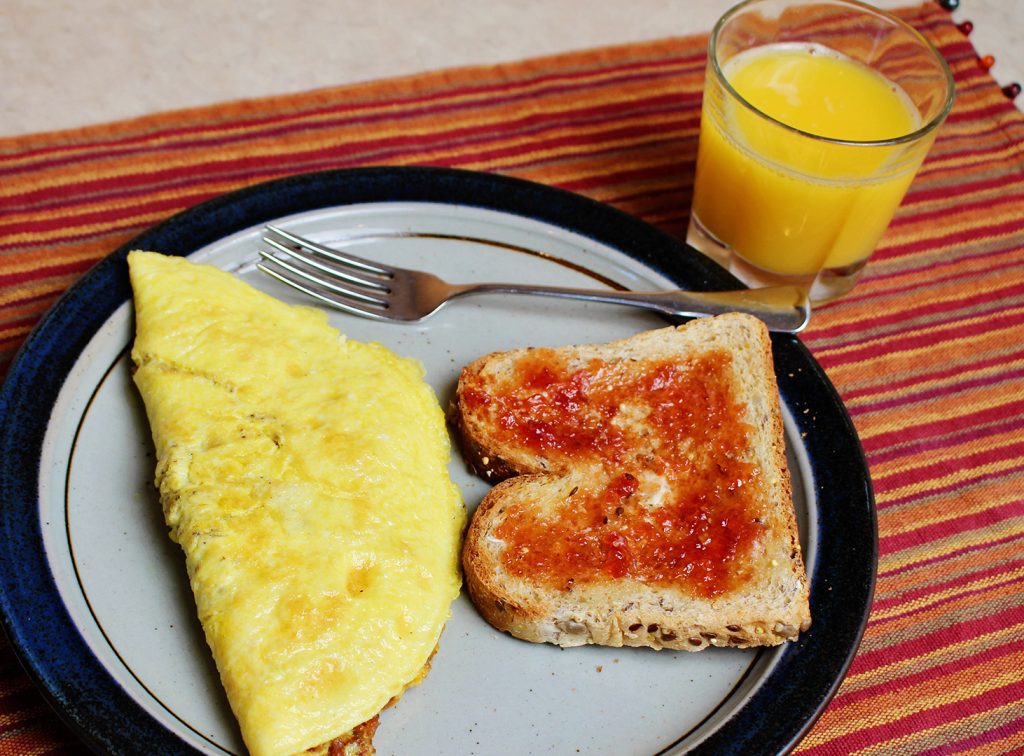
Slip the omelet out of the pan and right onto a plate. Don’t you feel a bit like a gourmet cook? Woo-hoo!!
Add a piece of toast and some juice and it makes a fantastic breakfast, or brunch, or lunch, or brupper (breakfast-supper)! Papa loves them anytime. I may have to list this as a Papa’s favorite.
What's your perfect omelet?
Email me and let me know your favorite combination of toppings to make the perfect omelet. And while you’re at it, give your combo an awesome name, too! Perhaps it will make you a famous gourmet cook!
Hey there grands, tell your friend that they can Learn to Cook an Omelet too!
Enjoy!
Welcome to Nana’s! Where there’s fun things to do with your “grand” kids!
Come join the fun at www.WelcomeToNanas.com

Cheese Omelette Recipe
Equipment
- Non-stick Skillet
- Spatula/turner
- Whisk
- Mixing bowl
Ingredients
- 3 eggs
- 1 Tablespoon (Tbsp) water
- 1 teaspoon (tsp.) butter
- 2 tablespoon bacon bits/crumbles
- 2 tablespoon shredded cheddar cheese
- Optional- other filler choices (peppers, onions, spinach, sausage, etc)
- Salt/pepper
Instructions
- Break 3 eggs into a mixing bowl.
- Add the water and whisk until well mixed.
- Heat the skillet on medium heat then add butter.
- Pour in the egg and let sit until starting to set.
- Sprinkle with salt and pepper.
- Pour the cheese and the bacon bits on ½ of the omelet.
- When mostly firm, fold the plain ½ of the omelet over onto the toppings half.
- Let cook a little longer to warm toppings and finish cooking.
- Slip onto a plate.

Diane Reece says
Excellent instructions! I’ve never been a great omelette maker, but these turned out pretty doggone good! I have a 10” cast iron griddle pan—thought, “why not?” It worked extremely well! Made 4 omelettes for our lunch. Everyone enjoyed. Yum yum!
Thanks!
Shelly says
So glad you made it happen and liked them!! They are so good and so easy!
Shelly says
Good for any meal, not just breakfast!! Don't tell anyone how easy they are! It's our secret.