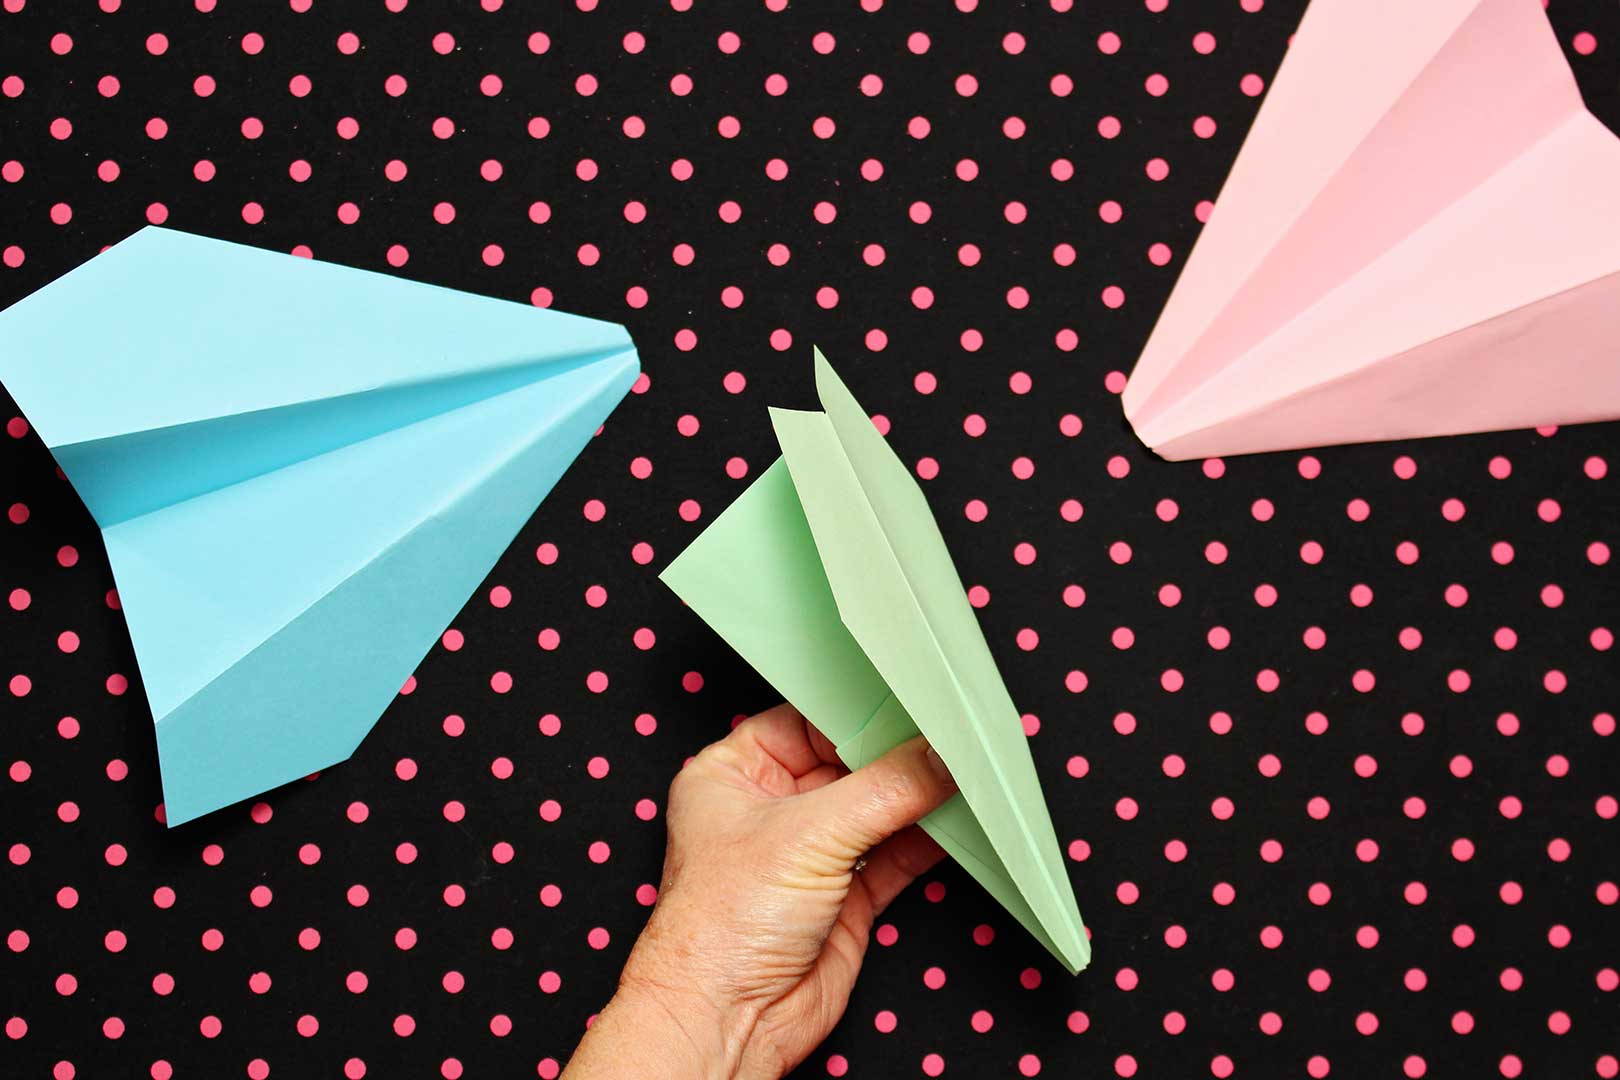
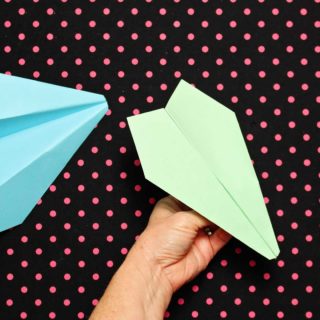
Do you want to know How to Make a Paper Airplane? My friend Daniel claims this origami plane is the best paper airplane, designed to fly better! You be the judge.
I may not be a licensed pilot, but with 3 kids and now 7 grandkids I’ve got years of experience practicing how to fold paper airplanes that soar the distance! Learn all my tips and tricks to help your planes fly far and straight with a tried and true, step-by-step tutorial for kids.
With 9 pilots in my family, a paper airplane that simply soars through the air (whether in your backyard or down a hallway) is an absolute must. Thankfully, all you need is a piece of paper and a few minutes to craft an expert paper airplane! If the kids are tired of the same design and want to mix it up, I’ve included some variations to play around with too!
Watch a Video on How to Make a Paper Plane

Supplies Needed to Make a Paper Airplane
Supplies for this craft are super easy- paper. I used 8.5x11 inch copy paper in fun colors to show you how to make a paper airplane. I’d be curious to test different types and sizes of paper at some point. Let me know the results if you do.
Steps to Make a Paper Airplane
The directions are written out in a list and the video goes in the same step by step process. You can watch the video and stop at each step to complete your own paper airplane. Go for it!!
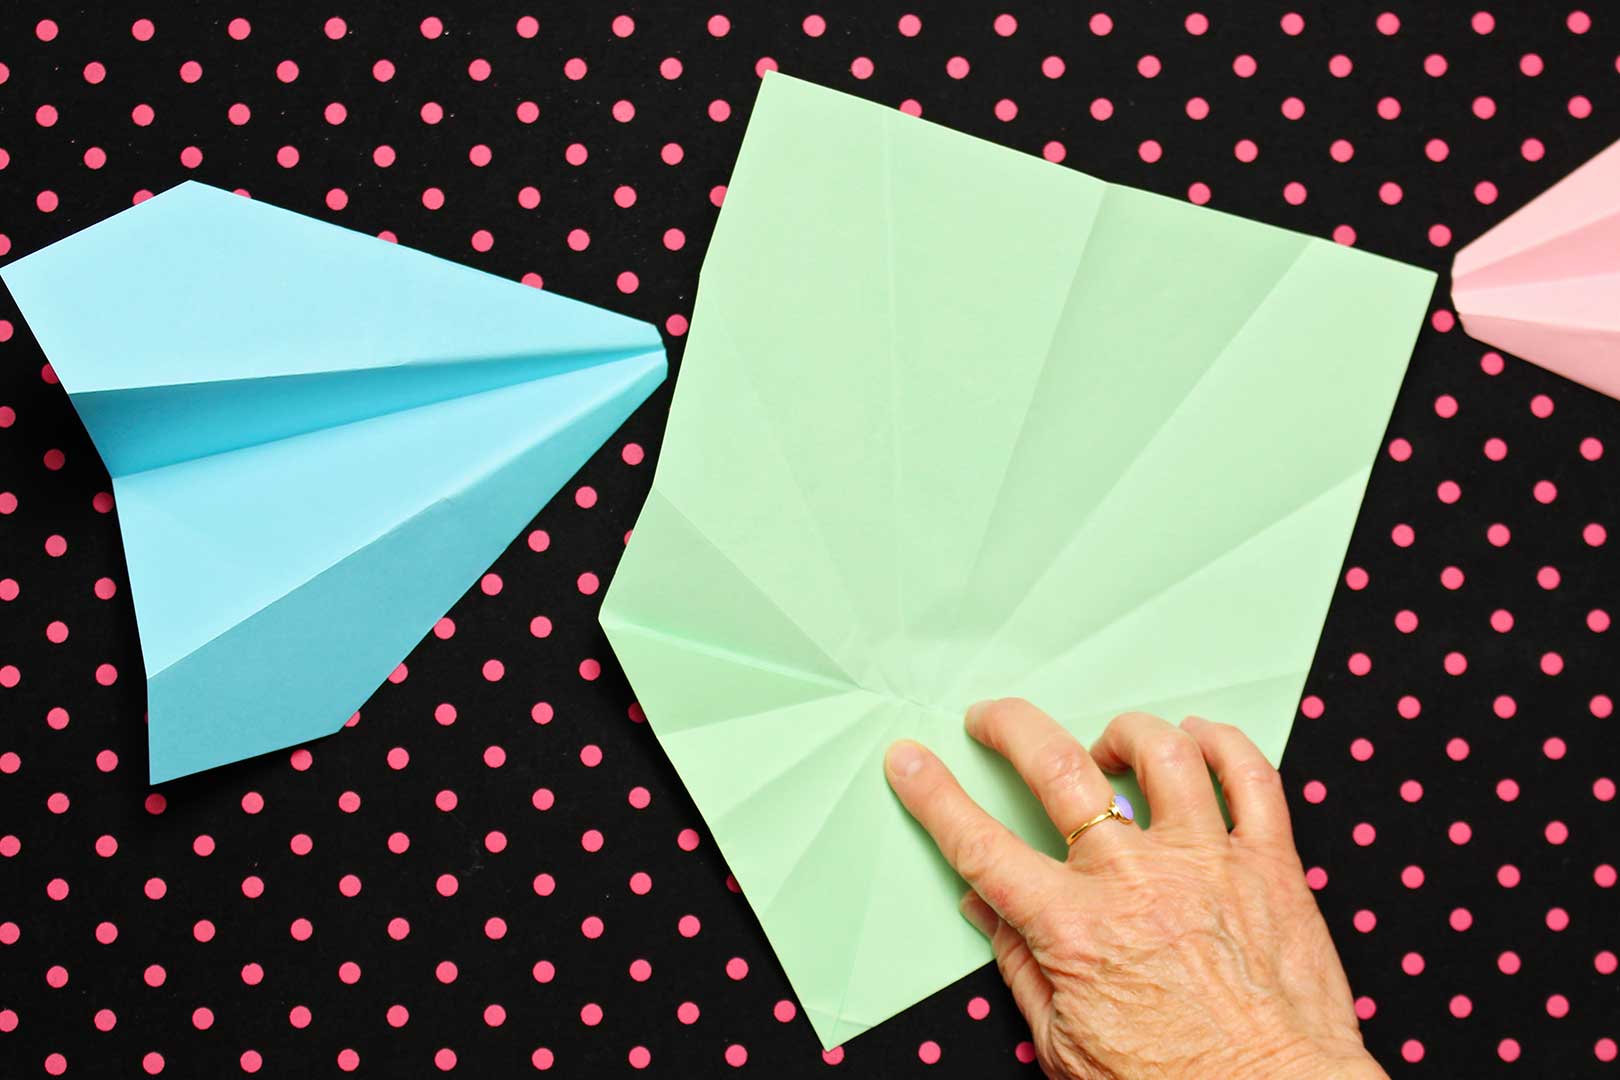
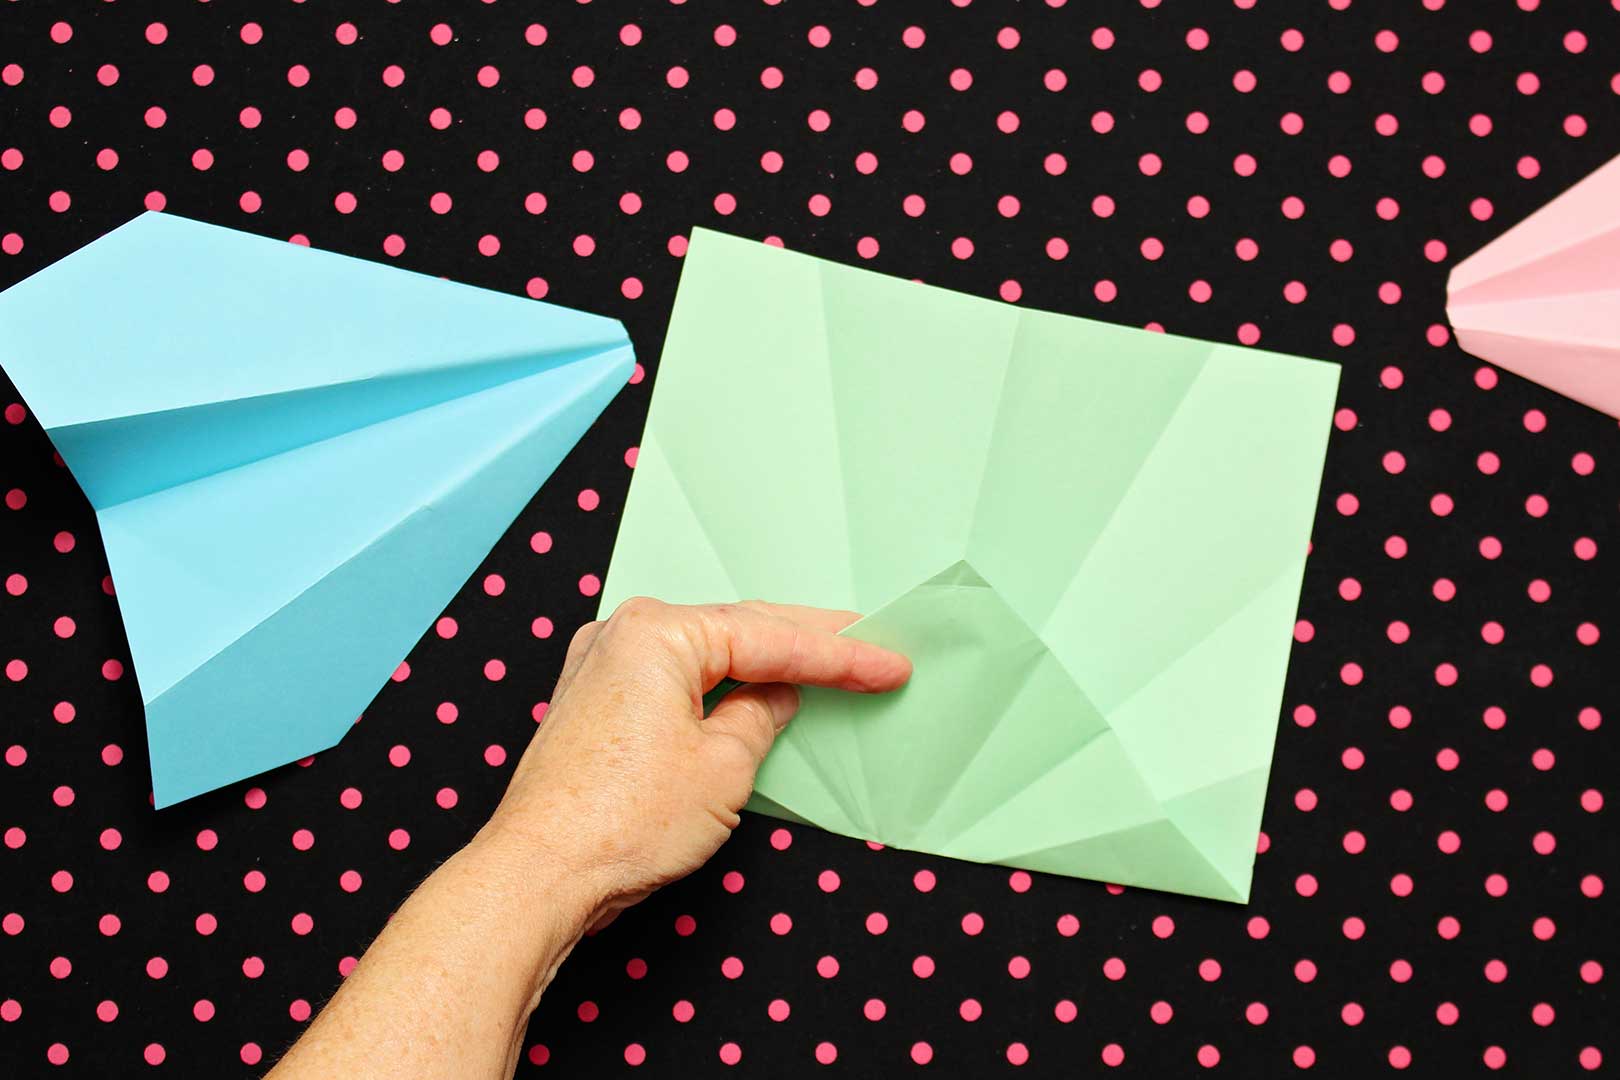
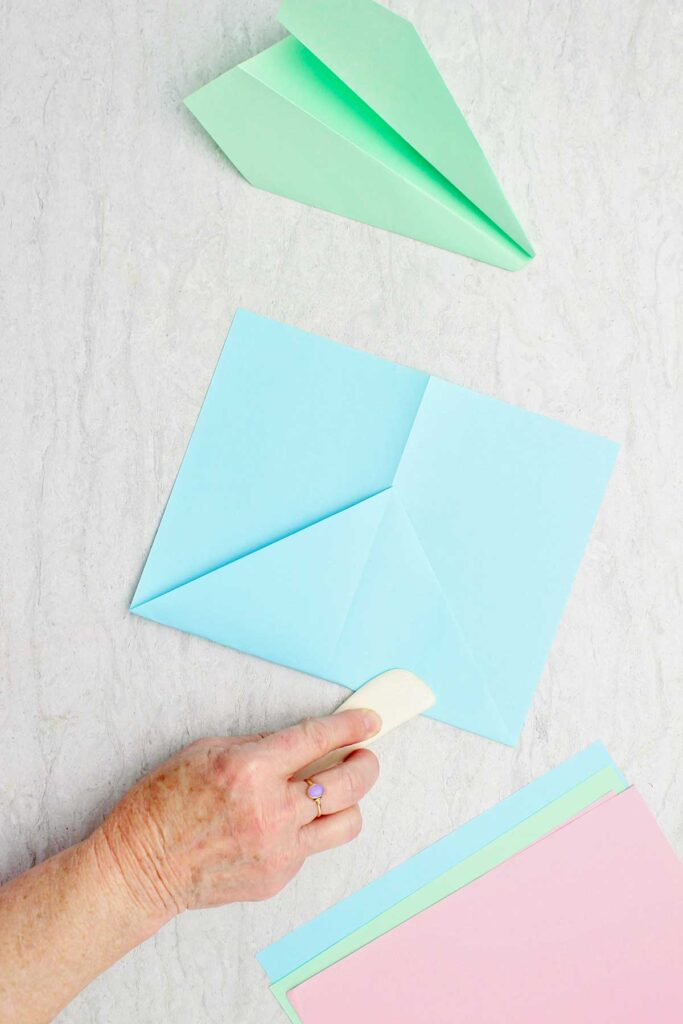
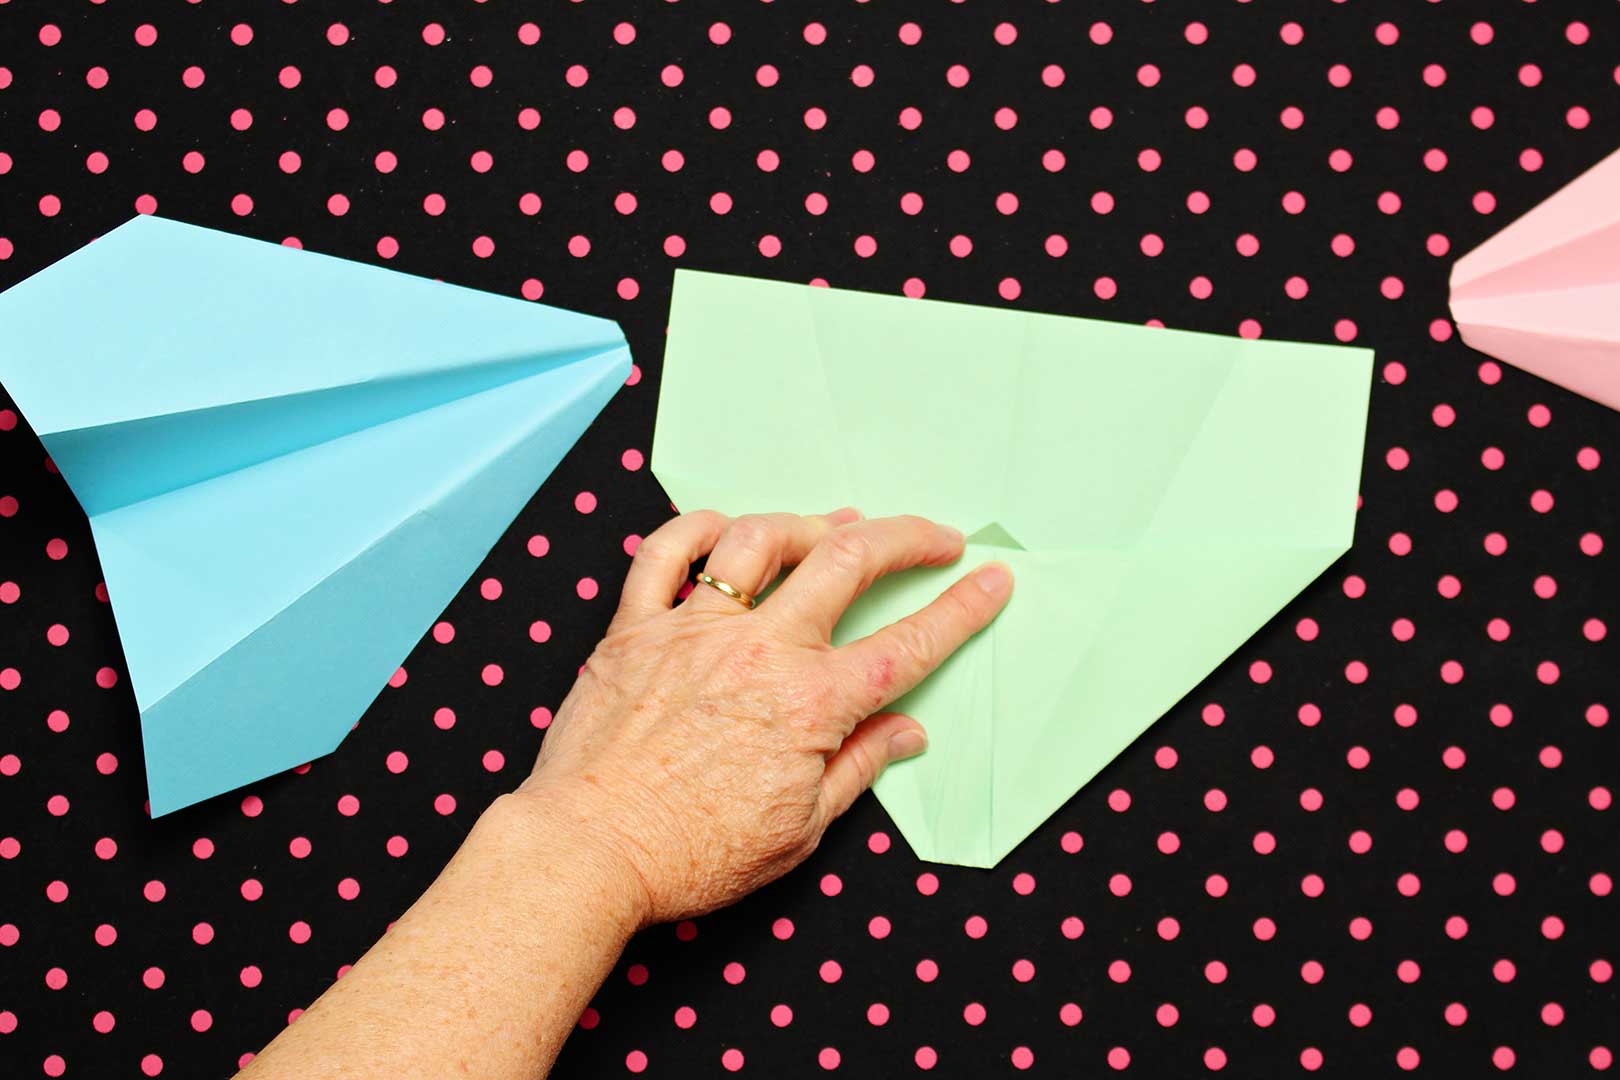
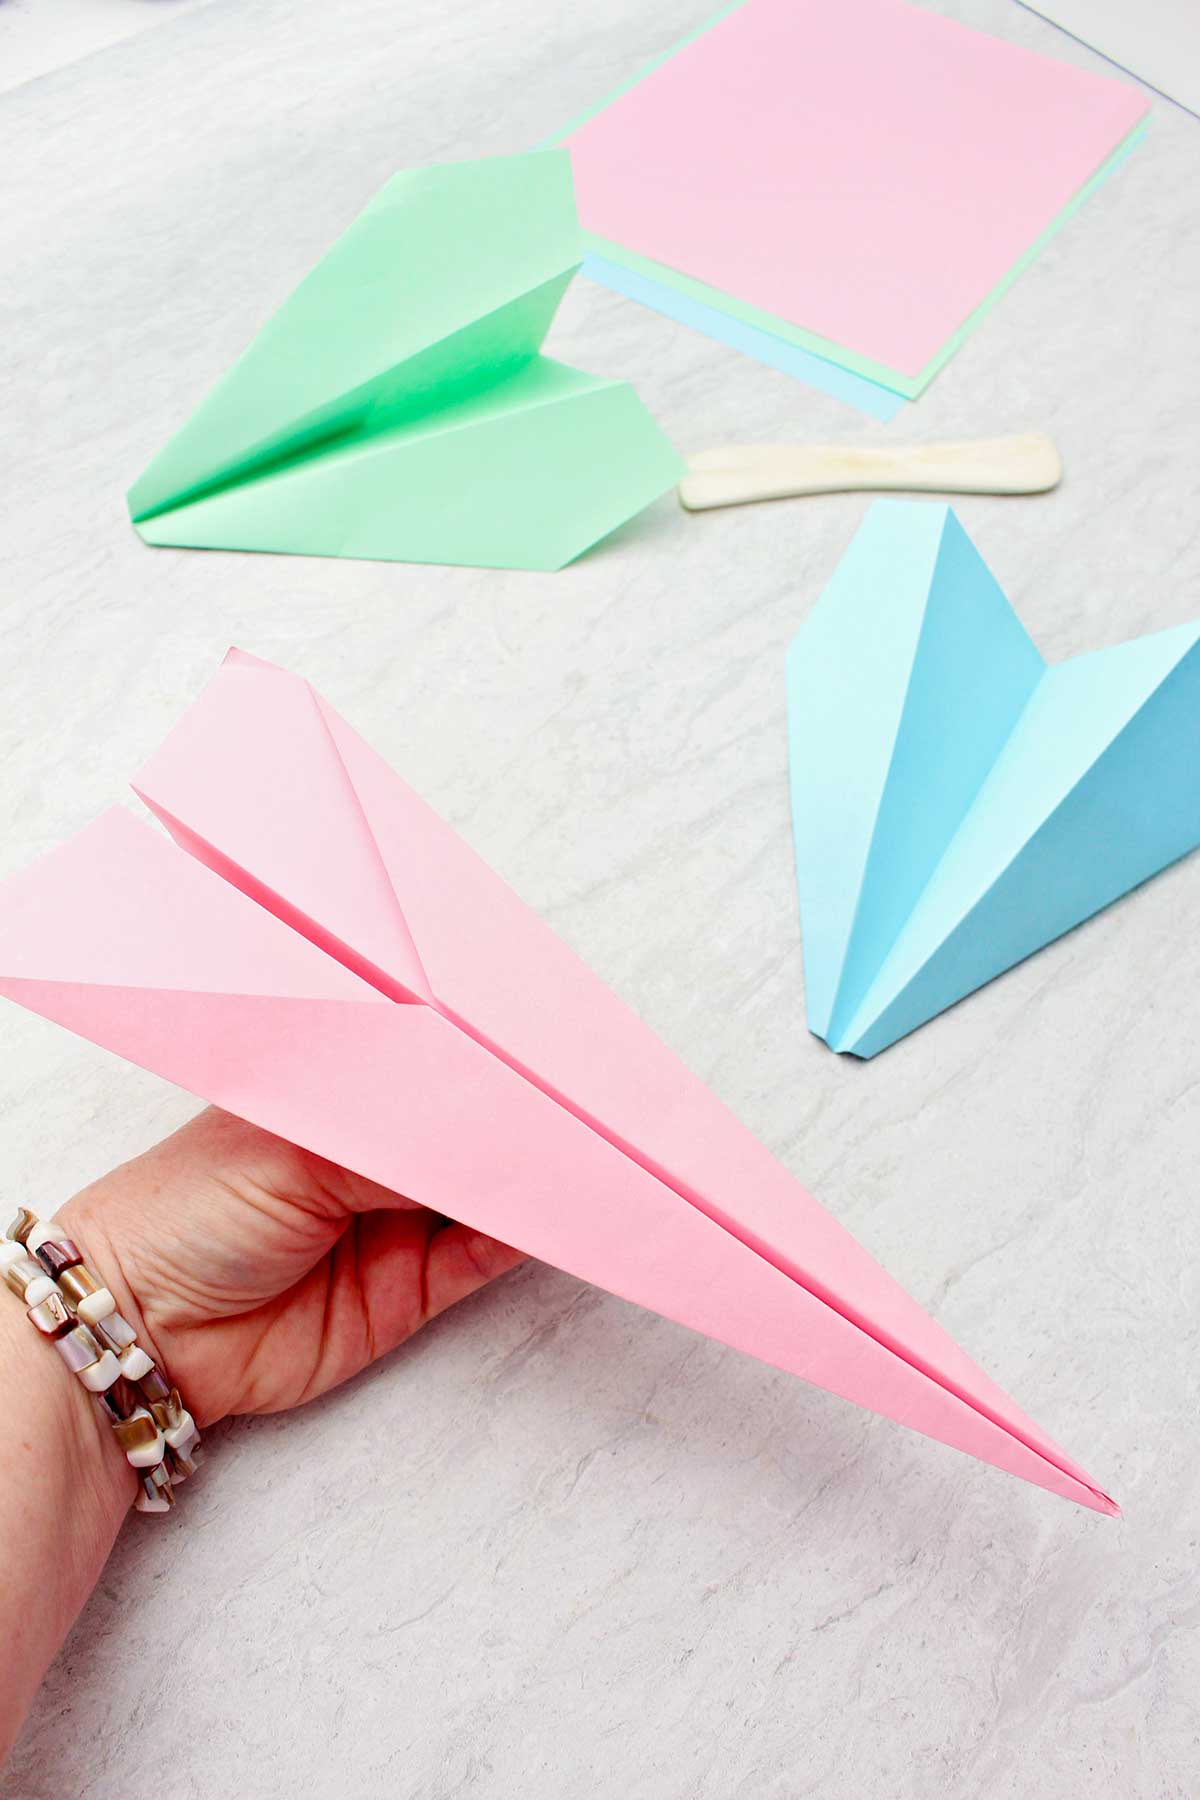
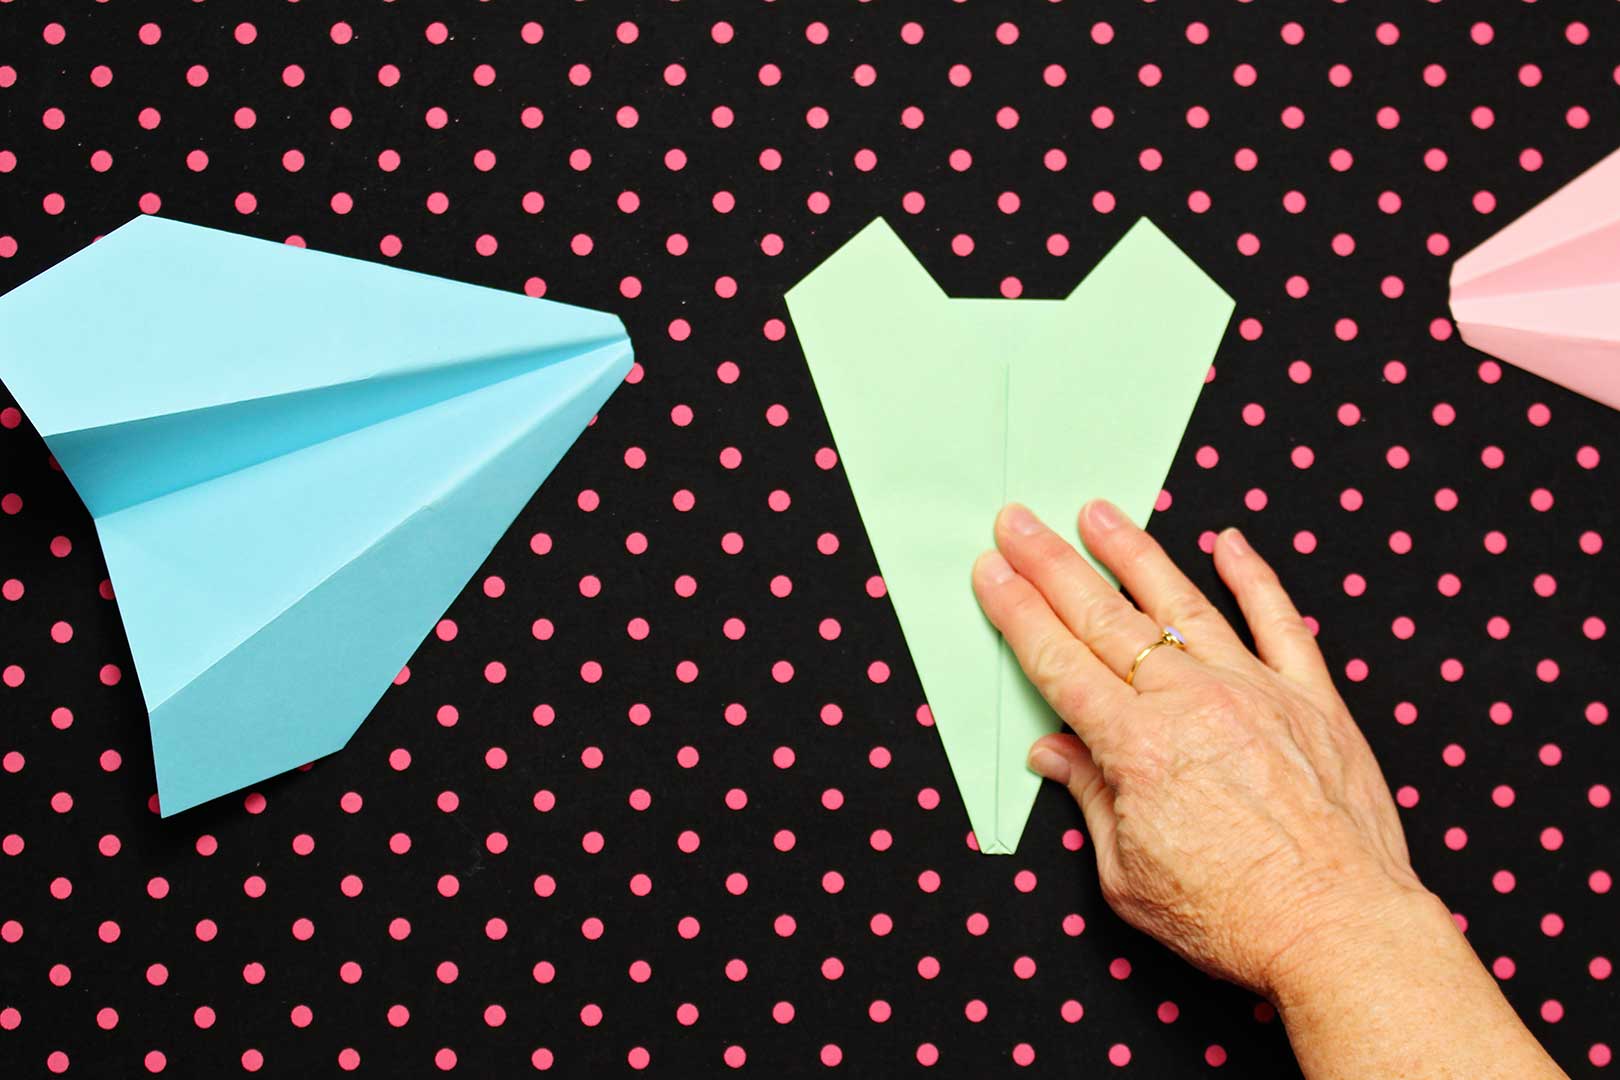
- Fold your paper hotdog style (the long way- for those of you who have been out of school for a while)
- Fold the two bottom corners up onto the center line
- Fold the pointed end up to the center line
- Fold the two bottom corners up to touch the center line- BUT- ¾ inch from the pointed end (this leaves a triangle point at the top and a blunt end at the bottom)
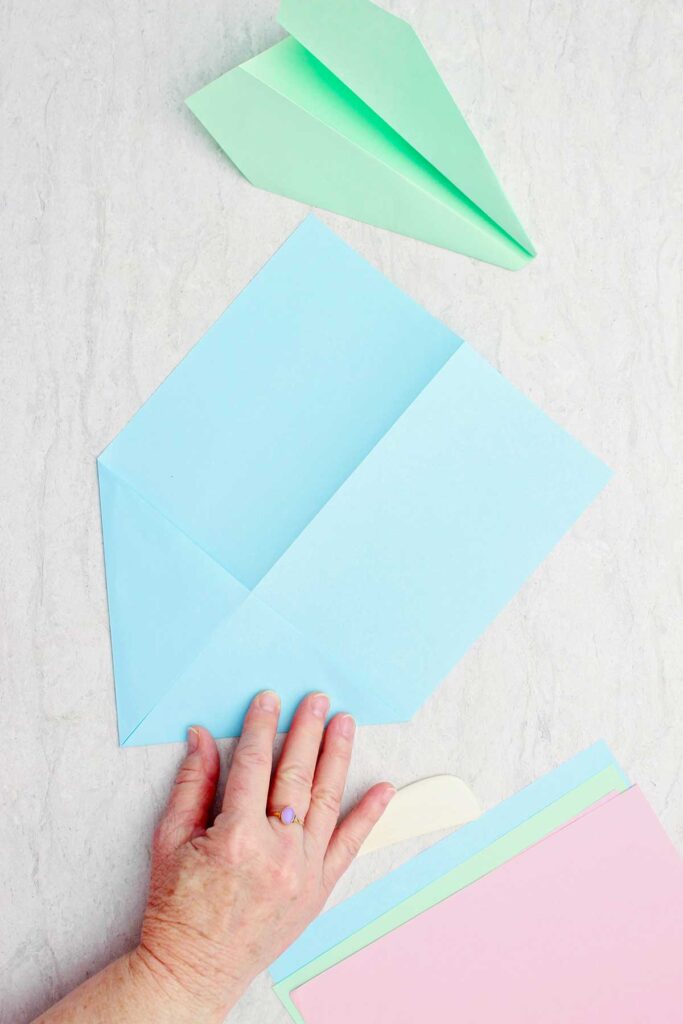
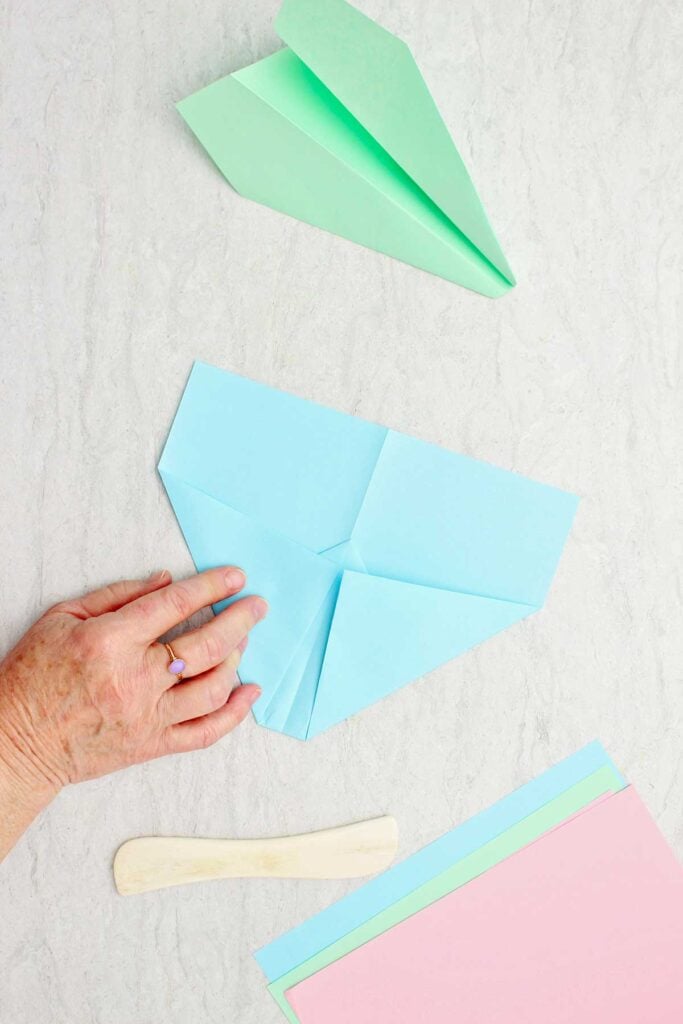
- Fold the small, pointed triangle piece down over the two flaps
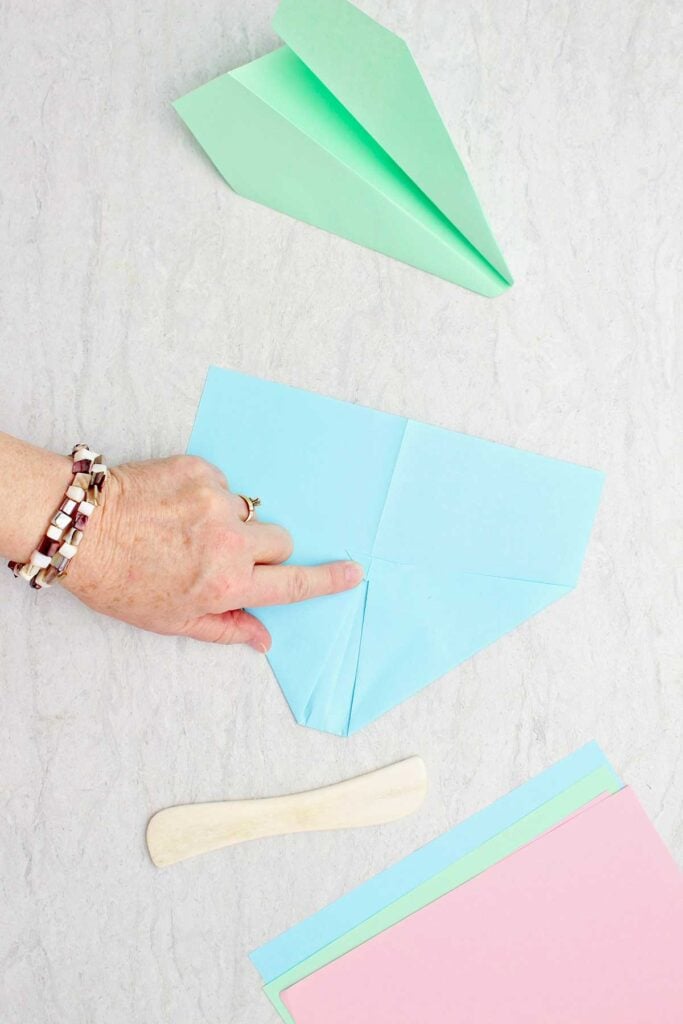
- Fold each side into the center line
- Turn the paper over and fold in half
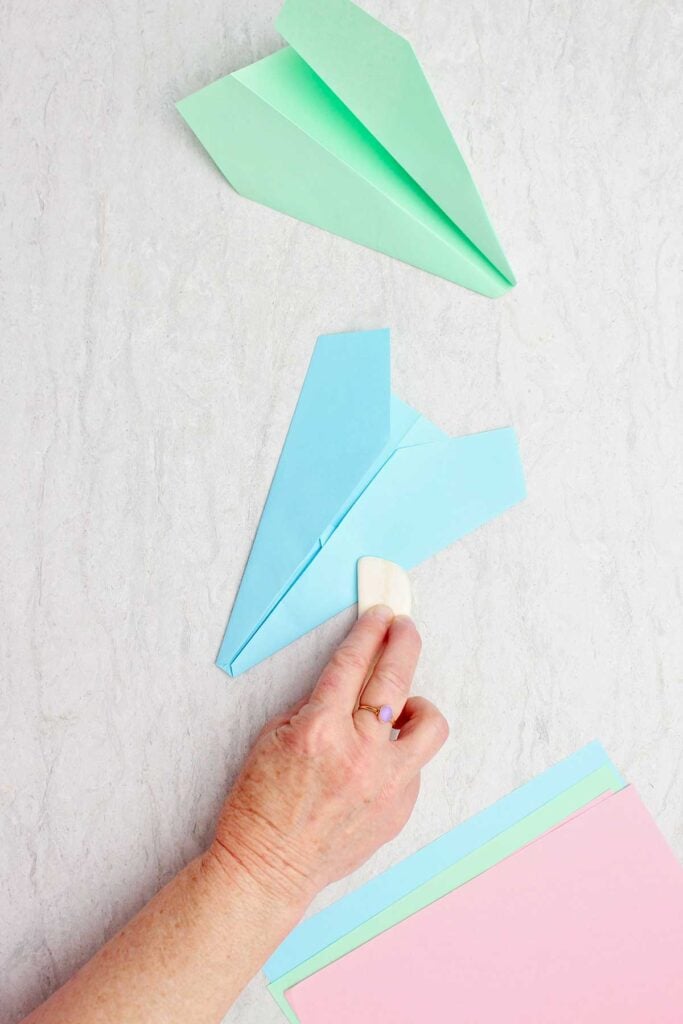

Lift the flaps and you are ready to fly!!
Nana’s Tip:
Try adding a paperclip to the nose if your plane dives too quickly- it adds a bit of weight and can help balance out the flight.
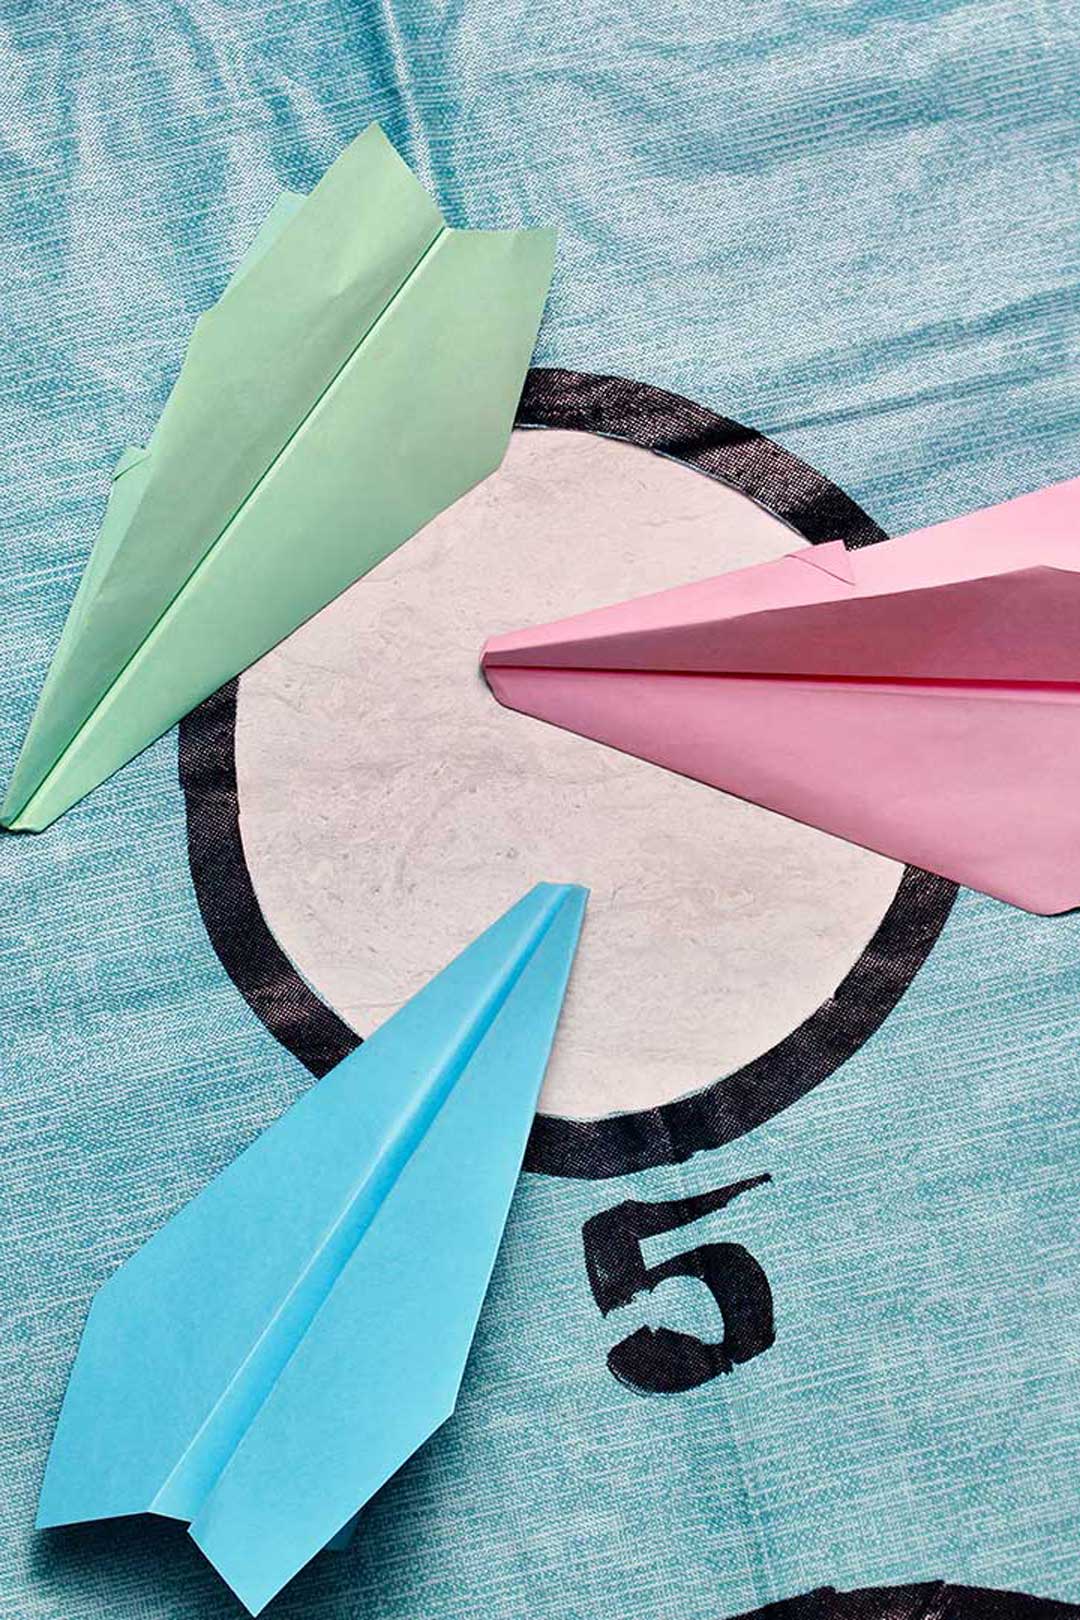
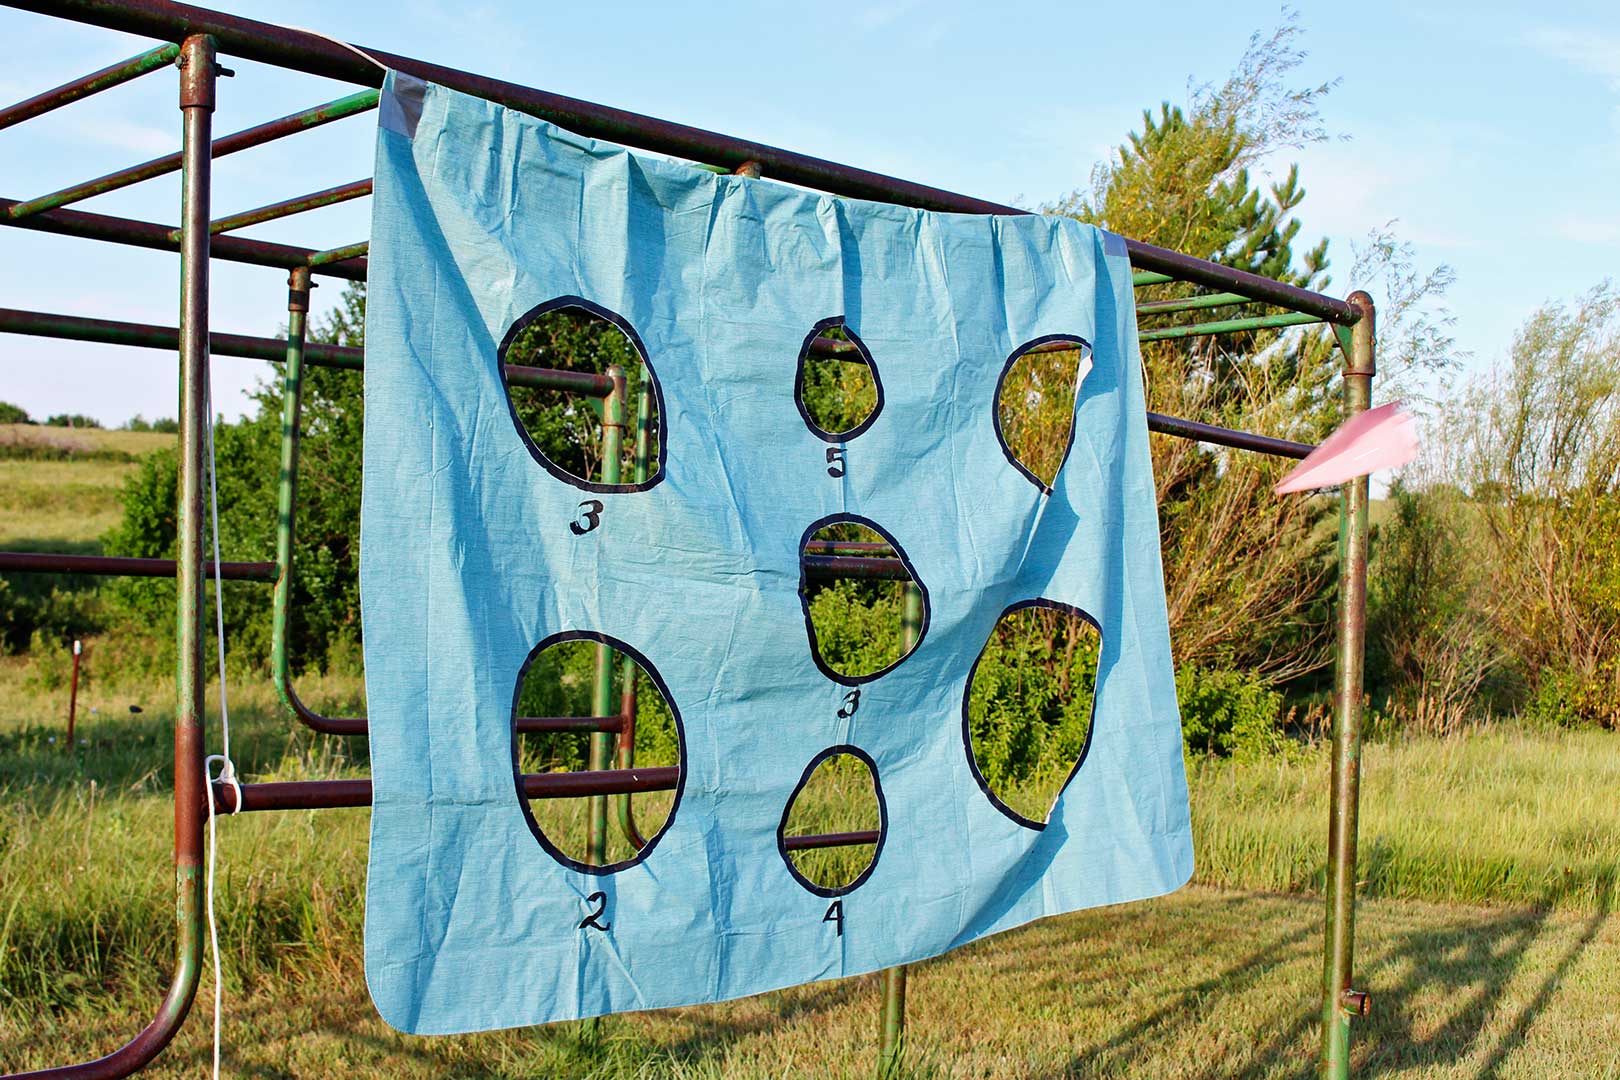
Have a paper airplane competition!
Make a few of these awesome paper airplanes and challenge someone to a competition.
Make your own targets or make this great target with instructions found on Welcome To Nanas by clicking the following link: Amazing Paper Airplane Competition. All it takes is a plastic tablecloth, a permanent marker and a scissors.
National Aviation Day Craft- How to Make a Paper Airplane
Celebrate National Aviation Day and Learn How to Fold a Paper Airplane. Who knows, it may inspire you or a young person in your life to become a pilot!!
More crafts that fly:
Here is another craft to make that flies! You can make a kite. Here are instructions from Welcome to Nanas on how to Make Your Own Diamond Shaped Kite- Click Here.
🛩️ Paper Airplane Designs
Once your kids have mastered the classic paper airplane, it’s so much fun to try out a few new designs and see how each one flies. Some are great for distance, others are better for tricks and loops—and part of the fun is experimenting together to find out!
Here are a few simple designs to try next:
The Dart
This one is great for speed and distance! It’s narrow and pointy, so it really zips across the room. Perfect for races or long hallway flights. Directions are found below. Oh and did I mention that this one is perfect for beginners?
The Glider
A wider body and upturned wings help this one float gently through the air. It's ideal if you're aiming for hang time rather than distance. This plane takes medium skill in paper folding. Directions can be found at the following link: Fold 'N Fly » Stealth Glider Paper Airplane
The Stunt Plane
With a few extra folds and wing tweaks, this plane is great for loops, twists, and turns. Kids love making it do tricks mid-air! Here is a link to find the directions to this paper plane design: Fold 'N Fly » Loop Paper Airplane
Try This!
Set up a little “test zone” where kids can fly their different planes and observe what changes when they fold it differently. Let them journal or draw what they discover—it turns into a mini STEM moment without any fuss!
✈️ The Best Paper Airplane for Distance
If your kids are anything like my kids and grandkids, once they’ve mastered folding a paper airplane, they’ll ask: “Which one flies the farthest?” Well, you’re in the right place! I’ve folded my fair share of paper planes, and this design is a favorite for beginners that want to go for distance.
Here’s a beginner level paper plane version that really soars:
What You’ll Need:
- 1 sheet of plain letter-sized paper (printer paper works great!)
- Flat surface for folding
How to Fold the Distance Glider:
- Fold the paper in half lengthwise (hot dog style) and crease well. Then unfold.
- Fold the top corners in to meet the center crease, forming a triangle.
- Fold the angled edges in again to the center line, so your plane starts to look like a narrow triangle.
- Fold the plane in half toward yourself, along the original center crease.
- Fold each wing down, starting about an inch from the bottom, so they’re even.
- Add a tiny winglet at the back of each wing by folding up about ½ inch. This helps with stability!
Now you’re ready to test it out! Have kids try different angles and throwing speeds. You can even make it a little STEM challenge: Who can tweak their design to get it to fly the farthest?

FAQs
In this post the best place to start with kids is folding “The Dart” paper airplane. It is a classic design that helps get you started in paper folding. Have fun!!
The best paper airplane for distance for a beginner is The Dart. It is easy to fold and can be tweaked to improve how far it can fly which is a great STEM activity! There are step-by-step directions in the post.
Yes! We list four different designs in this post, three of which are for beginners. Try all of them and see which one you like the best!
Enjoy!
If you try this craft, let me know! Go ahead and leave a comment, rate it, and tag a photo with #WelcometoNanas wherever you post.
Come join the fun at https://welcometonanas.com
How to Make Paper Airplanes
Equipment
- none needed
Items Required
Instructions
- Fold your paper hotdog style (the long way- for those of you who have been out of school for a while)
- Fold the two bottom corners up onto the center line
- Fold the pointed end up to the center line
- Fold the two bottom corners up to touch the center line- BUT- ¾ inch from the pointed end (this leaves a triangle point at the top and a blunt end at the bottom)
- Fold the small, pointed triangle piece down over the two flaps
- Fold each side into the center line
- Turn the paper over and fold in half
- Lift the flaps and you are ready to fly!!
- Make several planes and have a competition! Make your own targets or make this great target with instructions found on Welcome To Nanas by clicking the following link: Amazing Paper Airplane Competition.
Video


Laura says
This would be a great game for a rainy day