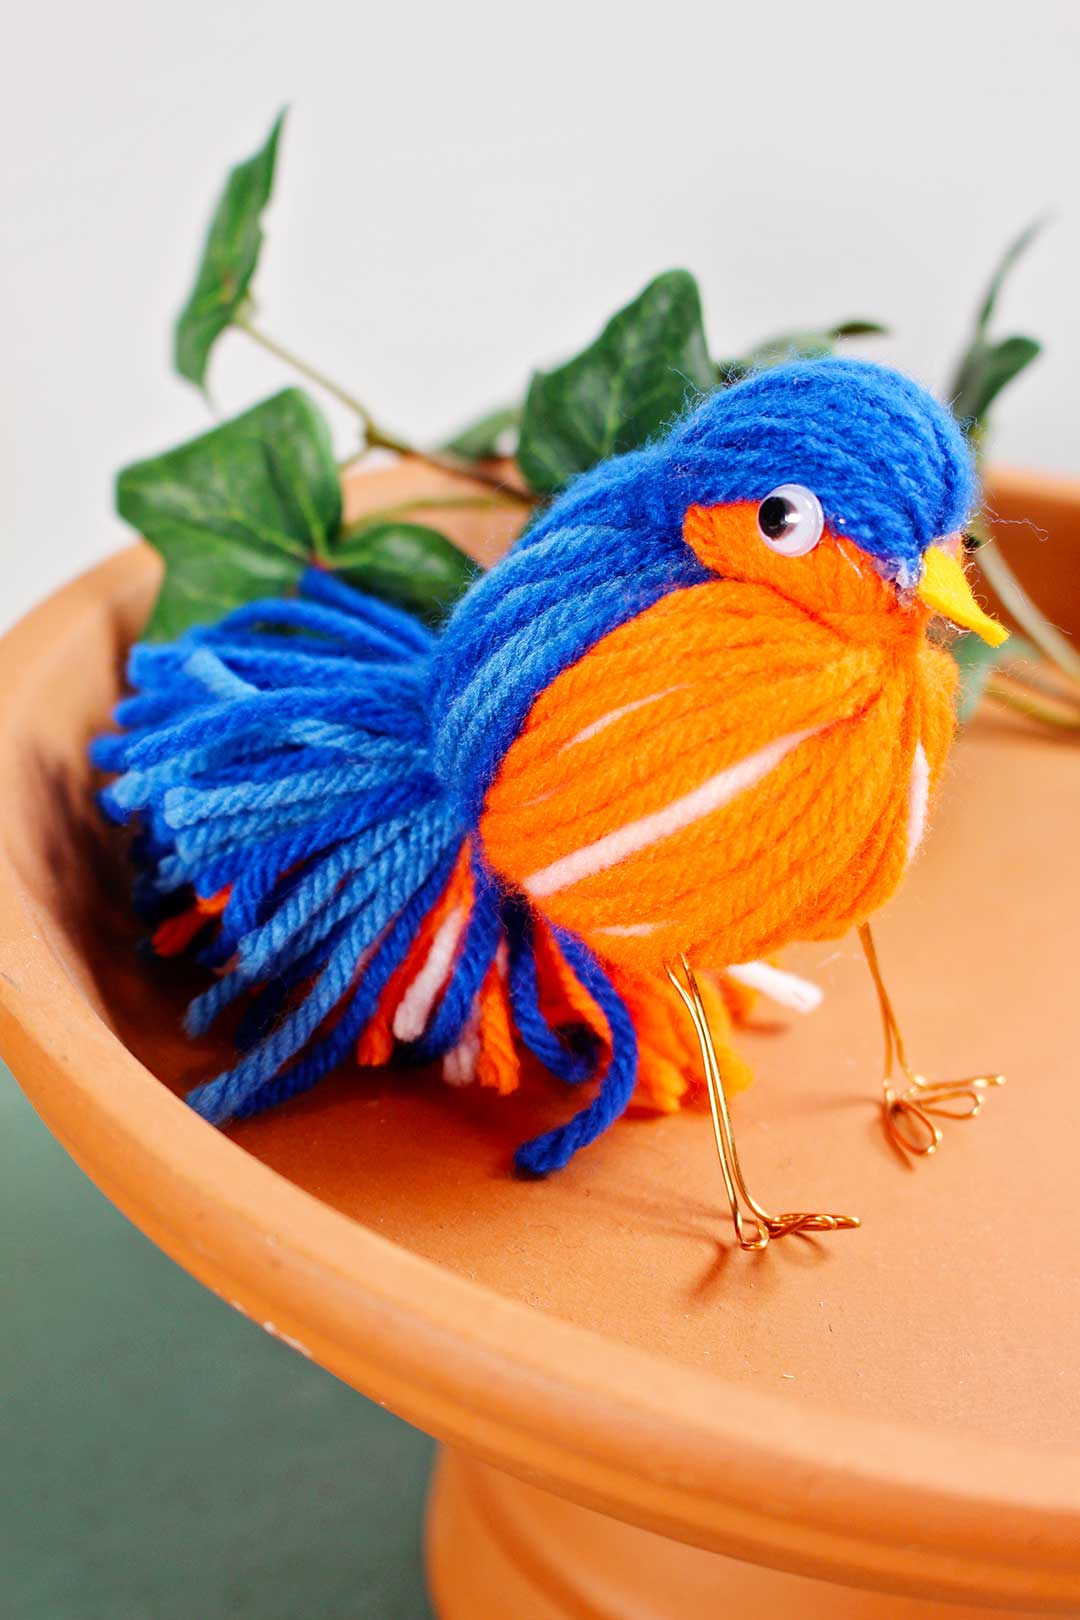
Spring has sprung. Our bluebirds are back!
Spring is coming and we have bluebirds nesting in our bluebird box south of our house. That is one of our favorite signs of spring. They make papa and I happy. We love to show the grands. There is a reason we talk about the “bluebird of happiness”.
Learn How to Make a Cute Yarn Bird-
How about bringing some of that happiness inside by learning how to make a cute yarn bird? I’m up for that. How about you?
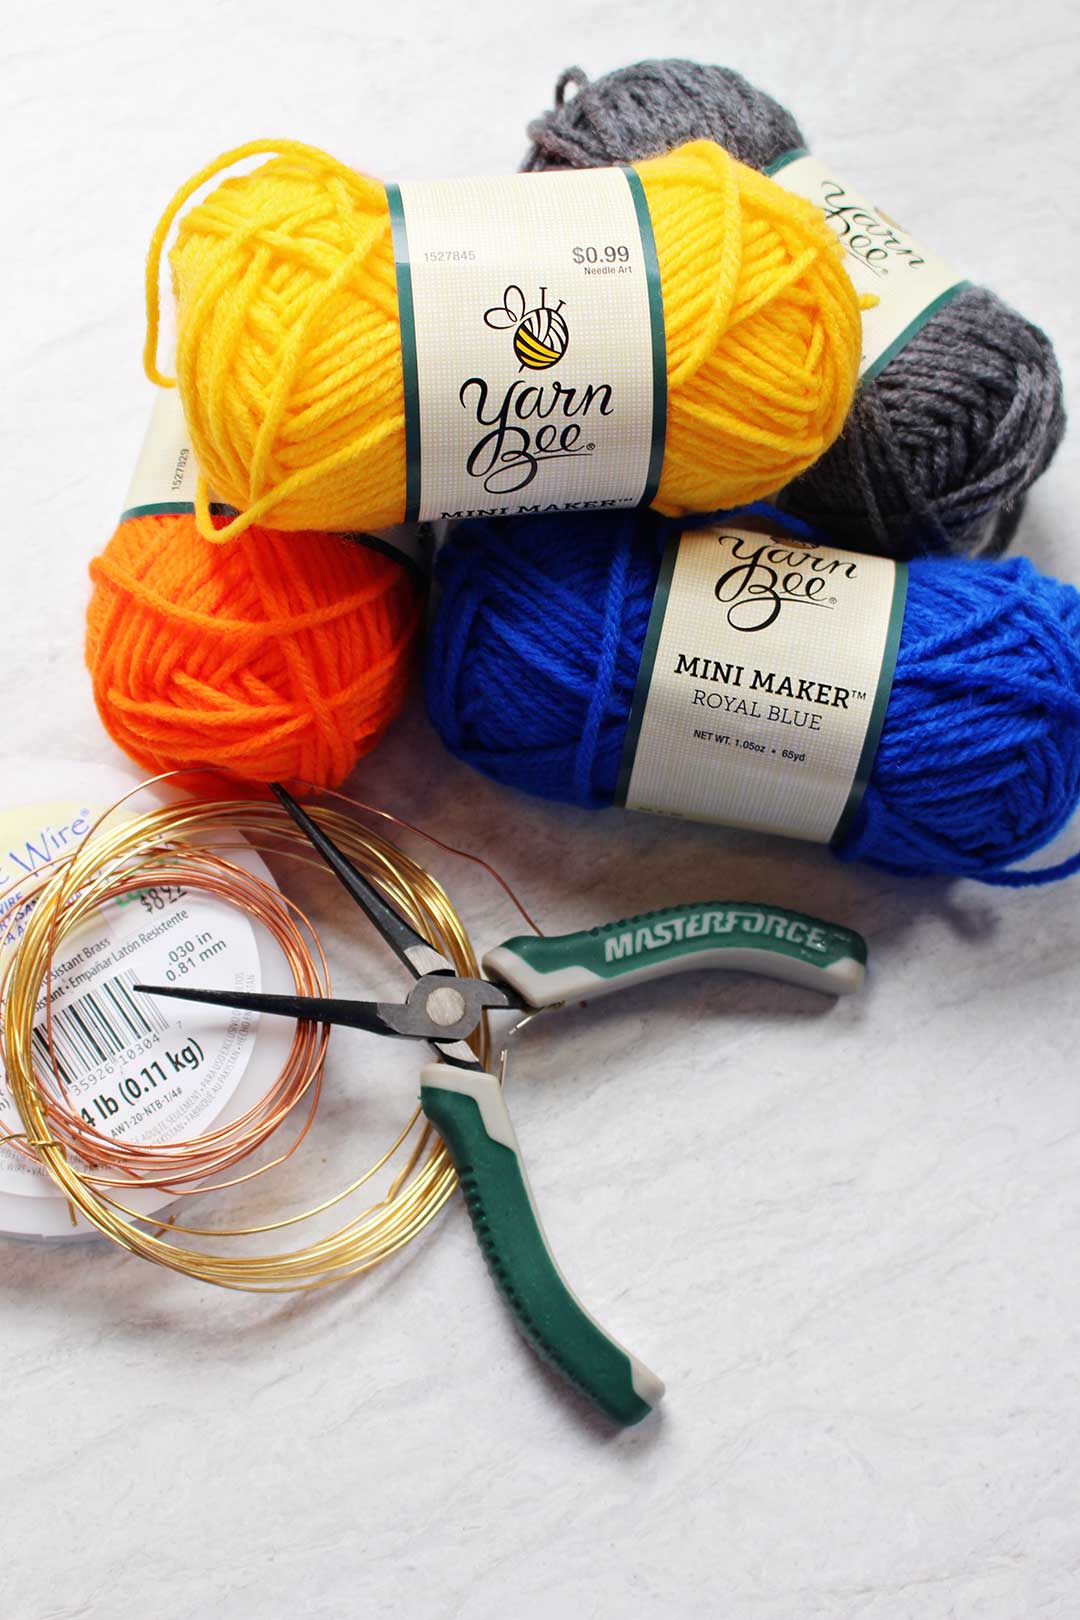
Yarn leftovers and yarn by the skein
There are some awesome 99 cent small skeins of yarn at Hobby Lobby that I was excited to find (I’m not an affiliate of Hobby Lobby). They are perfect for this project. There can be three or more yarn colors needed for each bird, one for the back of the bird, a second for the belly of the bird and a third for the body/wing part of the bird. I pulled up some pictures of several types of birds for ideas for yarn colors.
Note: There are other sources of Yarn in Assorted Colors.
What type of bird should you make?
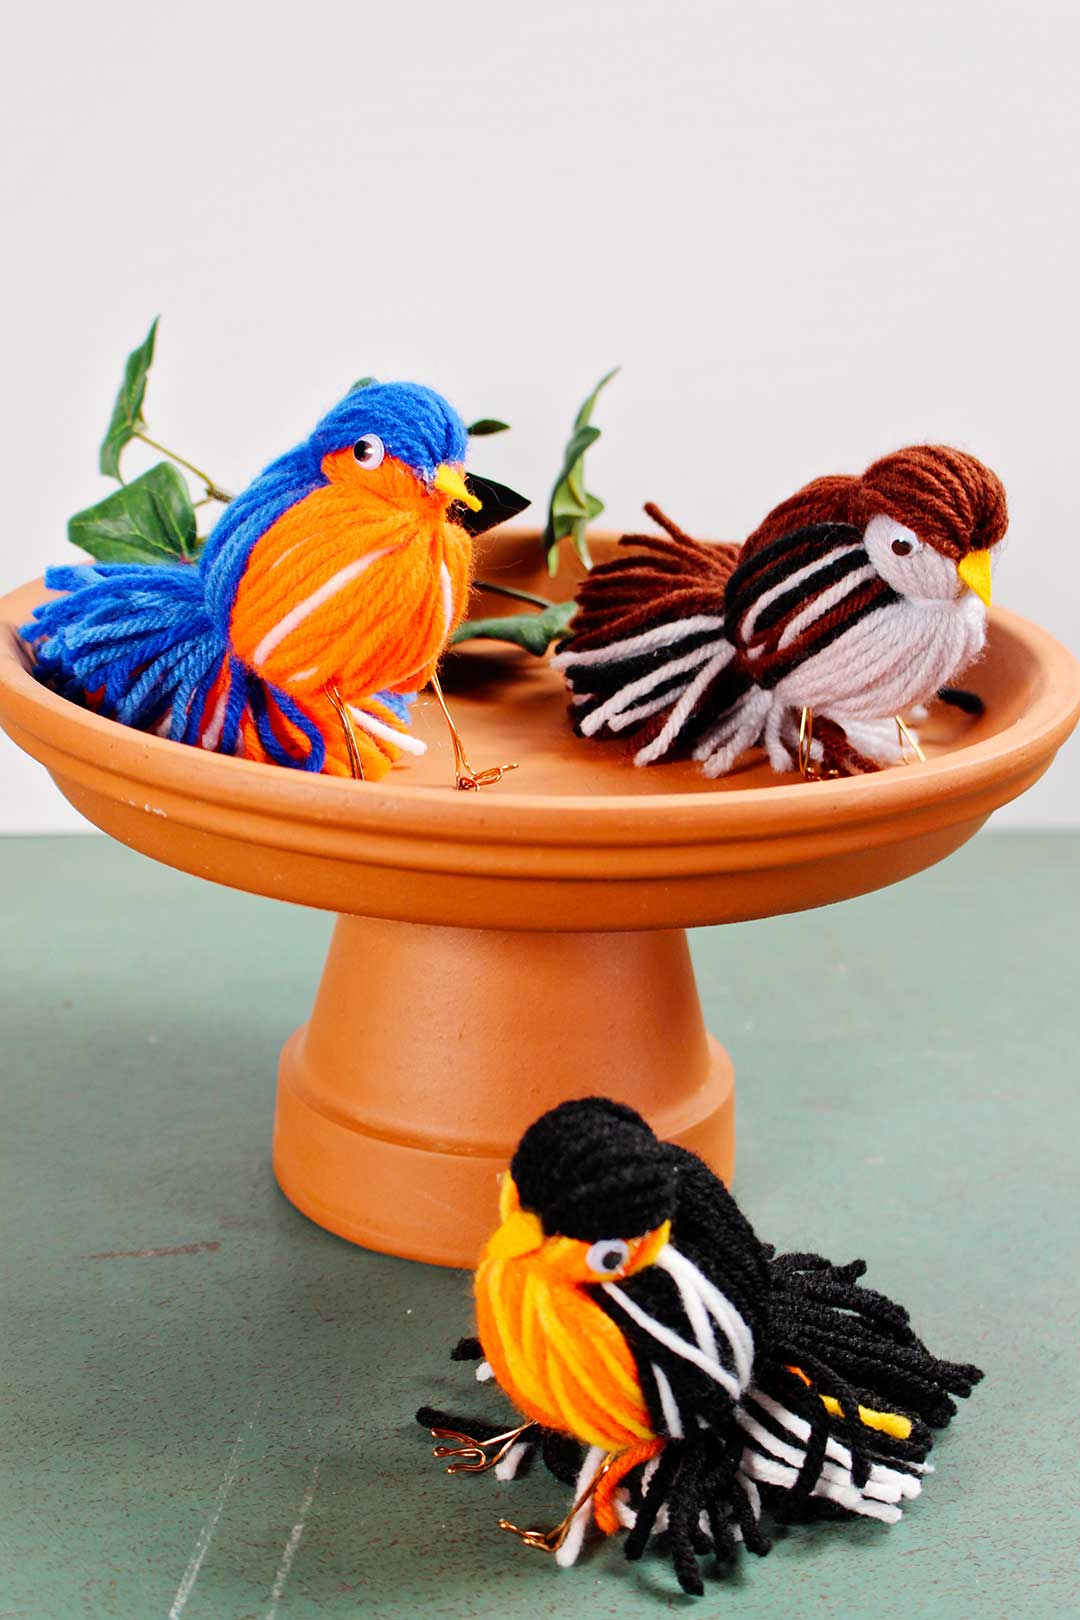
I’m thinking that the grands will have a favorite bird they would like to make so there is a list of several birds in the supply list along with the colors of yarn that I suggest for that bird. Of course this is a perfect way to use up leftover yarn so dip into your stash and alter these colors as needed.
Just a side note: this project takes some dexterity so may be better for older grands or may take more help from you.
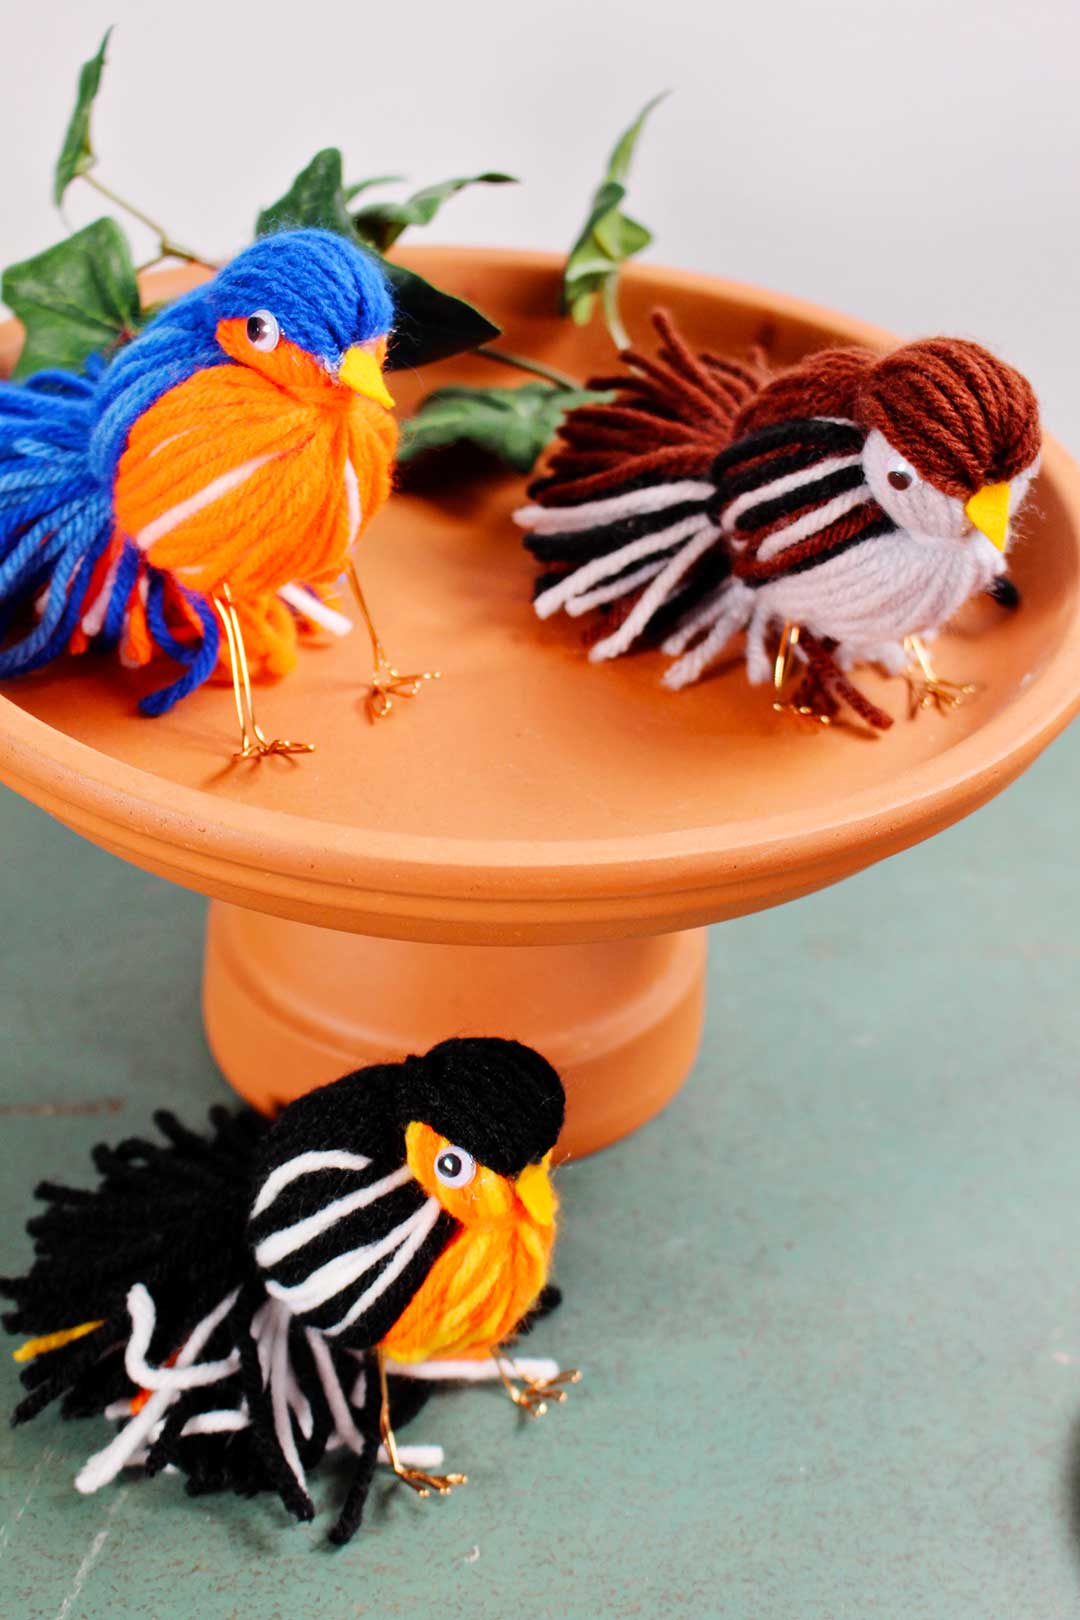
Sparrow, oriole, bluebird, oh, my!
I experimented first with a sparrow and then with an oriole, but will make a bluebird for this demo. Let's give it a whirl!
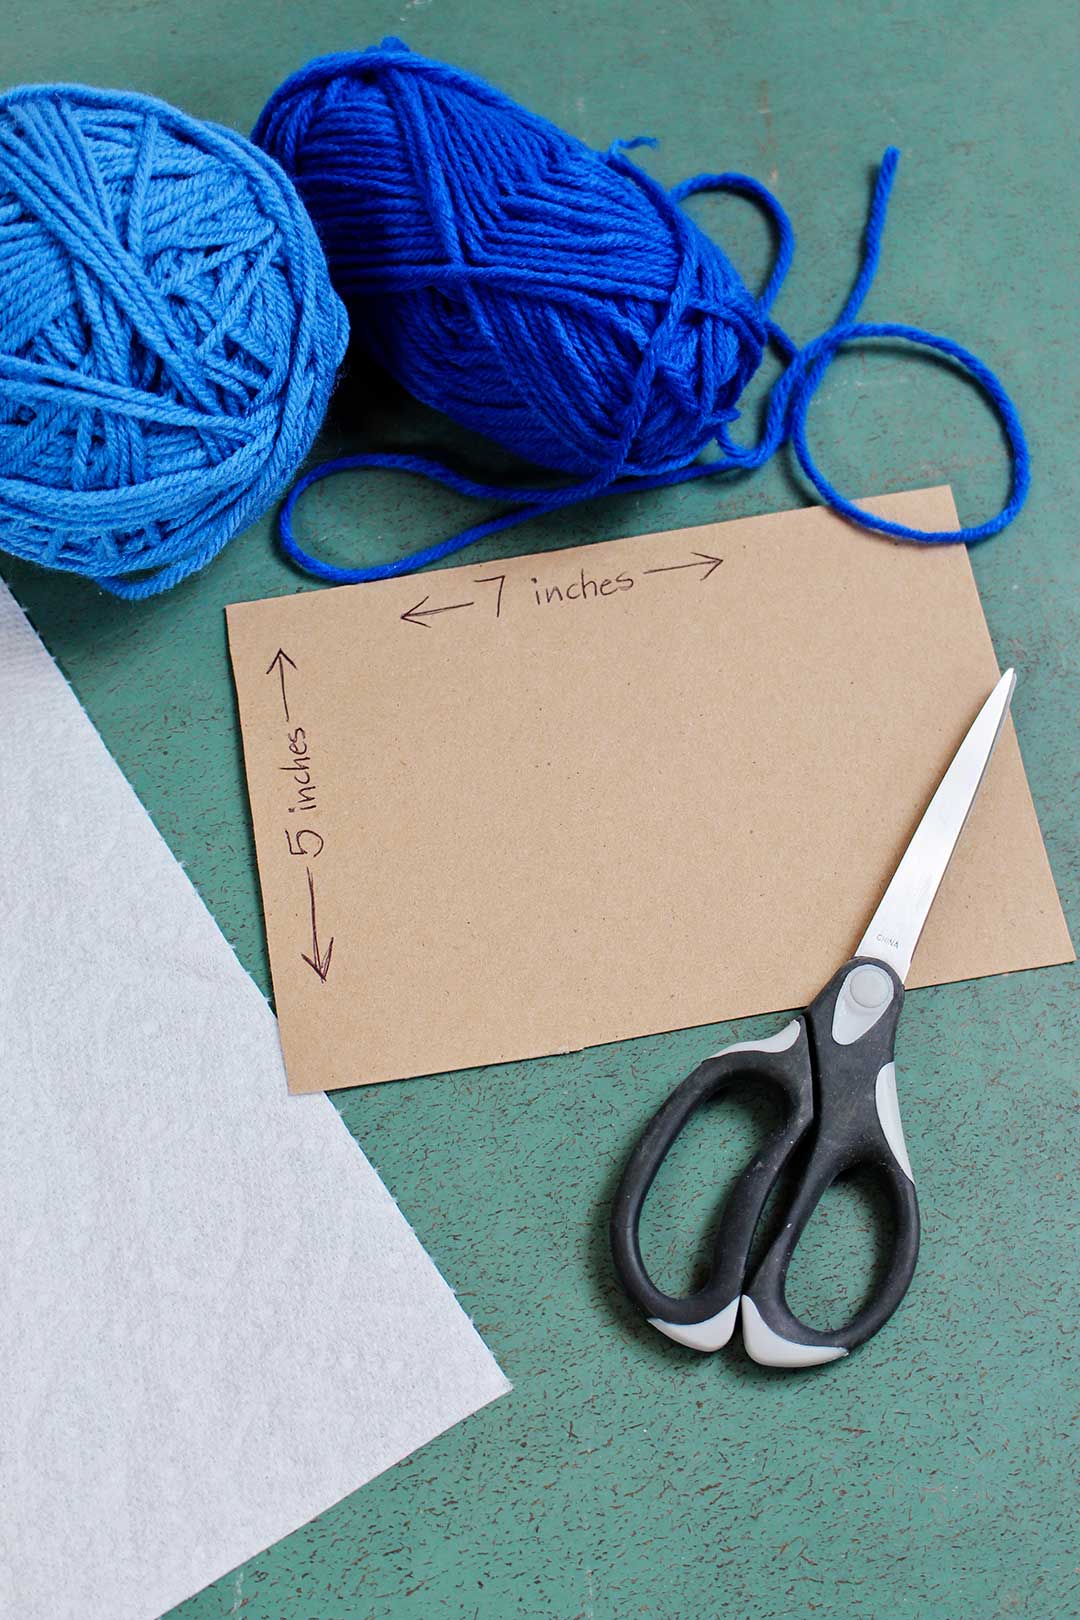
Make a Template
Cut a piece of heavier cardboard for a template, 5 by 7 inches in size.
Yarn "A" for the bird's back
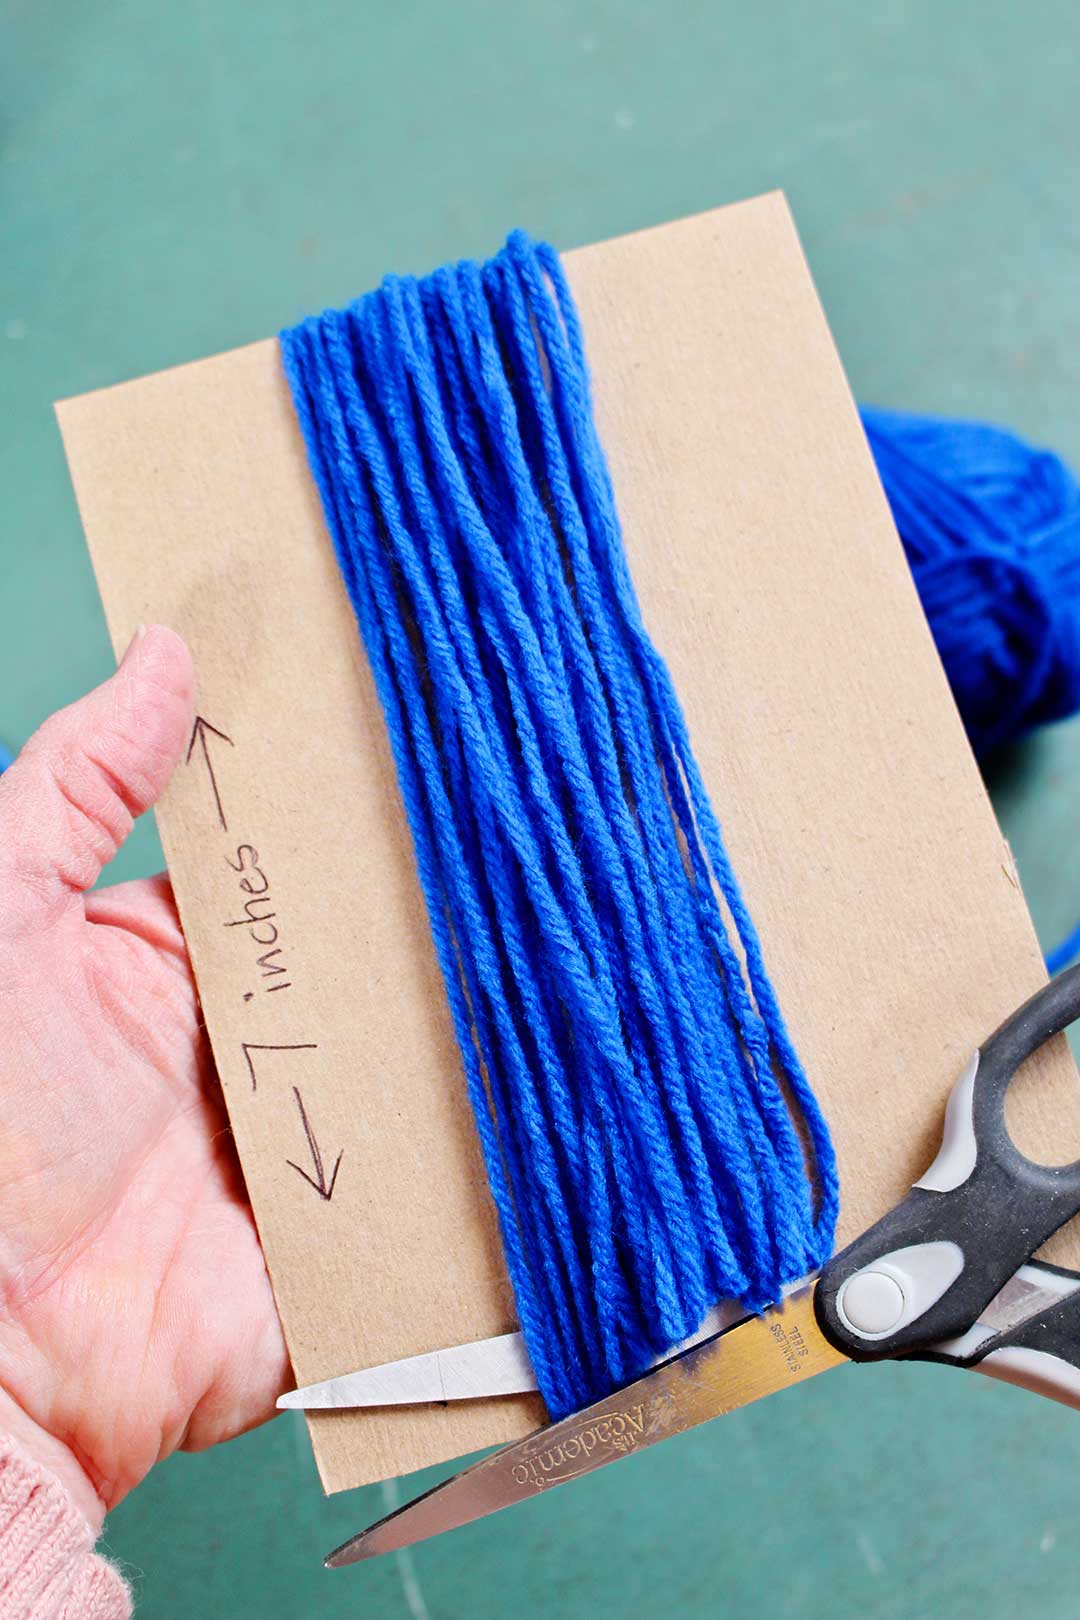
Wrap the loops of yarn around the template the 7 inch direction for the bird’s back. Wrap around about 40 times. For the bluebird this will be blue yarn.
Clip one end of the loops and lay out flat. These will be referred to as yarn “A”.
Yarn "B" for the bird's tummy
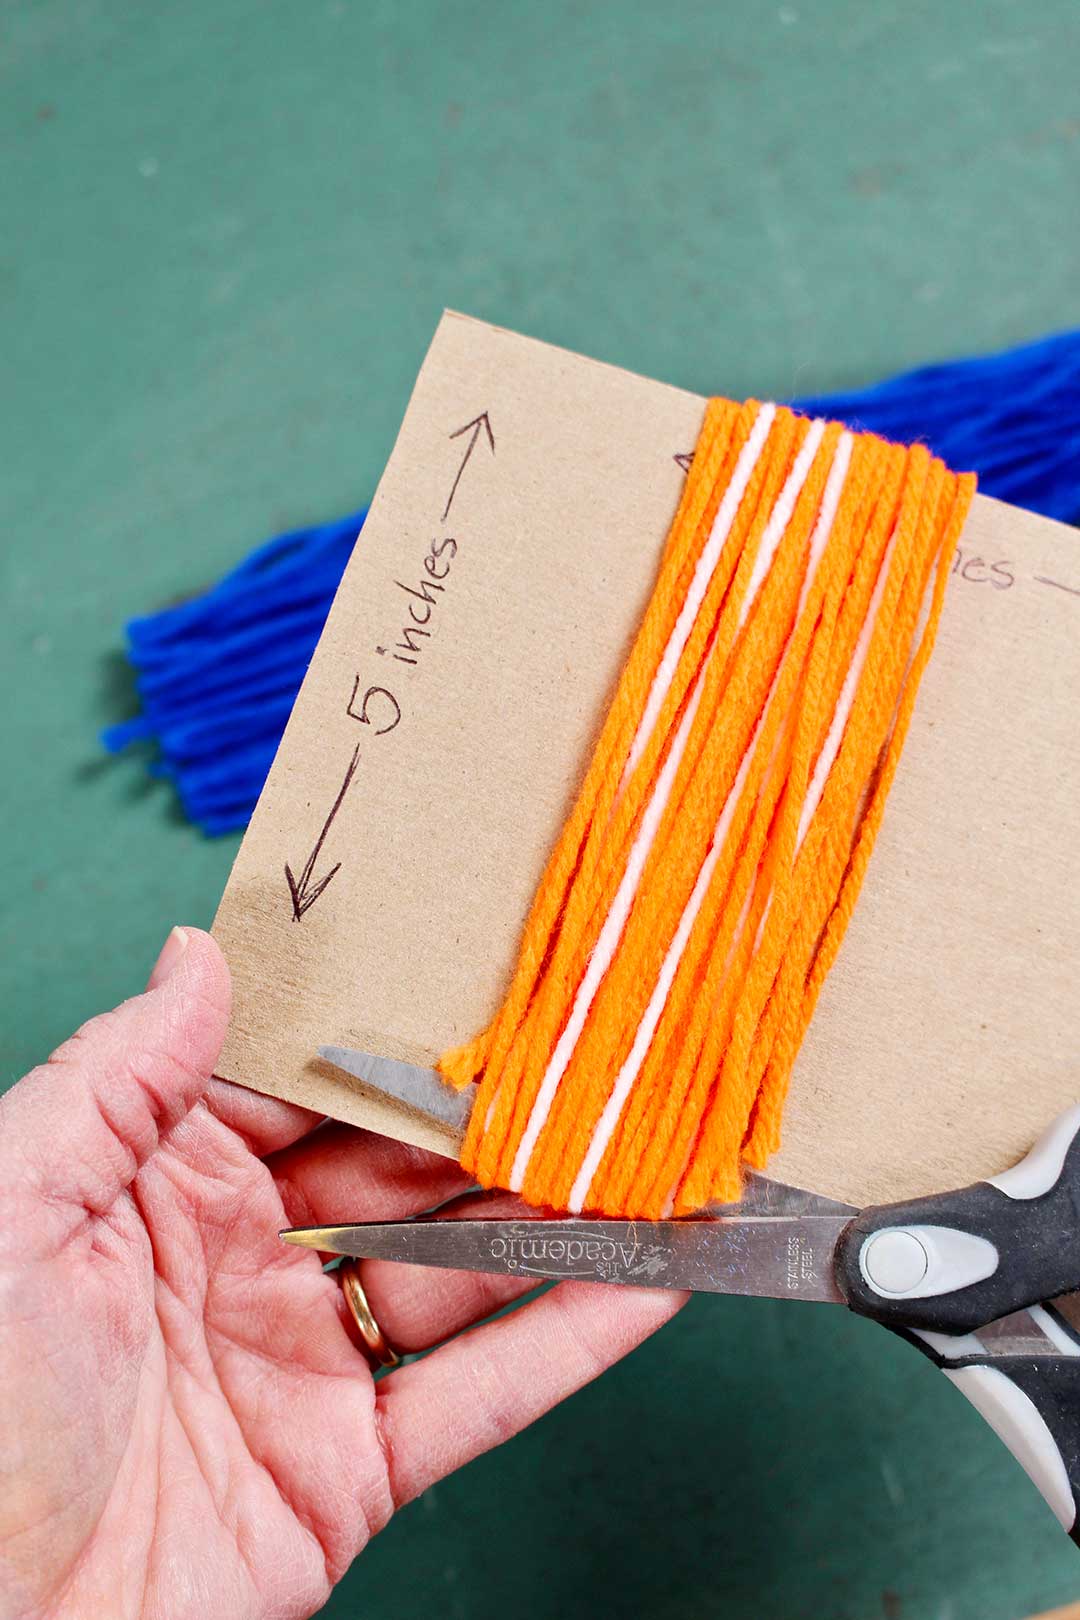
Wrap the loops of yarn around the template the 5 inch direction for the bird’s tummy. Wrap around about 40 times. I used orange yarn for this and added a few rounds of white into the orange.
Clip one end of the loops and lay out flat. These will be referred to as yarn “B”.
Tie "A" and "B" together
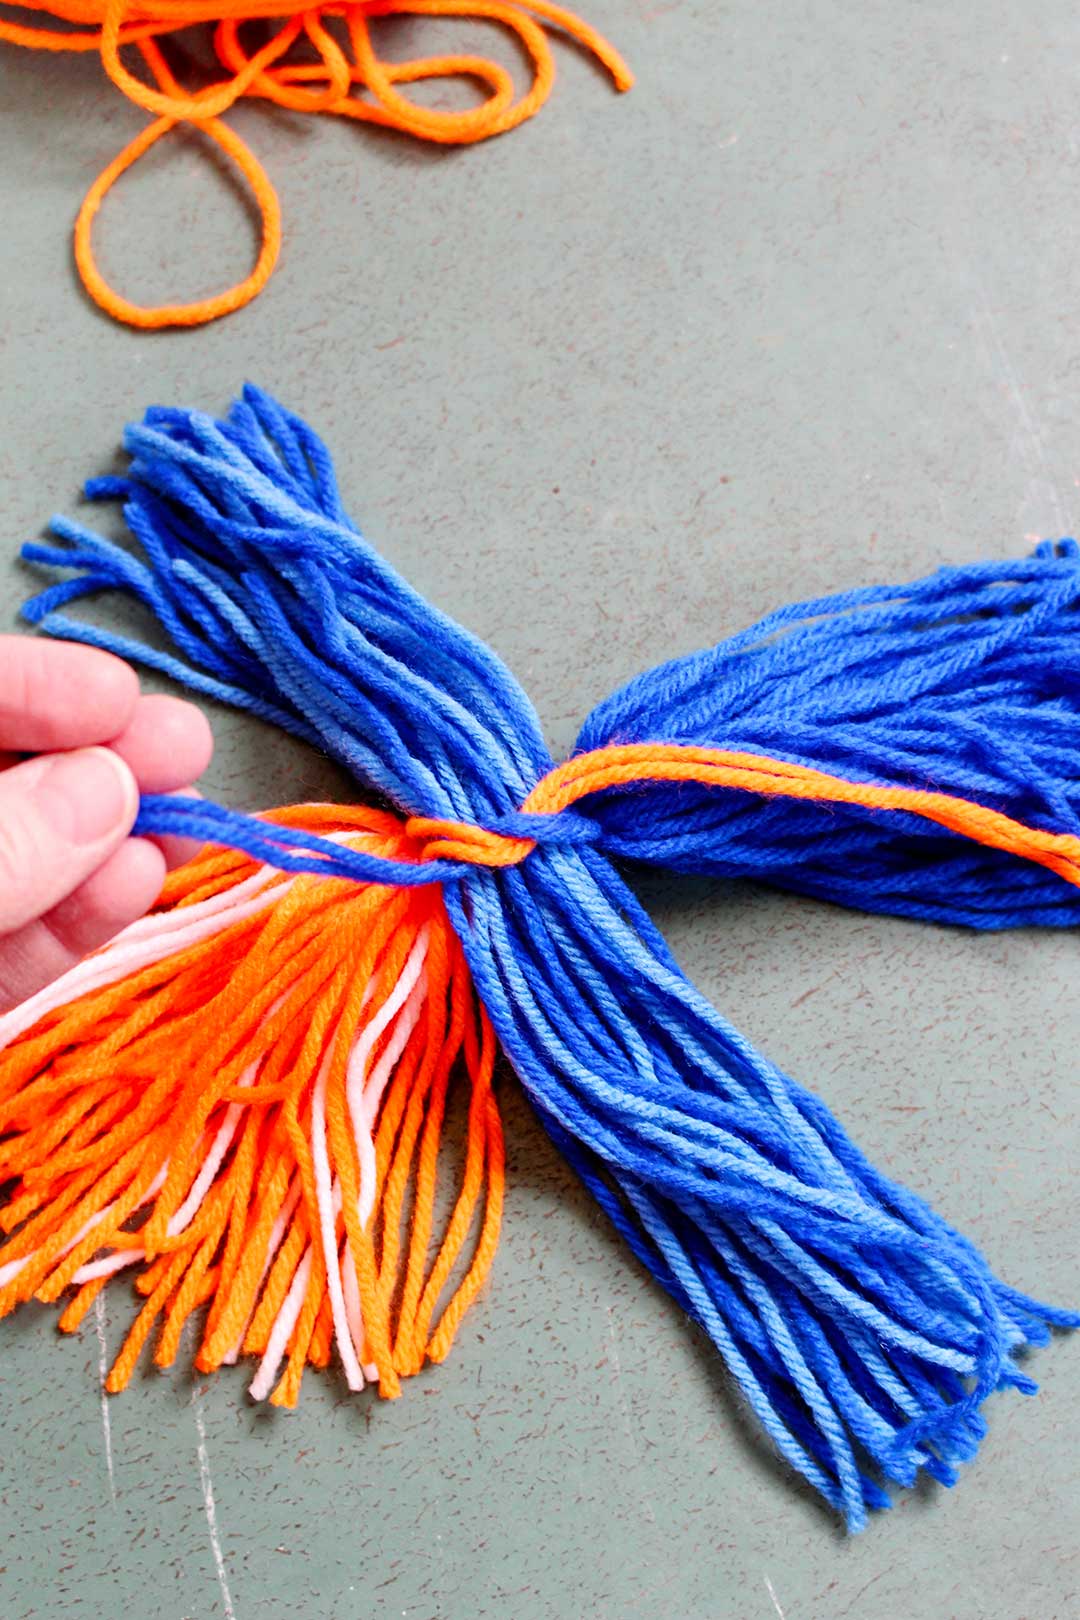
Place yarn “B” in a cross over yarn “A”.
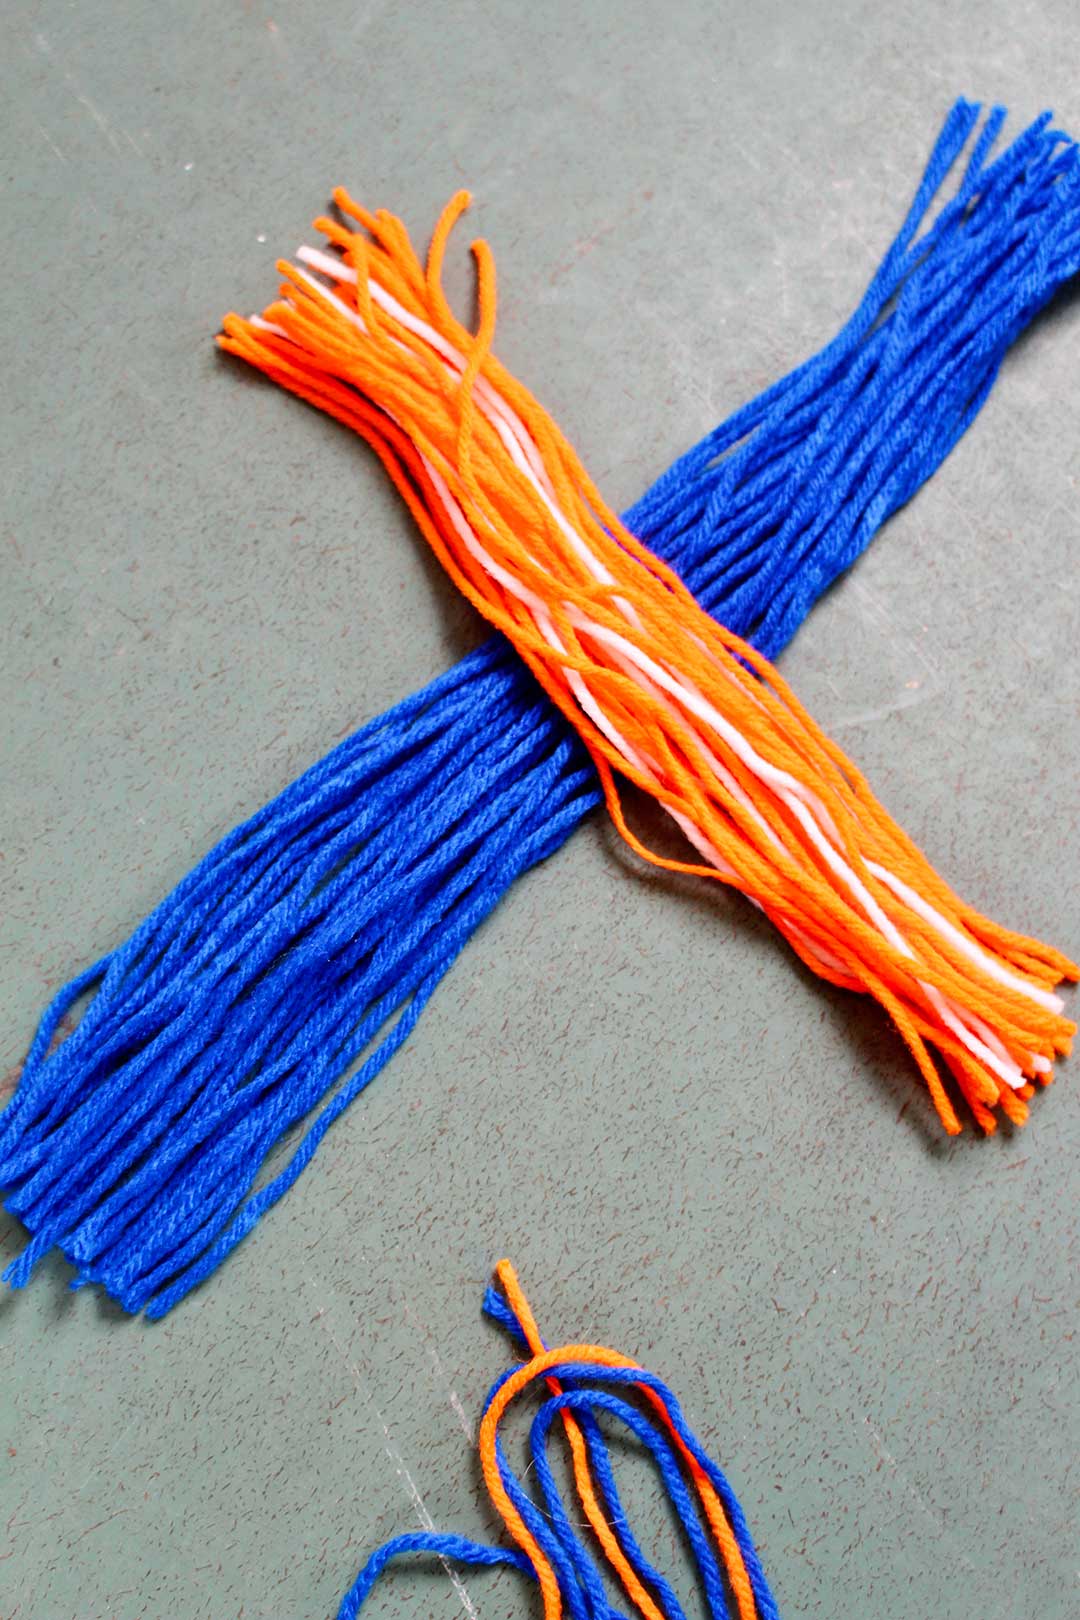
Pull yarn “A” back into a bunch so that it loops around/over yarn “B”.
Tie a yarn “A” colored yarn around all yarn “A”, close to where it crosses yarn B, holding it in place.
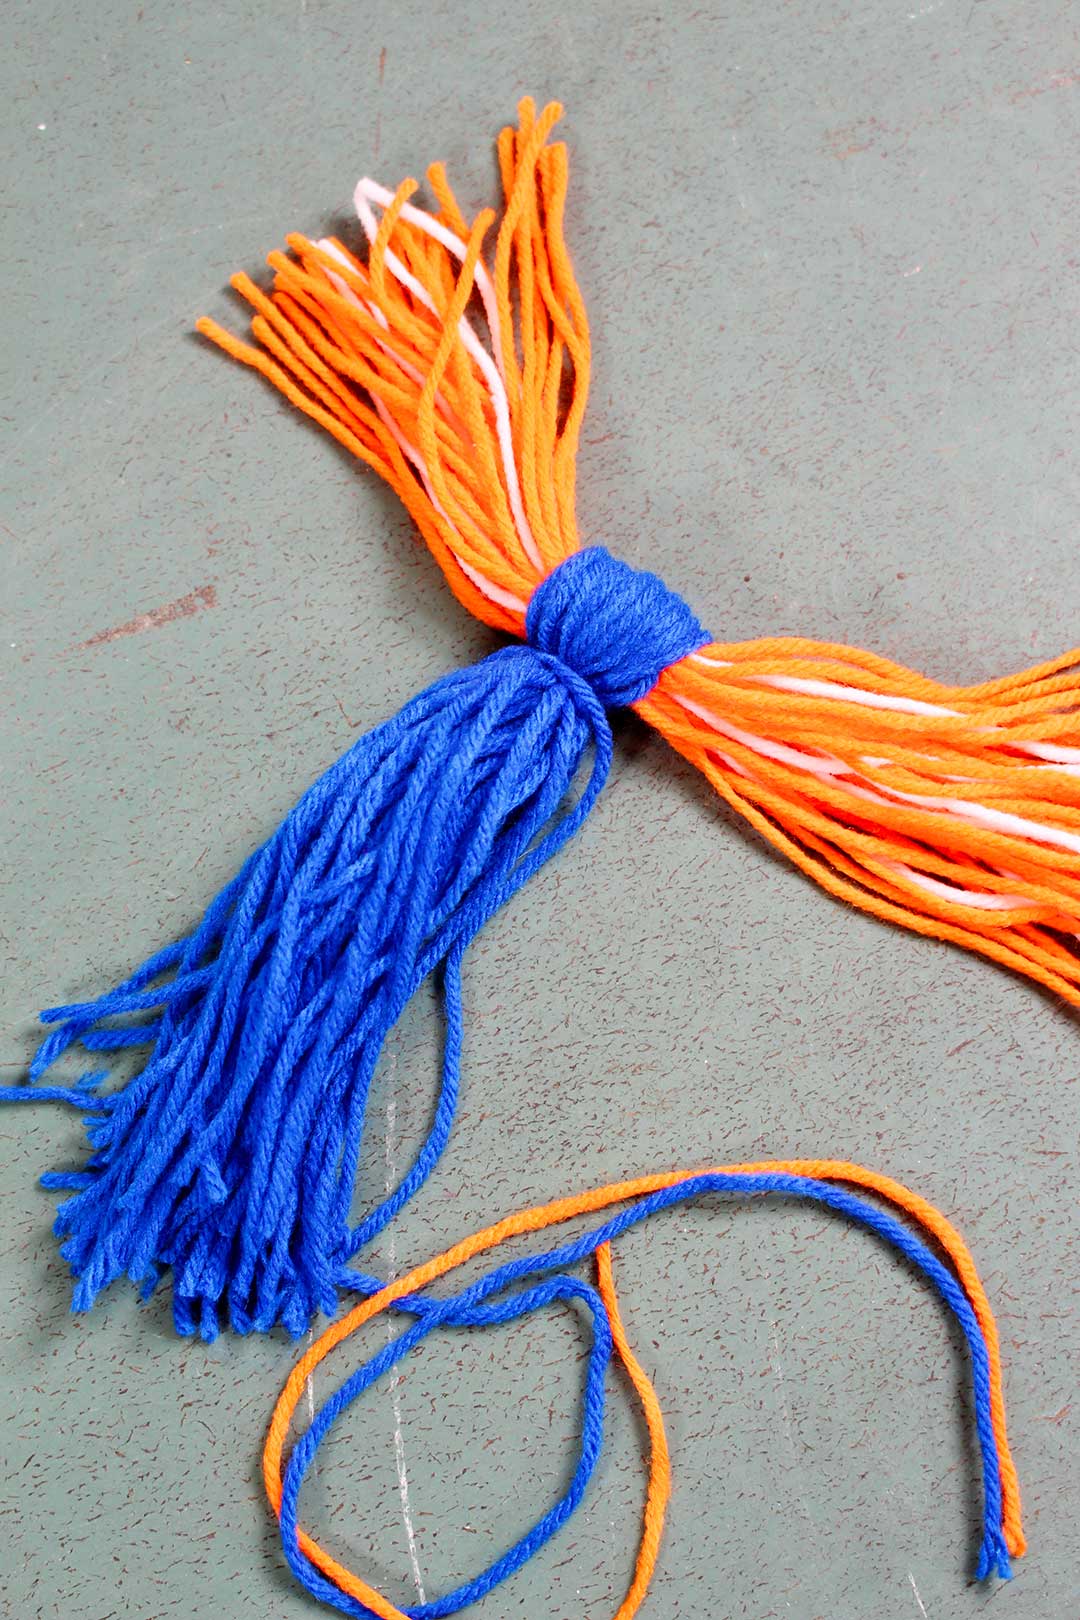
Note- you will use this same “A” colored tie to tie something else in a couple steps.
Pull yarn “B” back into a bunch and so that it loops over yarn “A”.
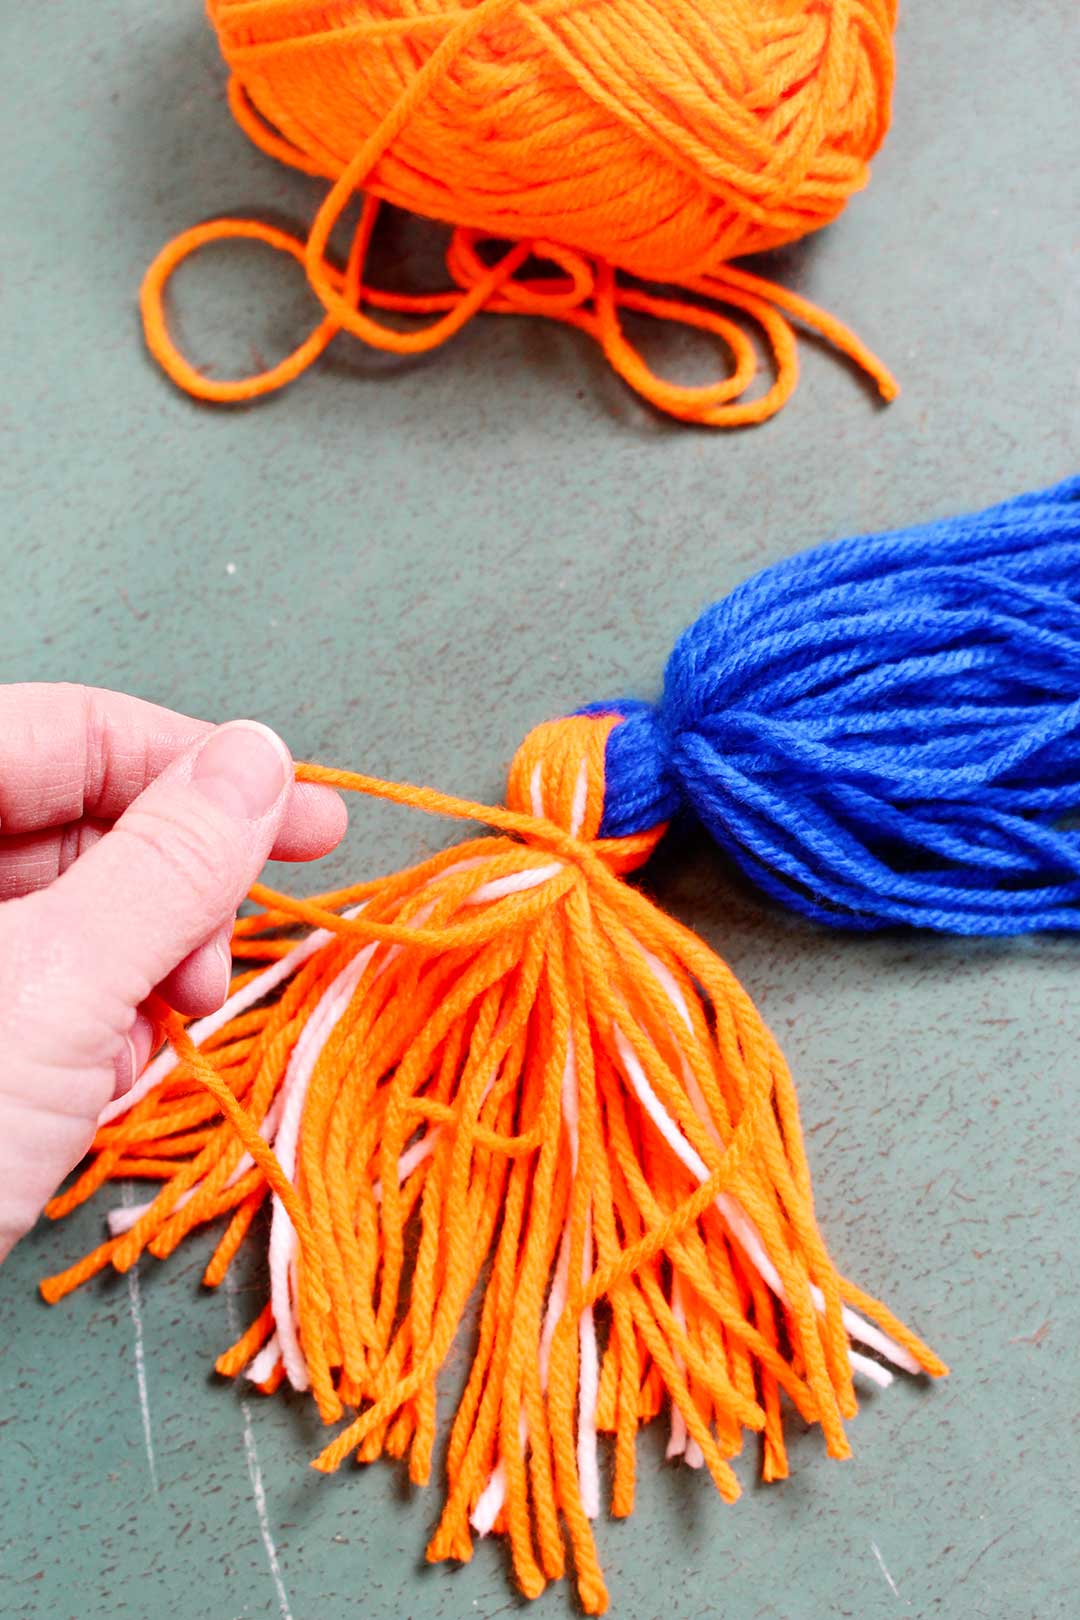
Tie a yarn “B” colored yarn around all yarn “B”, close to where it crosses yarn “A”, holding it in place.
Note- you will use this same “B” colored tie to tie something else in a couple steps.
Yarn "C" for the bird's wings
Wrap loops of yarn around the template the 5 inch direction for the bird’s wings. Wrap around about 40 times
Clip one end of the loops and lay out flat. These will be referred to as yarn “C”.
Lay yarn “C” over the tied area of yarns “A” and “B”.
Use the “A” and “B” colored ties to tie yarn “C” in place.
Form the bird's shape
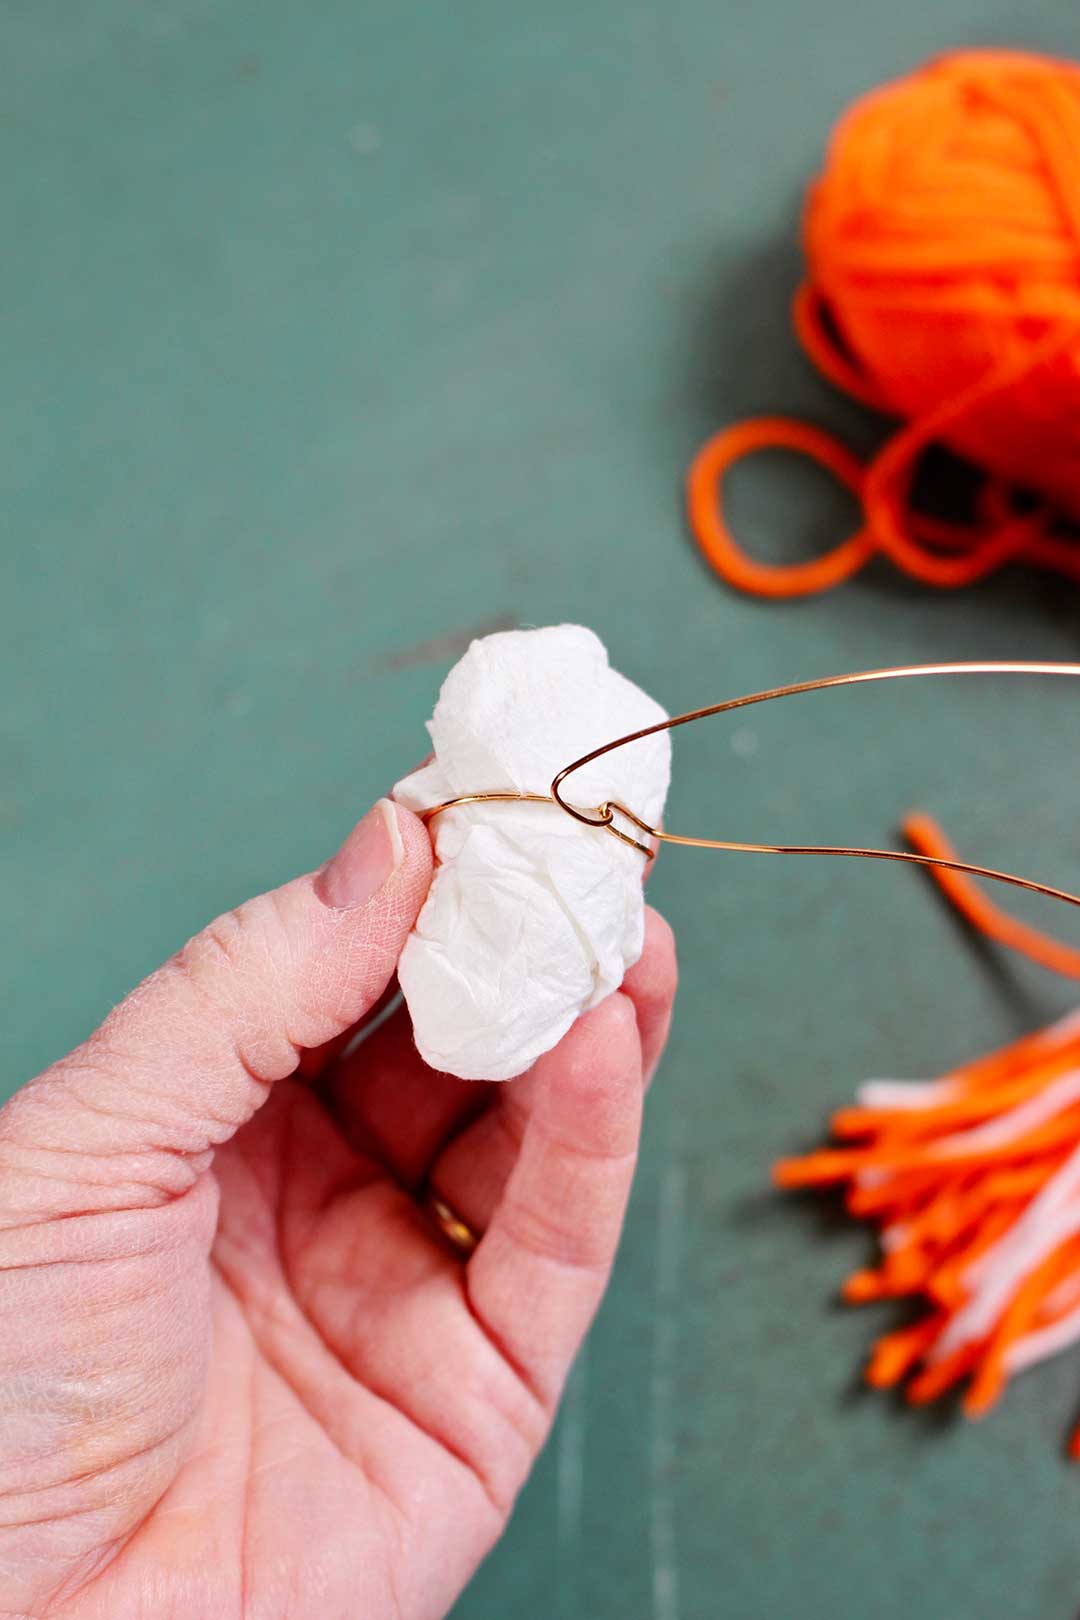
Make a ball from 1 small paper towel from your roll of Paper Towels, a ball that is about 1.5 inch in diameter
Take about 20 inches of the Orange Craft Wire and wrap around the paper towel ball. Twist to hold in place.
Note-The two long wires will be used to make the bird legs in a few steps.
Pull Yarn "B" straight under the ball of paper towel (stomach of the bird). ⅓ of the yarn will go to the left of the wire legs, ⅓ will go between the wire legs and ⅓ will go to the right of the wire legs.
Pull Yarn "A" in a group straight over the top of the paper towel ball (back of the bird).
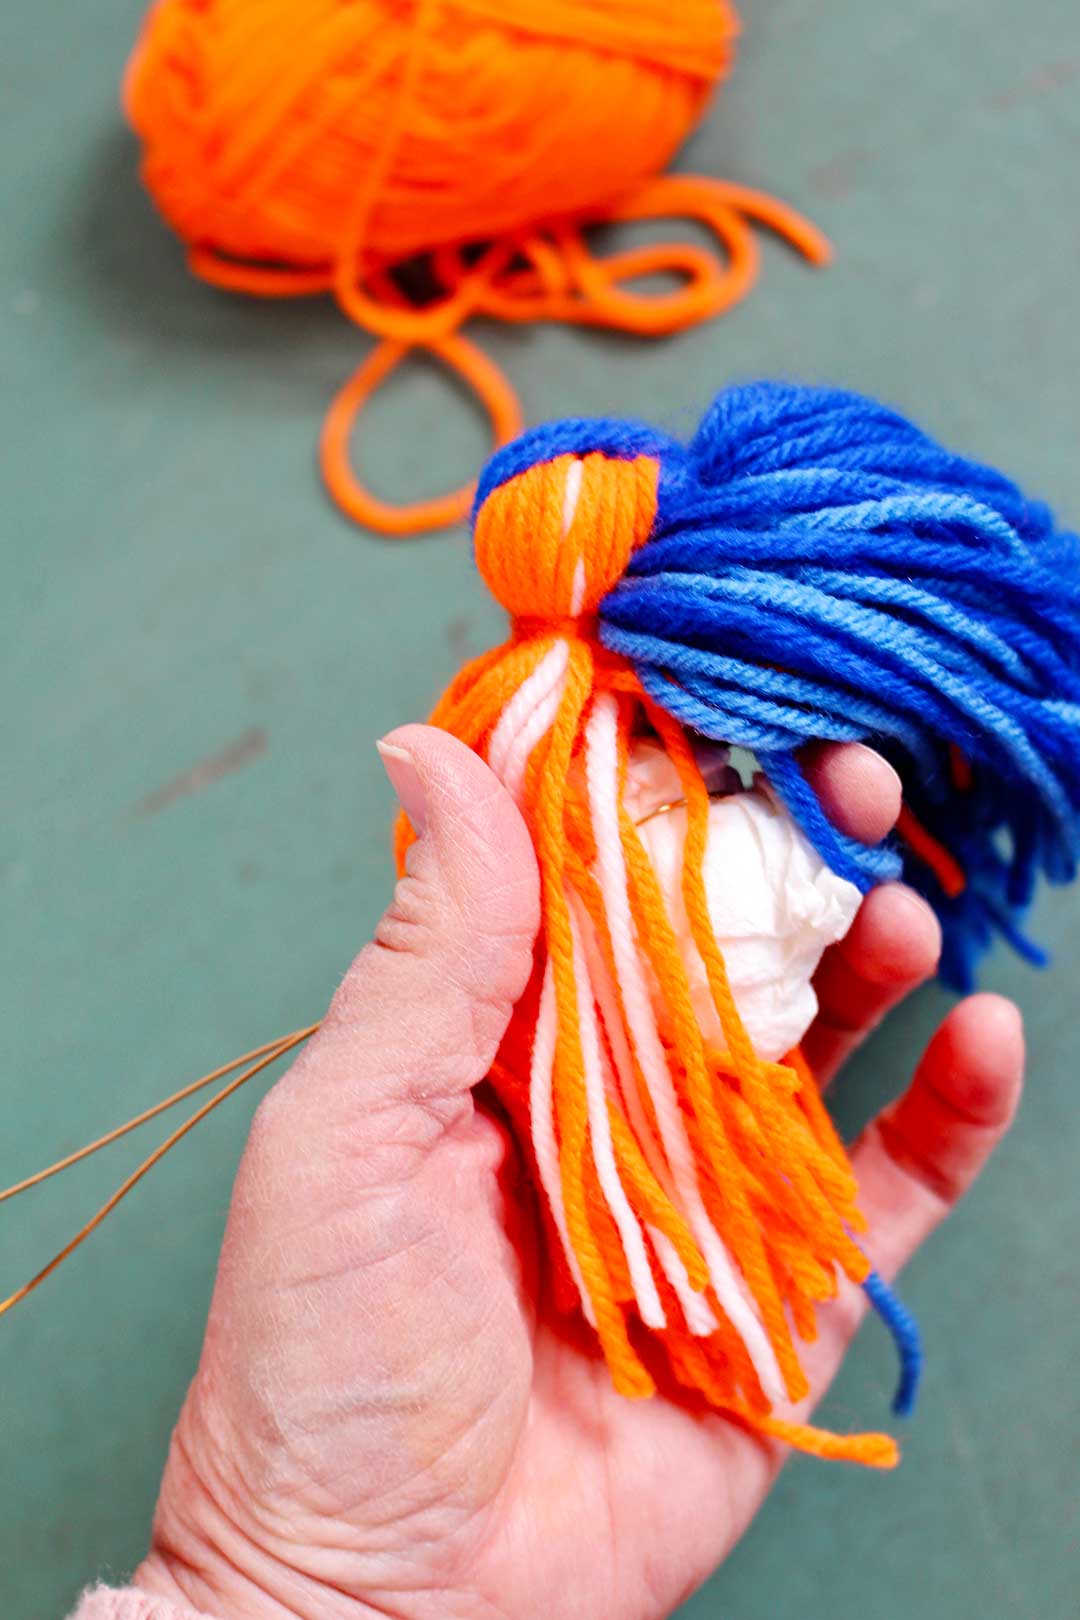
Pull Yarn "C" around the sides of the paper towel ball, half to one side and half to the other side (wings of the bird).
Gather all of the yarns together at the back end of the bird. Keep arranging the yarn so that you can’t see the paper towel at all.
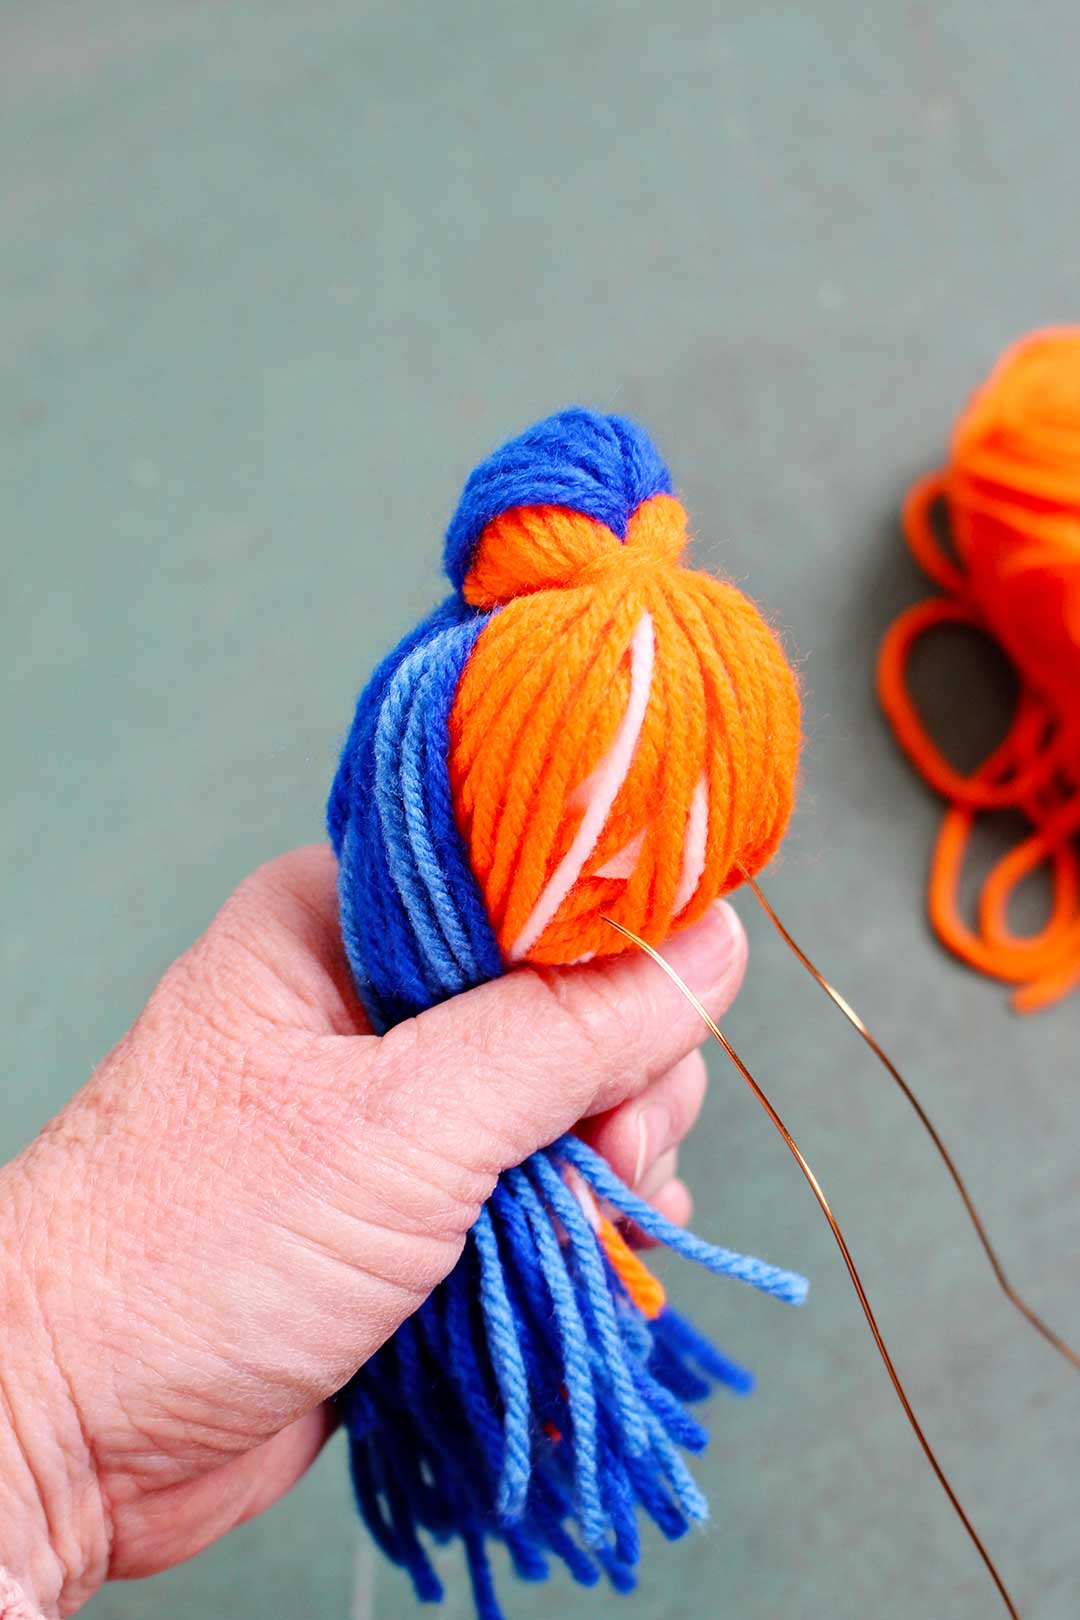
Tie a yarn around yarns A,B,C, close to the ball of paper towel. This holds the bird together, creates the tail of the bird and holds the paper towel ball in place.
Now you can see the head, body and tail of the bird!
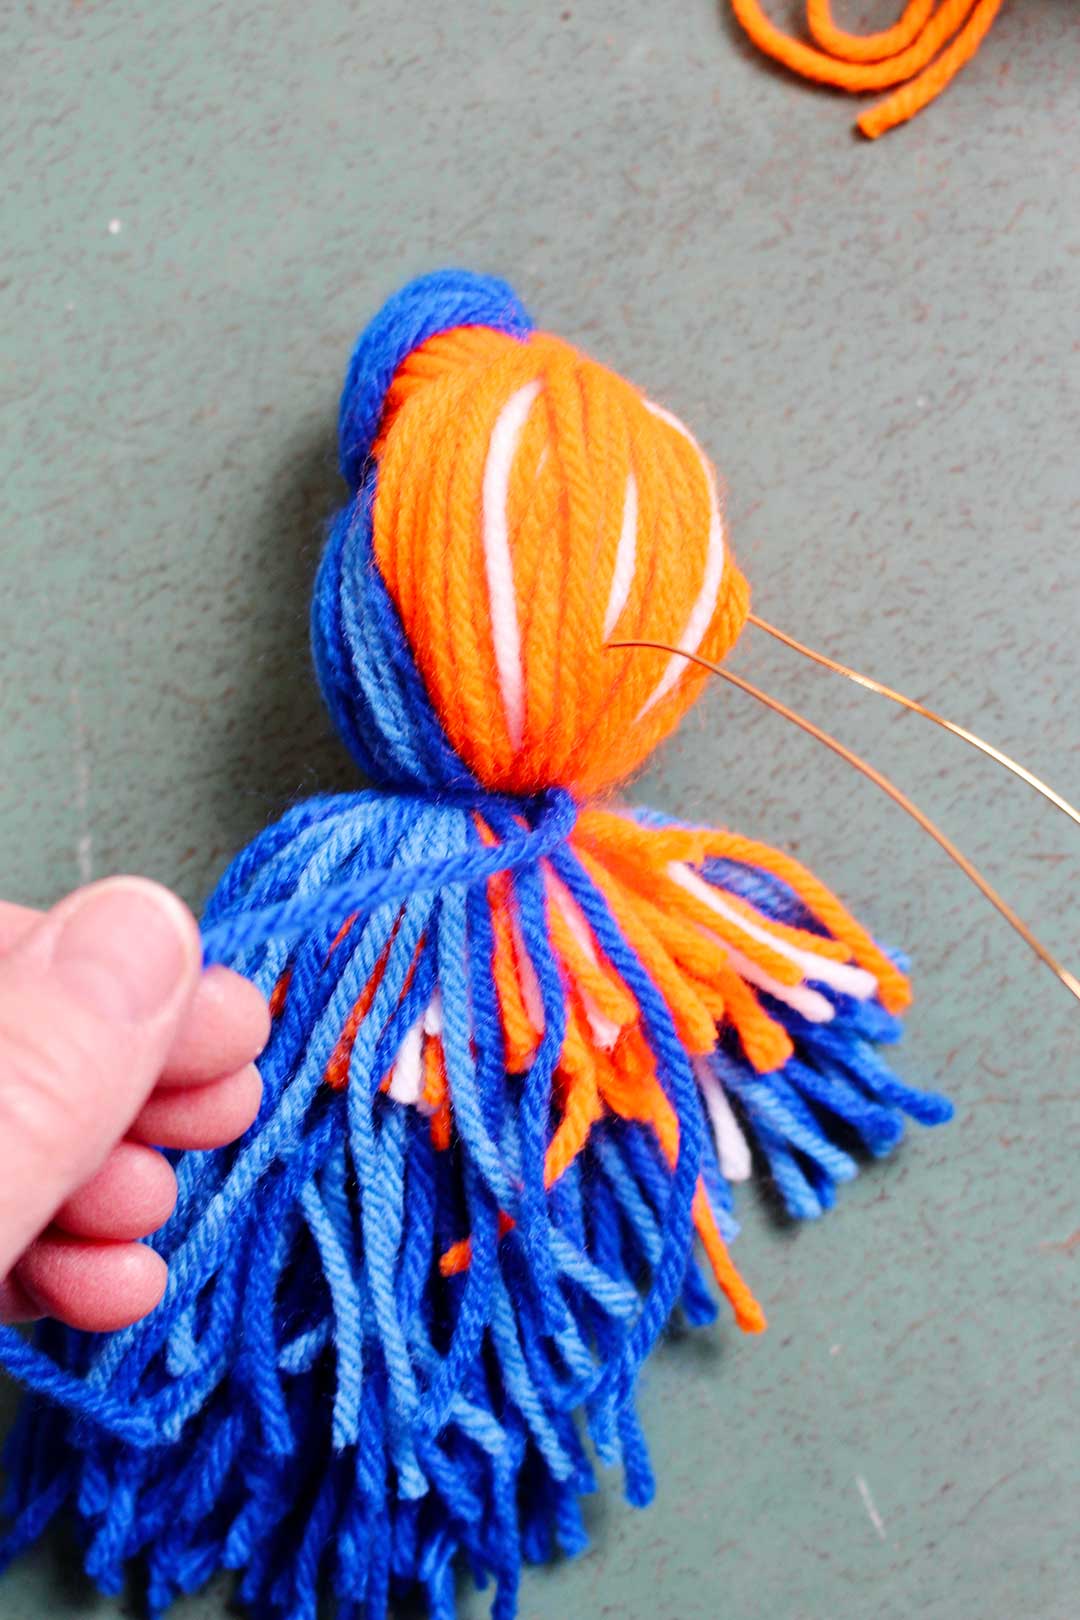
Now to make the bird's feet
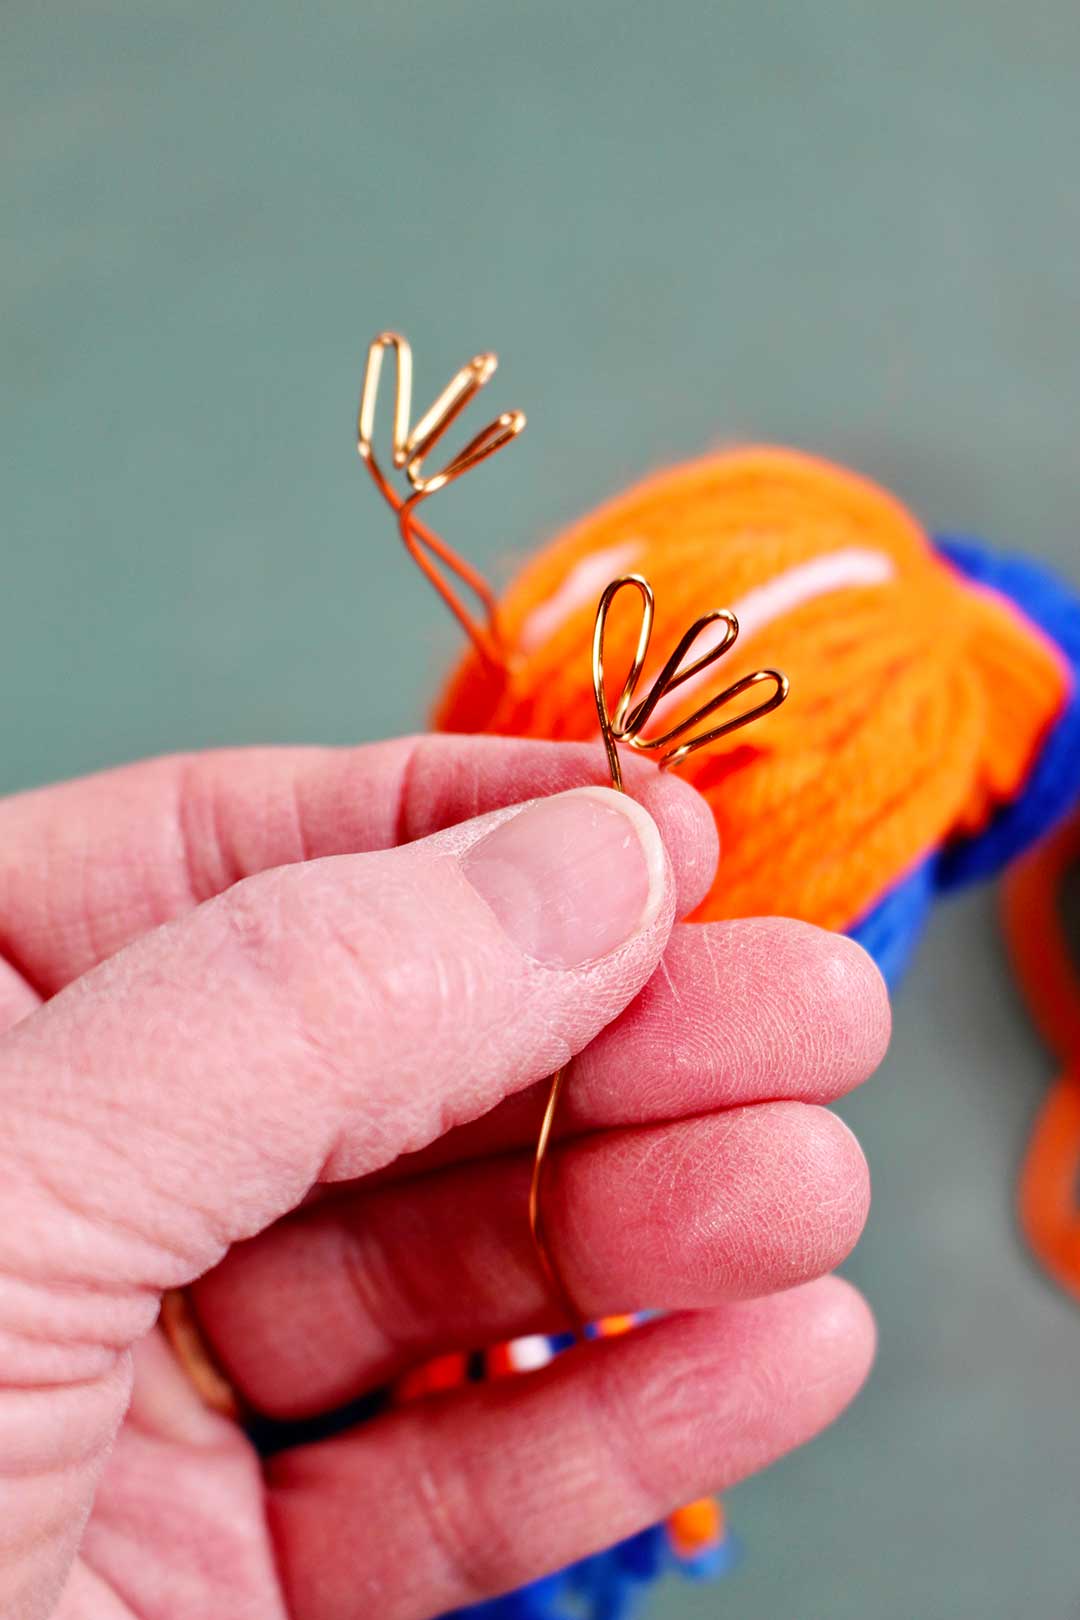
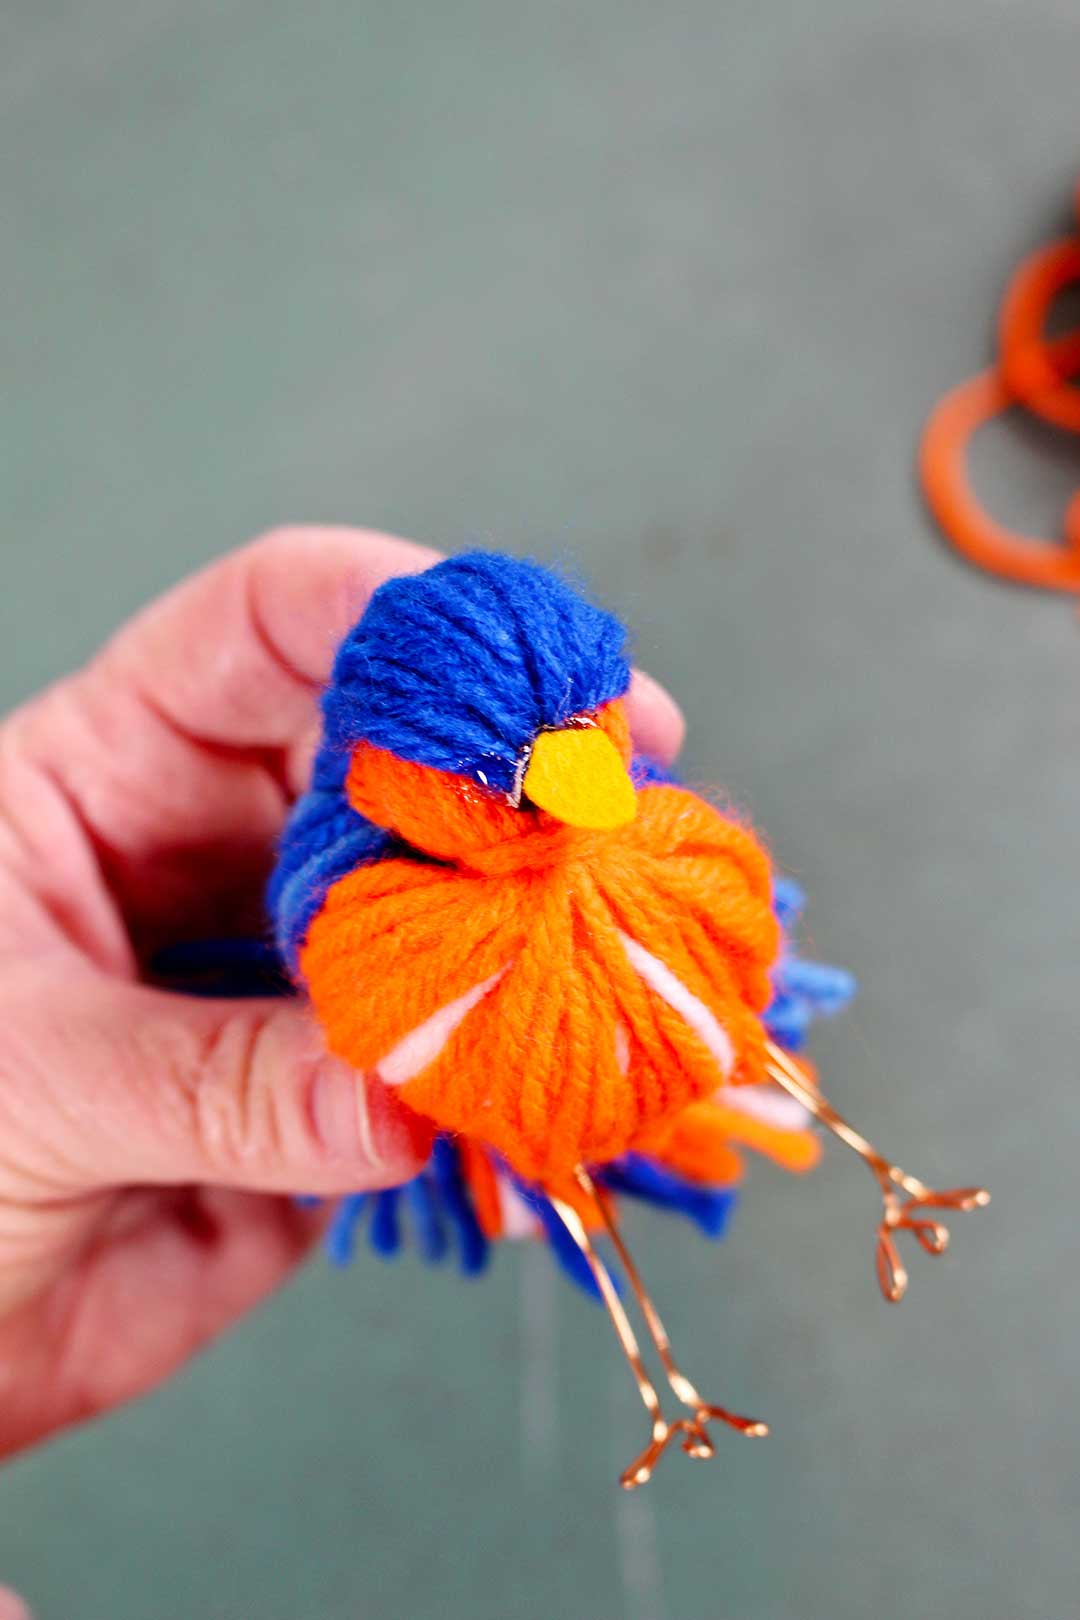
About 1 to 1 ½ inch from the bird’s body, bend each wire into the shape of a bird foot. This wire is light enough where I could do it by hand but you could also use a Needle Nose Pliers. Don’t get too particular, but the three toed form that you see in the picture worked really well and looks so cute.
Bend the foot to angle so that the bird will balance and stand upright.
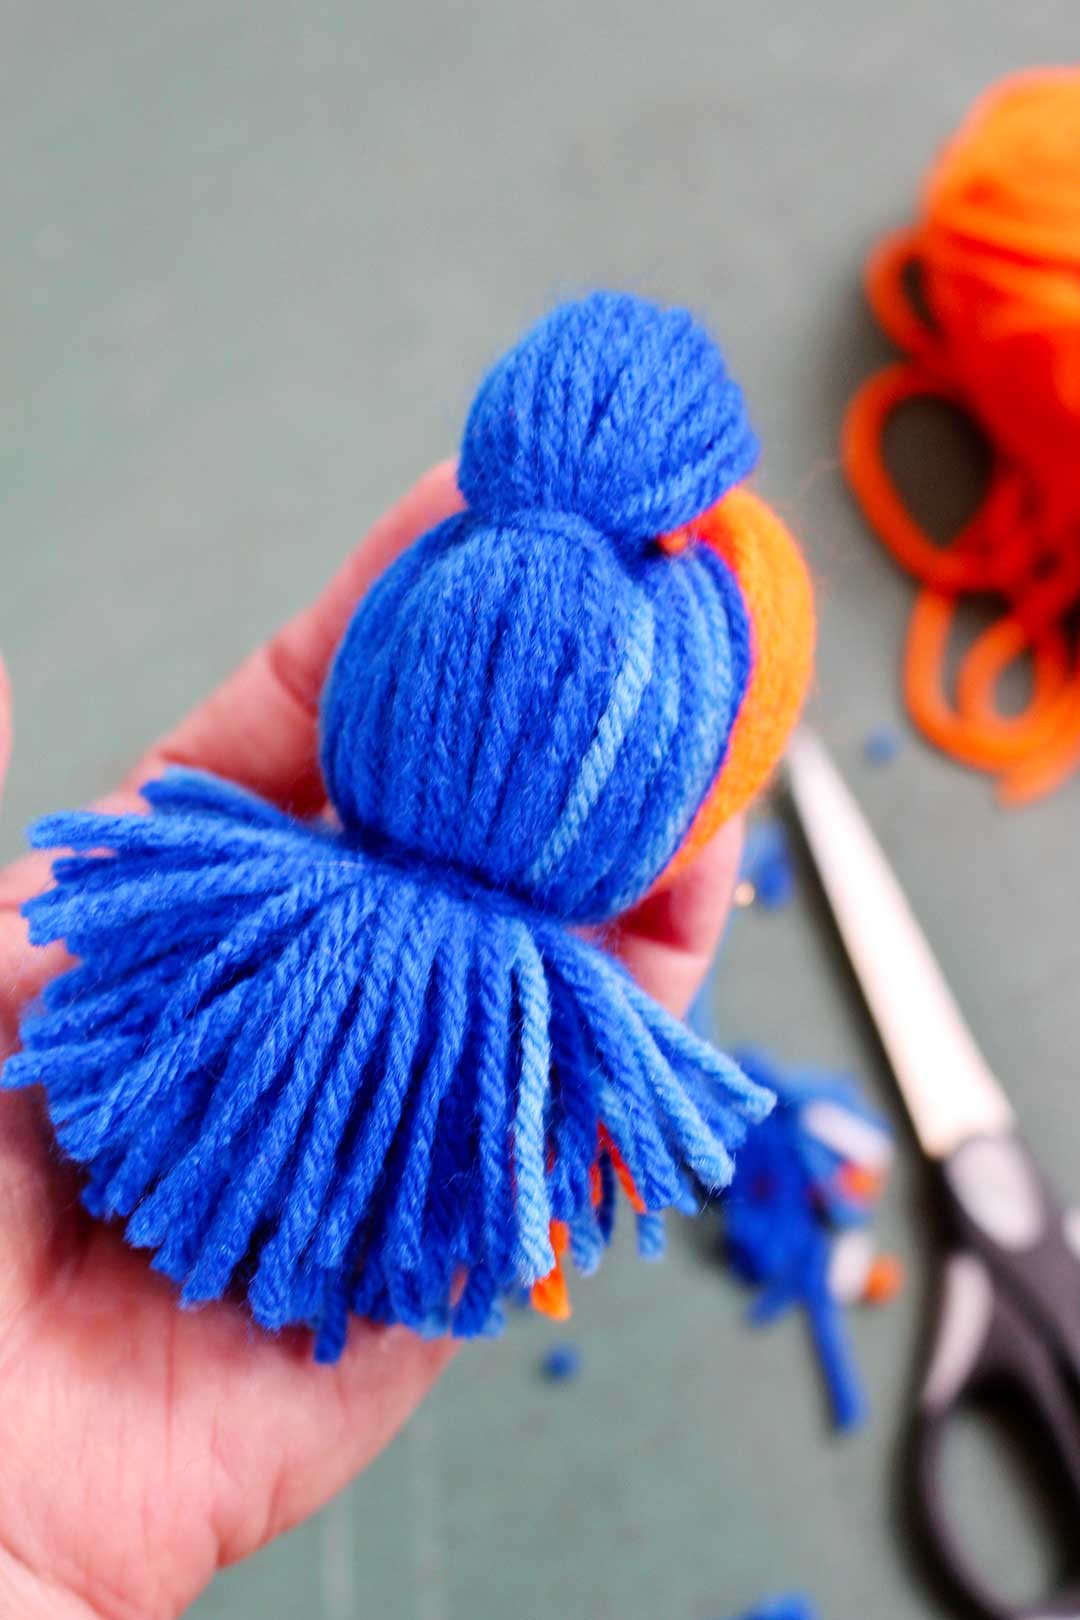
Trim the tail
Trim the tail to a length that you like. I kind of cut it in a “V” shape.
Tip: Don’t trim the tail too close to the body or the yarns will work themselves free.
Add a beak and eyes
We used hot glue to add a small triangular shaped beak made of felt and two small Wiggle Eyes.
You did learn to make a cute yarn bird
Oh my goodness, these are the cutest things. I think we accomplished what we set out to do…to learn to make a cute yarn bird and bring a little “bluebird of happiness” into our homes!
Now, a little more about those bluebirds in our yard...
When our son, Ben, was young my uncle gave him a Bluebird House. Ben proceeded to put it up on a post in our farmyard. We cautioned him that we had never seen a bluebird around, we didn’t want him to get his hopes up. We explained that just because you put up a bluebird house doesn’t mean that one will come. Ben told us, “oh, there will be a bluebird, just wait and see.” Well, by gum if there wasn’t a pair of bluebirds in that Bluebird House within the week.
Did you know that bluebirds come back to the same place every year and nest, or their offspring do? Ben knew that. And we have benefited from his act of faith and wisdom all of these years.
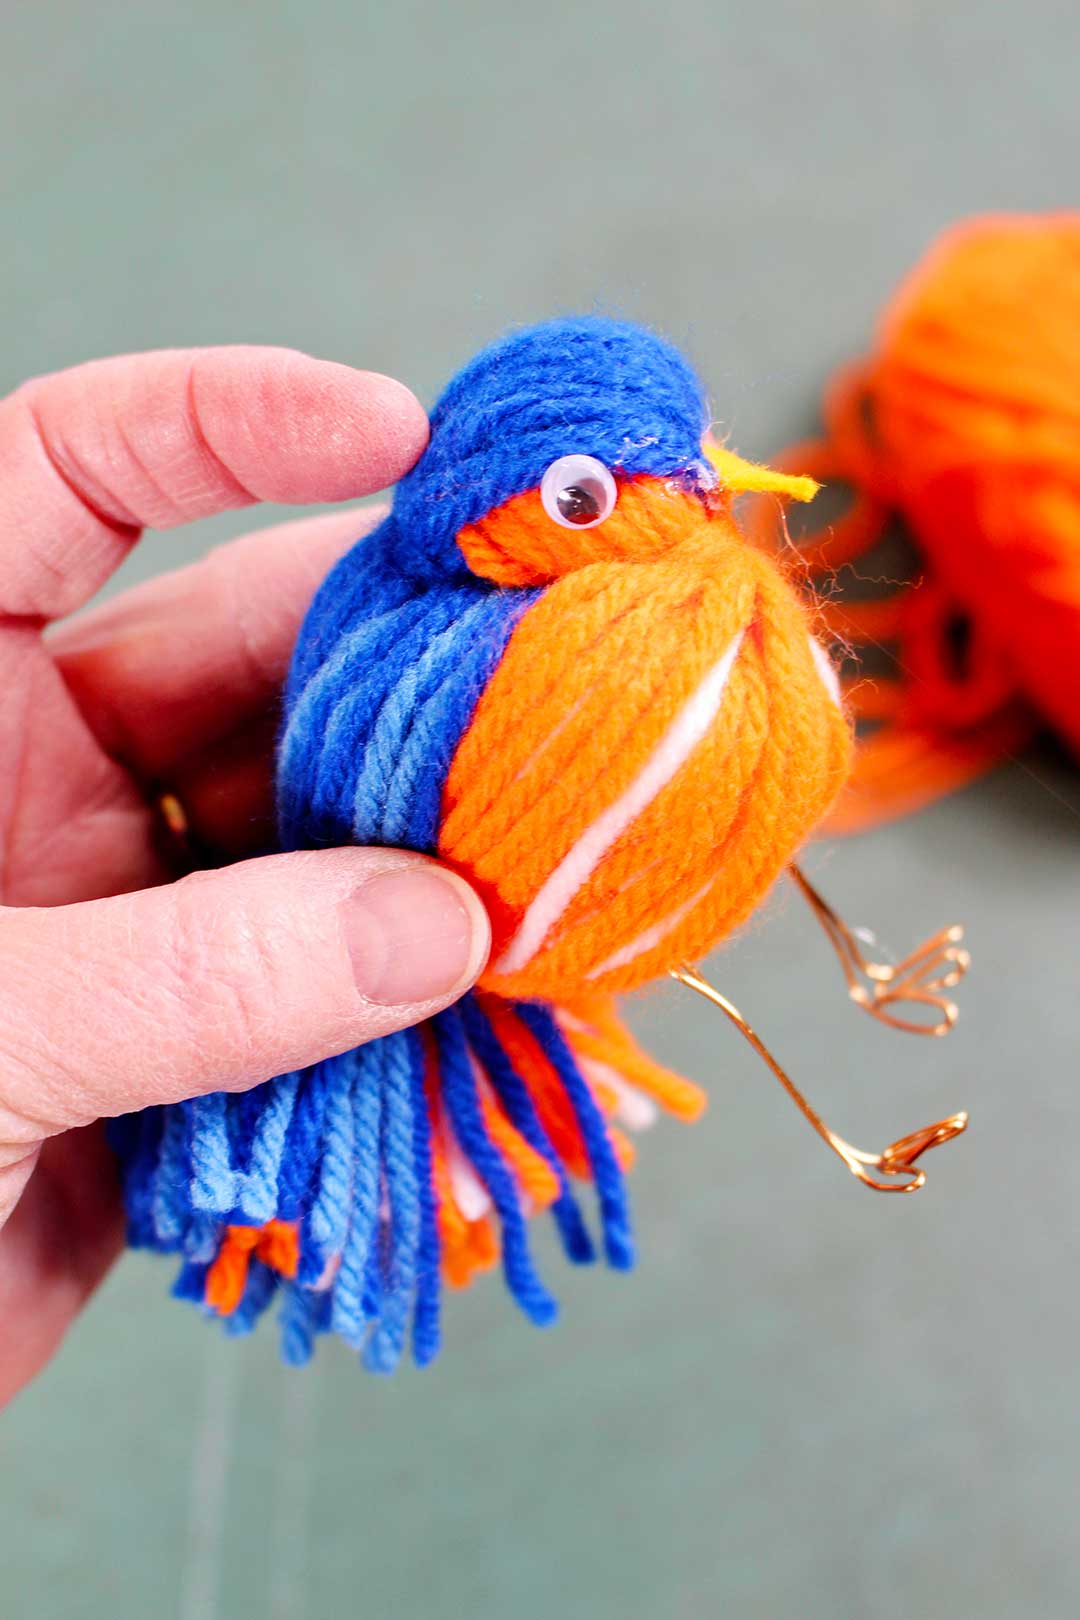
The bluebirds of happiness are back
Well, our bluebird family is back again this year and it brings a burst of hope to see that special sign of spring. We need that- especially this Covid year.
I hope you and your grands love making these little birds. Use your imagination and your leftover yarn to come up with a way to create your favorite birds.
Supplies:
- Yarn in Assorted Colors (bluebird- A is blue, B is orange, C is blue with light blue; robin- A is black, B is orange, C is black and white; goldfinch- A is yellow, B is yellow, C is black and white; sparrow- A is brown, B is gray, C is brown and gray)
- Orange Craft Wire
- Needle Nose Pliers
- Wiggle Eyes (¼ inch size)
- Felt- very small piece of yellow or orange
- Paper Towels
- Hot Glue Gun and glue
- Scissors
- Bluebird House- not for the craft, just for fun
Enjoy!
Welcome to Nana’s! Where there’s fun things to do with your “grand” kids!
Come join the fun at www.WelcomeToNanas.com



Leave a Reply