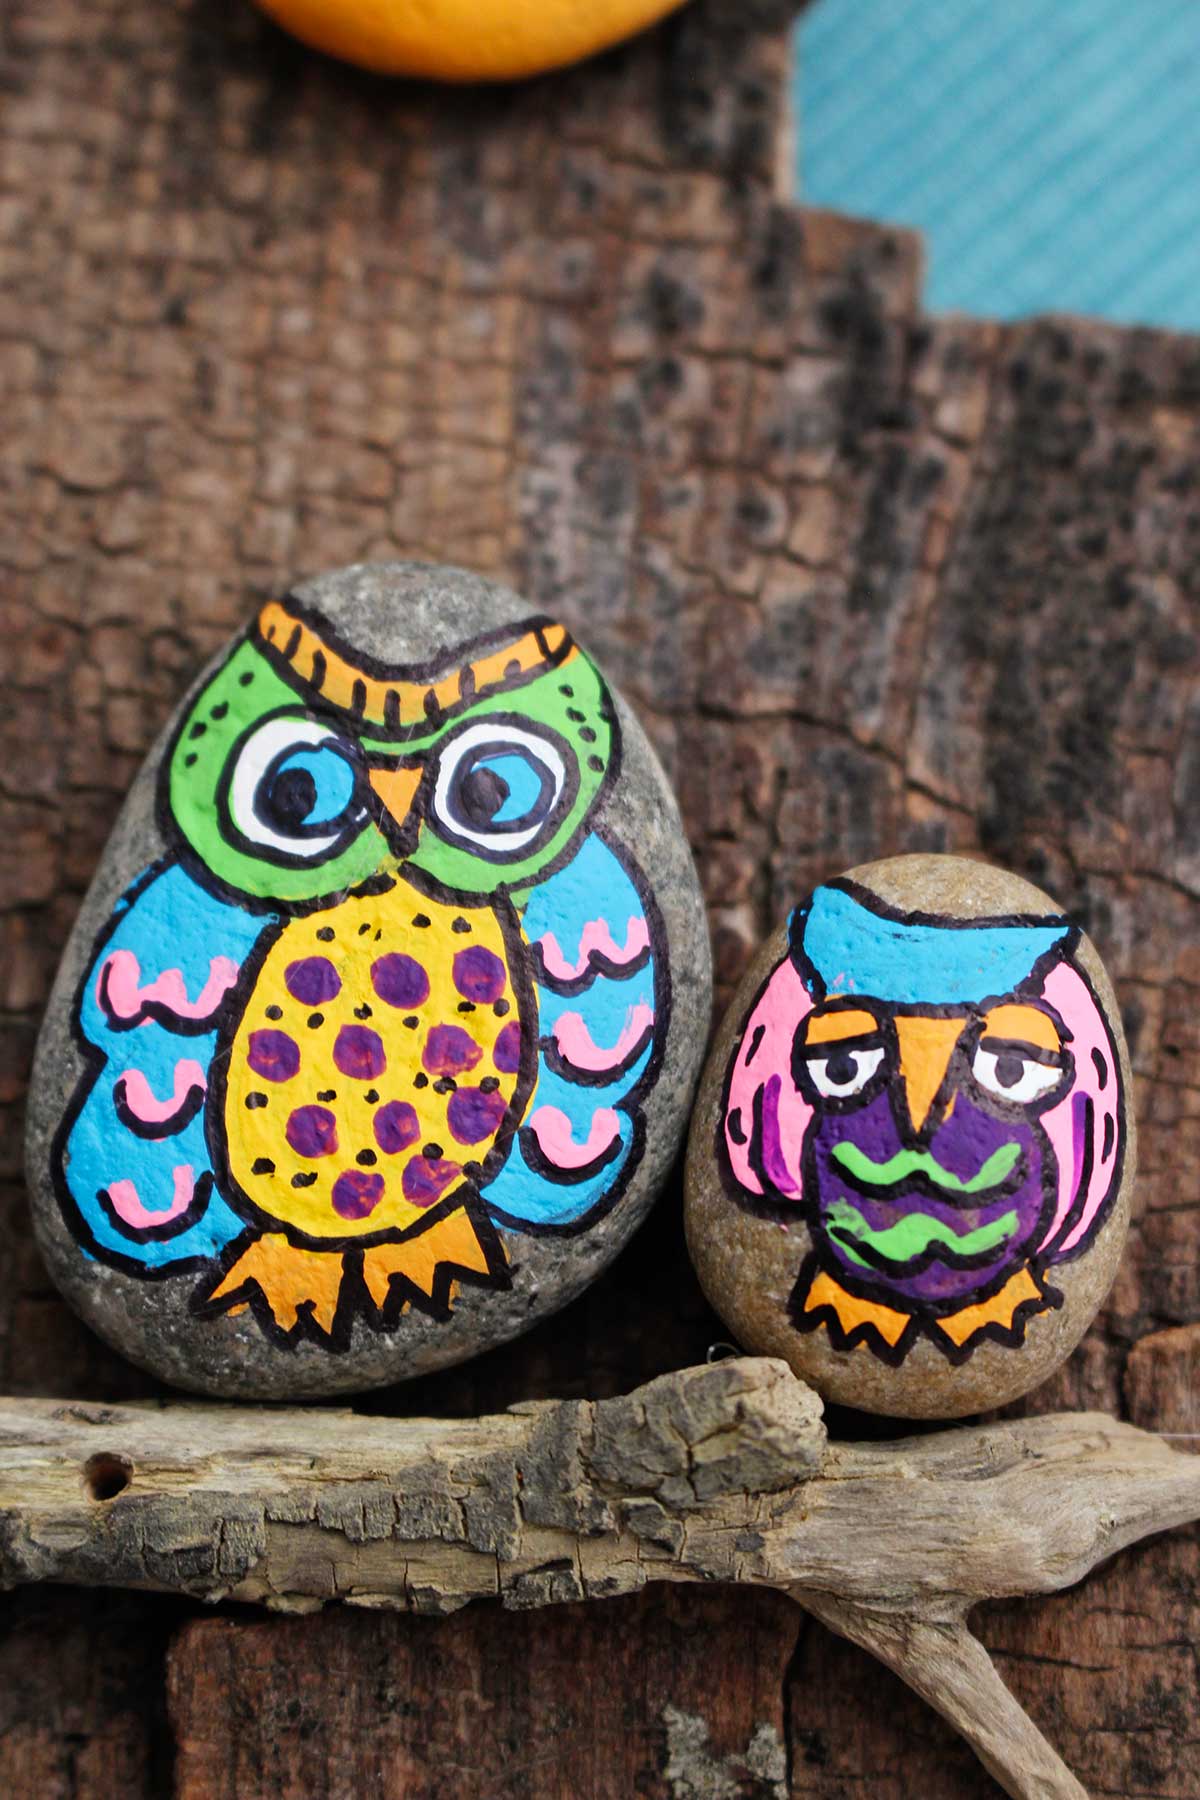
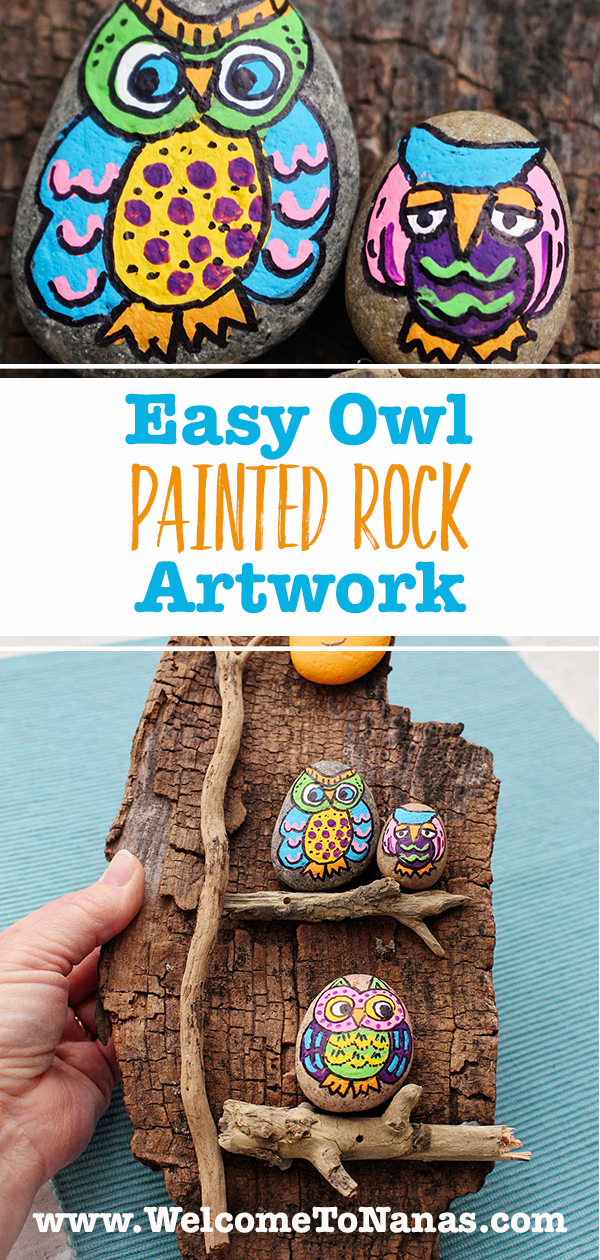
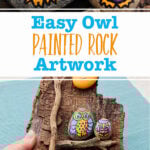
Grab some river rocks for Easy Owl Painted Rock Artwork and we’ll make a tree full of rock owls! This is one of the projects that started my art career 55 years ago, it’s a vintage but new project straight from the 70’s!
Jump to:
- Cute Craft Alert: Easy Owl Painting on Rocks
- Supplies for an Easy Owl Rock Painting
- Steps to Make Owls Painted on a Rock
- Craft Tips fo Hand Painted Rock Owls
- Craft Variations for Easy Owl Painted Rocks
- FAQ About Painted Rocks with Owls
- More DIY Rock Painting Crafts for Kids
- Come join the fun at WTN!
- More Crafts Please!
- Easy Owl Painted Rock Artwork
Cute Craft Alert: Easy Owl Painting on Rocks
We have an owl that sits on the top of a tree behind our house. He hoots his way through the night. His silhouette is kind of cool and kind of spooky, but I love it when he’s there. Hearing him recently reminded me of this craft.
Owls are cool and fun to draw. So this project puts together owls, painting, bright colors, natural materials, and a vintage vibe. I love it! Come on, let’s go have some fun.
I’ll show you step by step how to paint these cute rock owls. You’ll be amazed how easy it is when we create it together. Kids will love it, and it makes a nice gift.
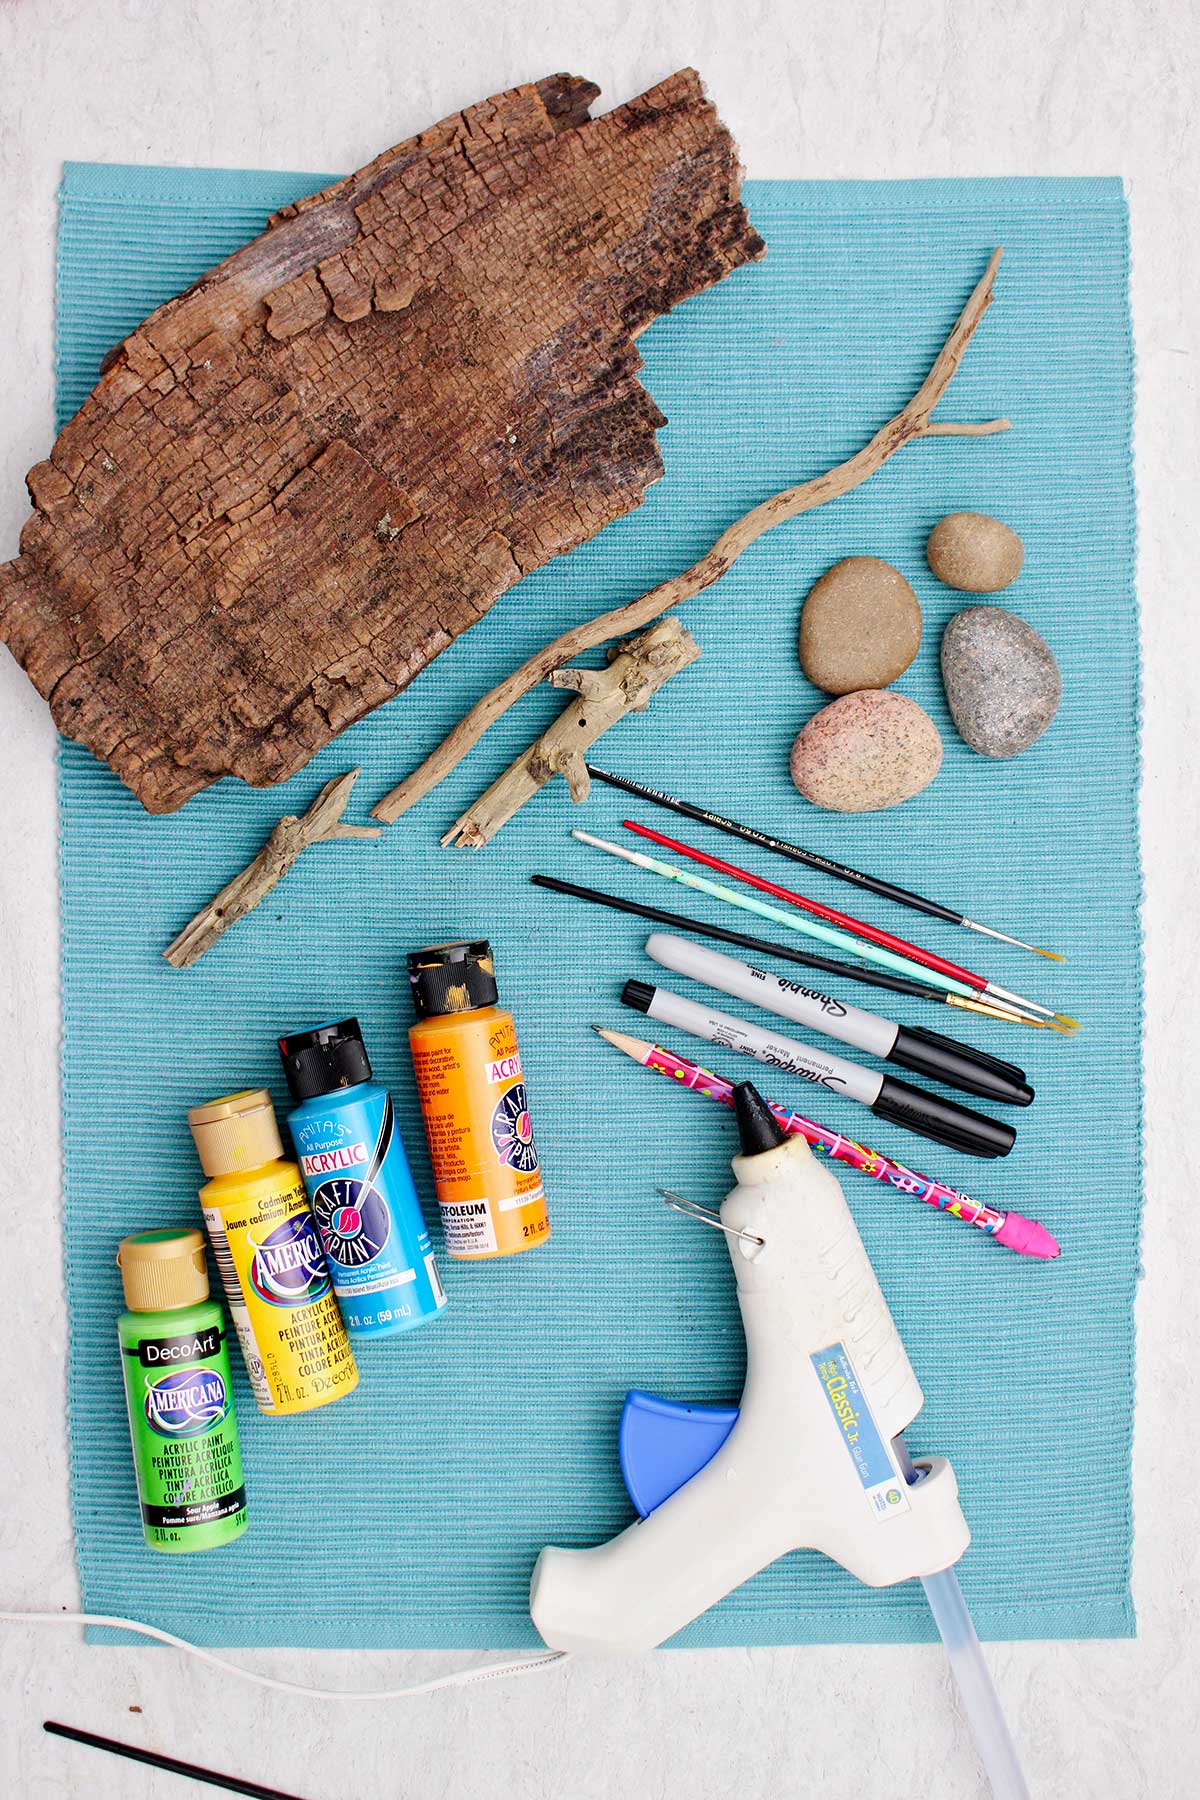
Supplies for an Easy Owl Rock Painting
Here are a few quick notes about the supplies you will need to make this rock owl painting craft!
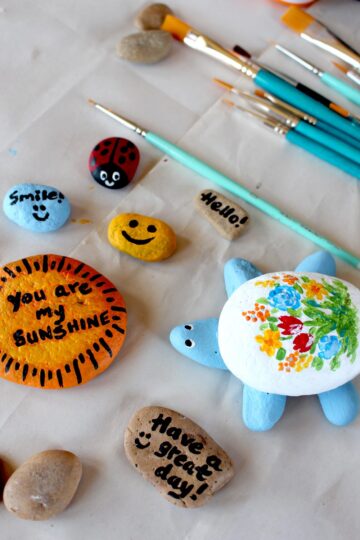
- Stones- Clean, smooth, round and fairly flat stones, like river rocks for rock art.
- Permanent markers- Two sizes of permanent markers, both are found in this package.
- Acrylic craft paints- A collection of acrylic craft paint in various colors.
- Small paint brushes- A set of paint brushes with several in small sizes.
- Paper plate- A paper plate or other item to hold your paints.
- Jar of water- A jar of water to clean your brushes.
- Paper towel- Use a paper towel to dry the paint brushes.
- Hot Glue gun and hot glue- Use a hot glue gun and glue to assemble the project.
- Piece of wood A cut piece of scrap wood or piece larger piece of drift wood as a backing for the project.
- Several small branches- A few sticks to be broken into pieces.
- Picture hook- A picture hook to place on the back to hang the craft (optional)
Steps to Make Owls Painted on a Rock
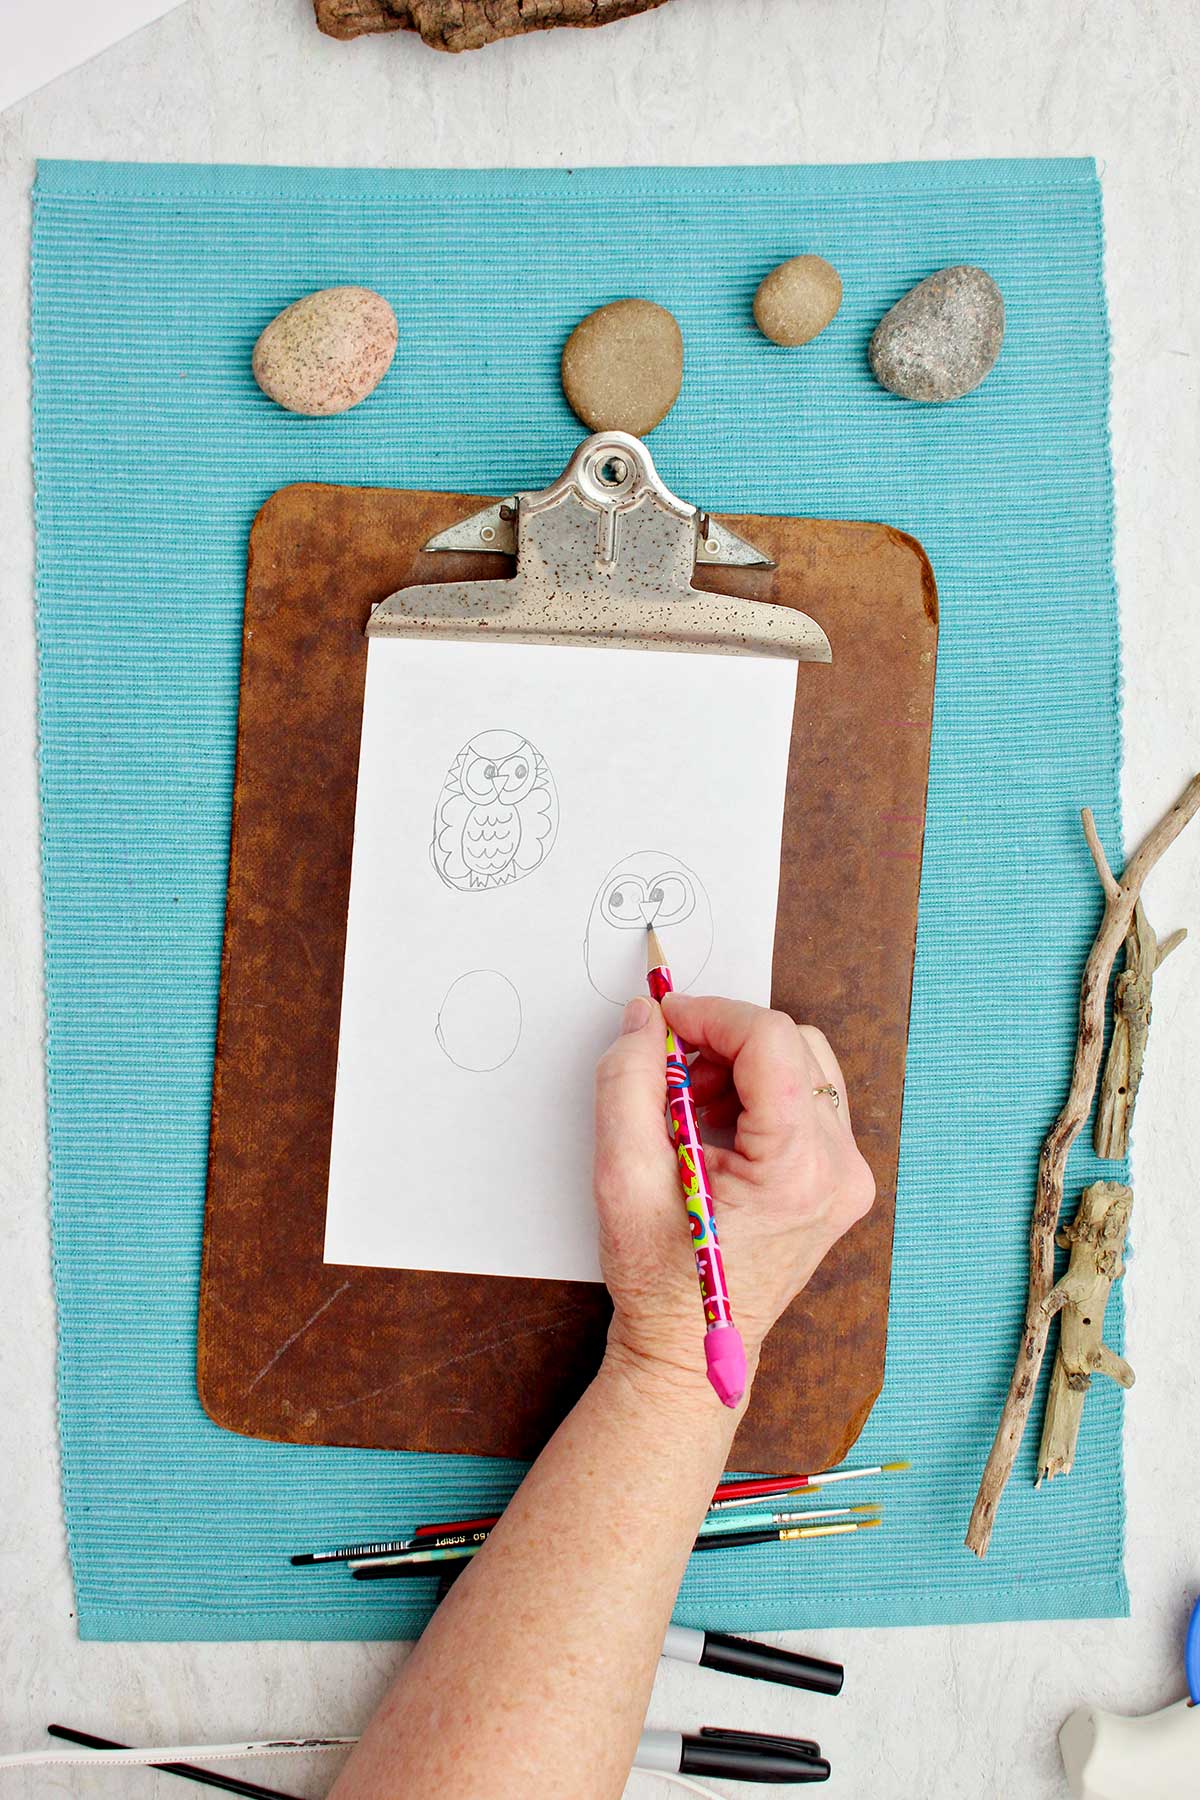
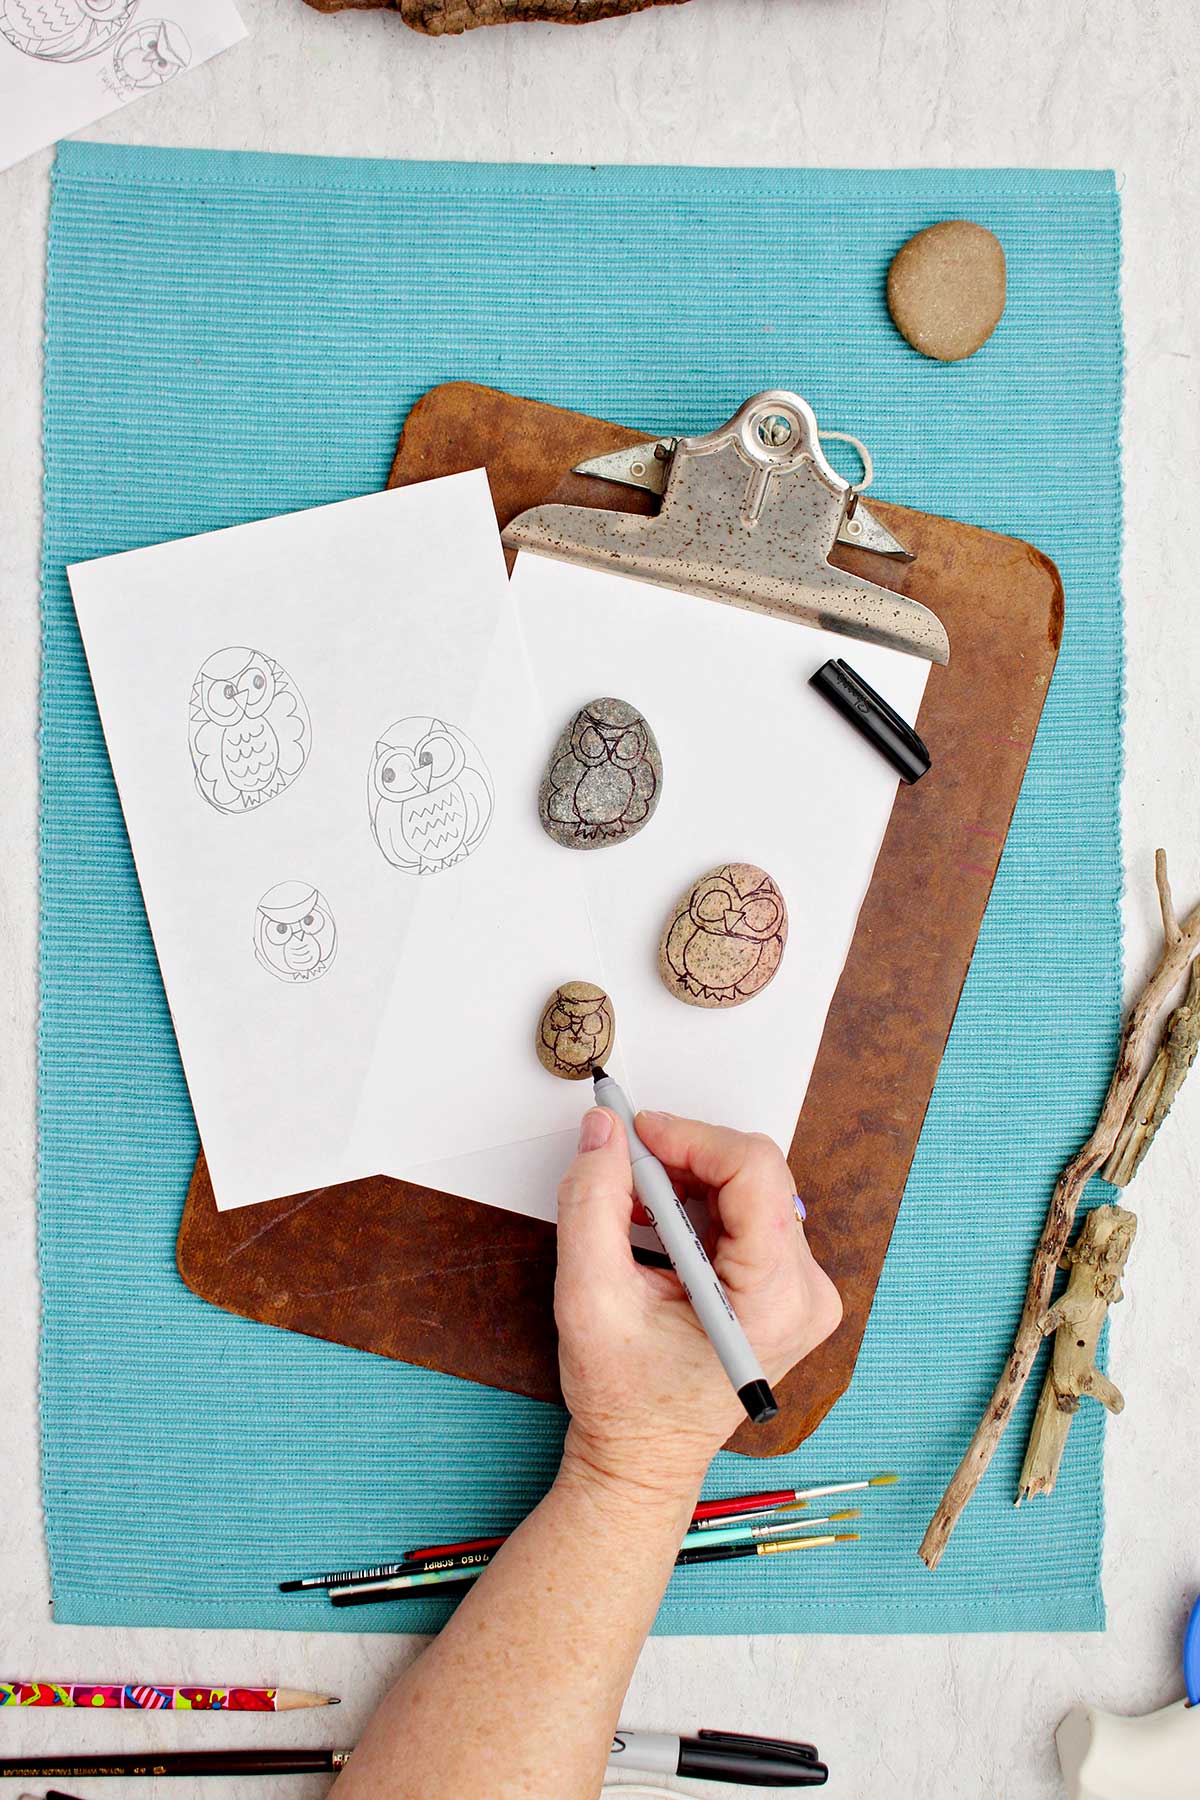
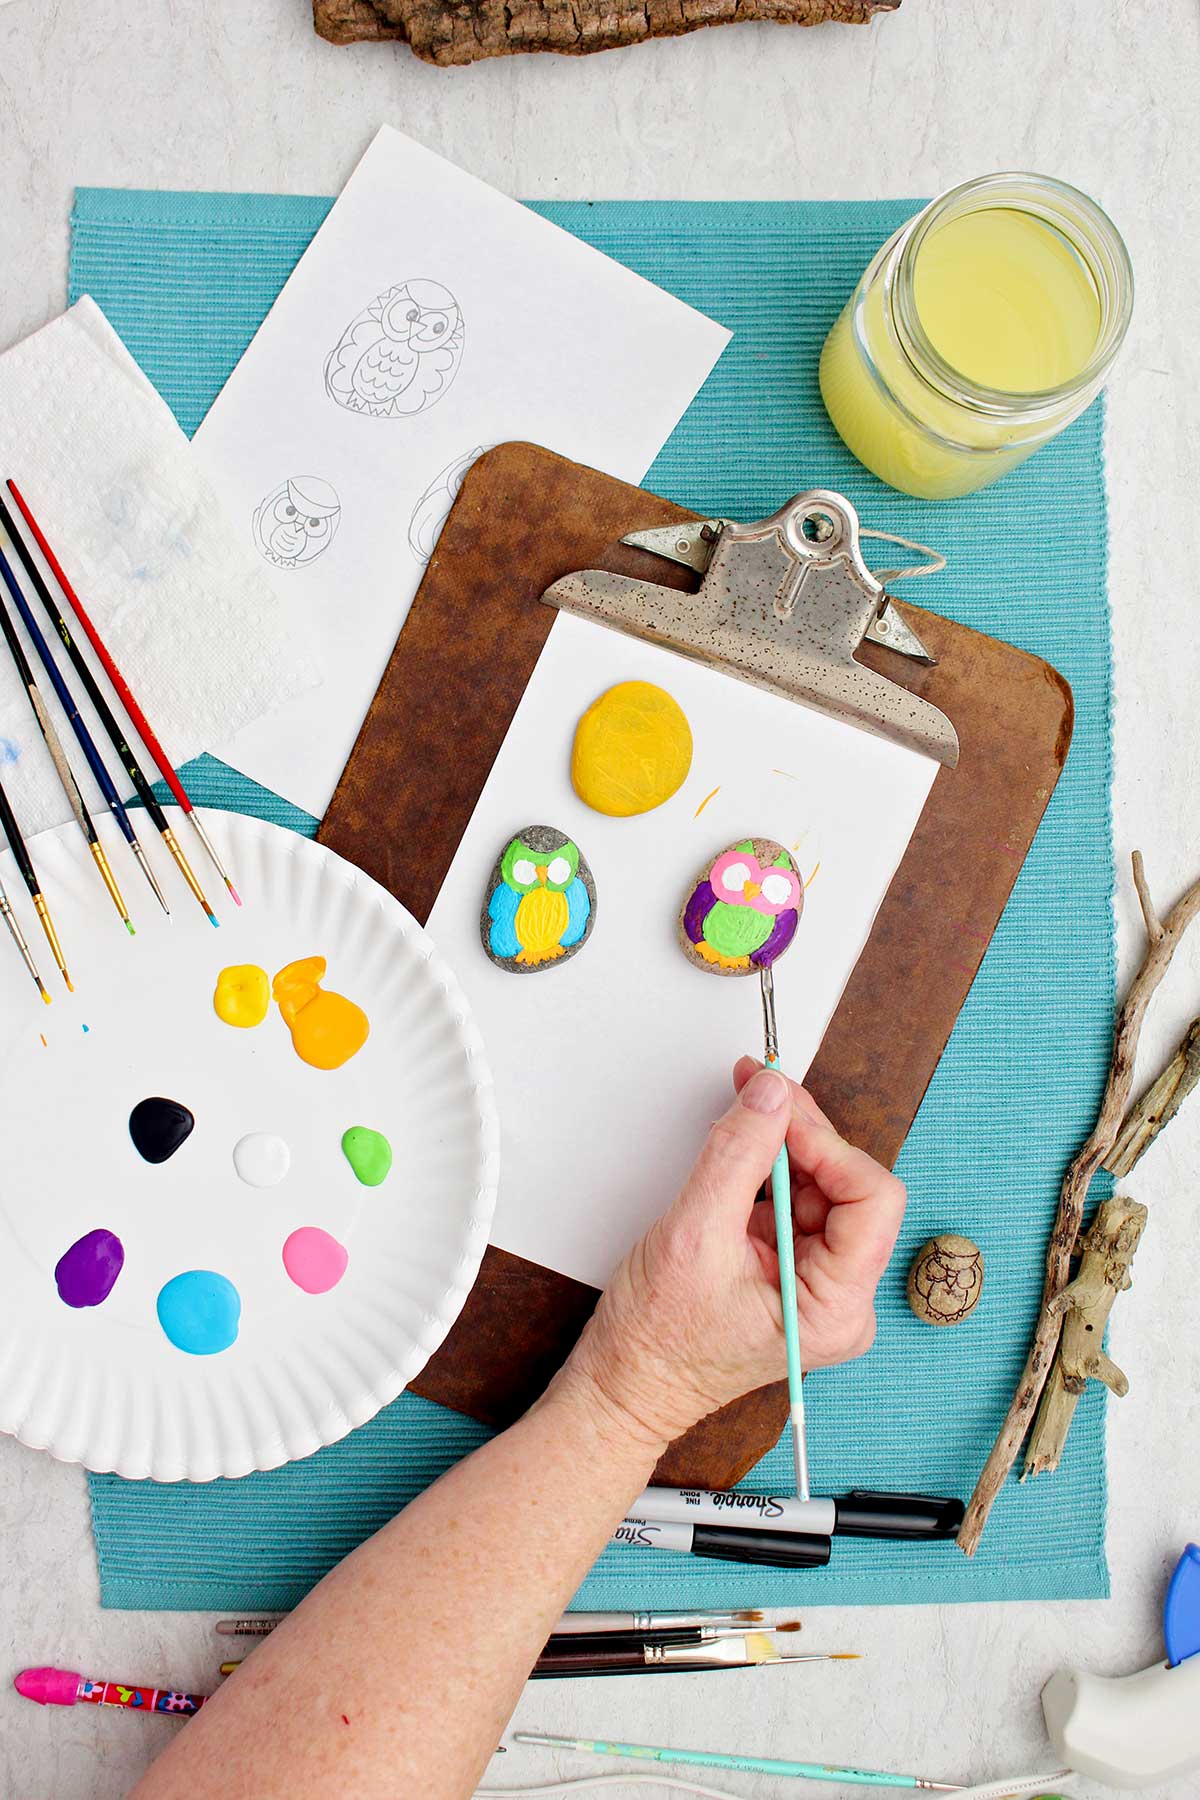
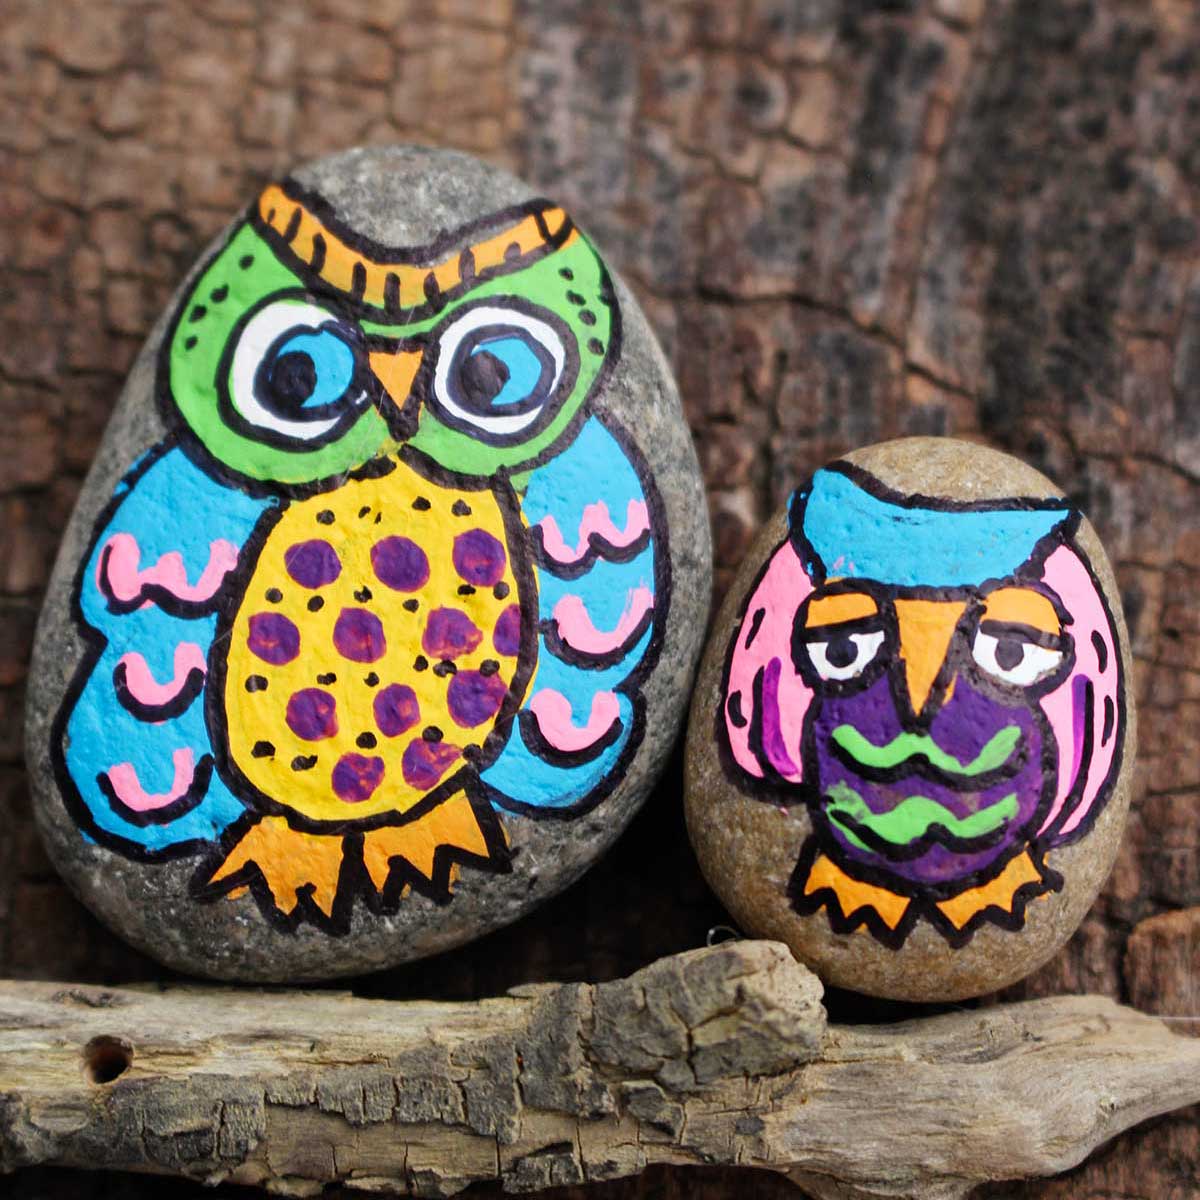
- Draw around each rock on a piece of paper. On the paper, sketch an idea for how you want your owls to look.
- Transfer your sketch onto the rock with a fine line permanent marker.
- Place a small amount of paint on a paper plate in each color you want to use on your owls. Acrylic craft paint is good for the painting of a rock
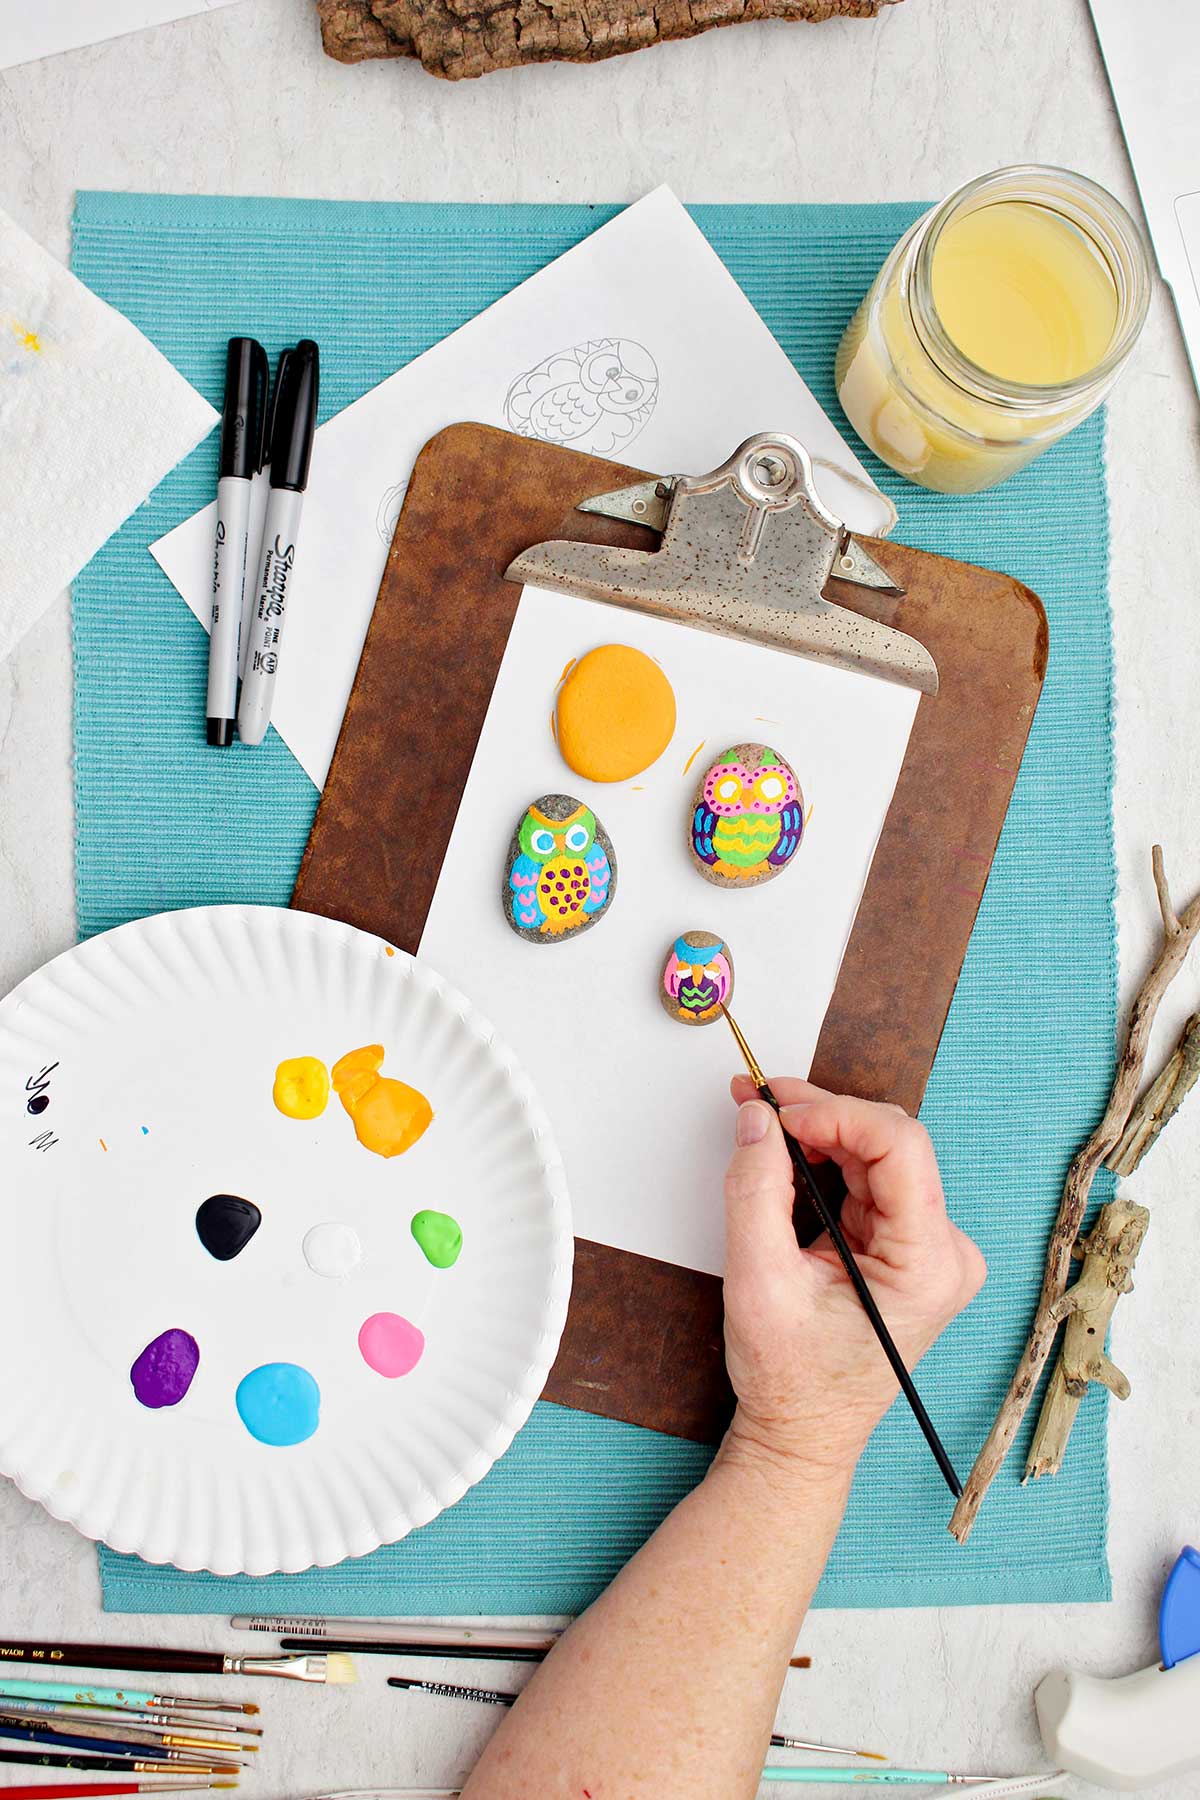
- Using a small paint brush, fill in the picture you drew on the rocks. You are blocking in the color in the spaces. Let this paint dry.
- Paint one rock a solid yellow or orange to be a moon (optional).
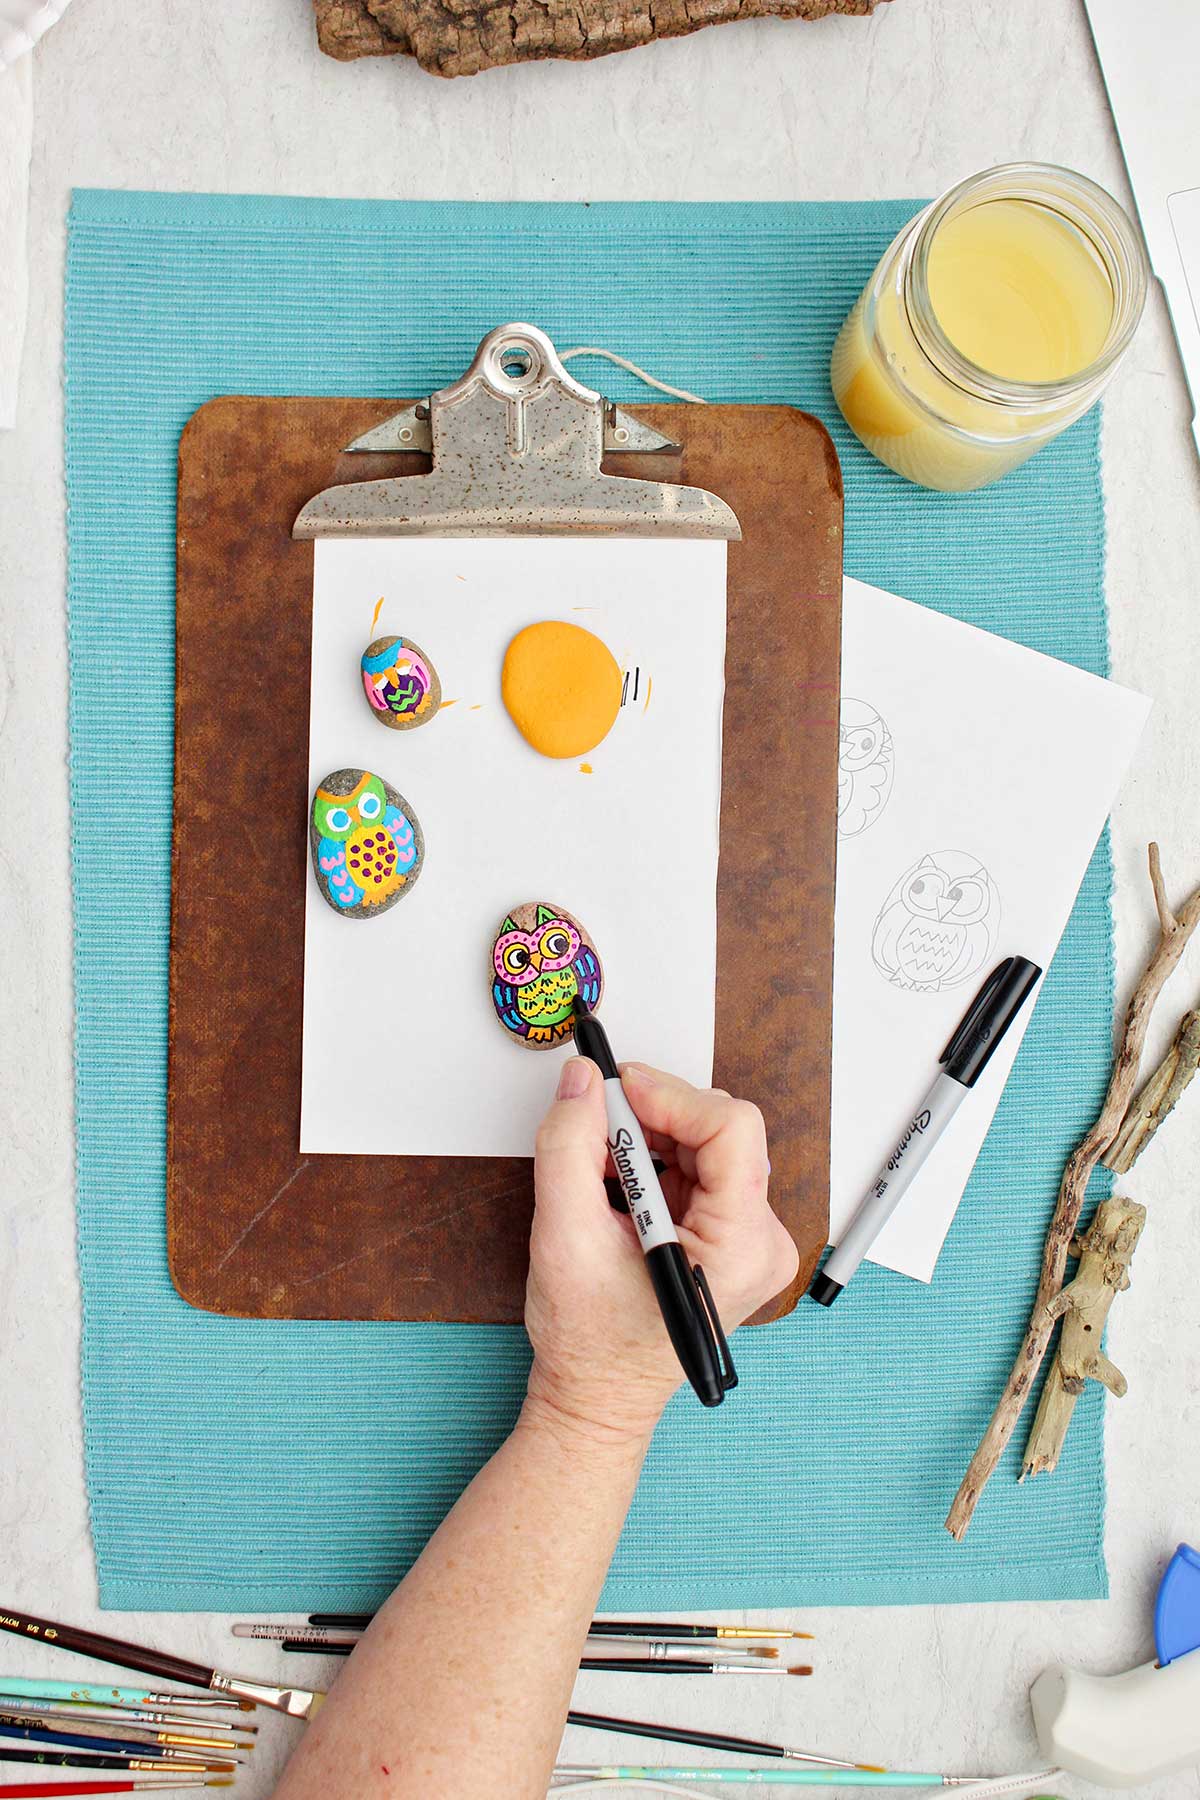
- Go back and add details onto the blocks of color on the owls. Add lines, dotes, circles of color to add details to the wing like feathers, pupils in the eyes, and designs to make the owl colorful and funky.
- Use a black marker to outline the sections of the owls you drew and to add more design pattern.
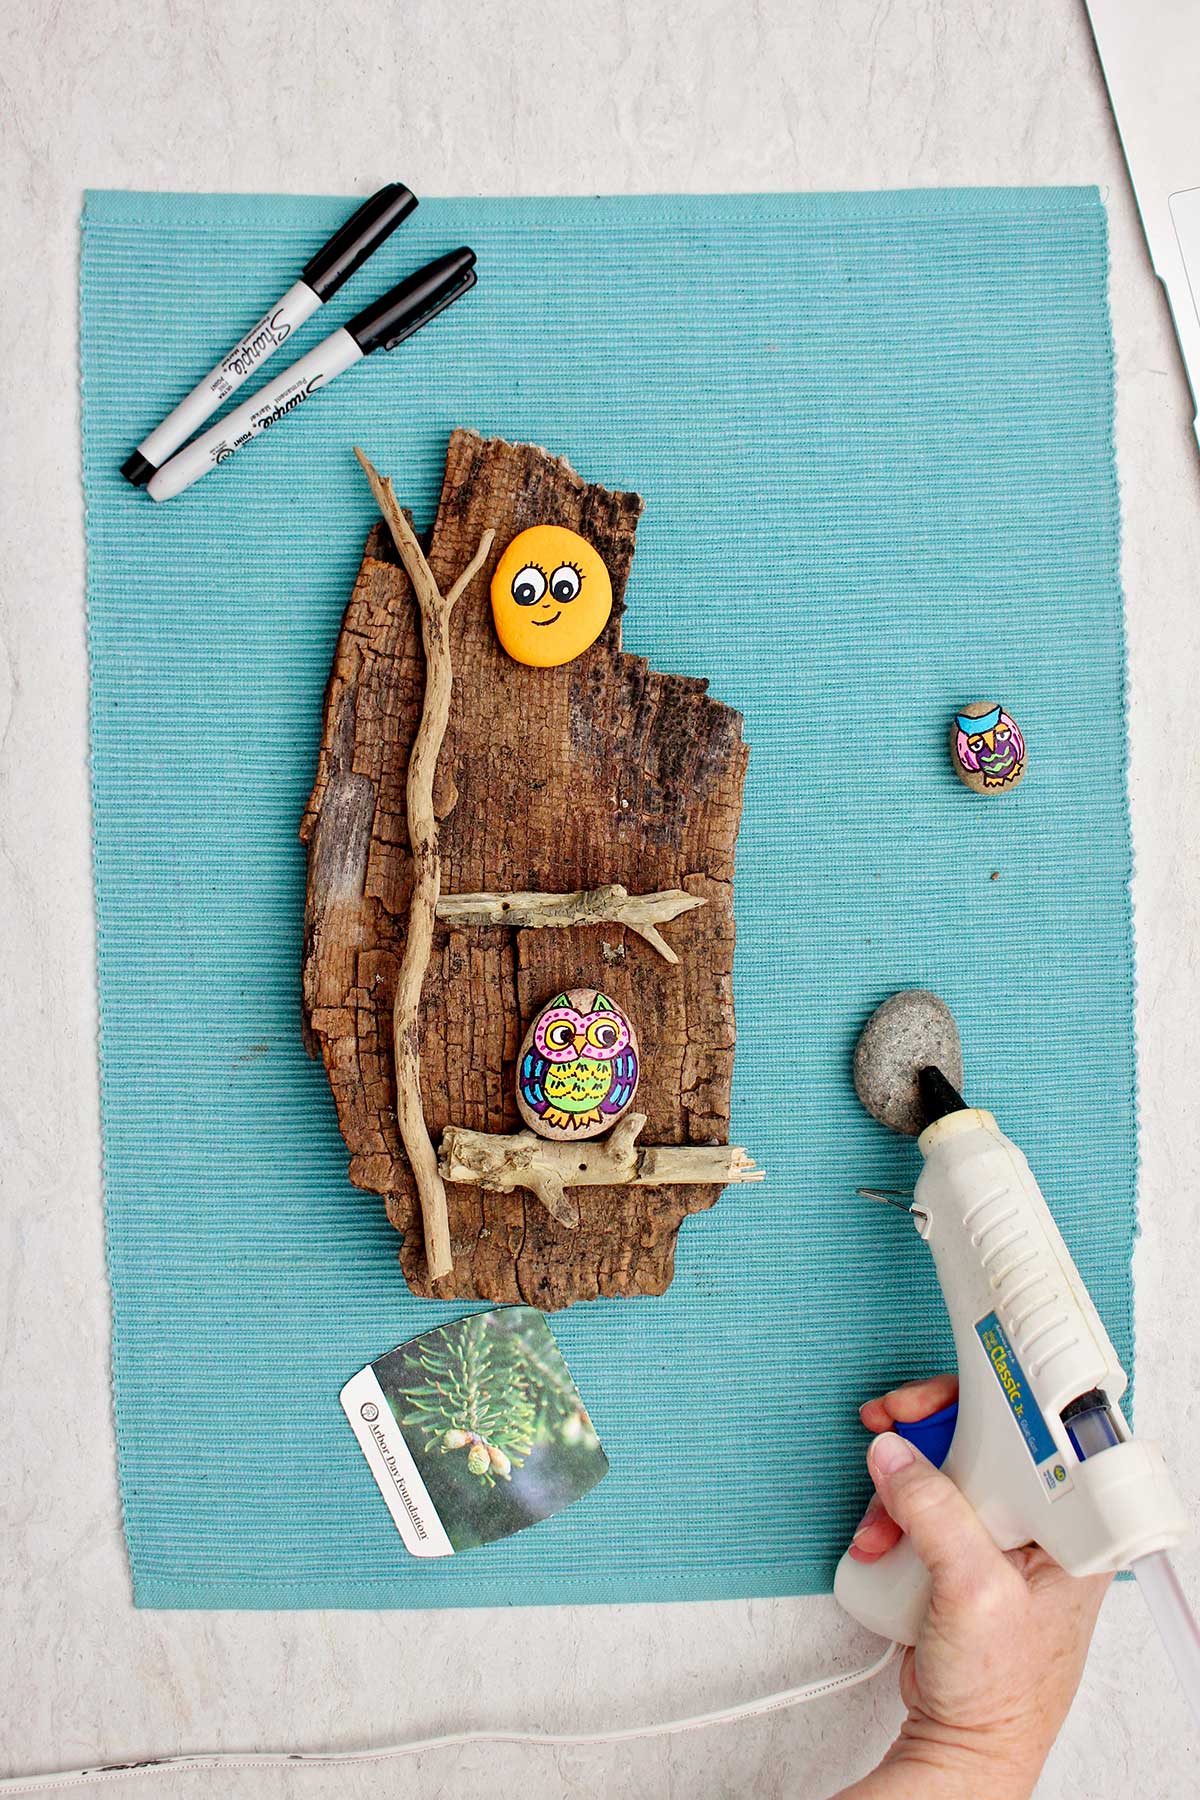
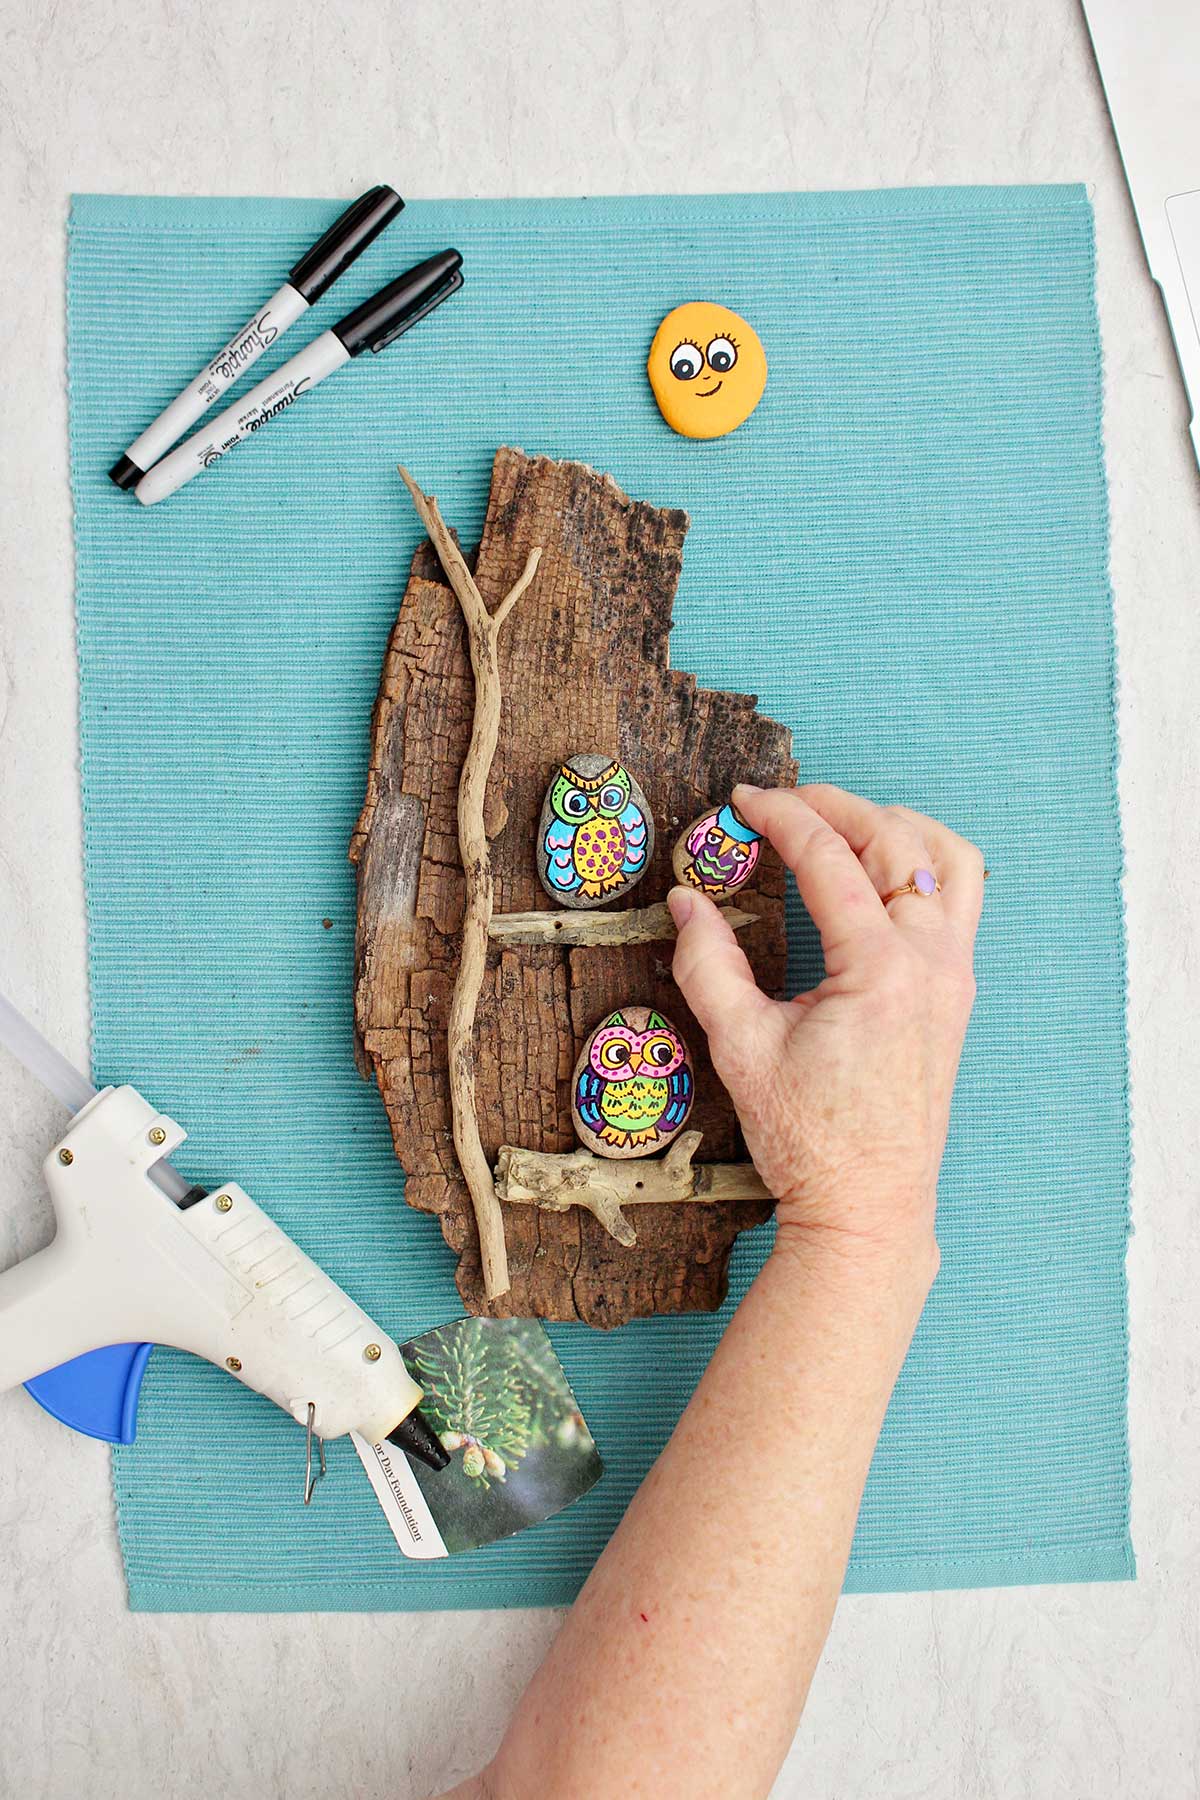
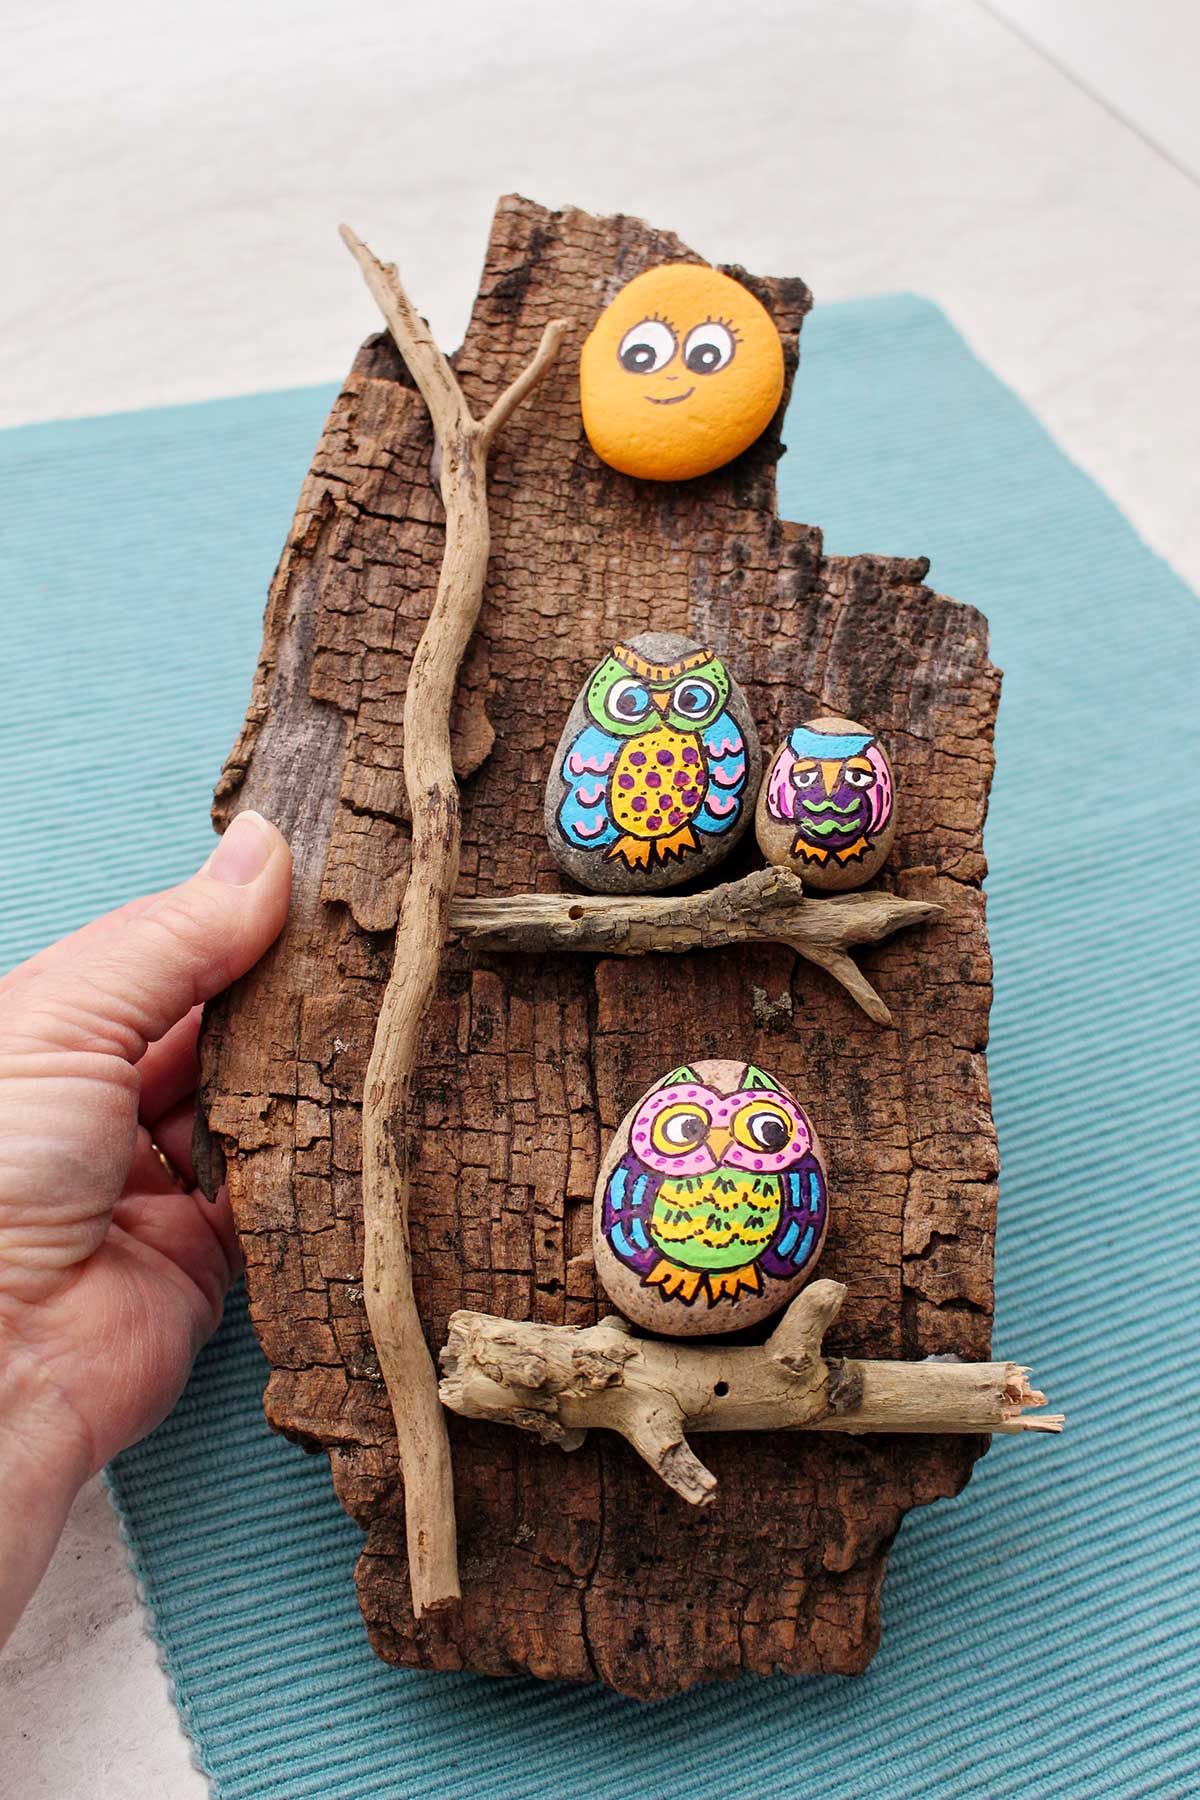
- Arrange your sticks and owls on the wood so you know where you want to glue them down. It is to look like a tree trunk with branches and the owls are sitting on the branches.
- Use a hot glue gun and glue the branches and the owl rocks to the larger piece of wood.
- Add a picture hanging hook to the back of the project so it can hang on the wall.
Craft Tips fo Hand Painted Rock Owls
These tips can help making an owl painted on rock even easier!
- Table covering- Place paper under your rocks so you don’t get paint on the table.
- Put the picture hanging hook on the back of the large wooden piece before you start the project.
- Choose rocks for rock painting that are smooth, it is hard to make a clear painting on a rough surface.
- There is a full length video of this craft on YouTube at this link: Easy Owl Painted Rocks Video

Craft Variations for Easy Owl Painted Rocks
Want to switch things up? Here are a few ways you can customize and play with this rock artwork.
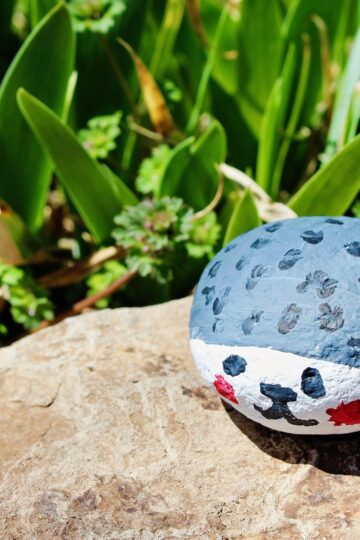
- Paint the entire rock a color before drawing on your design.
- Use an earth tone color palette instead of bright colors for a more natural owl.
- Googly eyes- Glue googly eyes on your owl for fun!
FAQ About Painted Rocks with Owls
For this craft I recommend acrylic craft paints. They wash up with water but adhere well to the stone. You can coat it with polyurethane when done, but I didn't do that for this rock artwork because it will take very little wear and tear.
I used a hot glue gun and glue for this craft. I think that a gorilla glue or wood glue would also work but it takes longer for these glues to set up.
I've used rocks I've found on a sand road as well as river rock I've purchased. The key is a smooth surface on the rock and the shape of the rock for what you want to paint. This river rock worked well for rock painting.
I found this piece of wood on a walk one day. It was from a tree that went down a few years ago. It would also work to use scrap lumber from a previous project.
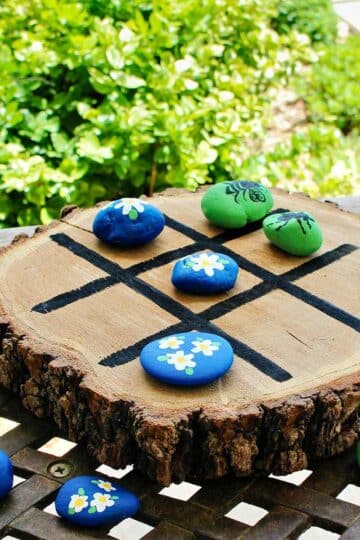
More DIY Rock Painting Crafts for Kids
Looking for more easy rock painting crafts to try? Here are a few of our favorites:
Come join the fun at WTN!
Try this craft, leave a comment, rate it, and tag a photo with #WelcometoNanas wherever you post.
More Crafts Please!
Love getting crafts straight to your inbox? Sign up to receive a weekly email and get a free gift!
Easy Owl Painted Rock Artwork
Equipment
- Hot glue gun and glue
Items Required
- flat stones, like river rocks
- permanent markers
- acrylic craft paint
- paint brushes
- A paper plate
- jar of water to clean your brushes
- paper towel to dry the paint brushes
- hot glue gun and glue
- piece of scrap wood or piece larger piece of drift wood
- A few sticks to be broken into pieces
- picture hook to place on the back to hang the craft (optional)
Instructions
- Draw around each rock on a piece of paper. On the paper, sketch an idea for how you want your owls to look. Transfer your sketch onto the rock with a fine line permanent marker.
- Place a small amount of paint on a paper plate in each color you want to use on your owls. Acrylic craft paint is good for the painting of a rockUsing a small paint brush, fill in the picture you drew on the rocks. You are blocking in the color in the spaces. Let this paint dry.
- Paint one rock a solid yellow or orange to be a moon (optional).
- Go back and add details onto the blocks of color on the owls. Add lines, dotes, circles of color to add details to the wing like feathers, pupils in the eyes, and designs to make the owl colorful and funky.
- Use a black marker to outline the sections of the owls you drew and to add more design pattern.
- Arrange your sticks and owls on the wood so you know where you want to glue them down. It is to look like a tree trunk with branches and the owls are sitting on the branches.
- Use a hot glue gun and glue the branches and the owl rocks to the larger piece of wood.Add a picture hanging hook to the back of the project so it can hang on the wall.


Leave a Reply