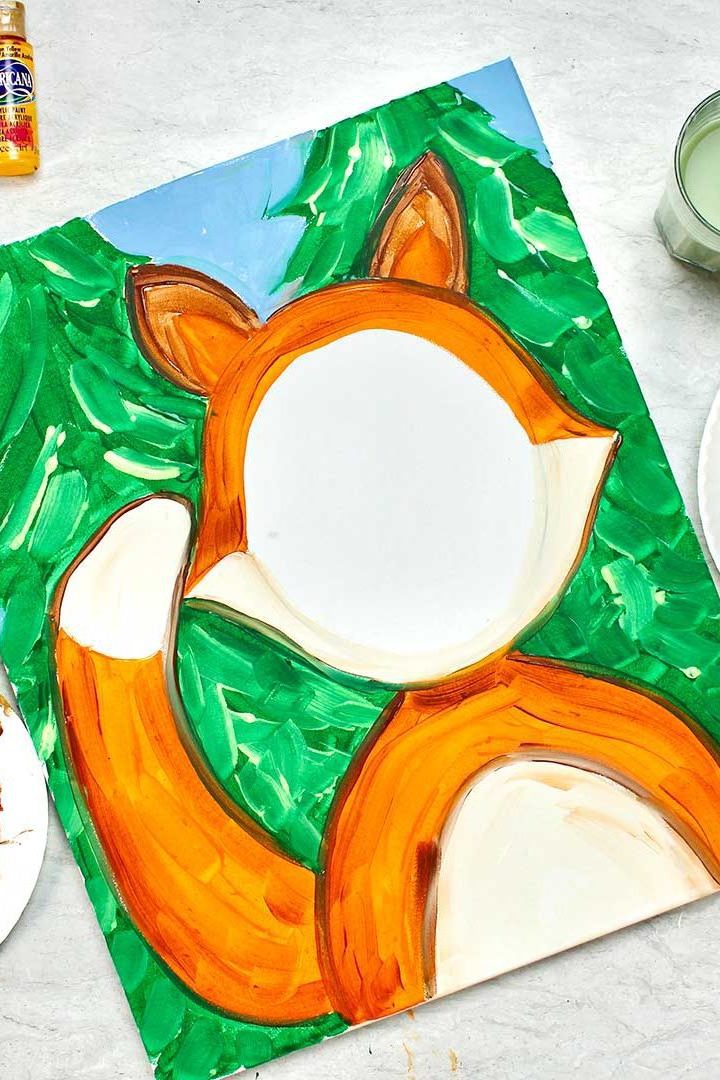
DIY Photo Frame Prop- Woodland Theme Party
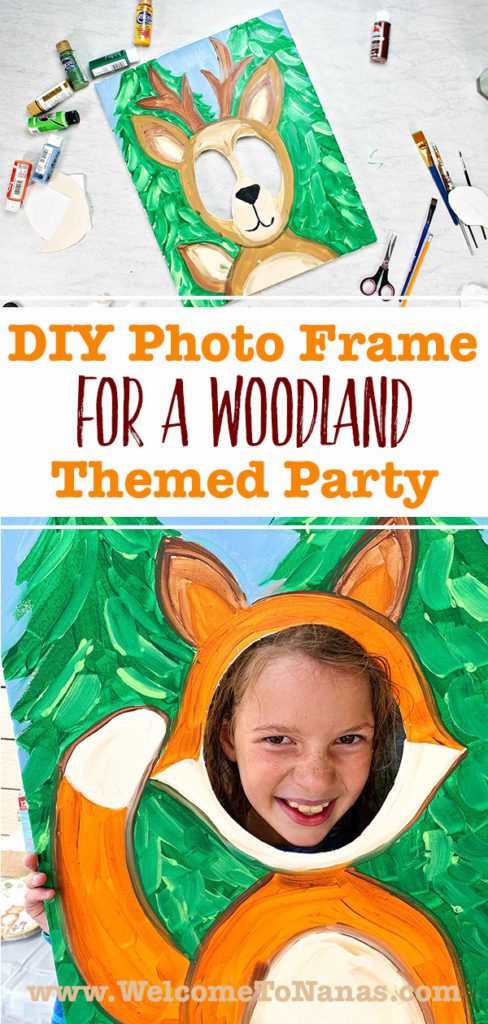
The DIY Photo Frame Prop for a Woodland Theme Party brought so many laughs to our granddaughter’s birthday party.
She loves animals and wanted a Woodland Theme with bears, fox, deer, and birds at her birthday party…along with her family of course. Ha!
We got some great photos and I still have the finished canvases to loan out to others in our area!
Woodland theme party invitation- yes!
My daughter asked if I'd like to help with the Woodland themed birthday party and I was eager to jump in, what a great theme.
As I got started on the canvases, I thought it would be fun to share the process with you, so I turned on the video. I forgot to take some pictures of the fox canvas as I painted but remembered during the deer canvas. I was deep into right brain mode and having so much fun!! My bad.
How to make a photo frame prop at home?
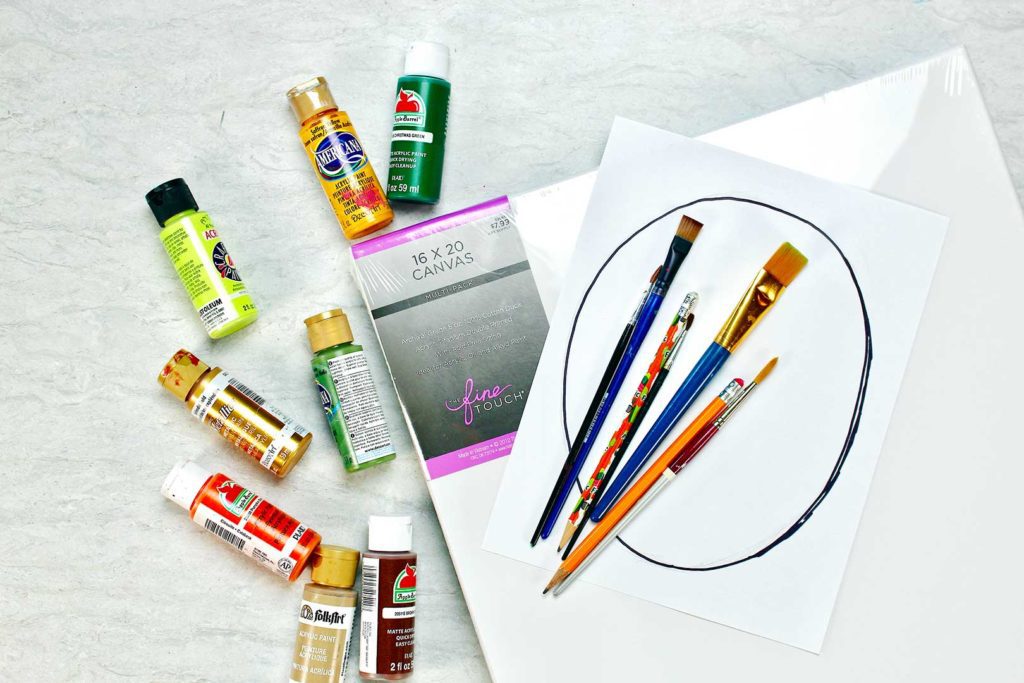
Canvas to paint on
I started with two large, stretched canvases, size 16x20 inches. If you have a used canvas, you can paint it over them with a base color and reuse it if you want.
Note: These are the kind with the wooden frame, not just a flat board.
I was making this up as I went, so I chose a fox (of COURSE!!) and decided to do a second canvas as well- a deer.
Two animals, just in case two people wanted to take a picture at the same time. Really, only one is needed for a small party, but…it was just fun to do. What can I say?
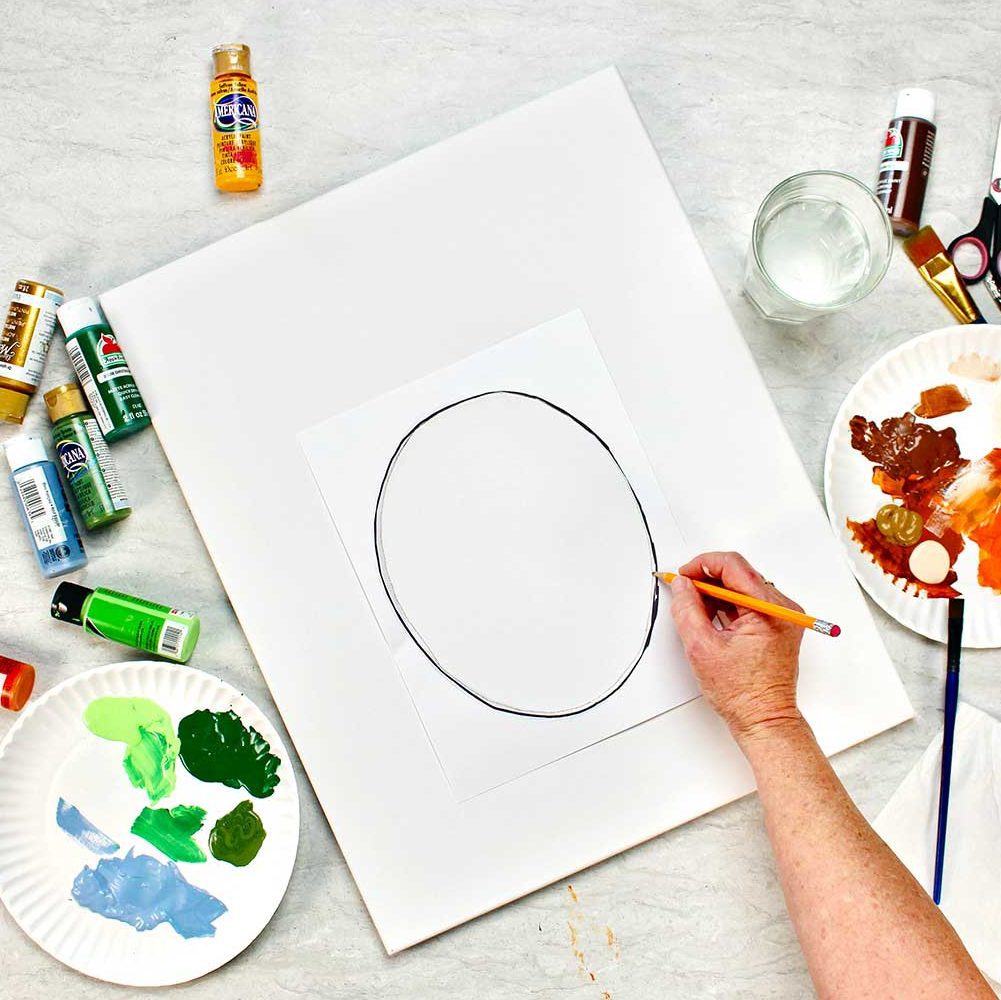
Free Printable Patterns for Fox & Deer photo frame props
I made printable patterns for you to use for this craft. There is a grid work pattern for drawing the fox and a second one for drawing the deer.
Get your download by clicking here: Free Printable Pattern for DIY Photo Frame Prop- Woodland Theme Party (Fox & Deer).
Freehand draw the pattern
I drew the pictures onto the canvas freehand and if you like freehand drawing, you can do the same.
Or use the grid to transfer the pattern
But if you would prefer, you can lightly sketch a grid onto your canvas and transfer the fox or deer drawing using the pattern that is also on a grid.
Using pencil, draw a 4x4 inch grid on your canvas.
Then draw the lines from square one of my pattern onto your canvas into square one. Continue drawing each square until you have done all 20 squares. With just a bit of correcting on your lines, your drawing of the fox or the deer will be complete. Cool technique, huh?
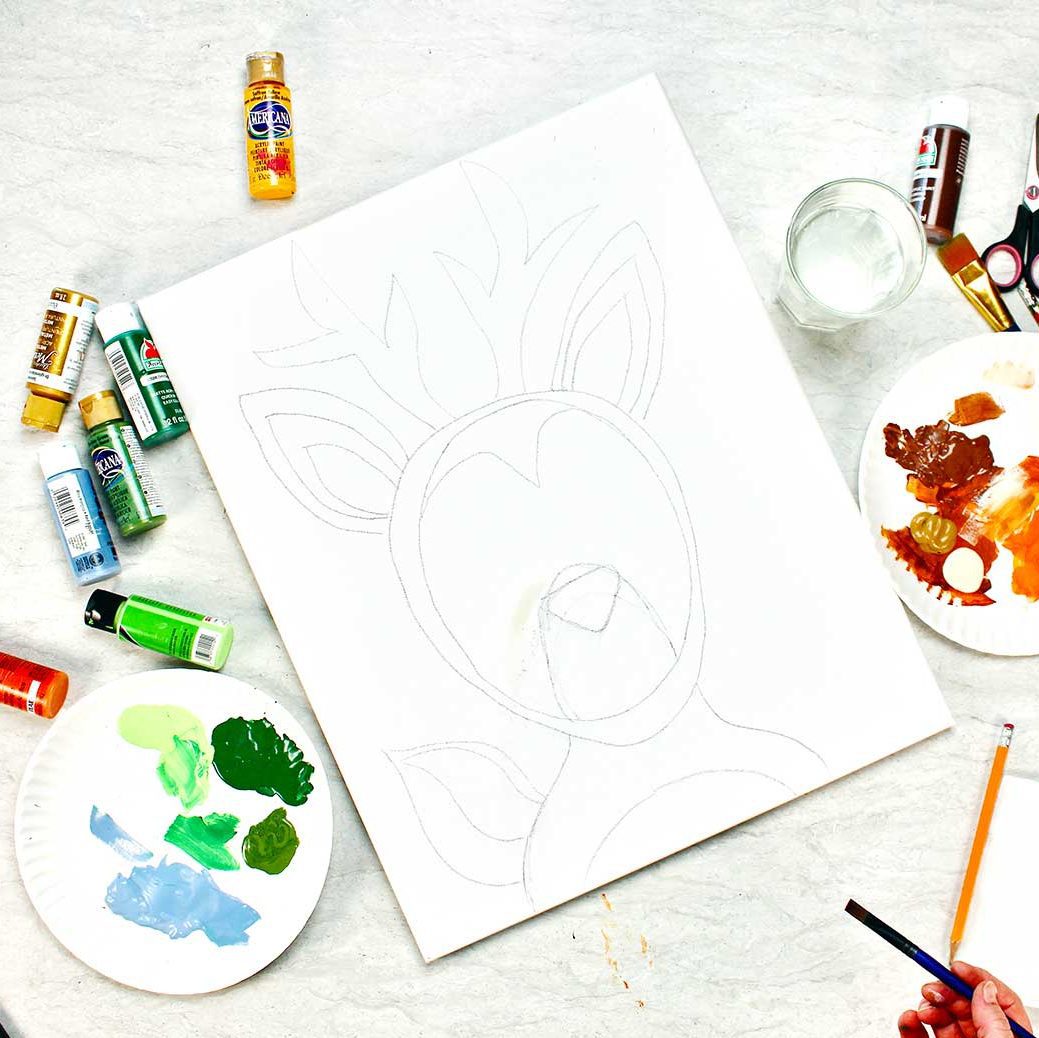
Face shape pattern for making your own woodland animal photo frame prop
I have also included a printable for the face shape only. If you want to make your own woodland animal, you can use the face pattern to draw a starting oval and then draw your own animal around it.
If you do this you HAVE to upload a picture, I really want to see what you create! Pretty please?
Paint supplies needed-
The painting for each animal is done with a limited number of colors of acrylic craft paint.
I have included my acrylic paint colors in the directions and the supply list. Use what you have though- and who said a deer has to be brown? Use your imagination and have fun.
Foam plates are my go-to for a paint pallet. They are inexpensive and disposable. A regular plate would work as the paints will dry and wash off.
I used a ¾ inch flat brush for this. Again, use what you have, but a larger brush works well to cover a larger canvas like this.
Video options for both Photo Frame Prop DEER and FOX!!
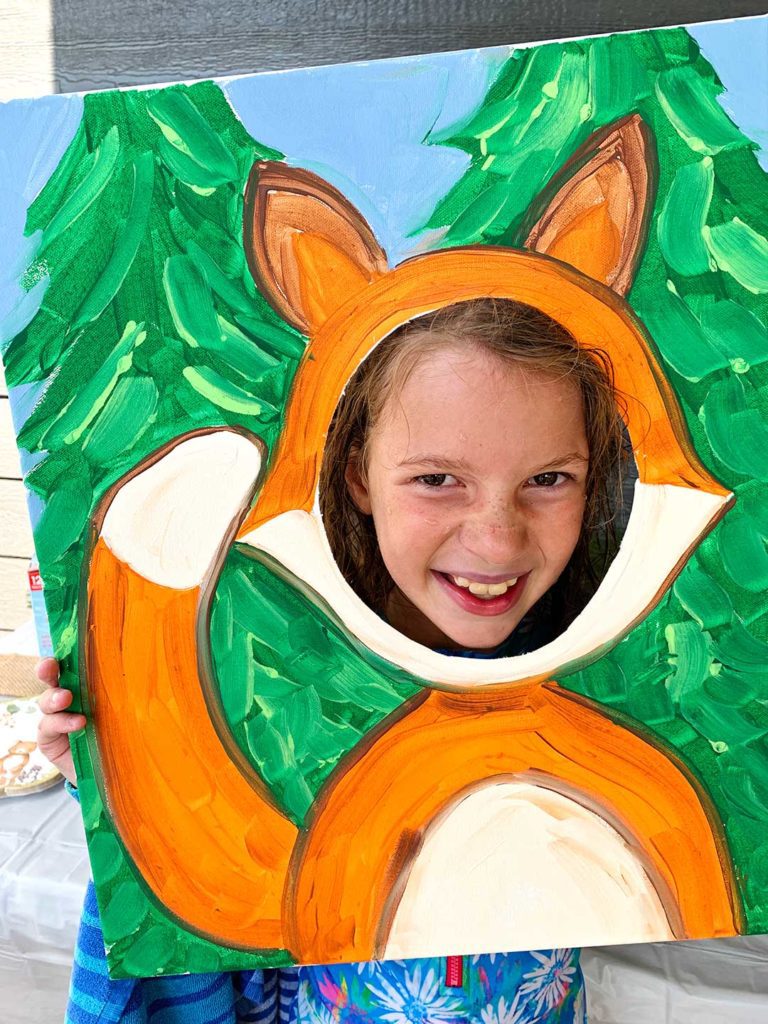
DIY photo frame prop directions: For the fox photo frame prop:
Paints onto a plate-
Squirt out a quarter sized amount of orange, white, and brown paint onto one plate.
Squirt out a quarter sized amount of blue, and two shades of green onto a second plate.
Specific painting instructions for the fox
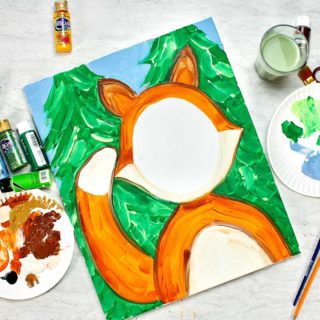
Mix a little orange into some brown and paint the outer part of both ears.
Add a little more orange into this color and paint the second part of both ears.
Then add in even more orange and paint the inner part of the ear.
Wash your brush out in a container of water and dab it on a paper towel to dry it out some. Do this whenever you make major color changes.
The upper part of the head, the lower part of the tail and the outer part of the body are all painted orange.
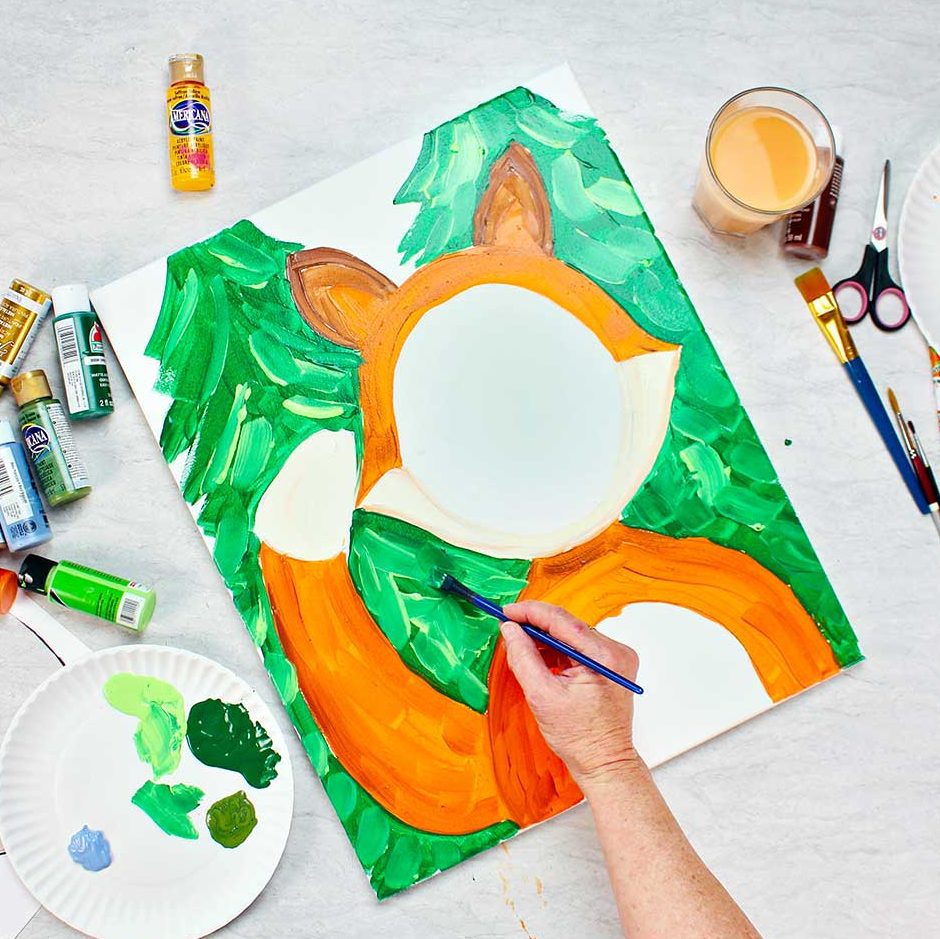
Add some shading
Mix a little brown paint from the plate into some of the orange paint and then kind of brush it along the outer edge of the head, body, and tail. Don’t add more paint but go back and kind of blend it in with another stroke or two around the edges. This will make the fox look like it has a bit of shadow and dimension.
The lower part of the head, the tip of the tail, and the tummy of the fox are painted white.
Use a very little bit of the orange paint or some of the brownish/orange paint you mixed previously to blend along the outside of the tail and lower part of the fox’s face. This is to get that shadowed look we did before on the orange.
Note: Don’t be a perfectionist on this shadow blending. It is just to give a hint of shadowing and isn’t an “exact” technique. If you really don’t like the look, go back and paint over it with the original color and try again or leave it off.
Wash out your brush well.
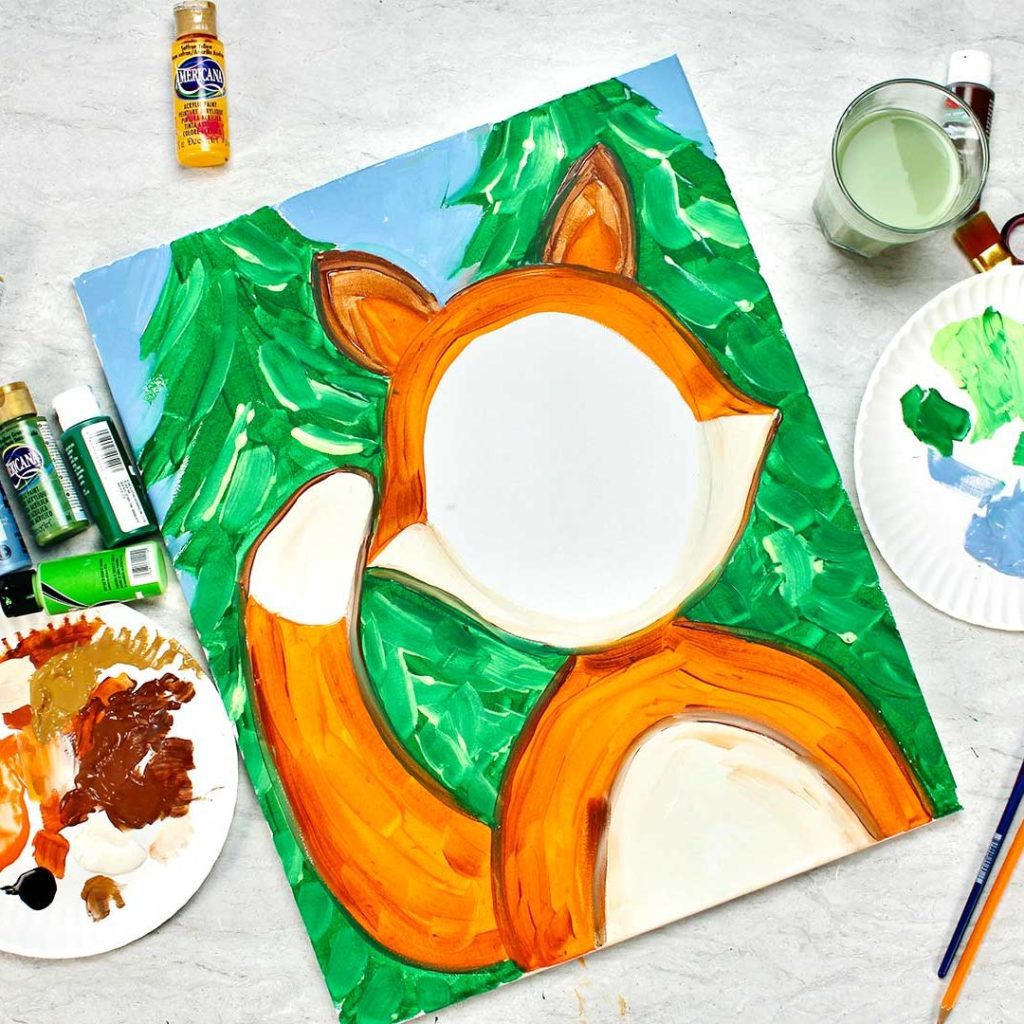
Background pine trees:
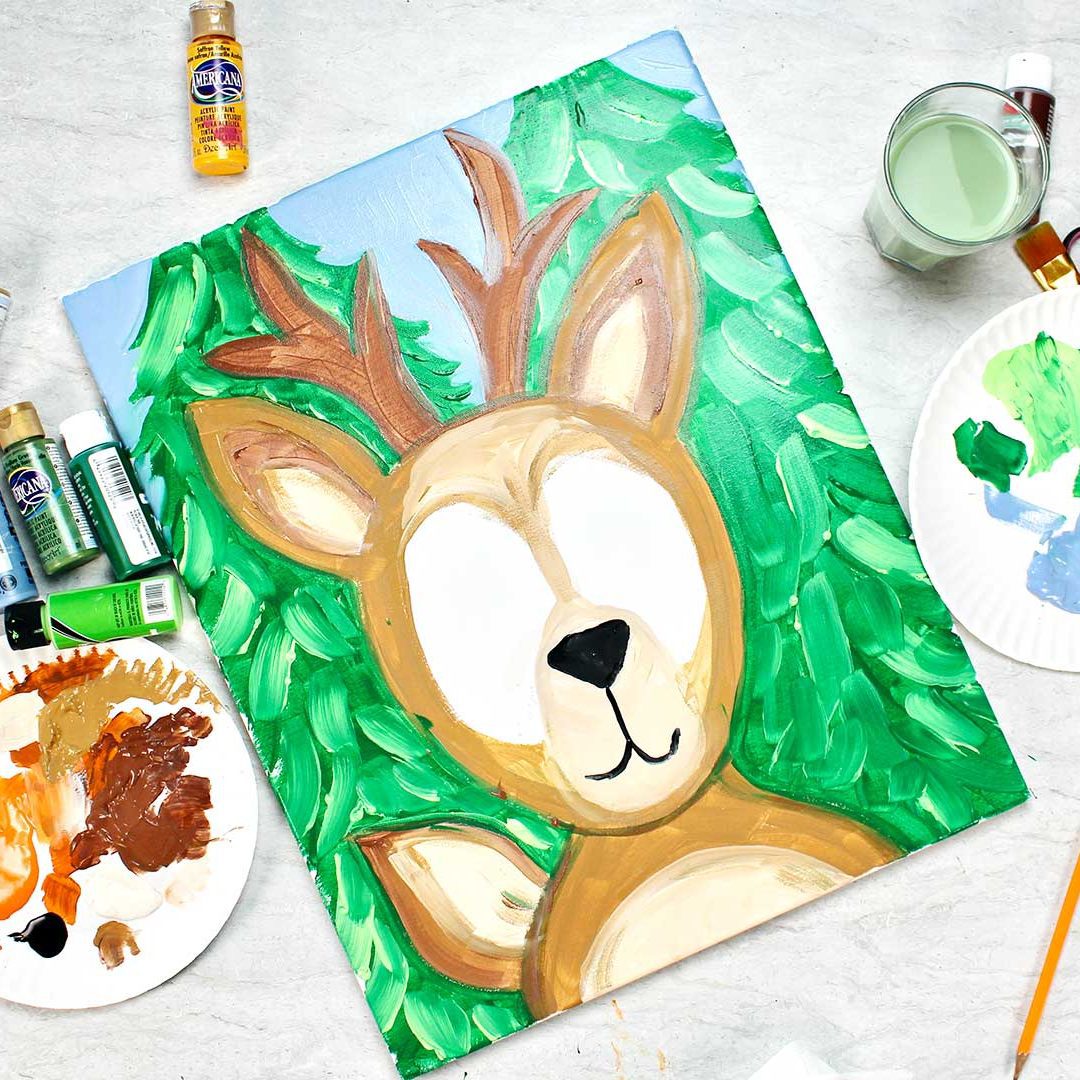
Use your darkest green color to paint in the pine trees behind the fox. Make sweeping downward brush strokes (about 1 inch long) like shown in the video. Don’t worry if little bits of the canvas show through. You will be adding more color and strokes over this first layer!
Next, use some of the lighter Yellow-green color on your brush and lightly go over the first color with the same downward sweeping brush strokes. You will make about half as many strokes of this color. You don’t want to cover up the dark green underneath.
Again, don’t be a perfectionist. This is just to give the impression of a pine tree with dimension. Have fun with the process! Risk trying!!
Lastly, paint the remaining blank canvas areas at the top with blue for sky.
Good job!
Cut the face holes in the canvas for your photo frame prop
Let your paint dry.
When paint is dry, use a small Exacto knife to carefully slit the canvas in the center of the unpainted oval shape. This is just to get the scissors blade into.
Then use some scissors to gently cut out the oval shape. This is where the person’s face will show through when getting their picture is taken of course.
Oh my goodness, I love this project!
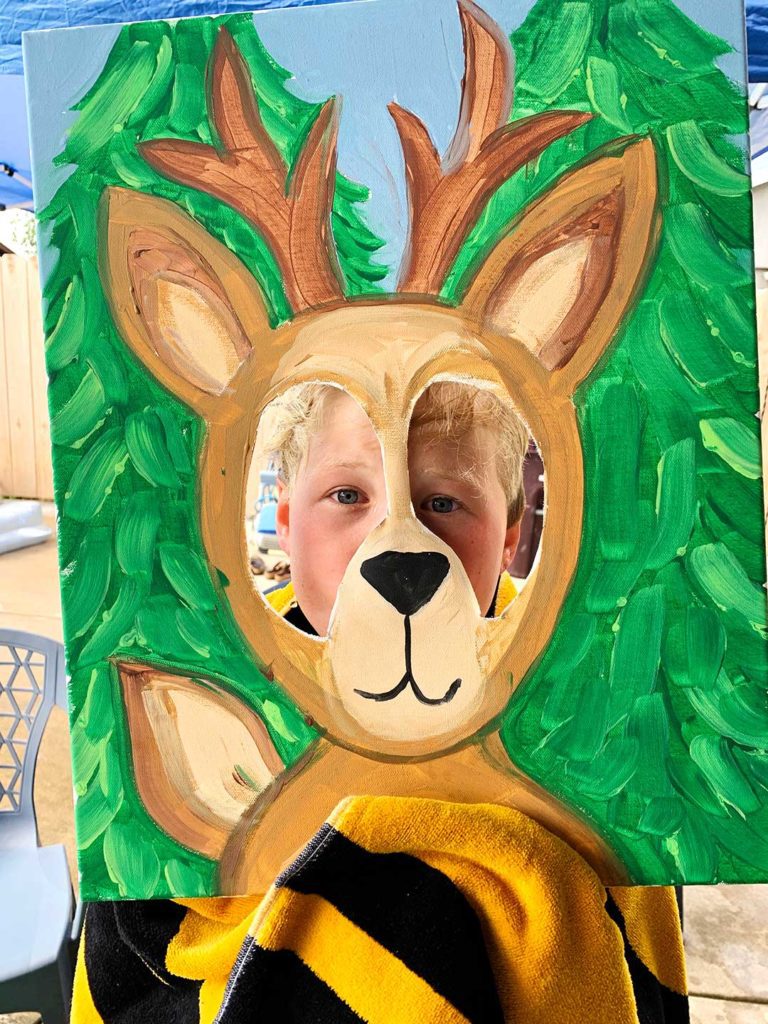
Painting the deer:
The deer is painted in the same way that the fox was painted.
If you choose to do the DEER Photo Frame Prop you may want to watch the YouTube video here: Photo Frame Prop DEER.
The YouTube video for the FOX Photo Frame Prop is found above on this post but is also found there: Photo Frame Prop FOX.
Paints onto the plate for the deer
In the video I used the same paint plates as the fox and just added a couple paint colors (dark brown, beige, and black). But if you are starting out fresh, here are the colors I used.
Squirt out a quarter sized amount of dark brown, medium brown, beige (skin tone is what I actually used), and black onto one plate.
Squirt out a quarter sized amount of blue, and three shades of green onto a second plate.
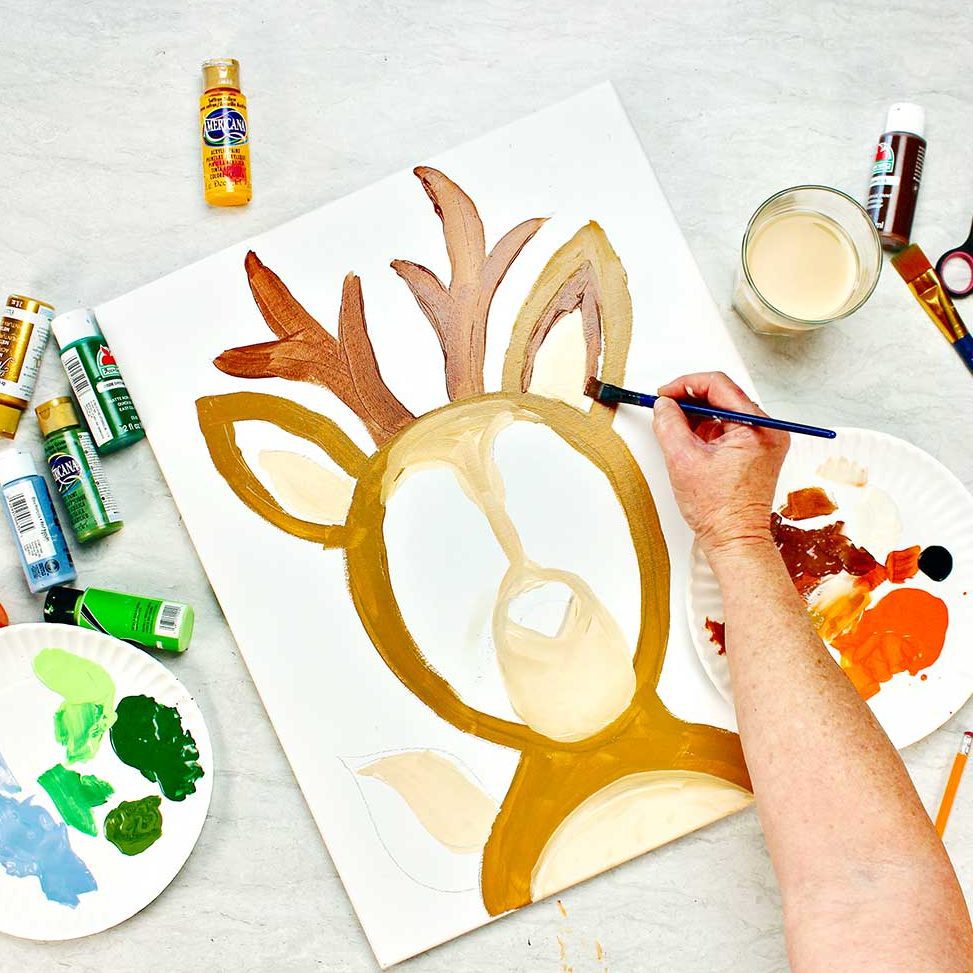
Specific painting instructions for the dear
Paint the outside part of the ear, the outside edge of the head, the outside of the body and the outside of the tail medium brown.
Use the darker brown color to paint the antlers, and the second part of the ear.
Then with the beige color, paint the muzzle and connecting area between and over the eyes, the center part of the ear, the center part of the tail, and the tummy.
Add some shading to the deer
Use a little of the dark brown to mix into some of the medium brown on the plate and run the brush around the outer edge of the ears, head, body and tail. Don’t add more paint but make a second stroke of the brush around these areas again to blend them a bit. This adds a little shading to the deer, making it look more three dimensional.
Use a little of the medium brown to do the same thing around the edges of the beige areas.
See my note above- don’t be a perfectionist about this! 😉
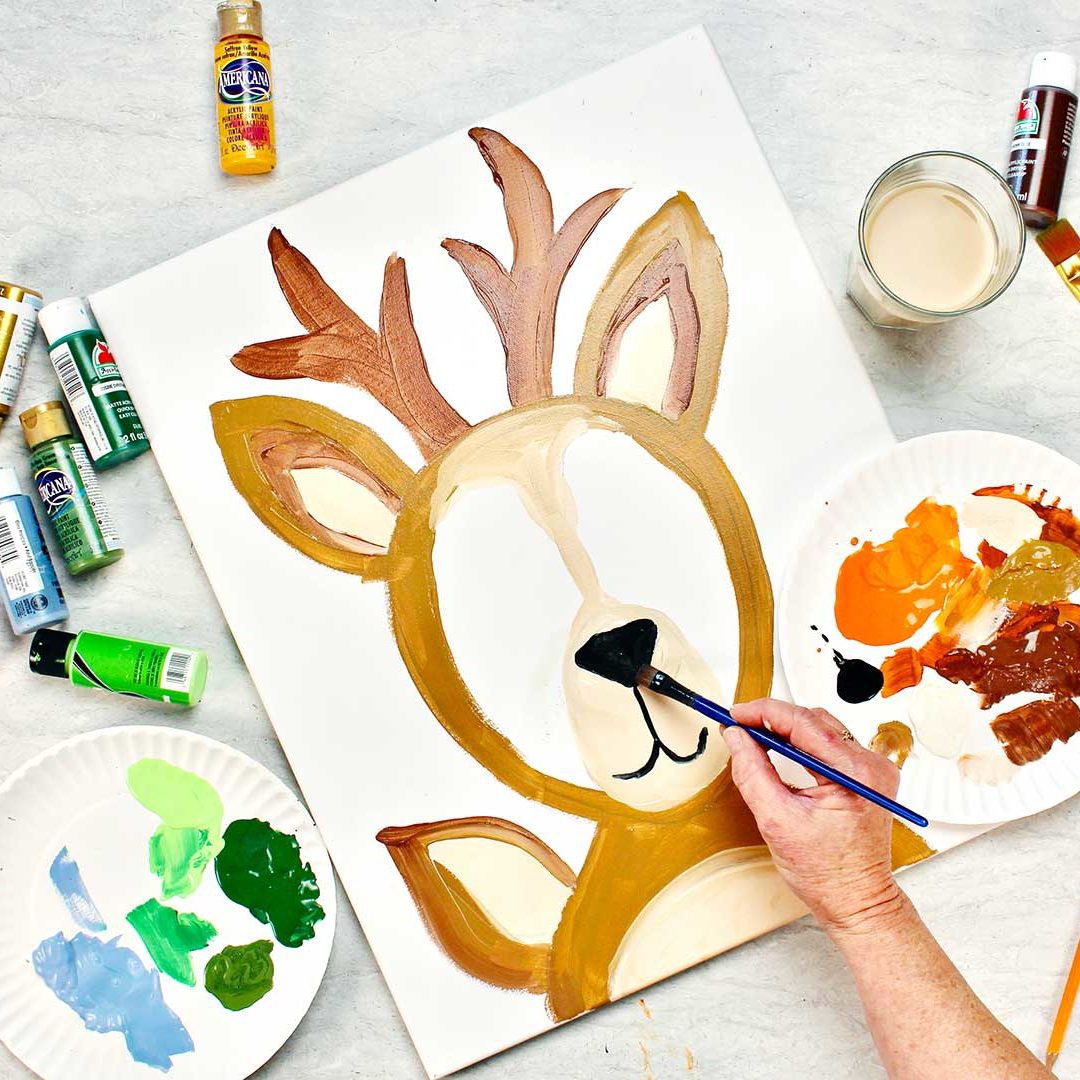
Tree and sky, then let dry (a poem!)
For the trees and sky, follow the instructions given above in the fox painting. It is done in the same way.
Make sure to let the paint dry before continuing.
Cut the face holes in the canvas for your photo frame prop
Cut the two blank sections of canvas out in the same way we talked about above in the fox instructions.
You are ready for taking photos at your woodland themed party! Woo-hoo!
Remember, you can create your own woodland animals (or other creatures) with the same techniques. Use the oval cutout pattern that I created for you to make it easy! I can’t wait to see what you do.
Woodland theme decorations
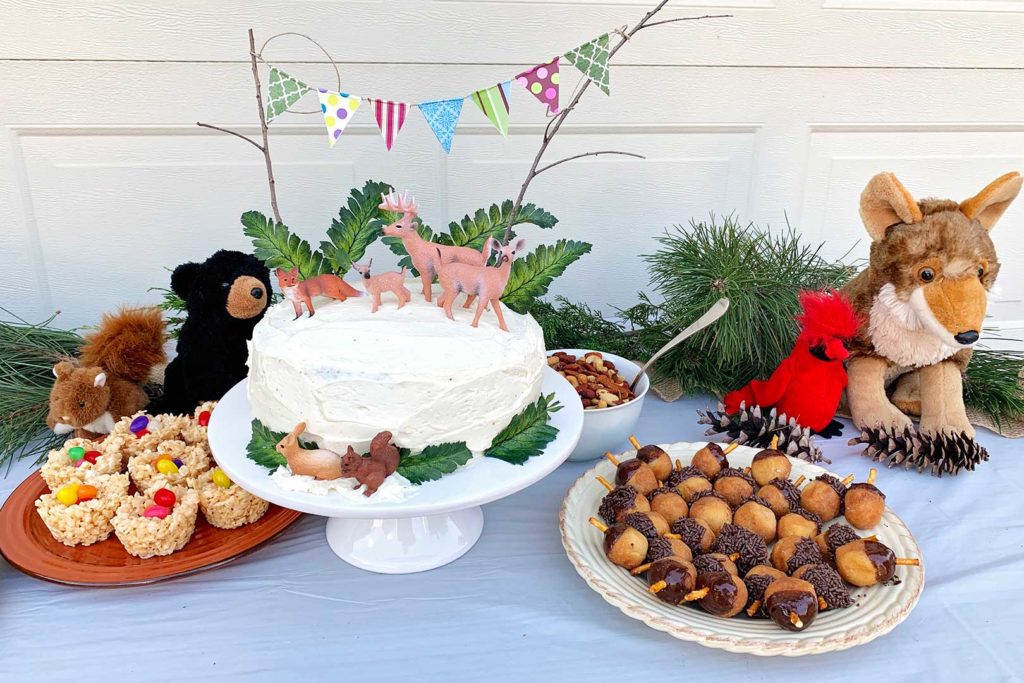
My daughter did such a nice job with snacks for the party. She made the cake and added plastic woodland animals on top.
I made the little banner for it from sticks, twine, and craft paper.
The little pinecones are made from cake donut holes dipped in frosting and chocolate sprinkles with a pretzel stem.
Directions for the nest cookies are found here on this site: Rice Krispie Nests Recipe.
Craft flop...total transparency!
We made a cool backdrop tree for the event. The trunk and branches were created from twisted brown paper (used for wrapping packages) taped to the wall. The foliage was of green balloons also taped in place. I had a cute triangle flag garland made for a different event that went over the top.
BUT… it was hot and windy and the balloons kept popping so we abandoned that one.
I do put it forward as an idea though, it was really cute for the theme and would work well indoors. We just live in a hot, windy place that had it in for our balloons (it was July in Kansas). I was so over it that I don’t think I took a picture. Sigh. Some things just don’t go according to plan.
Oh well, that’s life.
Woodland theme party
I hope this project brings you great joy and much fun at your woodland theme event. I’m smiling just thinking about it.
This is a great idea for a birthday party, a baby shower, or a school party.
I do think that kids could make these themselves. It would take some adult help perhaps but they would really like to contribute to the party I’m sure. Get them excited about it!

Want more themed party ideas?
Looking for more fun and easy party ideas? Nana's got you covered! Pick your favorite theme and start the celebration:
- Butterfly Birthday Party Theme Ideas
- Drive-In Movie Theatre Birthday Party Idea
- Simple Unicorn Birthday Party Ideas
- Let's Have a Bug Party Birthday!
- Pin the Tail On Party Game
Enjoy!
If you try this craft, let me know! Go ahead and leave a comment, rate it, and tag a photo with #WelcometoNanas wherever you post.
Come join the fun at https://welcometonanas.com
DIY Photo Frame Prop for Woodland Theme Party
Equipment
- Exacto knife
- Scissors
Items Required
- 16x20 inch Stretched Canvas (Craft stores sell these ½ price regularly)
- Acrylic Craft Paints Fox needs Orange, White, Brown, Dark Green, Yellow Green, Sky Blue; Deer needs Dark brown, Medium Brown, Skin tone/beige, Dark green, Yellow green, Sky blue, Black
- Foam plates to use as a paint pallet
- ¾ inch flat paint brush (the paint set linked above includes brushes)
- Free Printable Pattern for the DIY Photo Frame Prop FOX and DEER
Instructions
- Use the Free Printable Pattern for the DIY Photo Frame Prop FOX and DEER.I drew the pictures onto the canvas freehand and if you like freehand drawing, you can do the same.But if you would prefer, you can lightly sketch a grid onto your canvas and transfer the drawing using the pattern that is also on a grid. Using pencil, draw a 4x4 inch grid on your canvas. Number the squares the way I numbered the squares on the pattern. Then draw the lines from square one of my pattern onto your canvas into square one. Continue drawing each square until you have done all 20 squares. With just a bit of correcting on your lines, your drawing of the fox or the deer will be complete. Cool technique, huh?
- For the fox photo frame prop:Paints onto a plate-Squirt out a quarter sized amount of orange, white, and brown paint onto one plate.Squirt out a quarter sized amount of blue, and two shades of green onto a second plate.Mix a little orange into some brown and paint the outer part of both ears.Add a little more orange into this color and paint the second part of both ears.Then add in even more orange and paint the inner part of the ear.Wash your brush out in a container of water and dab it on a paper towel to dry it out some. Do this whenever you make major color changes.The upper part of the head, the lower part of the tail and the outer part of the body are all painted orange.Mix a little brown paint from the plate into some of the orange paint and then kind of brush it along the outer edge of the head, body, and tail. Don’t add more paint but go back and kind of blend it in with another stroke or two around the edges. This will make the fox look like it has a bit of shadow and dimension. The lower part of the head, the tip of the tail, and the tummy of the fox are painted white.Use a very little bit of the orange paint or some of the brownish/orange paint you mixed previously to blend along the outside of the tail and lower part of the fox’s face. This is to get that shadowed look we did before on the orange.Note: Don’t be a perfectionist on this shadow blending. It is just to give a hint of shadowing and isn’t an “exact” technique. If you really don’t like the look, go back and paint over it with the original color and try again or leave it off.Specific painting instructions for the fox Add some shading
- Painting instructions for the deerIn the video I used the same paint plates as the fox and just added a couple paint colors (dark brown, beige, and black). But if you are starting out fresh, here are the colors I used.Squirt out a quarter sized amount of dark brown, medium brown, beige (skin tone is what I actually used), and black onto one plate.Squirt out a quarter sized amount of blue, and three shades of green onto a second plate.Paint the outside part of the ear, the outside edge of the head, the outside of the body and the outside of the tail medium brown. Use the darker brown color to paint the antlers, and the second part of the ear.Then with the beige color, paint the muzzle and connecting area between and over the eyes, the center part of the ear, the center part of the tail, and the tummy.Use a little of the dark brown to mix into some of the medium brown on the plate and run the brush around the outer edge of the ears, head, body and tail. Don’t add more paint but make a second stroke of the brush around these areas again to blend them a bit. This adds a little shading to the deer, making it look more three dimensional.Use a little of the medium brown to do the same thing around the edges of the beige areas. See my note above- don’t be a perfectionist about this! 😉
- Background for fox or deer painting:Use your darkest green color to paint in the pine trees behind the fox. Make sweeping downward brush strokes (about 1 inch long) like shown in the video. Don’t worry if little bits of the canvas show through. You will be adding more color and strokes over this first layer!Next, use some of the lighter Yellow-green color on your brush and lightly go over the first color with the same downward sweeping brush strokes. You will make about half as many strokes of this color. You don’t want to cover up the dark green underneath.Again, don’t be a perfectionist. This is just to give the impression of a pine tree with dimension. Have fun with the process! Risk trying!!Lastly, paint the remaining blank canvas areas at the top with blue for sky. Good job!
- Cut the face holes in the canvas for your photo frame prop (deer or fox)Let your paint dry.When paint is dry, use a small Exacto knife to carefully slit the canvas in the center of the unpainted oval shape. This is just to get the scissors blade into. Then use some scissors to gently cut out the oval shape. This is where the person’s face will show through when getting their picture is taken of course.
Video
Notes
Supplies for DIY Photo Frame Prop for Woodland Theme Party
- 16x20 inch Stretched Canvas (Craft stores sell these ½ price regularly)
- Acrylic Craft Paints- Fox needs Orange, White, Brown, Dark Green, Yellow Green, Sky Blue
- Acrylic Craft Paints- Deer needs Dark brown, Medium Brown, Skin tone/beige, Dark green, Yellow green, Sky blue, Black
- Foam plates to use as a paint pallet
- ¾ inch flat paint brush (the paint set linked above includes brushes)
- Exacto knife
- Scissors
- Free Printable Pattern for the DIY Photo Frame Prop FOX and DEER



Leave a Reply