Cute craft from supplies you have on hand
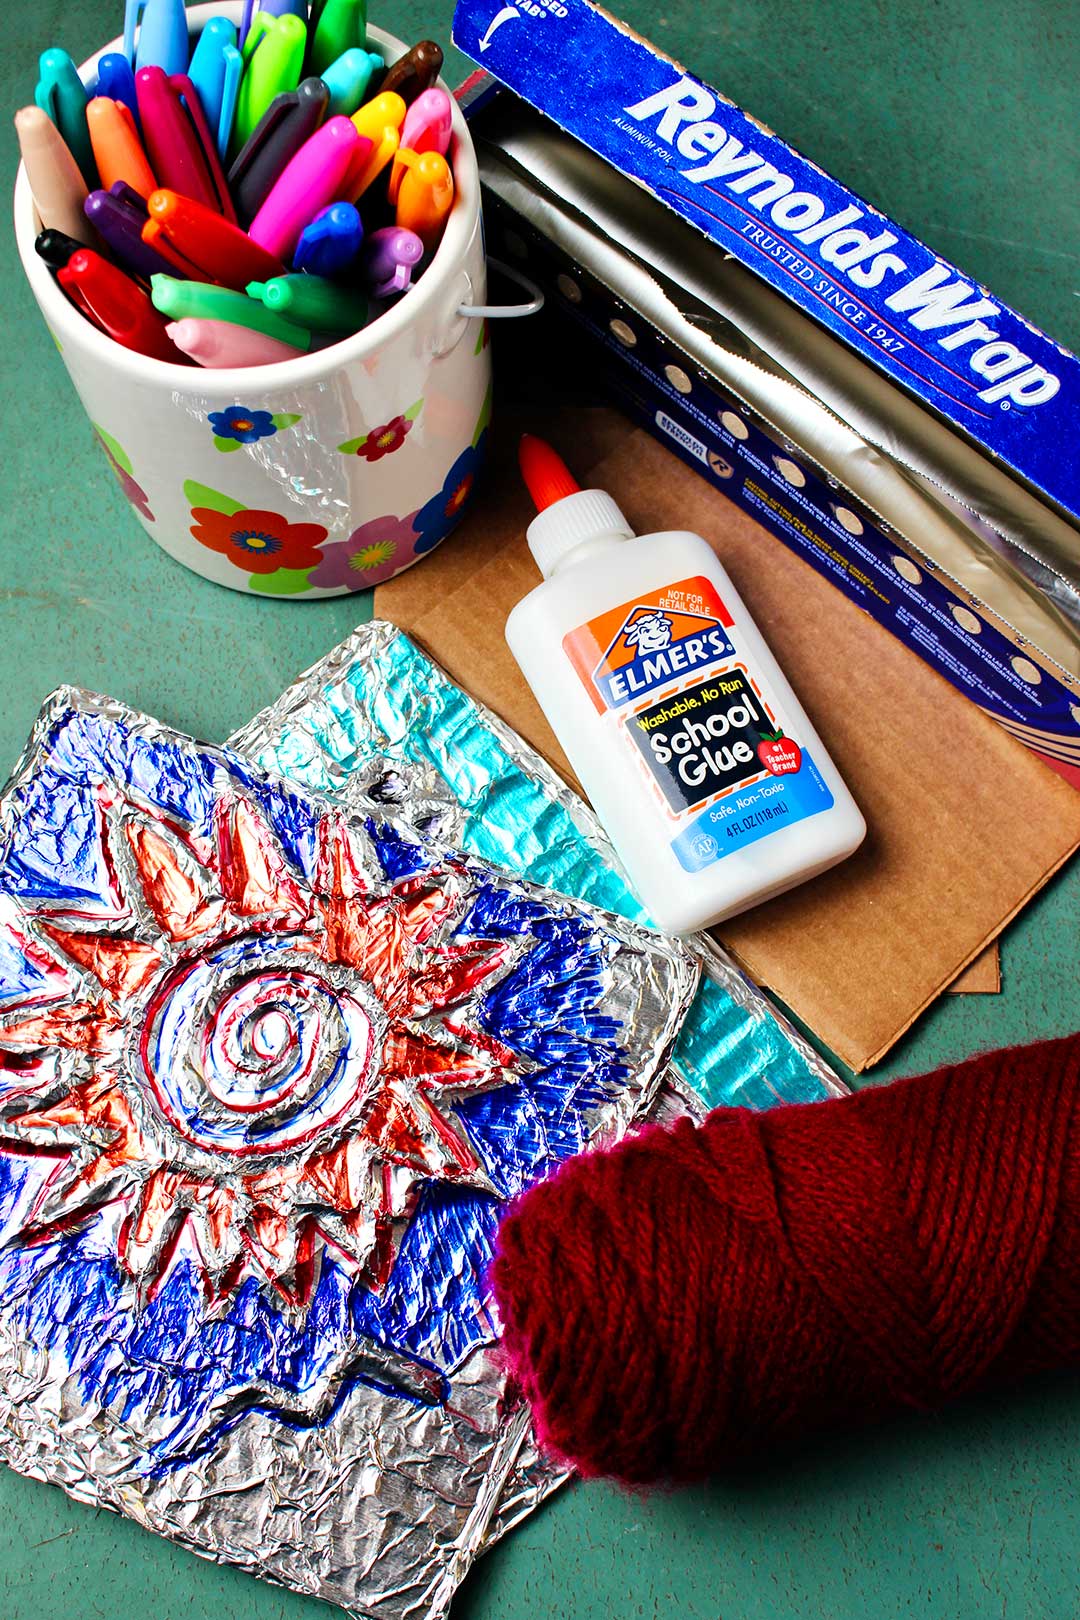
Aluminum Foil Embossing Art is a fun activity that works well when you want a quick project to do with the grands with materials that you have around the house. Heavy Duty Aluminum Foil, yarn, Elmer's Glue, Clear![]() (or regular), cardboard and Sharpie Fine Point Permanent Markers are all you need to make this cute picture.
(or regular), cardboard and Sharpie Fine Point Permanent Markers are all you need to make this cute picture.
Clear off a spot on the table and send the grands to fetch the supplies. Let’s do this!
Cardboard cut to size
Cut your cardboard into the size you would like your finished piece. The Discover Aluminum Foil Embossing Art pictures featured in this post are about 7 inches by 7 inches. We used cardboard from the flaps of an ever-available Amazon box!! I like a bit of recycling in an art project, don’t you?
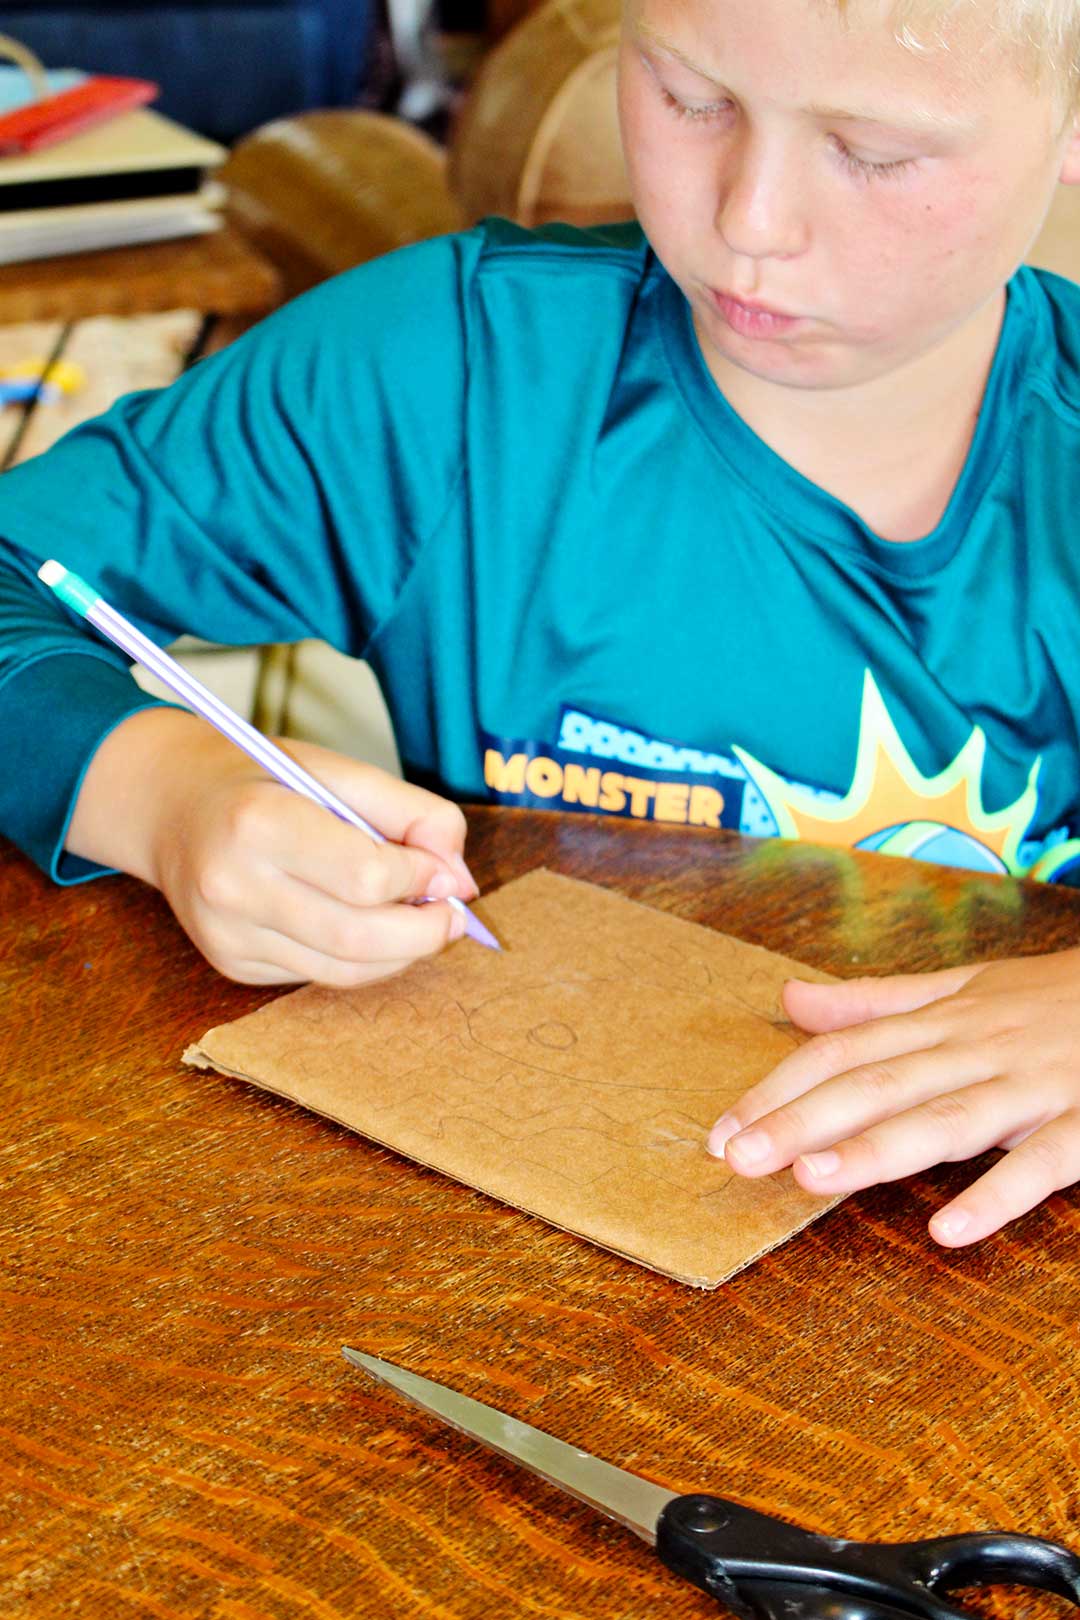
Draw your design
I always encourage the grands to draw their design before starting. They are always a bit resistant, but I’ve found that it helps them to think through their design better. They usually like the project results better as well. That was especially true in this case.
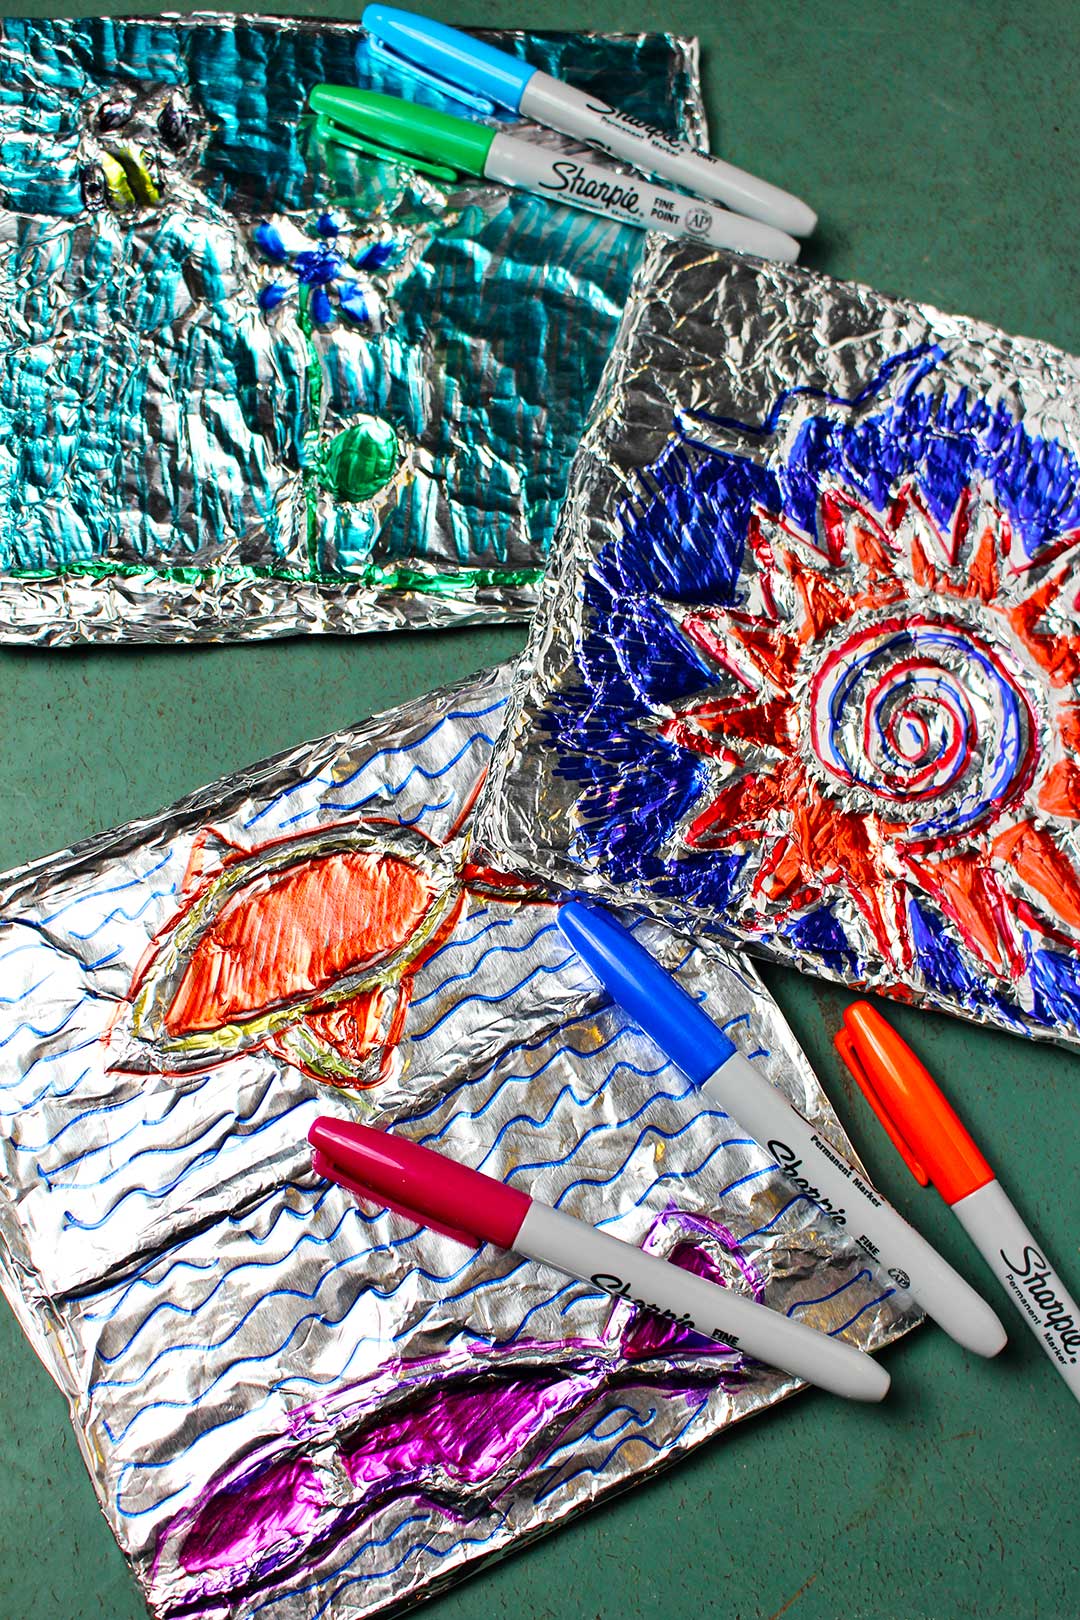
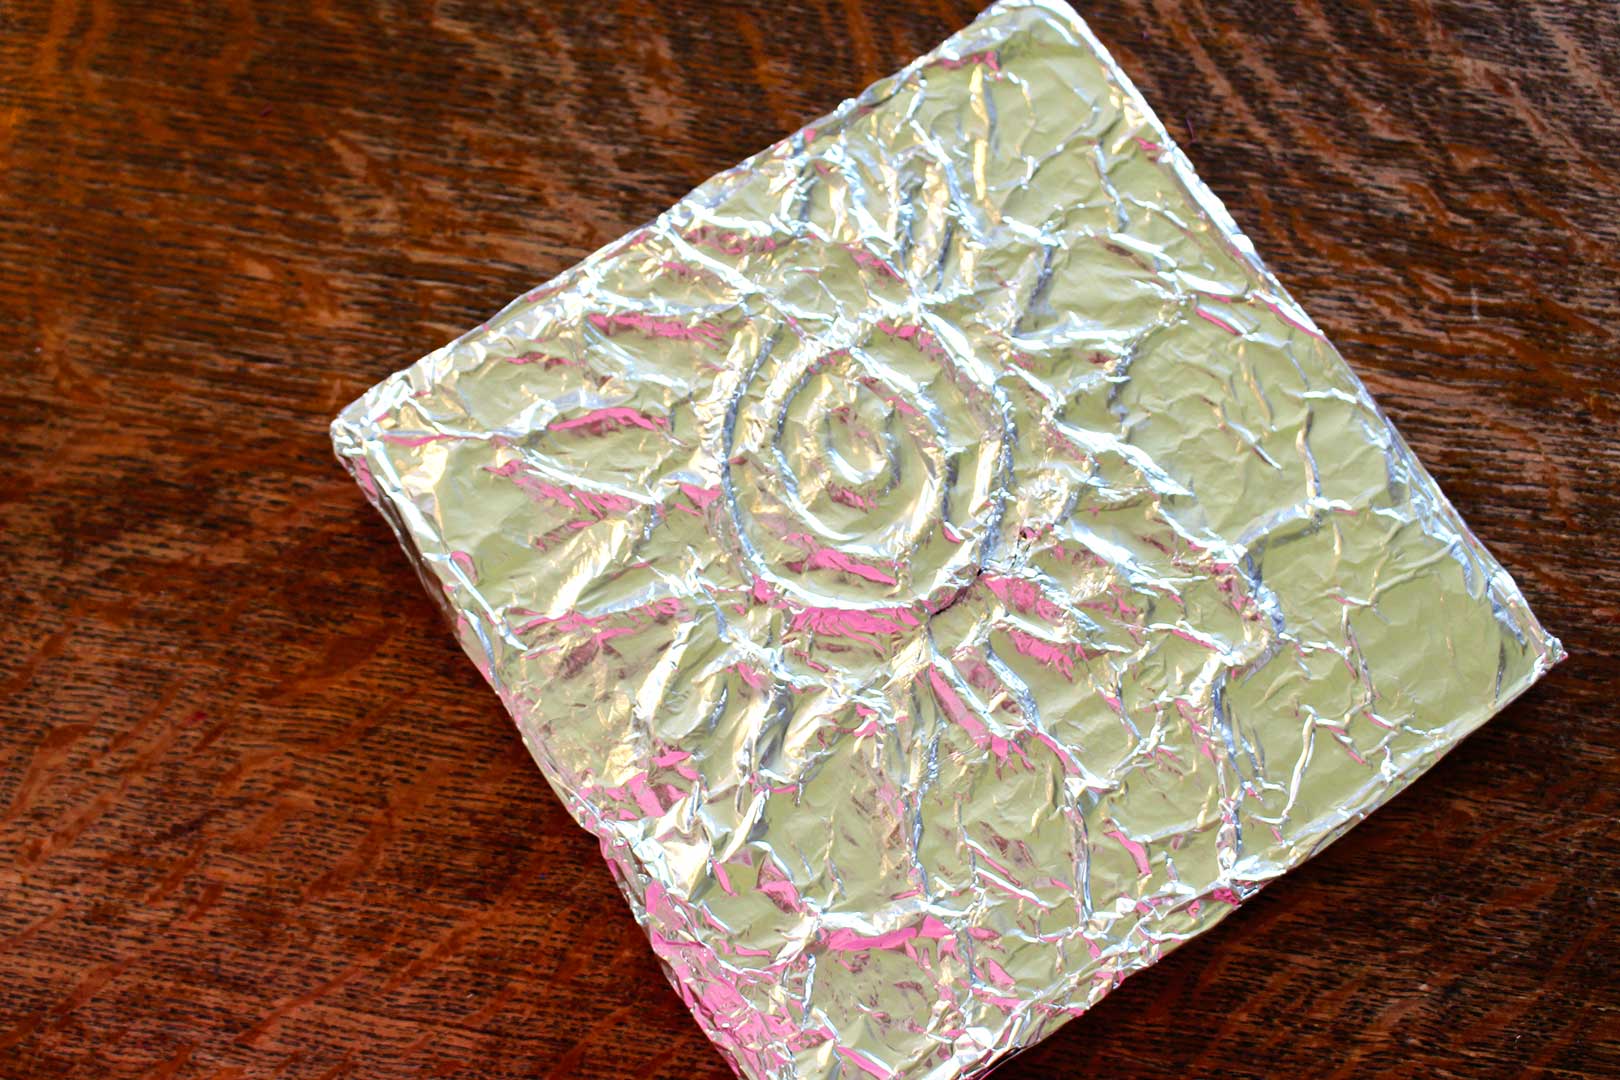
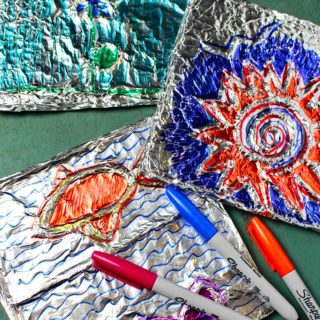
Aluminum Foil Embossing Art works really well with stylized and geometric designs. The fish and sun burst are great examples of designs that worked well. A lot of detail gets lost in the embossing of the foil at the end.
Aluminum Foil Embossing Art design ideas
Seasonal designs like snowflakes, Christmas trees, stars, hearts, birds, flowers, leaves, trees, pumpkins, etc. are great places to start for ideas. Kids usually don’t need much help coming up with ideas though!! I am always amazed at their creativity and how it flows out of them. We adults need to take lessons from them, that’s part of the fun of doing projects together, it reawakens our own creativity.
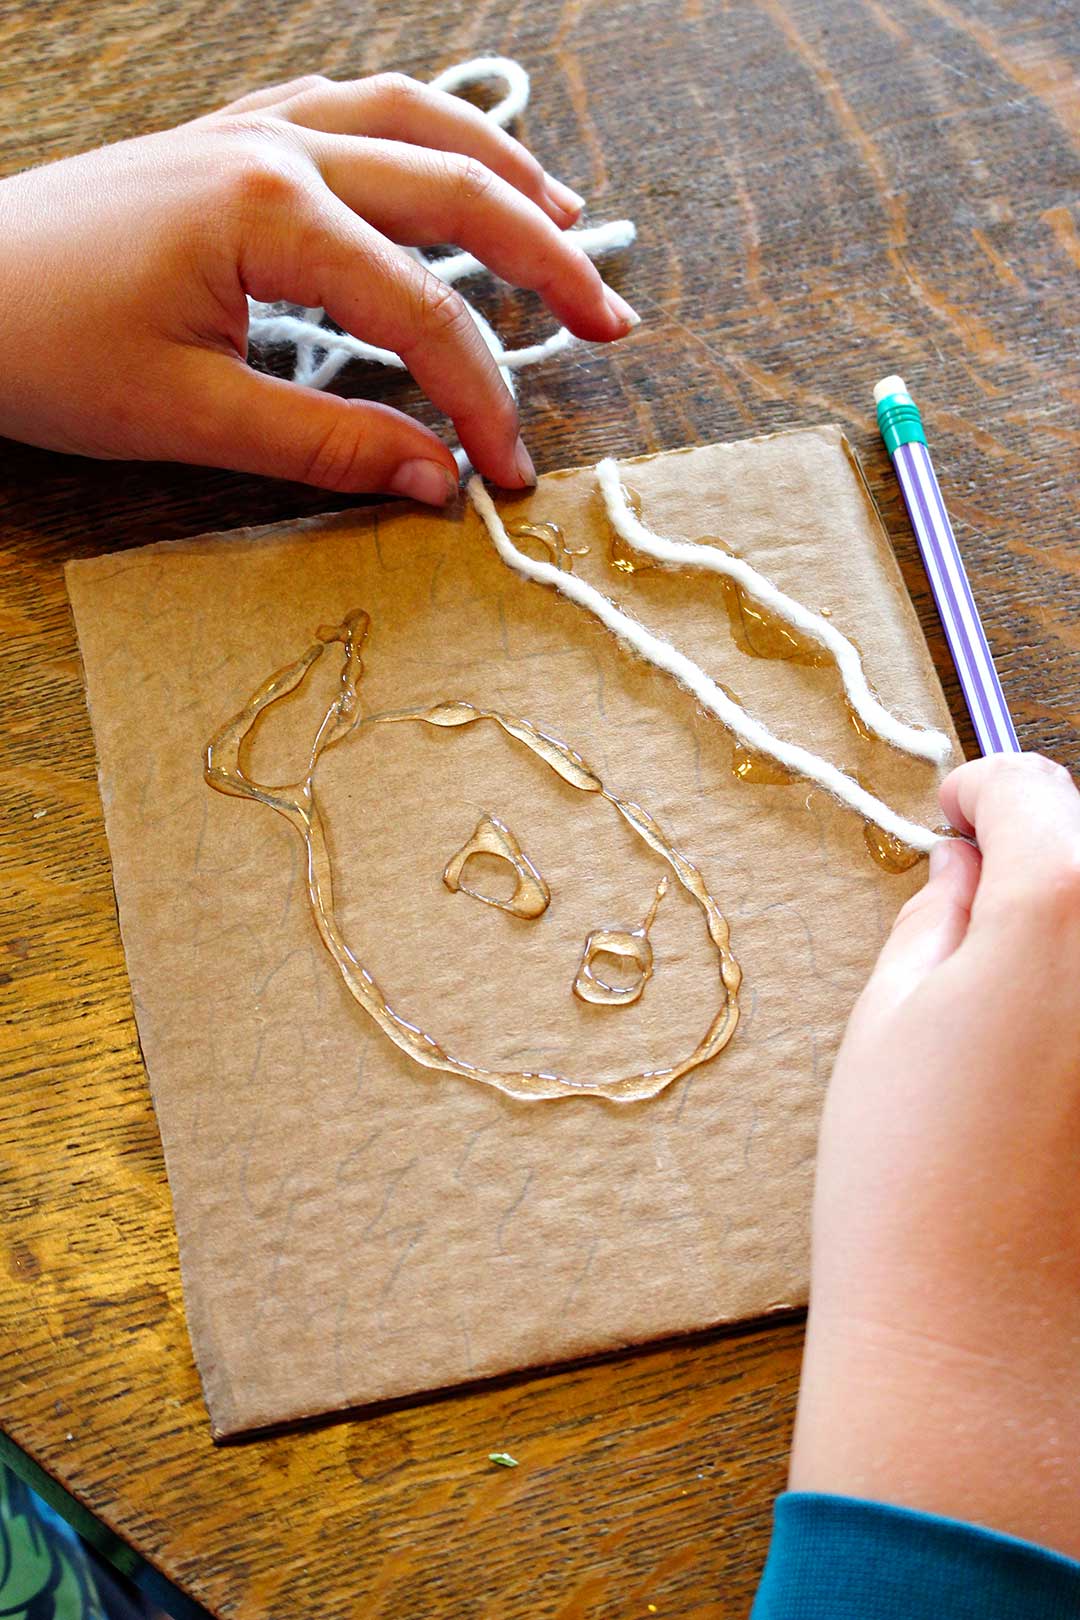
Glue and yarn applied
Go over the drawing with a solid bead of Elmer's Glue, Clear![]() . Cut and lay the yarn along this bead of glue. Work with one part of the design at a time so the glue doesn’t dry before the yarn is applied.
. Cut and lay the yarn along this bead of glue. Work with one part of the design at a time so the glue doesn’t dry before the yarn is applied.
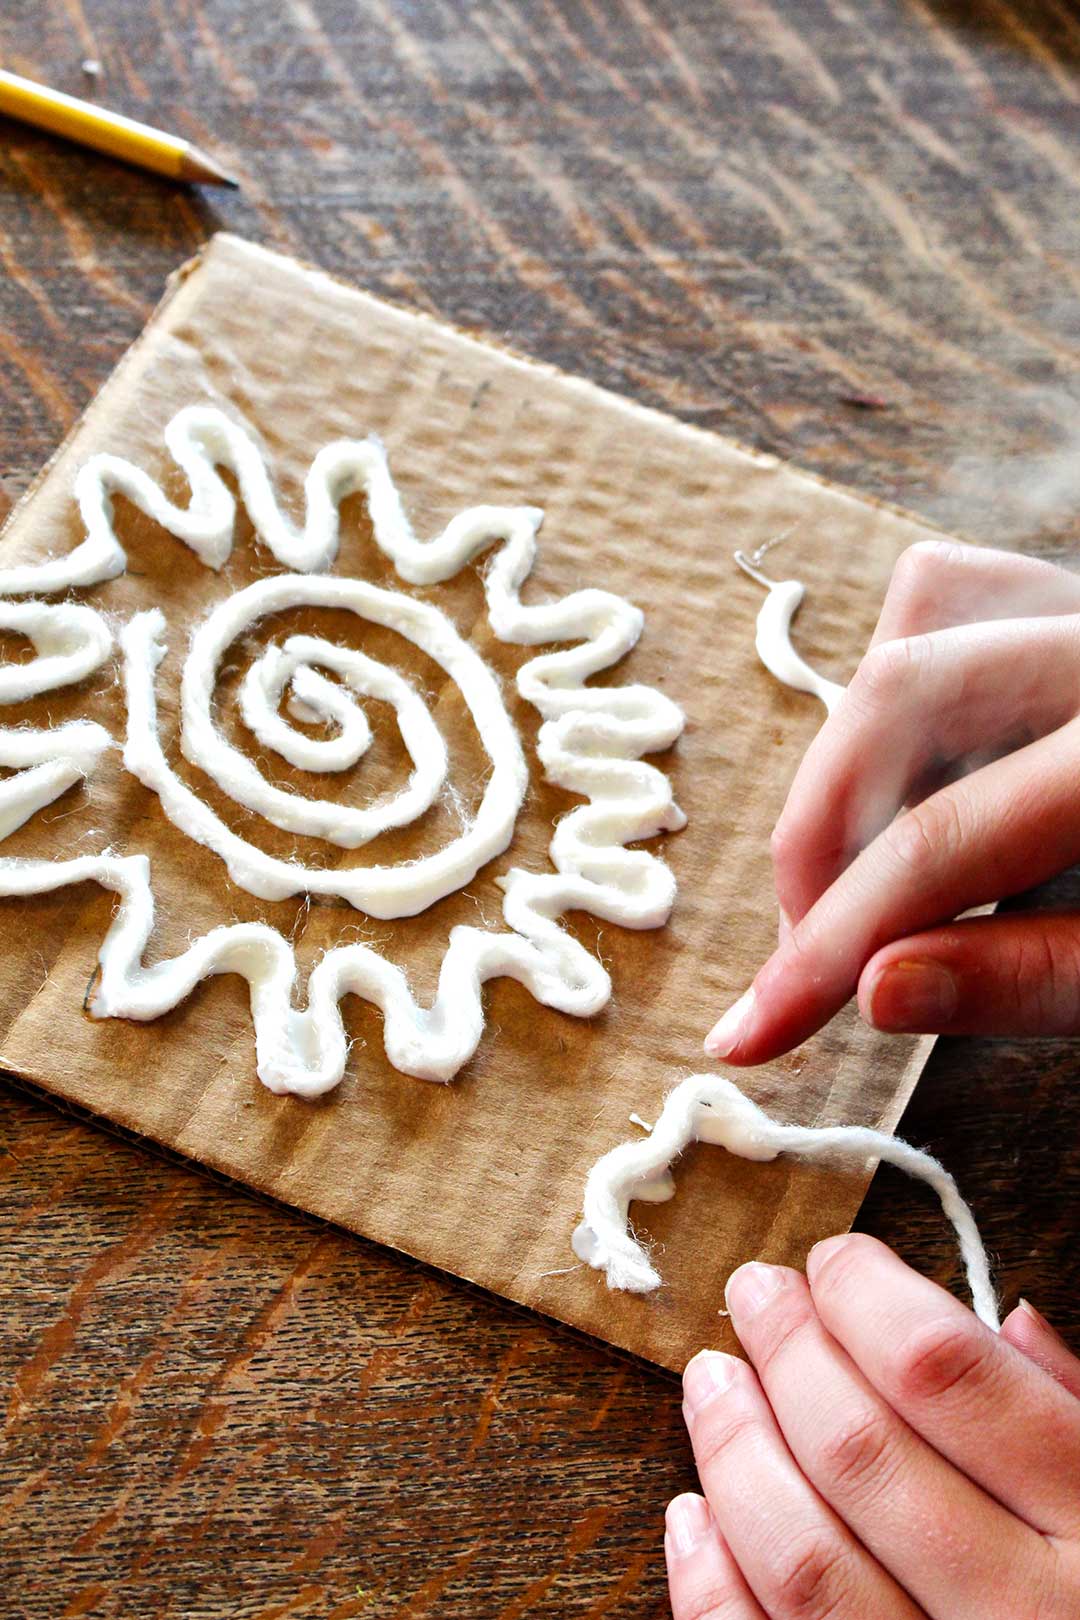
Be sure to let the glue and the yarn dry completely. We started too quickly on the next step and the glue and yarn flattened out a bit.
Note: It is possible to just let the glue dry without putting the yarn on top. This will still make the embossing pattern, but the embossing may be a bit smaller in size.
Fun adding foil
Give each child a sheet of Heavy Duty Aluminum Foil that is several inches larger than their project. Let the grands carefully crumple up the foil and then open it up again.
Cover the cardboard with some Elmer's Glue, Clear![]() - you can use an old brush for this if you have one.
- you can use an old brush for this if you have one.
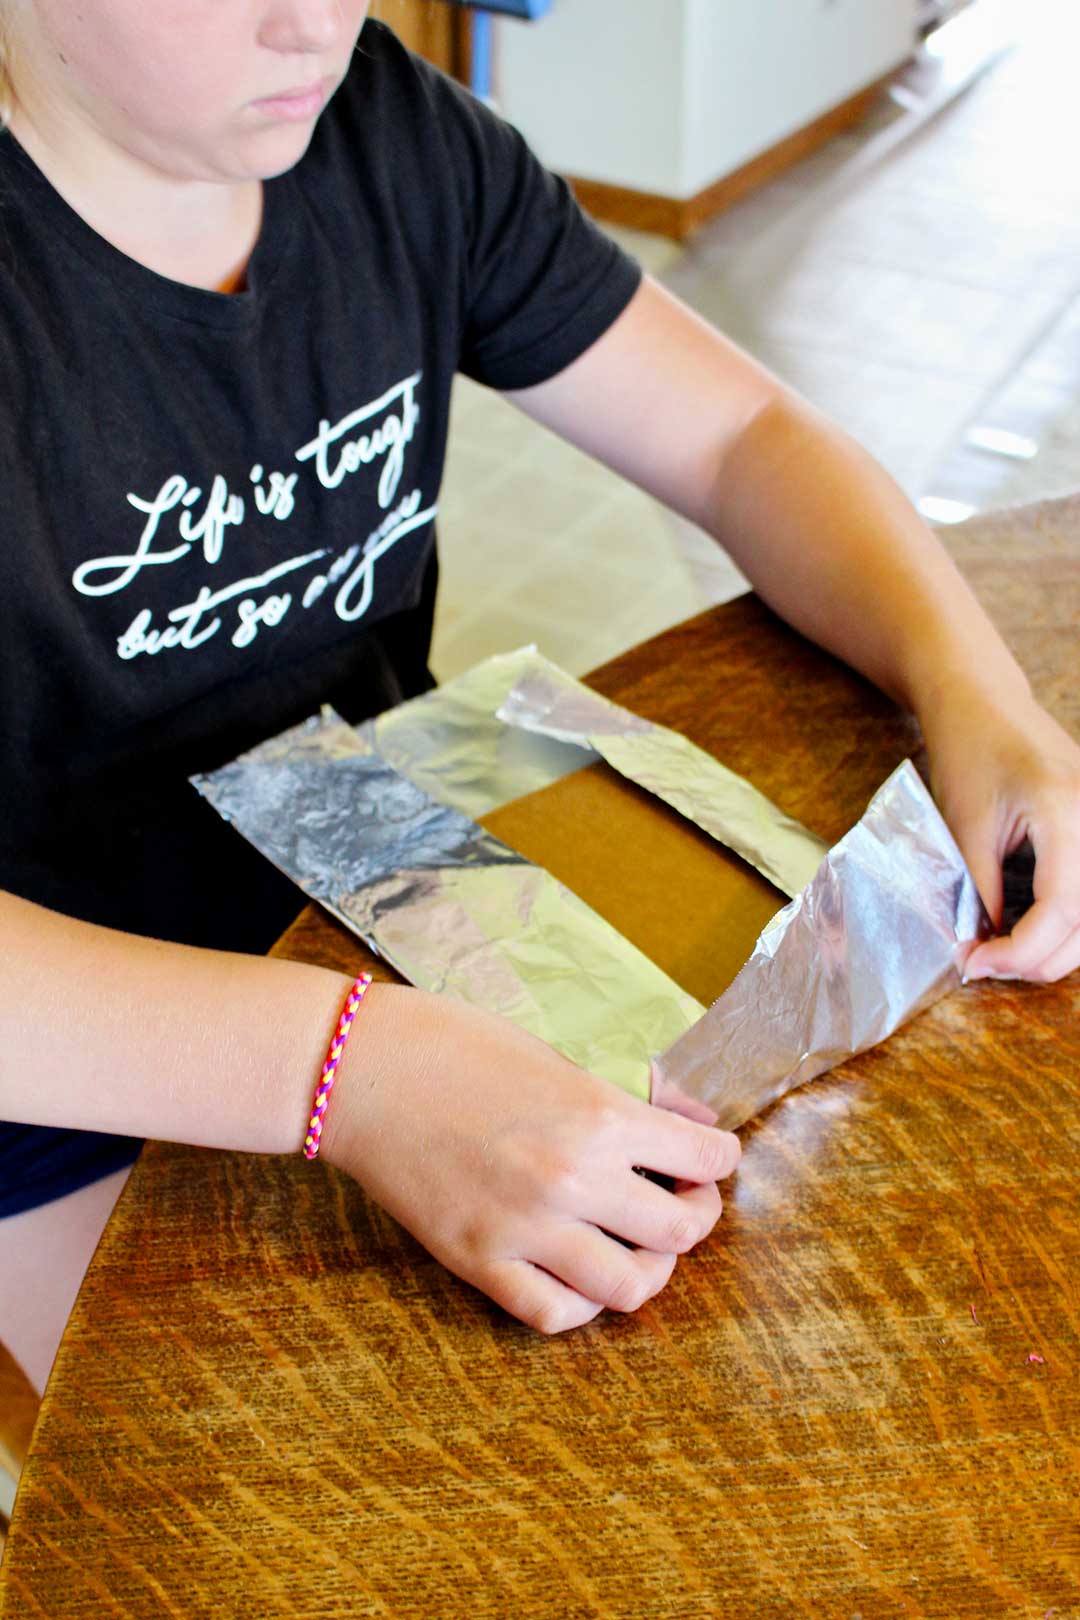
Place the foil on top of the yarn with the shiny side facing up.
Gently press the foil down over the surface of the cardboard, pushing it down between the yarns with your fingers so that it hugs the yarn. You will find that the foil flattens out some as you press it against the cardboard and that’s OK.
Fold the extra foil on each side of the cardboard over to the back of the project. You can use a bit of glue to secure it to the back if you want.
Now comes even more fun!
Use the Sharpie Fine Point Permanent Markers to color into the areas between the yarns. This is kind of like working on a coloring page. Don’t color on top of the yarns. I didn’t do a good job of explaining that to my grands, so they were a bit confused about this. They wanted to color on top of the lines so they would show up. But the yarns will be 3-D in the picture and will be silver when you are done coloring. It looks so colorful and bright, like stained glass.

Ideas for using Aluminum Foil Embossing Art
So if we make these again we will try use thinner cardboard and use them for the front of a card. I may take the embossed art the grands made and hang them in a series down a ribbon that can be displayed on the wall. They could also be mounted on a second piece of cardboard that is about an inch larger on each side (the cardboard could be covered in tin foil, painted a color or left plain. Hot glue a paper clip to the back to use to hang the piece if desired.
Stained glass collection
I must love stained glass as I’m getting a collection of projects that seem inspired by it. It’s the vivid colors that are so alluring, they just catch the eye and make a person happy. At least this person!
Hoping you love making this simple craft with your grands.
Supplies for Discover Aluminum Foil Embossing Art
- Heavy Duty Aluminum Foil
- Cardboard pieces cut to the size of your choice
- Elmer's Glue, Clear
 (or regular)
 - Yarn
- Sharpie Fine Point Permanent Markers
What designs were your favorite?
Enjoy!
Welcome to Nana’s! Where there’s fun things to do with your “grand” kids!
Come join the fun at www.WelcomeToNanas.com
Discover Aluminum Foil Embossing Art
Equipment
- Scissors
Items Required
- Heavy Duty Aluminum Foil
- Cardboard
- Glue (clear or white)
- Yarn
- Sharpie Fine Point Permanent Markers
Instructions
- Cut cardboard to desired size.
- Draw a design on the cardboard.
- Apply a bead of glue over the design and place cut pieces of yarn over the glue. Work on one section of the design at a time. Allow to fully dry.
- Crumple a sheet of heavy duty aluminum foil. Carefully open it up.
- Lightly cover the surface of the cardboard with glue.
- Press the foil (shiny side up) over the top of the cardboard and design, molding around the yarn. Bend the extra foil to the back of the cardboard.
- Use permanent colored markers to draw between the yarns, like a coloring book. Leave the bumps of yarn uncolored. So pretty!!


Leave a Reply