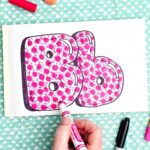
How to Draw a Bubble Letter B: Easy Step-by-Step Drawing Tutorial
Learn how to draw a bubble letter B with simple step-by-step instructions. Great for posters, signs, crafts, and kids' art projects.
Servings: 1 Bubble Letter B Drawing
Cost: $1
Equipment
- Clip board (optional)
Ingredients
- Drawing paper
- Pencil
- Eraser
- Black permanent marker (optional)
- Colored pencils, crayons, or markers (optional)
- Ruler (optional)
Instructions
- Draw a light pencil line across the paper where you would like the bubble letters to “sit” on the page. This will be used as an approximate bottom edge of the letters. Draw lightly so you can erase easily later. Leave enough space above the line to make the letter as tall as you want it to be. The letter will “bubble” below the line some too. I promise this will make sense soon (watching the video really helps- here's the link to the video: How to Draw a Bubble Letter B For Beginners
- Lightly draw a simple capital letter B as tall and wide as you want. With some space between, draw a lowercase letter b. This is your framework, like a skeleton for what comes next.
- Start by putting your pencil outside the letter B you drew, about ½ inch away. With your pencil down go around the entire letter at about the same distance away as you started. Your bubble will be curved around the top, bumps, and bottom edges to make it rounded. Don’t make any square edges.
- Go back and make small “bubbles” inside the two center holes that the letter has, making them rounded to make the letter B shape obvious.
- Repeat this process for the lower case “b”. If, when drawing around the second letter you “run into” the first letter line, just lift your pencil up and skip over that part of the first letter. Put the pencil down again when past the first letter and finish the second letter.
- Erase the original framework letter you drew as a skeleton.
- Add a reflection or highlight on the letter by drawing a circle or square on one side of each letter (see the video). This makes the letter look like light is shining on it and reflecting. Don't color inside this area, leave it white.
- Use a permanent black marker to go over the bubble letter "B"s you drew. Now you can decorate the letter(s) with Colored pencils, crayons, or markers and it won’t smudge. Decorating is optional but makes your lettering unique
- Keep practicing your uppercase letter “B” and lowercase letter “b” several times until it is familiar to you.
Video
Notes
Complete instructions, tips, and variations are found at the post at: https://welcometonanas.com/how-to-draw-a-bubble-letter-b/