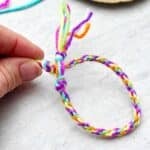
Easy Round Friendship Bracelet Pattern with a Cardboard Loom
Learn how to make a Round Friendship Bracelet using a DIY cardboard loom with this step-by-step tutorial! This braided round bracelet is an easy craft for kids and makes for a perfect friendship gift.
Servings: 1 Round Friendship Bracelet
Cost: $1
Equipment
- Scissors
- Ruler
- Pencil
Ingredients
- Yarn, Embroidery floss, or Crochet thread. (Seven strands 30 inches each)
- Cardboard
- Drinking glass like a plastic Solo cup
Instructions
To Make the Cardboard Loom
- Use the top of a drinking cup to draw a circle on a piece of cardboard to make your circle cardboard loom for this craft.Use a pencil or pen to draw the circle around the top of your drinking cup onto the cardboard. Then cut out the circle with scissors.
- Take a ruler and find the center or midpoint of your circle. Use the ruler to draw lines across the cardboard circle. Draw one line that goes across your circle, through the center.Draw a second vertical line that goes through the center point and intersects the first one. It is perpendicular to your first line. These two lines divide your circle into four equal sections. Use the ruler to draw two more lines that divide the four sections into halves. Now you've divided your cardboard circle into eight sections.
- Cut slits from the outside edge inward for about ¾ of an inch. Do this on each of your eight lines.
- To finish your cardboard loom, use your pencil to poke a hole in the center. Don't push the pencil all the way through, just part way up the lead.
To Make a Round Friendship Bracelet
- Cut the yarn or embroidery floss into pieces into pieces 30 inches long. Gather the seven strings up into your hand by one end of each string. Tie a simple overhand knot about 2 inches from the end of your seven strings to hold them all together.
- Draw the seven pieces of string up through the hole in the center of your cardboard loom.Draw the strings all the way through the hole. The knot will be next to the loom and the loose string will be coming out of the other side of the loom.Take one of the strings and pull it out to a slit on the edge of the cardboard loom- pull it down through that slit.Take the second thread and pull it out and down through the next slit. The third thread goes through the third slit and so forth until all seven strings go out from the center and down through a slit. This is now the top of the weaving. The knot and extra string are on the back of the cardboard loom.You will notice that there’s one empty slit left because there’s seven strings and eight slits. This is on purpose, don't worry.
- Hold the loom in your left hand with the flower looking part up and the rest of the threads dangling below. Turn until the empty slit is towards you.Take your right hand and count three strings to the right of the empty slit. Remove the third string out of the slit and bring it towards you. Put it down into the empty split.Turn the loom so that the empty slit is in front of you again. This turns the cardboard loom in a clockwise directions for a right handed person.Now again, hold the loom in your left hand, empty slit in front of you. With your right hand count up three threads. Pick up that third thread, take it out of its slit, bring it down into the empty slit right in front of you. Turn the loom clockwise till the empty slot is in front of you.
- Repeat counting and turning to continue the weave.After few turns, reach underneath the loom and gently tug the little knotted section in the center of the loom. The round friendship bracelet is beginning to form!Continue weaving and turning in the same pattern, tugging the bracelet through the loom every several weaves.
- Watch the length of the bracelet grow until it is the length that you would like. The bracelet needs to be long enough to go around your wrist or your friends' wrist.
- Once you've reached the desired length, gently pull each of the strings out of the slits on the loom. Pull the bracelet downwards so that the extra thread comes down through the center of the loom and off the loom.Tie an overhand knot on the end of the bracelet in the location right where the weaving stops. Pull the knot tight.
Tie Closure
- To use the thread ends to tie your bracelet, leave 2-3 inches of thread on the end of the bracelet and cut off the rest.Use the two sets of threads to tie your friendship bracelet onto your wrist or onto your friend's wrist.
Knot Closure
- To make a little closure for the bracelet, tie a second overhand knot about ⅜ of an inch from the one that you just made. This leaves a small amount of space between the 2 knots.Pull the knot from the other end of the bracelet through this small space and use this as a closure for your bracelet.Trim the threads from both end of the bracelet to be about a half an inch from the knots.
Video
Notes
If you are left handed you can hold the loom in the right hand with the slit towards you. Then count up 3 strings to the left and bring that string down into the slit at the bottom of the loom. Repeat that pattern.
