Drawing Mickey Mouse
Learn How to Draw Mickey Mouse step-by-step with this easy to follow tutorial and video. It's a great drawing idea for artists of any skill level - kids can do it and so can you!
Servings: 1 Drawing of Mickey Mouse
Cost: $1
Equipment
- none needed
Ingredients
- Pencil A typical #2 pencil is fine, or purchase a set of drawing pencils
- Eraser Use an eraser that doesn’t smudge the lead as it erases
- Paper Drawing paper or copy paper work fine.
- Black permanent marker (optional for outlining) A Sharpie fine line permanent black marker works well.
- Crayons, markers, or colored pencils (optional for coloring the drawing) Use your choice of crayons, markers, or colored pencils for coloring in the drawing.
Instructions
Part A- Steps for drawing Mickey's head
Draw the Nose, Eyes
Using a pencil, start with a side to side oval shape on your paper for Mickey’s nose. Add a curved line over the top (bridge of the nose). On top of this line draw two arched eye outlines then draw a circle (pupil) inside each one towards the bottom.Add a smile
Draw a large curved smile line under the nose with a small line on either end as the end of the smile. Under this is a small curved line as the bottom of the mouth. Add a tongue as shown in the picture (two “hill” lines side by side.) It already looks like Mickey Mouse doesn’t it? Such personality in a simple face drawing!Finish the face
Draw what looks like the top half of a heart over the two eyes. It follows the shape of the eyes and will stop close to the side of the eyes.Draw a scooped line under the smile for a chin. Then draw two rounded cheek lines (one on each side of the face) that connect the top of the heart shape and the chin. This creates Mickey’s lighter face area.Complete the head
Place an arched line (rainbow like) over the eyes area of the face as the top of the head, also stopping at the bottom edge of the eye, stopping on the rounded cheek lines.Add the Ears
Draw two large circles on top of the head for ears- one slightly to the right and one slightly to the left. The circles may not be exactly circular or exactly the same size. That’s OK, do the best that you can.This is a great place to stop and jump to Part C with younger kids. If you want to draw Mickey's body as well, keep going to Part B!
Part B: Sketch Mickey’s body
Torso and arms
Draw a line from below Mickey’s right cheek curved out and down which about the same length as the head and ears are high (front of tummy). Two parallel lines are drawn out from the top of this line to the left side of the paper that are about half the length of the tummy line (his right arm). Two short and close curved parallel lines go across the end of the arm as a cuff for Mickey’s glove. Close those two lines off on the ends with a short curved lineThen draw the hand with curved lines. See the picture and video to see what these look like. From the top of the cuff, draw a knob upwards as a thumb, then three overlapping curved lines to the left for three fingers. The last finger is a full knob which comes back to the bottom of the cuff. Mickey’s left arm is done in a similar fashion but is curved instead of straight. Draw two parallel lines to the right from the bottom of the cheek line. This time, bend them back towards the body (like the arm is bending at the elbow). Draw the cuffs and hand in a similar manner as before. But you’ll see in my drawing the hand is in a fist on Mickey’s hip. So draw curved lines for the thumb and then the three fingers but only bumps compared to the open hand you drew earlier. Notice there are three lines on the back of the glove. Finish the torso with a line that goes from underneath this arm down to the hand (for his back).Shorts
Draw a slightly upward curving line across MIckey’s tummy for the top of his shorts. Place two ovals below this line for buttons.The bottom of the shorts are created with two short lines drawn down from either side of Mickey (the stomach line and extending the back line below the left arm). There is a “T” shaped line in between these two lines for separating the right and left leg of the shorts. Draw two slightly upward curving lines across the two shorts leg openings. This is where the legs will extend in the nest step.Legs
Each leg is drawn with two short parallel lines down from the middle of the shorts leg openings. They are closed at the bottom with two close parallel lines that are the cuff above the shoe. Close those two lines off on the ends with a short curved line.Shoes
The shoe on Mickey’s right leg is like a large potato shape, ha! Draw an oval starting at the left side of the cuff and end at the other side of the cuff. The shoe on the left leg is a bit more complicated. Observe what it looks like in the drawing or video. The edge of the shoe is drawn with a line in a slight “S” shape that starts from the left side of the second leg, goes down and then upwards. From where it stops there is a line that starts there and is slightly curved up, ending at the other side of the cuff.A second slightly downward curved line is drawn from the heel of this foot to the pointed toe area. That looks like the bottom of his shoe!You finish with one very short line on each shoe to make it look like the shoe is bent a bit.The "Tail End" of Your Drawing!
Draw little curved lines to complete the back edge of Mickey’s shorts leg openings.Then draw a long slightly “S” curved line to be the tail coming from the bottom of the shorts leg. A second line will closely parallel the first and make a point at the end where it meets the end of the first line.I forgot this step on my drawing until I was coloring it, sorry. It got left out of my notes!!Draw a line across the background for a “floor” to your picture. You’re done drawing!!! Good job! Keep practicing and each time your drawing will look even more like MIckey Mouse. And you can try drawing Mickey in different positions!
Part C: Outline & Color the Drawing
Outline and Erase
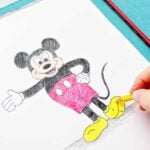
Go over your final lines with a permanent black fine line marker. Then gentlyerase any extra sketch lines.Color in Your Drawing of Mickey!
Color your drawing of Mickey in the traditional colors like mine or color any way you would like! Use your choice of crayons, markers, or colored pencils
Video
Notes
There are tips and variation ideas as well as a link to a full length video on the post found at: https://welcometonanas.com/drawing-mickey-mouse/