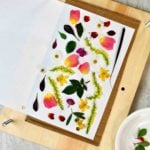
DIY Flower Press from Wood for Pressing Flowers
Make a large DIY Flower Press from Wood that can hold many layers of pressed flowers. It’s strong and easy to make and the kids will love it!
Servings: 1
Cost: $10
Equipment
- Drill with ¼ inch bit
Ingredients
- 2 Wooden rectangular plaques (mine were 8.5 by 11.5-inch rectangular wood plaques with beveled edges) These go on sale for 40% off regularly at craft stores
- 4 4 inch long and ¼ inch in diameter carriage bolts
- 4 wing nuts to fit the carriage bolts
- Extra wood to place underneath while drilling
- Corrugated cardboard
- Paper (copier paper will do) Newspaper or scratch paper can be used
Instructions
- Drill a hole in each of the four corners of one of the plaques. Have extra wood underneath so you don't drill into your work surface.
- Clamp the second plaque onto the first, larger flat sides together. Use the holes in the first plaque as a guide to drill the holes in the second plaque.
- Slip the carriage bolts into the holes of one plaque from the narrower side. Lay it on the table with the ends of the bolts upward.
- Cut 8-10 pieces of corrugated cardboard to fit inside the four bolts in the corners of the plaque.
- Take the grands and make a walk around the house and yard for small flowers that would press well. Thick flowers don’t work well so look for smaller flowers.
- Put down a layer of cardboard, paper, flowers and leaves, and then paper. Spread the flowers and leaves out so they do not overlap.
- Repeat this layering over and over. Always end by placing another layer of cardboard on the top.
- Place the second wooden plaque on top of the last piece of cardboard (larger flat side towards the cardboard). Twist the wing nuts on the carriage bolts
- Let the flowers stay in the press 2-4 weeks depending on how thick they are.
