How to Easily Make Recycled Paper at Home
Follow these easy step-by-step instructions to make your own, customizable, Recycled Paper at Home!
Cost: $5
Equipment
- Heavy duty stapler
- Blender
- Tub
- Sponge
- Bath towels
- Paper towels
Ingredients
- 2 8x10" Frames upcycled some old ones, preferably wood
- 1 piece Window screen
- Recycled paper shredded or torn
- Dryer lint, colored paper, other papers to add for fun optional
Instructions
Make a Mould and Deckle
- Take the two frames apart and discard the glass, cardboard and any nails or tabs they may have. You only want the frame itself.
- Take one of the frames and staple a piece of the window screen onto it to cover the opening
- Staple the screen onto the flat side of the frame, not the ridged decorative side. This is your “deckle” that will strain the paper pulp.
- The second frame will be used as it is on top of the screened frame and will be the “mould” that provides an edge for the paper.
Let's Make Some Paper!
- Take a few minutes to pour water into the tub to about 3 inches deep or so.
- Shred or tear old papers that are to go into the recycling bin into little pieces.
- Let the grands place a couple handfuls of paper into the blender along with a generous amount of water. Let them blend up the paper and water until it is a globby mess. The paper pulp should be in plenty of water or it will be hard on the blender motor. It also works better in the paper making process.
- Hold the mould and deckle, flat sides together, in the tub of water (the deckle, with the screen side up, is on the bottom). Hold them together firmly during this process and position it so that they are under the water but not so far that the pulp will go everywhere in the tub.
- Pour the pulp into the open area of the mould and onto the screen of the deckle. It will spread out naturally on its own.
- Pull the mould and deckle out of the water and let the water drain off and into the tub.
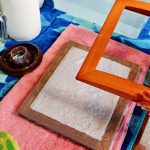
- Set the mould and deckle on a set of towels and gently lift the mould off.
- Place a paper towel over the pulp area. Gently dab it with the flat surface of the sponge. Twist the water out of the sponge several times as you continue to dab out some of the water.
- Turn the deckle over so that the paper towel is flat on the towel. Gently pull the deckle off, leaving the paper towel with the paper on it.
- Bring the paper towel and paper over to the ironing board. Place a tea towel over it and iron it very gently with very little pressing motion. This will provide some pressure and heat to get the paper fibers to bond.
- Set your paper to the side to finish drying, and make some more!
Notes
Tip: There are a lot of things we can do to make various types of paper. The second piece of paper the kids made had some paper pulp and a small handful of dryer lint. It works really well to get fabric fibers into the paper! You can use bits of construction paper or colored paper to make speckled paper which looks really cool. I’ve heard of putting some food dye in the blender so it turns it pink or yellow but I haven’t tried that myself. I have also seen paper with little leaves and flowers placed on it as soon as the pulp is spread on the deckle and mould.
