DIY Twine Wrapped Bottle Vases (Upcycled Bottles)
DIY Twine Wrapped Bottle Vases is trendy & vintage, bringing back memories from the 70’s. Great vases for Mother’s Day flowers & decorations.
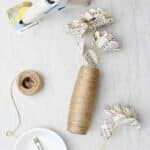
Servings: 1 Twine Wrapped Bottle Vase
Cost: $3
Equipment
- Hot glue gun and glue
- Scissors
Ingredients
- Bottle(s) of any size and shape- label removed, clean and dry
- Goo Gone- to remove labels, optional
- Twine- in a diameter size of your choice
- Colored Twine- optional
- Hot glue gun and glue
- Tacky glue or Elmer's glue
- Scissors
Instructions
- You can upcycle any type of glass bottle that you would like.Take the time to scrub the label off your bottle before adding the twine. This is an optional step, but I highly recommend it. If you soak the bottle in warm water for a while, the label usually comes off fairly easily. I use a product called Goo Gone to take off the remaining rubber or sealant. You probably have your own trick for that!When your bottle is clean and dry, you are ready to go! I love upcycled craft ideas, don't you?
- I always start at the top of my bottle and work downward. I’m sure it would work either way, but this is the way I’ve always done it. :-)I take about a 2 inch piece of the twine and stick it down to a bead of hot glue that runs up and down a couple inches from the top of the bottle.This holds the twine in place as you get started wrapping the bottle with it. Be careful not to touch your fingers into the hot glue.I like to place the twine around the mouth of the bottle next. I put down small amounts of hot glue on the lip of the bottle or vase and glue about a quarter of the way around the top and then lay the twine in it the hot glue.Then repeat that all the way around the lip of the bottle. If I go the whole distance around the lip of the bottle with the glue, the glue tends to cool before I can get the twine placed properly. Again, be careful of your fingers with the hot glue.
- Now set the hot glue gun aside. Place some tacky glue in a small bowl and get out an old paintbrush.We are going to brush glue onto about an inch of the bottle at a time and put the glue and put the twine down in it as we wrap.So take your paintbrush, and paint a little glue about an inch down the neck of the bottle.This step is optional- but helps hold twine in place over time.
- Hold the twine in one hand, and the bottle in the other. The bottle so that the twine comes off of the roll, through your fingers, and onto the bottle as it turns.This way, your fingers will guide the twine onto the bottom, so that it does not kink up or overlap itself accidentally.Do you want the twine to lay as close to the last round of twine as you can.Stop occasionally and gently push the twine up on the bottle so that it is close together with no gaps and also horizontal across the bottle so that it is on as straight and neatly as possible.Now, repeat that with the next inch of the bottle, and so forth, until you have covered the entire bottle!
- When you get down to the bottom of the bottle, you will want the end to be secured with hot glue.So wrap the twine around the bottle area covered in the tacky glue until it gets to the bottom end of the bottle. Clip your twine so that it will have a two or 3 inch piece that you will attach with hot glue.Wipe off any excess tacky glue, and then place a line of glue in that area and lay the twine down into it carefully.Before you’re done, clip off any excess twine and check to make sure that the bottle will sit flat on a table. If it doesn’t, quickly rearrange the twine in the Elmers glue, and you may need to repeat the process of the hot glue and reposition it the end of the twine so that the bottle will sit flat.
Video
Notes
It is possible to stop one color of twine and begin another color of twine so that you have a pattern on your bottle.
If you would like to do this, you would need to purchase two colors of twine. I’ve seen lighter and darker twines and I’ve also seen a green twine. I’m sure there are other colors as well. Those may have to be purchased online.