Paper Plate String Art (Easy DIY Craft for Kids)
The Paper Plate String Art Craft is an easy DIY for Kids. Make it for any holiday or for a fun activity to gain eye hand coordination.
Servings: 1 paper plate string art project
Cost: $1
Equipment
- Scissors
- Cookie cutter, or printed design outline (optional)
- Hole punch
- Yarn needle
Ingredients
- Paper plates, preferably the wax coated type
- Scissors
- Cookie cutter, or printed design outline (optional)
- Hole punch
- Yarn in colors of your choice (other types of thread or string could work, such as crochet, thread, or embroidery floss)
- Yarn needle
- Tape
- Colored markers
Instructions
- Turn your paper plate over and draw a design on the middle part of the plate, I did go over onto the fluted edge a couple times, but mostly drew in the flat area in the center of the plate
- Use scissors to poke a hole in the center of that design, and then proceeded to cut it out on the line that you’ve drawn.You want to help young children with this step. Be sure not to get fingers behind the plate where the scissors will poke through.
- After the design is cut out of the middle of the plate, take your hole punch and punch holes through the plate all the way around the perimeter of the shape.The holes should be about a quarter inch from the edge of the cutout design and be about a half inch apart. A half inch is about the width of your finger if that helps you place the holes.
- Cut off a piece of yarn that’s about 4 feet long. Thread it onto your needle by either using a needle threader or you can twist your yarn tightly and bend it in half and then slip that twisted part through the hole in the needle. That always works for me.Bring the yarn up through one of the holes from the back of the plate to the front. Turn the plate over and tape the end of the yarn to the back of the plate.Now proceed to use the needle to go down through a hole that is on the opposite side of the design. Then come up through a different hole and go down through another hole crisscrossing across the cutout design area.
- If you run out of yarn, just bring the needle through a hole to the back of the plate. Tape the end of the yarn to the back of the plate and clip off the extra. Then start again with a new piece of yarn. At this time you can also change colors of yarn if you would like to.
- For fun, I punched holes around the edge of the paper plate for the fish. A darker blue yarn was used in a circular design to go all the way around the edge of the plate. This is done by taking the needle up through a hole in the edge of the plate, taking the needle around the back of the plate and then coming up through the next hole. You’re always going up through each hole with the needle.
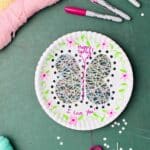
- You can also use markers or colored pencils to colored designs around the edge of the plate after the stitching of the design. That was what was done on the butterfly plate.
Video
Notes
You could look online for a design and then print it off to use as a template. Or just freehand the design. Don’t get uptight about it being perfect.
This is a good learn to sew project before starting embroidery.