How to Draw a Wedding Cake
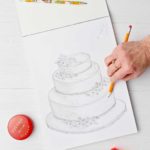
Learn How To Draw a Wedding Cake in June, a month known for love and weddings! Use overlapping cylinders to make a multitiered wedding cake.
Servings: 11 drawing
Cost: $1
Equipment
- none needed
Ingredients
Instructions
- Start with a smile line on your paper, not very curved .Then draw an upside-down smile line over this one, similar in its curved shape, just upside down.Connect the two smile lines on each end, creating an oval, a foreshortened circle!Draw your short and wide cylinder (a cake) on your drawing paper. Draw the two lines coming down from the two ends of the oval- they are the same length and not very long. Connect the bottom of these two lines with a smile line that matches the one above it.This is the top layer of your cake, a short and wide cylinder shape.
- Now we are going to draw the second layer of the cake that is underneath the top layer. This is a second cylinder shape, but it is slightly larger in size, both in width and height.Draw a smile line under the last one you drew that is the similar in its curved shape- but wider. Then draw a smile line that matches this one but is above it and upside down, just like you did on the top level.BUT- this line will go behind the top layer of your first cake. If it helps you, draw this line lightly and draw it right through the top layer of your cake. Then go back and erase the part of the smile line that is through the top cake layer and make the lines darker that are not behind the top layer.Connect the two smile lines on the end creating a foreshortened circle. This foreshortened circle should look similar in shape to the top one except be slightly larger.This gives the illusion that the two layers of the cake overlap. Cool, huh?Complete the second layer of the cake (the second cylinder) by drawing the two lines on the ends of the foreshortened circle coming down. Then draw the smile line that connects them and that matches the curve of the one above it.
- Repeat the same process as you did for the second layer except make the third short and wide cylinder even a bit larger than the second one.In theory you could keep doing this over and over and make your cake drawing huge. A 10-tiered cake that could feed an army!
- The plate is just one more additional overlapping cylinder except it is very, very short.Draw one more smile line under the last one that is slightly wider but still similar in the curve of the line. Then complete the foreshortened circle.But this time the two side lines coming down are very, very short. Finish with the last smile line that will be very close to the one above it. This gives the illusion that the plate is very thin.
- Have fun adding flowers on each level of the cake. You can imagine these flowers are made from frosting or are real flowers. I drew a shaded line around the base of each cake layer, like a decorative line of frosting. I just liked how that looked.
- Lastly, we will do the contour lines and shading.Pretend that the sun/light source is to the upper right.With the side of the pencil, shade the parts of the cylinders that are away from the light. The cake would block the light and put the sides away from the light in shade. Smudge this a bit with your finger. There are more details on this step in the How to Draw a Cylinder lesson.
Video
Notes
Note: Review how to draw a cylinder by going to this post.
There are details in the How to Draw a Cylinder lesson.
