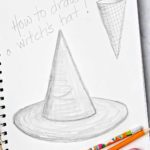
How to Draw a Witch Hat
Learn How to Draw a Witch Hat for Halloween. Use these step-by-step instructions and it’s simple using a cone shape and shading. Boo!
Servings: 1 drawing
Cost: $1
Equipment
- none needed
Ingredients
Instructions
- When we learn How to Draw a Witch Hat, we will start by tipping a cone shape upside down-with the tip of the cone up.
- Draw a tall tee-pee shape, an upside down “V”. Make a smile line between the two tips of the “V”.This is going to be the pointed top of the hat.
- Draw a second smile line below the first smile line that has the same smile shape but goes wider than the first line. This is the brim of the hat.
- Draw a second upside down smile line that goes on top of the brim of the hat and connects the two ends. This will make a long oval shape to complete the brim of the hat.Erase the part that goes behind the V-shaped top of the hat.
- Shade the hat by imagining that the light source is shining from the top right. That means that the shade is on the left-hand side of the hat.Lay the pencil more on its side and use the side of the lead on the paper instead of the tip. Gently press the side of the pencil led on the paper.Shade down the left side of the pointed part of the hat- using contour lines and shading up and down. Blend with your finger.Also shade on the left side of the hat brim and blend.
- Boo! That wasn't hard, was it?
